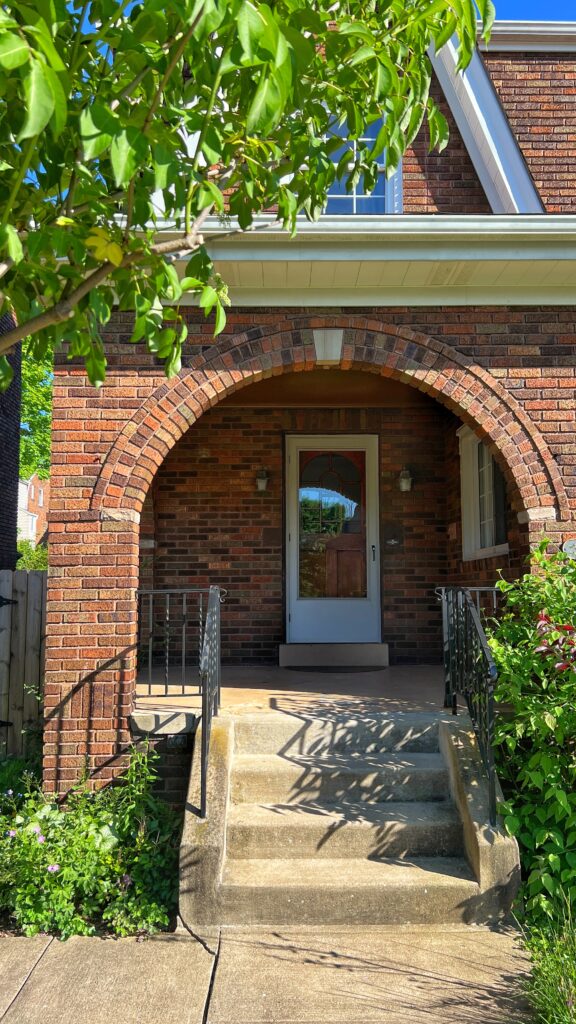
My husband and I just bought the most beautiful 1930 home and one of our favorite things about it was the small front porch with brick arches. It quickly became our favorite outdoor space so we decided to do a little front porch makeover on a budget!
Front porches not only impact your home’s curb appeal, but it’s also the first thing your guests see when they come visit! In this post, i’ll show you how you can totally transform a small space like this with a little fresh paint, some thrifted outdoor furniture, and a few flowers! This beautiful space got a whole new look and I can’t wait to show you how it turned out!
Disclaimer: This post contains affiliate links. This means, if you purchase something from a link I provided, I will receive a small commission. This is at no extra cost to you! Thank you so much for the support!
Front Porch Makeover on a Budget
If you’re more of a visual person, here’s my YouTube video 🙂
Painting the Porch Ceiling
One of the first things we did was give our front porch a good cleaning using our power washer and shop vac! Having a clean surface before painting is always important! You don’t want cobwebs mixed in with your paint 😂
How to choose paint colors for your home
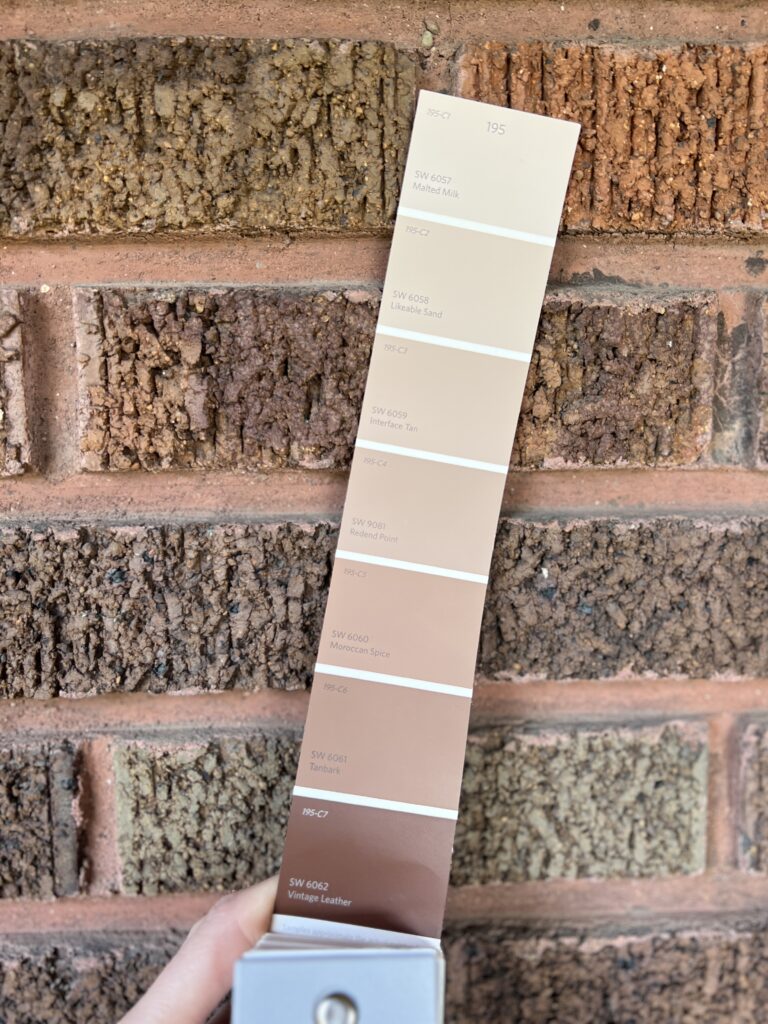
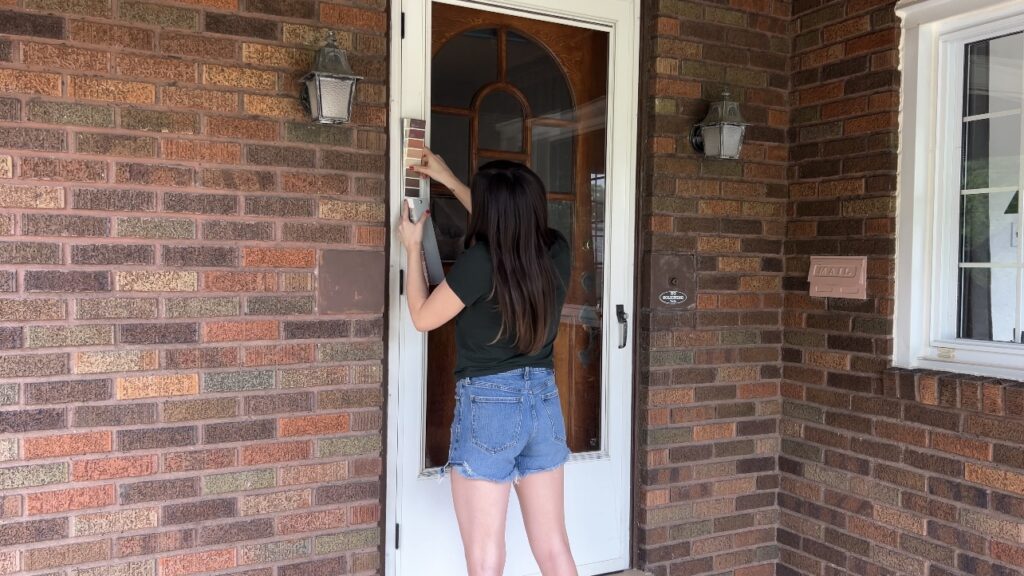
It was a little overwhelming making so many color decisions for our front porch makeover, but I knew I wanted to pull some colors from our brick house.
An easy way to do this is to use a color reader device. You simply place the device on a surface, click the button, and it gives you paint color matches that are similar! I had it set specifically to show Sherwin Williams colors because I knew I was using their paint. I moved this around to multiple bricks and it really helped me narrow down the color options!
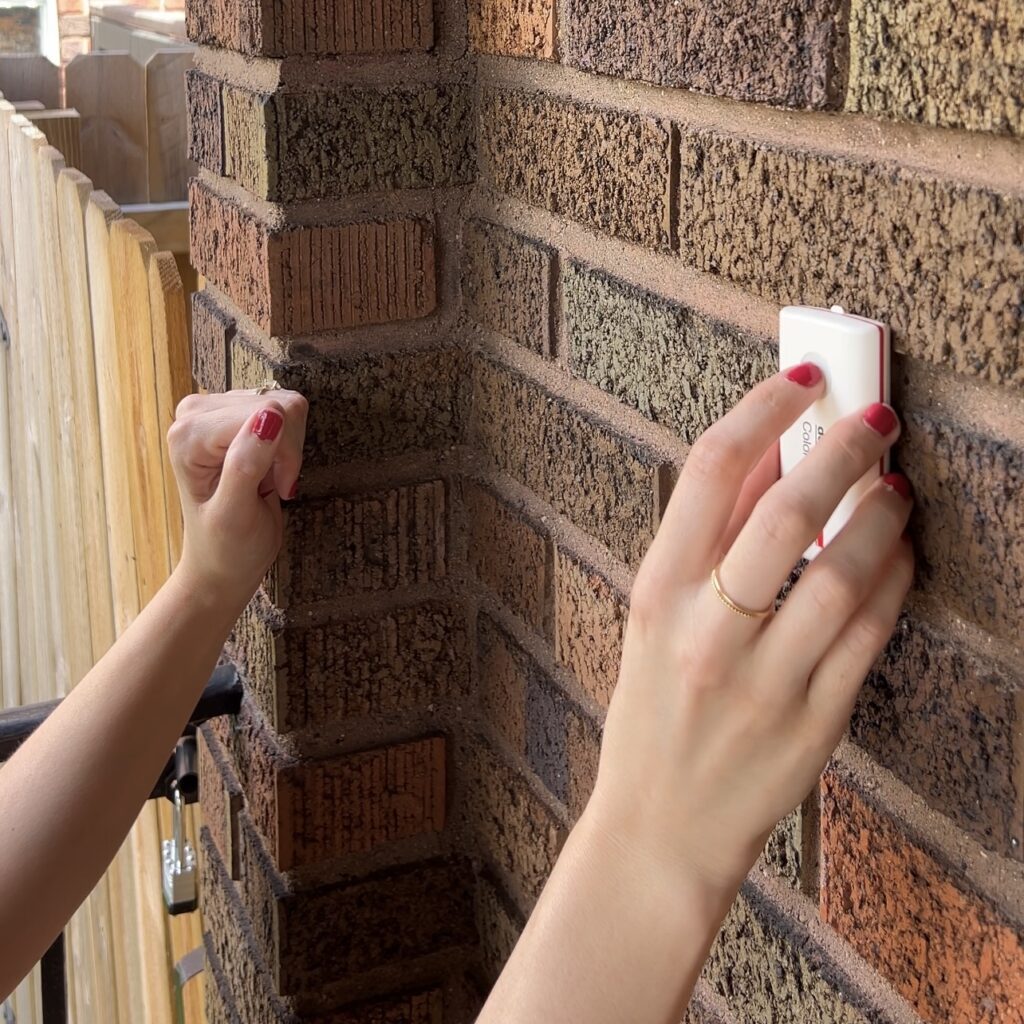
Once you do decide on some colors, I highly recommend getting samples to test first! This is something I normally always do, but this time around I didn’t and I paid for it 🙁 Learn from my mistakes!
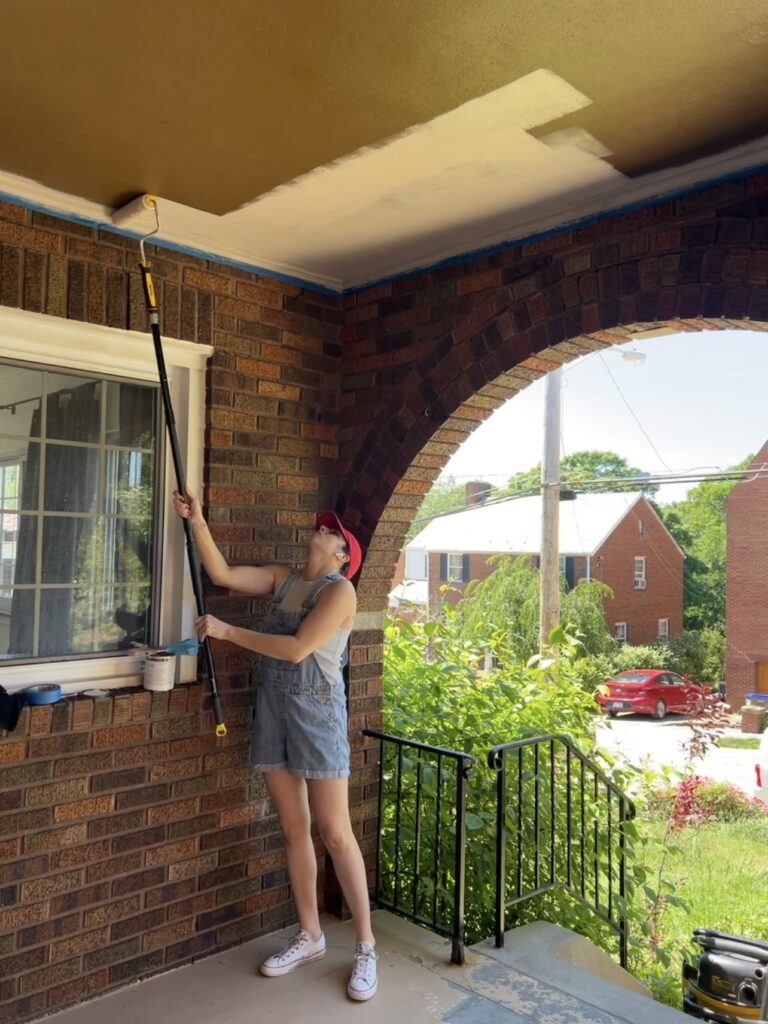
Painting our porch ceiling… three times!
I decided to go with SW Moroccan Spice for the porch floor and figured that a lighter color from the same swatch would work well so I got Likable Sand for the ceiling. For the ceiling paint I used SW latitude exterior paint in a flat finish.
Once I started edging in, I immediately knew this wasn’t the right color. It was just too light and didn’t compliment the brick well. Regardless, I kept painting because I wanted to give it a true chance and figured it would work well as a primer either way.
At this point I figured I should probably check and make sure I even like the floor color I got. Sure enough, I didn’t 🙁 It was pulling too pink, so back to Sherwin I went. The manager there made a good point that the brick from our house makes the color appear even warmer. Makes total sense!
I’m definitely disappointed in myself for not getting samples to begin with, that’s honestly very unlike me, so this time I grabbed a couple samples for the floor (but not for the ceiling- oops!). The samples I got were SW Llama Wool and a SW color match of Farrow and Ball’s Mouse’s Back.
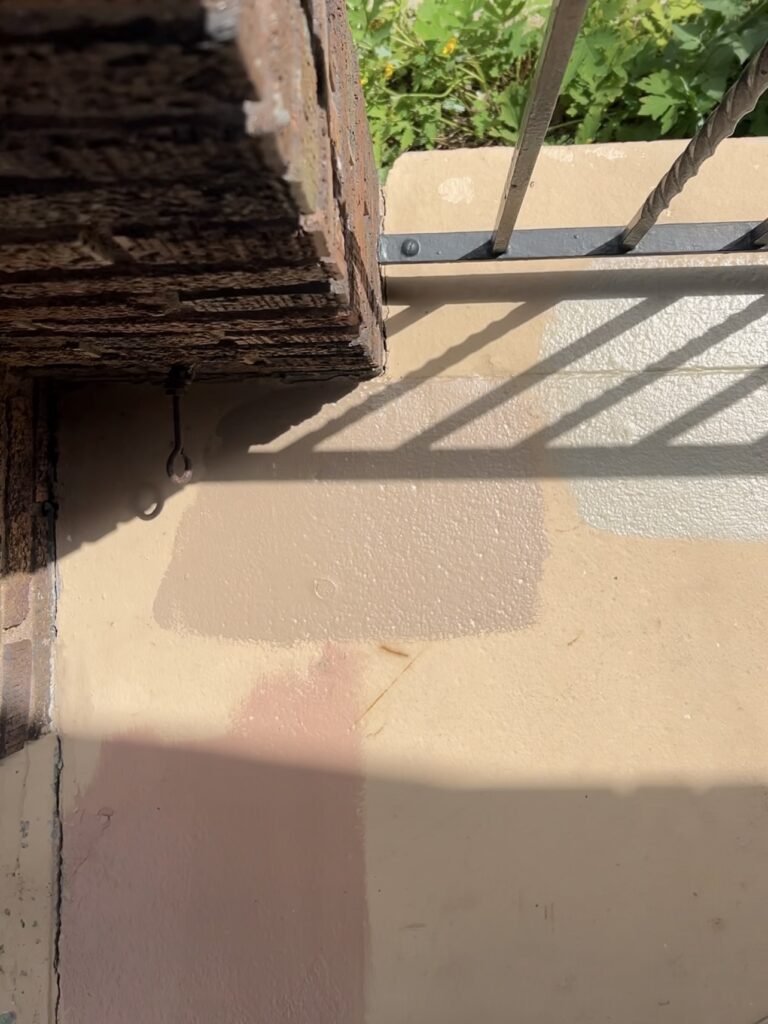
I decided on Llama Wool and once again chose a lighter color (Smokey Beige) from that swatch for the ceiling. Oh and btw, that Moroccan Spice porch paint won’t got to waste, I promise! I’m planning to use it on our basement stairs at some point!
This color seemed promising at first- it was more of a tan and a little darker than the first color. But as much as it killed me to admit… I still wasn’t a fan. Ugh!
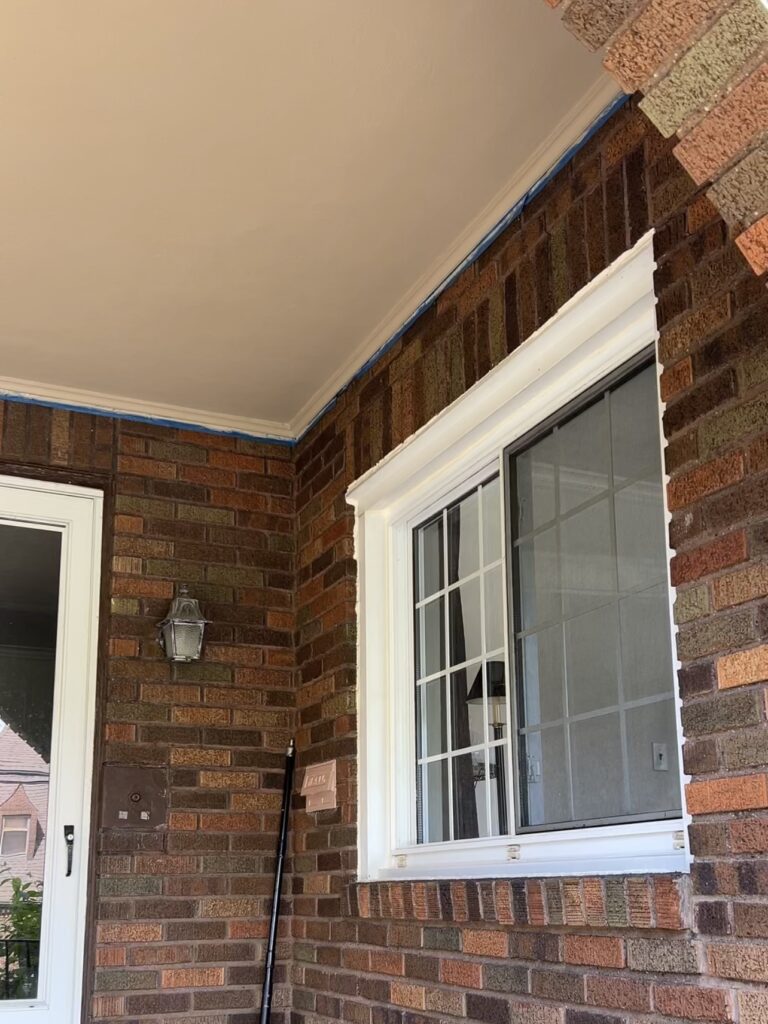
On the bright side, it took seeing these two colors for me to realize I wanted something much darker for the ceiling. Something that would blend in nicely! Eventually I narrowed it down to SW Superior Bronze and THANKFULLY the 3rd time was the charm.
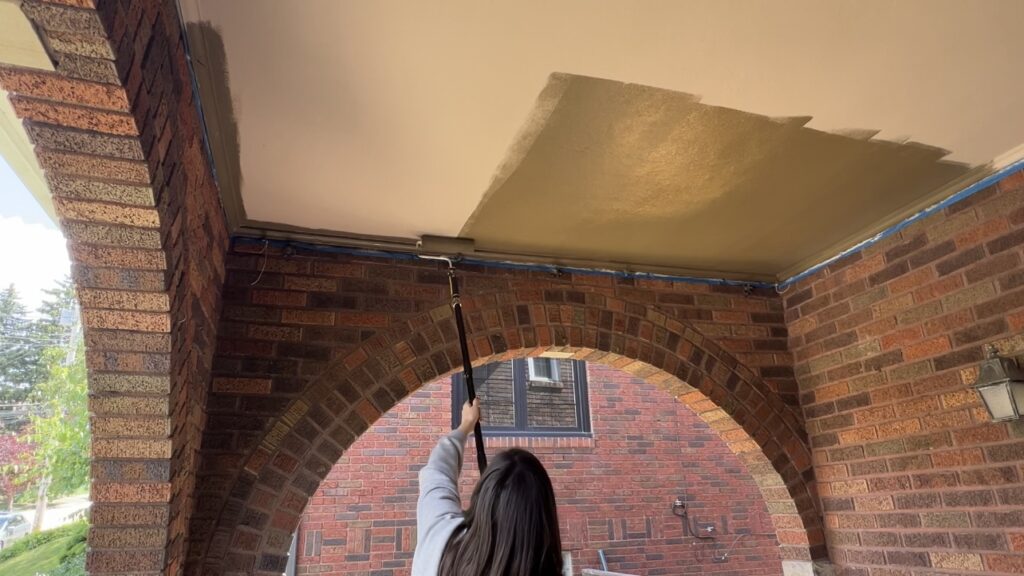
I LOVE how this color looks. It compliments the brick so well. Also, I learned my lesson (again) to always, always test samples before buying the paint. End of story 🙂
How to Repaint a Concrete Porch
Our concrete porch floor has been painted many times over the years and unfortunately it was peeling pretty bad!
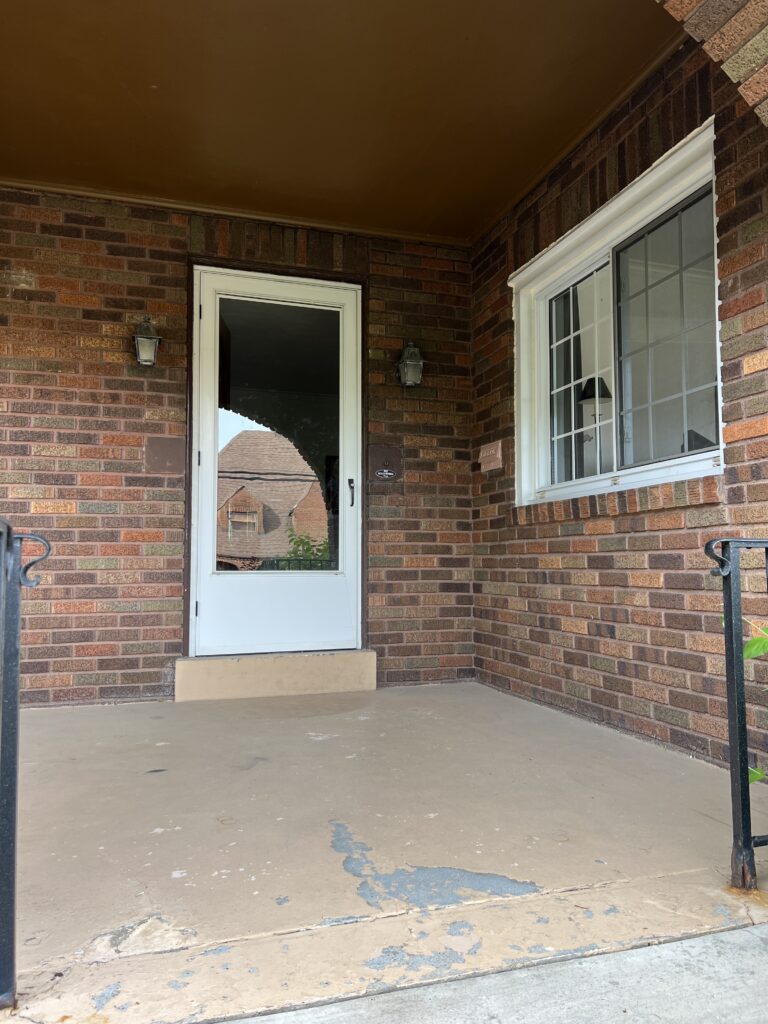
One day we plan to brick our porch floor, but for now we’re doing this front porch makeover on a budget! Before you can add brick, you have to fully remove the paint from the concrete which is quite the process. So rather than doing this twice, we decided to just repaint the concrete for now!
How do you remove old paint from a concrete porch?
There’s a few different ways you can remove old paint from a concrete porch:
- Chemical paint stripper
- Pressure washing
- Grinding
- Heat gun
- Sandblasting
There are pros and cons to all of these methods, but ultimately it depends on your budget, the size of your concrete floor, and the condition of the old paint. You many need to use a combination of more than one of the above methods!
Repainting a Concrete Porch
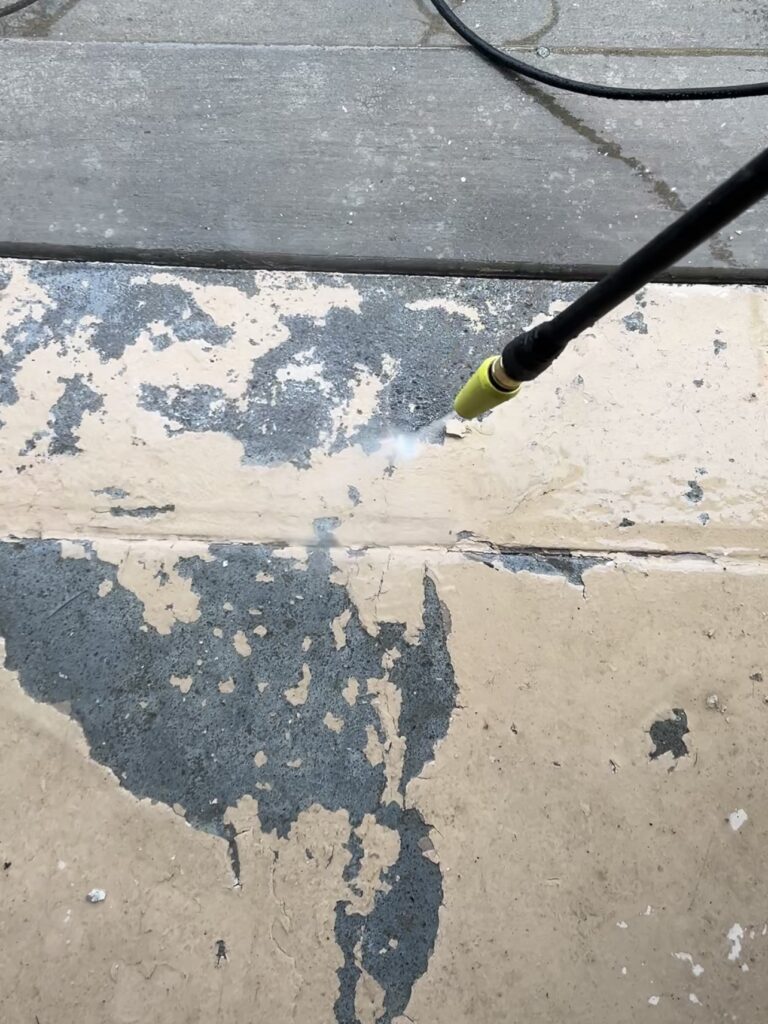
When you’re repainting a concrete floor, the first goal is to get as much of the peeling paint off as you can! We started by using our pressure washer, which worked well, but it made quite the mess. Paint chips were flying into our front yard and we later found out that water was leaking down into our basement through some of the big cracks in the concrete. Yikes!
So then I just manually scraped for more hours than I’m willing to admit. This knee pad was a life saver! I tend to fixate on tedious tasks like this and had a really hard time knowing when to stop😂 After days of chipping away at this (no pun intended lol), I forced myself to come to a close.
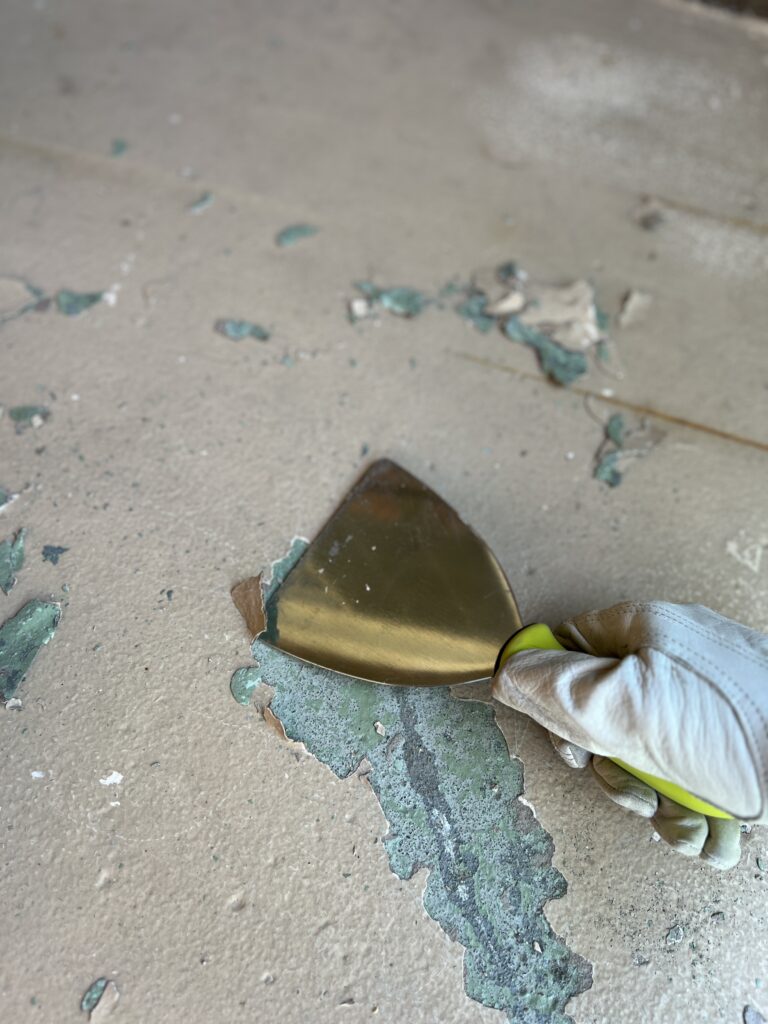
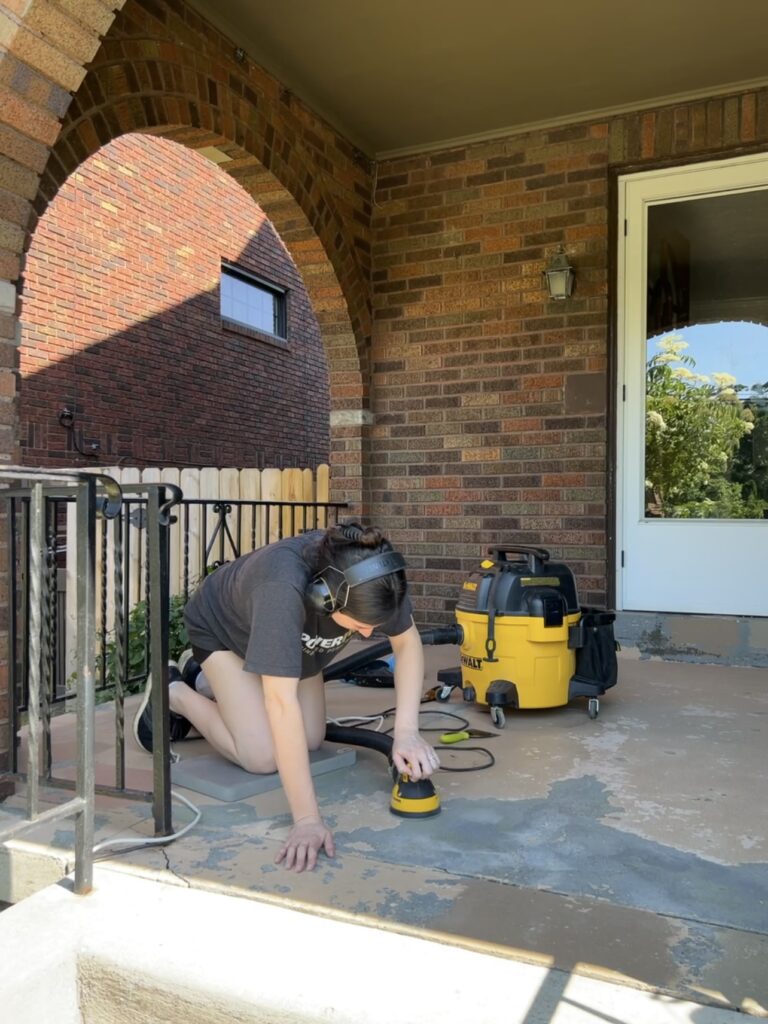
For one final round, I went around and just double checked for any lifting paint. I’d chip away anything that was loose. Once it was good I used my orbital sander with 80 grit paper and feathered the edges down. I also did a quick sand on the entire porch floor for better paint adhesion.
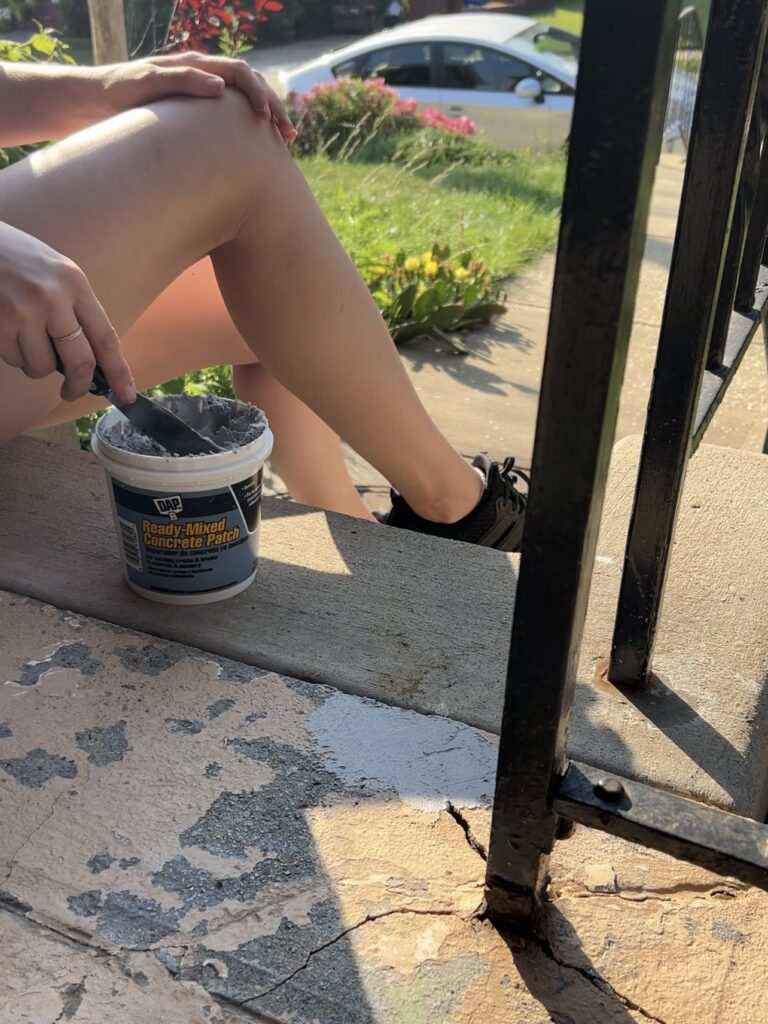
After this I patched any cracks or gouges with this ready mixed concrete patch and then blended it in with a dry craft brush. This product was really simple to use and worked great!
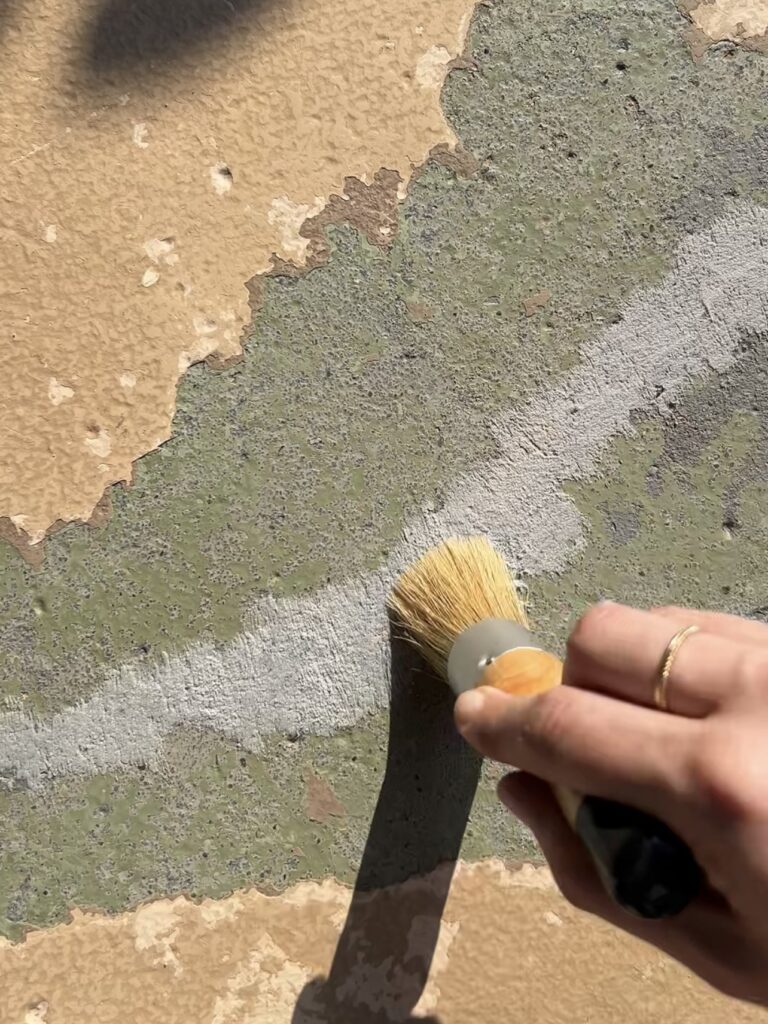
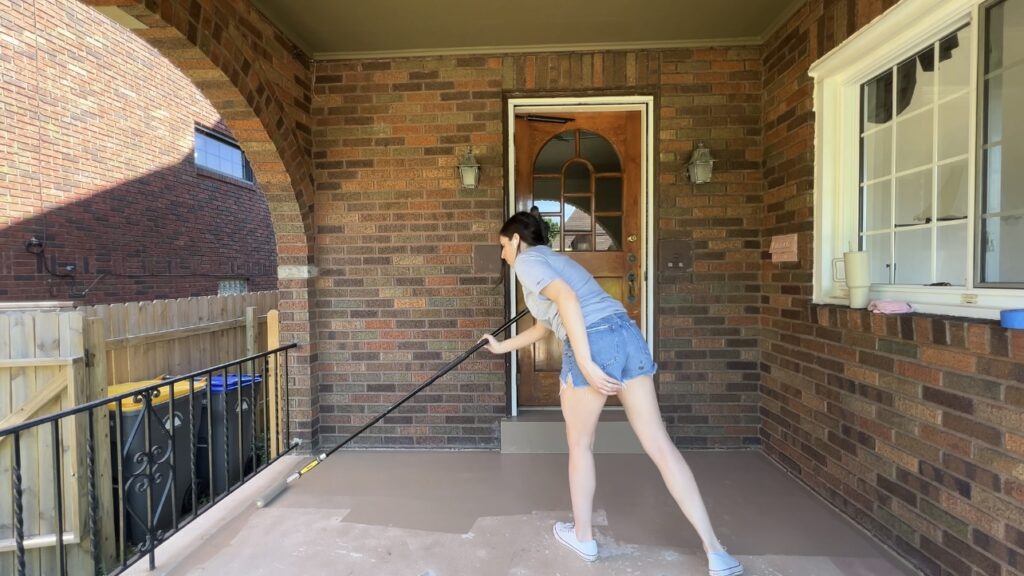
Finally it was time to paint so I edged in first with a brush and then used a roller on a pole for the rest! I’m using Sherwin Williams Porch and Floor Enamel which didn’t require a primer of any sort!
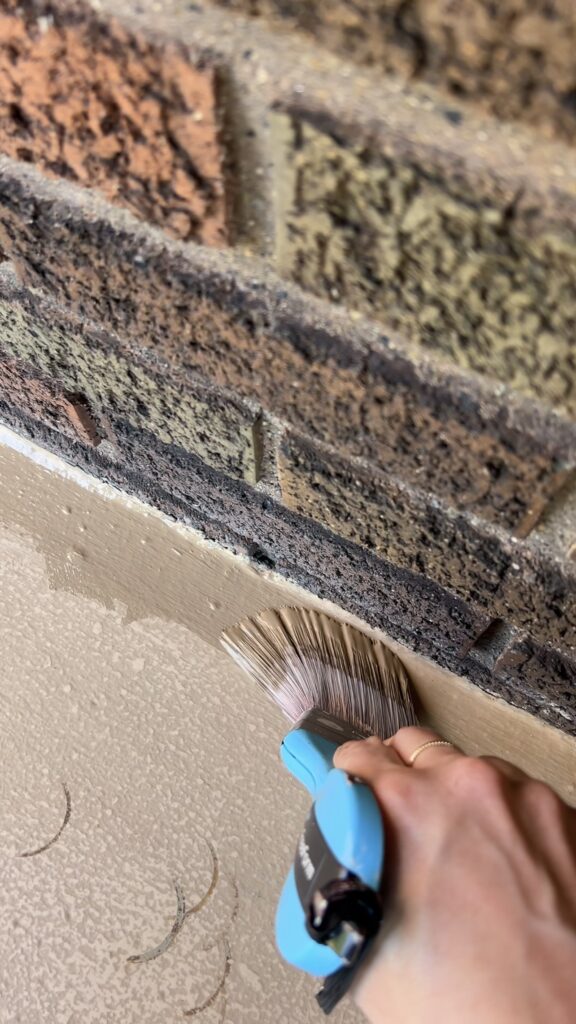
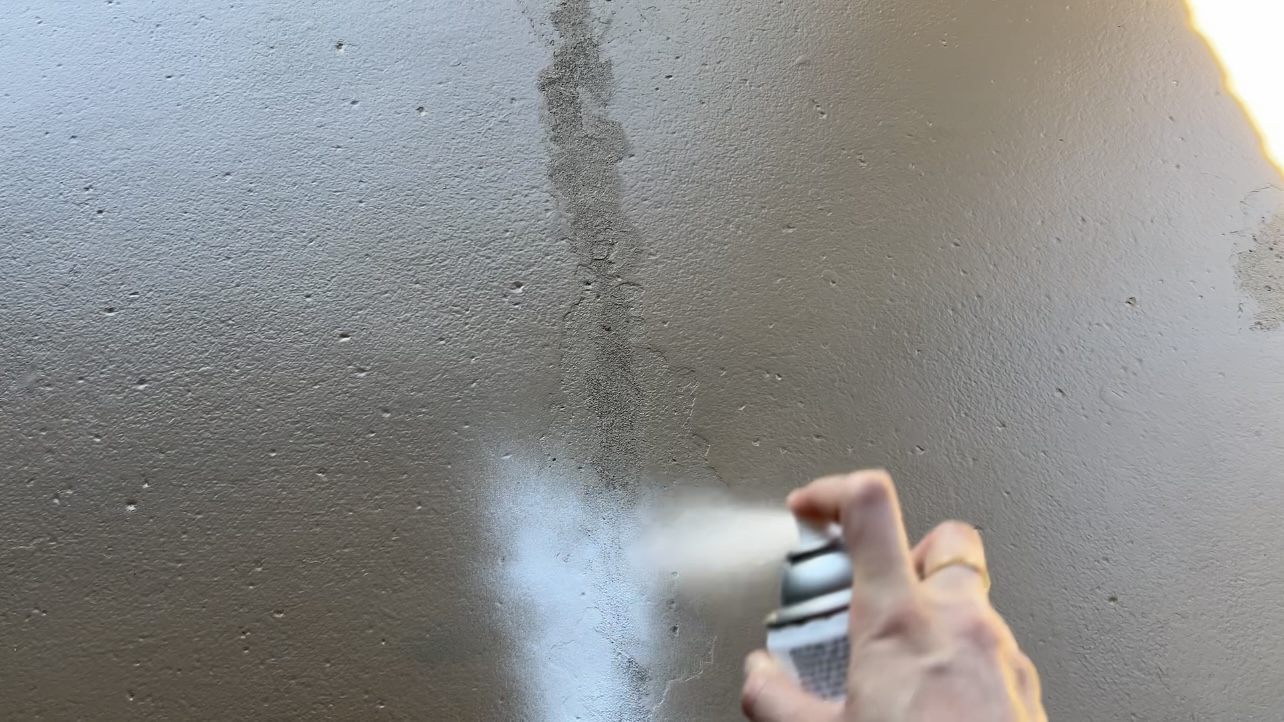
After the first coat dried, you could really see the areas where I patched. It then occurred to me that I probably should have spot primed those areas before painting. Oops!
But hey it wasn’t too late because I still had more coats ahead. When the paint was dry I use this primer spray and just got those particular areas. The concrete patch mimics the texture of concrete, so it’s perfect for untouched concrete. When it comes to painted concrete, it does stand out. But we needed those areas patched one way or another and since we were putting an outdoor rug down, I didn’t let this bother me!
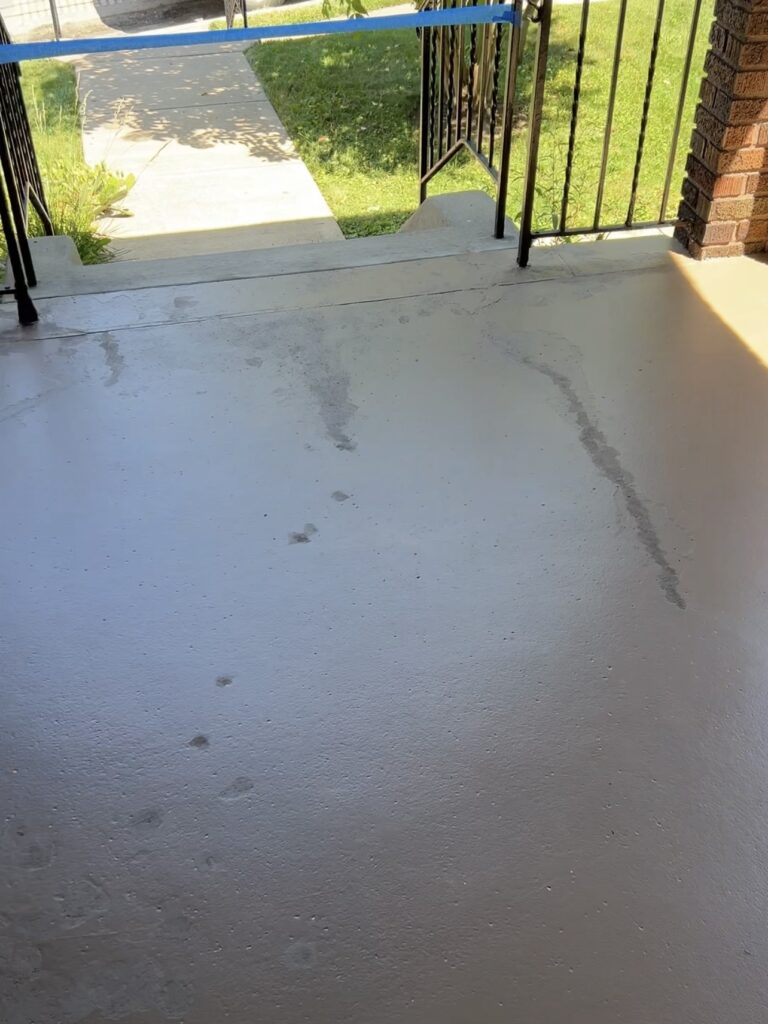
I ended up doing 3 coats of paint, but I definitely could’ve gotten away with two! It’s crazy what a huge difference a fresh coat of paint makes!!
Storm Door Makeover
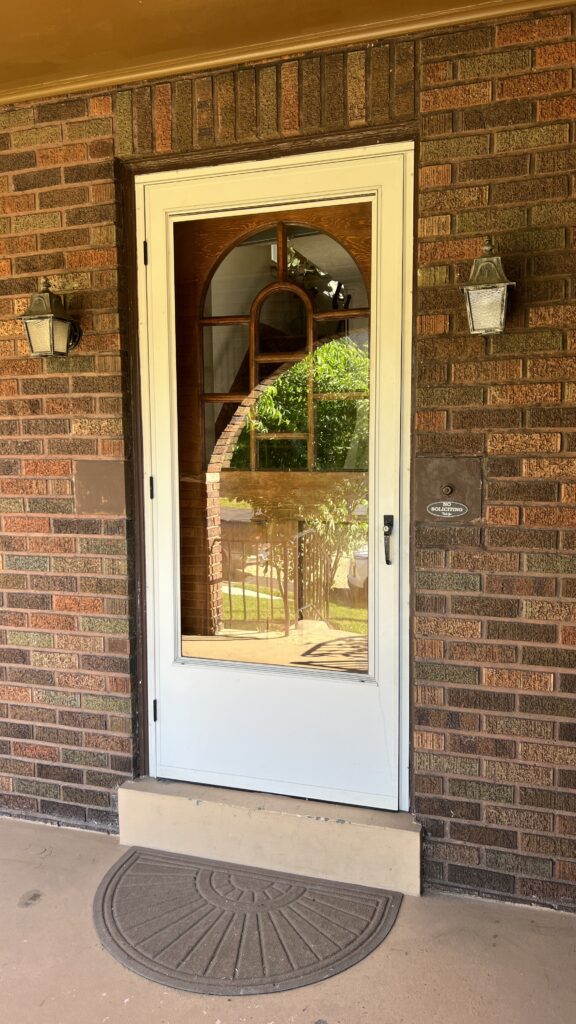
Our storm door, to me, was the biggest eye sore on our porch so I was very excited to give this a little makeover!!
When we first moved in I thought I wanted to get rid of the storm door because it does hides our front door. (Also the white didn’t help lol) But after living here for a bit, I realized how much I like it! It’s another layer of insulation, extra security, and it allows more natural light in. We’re happily keeping it for now!!
Best Paint for a Storm Door
Sherwin Williams Urethane Trim Enamel is the perfect paint for a storm door. This is a water-based interior and exterior enamel paint thats incredibly durable and levels so nicely! I’ve used it on many projects, like my DIY Fluted Bathroom Vanity from our previous home! It’s definitely pricy but SW stores always have great sales so I only buy paint when it’s 30-40% off.
How to Paint a Storm Door
The best way to paint a storm door starts by removing the door. You can paint it while it’s still up, but it’s really easy to take down and you’ll end up with a better finish!
Before painting, give the storm door a good cleaning using a degreaser of some sort. We had regular krud kutter on hand, but they also make a special pre-paint cleaner too!! Be diligent as you clean because any grime that remains may not accept the paint. Certain spots had buildup that needed to be scraped so I used a putty knife for those areas!
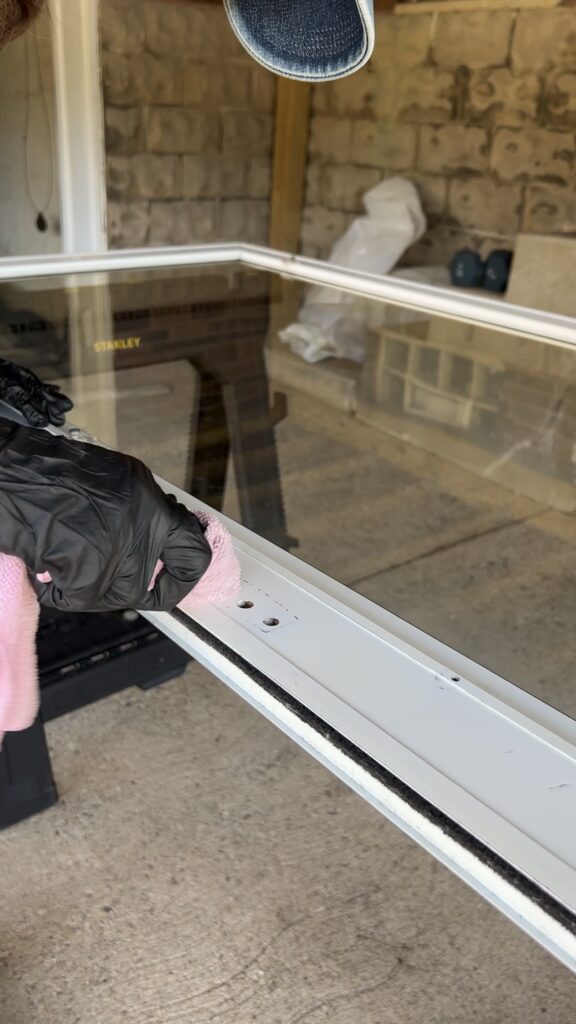
Next, tape off the glass and apply a strong exterior primer. I used SW extreme bond primer which is a very heavy duty primer that’s perfect for shiny surfaces like this!
After that I sanded it all down with a 220 grit sponge, wiped the excess dust up with a tack cloth, and then applied the paint. I used an angled brush for the edges and a ¼” nap roller for the rest!
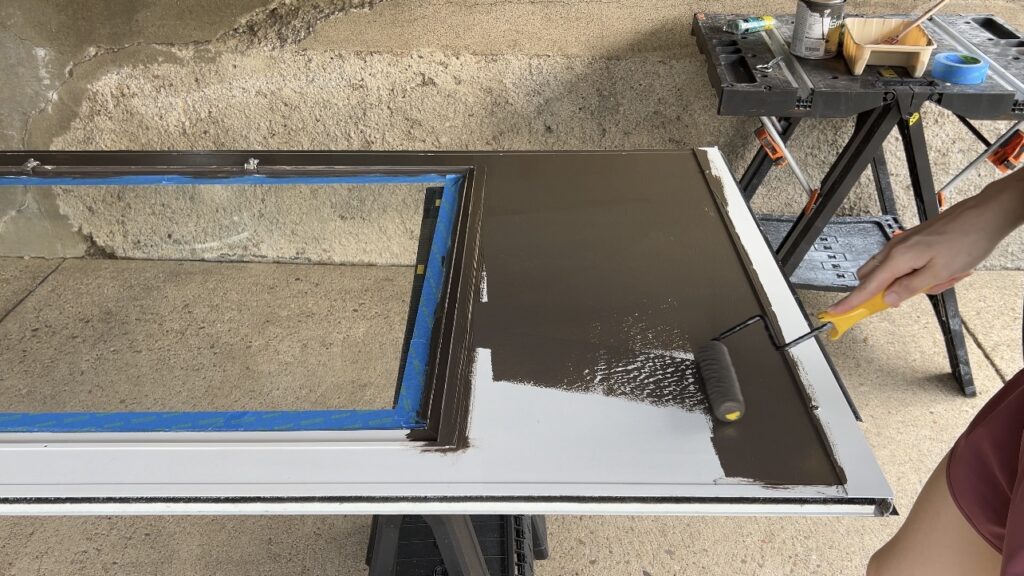
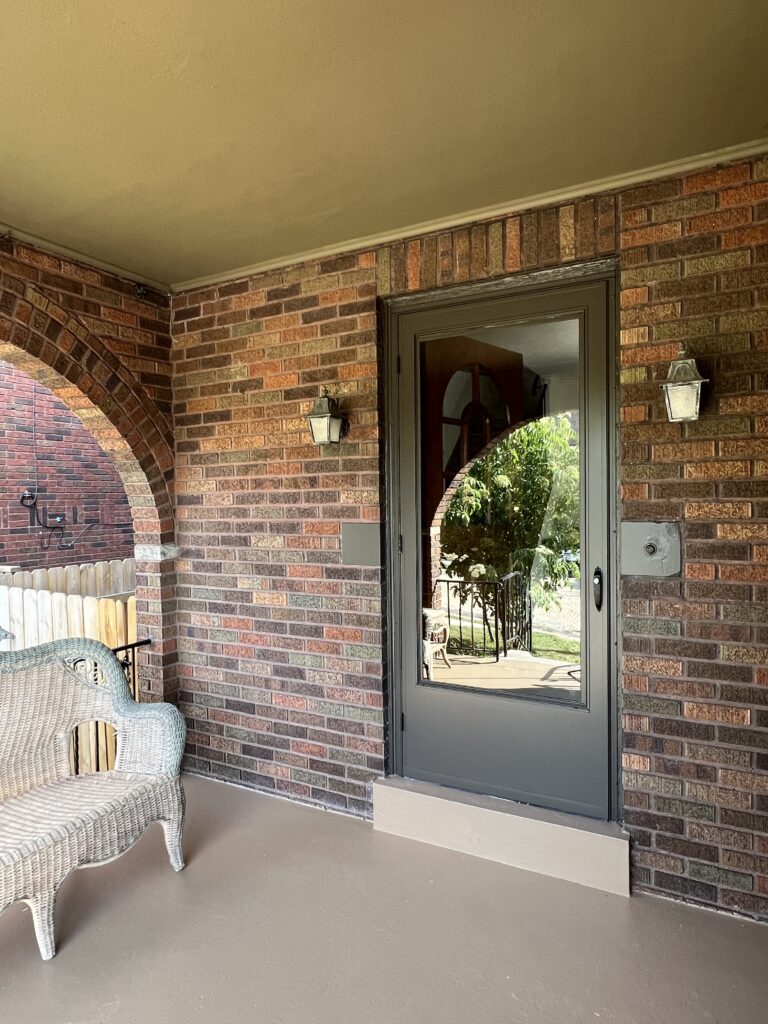
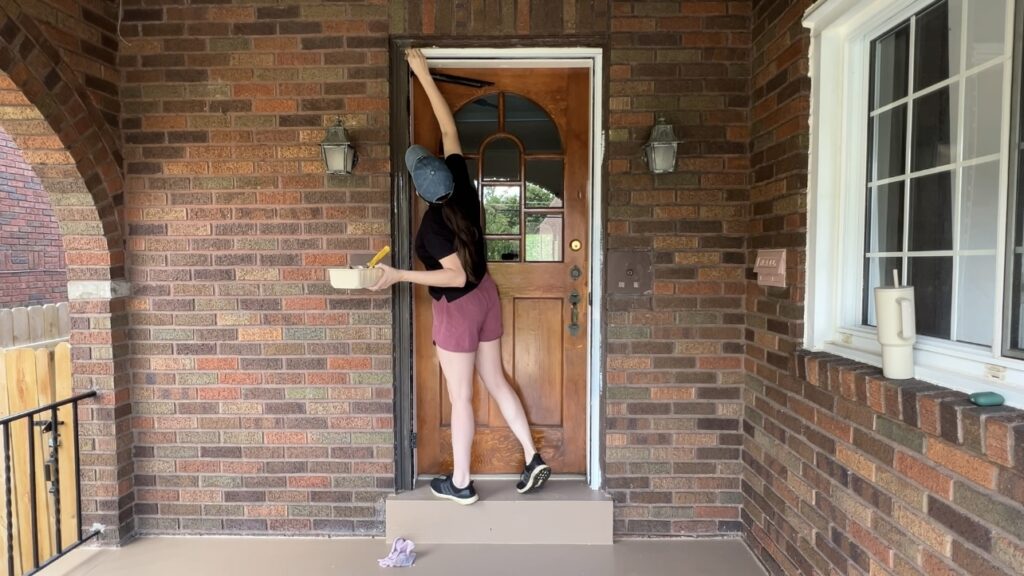
After doing the first coat I went and painted the trim around our front door too!
I did 3 coats of paint on each side of the door and sanded with 220 grit in between coats. The finish turned out beautifully and we also replaced the broken handle so it looks like an entirely new door!!
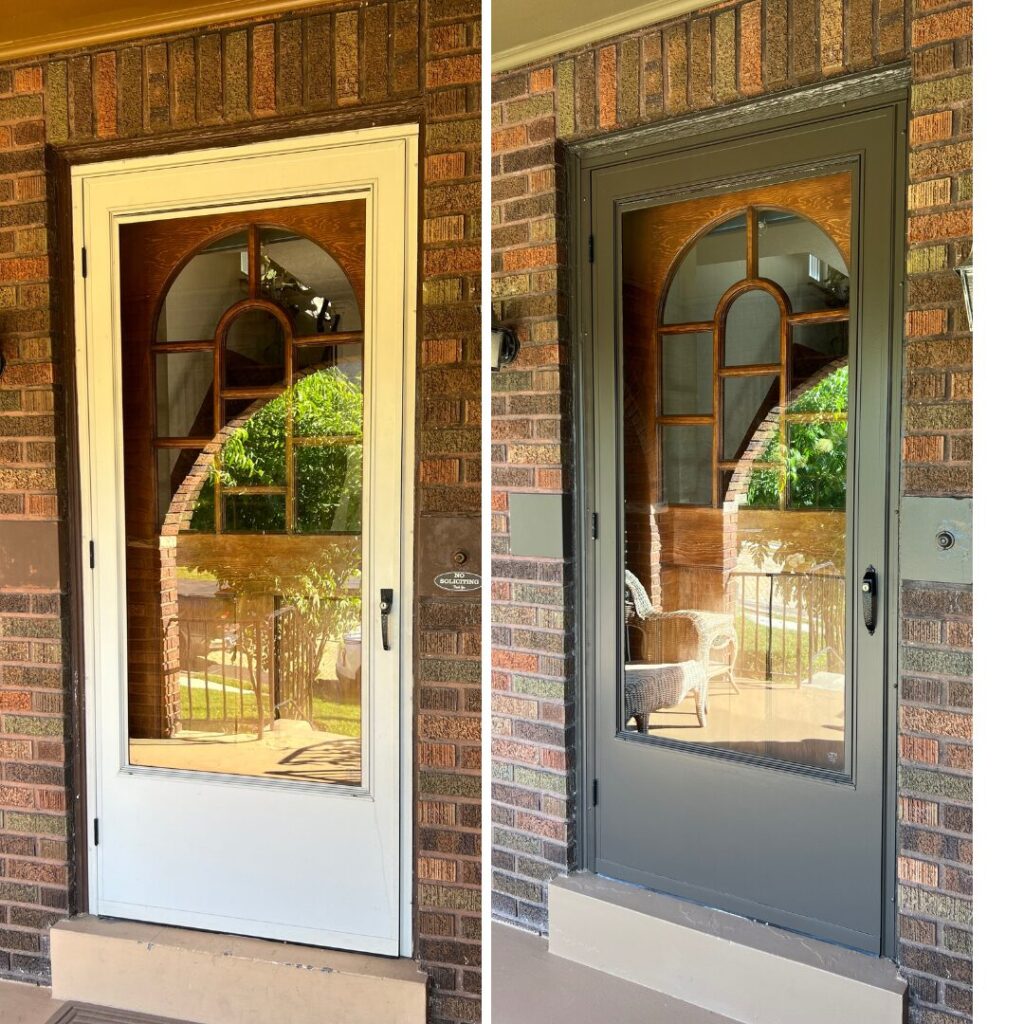
The color is Sherwin Williams Black Fox and I couldn’t love it more for our porch!!! Painting our storm door had a huge impact on our front porch makeover on a budget!

How to Fix Wicker Patio Furniture
Trust me, you don’t need to buy new furniture for your front porch makeover. Visit a local thrift store or flea market and I’m certain you find plenty of outdoor furniture that just needs a little love!
I thrifted this cute wicker furniture set for $100! (There’s also a chair!!) The love seat, in particular, isn’t in the best shape but it’s still durable enough and my plan was to give it a little makeover with… you guessed it, paint!

But the more I looked at it on our porch, the more I liked the way they looked!! So for now, I think I’m leaving them as is! Although I can’t promise that I wont end up painting them a month or a year from now because… I am who I am.
How to Repair Wicker Patio Furniture
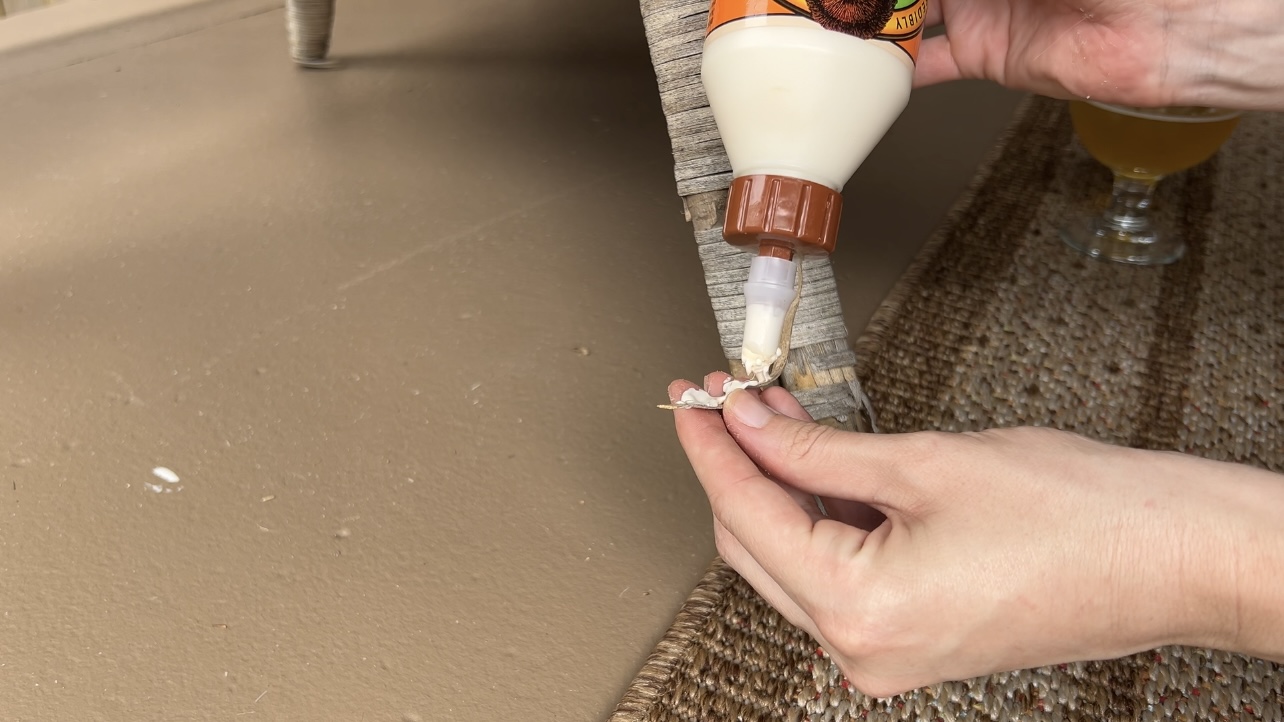
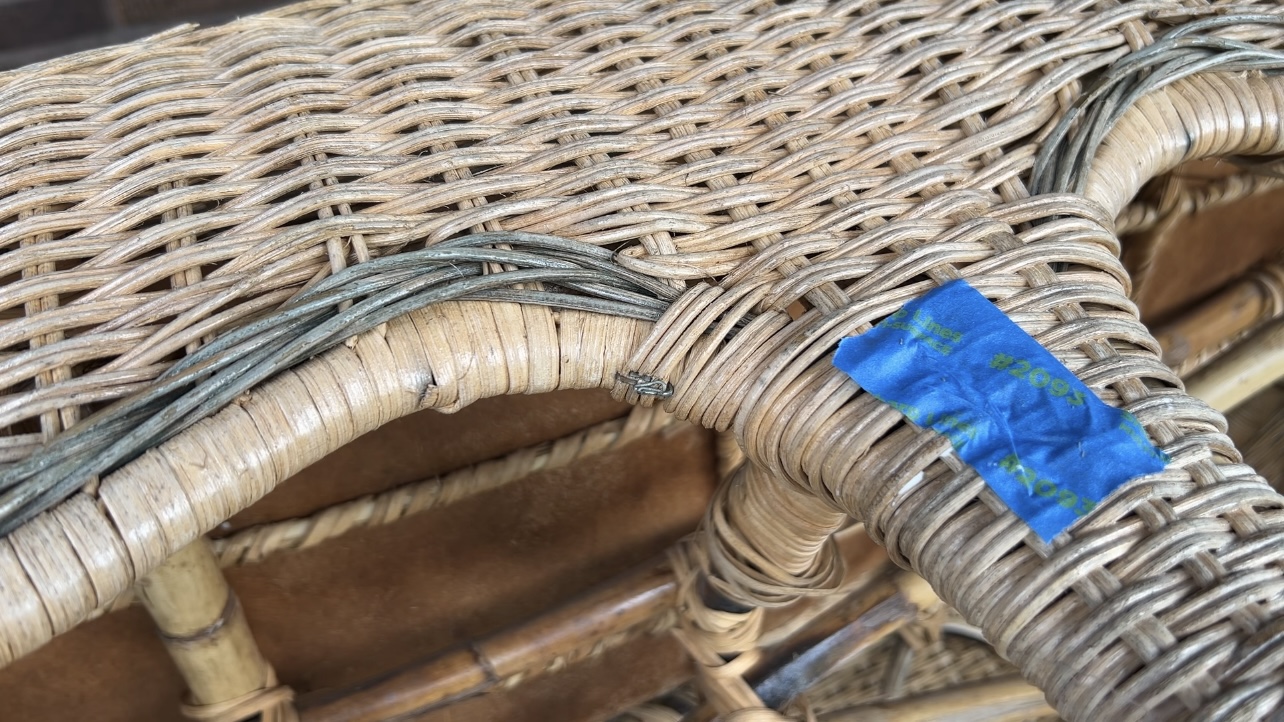
Either way, this wicker furniture set still needed some love. First I repaired the areas where the rattan was unwoven. I got it positioned properly and then put a dab of wood glue. For some areas (like the legs) I used clamps, but for other little repairs I’d use a piece of painter’s tape to secure it until the glue dries!
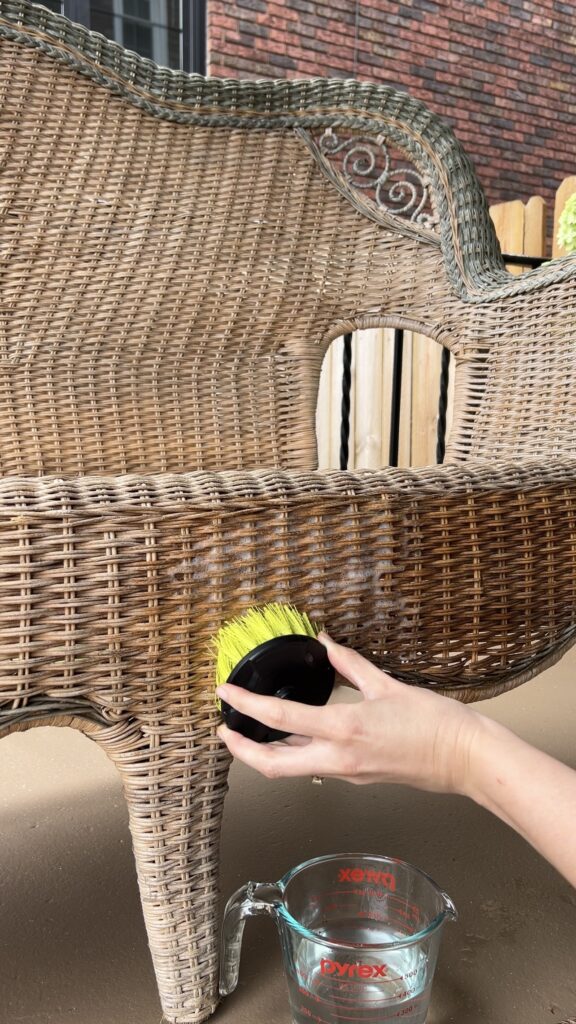
After this I gave the furniture a good clean with warm water and dish soap. I used a big scrubber and had plain warm water handy to rinse off the soap.
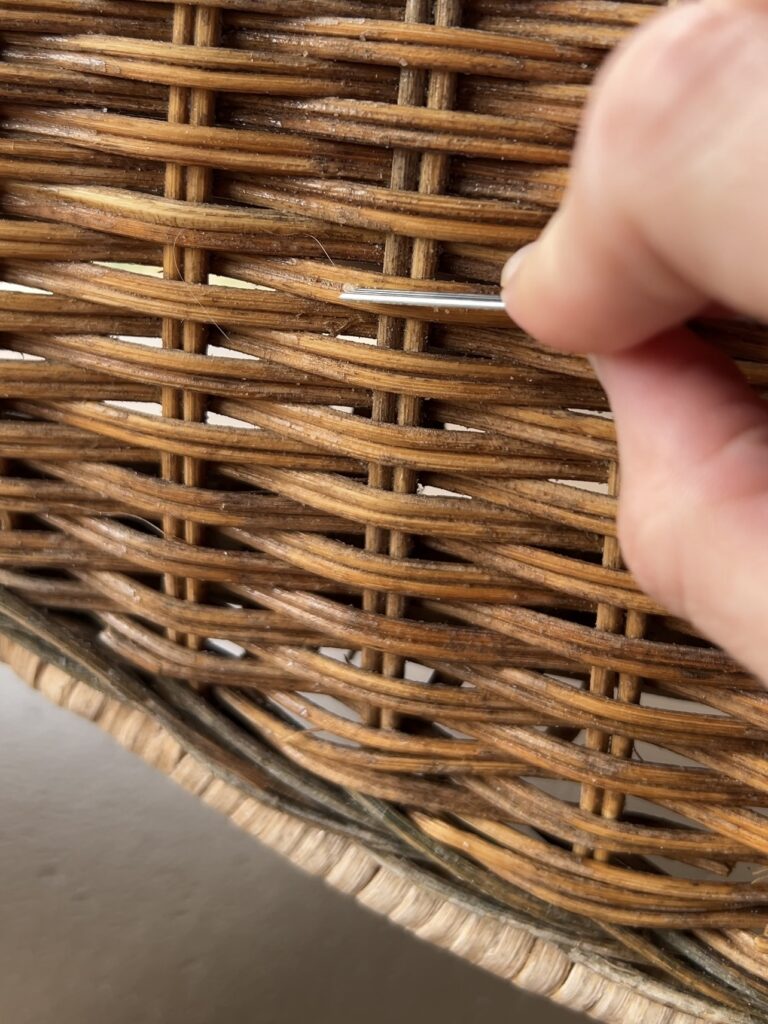
Once again, I was getting too fixated on the small details. I got my toothbrush out and started working one piece at a time. I even got out some stray brad nails to scrape in all the crevices. About an hour in, I realized how ridiculous this was because, while it was certainly getting the job done, I’d only covered about 1 square inch😂 Why do I do this to myself?! Every single time.
So I did my best job to get what I could without spending an eternity.
Just a note!! I read somewhere not to wash the entire wicker piece at once, but to do small areas at a time. If the entire furniture piece is wet, it get misshaped. I’d work on furniture piece and then jump over to another while I was cleaning.
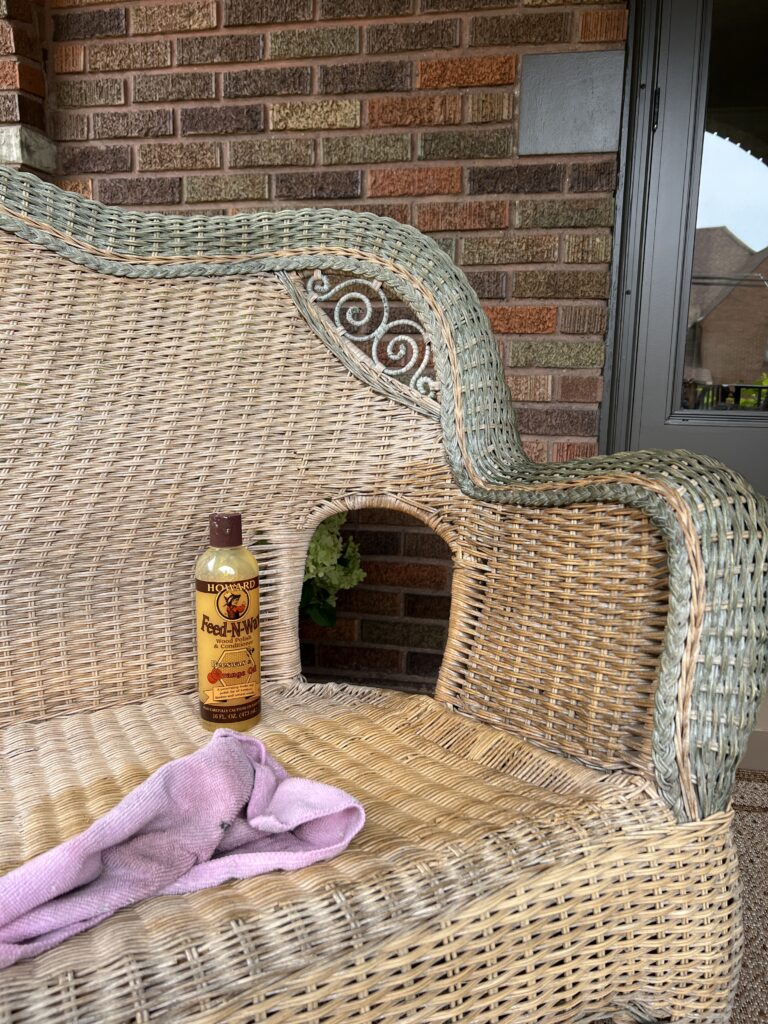
Once it was dry I used this Howard Feed-n-Wax wood polish and conditioner. This product kept popping up in my research on how to clean and repair wicker furniture so I decided to give it a shot. I applied it with a microfiber cloth and just worked in into the wicker and then wiped the excess with just warm water.
Right away I noticed the difference! It just gives the wicker life and more vibrance. This sofa was in desperate need of some moisture. I’ve never owned wicker furniture until now, but I’m learning that if you want it to last long you have to take care of it and moisturize it every so often! It makes sense!
Lastly, and most importantly, I got a cushion set and a couple throw pillows which added a pop of color and coziness!! I’m very happy with how they look 🙂

Small Front Porch Ideas
Lighting
During the warmer months, we spend a lot of nights out on our front porch so lighting is key! The biggest splurge of our small front porch makeover was new light fixtures and it was so worth it. The light fixtures we chose definitely give our porch an upscale look between the size and the beveled glass detail!
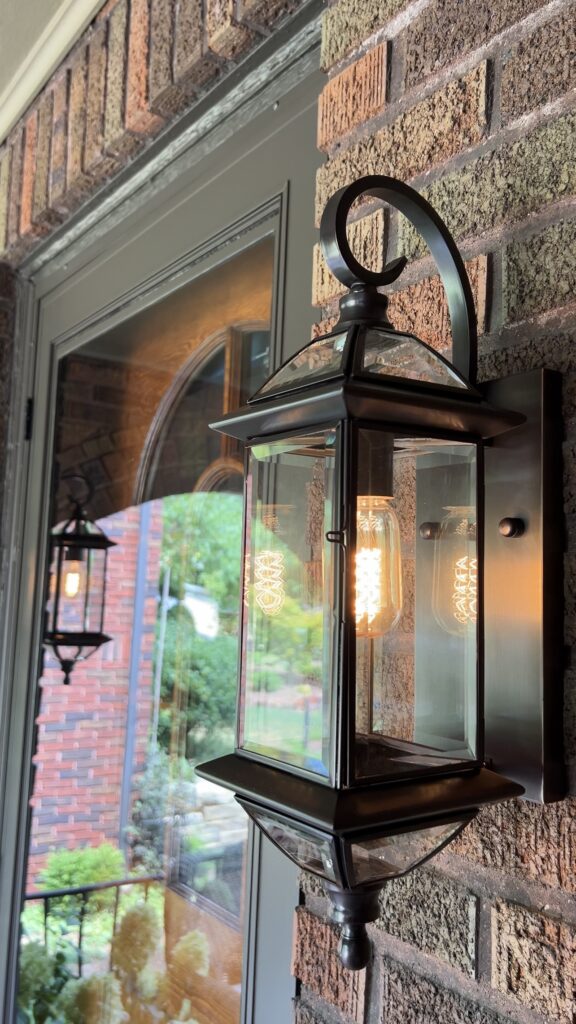
However, there are definitely more budget-friendly ways you can update your outdoor lights! You could give your current light fixtures a fresh coat of spray paint or perhaps even just update the bulbs to something with a nice, warm ambience. We got these light bulbs for our porch and they’re perfect for setting the mood for a summer night!
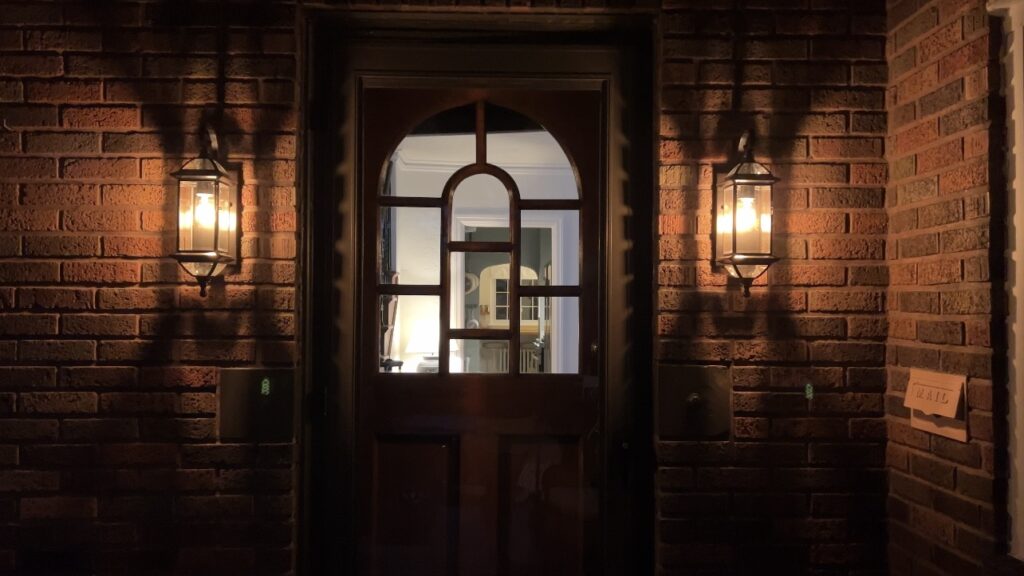
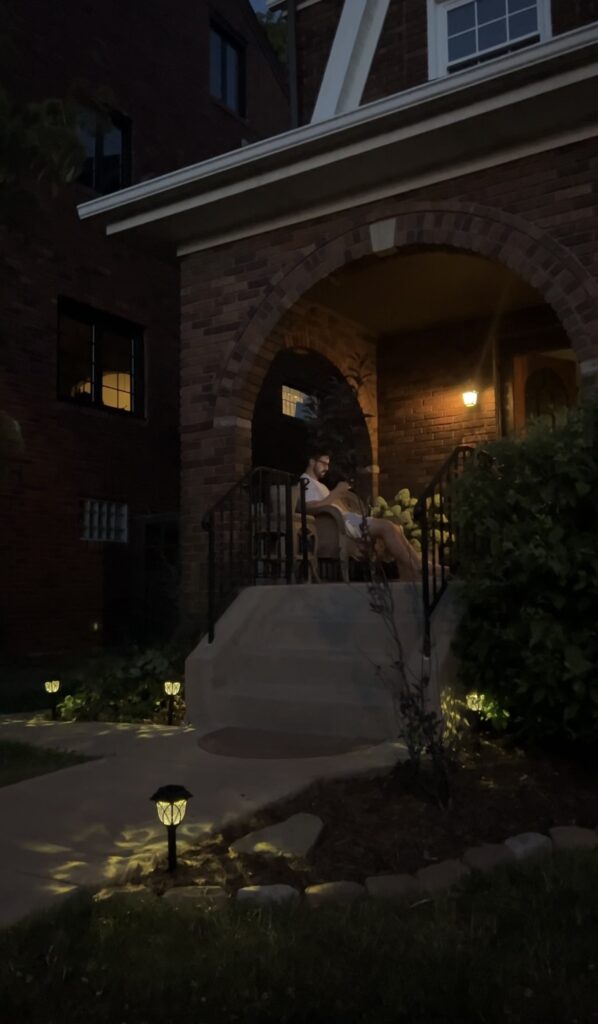
Don’t forget, it’s a good idea to have multiple light sources, if possible! You can add additional lighting in the form of string lights, lanterns, or even motion sensor lights. We also got some cute solar lights in our front yard that we get to enjoy while on our front porch!
Greenery
Adding plants and flowers is a great way to bring life to your front porch! You also don’t need to have a green thumb!! There are so many beautiful faux outdoor plant options that look like real plants and will last for years to come. These are just a few examples:

- Giant Boston Hanging Fern
- Morning Glory Bundles
- Boxwood Topiary Potted Plants
- Mixed Daisy Hanging Basket
- Set of 2 Boxwood Balls
- Dried Daisy Flower Bouquet
- Camellia Flower Tree
- Bundles of Artificial Lavender
- Bird of Paradise Faux Plant
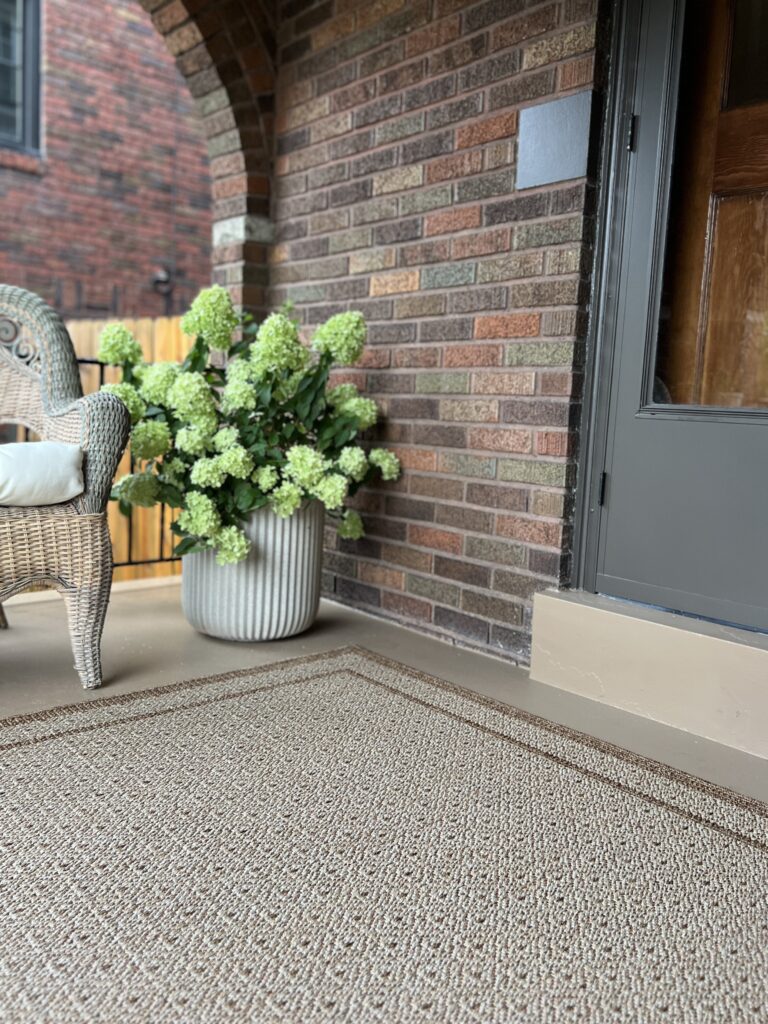
We found some gorgeous hydrangeas at a local nursery and I love the bright pop of color they add to our little porch.
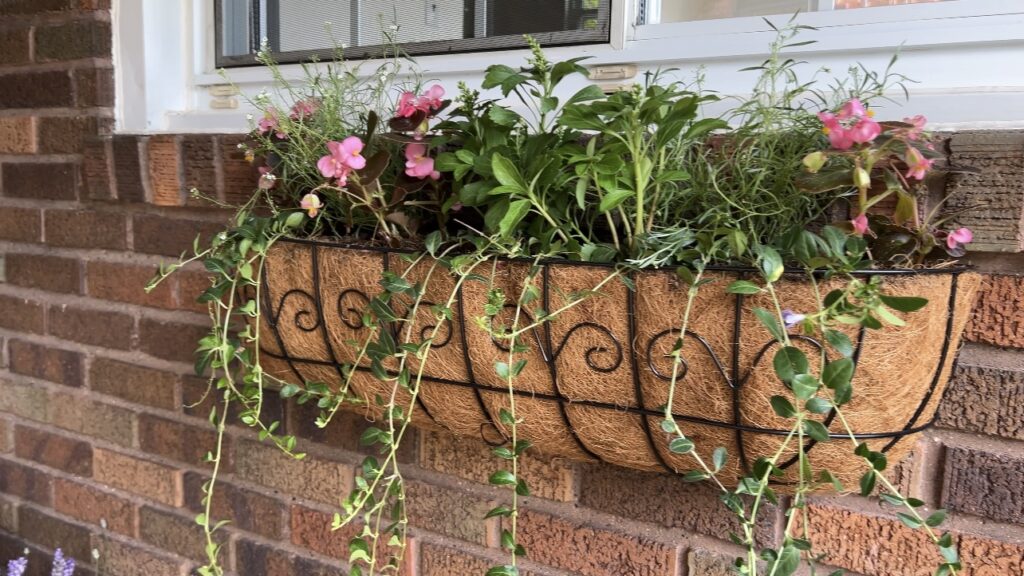
This cute little window flower bed was an Aldi find! We filled it with some shade friendly flowers we got from Home Depot! To attach the window box to our brick house, we used a hammer drill and these anchors.
All the outdoor planters we already had, but I did attempt a DIY planter makeover that ended up being a fail. Just to briefly share the process, I cleaned our planters (they were these but a terracotta colored), primed them, and then used a combination of all of these spray paints:
- Rustoleum Textured Spray Paint in Pebble
- Rustoleum Textured Spray Paint in Gray
- Krylon Matte River Rock
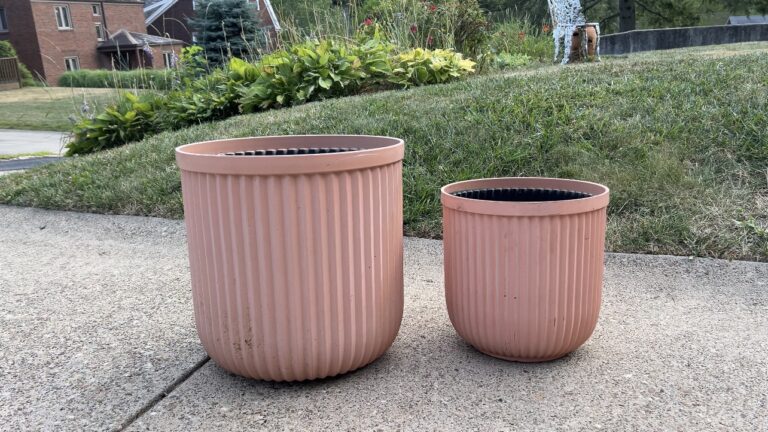
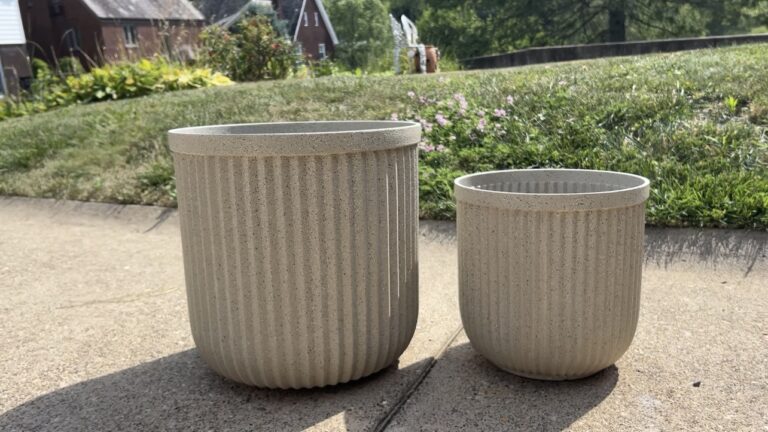
At first I was so pleased with how it turned out but after a week or so the flakes were wiping off the planter entirely which was such a bummer 🙁 Maybe I applied the textured spray paint too heavily? I’m not sure! This was my first time using it!
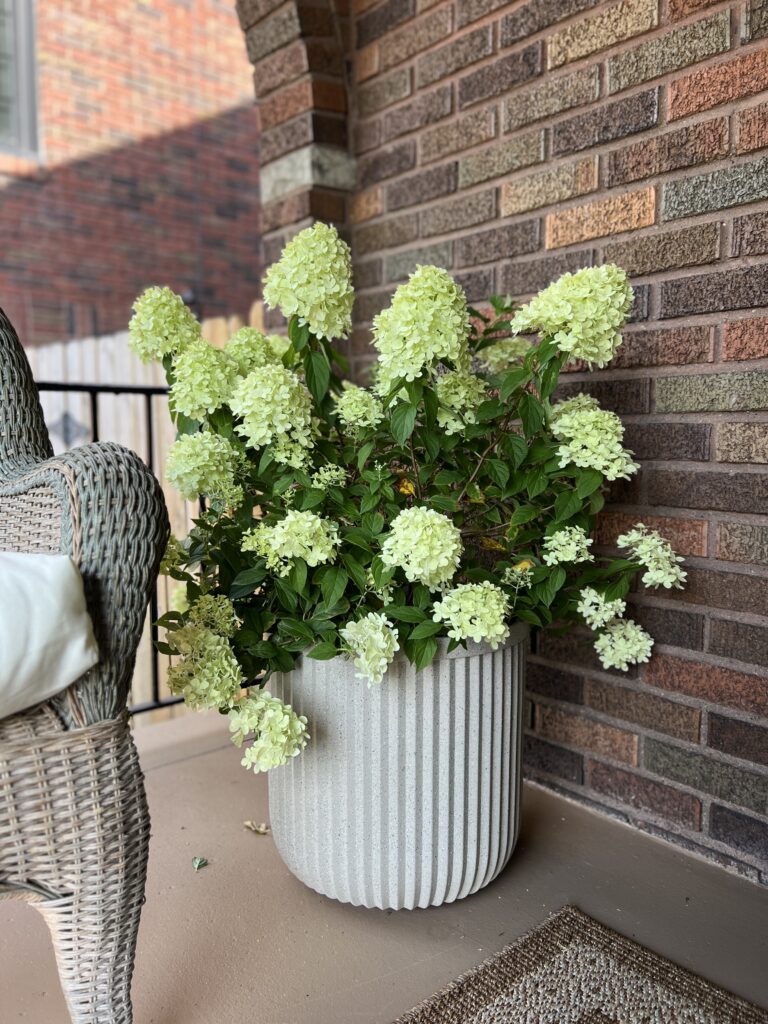
I knew I had to get after videos of the porch so I gave the planter a quick fix makeover with Krylon Coffee Bean. I’ll admit, I was rushing and it definitely could’ve used another coat so i’ll eventually do another makeover on that planter! Here’s another, more involved, DIY planter makeover idea i’ve been eyeing!
Decorative Elements
Area rugs are one of the easiest ways you can make a welcoming front porch. Choose one that represents your personal style, whether that be a rug with a vibrant color scheme, or maybe one with more natural elements. I wanted one that was neutral and had a traditional feel to it and this one couldn’t have been more perfect.
If you don’t have the space for an area rug, a welcome mat is the perfect place to showcase your personality. I also think it’s so cute to do the layered look with door mats!! You can swap out the top mat with a seasonal DIY coir doormat, like this one I made for July 4th this last year!
Furniture for Small Front Porches
I know, I know I have a large porch in comparison to some! Not all porches have enough square feet to fit a wicker furniture set. It’s all relative! Consider these furniture options for a small front porch:
- Rocking chair
- Adirondack chairs
- A porch swing (we eventually want one of these!)
- A bistro set
- A small side table or plant stand
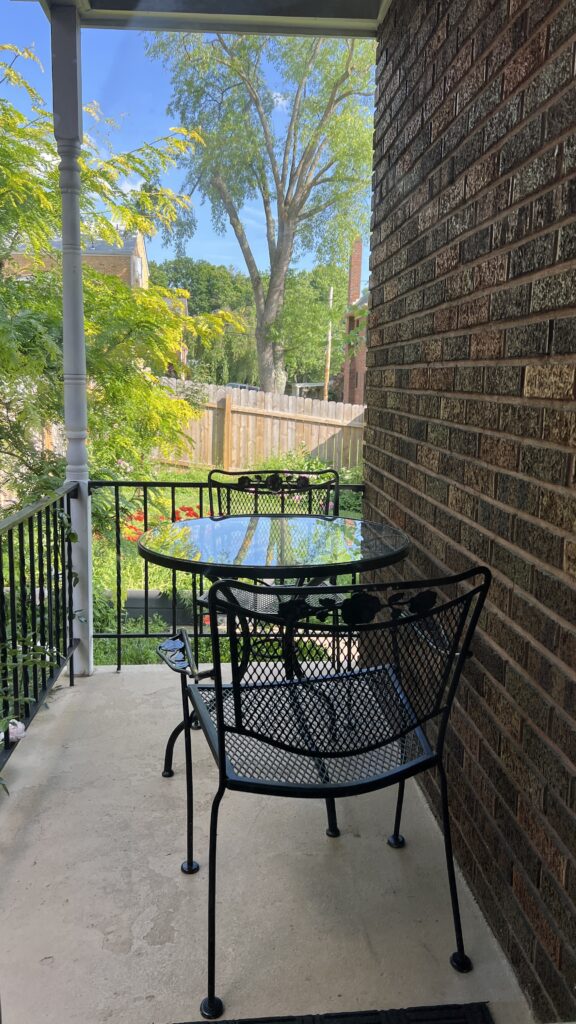
We actually have a tiny porch with a small seating area on the side of our house. Look at this cute little bistro set I thrifted for it! It has become my favorite spot to have a cup of coffee 🙂
Personal Touches
My biggest style tip is to make your space feel like you. Just because your front porch is outside, doesn’t mean you can’t add some personality through artwork and decorative items! Here are some of the best ways you can make your small front porch uniquely you:
- Outdoor safe wall hangings
- Wind chimes
- A welcome sign
- New house numbers (They come in so many styles!)
- Anything vintage!
- Garden statues
- Outdoor curtains (so dreamy and cozy!)
- Decorative hooks for gardening supplies
- Bird houses or feeders
- Seasonal Decor (wreaths, flags, etc.)
- Outdoor throw pillows
I’m still working on the personal touches for our small front porch makeover because I want to be intentional with what I choose! One thing i’m on the hunt for is a vintage welcome sign or some kind of plaque. It has to be the perfect size to fit on the cement block to the left of the door! Wish me luck 🙂
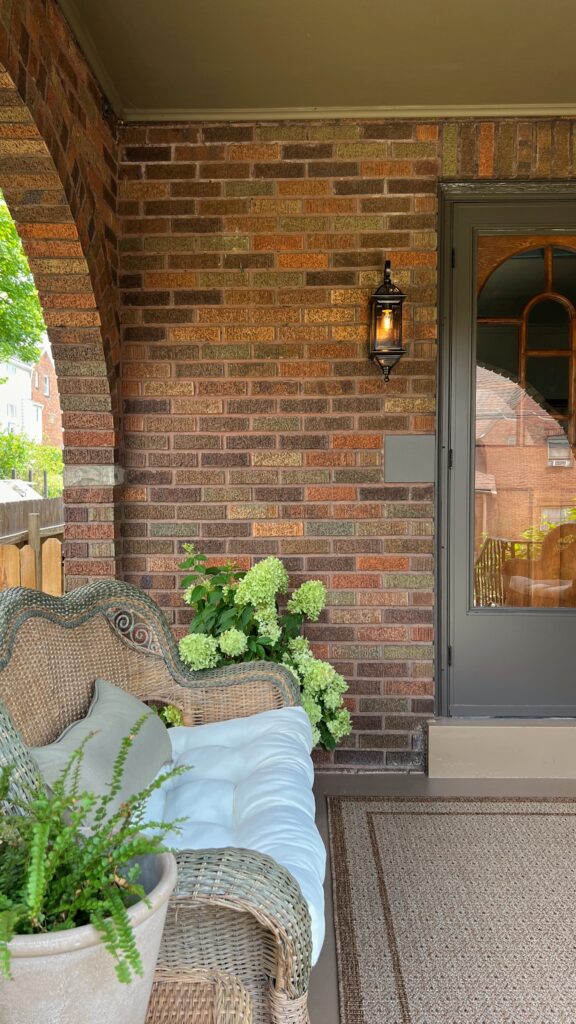
Small Front Porch Makeover Before and After
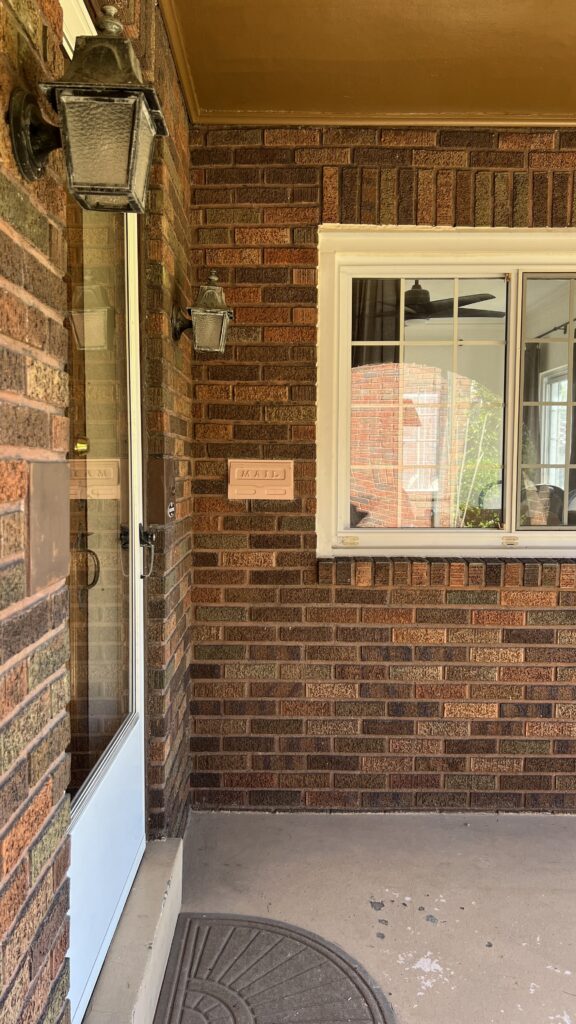
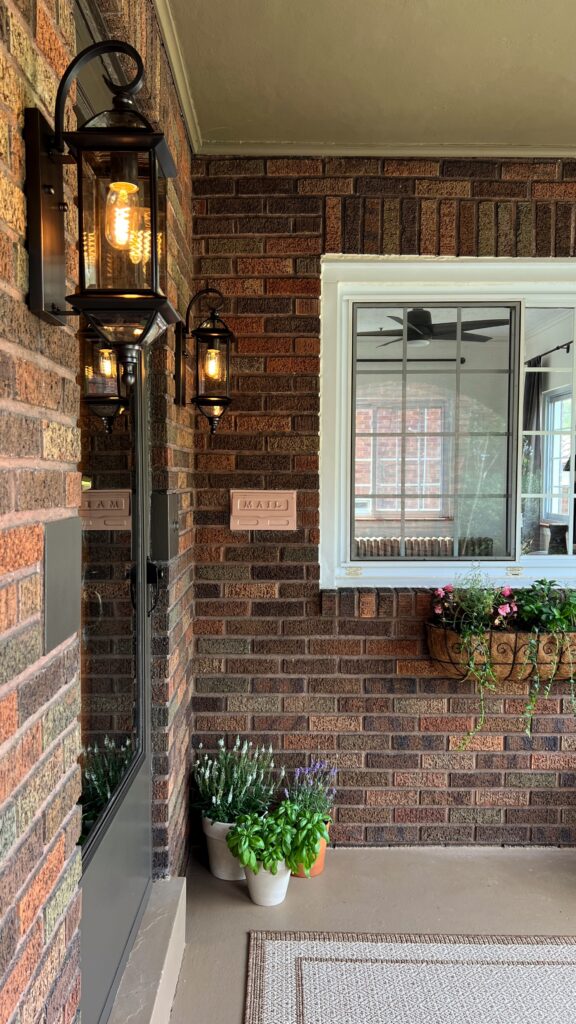
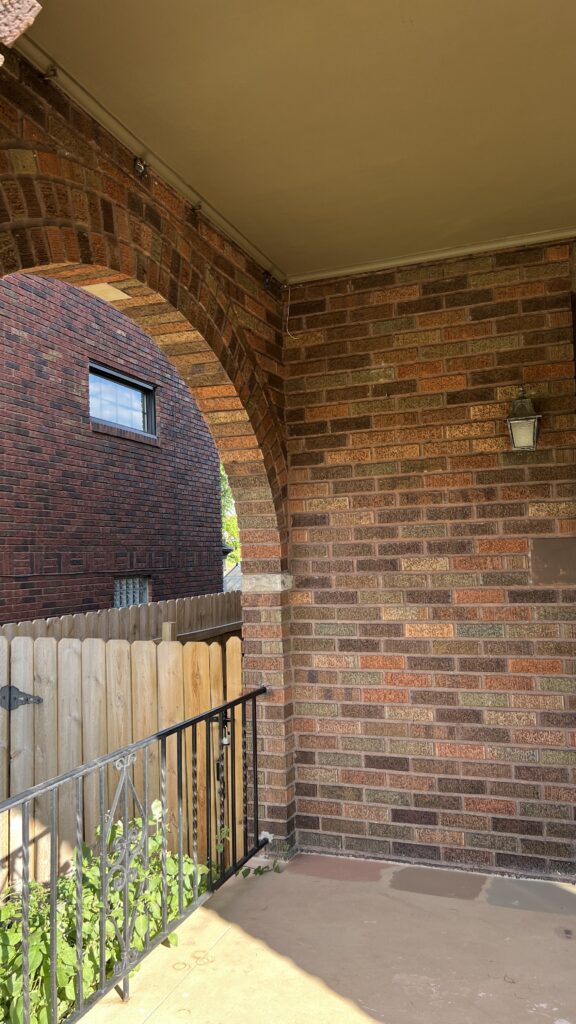
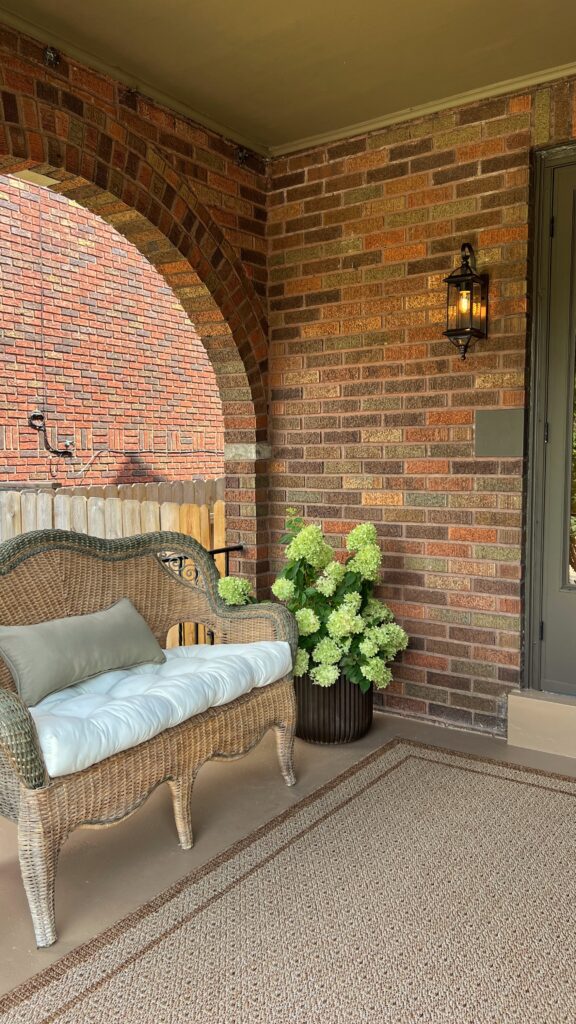
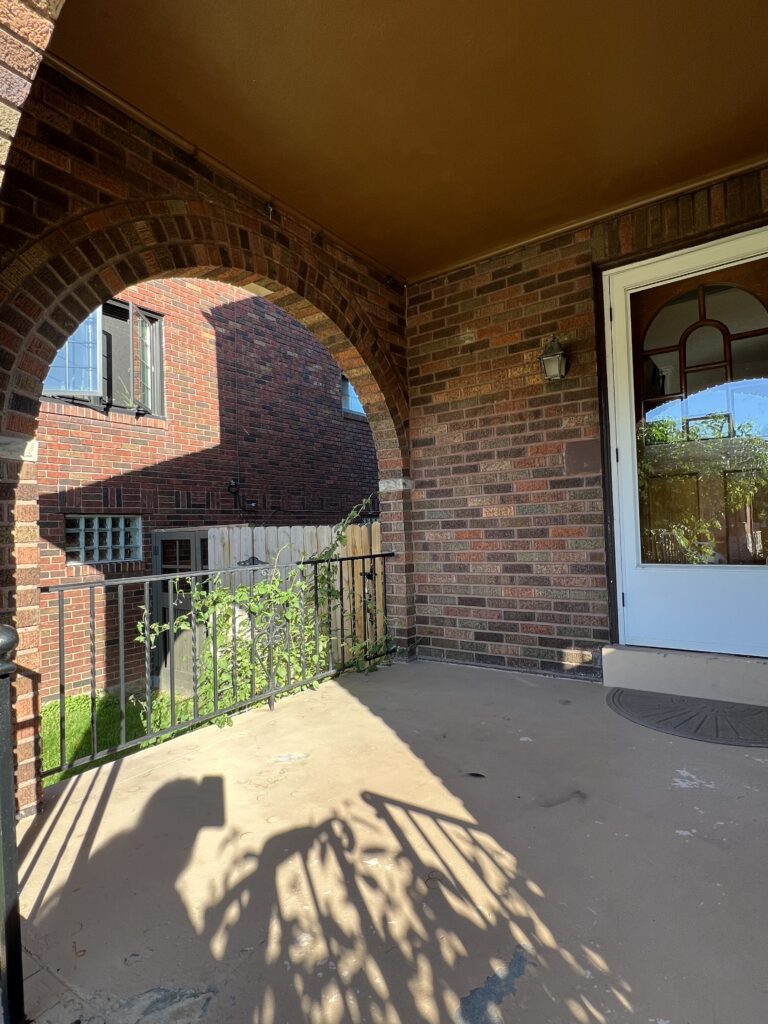
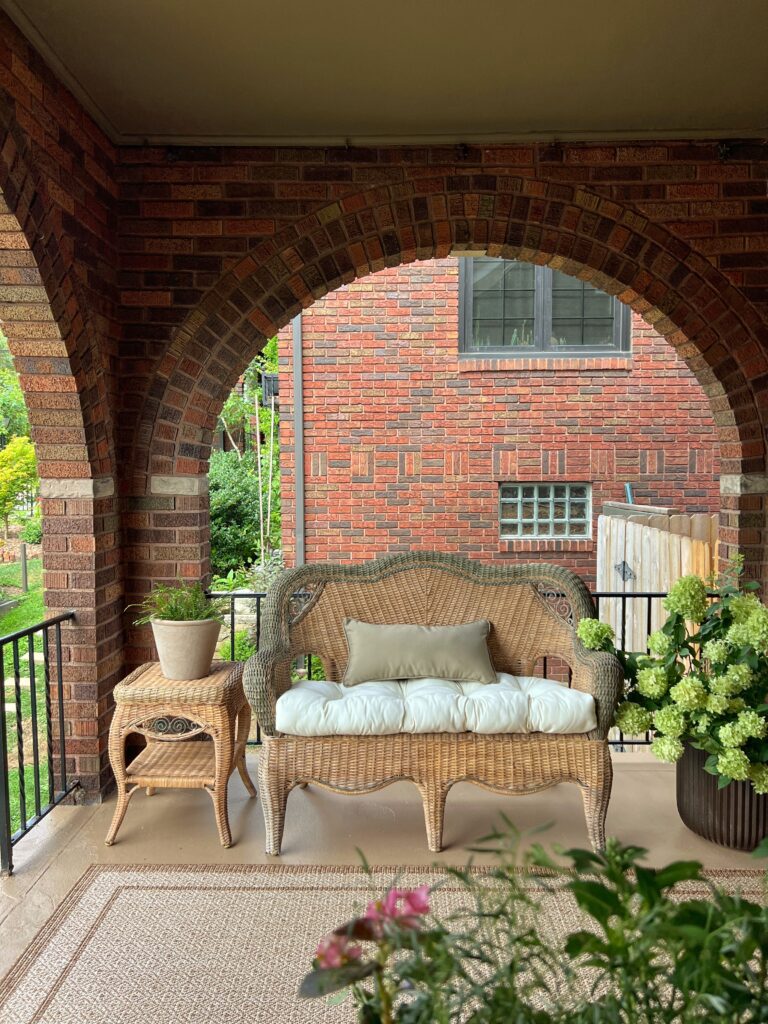
For even more views of this small front porch makeover on a budget, check out my YouTube video!
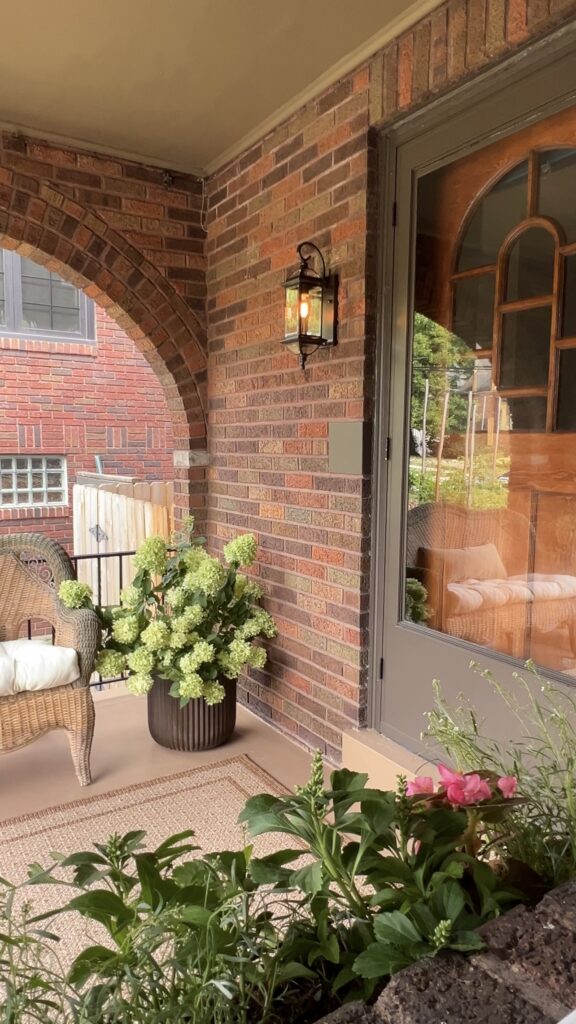
This here is proof that small porches can be just as beautiful as a large front porch! I’m so happy anytime I get a view of the front of our house. We’ve been enjoying our small front porch makeover every single day!! Even our cats love hanging out here 🙂
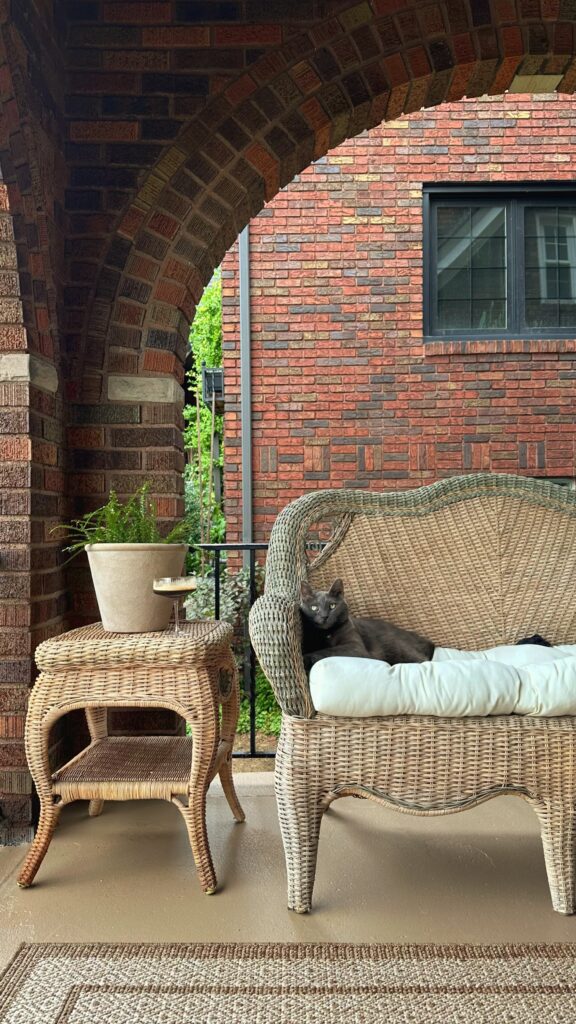
I hope you found some good inspiration for your own budget friendly porch makeover! Please let me know if you have any additional questions!!
Elisha
Wow! What a great job! I love all of it, so glad you stuck with it😉for perfect colors. I bet your neighbors love having you on the block!👏👏👏
Thank you so much Sally!! I’m glad I stuck with it too! The neighbors even weighed in on the color options too 🙂
Oh my gosh girl I love every part!!!!! You did such a beautiful job! I would totally want to hang out here all the time!
Thank you Lisa!!! You’re too sweet! We’ll be taking full advantage, that’s for sure 🙂
Looks so good! I LOOOVE that little mail slot! Can’t wait to come visit!! ❤️
Awe, thank you Tiff!! Can’t wait either! And isn’t that the most darling?! I love it.