

This post is sponsored by Minwax. All opinions are my own.
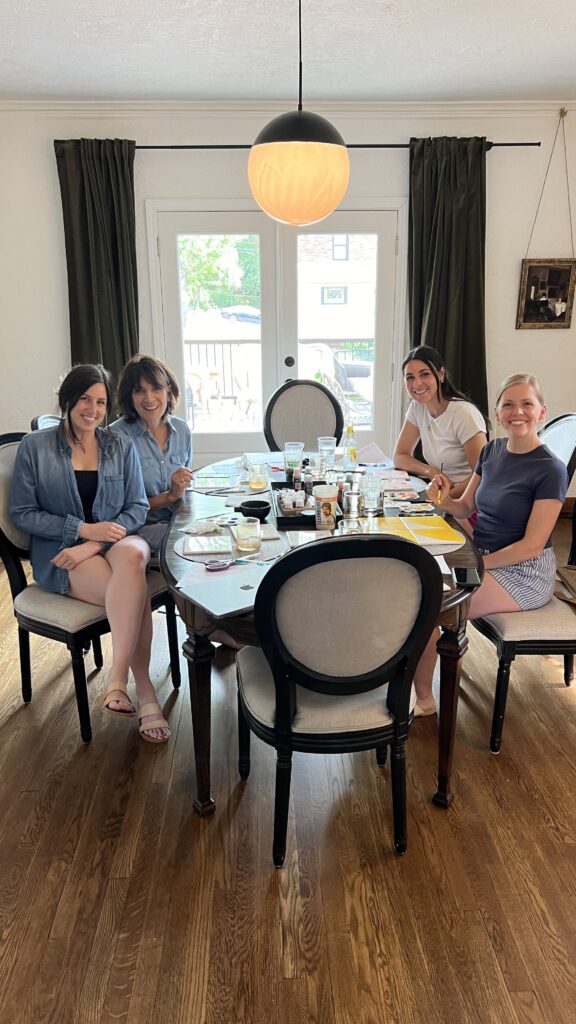
My husband and I recently moved closer to family and I thought it would be fun to host a girl’s craft day with my in-laws! We had brunch, crafted, and just enjoyed each other’s company. Highly recommend! Everyone painted their own ceramic tiles which I then used to make each guest a personalized DIY table tray! I’m still in awe of how cute and unique each serving tray turned out.
If you prefer easy projects, you’re in luck! This DIY wooden tray is actually a great beginner friendly woodworking project. The tile addition adds so much character! In this post I’ll share the step-by-step instructions so you can recreate this project however you’d like!
Disclaimer: This post contains affiliate links. This means, if you purchase something from a link I provided, I will receive a small commission. This is at no extra cost to you! Thank you so much for the support!
Tools and Materials for a DIY Table Tray with Tiles
Tools
Materials
- 1×3 Boards
- 1/2″ Plywood
- Purdy Brush
- Minwax Pre-Stain Wood Conditioner
- Minwax Oil-Based Stain
- Minwax Oil-Based Polyurethane
- Wood Glue
- Wood Filler
- Loctite
- Ceramic Tiles
- Porcelain Paint
- Craft Brushes
- Grout Caulk
- Krylon Crystal Clear Acrylic Coating
Step One: DIY Table Tray Design
As always, it’s important to first figure out how you want your DIY wood tray to look! I got the inspiration for this project from this tutorial! Hers turned out so cute!!
Unfortunately I made the mistake of getting 6″x6″ tiles and didn’t realize until the day of my craft party when it was too late. (I was envisioning 4″x4″ tiles) This definitely impacted the overall look and size i’d planned on, but it worked out just fine in the end!
After chatting with my guests, we all decided to do three rows of three tiles and therefore making the tray right around 18″x18″ (the finished size is a little bigger with the sides of the tray too!)
Step Two: Measure and Cut the Wood
To build the tray, I used red oak 1x3s and 1/2″ birch plywood. You can really use any type of wood species! Red oak is a personal favorite because I love the grain and it accepts stain beautifully. To make this project more cost effective, you could use these boards instead!
As for the plywood, I chose birch because it was the best looking option at the hardware store. Since the plywood is the bottom panel, you’ll want something sturdy. Pay special attention to the straightness of your boards when you’re shopping! Warped pieces can really throw off a project.
If you decide to make the same size as we did, feel free to use my cut list:
- One 18 1/8″ x 18 1/8″ of 1/2″ plywood
- Two 19 5/8” 1x3s
- Two 18 1/8” 1x3s
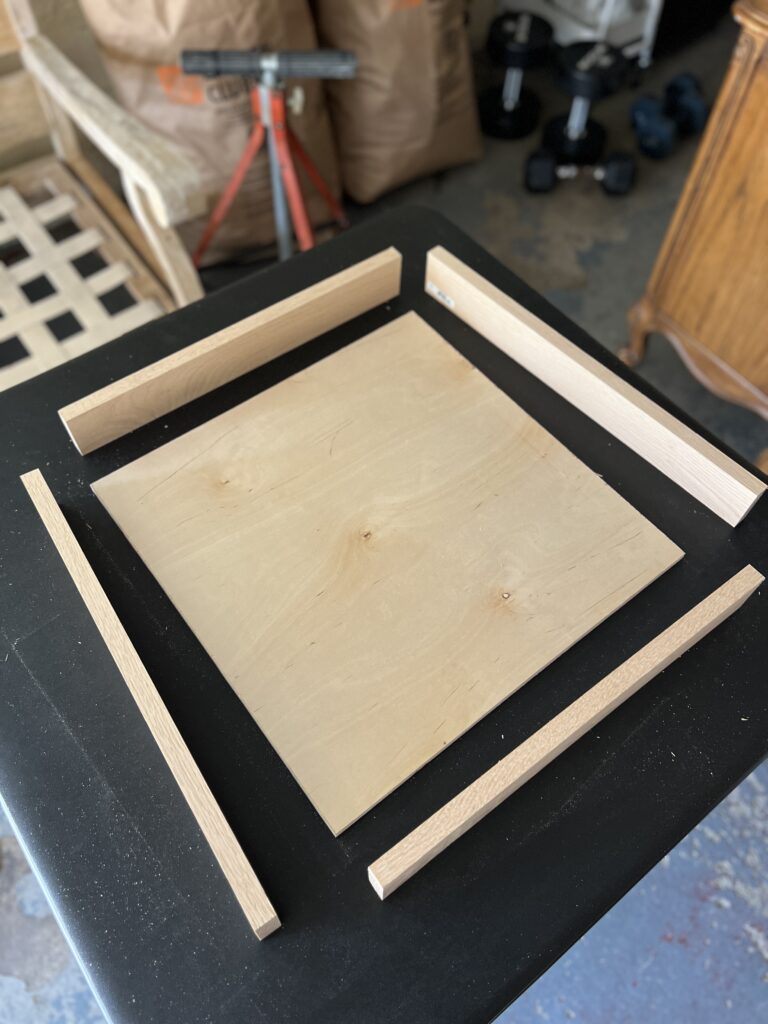
For the bottom of the tray, I placed all the tiles on the plywood and marked the placement just to be SURE they’d fit! Once it was marked I used my circular saw to cut it!
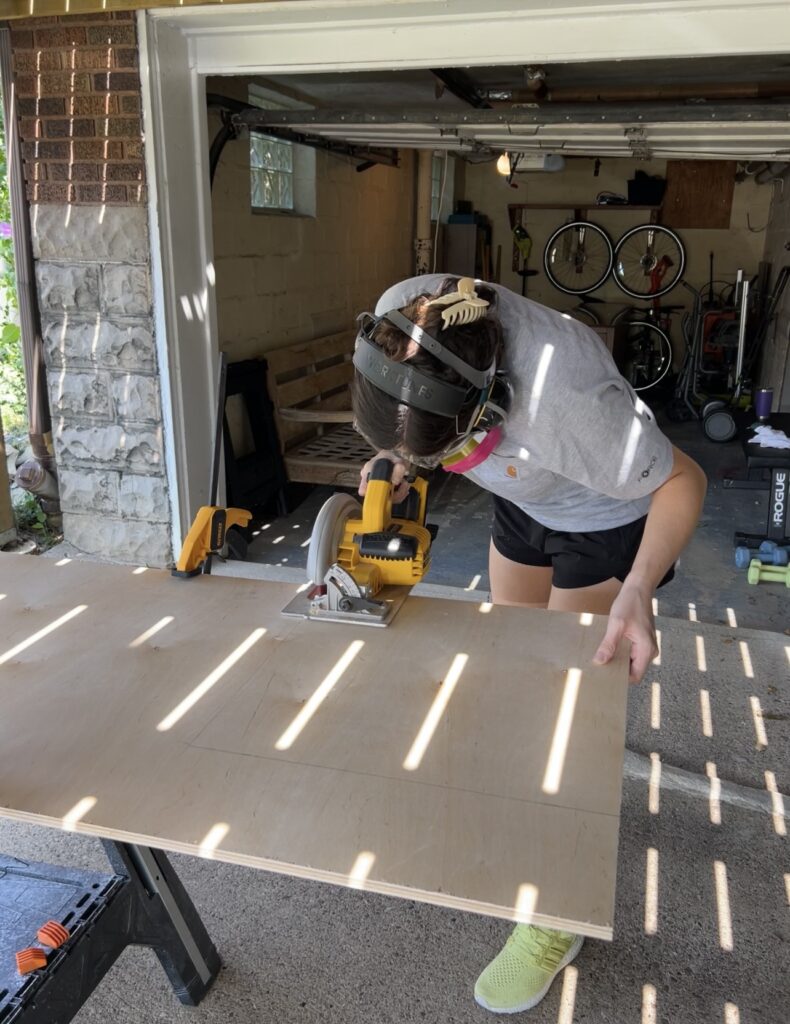
As for the other pieces of wood, I cut them to size with my miter saw. It’s totally up to you what kind of joints you want to use! While I could have mitered the boards at a 45 degree angle, for whatever reason I felt like keeping it simple and using butt joints. Butt joints aren’t the strongest option, but they’re simple to do and for this particular project, they’ll work just fine!!
Step Three: DIY Cutout Handles
Originally I planned to use drawer pulls, but at the last minute I decided to do cutout handles instead. The main reason was easier storage since it’s a big serving tray as it is! Also, I was nervous about the trays feeling too heavy so it made sense to take off some of the weight vs. add more!
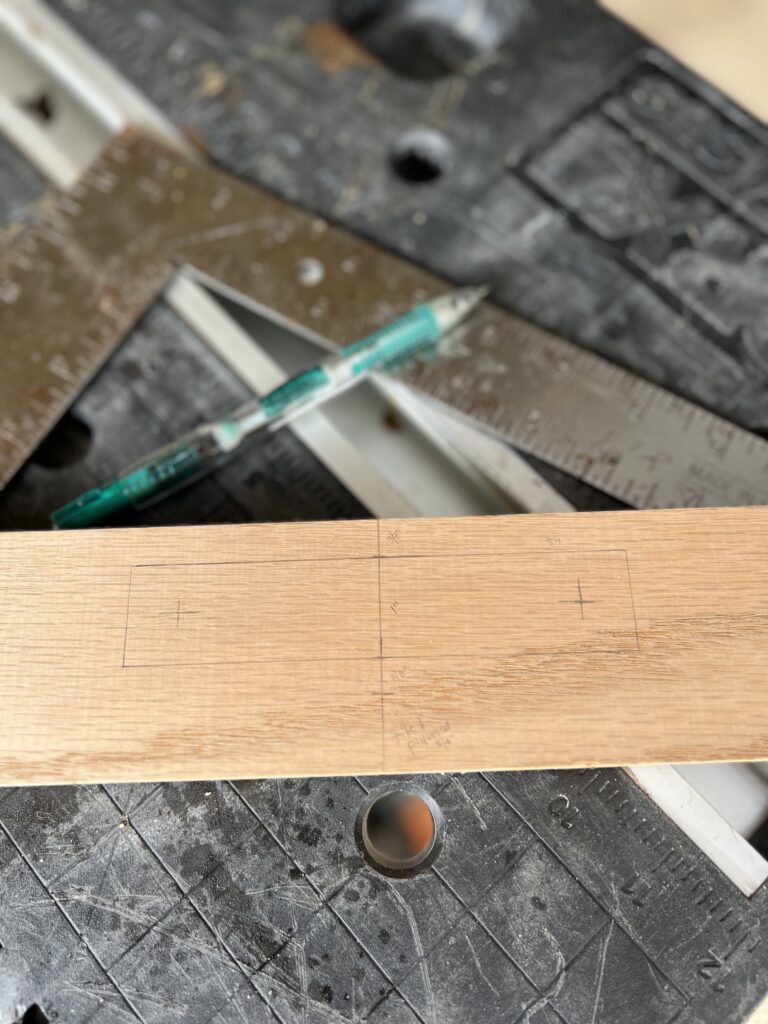
The cutout handles were easier than I expected too! First I had to do a little math to mark the placement. The hole for the handle is 1″ high 5″ long so I started by marking the center of the board and then marking 2.5″ out from each side. I made sure to note the height of where the tile comes up to on the 1×3 (it was about 3/4″) before determining how high to put the hole.
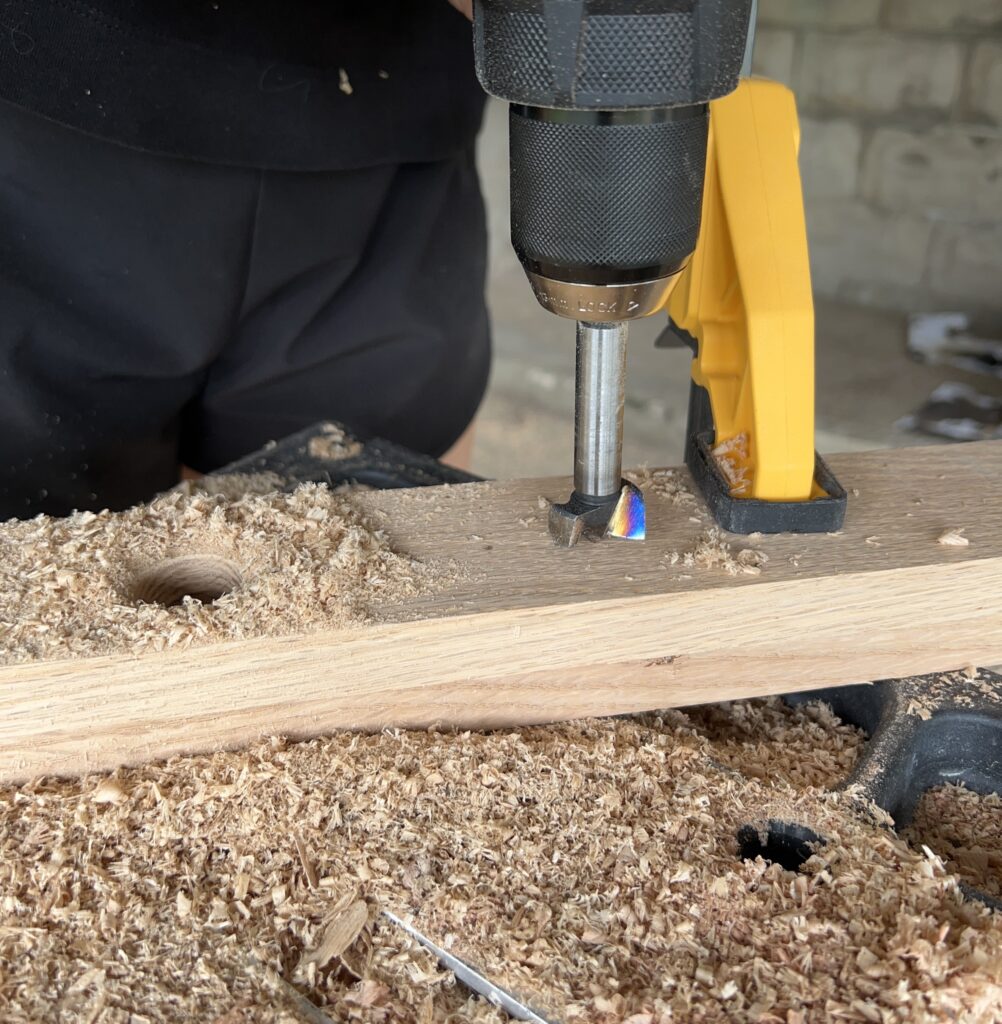
Previously I’ve used a spade bit to make holes in wood, but it wasn’t always a clean cut. After doing a little research, I learned that a Forstner drill bit would be better cut out for this job (no pun intended hehe) so I tried it and it worked awesome!
You’ll want to place a scrap piece of wood underneath where you’re drilling and clamp both pieces down. Initially I was using my regular drill, and that totally works fine, but my husband reminded me we have a hammer drill which just gave me more leverage. It’s difficult to make a perfectly straight hole without a drill press, but we’re not looking for perfection here! I just wanted some functional handles.
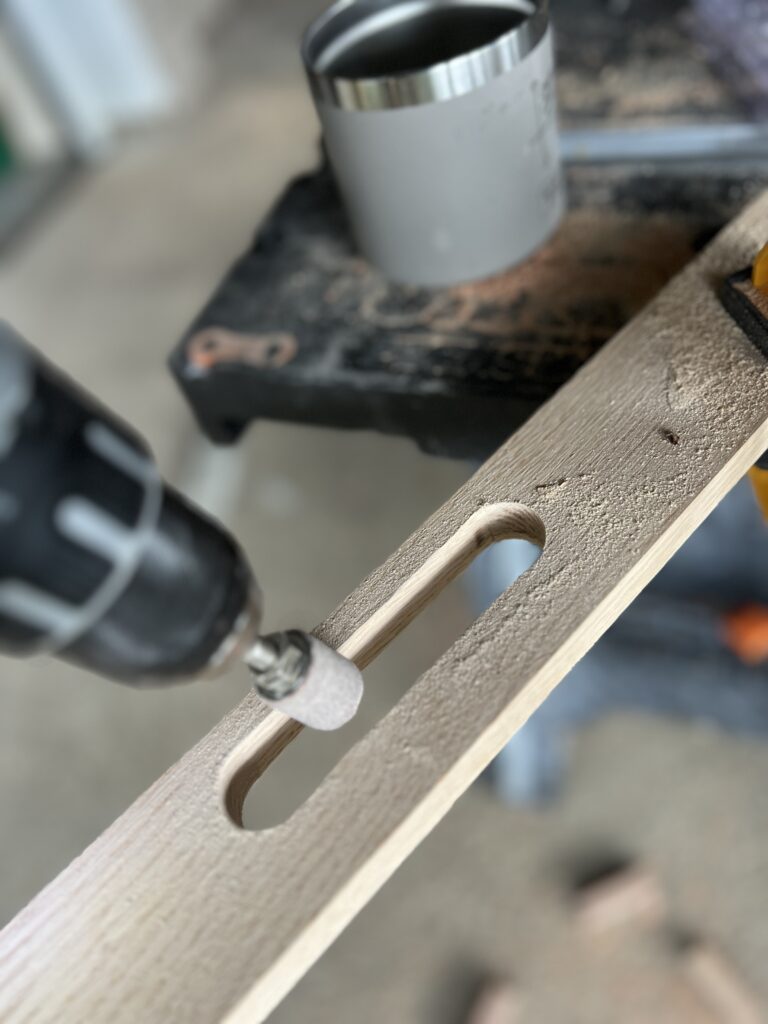
Once both holes were drilled, I connected the edges of each with a ruler then used my jigsaw to cut!! Lastly, I used a sanding drum attachment to smooth everything out!!
Step Four: Stain
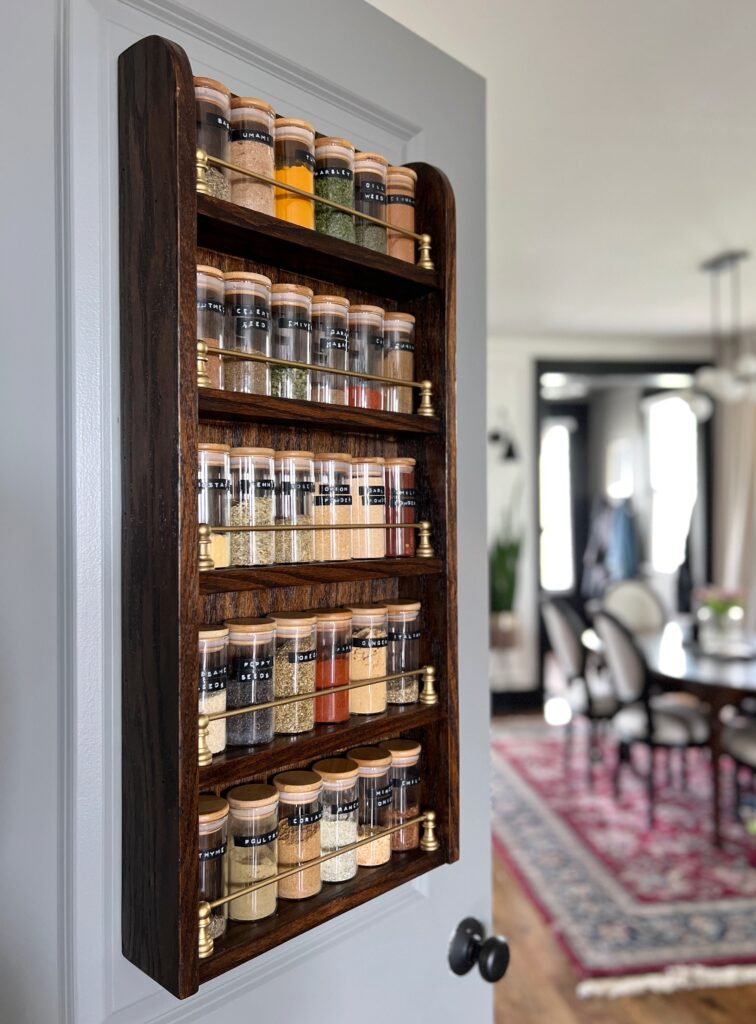
Last year I made the cutest DIY wood spice rack (check out my tutorial here!) and for that project I assembled then stained. What I learned from that experience is that if you leave any wood glue behind, it’s not going to accept the stain. Makes sense!! This isn’t ideal especially if you’re using a dark stain. For this project, I wanted to try staining then assembling!!
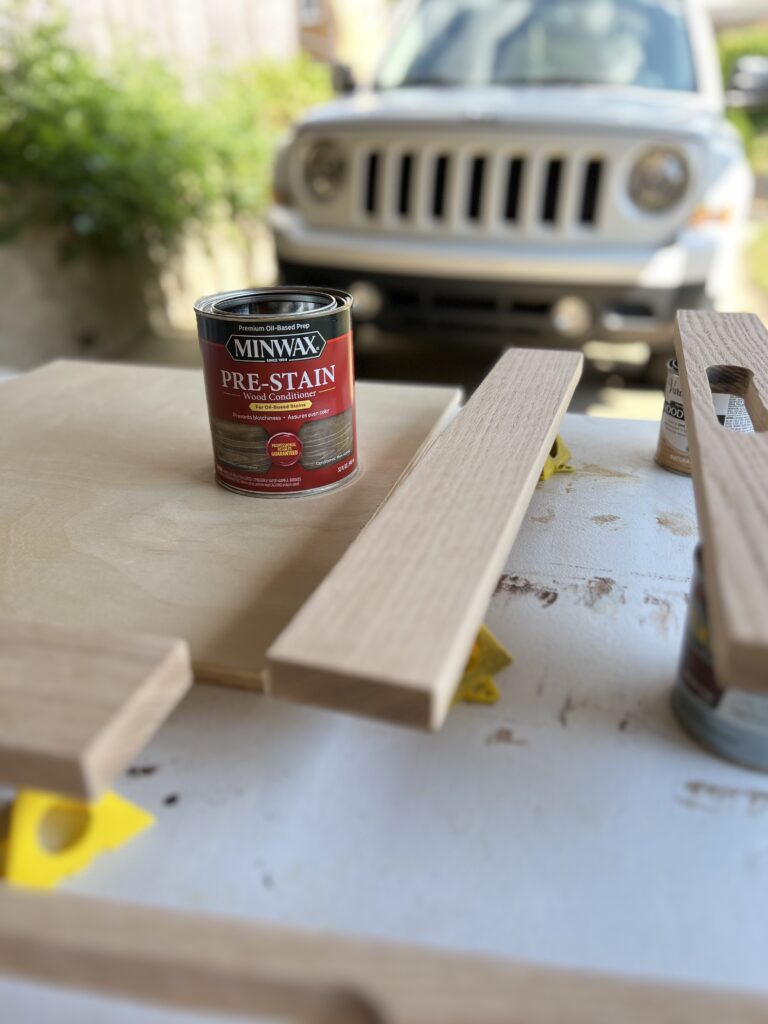
Before staining I sanded all my pieces with 220 grit sandpaper, wiped off the dust, and then applied Minwax pre-stain wood conditioner. Don’t skip these steps if you want a smooth, professional looking finish!
With any staining project, I always test out stain samples on scrap pieces of the wood i’m using! Stain colors vary on different wood species so this is a great way to ensure you’ll be happy with the finished product!
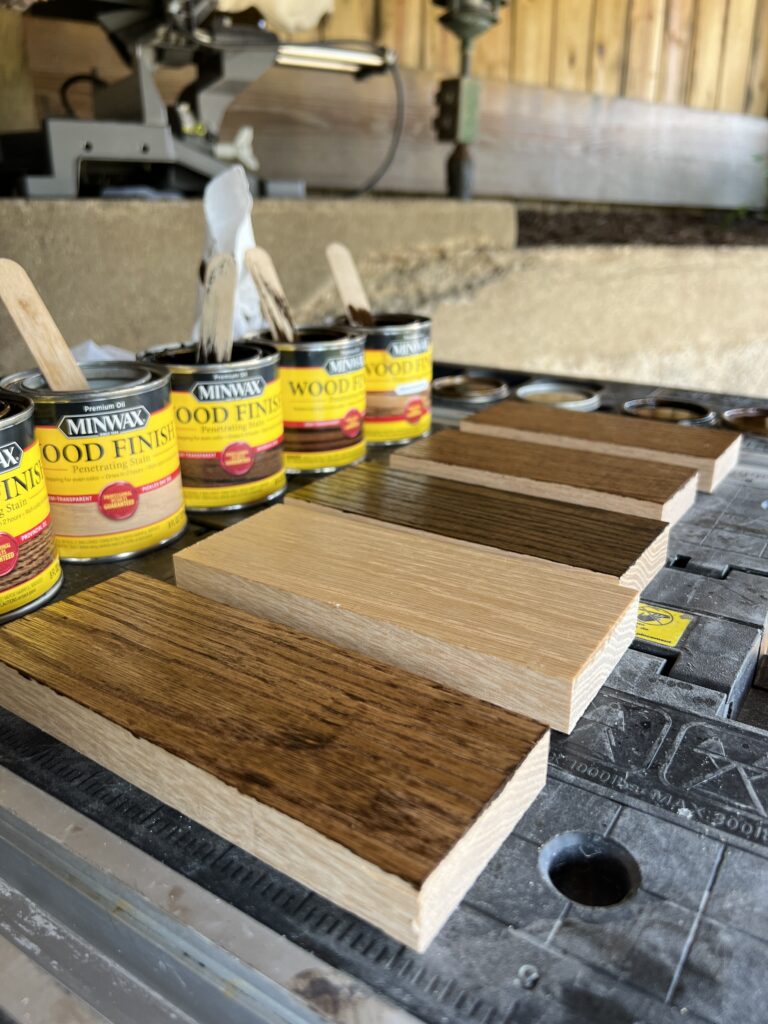
As for me, I had customers to please so I wanted to give them options to choose from! I had five Minwax stains but decided to take it a step further. Did you know you can mix and layer Minwax stains to create your own custom color? This is exactly how I got such a beautiful finish on my DIY spice rack too! For that project, I did one layer of Minwax espresso followed by a second layer of Minwax English chestnut.
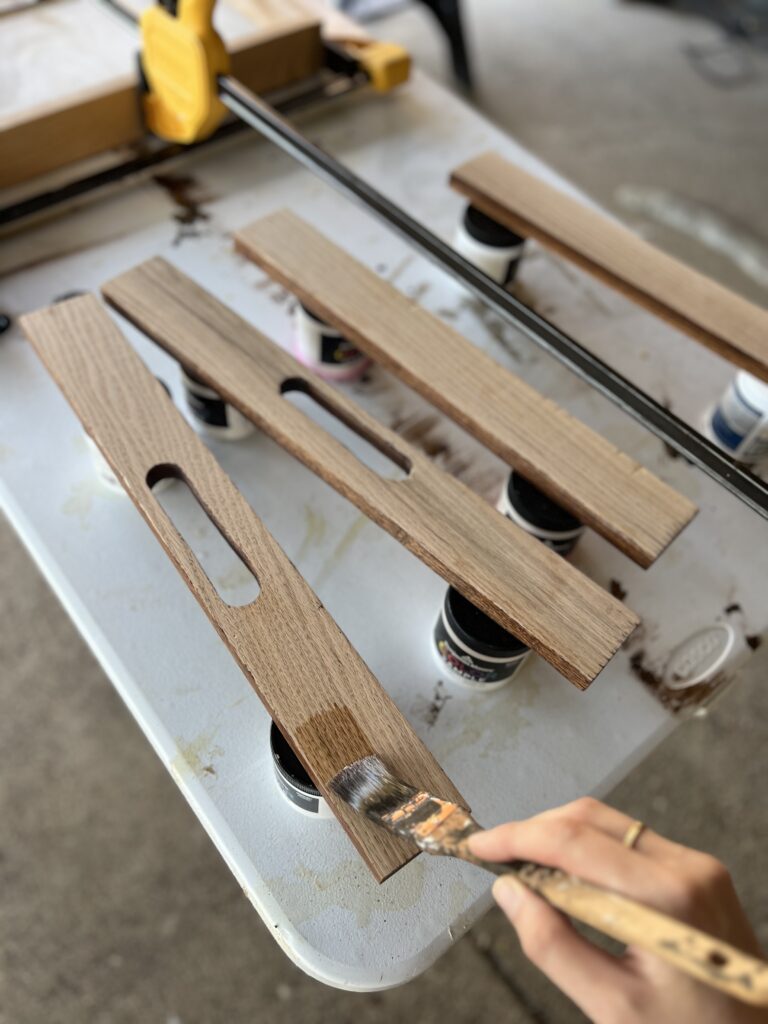
Here’s all the stain samples I created for reference! My in-laws had so much fun choosing one and I love that we all went with a different look! You’ll have to see all the finished products at the end of this post 🙂
Do you notice how some of the samples have a blotchy finish? That’s because I didn’t use wood conditioner!! I’m telling you, it makes a difference!


Apply the stain evenly, going in the direction of the grain! This is my favorite brush to use for stain projects. Let the stain sit for 5-15 minutes and then wipe off the excess with a rag. I had all my pieces propped up so I could get 3 sides.
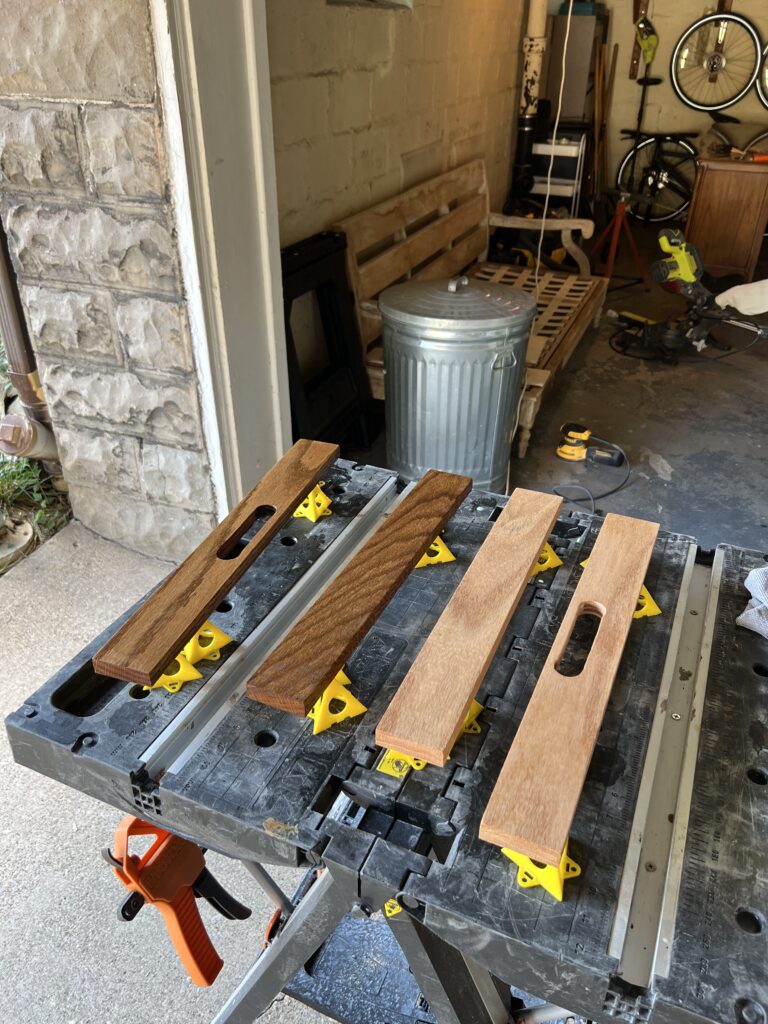
Don’t forget to stain the plywood piece too! You only need to stain one side (which will be the bottom of the tray) because the tiles will cover up the other side!
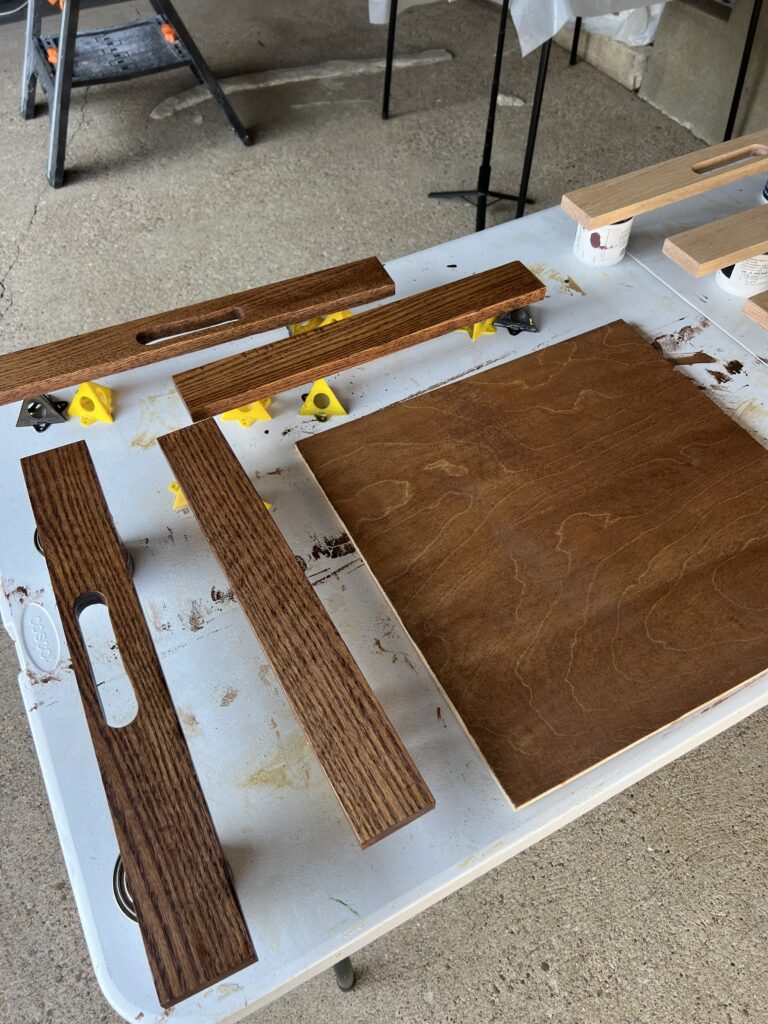
Once they were dry, I flipped and repeated the process starting with the wood conditioner. Some pieces had stain that leaked onto the unstained side. When that happened, I sanded those sides down quick to avoid an uneven finish!
The trays that were just one stain color only required one coat for a beautiful finish! Two of the trays were layered stains so I decided to assemble them before applying the second coat!

Now that i’ve tried both orders for staining, I definitely prefer staining before assembling. After seeing all the glue everywhere, I can’t imagine how the finished product would look if I didn’t stain first!
Step Five: Assemble the Wooden Tray
For assembly, I used wood glue and brad nails. I’d considered using pocket holes for additional support, but I got the kreg jig out to test on scrap pieces and decided not to. Using pocket holes with 1/2″ plywood can be tricky because it’s pretty thin and sometimes the screws jut out. I didn’t want to risk this so I opted for the wood glue and nails!
Another option would have been to use wood screws on the corners of the wood, but since I was staining, I didn’t love the idea of the huge holes screw heads would create.
You’ll want to work somewhat fast while assembling. I recommend having an extra hand, if possible! Keep a damp rag or paper towels on hand to wipe up the excess wood glue as you go.
Working with one single board at a time, we attached the sides to the bottom of the tray. We started with the short sides first. I applied wood glue to the 1×3 while my husband applied it to the plywood side. We used our finger to spread out the glue before joining the pieces.
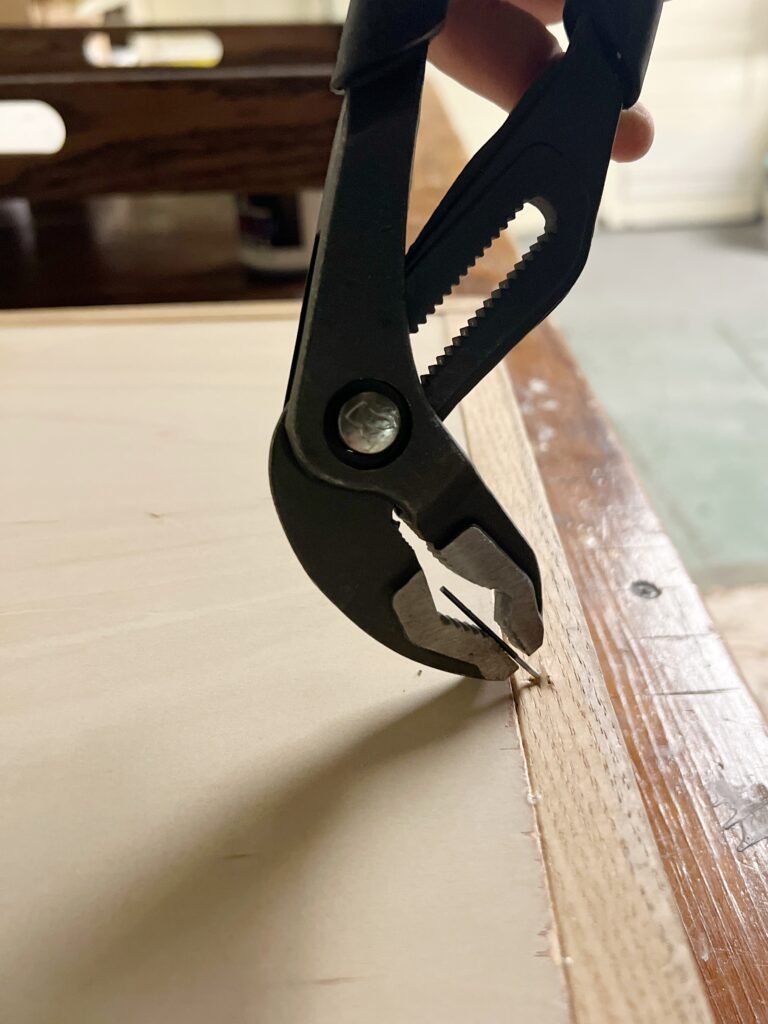
Once the placement was right, we used our brad nailer on the two corners and in the middle. At first we were using 1 1/2″ brad nails, but it was really tricky to get them to go all the way through the wood without jutting out- so frustrating! So we learned our lesson and switched to 1″ nails and had much better results.
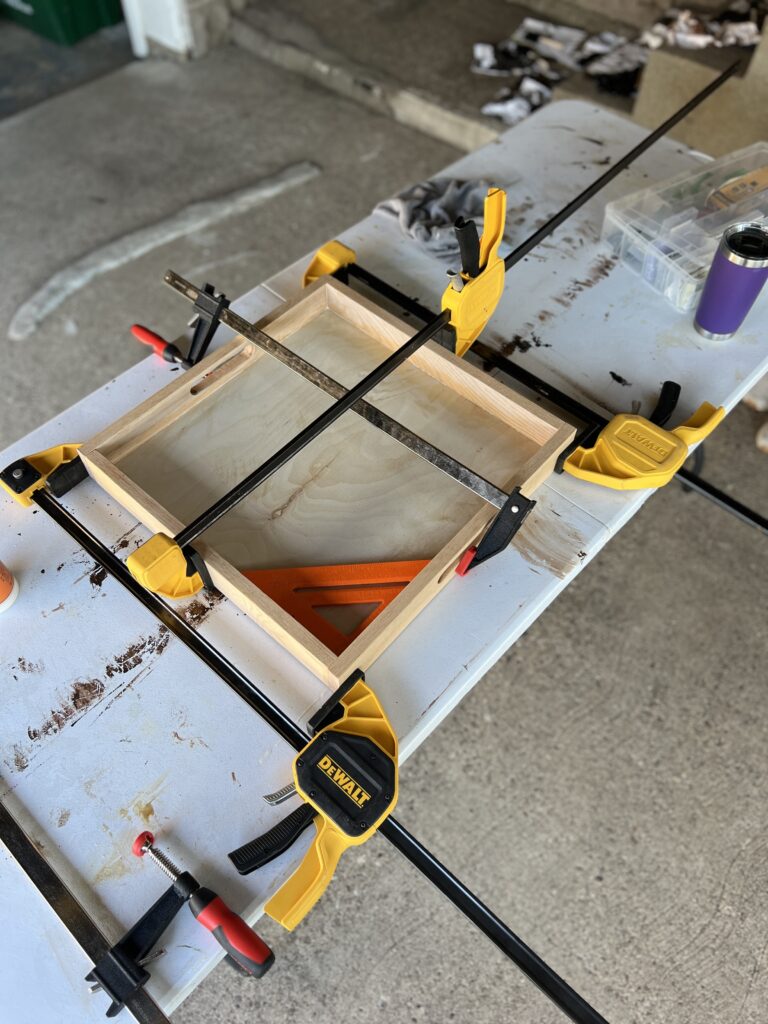
When attaching the long sides to the short sides, use a square to make sure you have a 90 degree angle. We also switched back over to the 1 1/2″ brad nails for this part because we were joining two 1x3s together which meant thicker wood to work with! We used a nail at the top and bottom of each corner!
Once they’re all assembled, clamp it together for at least an hour or so!
The option to use wood filler for your DIY table tray is totally up to you! I used Minwax stainable wood filler for the tray with a lighter stain. With a darker stain you can barely even notice the nail holes because they’re so small, so I left those alone. If you’re layering stains like I did for a couple of our DIY table trays, you can apply your second coat of stain at this point!

Step Six: Apply the Top Coat
Polyurethane is necessary for a durable and professional looking product! It’s also the best part about wood DIY projects because it brings vibrance to the stain and has a smooth feel and appearance.
Since I used oil-based stain, I used Minwax’s oil-based polyurethane in a satin finish. I applied it with the same brush I used for the stain! Apply in thin coats going with the grain. You’ll also want to check frequently for any drips before they dry. Since polyurethane is clear, it can sometimes be hard to tell where you’ve applied it so I find it very helpful to wear a head lamp as i’m doing this part.
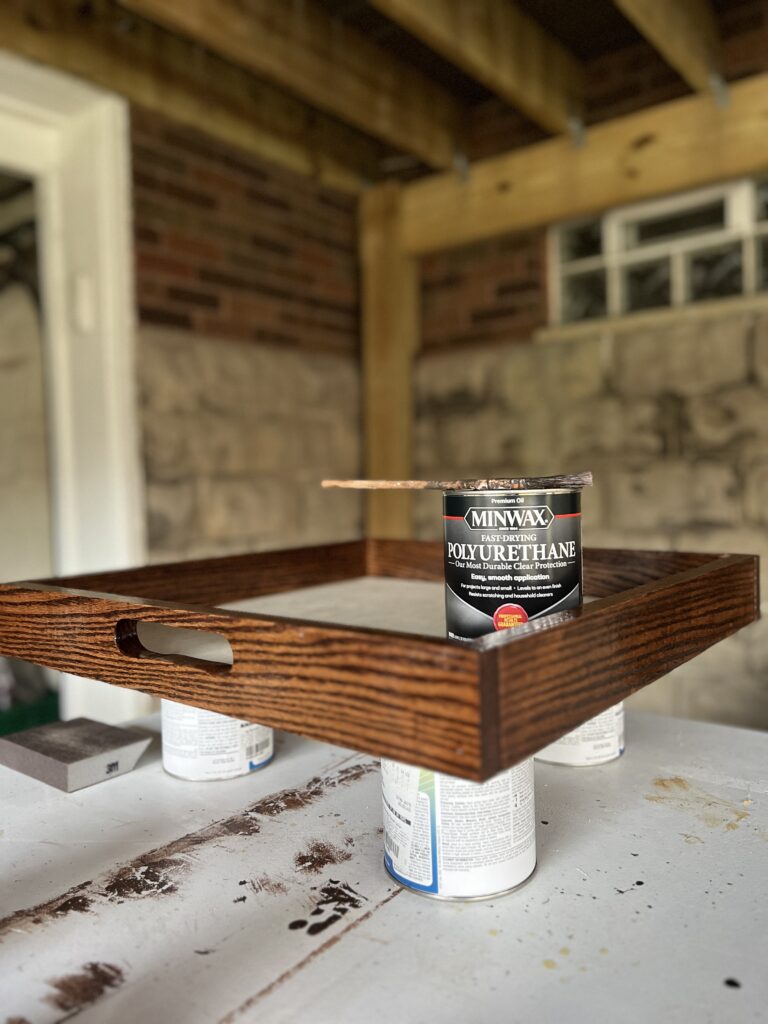
I propped the trays up on paint cans and got all the sides first. Then I carefully flipped the tray (putting one hand in the middle on the top, one hand in the middle on the bottom) and applied polyurethane to the bottom!
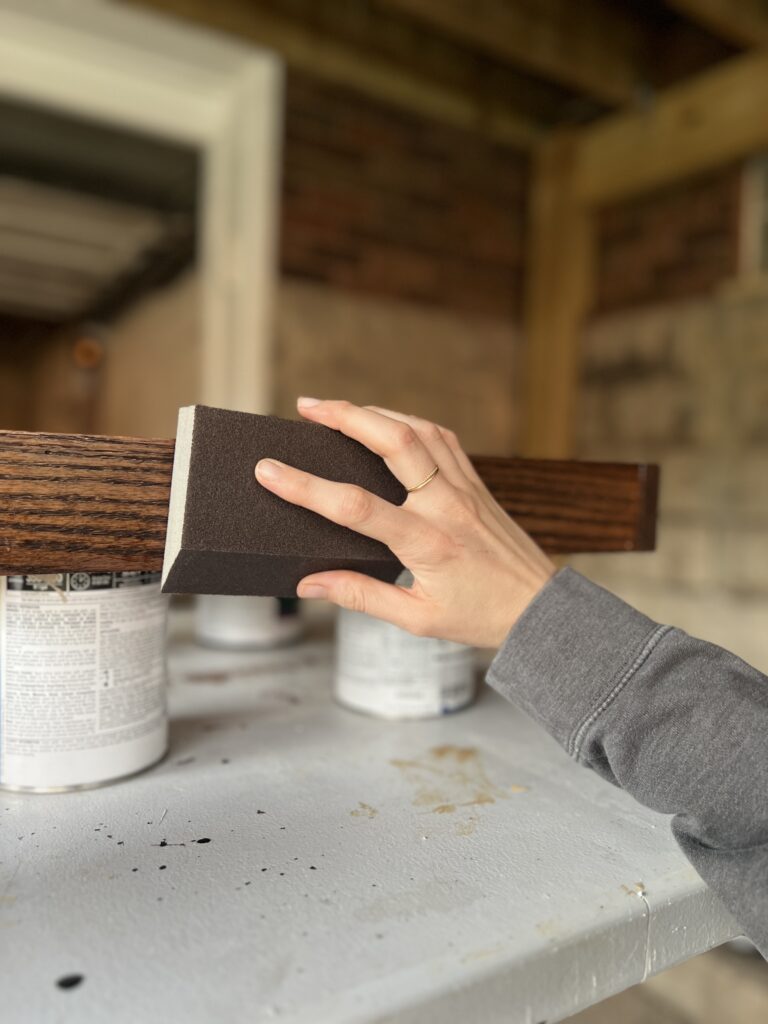
I’d recommend at least two coats, but I did three for extra protection! Do a light sand with a 220 grit sanding block in between coats, especially if you had any drips. This makes the biggest difference!!
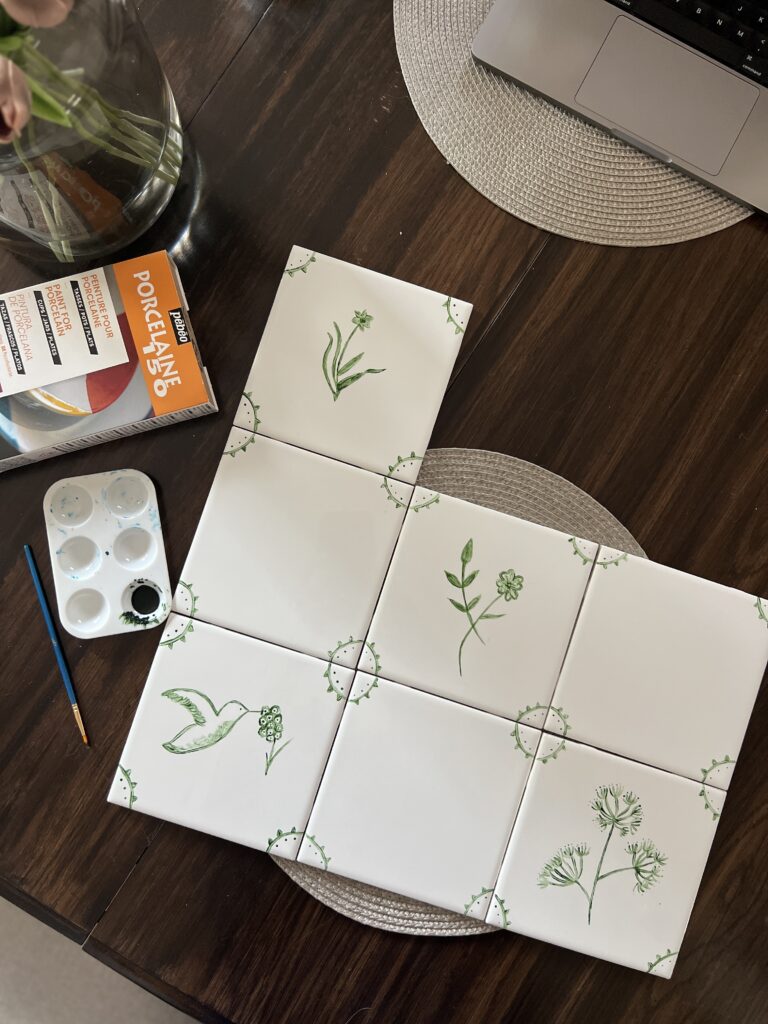
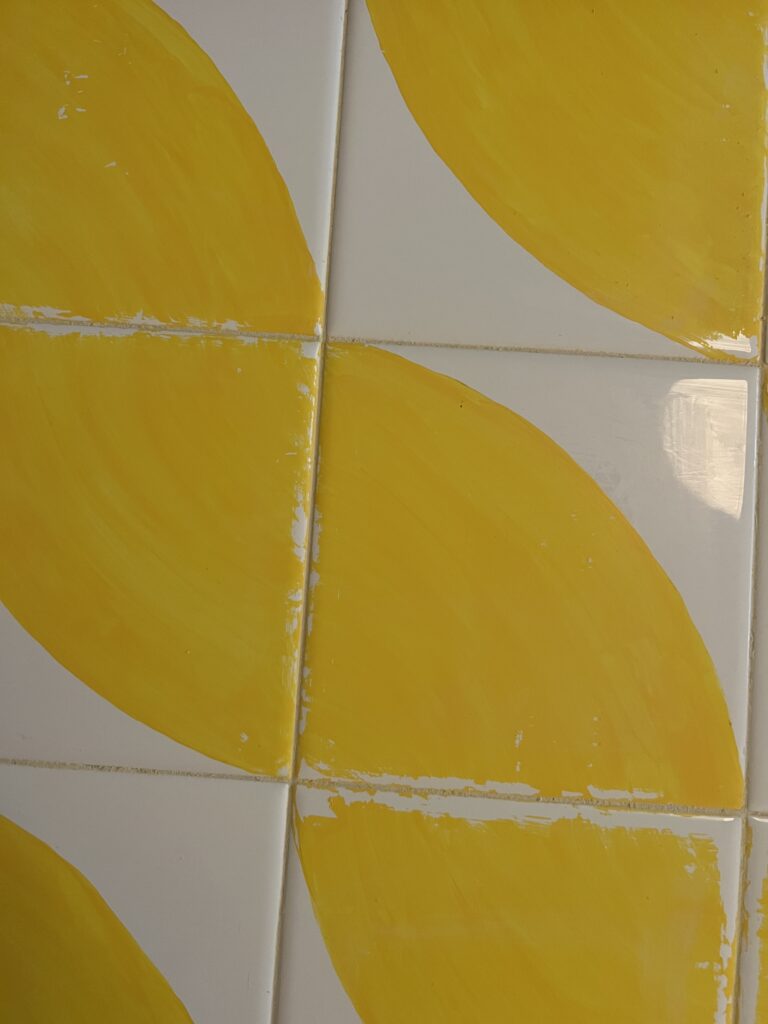
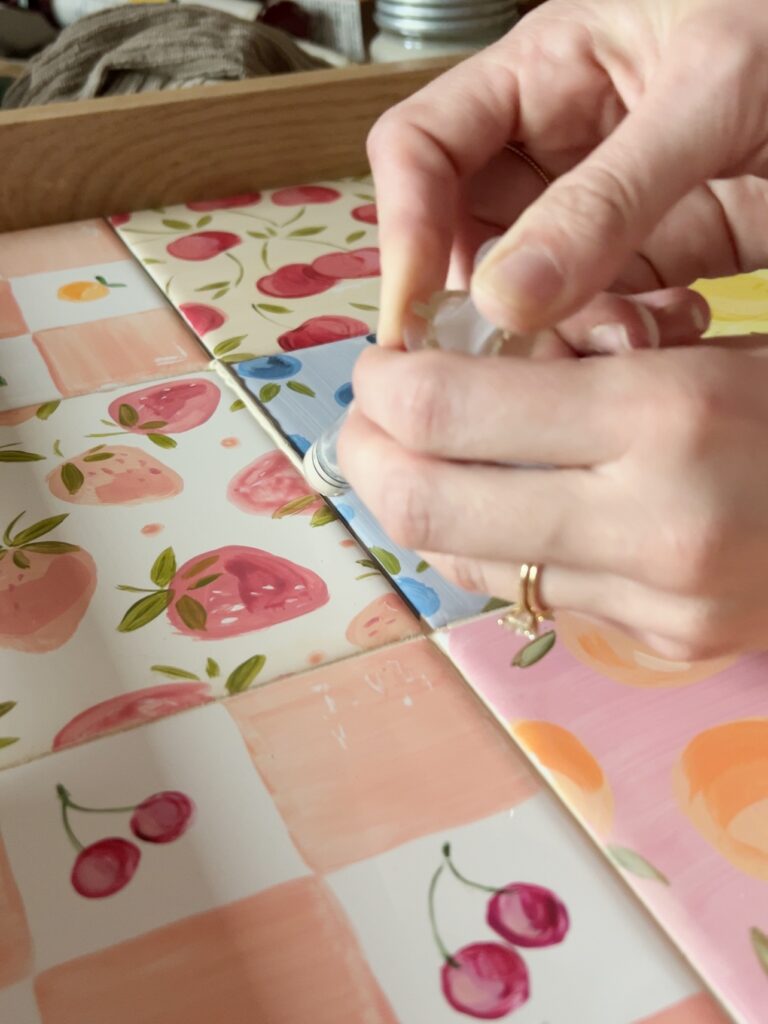
Step Seven: Paint the Ceramic Tiles
And for the fun part! This was my first experience painting ceramic tiles so I learned a lot and wanted to share my tips with you!
- Use porcelain paint! (This is the set I purchased)
- Before painting, clean each tile with rubbing alcohol for proper adhesion.
- Using thin artists brushes to create whatever you’d like!
- Try not to apply the paint too heavily and paint in the same direction.
- If you mess up, or don’t like how something turned out, you can easily wipe off the paint with a wet rag or paper towels! I took advantage of this often 🙂
- As you store the tiles, try to avoid stacking them (especially before baking) as this can scrape the paint! (This happened to a couple of ours!)
- Bake in the oven at 300 degrees for 35 minutes
By the way, I’m no artist (but my husband’s mom and sister are so just wait until you see their trays!!) so I had to find inspiration and replicate that! Here’s a link to the tiles I was replicating.
Step Eight: Adhere and Protect Tiles
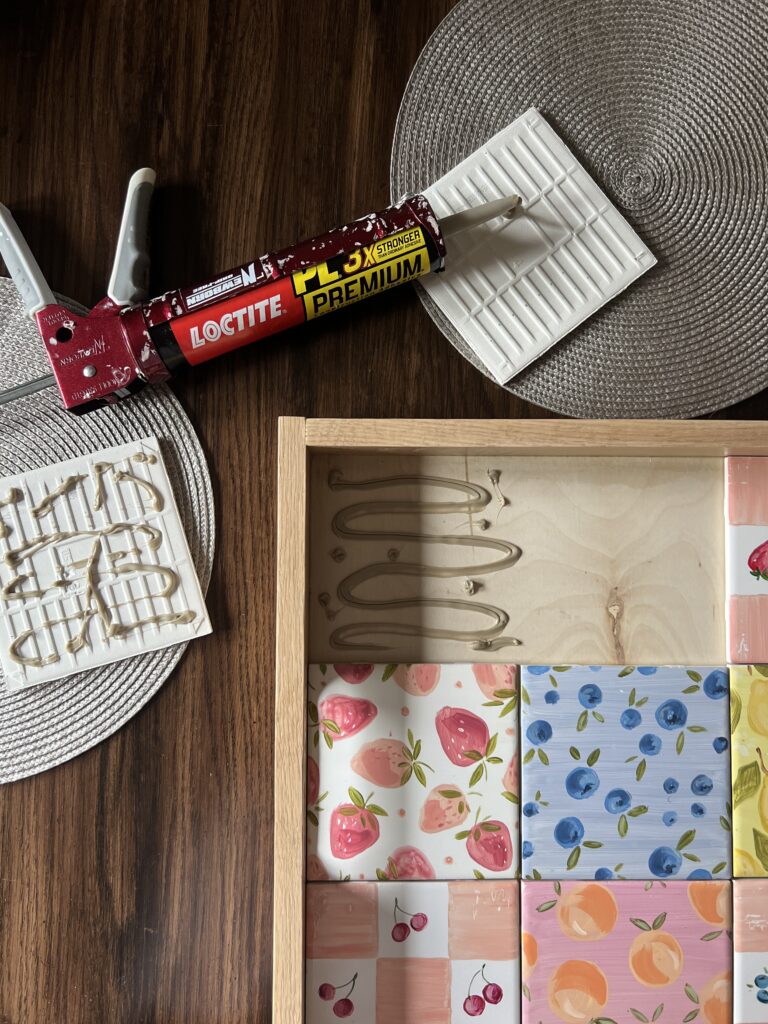
Attaching the tiles was so simple! I used Loctite adhesive on the back of each tile and the bottom of the tray, working one tile at a time! Between all four trays, I used two tubes of this.
For a finished look, I used grout caulk in all the seams. My first attempt was a bit of a nightmare because as I was wiping off the excess caulk, some of the paint was coming off 🙁 Luckily I was able to touch it up with more paint, but I couldn’t re-bake it so hopefully it holds up okay with the top coat!!
Thankfully this only happened with one tray and I’m thinking maybe the porcelain paint was applied too thickly. Either way, I ended up using a tiny little syringe for the caulk. This was a more controlled approach and worked much better! This grout caulk really did make a big difference though- I love how they look!
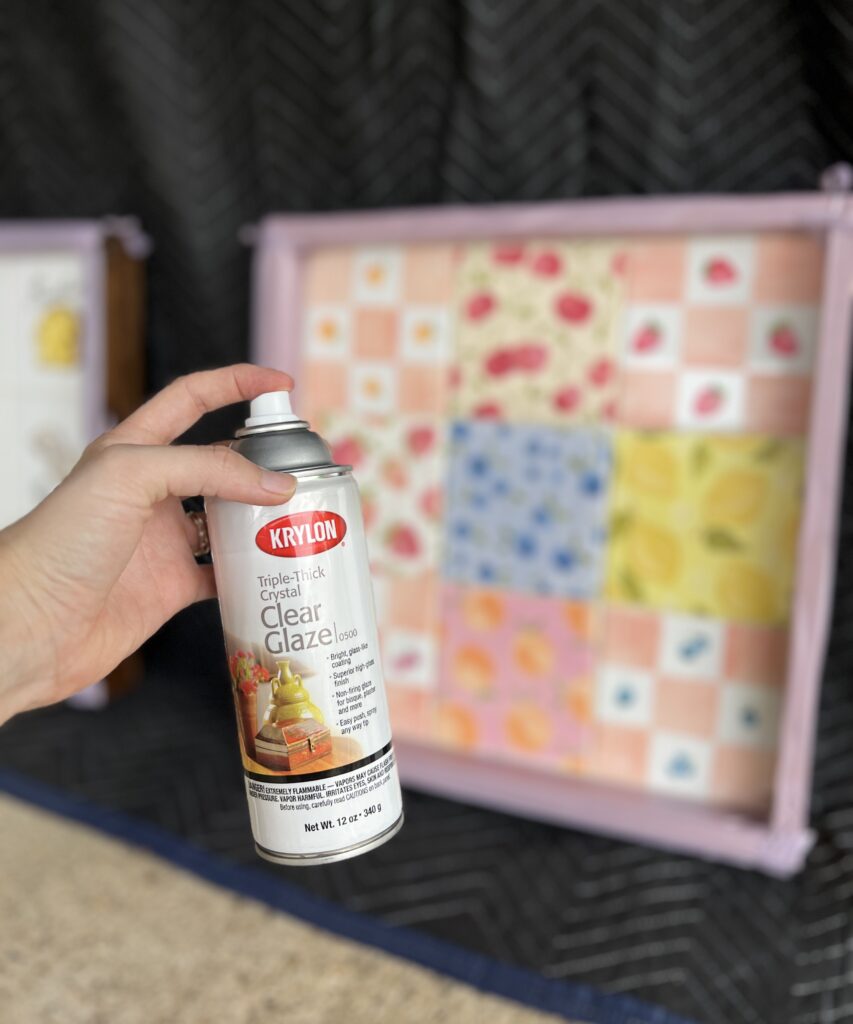
Lastly, the tiles need extra protection so they can last long! For this I used just one coat of Krylon Crystal Clear Acrylic Coating!
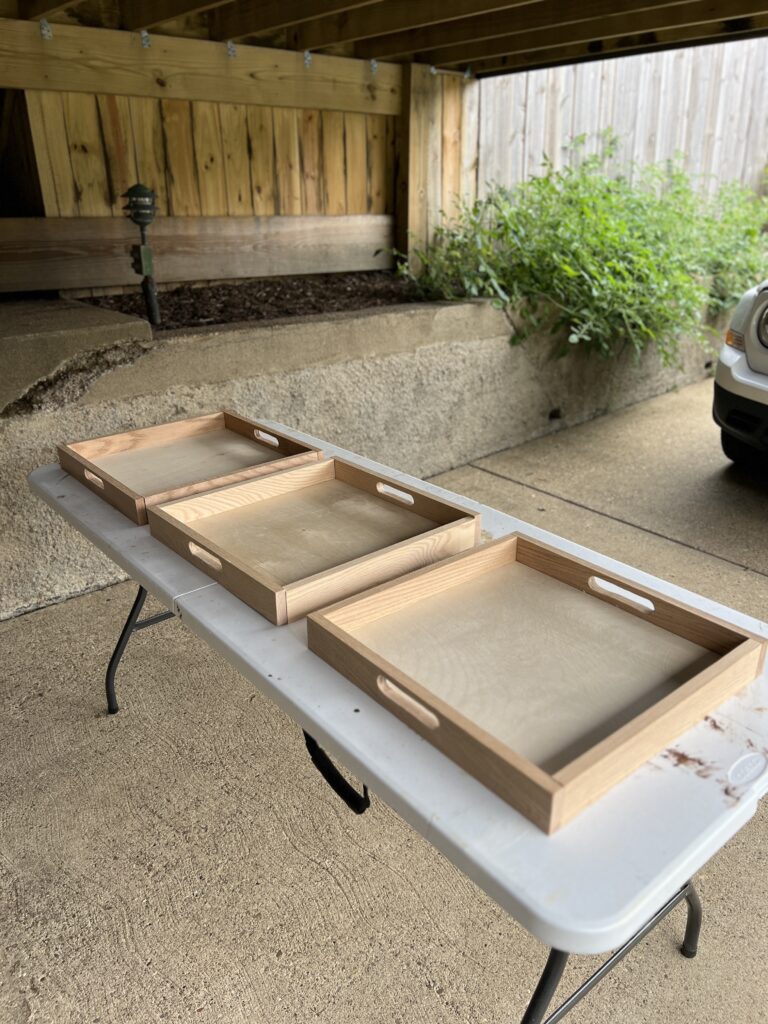
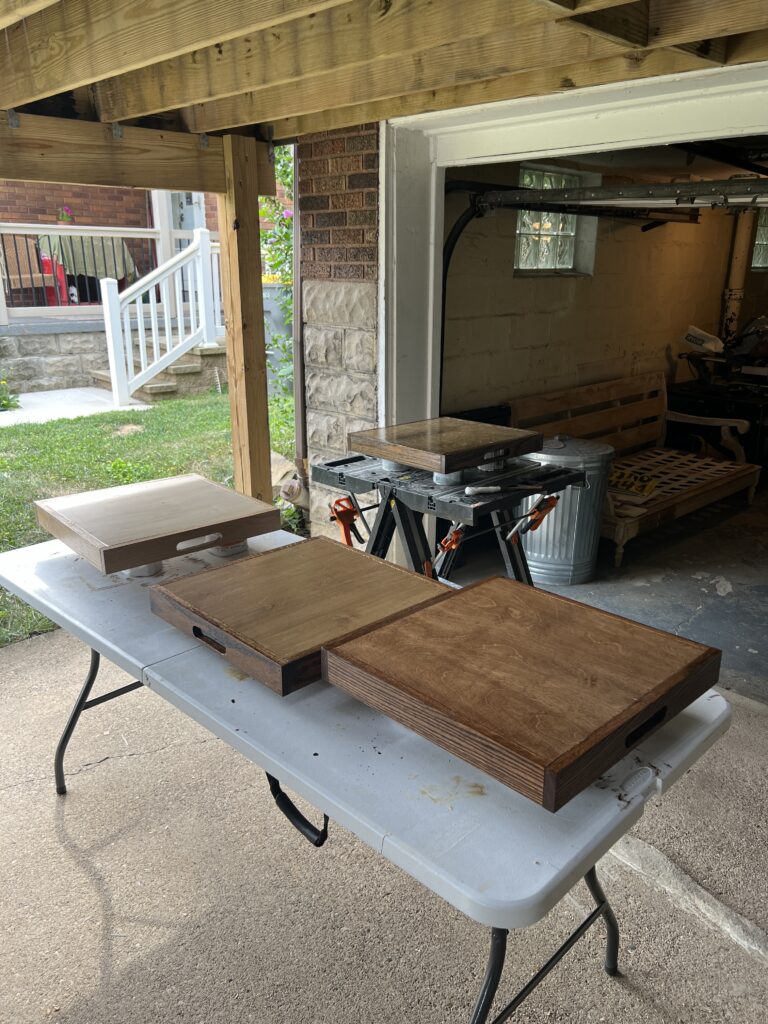
The Finished DIY Table Trays
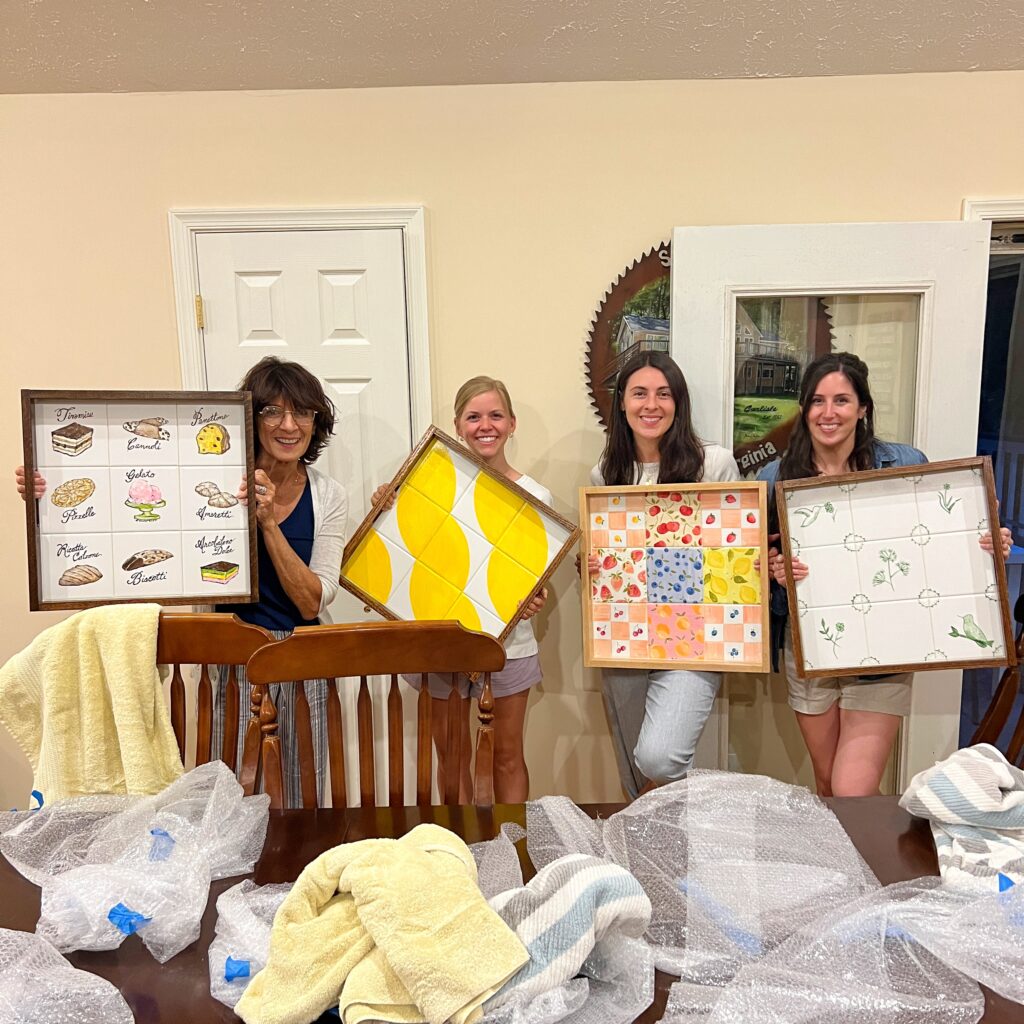
Just LOOK at how awesome these turned out! As I mentioned before, my husband’s mom and sister are both artists so I was simply blown away by what they were able to create with the porcelain paint!! Let’s go through each tray:
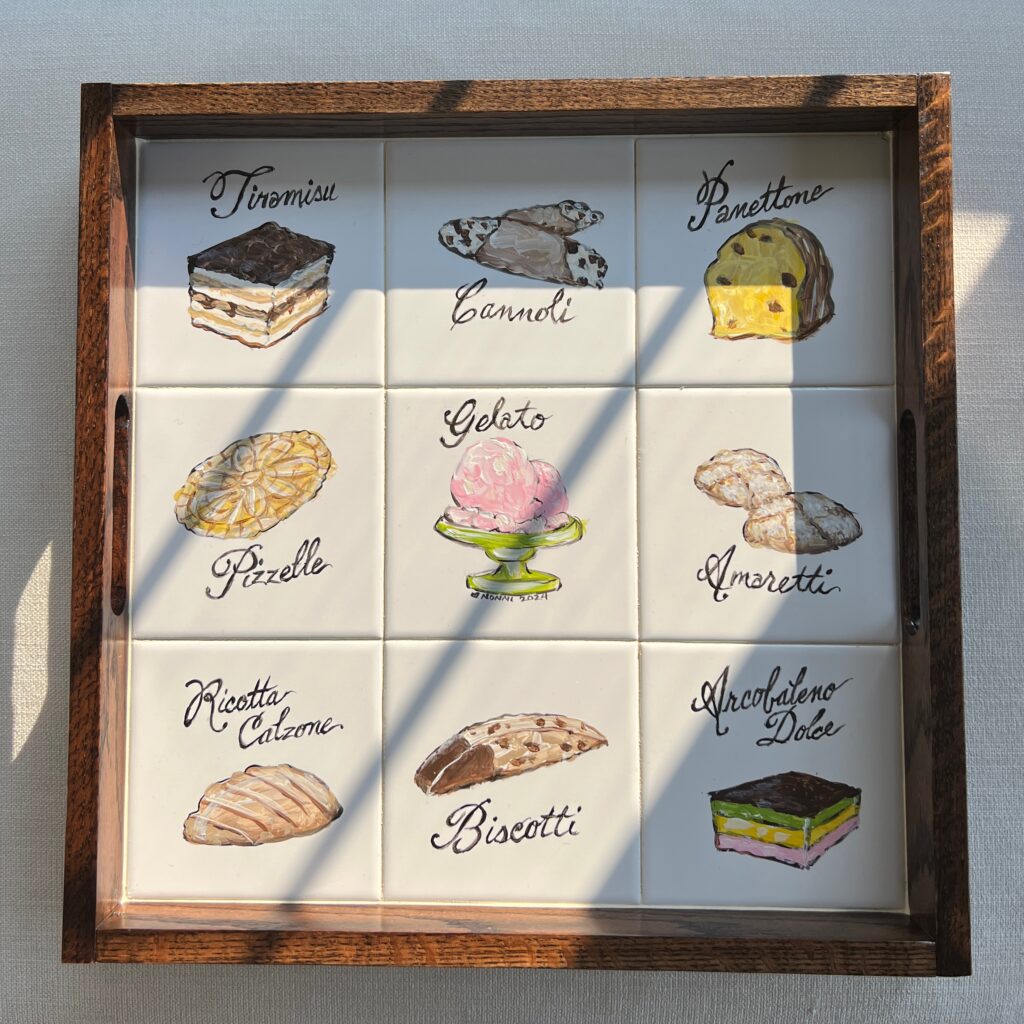
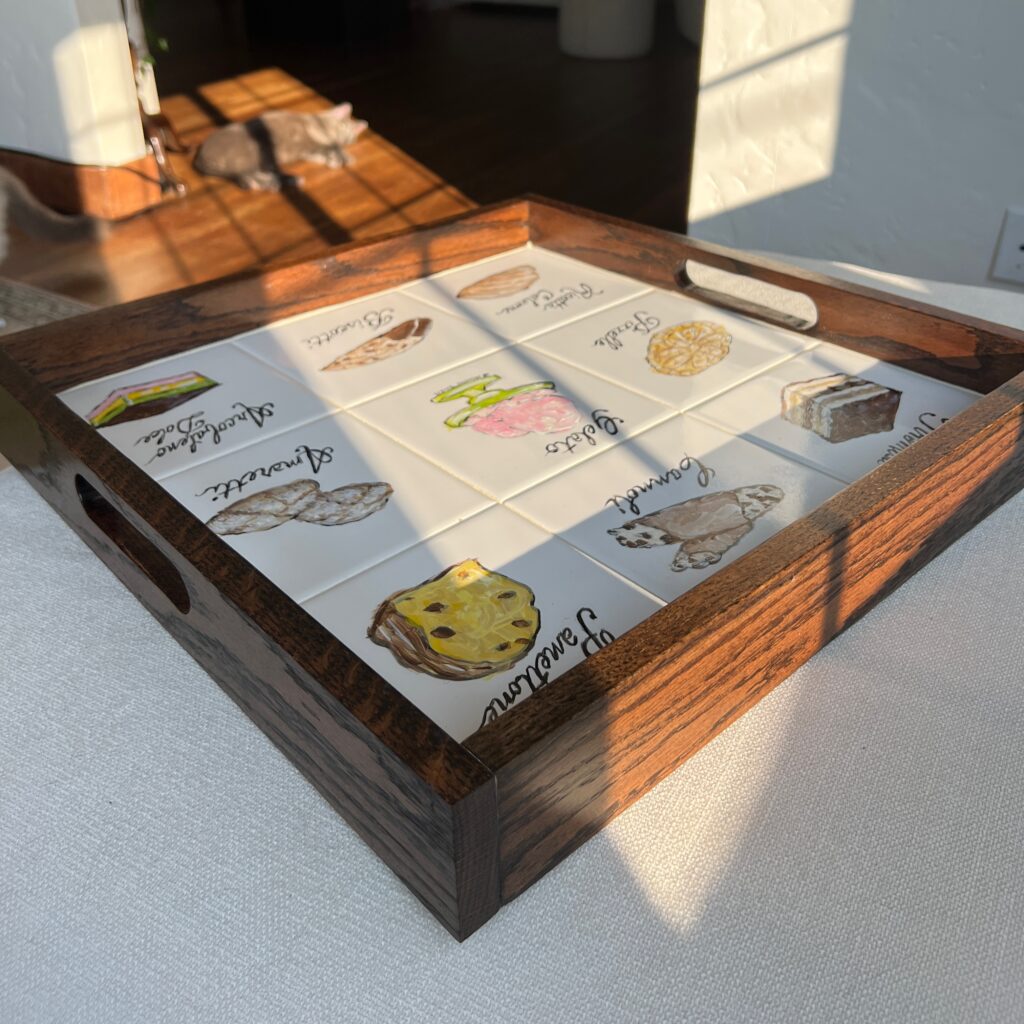
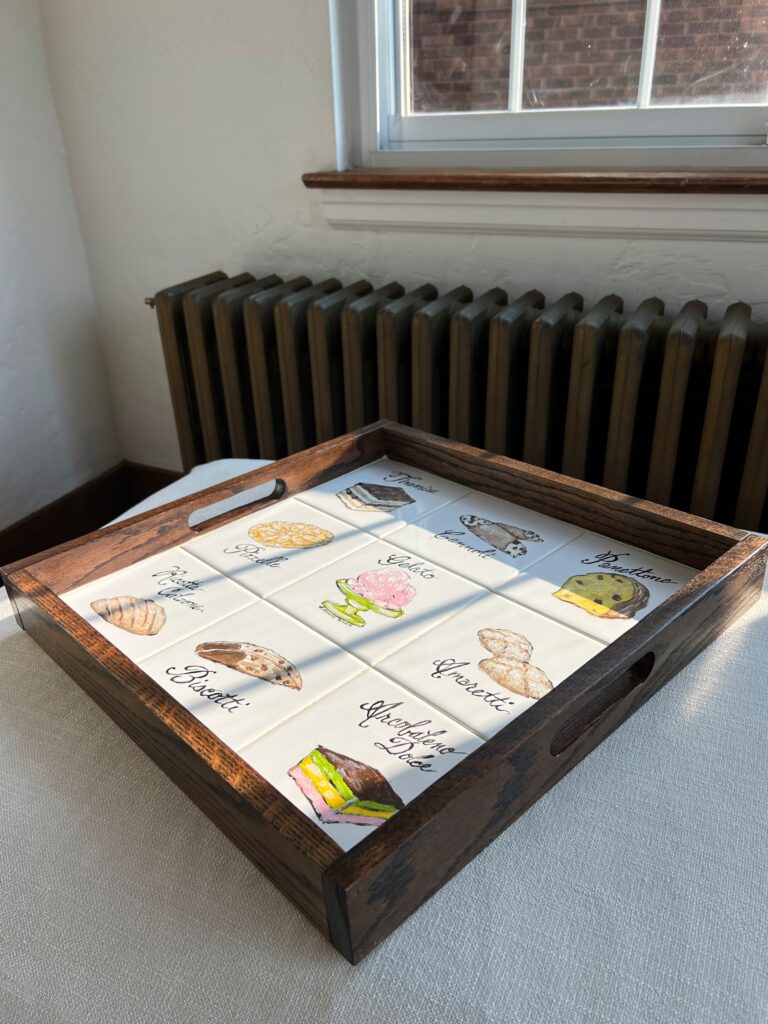
Minwax Jacobean
My mother-in-law did an Italian dessert theme and I couldn’t love it more! She even put “Nonni ’24” in the middle which I thought was such a cute touch. Her plan was to use this tray to serve dessert and coffee, but she loves hers so much that she’s thinking of displaying it as wall art!!
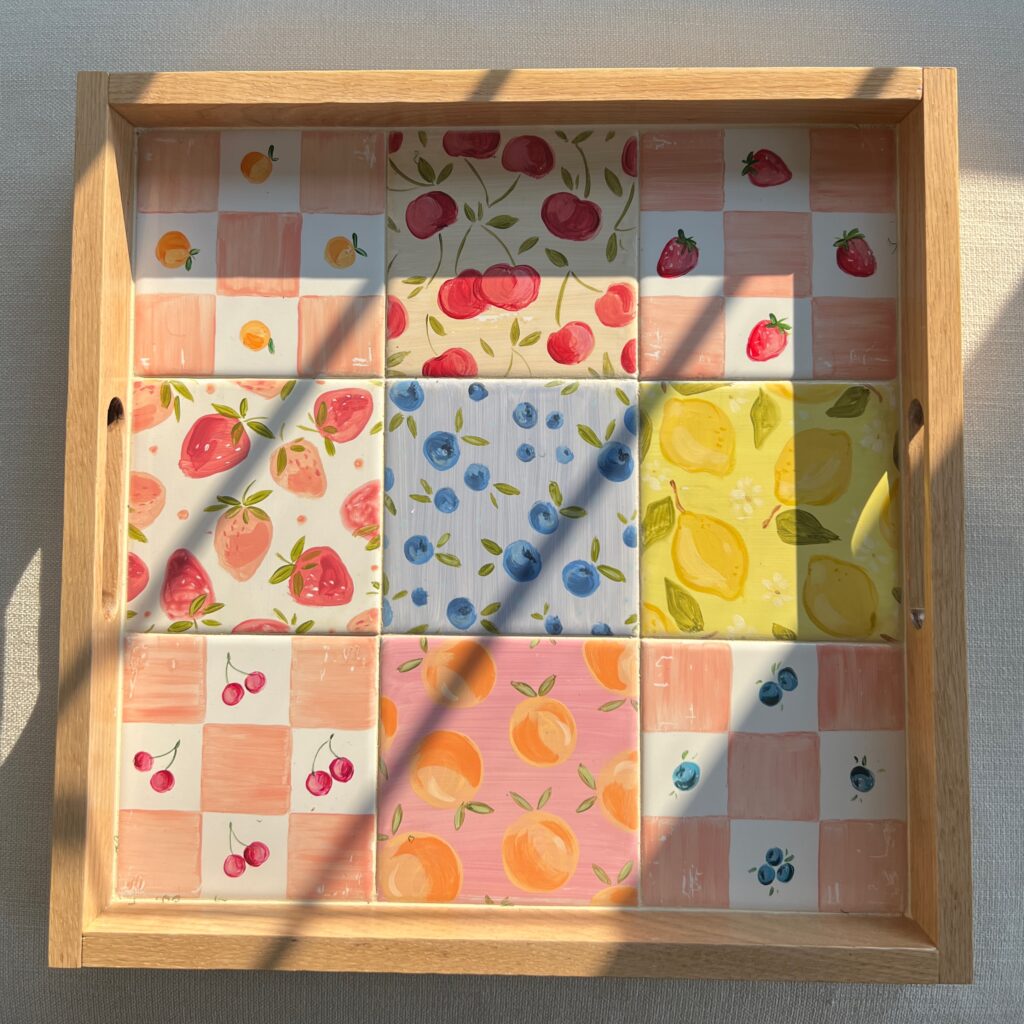
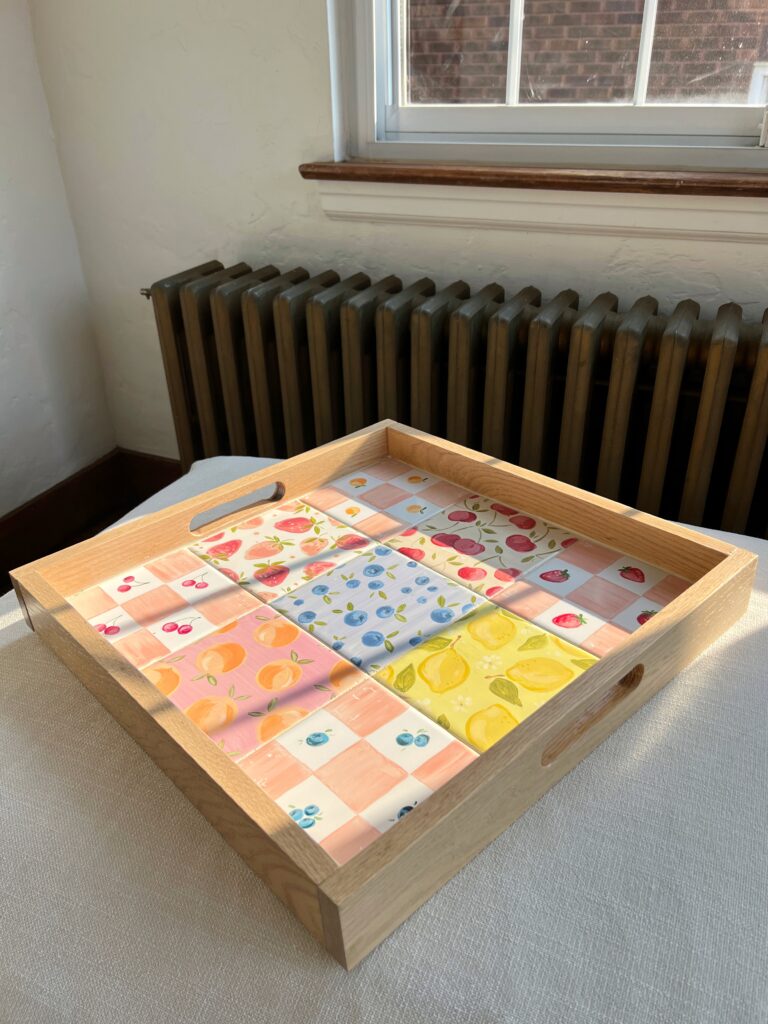
Minwax Pickled Oak
My husband’s sister did a fruit theme which is perfectly in line with her latest fruit-themed collection. (Check out her art here- she’s so incredibly talented artist!) I couldn’t adore hers more, especially with the lighter stain color!!

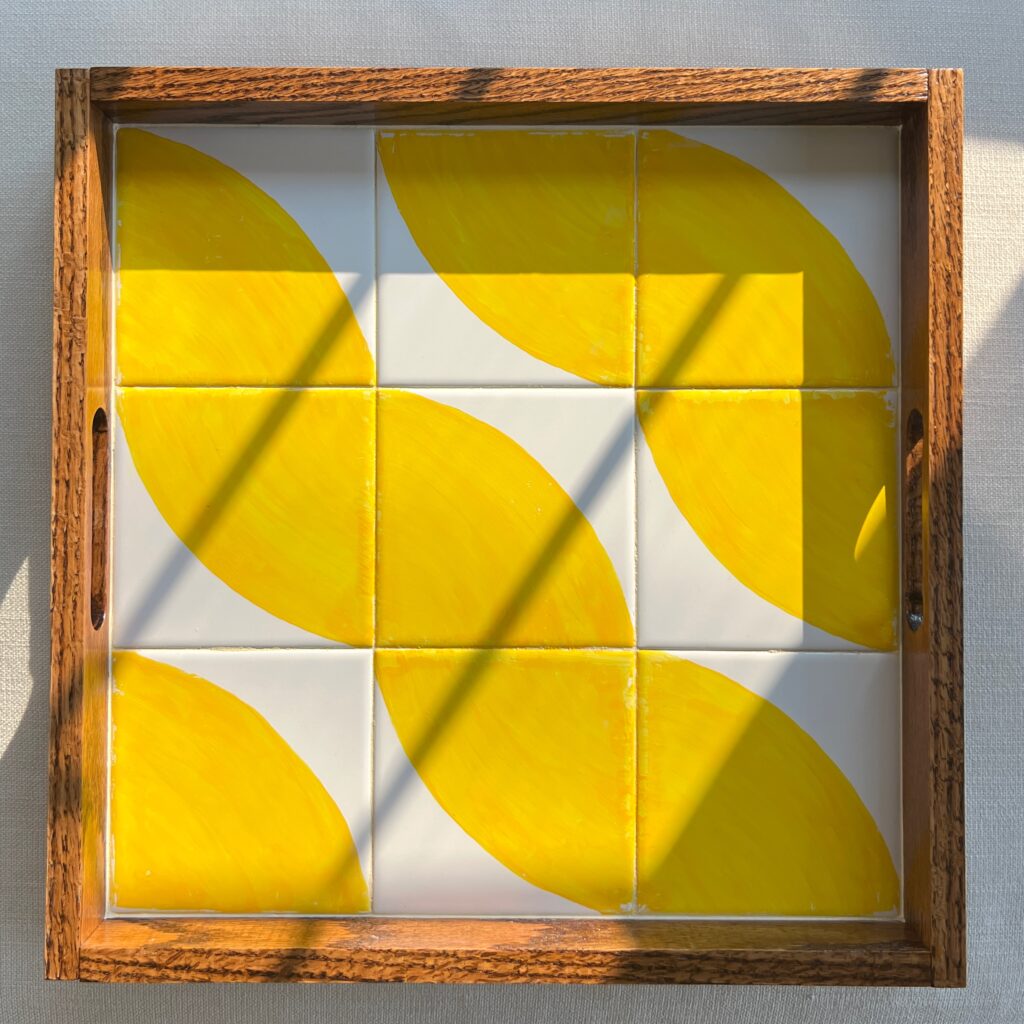
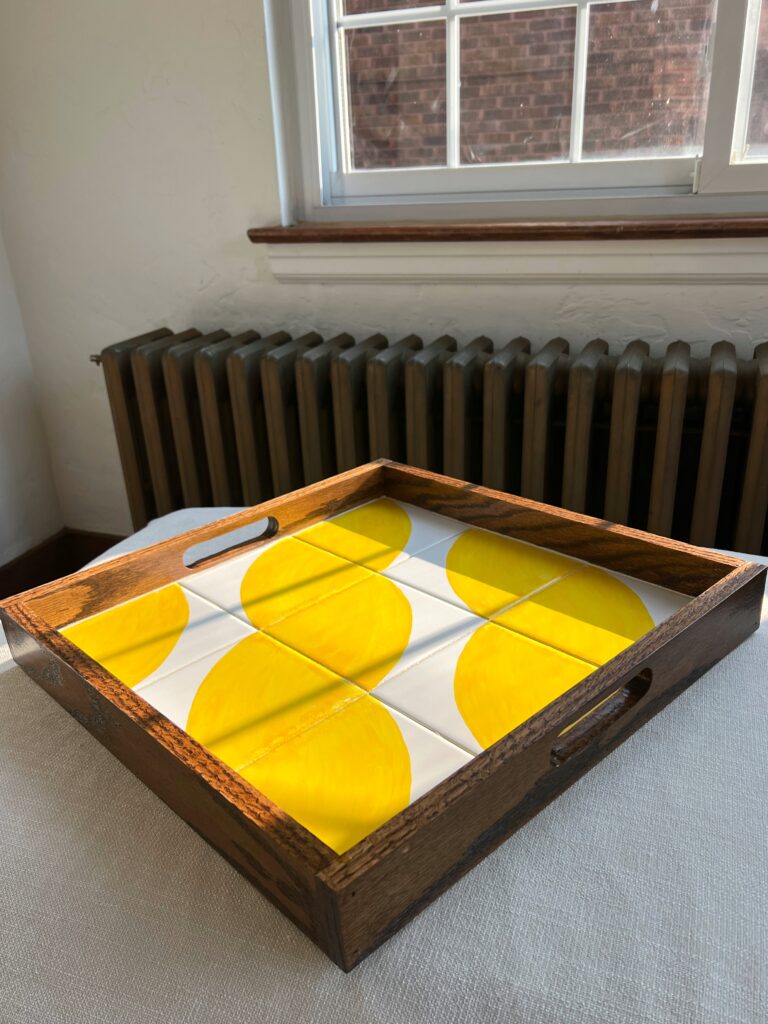
One Layer of Minwax Provincial + One Layer of Minwax Honey
My sister-in-law is, like me, not an artist but I’m proud of her for coming and making this fun design!! I’m loving the yellow and how well her stain choice compliments it!! The grain is beautiful.

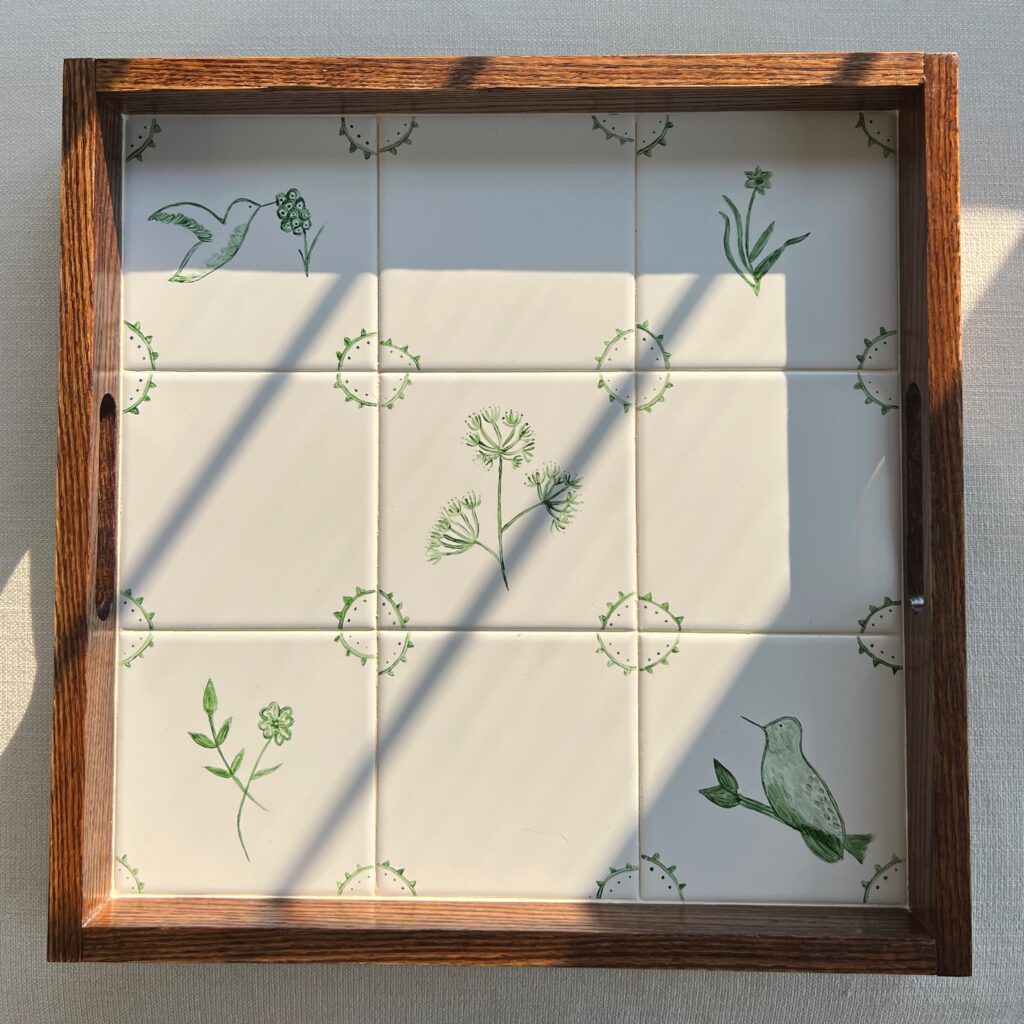
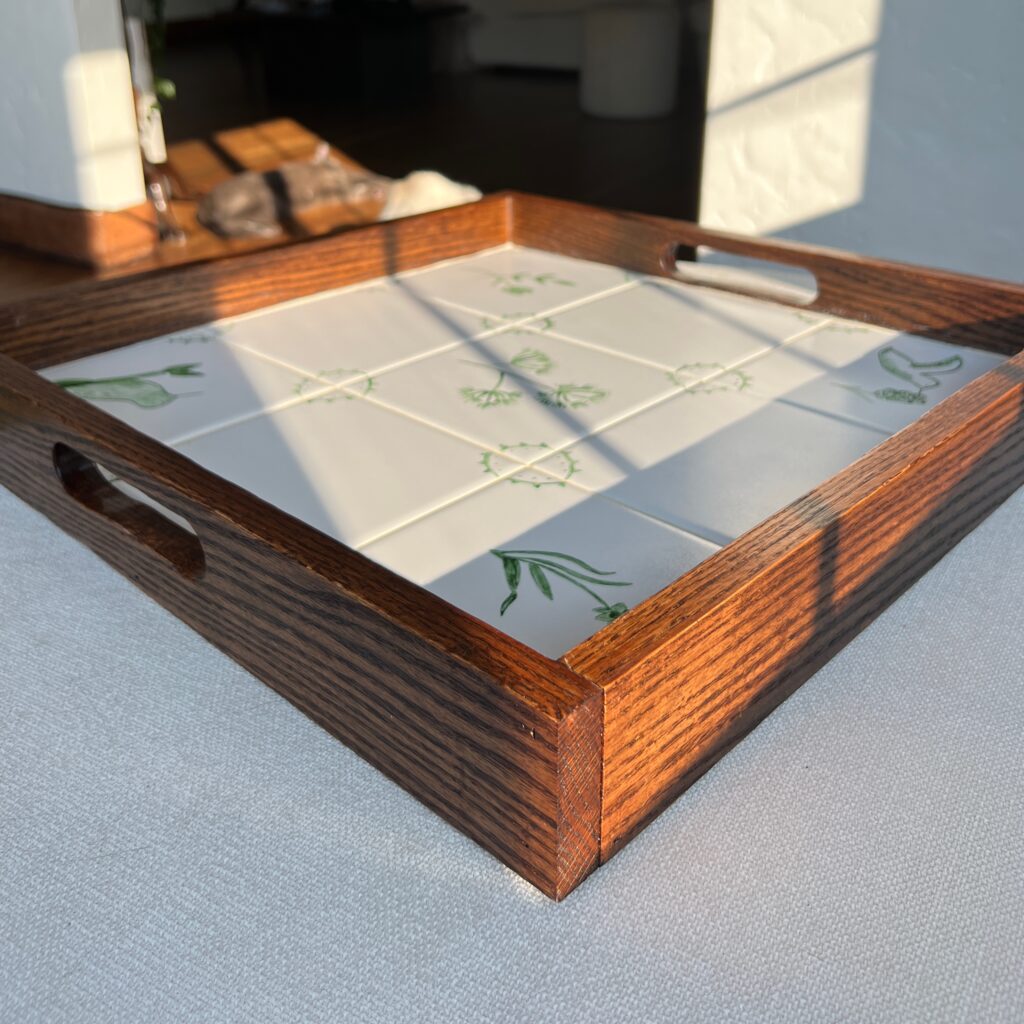
One Layer of Minwax English Chestnut + One Layer of Minwax Jacobean
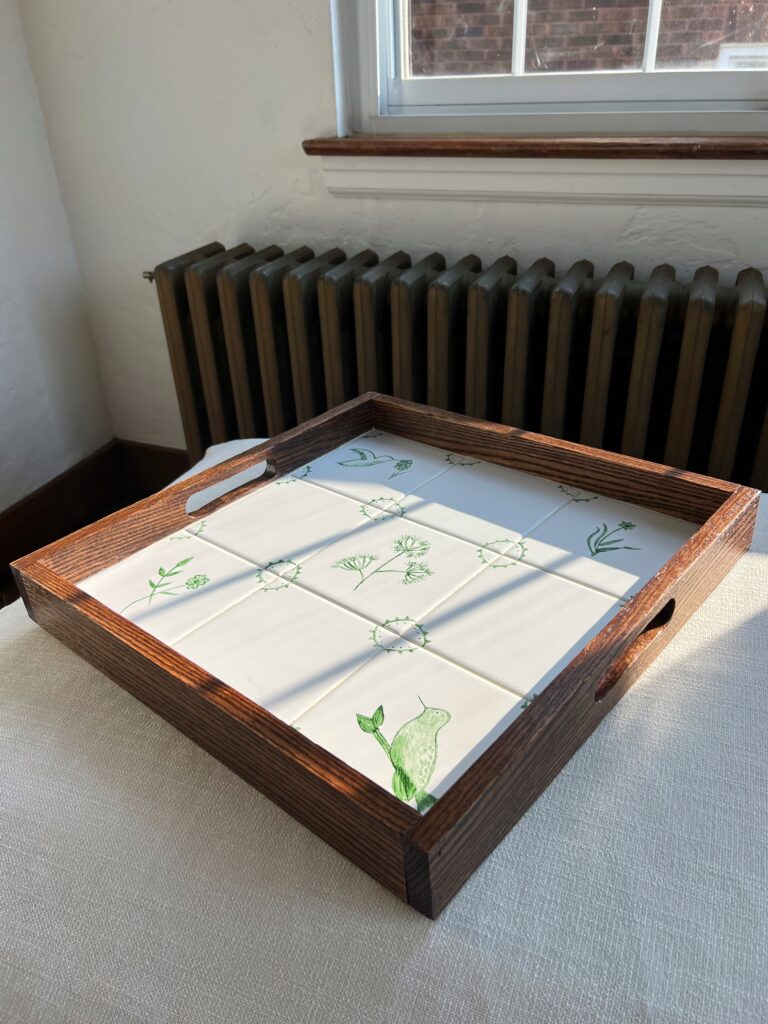
Here’s mine!! I was going for a simple, vintage vibe and I love how it turned out! The little corner designs don’t match up but ya know, I kind of like little imperfections like that because then you know it was hand made with love 🙂
Final Thoughts
My in-laws were so impressed and excited about this collaborative keepsake from our craft day. And I know i’ll be excited to see these in use at future family gatherings! PS this beautiful tray would also make a great gift!! You can make this an even more simple DIY by buying a pre-made tray!! Michaels sells unfinished trays in bulk (linked here) if you decide to do a craft party also 🙂
Would you try making this DIY table tray? If so, what would you paint on your tiles? I hope you found this tutorial helpful. Please let me know if you have any questions at all!
Elisha

This is such an awesome idea.
Thank you so much Nicole!! We had a blast 🙂
Great job & what a fun day with the girls!! I bet they love having you live closer!
What an amazing project! I am absolutely amazed at how wonderful they all turned out! Be proud!
Such a fun and cute idea!!! I definitely want to try this !!
Thank you Sally!!! Living in the same city is truly the best! Cheers to more craft days together 🙂
You’re so kind!!! Thank you so much, Lynn! <3
Yay! You absolutely should! Thank you Kate 🙂
These are so stinkin’ adorable. I love the hand painted tiles so much.
Thank you Brittany!!! I loved that part too! It was a memorable craft day 🙂
These are so cute! I absolutely love the fruits one!
I really want to try this out! They turned out super cute!
Thank you Lauren!! The fruit tray stole my heart too <3
Thanks so much Momina! You totally should!! 🙂