

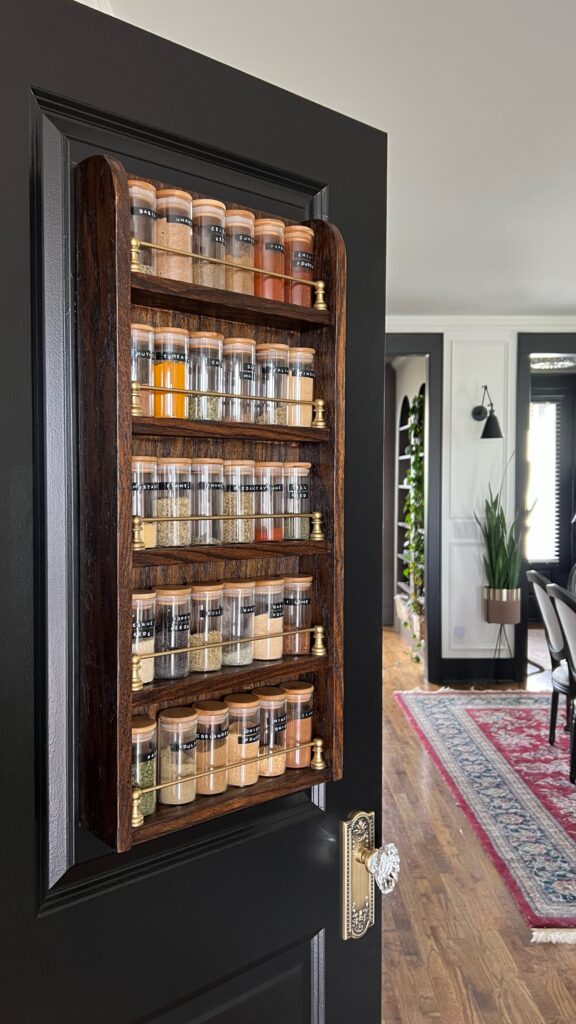
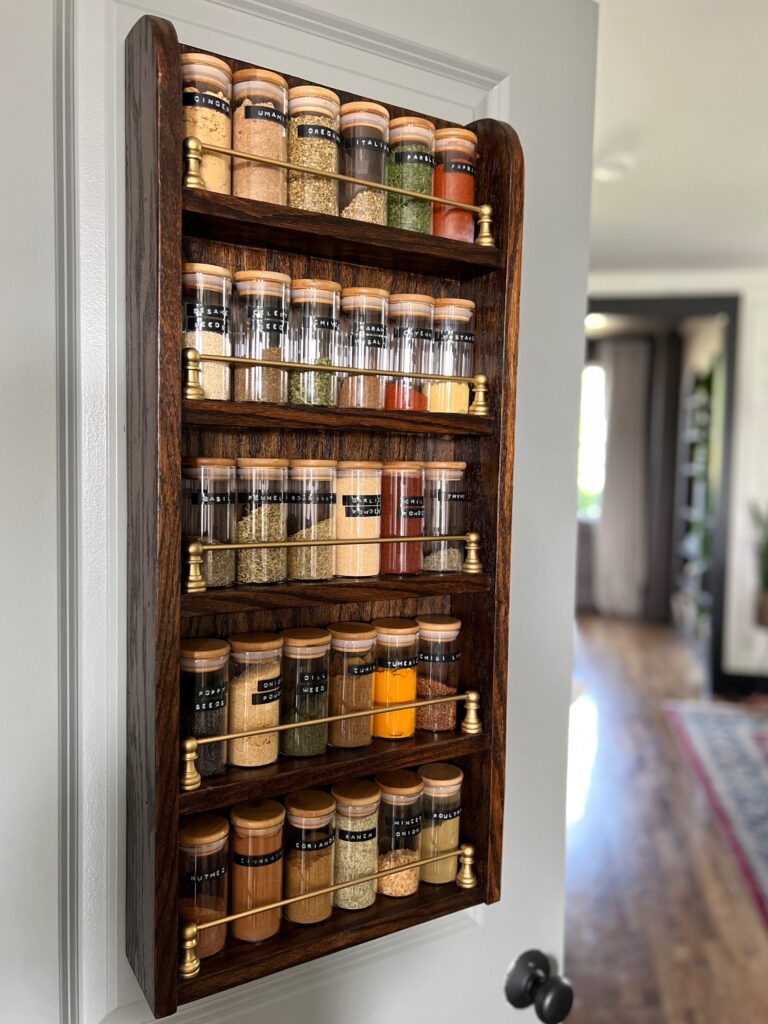
Are your spices a hot mess? If so, this pantry door spice rack is for you! Trust me, I get it! I had to practically empty out our kitchen cabinet just to find that one spice I was looking for.
With a small kitchen, we didn’t have enough storage to have a tiered spice cabinet and we also couldn’t sacrifice a kitchen drawer. Storing our spices on the inside of the pantry door, within easy reach, felt like the perfect solution!
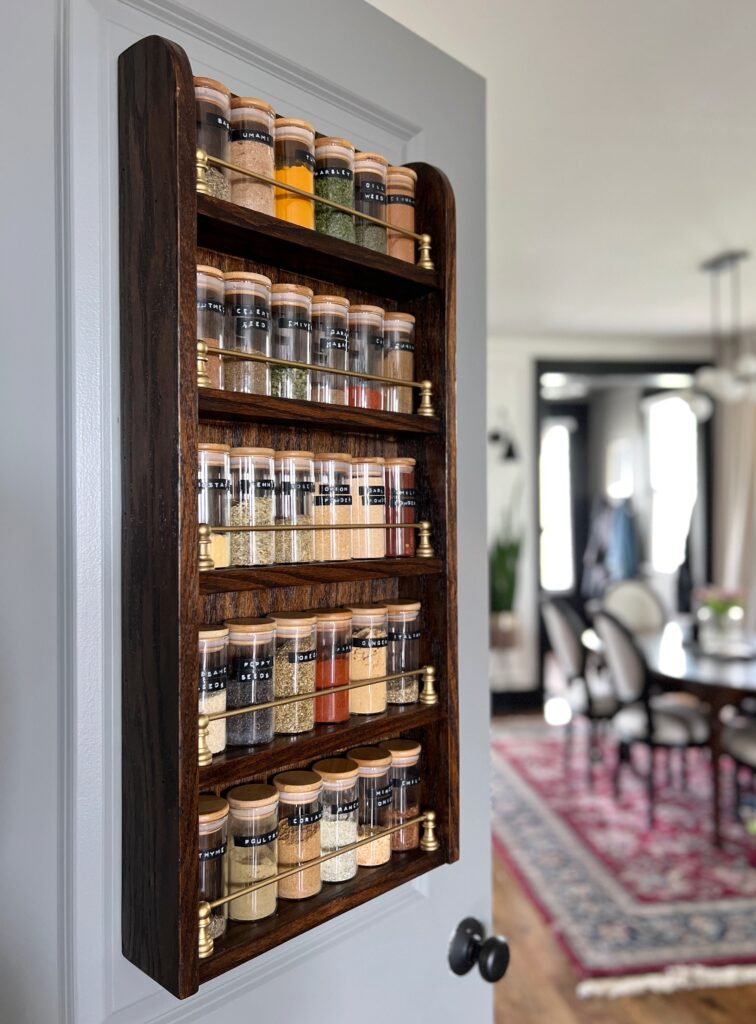
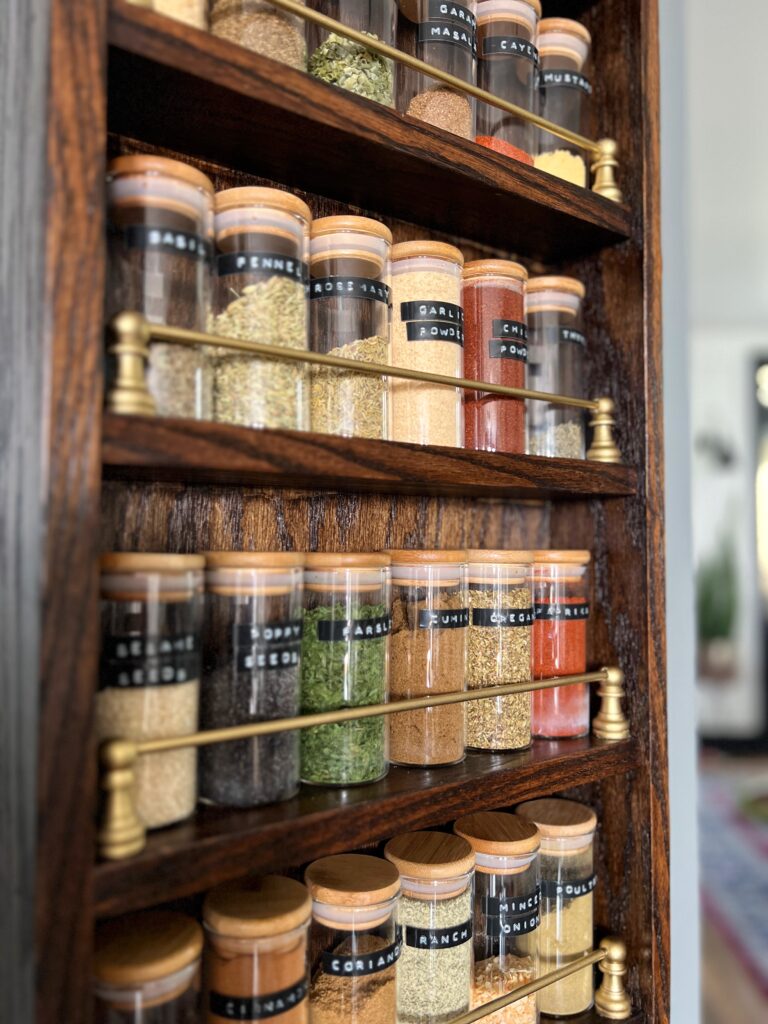
This DIY pantry door spice rack is such a great way to free up storage space. Being able to see all your spices at once is an absolute game changer for cooking!
Disclaimer: This post contains affiliate links. This means, if you purchase something from a link I provided, I will receive a small commission. This is at no extra cost to you! Thank you so much for the support!
tools:
- Table Saw (Optional)
- Brad Nailer
- Sander
- Miter Saw
- Jigsaw
- Edge Banding Trimmer (Optional)
- Framing Square
- Drill
- Clamps
materials:
- Red Oak Plywood
- Sandpaper
- Wood Glue
- Red Oak Edge Banding
- Purdy Paint Brush
- Minwax Pre-Conditioner
- Minwax English Chestnut Stain
- Minwax Espresso Stain
- Minwax Polyurethane Clear Satin
- Minwax Stain Marker (Optional)
- Spice Jars (Optional)
- Label Maker (Optional)
DIY Brass Gallery Rails
Step One: Planning & Preparation
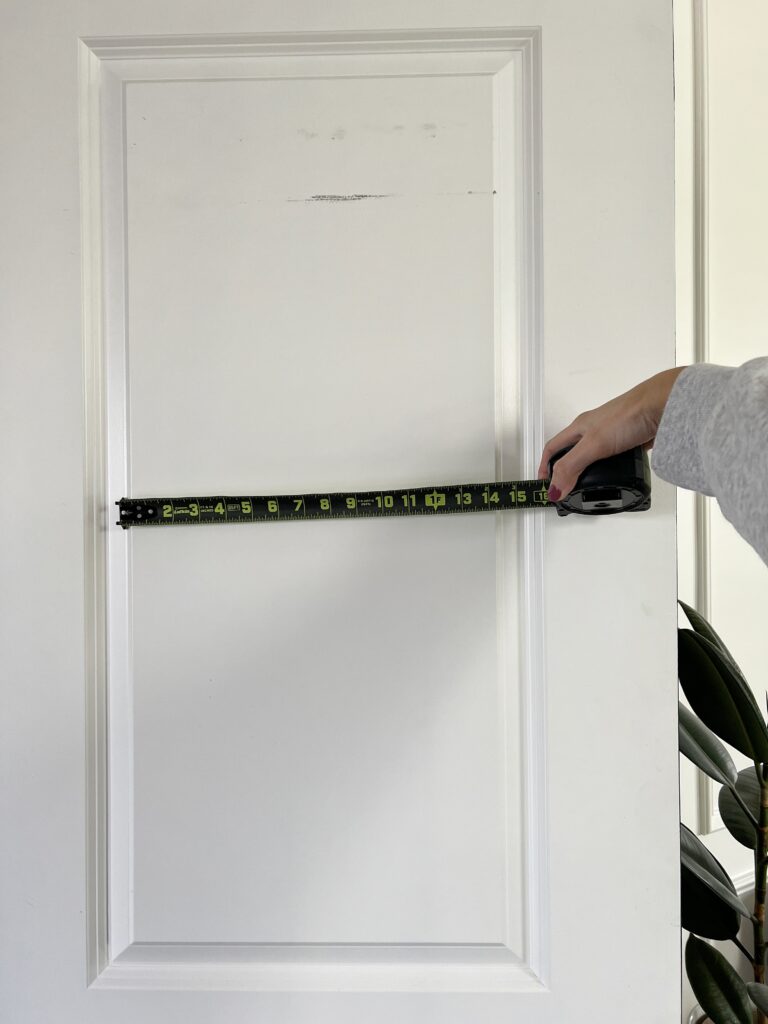
Measure your pantry door
Before you can start your DIY spice rack, you’ll need to measure your door and see what kind of space you have to work with! We had some paneling to work around.
I wanted mine to fit just within the paneling, so my vertical spice rack measurements are 13.5″ x 30″.
Analyze your needs
Check out your spice collection to see how many you need to store! If you have larger spices that you don’t want to transfer to a smaller jar, you might consider having just one higher shelf to fit those taller bottles. Just a thought!
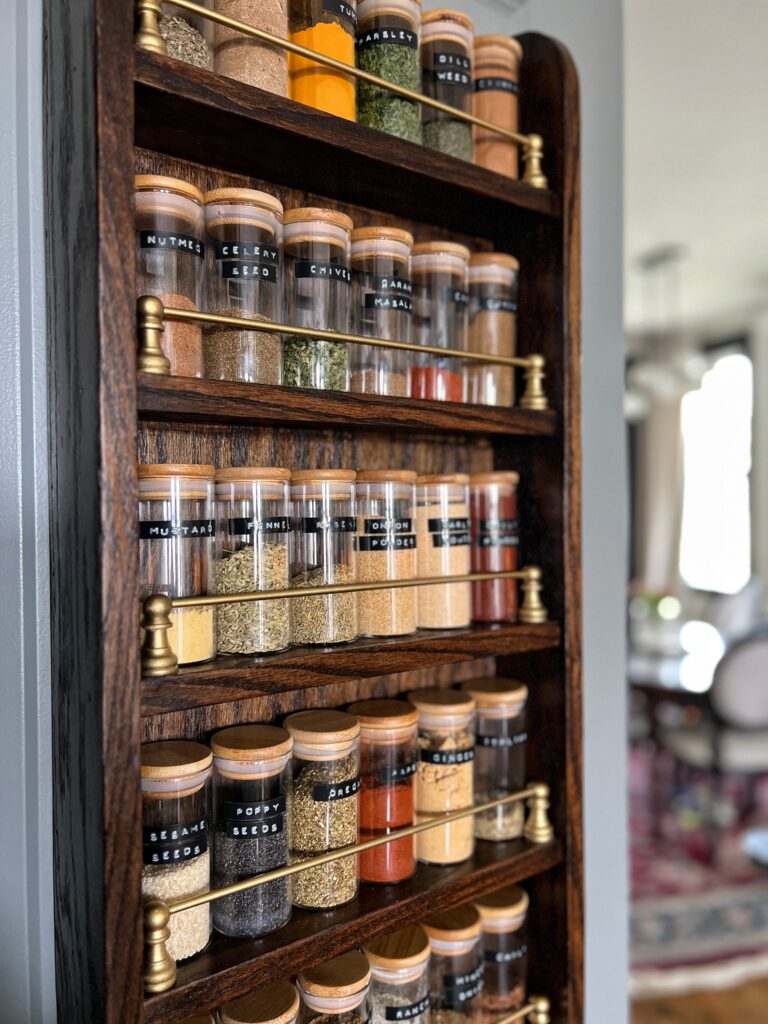
Personally, I wanted a clean look with all clear jars. Luckily the 30 spice jars worked perfect and I was able to get the measurements to fit them into 5 rows of 6!
I’ll admit, I have a few spices that were in bigger containers that I have to store in my cupboard. I’ll just refill the glass jars as needed- I don’t mind!!
Step Two: Making Your Cuts
What is the best wood for a spice rack?
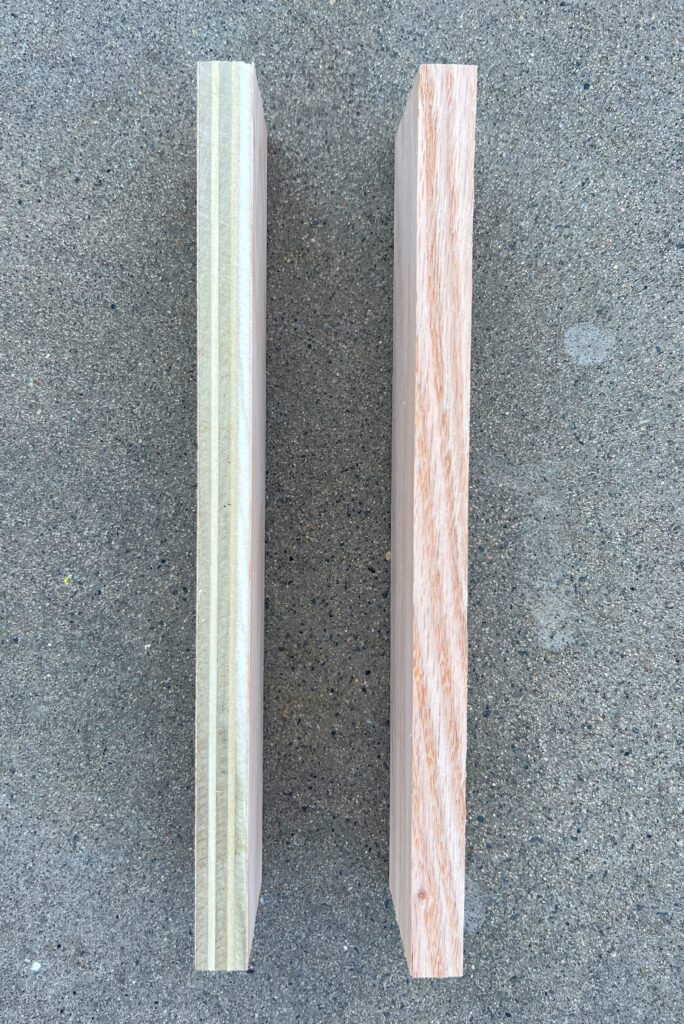
You can use whatever wood type you want for your DIY spice rack! Just keep in mind- inexpensive wood options like pine and birch don’t take stain as well.
I chose to use red oak plywood! Why? This type of wood has a beautiful grain, it stains really nicely, and it’s still budget friendly! Click here for the plywood I ordered- I only needed one board!
White oak plywood would also be a stunning option!
DIY Pantry Door Spice Rack Cut List
This is the cut list for a pantry door spice rack with 13.5″ x 30″ dimensions!
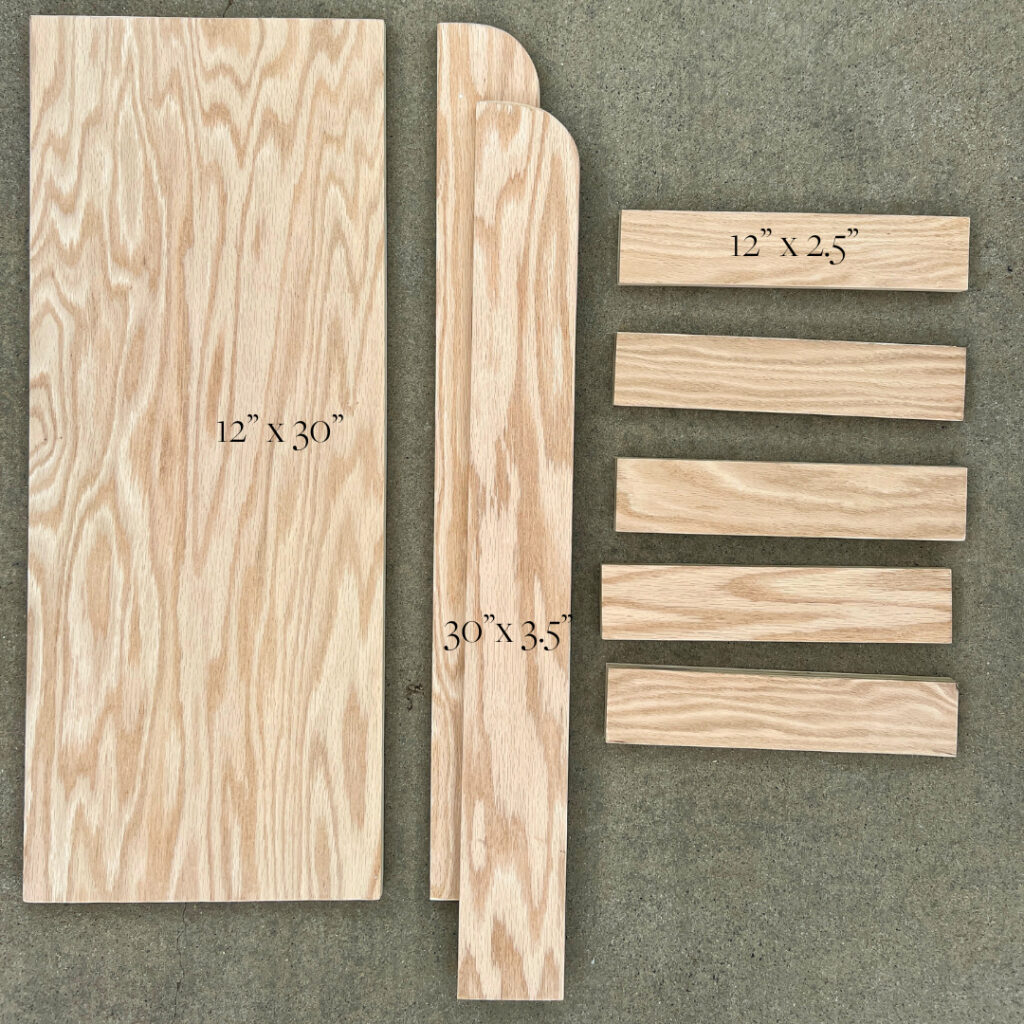
I made all of these from this one 2’x4′ piece of red oak plywood!
Note: If you’re using different spice bottles than I did, make sure you measure and test them out before determining your shelf depth!

Tips for making cuts
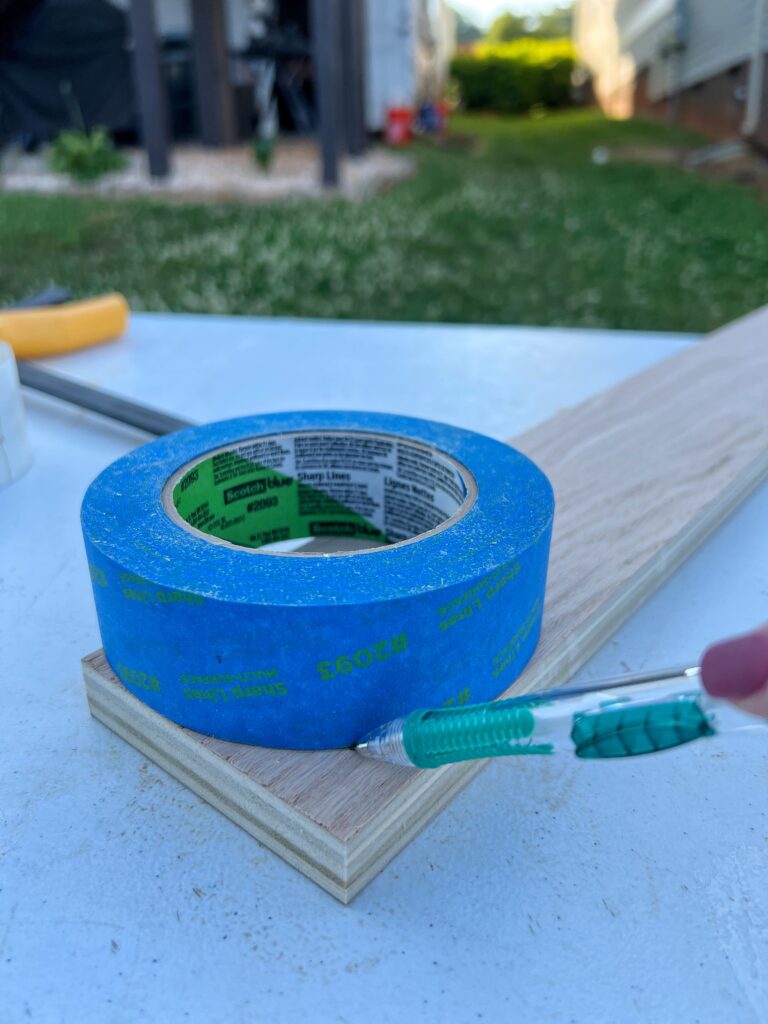
When you’re cutting plywood against the grain, you’ll likely notice some tearing which can be so frustrating!
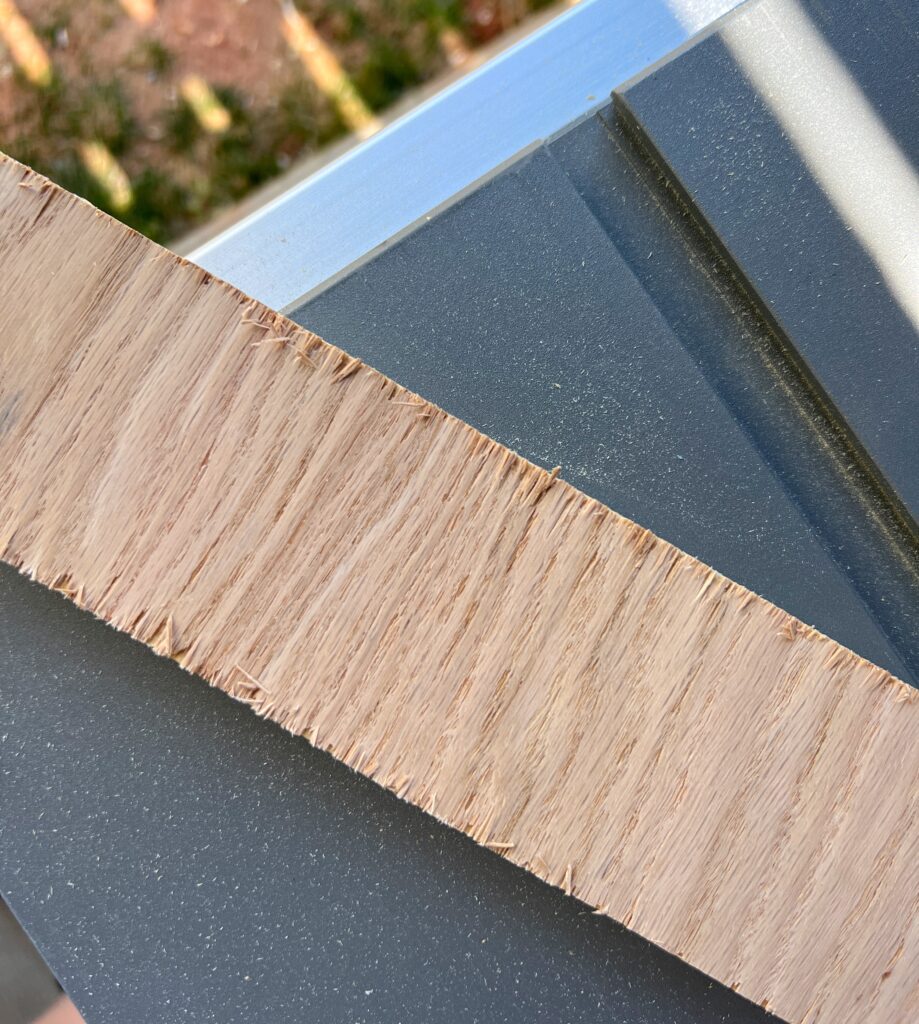
You can prevent this by using painter’s tape where your cut line is. You’ll leave the tape on when you run it through your table saw or circular saw. If you don’t want any tearing on the back side of the plywood, be sure to tape that part too!
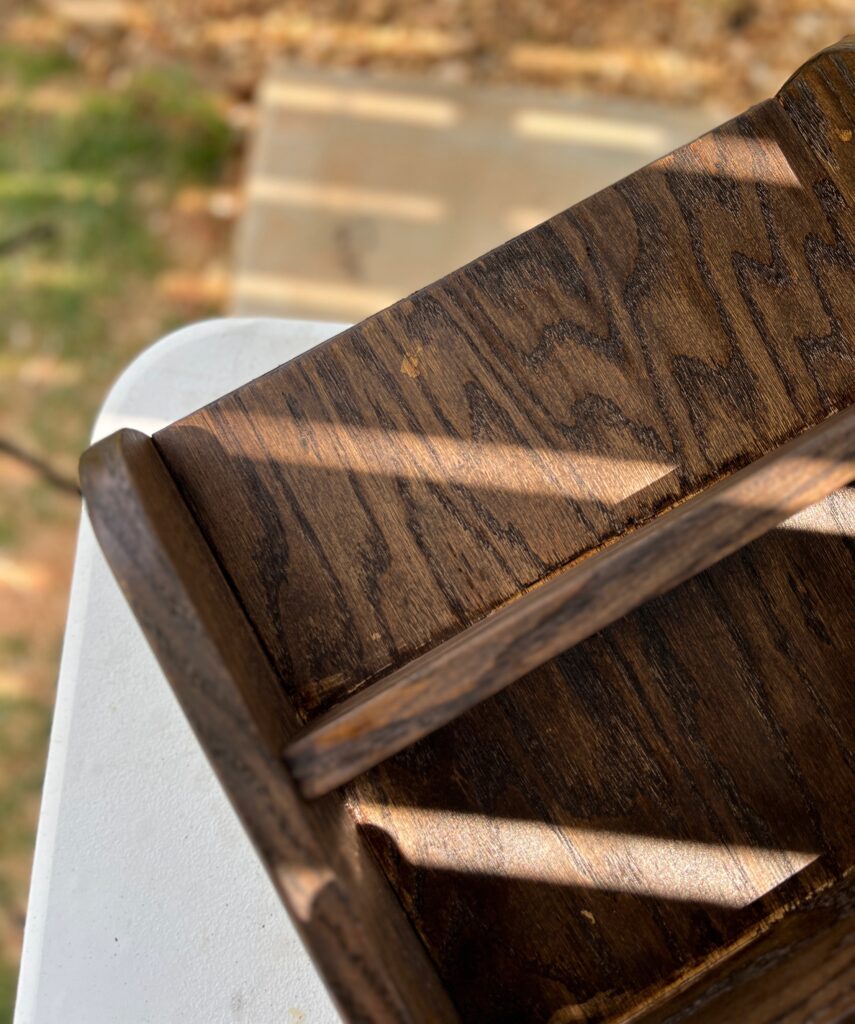
The curved sides add so much to this DIY spice rack! It’s really simple to do too!
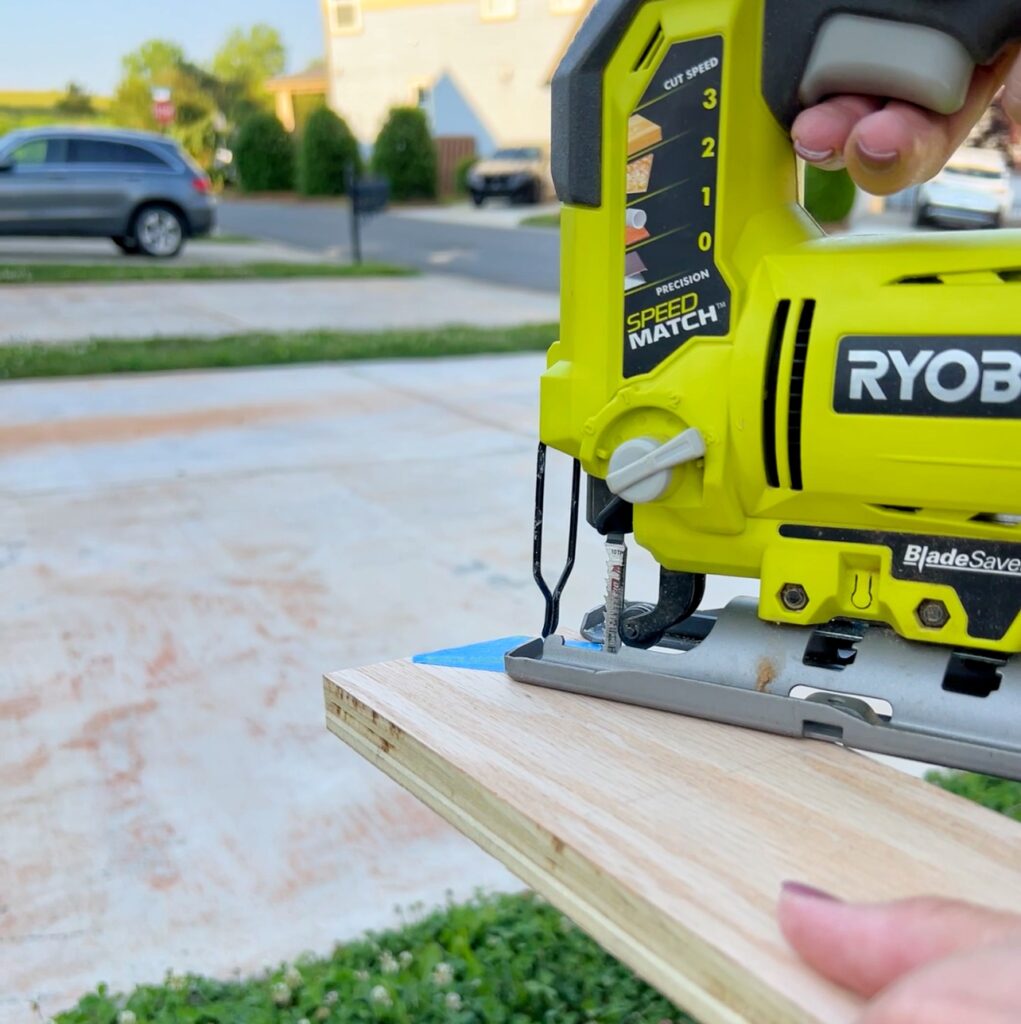
Find a round object to trace a curved line! I played around with a bunch of different things but I liked the curve I got from a roll of painter’s tape.
After this, I simply cut along the line using my jigsaw! I quickly remembered I need to use painter’s tape to avoid tears when cutting this way too!
Applying the edge banding
Edge banding is so magical! It’s a thin piece of veneer that you iron on and it makes plywood look like solid wood! You can get it in different types of wood so that your stain matches! For this project, I used red oak edge banding.


The little red gadget I’m using is awesome! You run it along the edge and it trims the excess banding. So easy (and very satisfying) to use!
After trimming, sand down the edges with some 220 grit sandpaper and you’ll forget it was ever plywood! While you’re at it, sand the surfaces of all your pieces too in preparation for stain!! Look at the difference the edge banding makes! I love it.
How to make your cuts the quick and easy way
There’s a couple ways to make this project easier for you!
Take advantage of your local hardware store. Lowe’s and Home Depot can help with cuts! I don’t *think* they would be able to do the smaller pieces of wood (they have certain rules) but they should definitely be able to cut the back piece to size!
For the smaller pieces, you have the option to purchase 1×3 red oak boards for the shelves and 1×4 for the sides! Click here for the link! By using these boards, you wouldn’t have to worry about ripping them down or doing edge banding! You would just have to cut them to the right length!
Step Three: Assemble
Before assembling, make sure all your pieces have been sanded! It’s way easier this way. You likely already did if you used edge banding!
Marking for the shelves
To determine my shelf spacing…
I added up the 5 shelf thicknesses (.75″ x 5 = 3.75″), deducted that from the height of the back piece (30″- 3.75″= 26.25″) and divided by the number of spaces (26.25″/5= 5.25″)
There’s 5.25″ between each space.
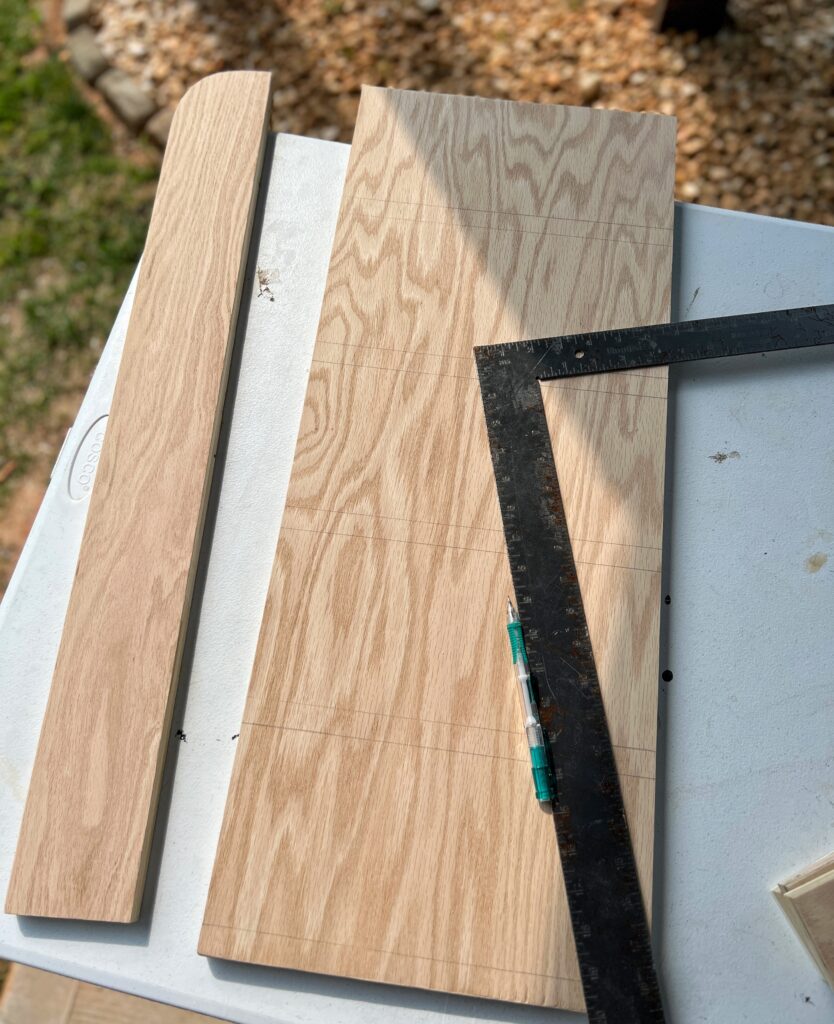
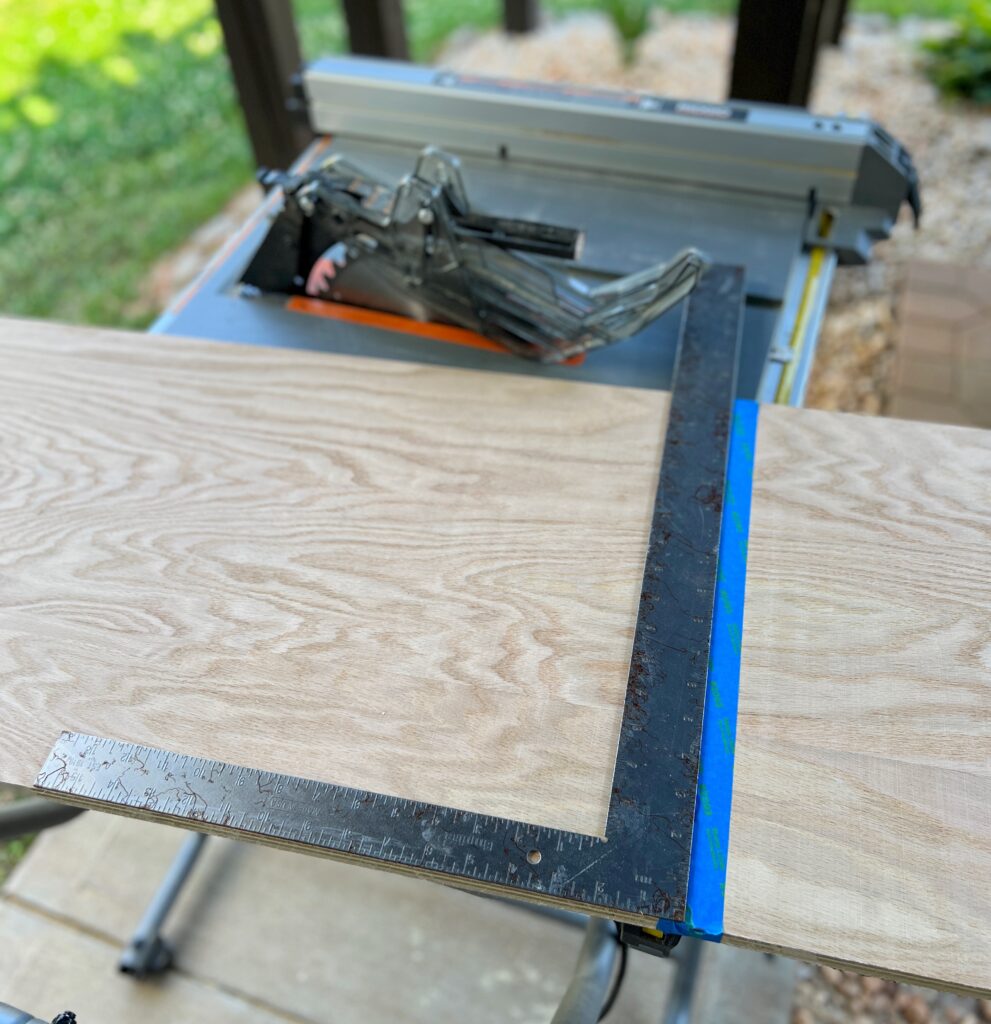
Using my framing square (a must have tool!) I marked straight lines for the shelf placement!
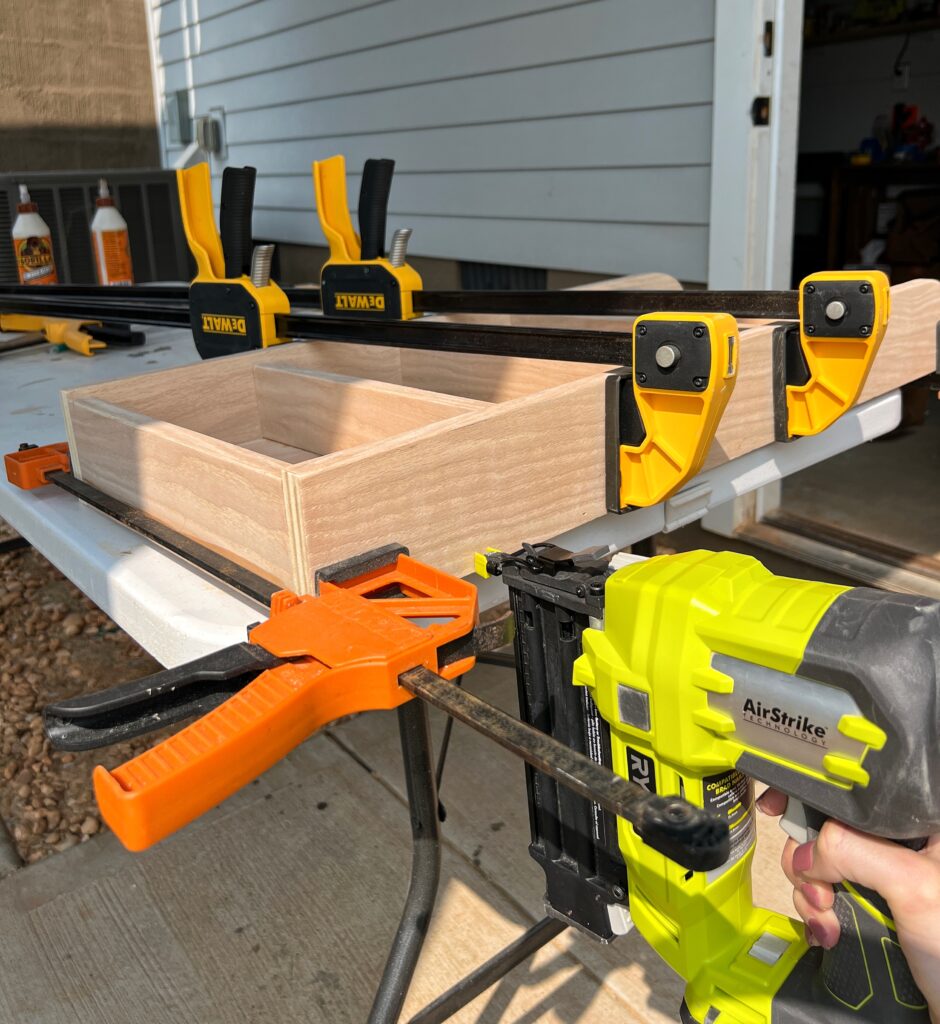
Wood glue & nails
Next I applied wood glue where I marked on the back piece as well as on the edge of the sides.
If I could do this over, I’d be WAY more careful about not having too much excess glue and wiping up as much as possible.. Or i’d just stain all the pieces individually before assembling. Wood glue doesn’t accept stain 🙁 You’ll see what I mean in the next step!

I quickly and carefully aligned everything and clamped it into place!
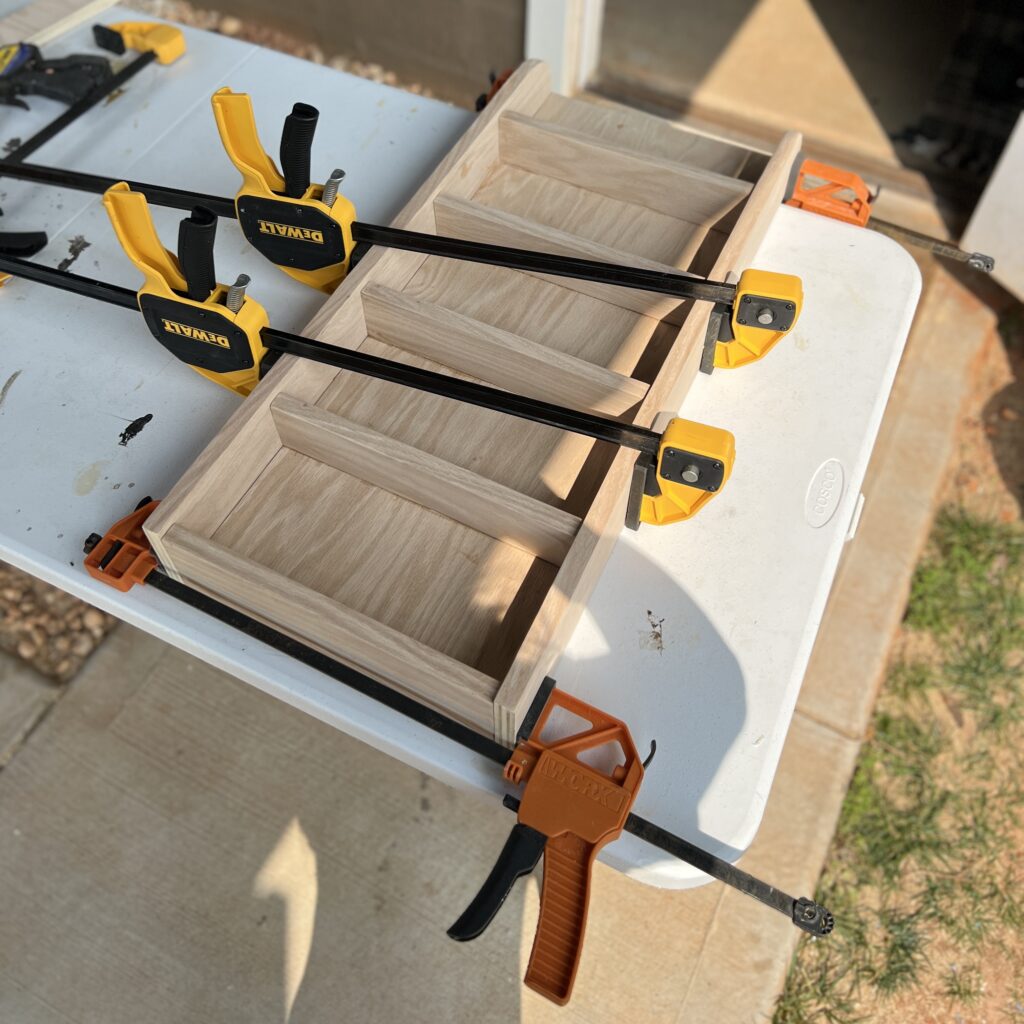
For additional support, I used 1.5″ brad nails along the sides, being careful that my nails go in straight!
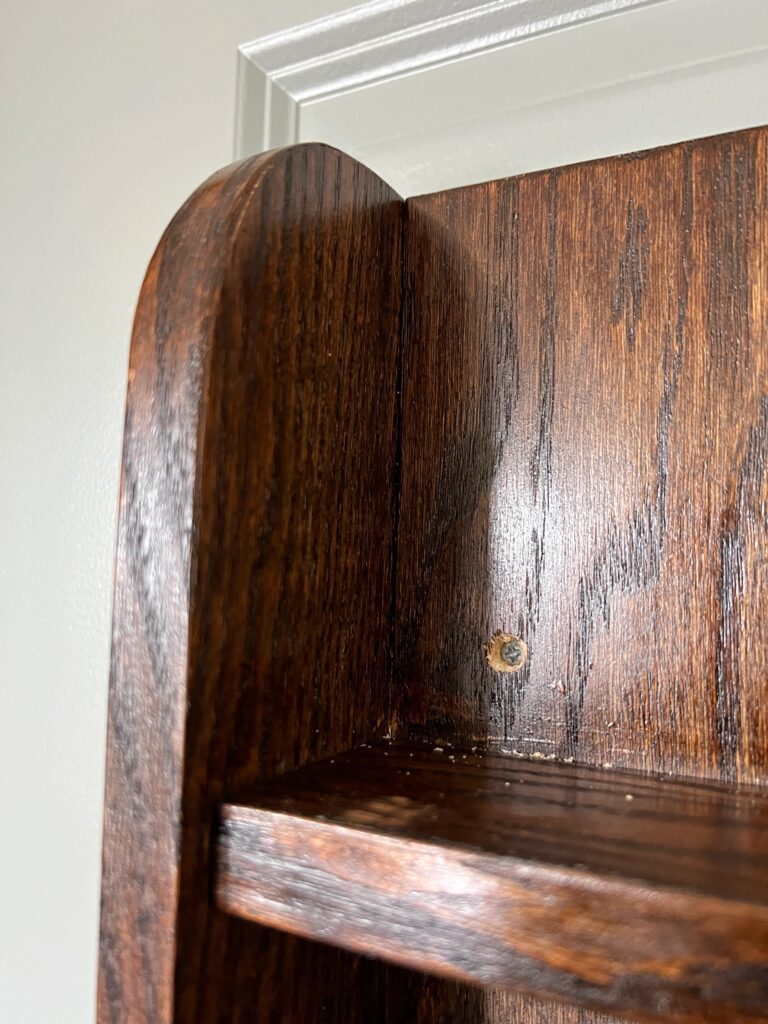
Is it necessary to use wood filler?
It’s totally up to you if you want to fill the nail holes! Sometimes I feel that filling nail holes makes them more obvious so I left them be!
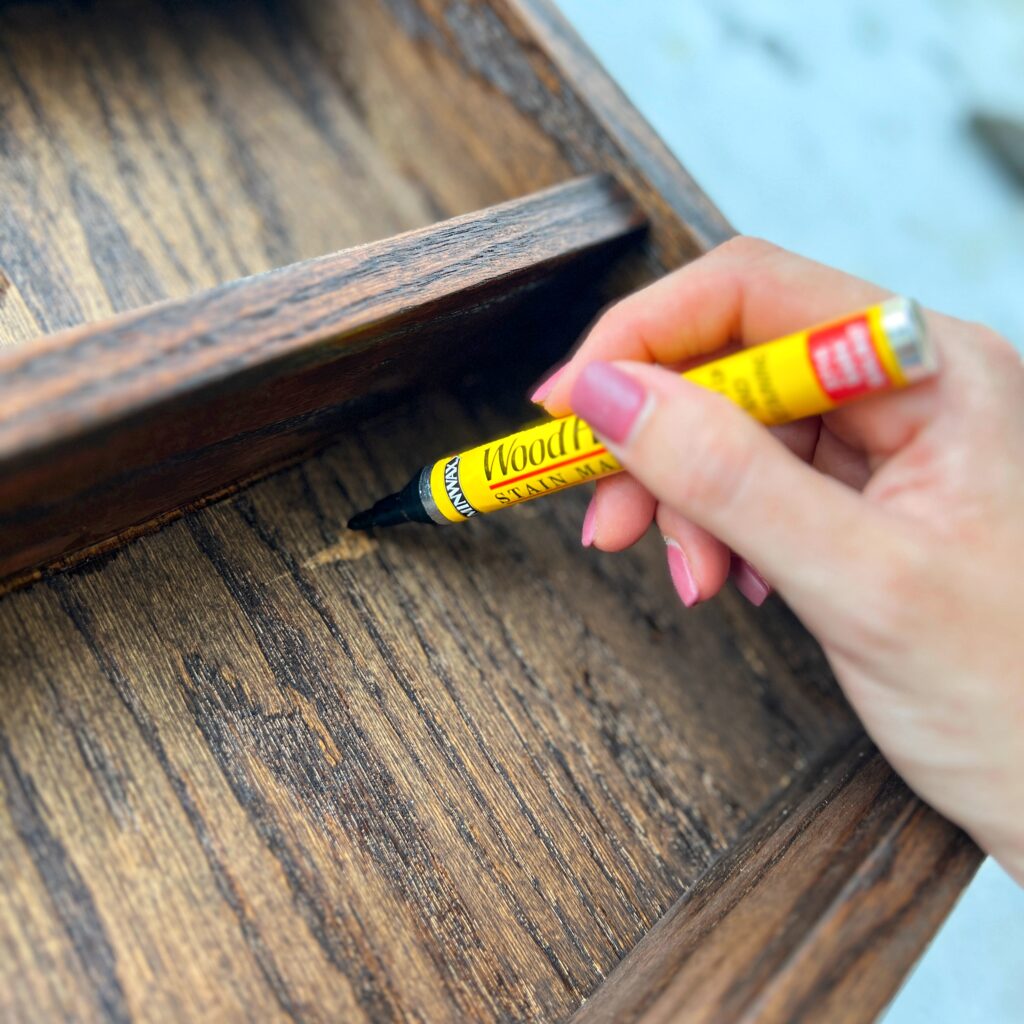
For one nail hole, I experimented with this Minwax stain pencil which worked pretty well but I should have maybe tried before I did the stain because it gave it a chalky sort of finish?
There’s 3 or 4 nail holes in this photo but you have to squint to really see them! I’m totally okay with this finish, but again, personal preference!
Step Four: Stain
Preparing for stain
First use a tack cloth or damp cloth to make sure you don’t have any saw dust!
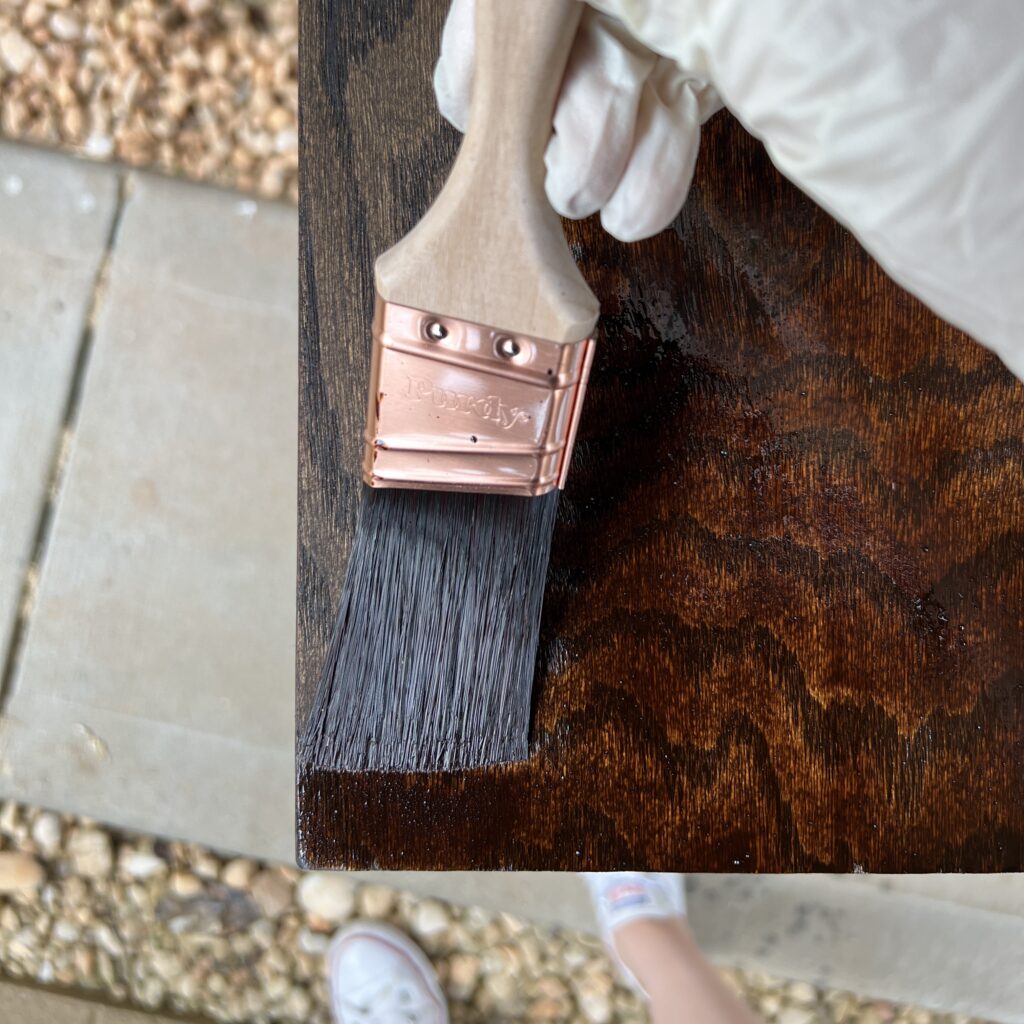
Before you can apply stain, it’s important to use wood conditioner. I used this oil-based pre-stain since I was using oil-based stain, but they also make water-based wood conditioner too! Wood conditioner helps prepare the wood for stain so you can get a nice, even finish. Don’t skip this step!
Custom stain
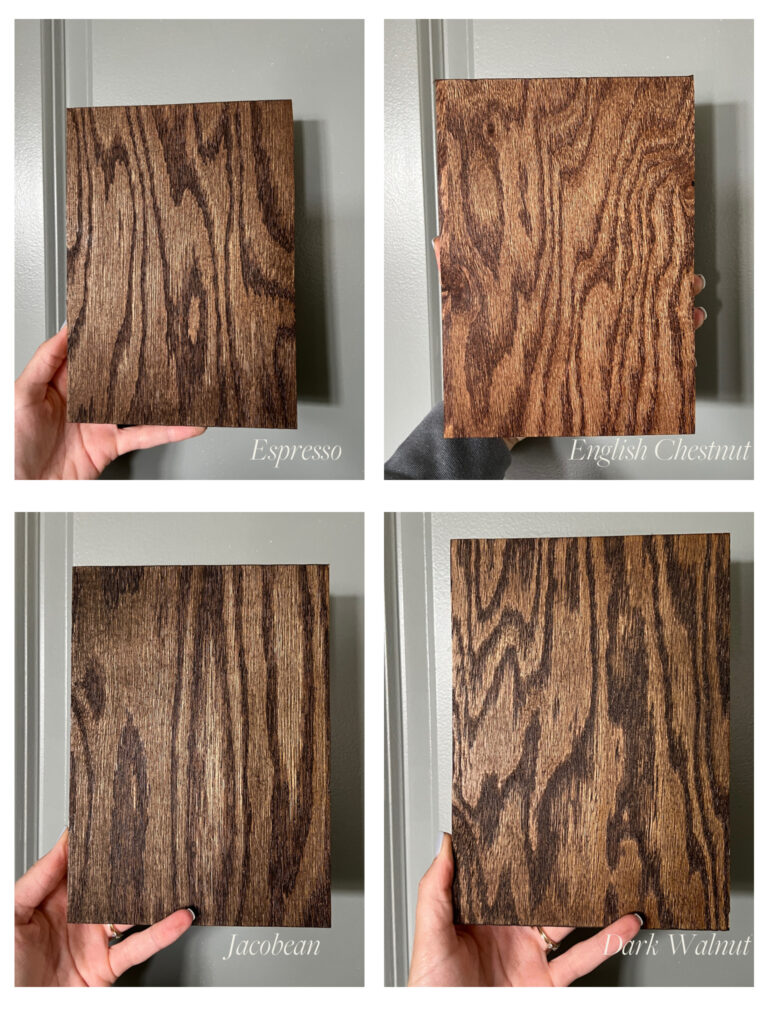
Choosing the stain color was the hardest part! But have you ever tried layering stains? It’s the best way to customize your finish and get the exact look you’re going for!
I tested out four different dark Minwax stains on scrap pieces of red oak plywood. Did you know that stain shows up differently on different wood species? This is why it’s important to test your stain before committing to your full project!! Ask me how I know… this blog post is your clue 😉

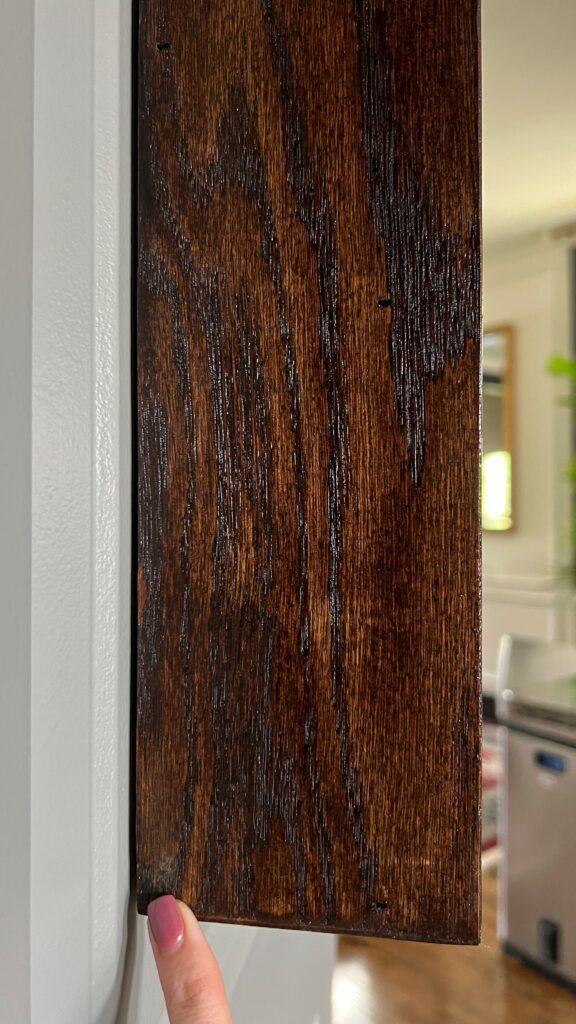
Be sure to look at your options in the location that they’ll be used! In my case, against the pantry door…
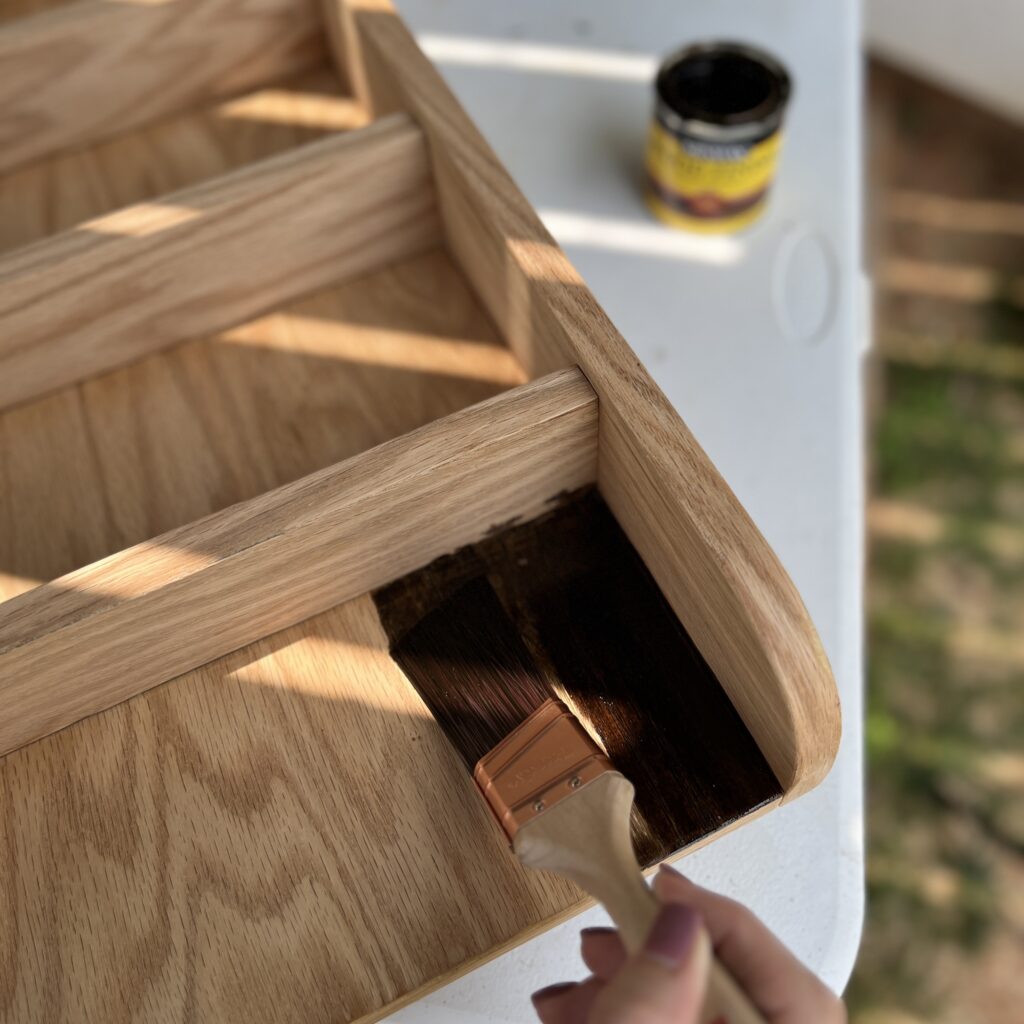
First I did a layer of this oil-based espresso!! I applied the stain generously, going with the grain, using a quality paint brush.
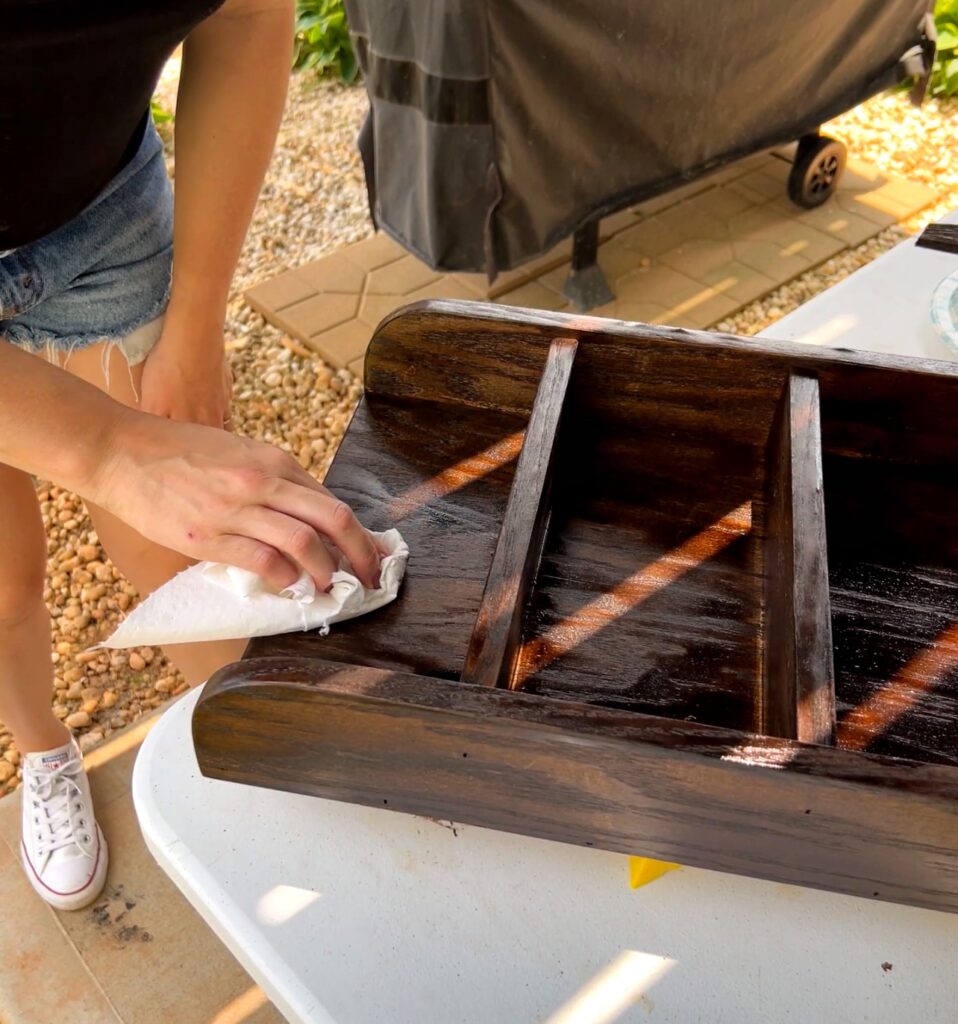
I let the stain sit for about 5 or so minutes and then I wiped off the excess with one of these rags.
As I was applying the first layer of stain, I could tell immediately that the stain was not sticking to any areas that had wood glue! There’s a spot in the middle of the top part, but mostly it was just right near where I glued each shelf on!
I let the first layer of stain dry for about 3 hours and then did a layer of English Chestnut stain to add some warmth!
This stain marker helped with those wood glue spots!! It wasn’t perfect, but definitely better. Luckily the spice jars covered them all up anyway!
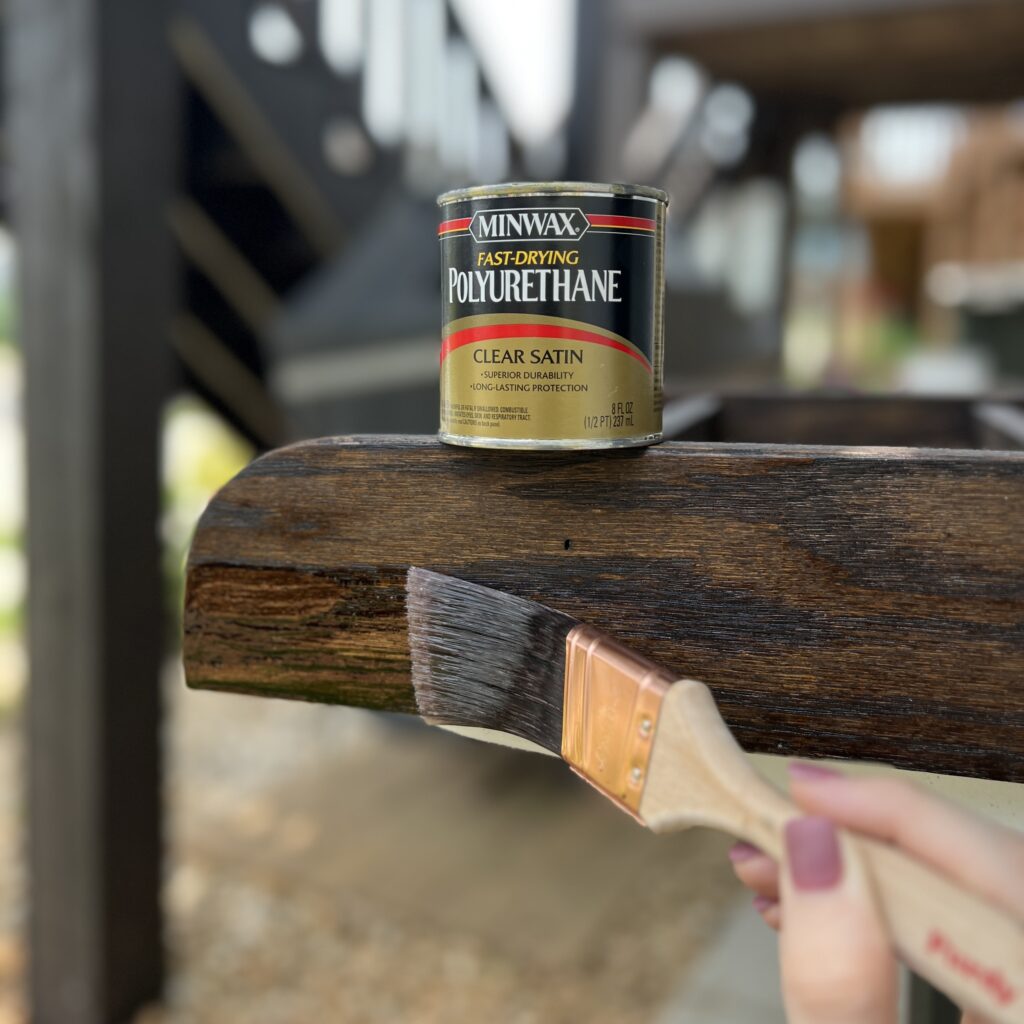
Protective Coat
The last step is the top coat! Not only will does protect your wood spice rack, but this clear satin polyurethane adds the perfect amount of shine… giving it a very professional looking finish!! It’s a favorite.
I did two coats, letting it dry for 4 hours in between, but you can do as many as you feel you need!
Step Five: DIY Brass Gallery Rails
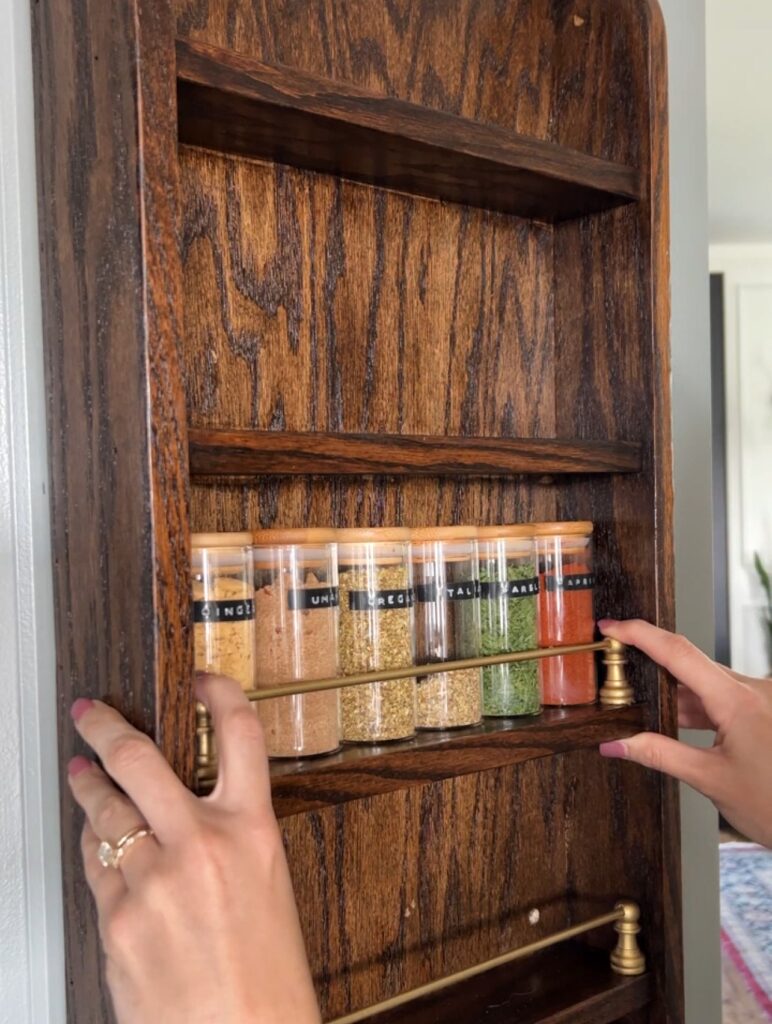
Let’s talk about my favorite part of this pantry door spice rack… the DIY brass rails! These give it a beautiful, unique look and I’m just SO excited about how they turned out.
Another Budget Friendly Brass Rail Option (Updated)
I’m updating this post a couple years later because i’ve since discovered another budget-friendly way to get a brass gallery rail using lamp parts! I like this method better because it’s much easier, it’s real brass, and it’s still affordable. I used it on this DIY wine rack!! Click here for the tutorial!

Brass Rail with Chess Pieces
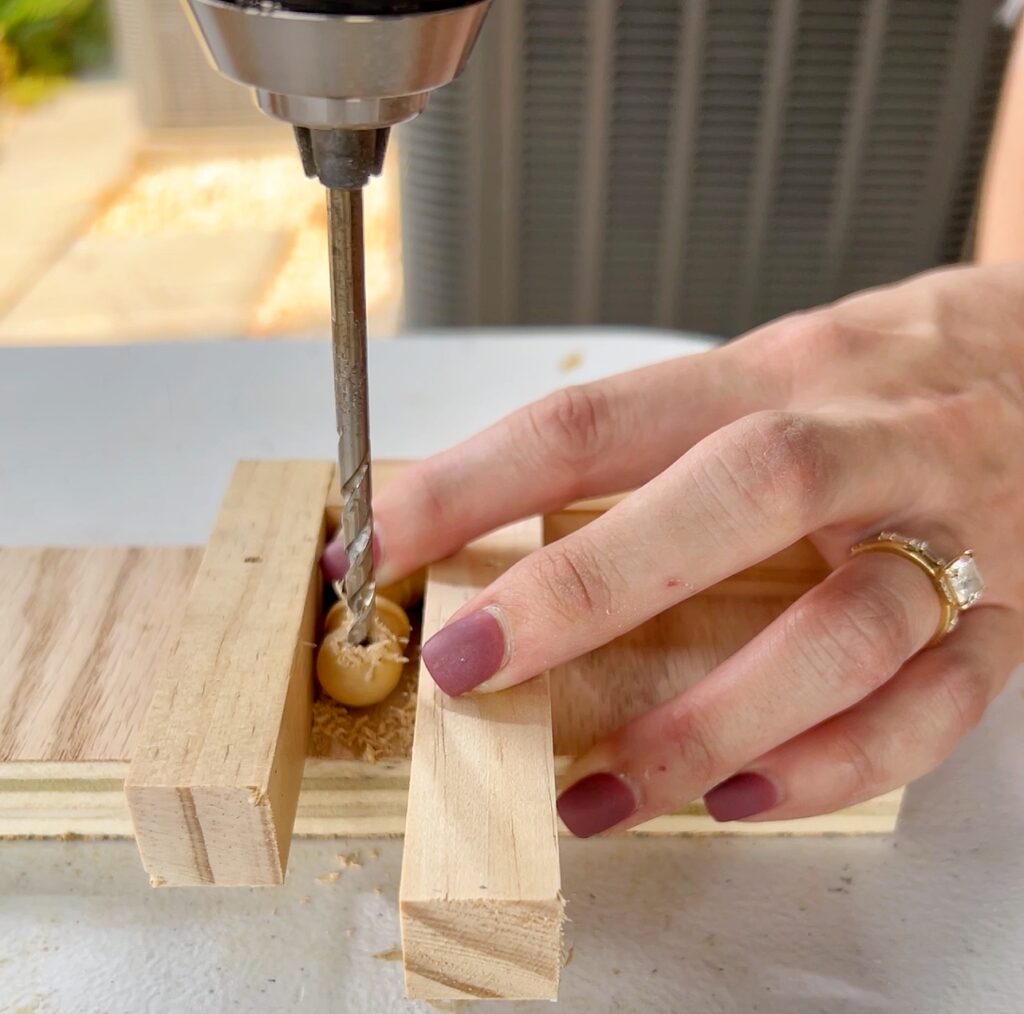
First I have to give a shout out to Corey @sawdust2stiches who came up with the great idea to use chess pawns for gallery rails… how cool is that? Thank you Addy @addydoesit for sharing it with me!
Yes… you heard that right! I used chess pawns to make these DIY brass rails!
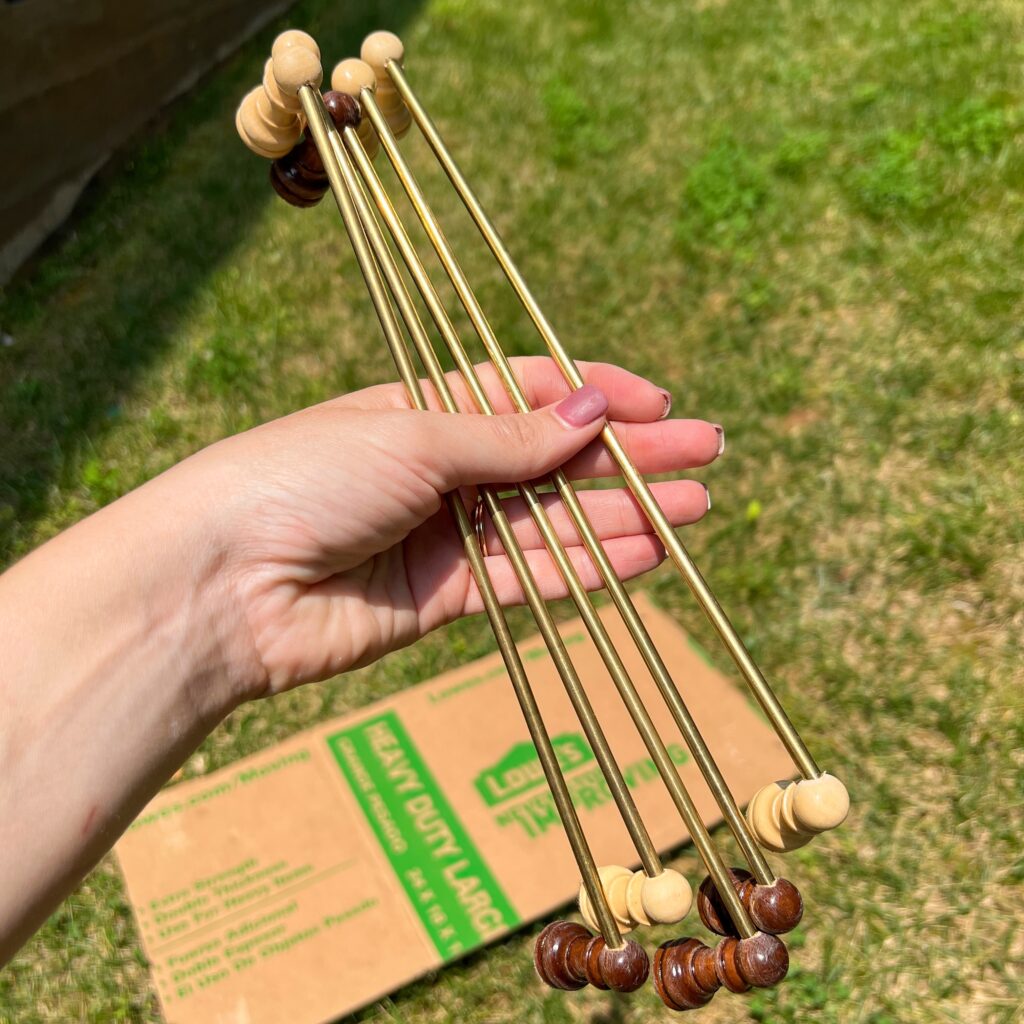
I looked around for wood chess pieces that had a shape that I liked and were the right scale this wood spice rack. This set worked perfectly and were very affordable! To hold them secure while I drilled, I made a little jig out of scrap wood I had! I used a 3/16″ drill bit to fit these 3/16″ brass rods I got.
I used my miter saw to cut the brass rods to size and just pushed them into the chess pawns! You likely drilled further into some pawns than others, so just make sure to adjust your brass rails until they’re all even in length.
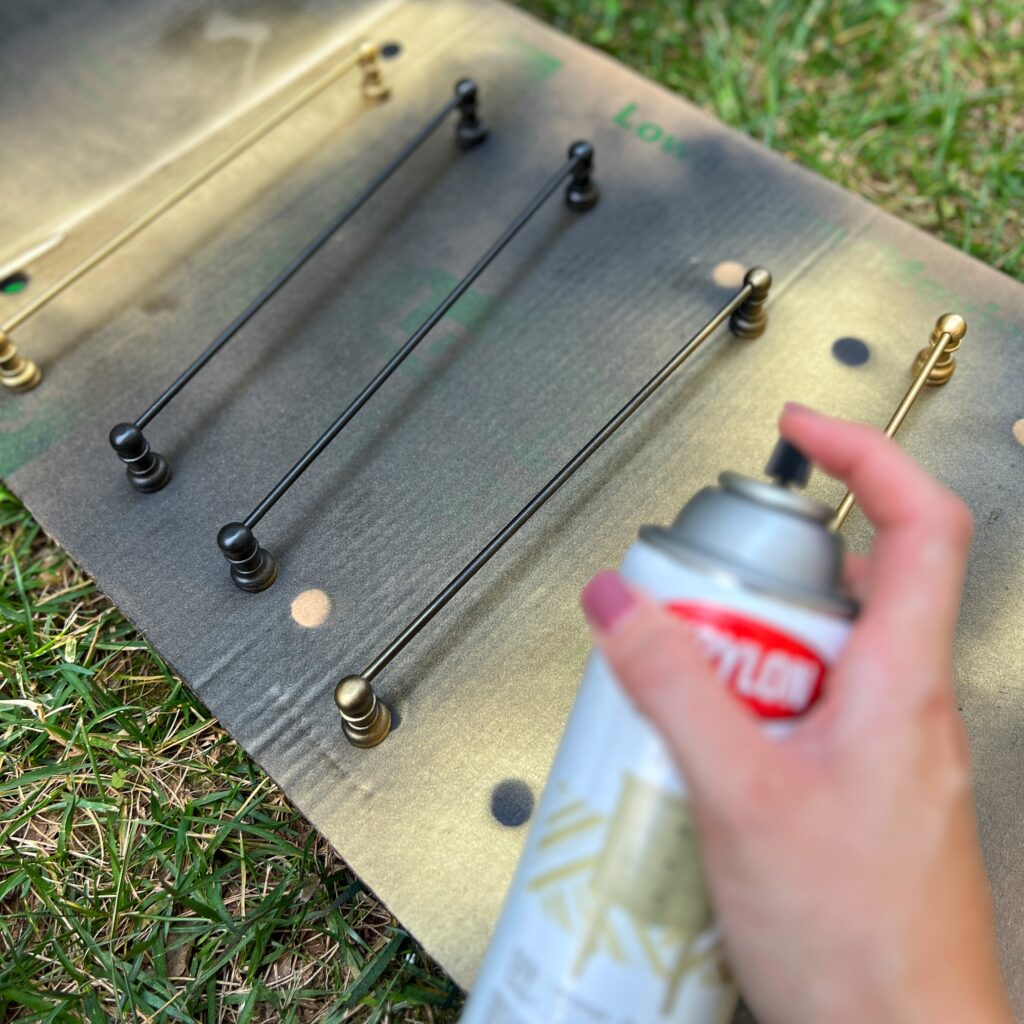
First I primed the gallery rails with Krylon satin black spray paint. This creates more of a vintage aesthetic. Then I used Krylon gold leaf spray paint to achieve the brass look! I love how this finish turned out.
Once the gallery rails were dry, I attached them to the spice rack using super glue! It’s really that simple! I recommend getting the gel version of super glue to help prevent it from dripping when you attach them!
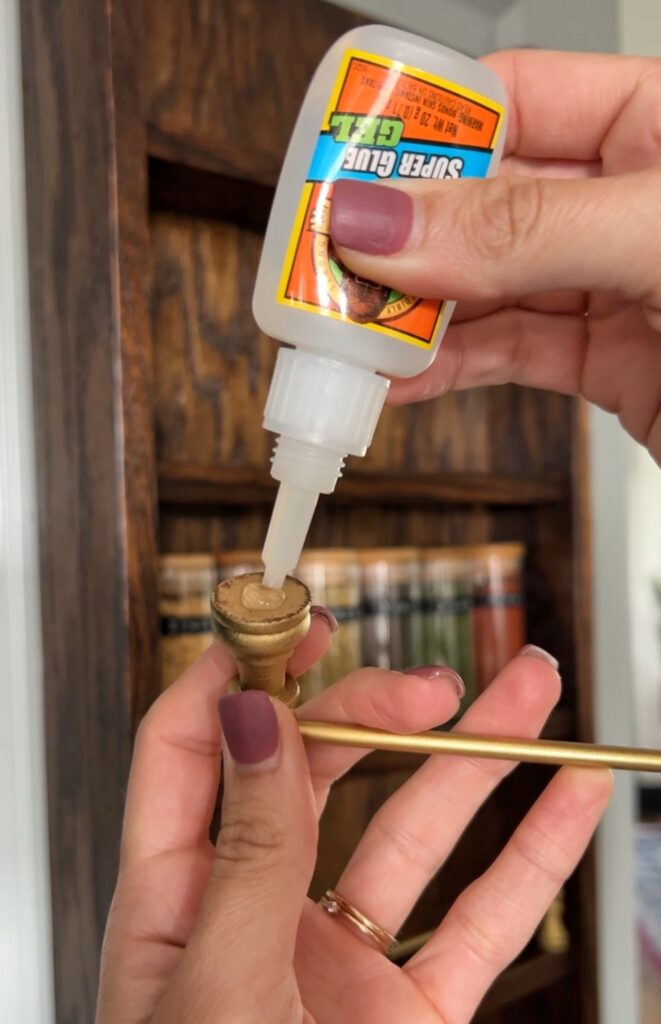
One really odd thing I want to mention is that I started putting the glass spice jars up immediately after gluing down the gallery rails (I was excited!!) and noticed…
How weird is this? The spice jars that were close to where I glued started fogging up!! Luckily we were able to wash them to fix it, but next time I would just wait for the glue to settle in before putting the jars up!
Step Six: Attach Spice Rack to Pantry Door
Can you hang a pantry door spice rack on a hollow core door?
Yes you can! Our biggest worry with this DIY pantry door spice rack was that our hollow-core door wouldn’t be strong enough to hold it. But after doing quite a bit of research, we felt confident we could make it work! Here’s the secret:
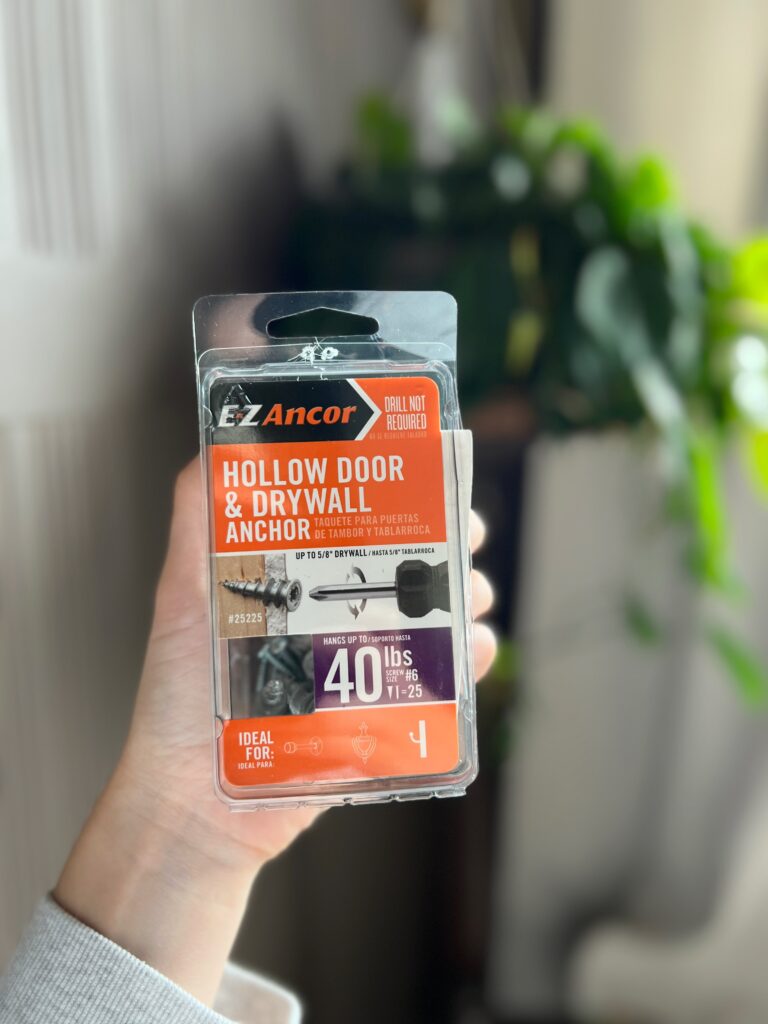
Did you know they make hollow door drywall anchors?
How to hang a wooden spice rack on a pantry door
We did have to put screws right through the spice rack, but I didn’t mind because I knew the spices would cover them anyway!
There’s 4 screws total- two on the lower part of the top shelf and 2 on the lower part of the bottom shelf, about 1 1/4″ in from the sides. Use a large drill bit and go about 1/8″ into the screw hole. This way, the screws countersink and won’t get in the way of the spices!

To make sure we put the anchors in the right place, we first put the screws in so they just poked out the back.


We then held the spice rack in the exact placement we wanted it on the back of our pantry door (using a level of course) and then pushed on it so that the screws made tiny indents on the door. Using those marks, we then screwed in the hollow door anchors!
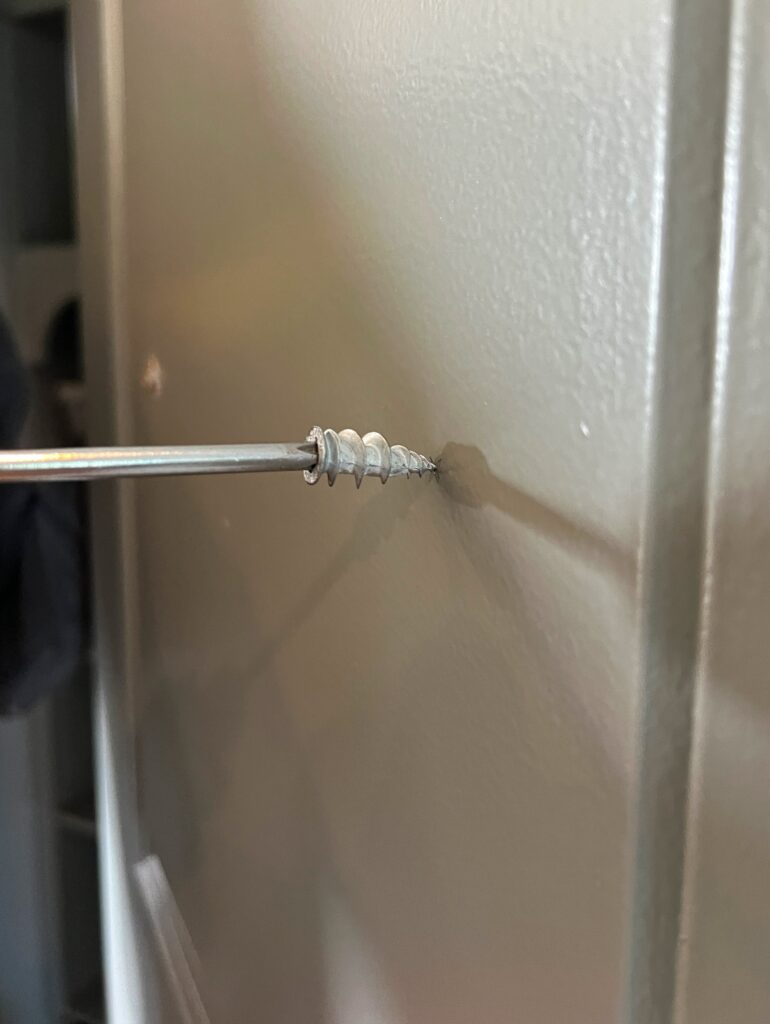
See how the screws sank right in? You could fill these and touch up with that stain marker, but I just left ours! Again, you don’t see it unless the spice rack is empty!
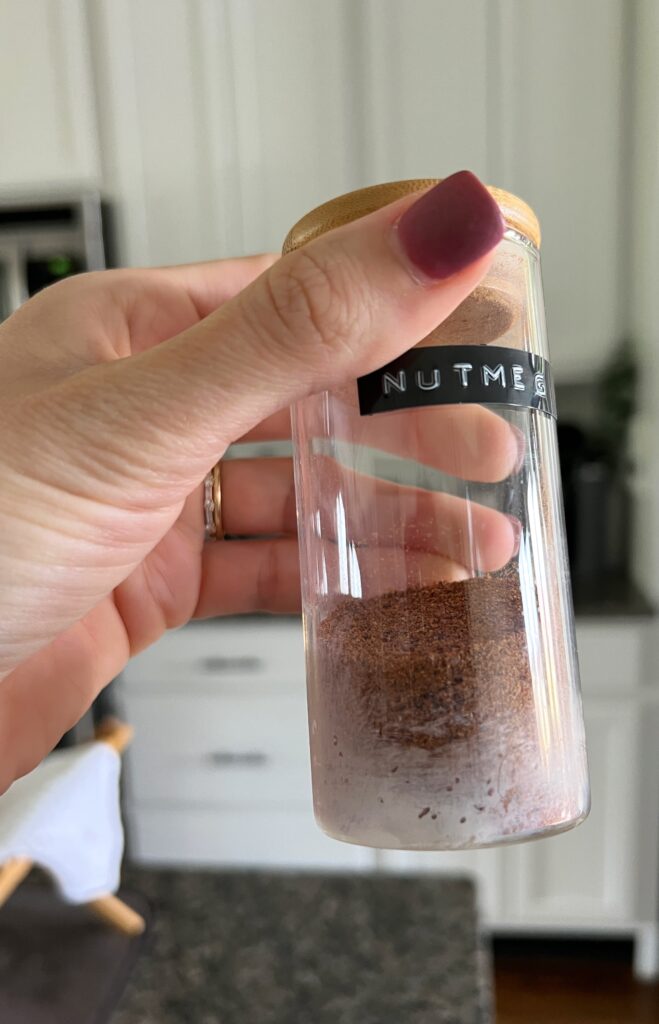
Step Seven: Label Spice Jars
The final step and absolutely the most satisfying! I’m a big fan of the classic, simple look glass jars with black labels.
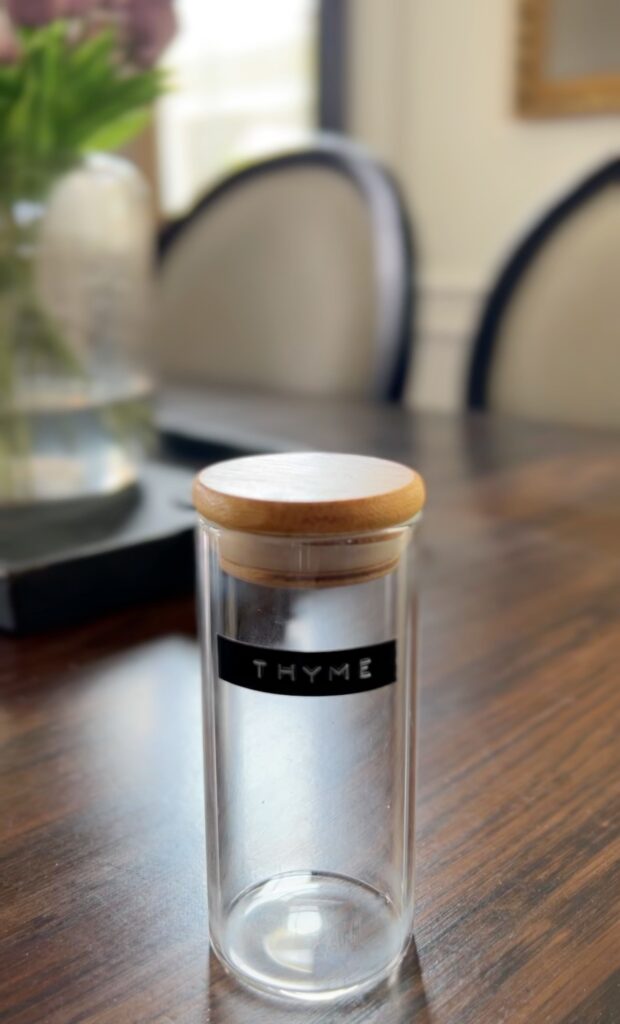
This label maker is so affordable and easy to use! It comes with 3 tapes (2 black, 1 red) and I was nervous I wouldn’t have enough to do my 30 spices, but I didn’t even use one full roll of black tape!
I’m also really happy with these glass spice containers that I used! They were an affordable option in comparison to others I saw and they’re so pretty!
This hanging spice rack is truly such an easy DIY project! No need for a kreg jig or pocket holes, just some simple cuts, a little wood glue, and a few nails!
Keep in mind- you can also make this a wall-mounted spice rack! Determine the best place for you and your family. Whatever gives you easy access and helps you free up some cupboard space!
I’ve never had such a beautiful and functional spice rack and now i’ll never go back. What do you think? Would you try making your own DIY spice rack?!

This is brilliant! I love how these turned out for a fraction of the cost!
Can you confirm what size rods you used? You mention using 3/8″ rods but the link is for 3/16″.
Thanks 😉
Hi Daisy!! Thank you so much 🙂 And oops my bad I’m going to fix that- thank you for letting me know! I just checked my Amazon order and it’s 3/16″ that I used!!