

Wallpaper can be intimidating, I get it! But don’t worry… I’m here to share everything you need to know about how to hang traditional wallpaper!
If you’ve never hung wallpaper, my recommendation would be to start with doing one wall in a small space. My first time wallpapering I did a tiny wall in our powder room and I used peel and stick wallpaper. This gave me the confidence to try it again!
I’ve used all 3 types of wallpaper (yes, there are 3 types!- check out this blog post to learn more) and traditional is my favorite to work with! Hopefully this step-by-step tutorial gives you the tools and confidence you need to try it out!
Disclaimer: This post contains affiliate links. This means, if you purchase something from a link I provided, I will receive a small commission. This is at no extra cost to you! Thank you for your support!
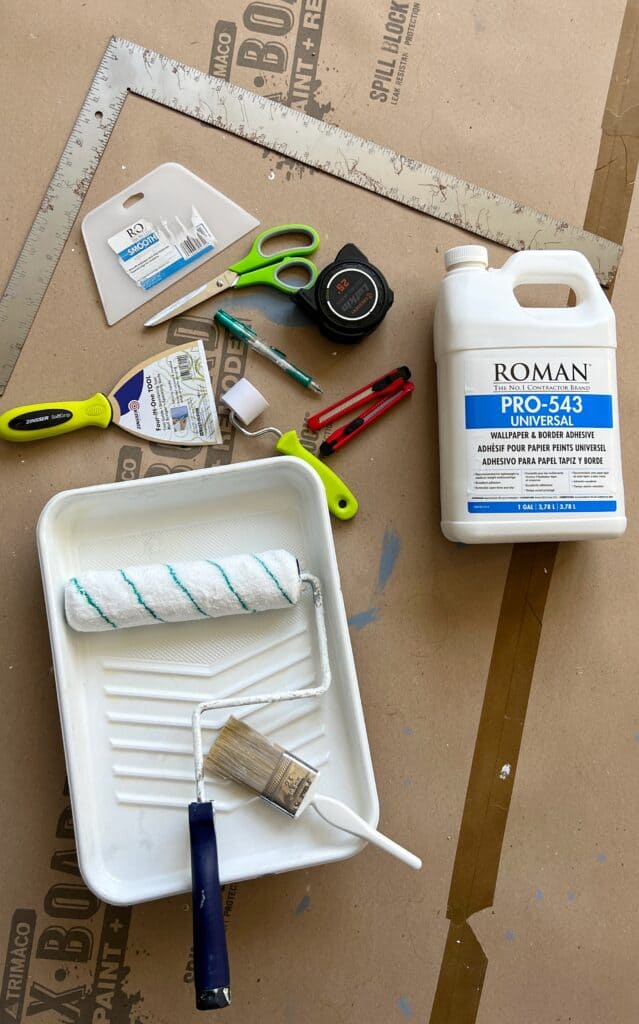
TOOLS:
- Utility Knives
- Laser Level
- Measuring Tape
- Wallpaper Smoothing Tool
- Wide Putty Knife
- Seam Roller
- Carpenter Square
- Scissors
MATERIALS:
How to Calculate Wallpaper
Find the square footage of your wall(s)
The first thing you need to do is calculate the total square footage of the area you’re wallpapering.
- One wall– Measure the ceiling height and the width of the wall and multiply those measurements.
- Multiple Walls– Measure the width of each wall and add them all together. Multiply that measurement by your ceiling height.
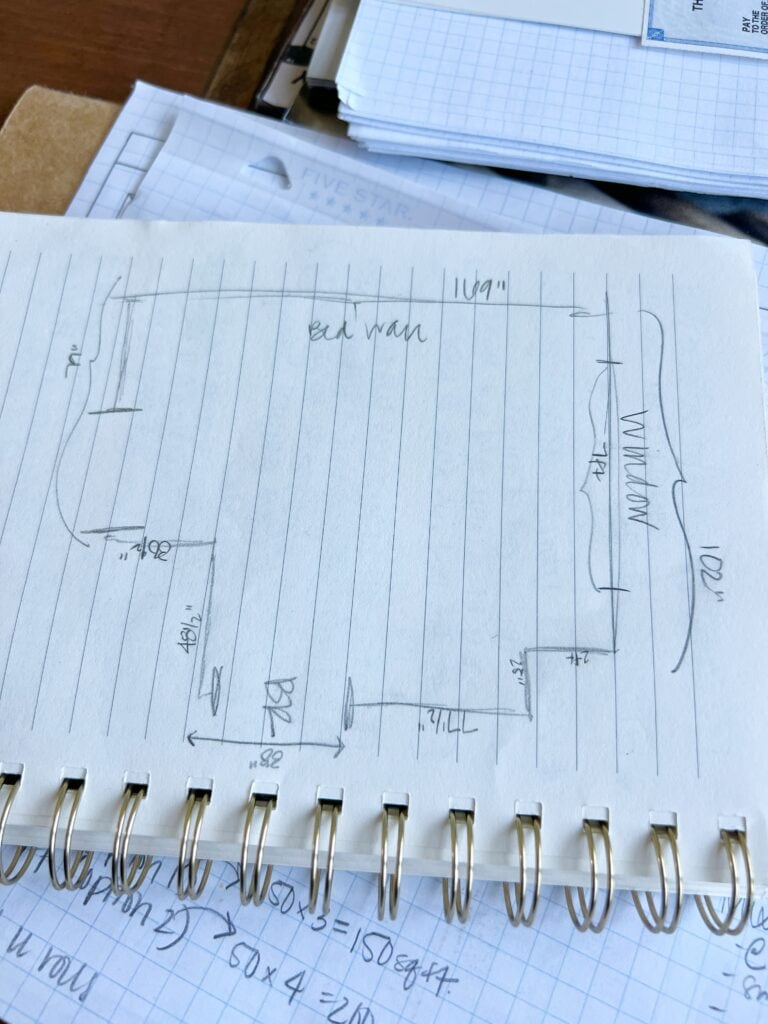
If you’re wallpapering around the whole room like I did, it helps to have a little sketch with your measurements! Don’t worry about deducting windows or doors from your measurements! You’ll have to wallpaper around them and keep the pattern going. Plus, it’s always better to have extra!
Find the square footage per roll
Some brands may tell you exactly how many square feet one roll covers, others might require a little bit of math. Look at the product specifications to see what you can find! Sometimes you have to dig a little.
If you do have to do some math, here’s an example with a wallpaper roll that’s 33 ft long x 1 ft 9″ wide:
- First, convert the width to feet
- 1 ft 9″ = 21″ and 21″ ÷ 12″ = 1.75ft
- Multiply length x width
- 33 ft x 1.75 ft = 57.75 square feet per roll
Determine the number of rolls you need
Take your total square footage and divide by the number of square feet per roll.
Example: If your total square footage is 300 and the wallpaper covers 56 sq ft, you would divide 300/56= 5.3, so you would round up to at least 6 rolls.
Note: Wallpaper sometimes comes in double rolls. Double rolls are just double the amount of wallpaper on one roll. If you’re using my method above to calculate your wallpaper, this shouldn’t matter anyway!
Consider pattern repeat
If your wallpaper has a pattern, you’re going to want to order extra to be safe! Your wallpaper source should specify how often the pattern is repeated. This will give you an idea of how much might go to waste during the install process.
Most wallpaper brands have calculators on their site!
Save yourself the headache and see if your wallpaper source has a calculator! This is likely going to give you a more accurate estimation because they’ll consider the square footage and the pattern repeat.
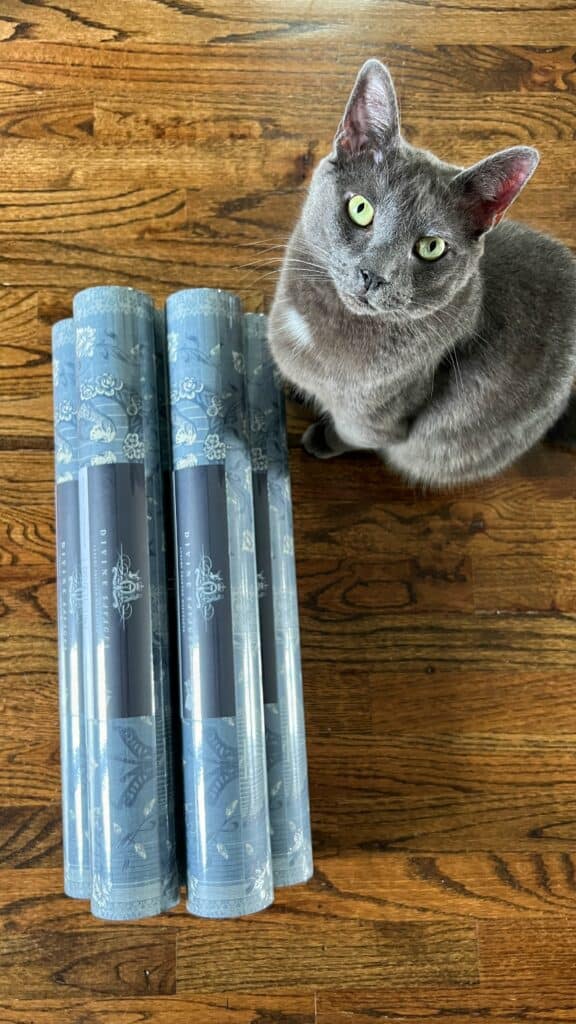
Luckily I found one on Divine Savage’s website, but I did have to search for it!
Step One: Prepping Your Walls for Wallpaper
Make sure your walls are smooth and clean
Just like with painting, you’ll want your walls to be smooth before applying the wallpaper.
I had to fill some holes and sand them down. I also used a 220 grit sanding sponge and just ran that over all of the wall surfaces to smooth down any bumps. After this, make sure you wipe off any dust with a wet rag or a tack cloth!
Do you need to prime walls before wallpapering?
This part is usually optional, but I decided to for a few reasons:
Peace of mind– I simply felt better knowing my walls were in the right condition for wallpaper.
You can tint it– You’re able to tint the primer to a color similar to your wallpaper. (You can ask at the hardware store or mix paint in yourself!) This way, if your wallpaper seams shrink or if you didn’t perfectly match the seams, it’ll be very difficult to tell!
It makes installation easier– The primer allows for more shifting of the wallpaper while it’s on the wall!
Easy removal– If you’re concerned about removing your wallpaper in the future, you won’t want to skip this step! (see below!)
Why I loved using Zinsser Sheildz Wallcovering Primer
This is the primer I used and it’s great! You can wallpaper 2 hours after applying it! The application doesn’t have to be perfect- you just want to get it on the wall!
By the way- this stuff really does help with easy removal. How do I know? Well… after I finished wallpapering the whole room I decided to take down the first panel because I wasn’t happy with it. (I didn’t use enough glue and the paper was lifting in one spot)
All I did to remove the wallpaper was use my steamer! It worked perfectly and the wallpaper peeled off in one piece with no residue! Just for reference, this panel had been on the wall for over 2 weeks. Let’s just say I’ll be using this primer anytime I hang traditional wallpaper.
Can I wallpaper over textured walls?
The short answer is yes, you can.
But, there are different types of textured walls and different types of wallpaper, so you have to do your research and turn to the suggestions of the wallpaper manufacturer. Certain colors and patterns may not be the best choice for textured walls.
Ultimately, it will be easier and look better to wallpaper over a smooth wall, but you 100% can still do it! You also have the option to do a skim coat to make the wall smooth before installation.
Here’s a great article on what to do if you want to wallpaper over textured walls.
Step Two: Setting up!
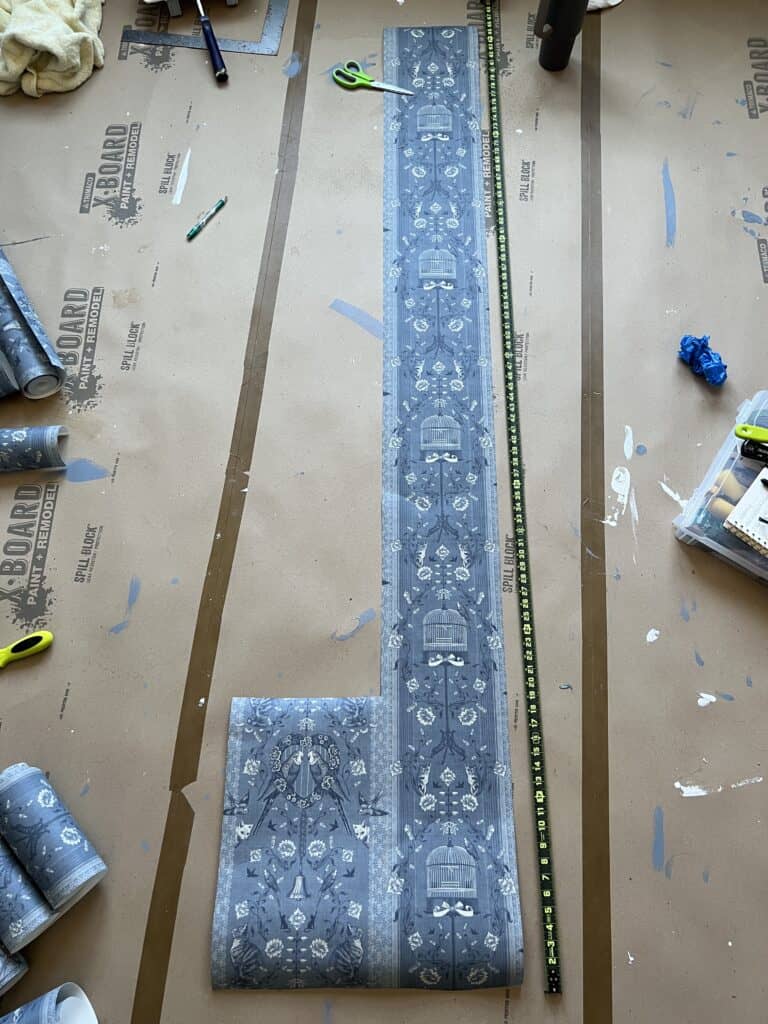
Have a cutting station
It’s nice to have a designated area setup for making your cuts! You’ll need measuring tape, a pencil, a carpenter square, and scissors. The area I was wallpapering was 81.5″ in height so I cut my panels 85″ long. This allows some excess wallpaper on the top and bottom to trim off.
Tip: Leave your measuring tape set to the length you need for quicker cuts!
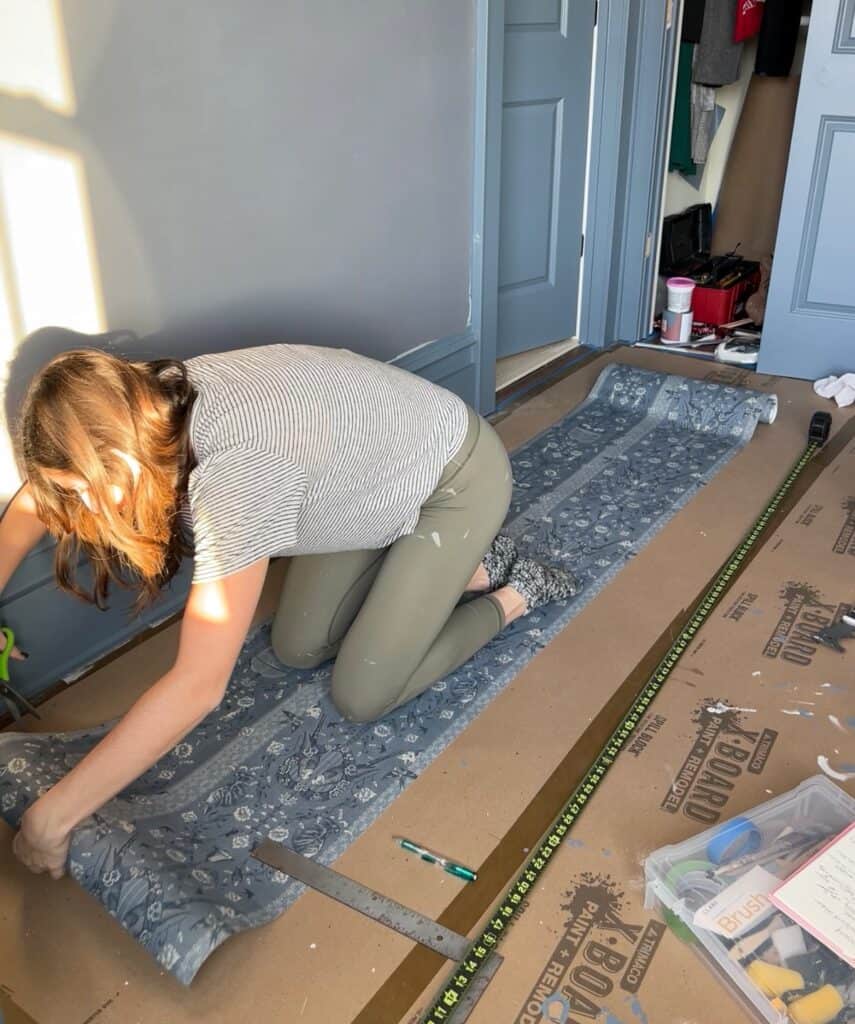
Cutting the panels
I used a carpenter square and pencil to mark the wallpaper. You don’t really need to use a square, but I liked to cut them straight just in case. Scrap pieces can definitely come in handy!
I drew right on the wallpaper (since I knew the marking would be trimmed off anyway and cut with scissors.
Do you need to make all your cuts ahead?
When I was researching all things wallpaper, I saw a couple sources mention making all of the cuts ahead. I’m no professional, but I don’t think this is a great method! If you don’t plan it out right, you could end up wasting a lot of wallpaper. Cutting as you go works just fine!!
Gather all your materials!
Before you hang up your first panel, make sure you have a utility knife with a sharp blade, your wallpaper smoother, your putty knife nearby!
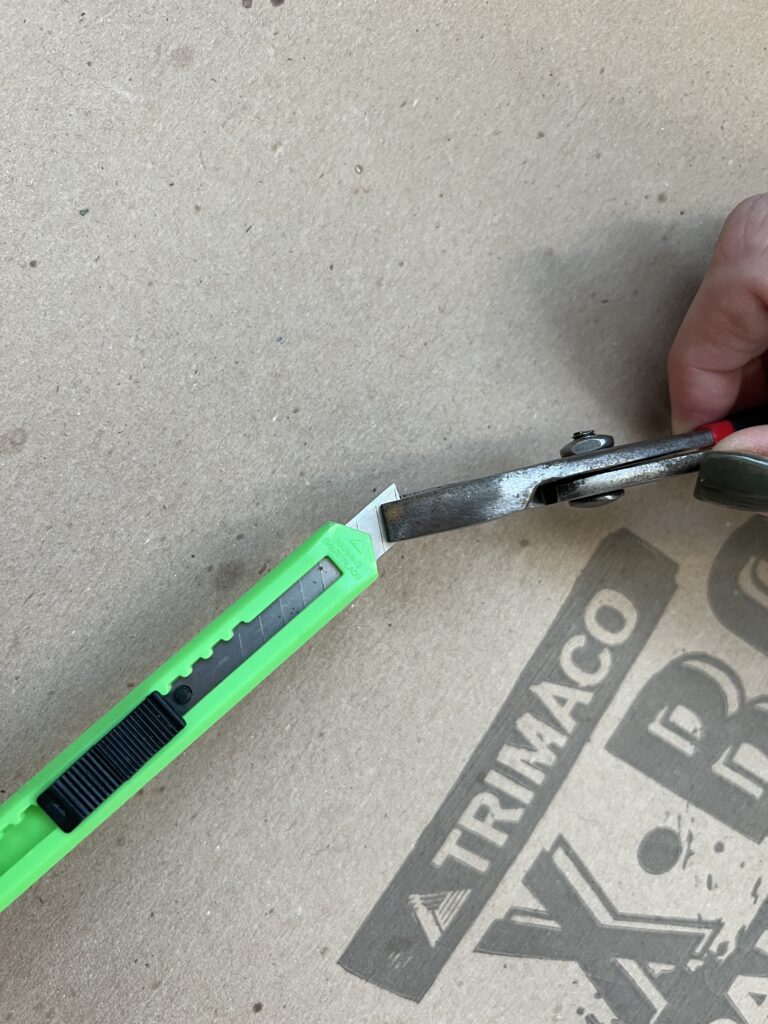
How do you break off a new blade on a utility knife?
Wearing safety glasses, extend the blade one line past and use pliers to break it off. Safely discard the broken blades into painter’s tape. Place it on the sticky side, roll it up, and discard it!
Another method uses the cap on the back of the utility knife. You take it off, place the blade in the slot, and break. This is great when you don’t have any tools nearby, but I don’t feel the safest when I do this!
Step Three: The First Panel
The first panel is very important! It needs to be perfectly level (so the rest of the panels are too!) so where you start does matter.
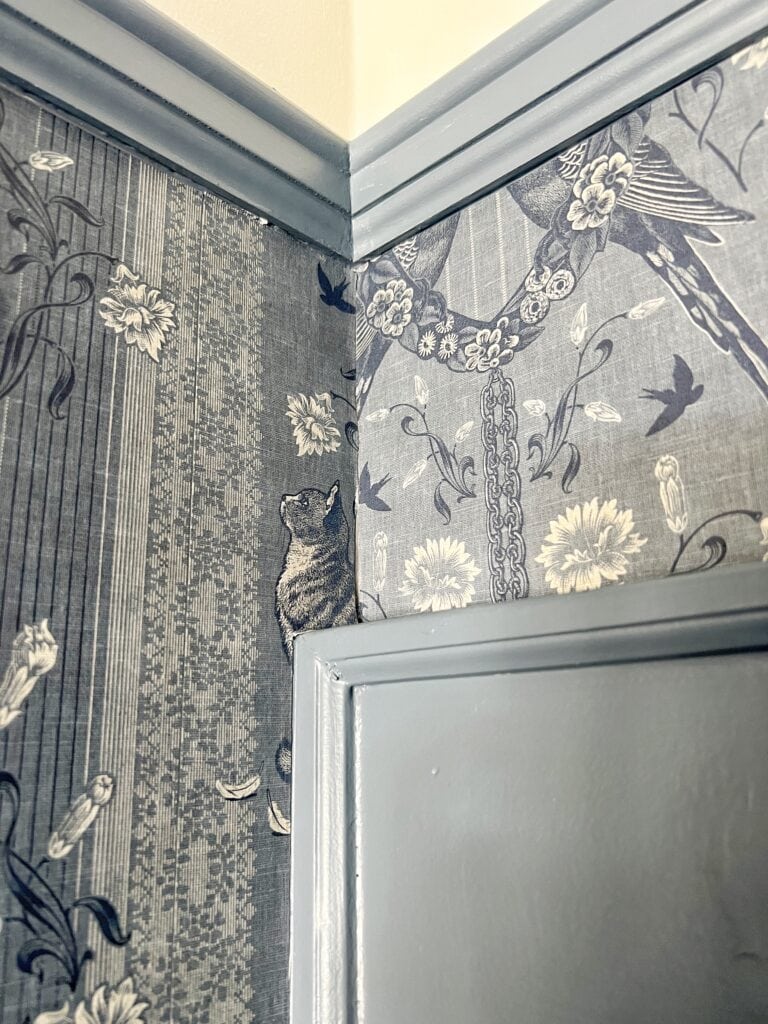
How do you decide where to start wallpapering?
If you’re just doing one wall, this will be a much easier decision! You’ll just choose a corner to start from!
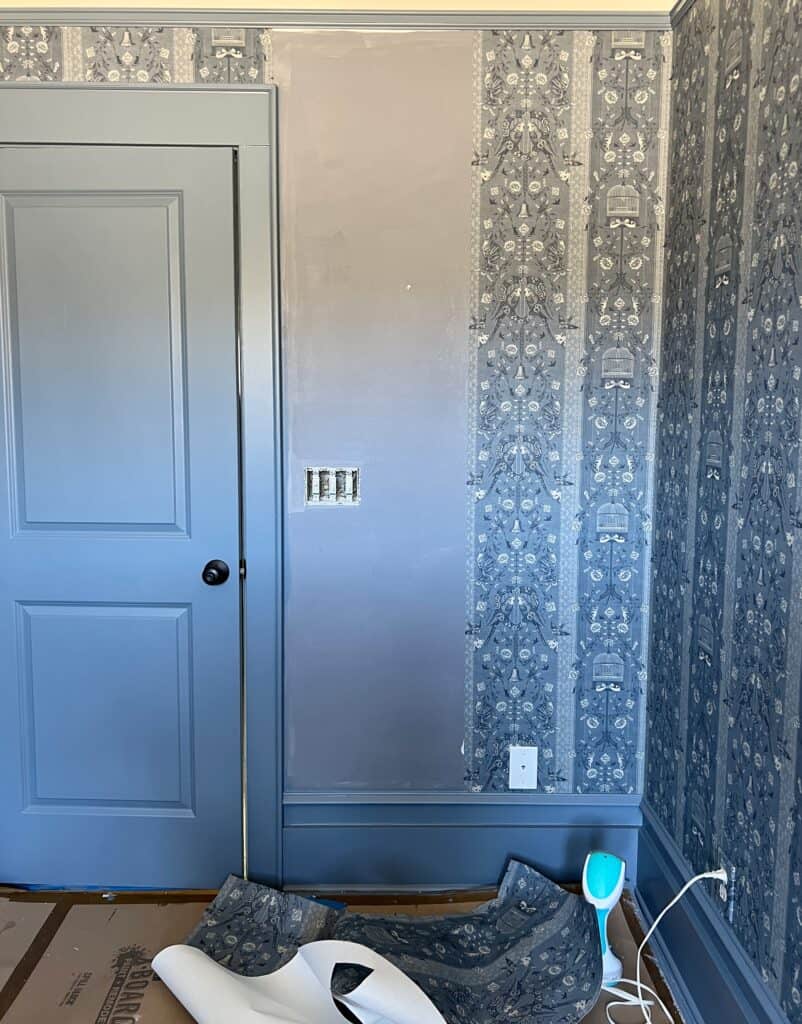
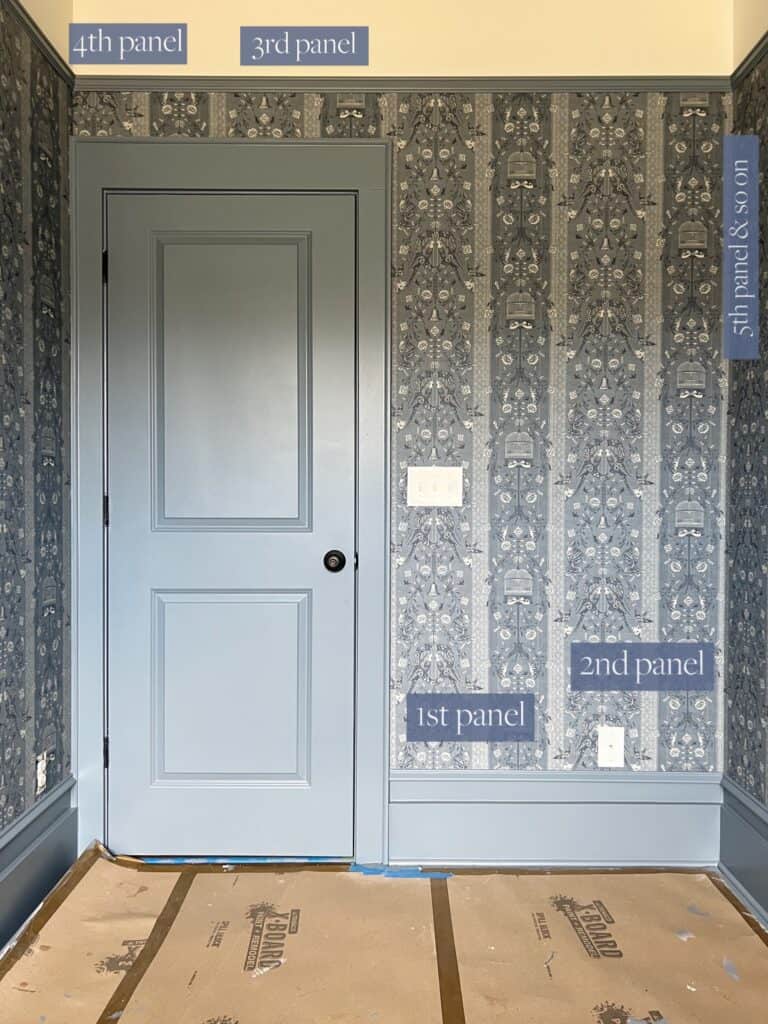
If you’re wallpapering around the room, you’ll want to start in the least noticeable corner. Why? Because once you work your way around the entire room, it’s very possible that the pattern may not match up! As you can see, my pattern didn’t match up! But luckily it’s in a small, hidden corner above the door frame.
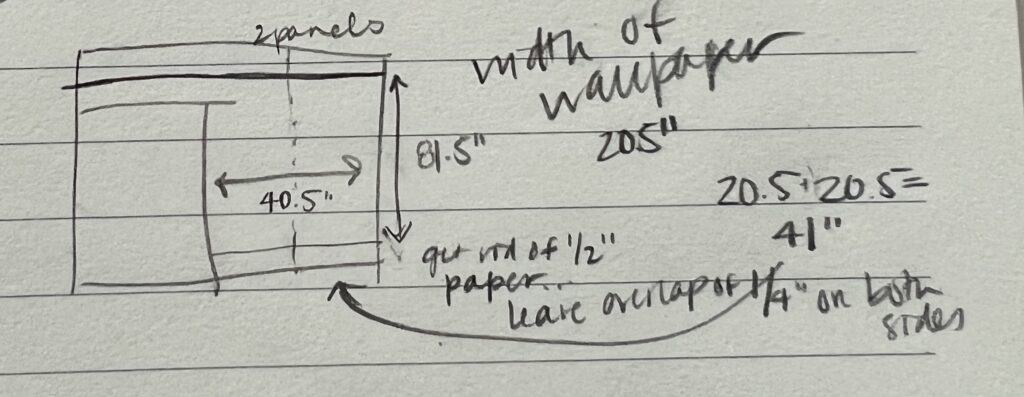
In most cases I would start in the corner, but I decided to start to the right of the door frame. Let me explain…
I measured the distance between the door and the right corner and it ended up being just 1/2″ smaller than the size of two panels.
See where I’m going with this? It was the perfect amount of space to fit two full panels. If I started in the corner, I would have had to cut a huge chunk out of a panel to fit around that door.
Benefits of starting in this spot:
- It was easier! Having to cut around door frames isn’t my favorite…
- I saved wallpaper!
- This wall is a better focal point with 2 full panels
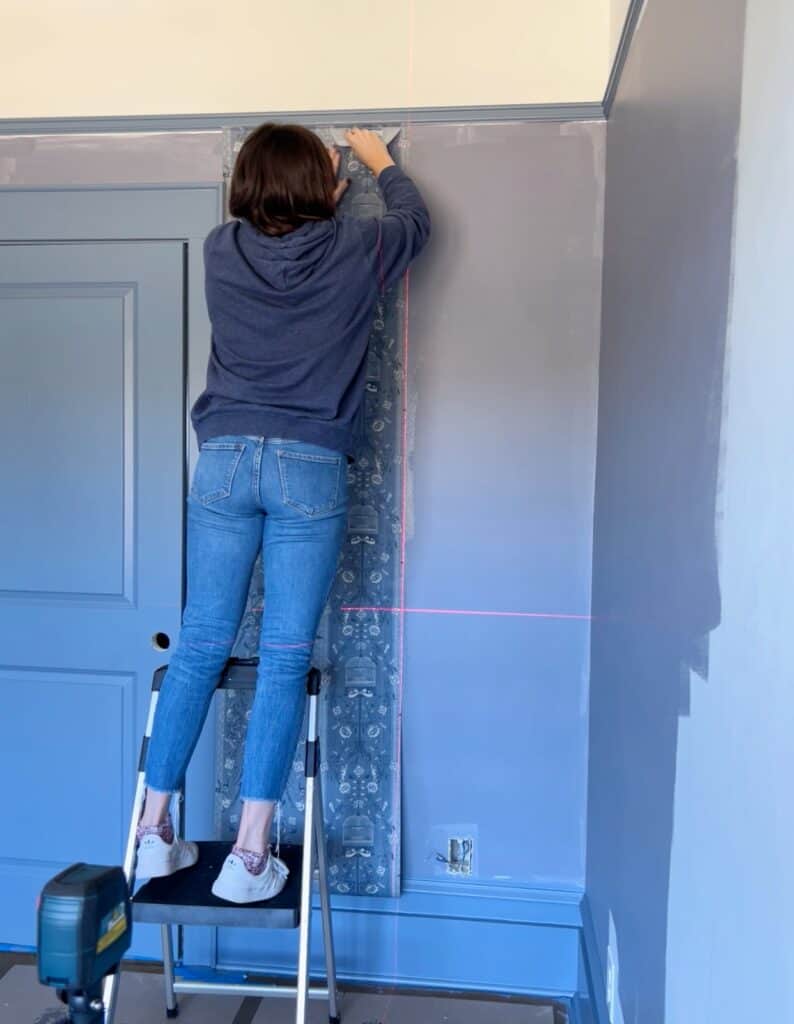
Making sure your first panel is level
It’s not likely that where you’re starting is level, so plan to have at least 1/4″-1/2″ overhang.
Note: If you’re starting in a corner and plan to go around the entire room, leave the overhang and don’t trim it yet! It will make more sense when I go over how to do corners!
Once you decide how much of an overhang you’re doing, deduct that measurement from the width of your wallpaper. My wallpaper was 20 1/2″ wide and I did a 1/4″ overhang so I set the laser level at 20 1/4″ from the door frame.
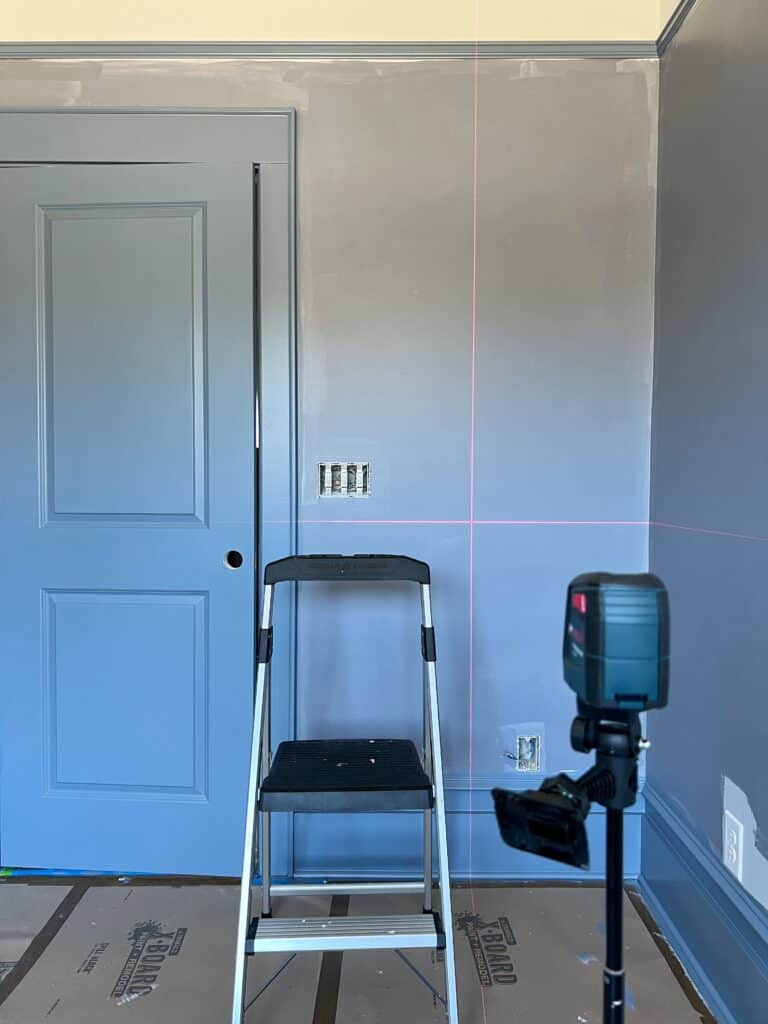
If you don’t have a laser level, you’ll need to measure, mark, and use a large level to draw a straight line to follow!
I highly recommend getting a laser level! This is the one I have and it was truly a life safer for this project (and most other projects). Once it’s set up, you’re good to go!
Step Four: Hanging the Wallpaper
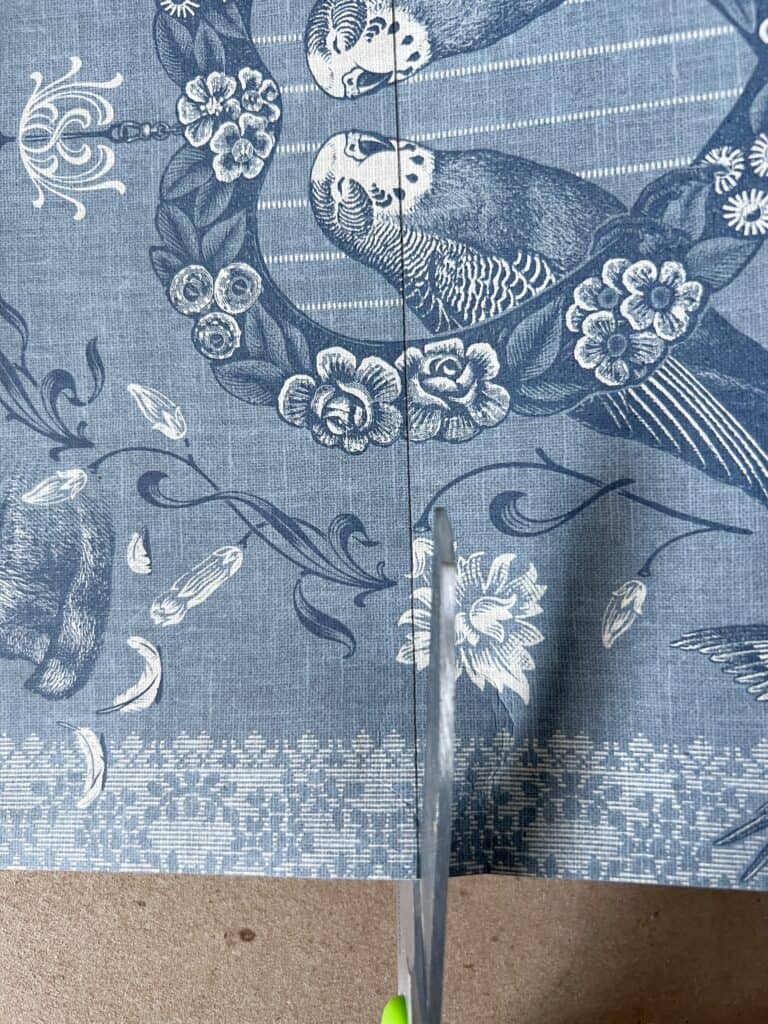
Cut the right part of the paper!
It is SO important that you pay attention to the pattern before each cut. (Ask me how I know…)
For each panel, I held up the roll of wallpaper, found where the pattern matches, and then I make a tiny tear about 2 inches beyond so I know where to start my measurement of 85″ long!
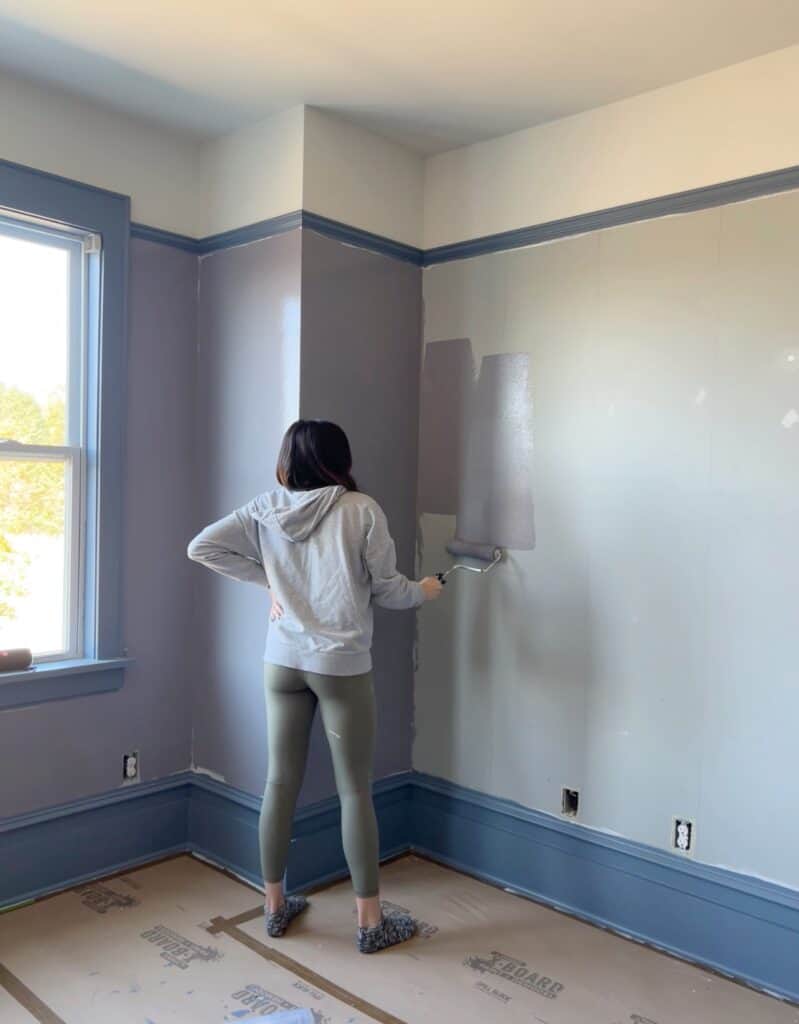
Apply the glue
My biggest advice is to be generous with the glue! I definitely didn’t use enough on my first panel (it was lifting in one area) so I ended up taking it down and re-doing that piece!
Get a roller brush with a high nap that’s meant for rough surfaces. A 3/4″ nap is what I used and I loved it! You’ll also want a paint brush for smaller areas too!
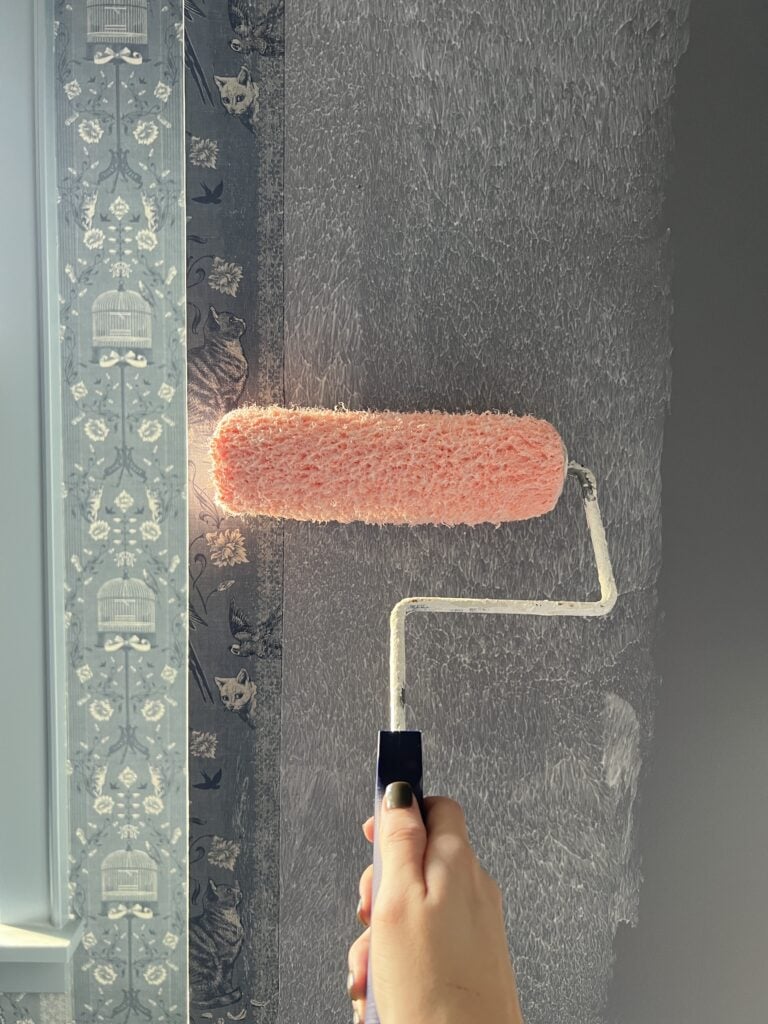
When you’re applying the glue, make sure you get it where the seams will be. This means, on the wallpaper a little and where the laser level is! If you get wallpaper adhesive on your wallpaper or freshly painted trim, just wipe it up with a rag or a sponge fairly quickly! It’s impossible to avoid!
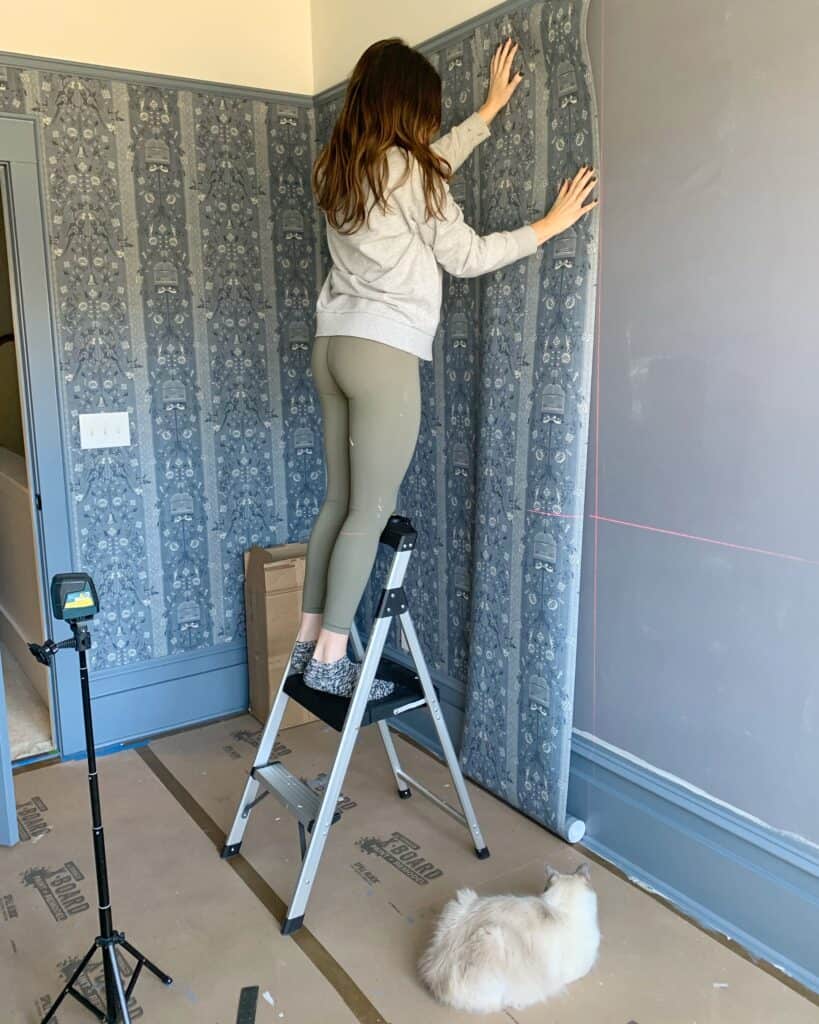
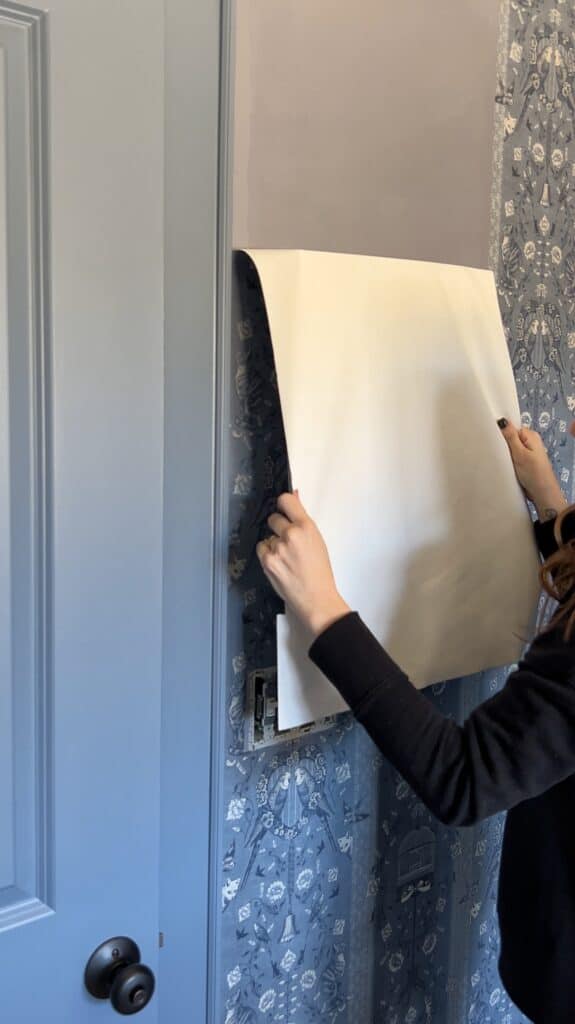
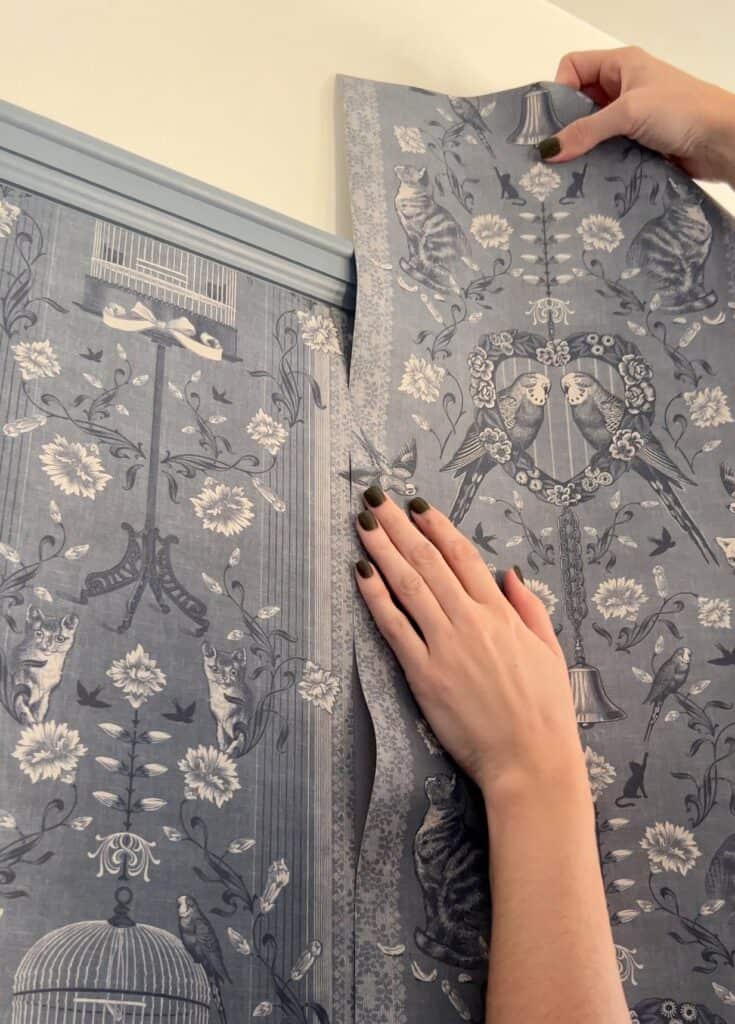
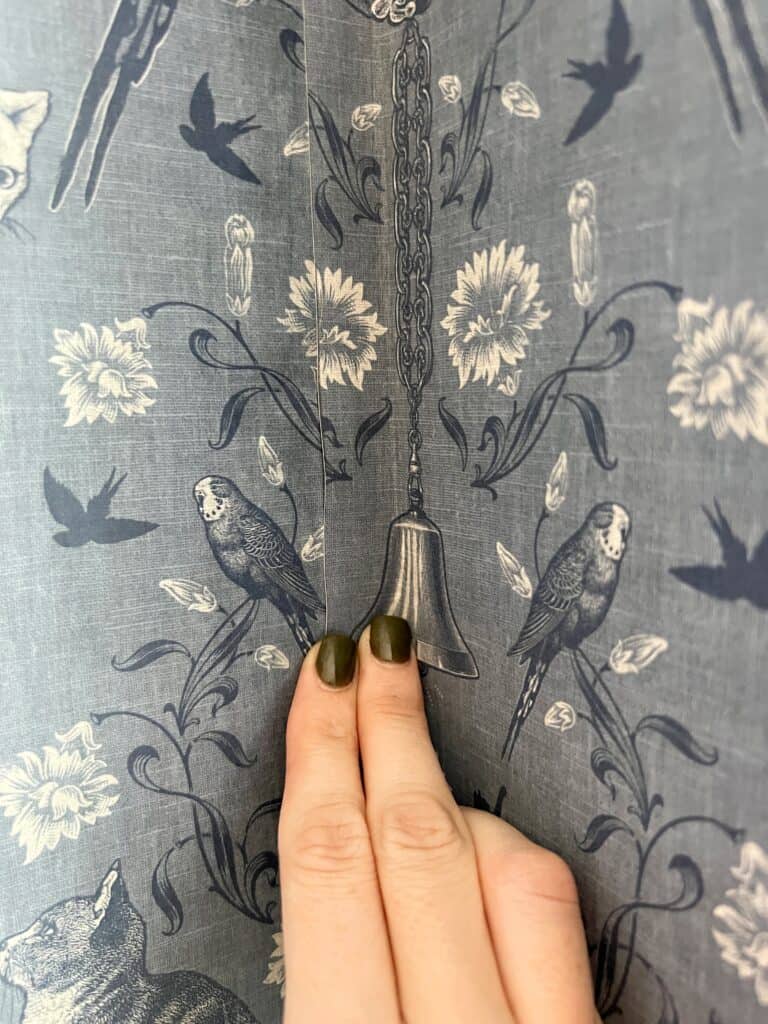
Smooth wallpaper in place
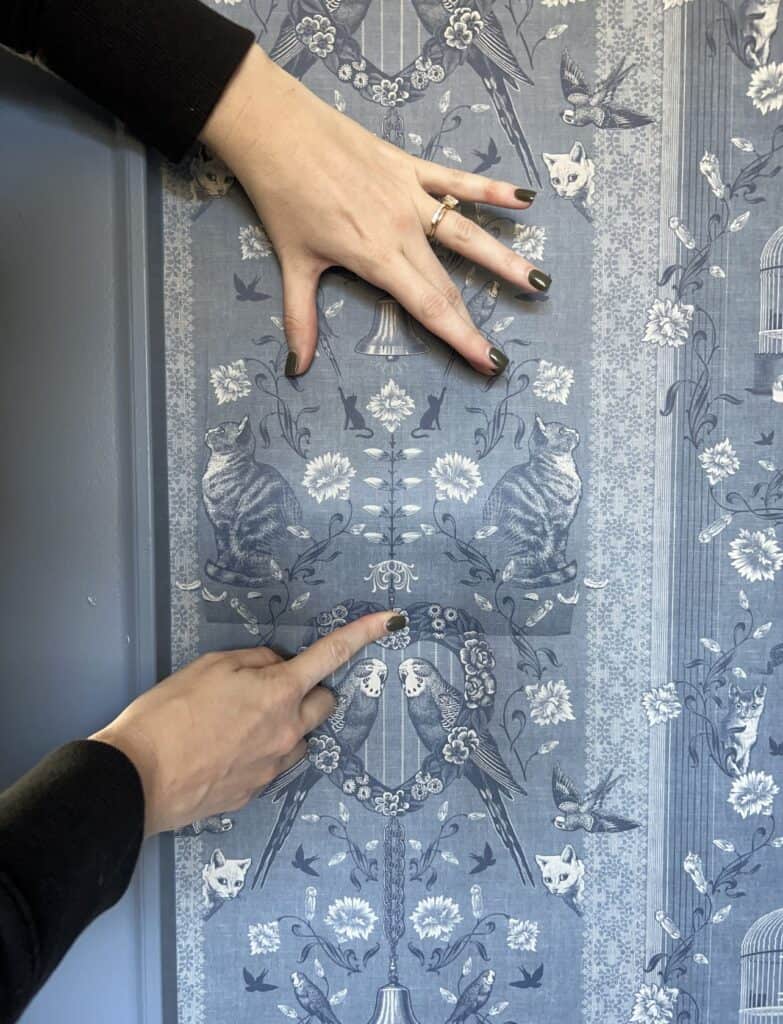
Working your way down, match up the pattern and smooth out towards the laser level!
Do you overlap wallpaper seams?
It depends on your manufacturer’s instructions. All wallpaper is a little different and I know some require you to overlap.
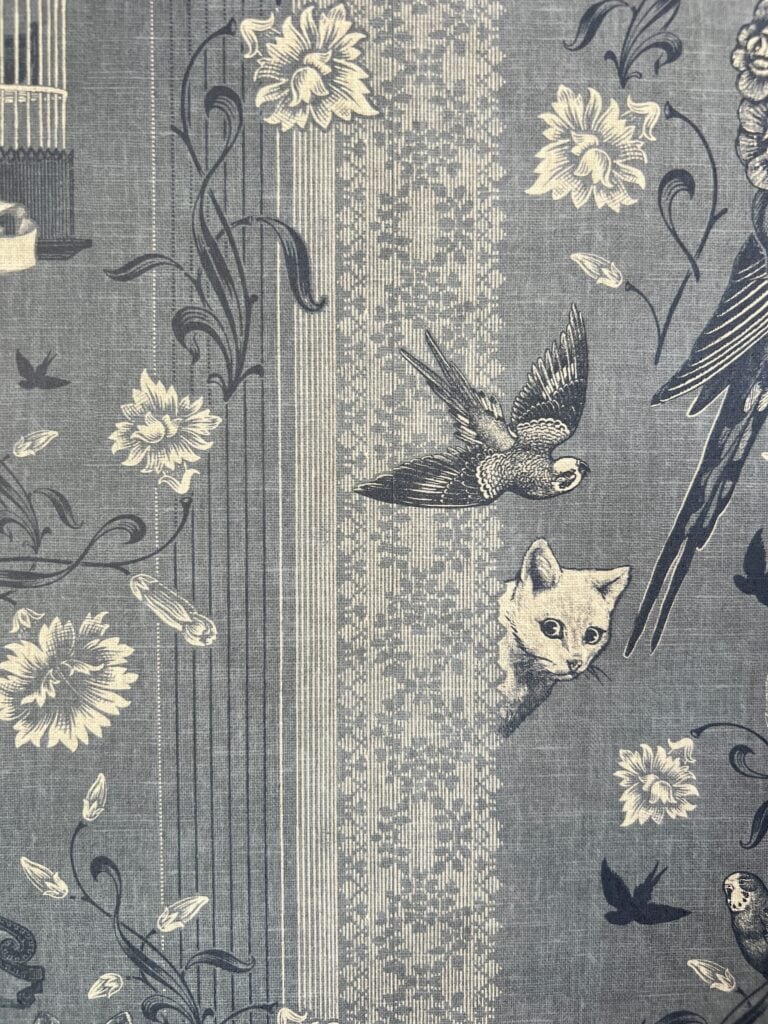
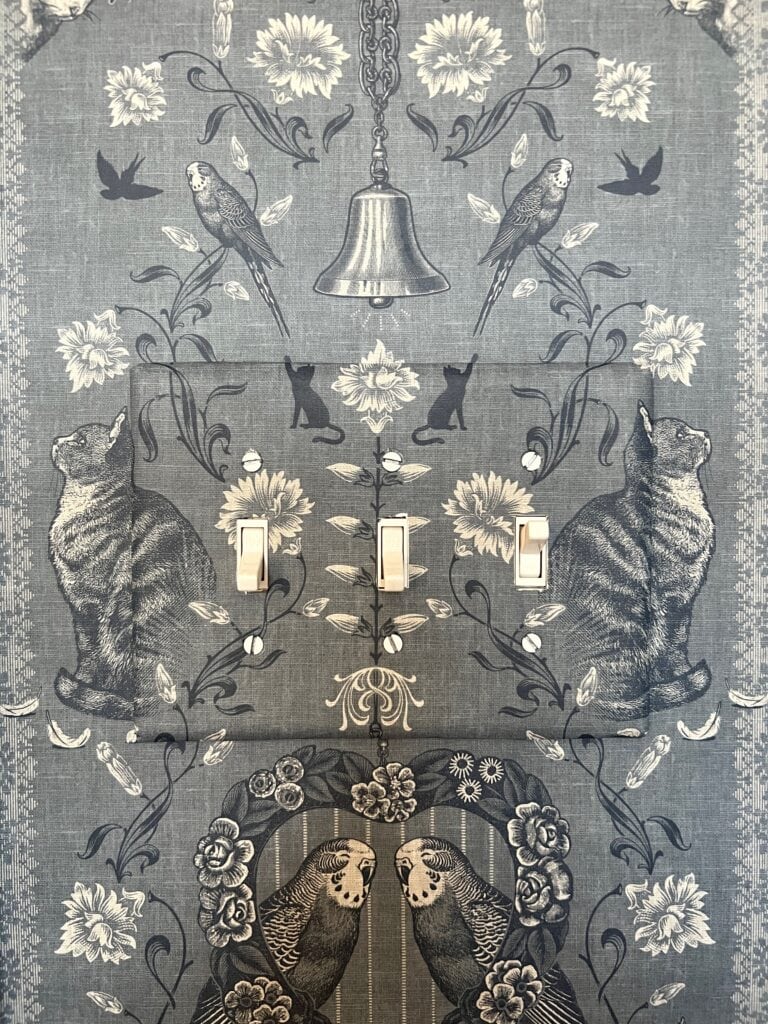
The instructions for my wallpaper were to match the panels at the seam without overlapping. Can you see the seam? Look to the tip of the bird’s wing and you’ll see it! They blend in so well!
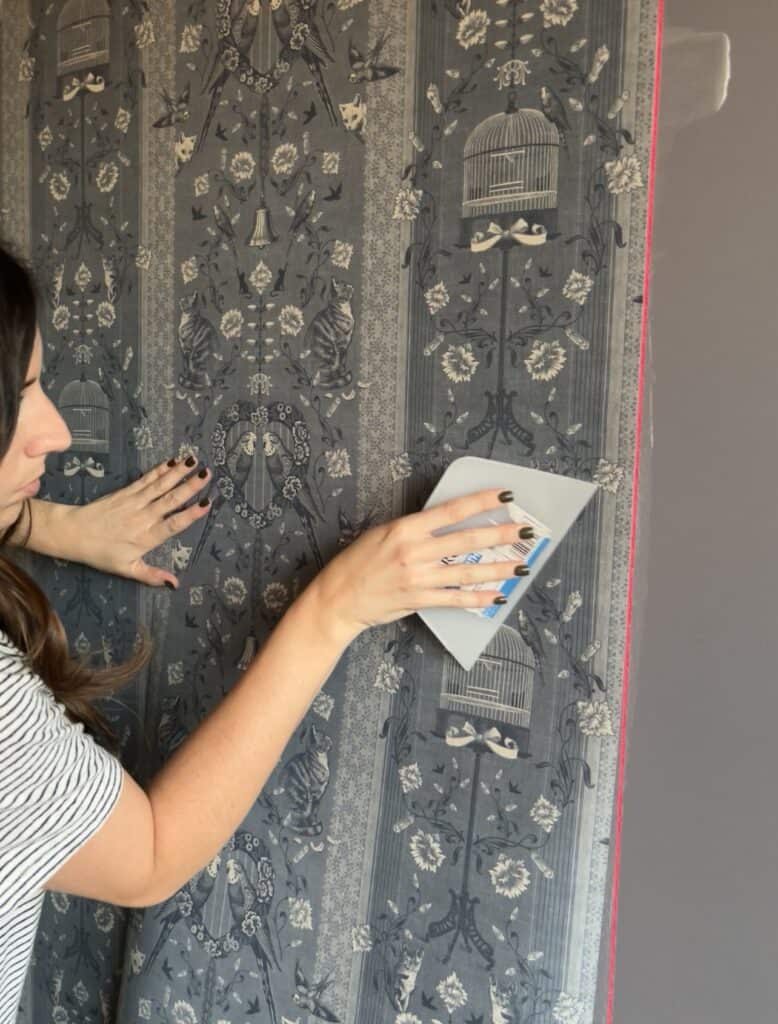
Trim excess wallpaper
Before trimming, I like to add extra adhesive to the wall underneath the top and bottom of the panel with a paint brush. Usually those are the last parts I get to so I felt like the glue would sometimes dry up a little.
A sturdy putty knife will be your best bet for trimming the wallpaper!
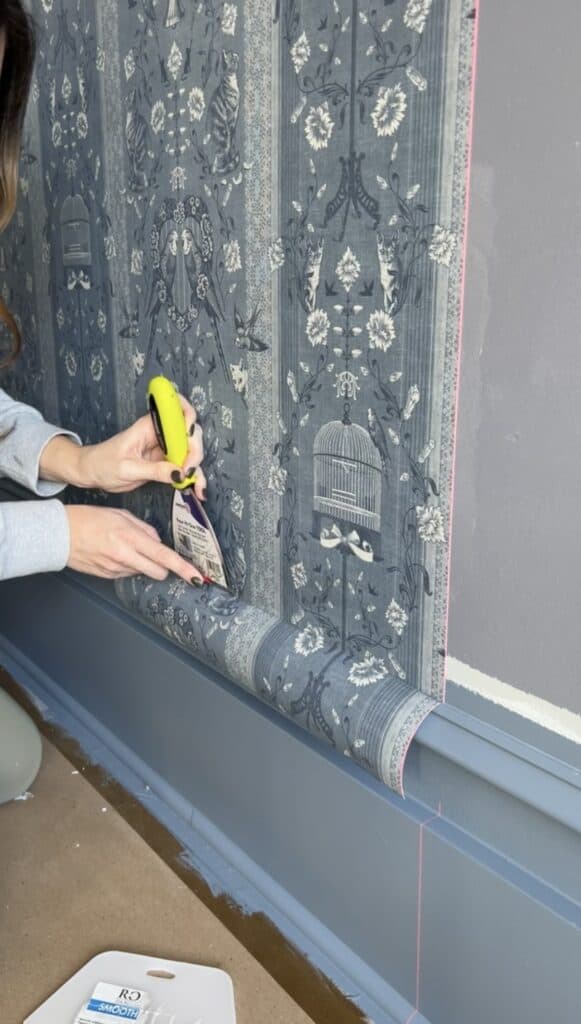
I recommend slowly working your way down with the trimming. Sometimes I would drag it too fast and my cuts weren’t as even as I’d like them to be!
Make sure you change your blade often!
Break off a new blade every other panel or so! I know it sounds like a lot, but trust me, you want to have clean cuts or else the wallpaper will tear and look sloppy. I ended up going through two of these utility knifes, so it’s worth just getting the pack! If you don’t know how to change the blades, refer to step two.
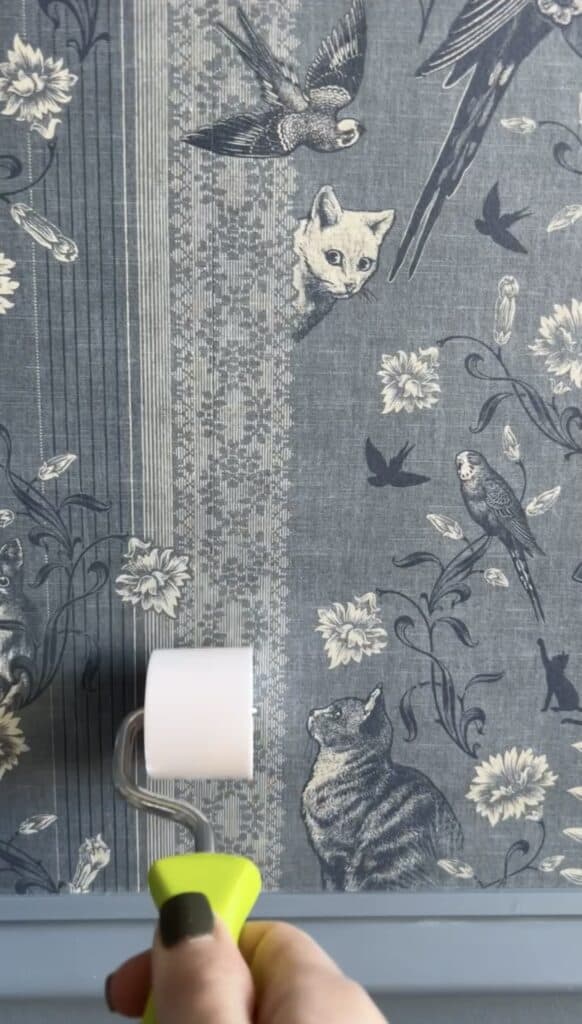
Use the seam roller
Using the wallpaper seam roller is such a fun finishing touch to each panel! Rolling this over the seams helps flatten it down and seal it into place. I wouldn’t say this tool is necessary, but it’s definitely nice to have especially if you plan to wallpaper again!
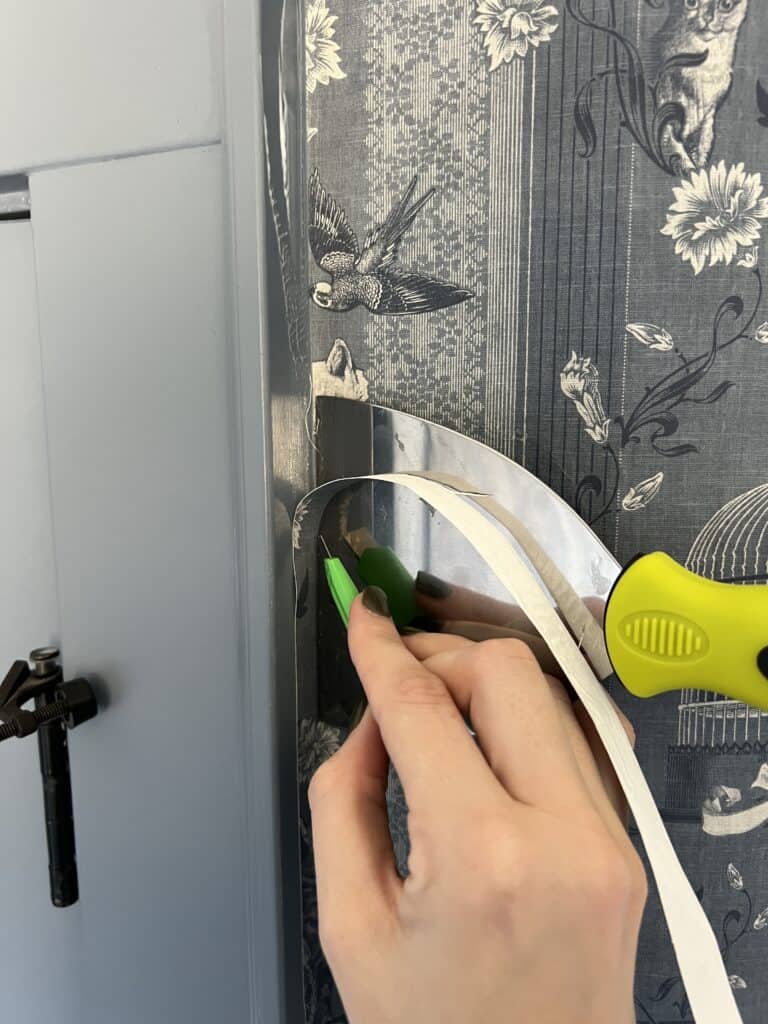
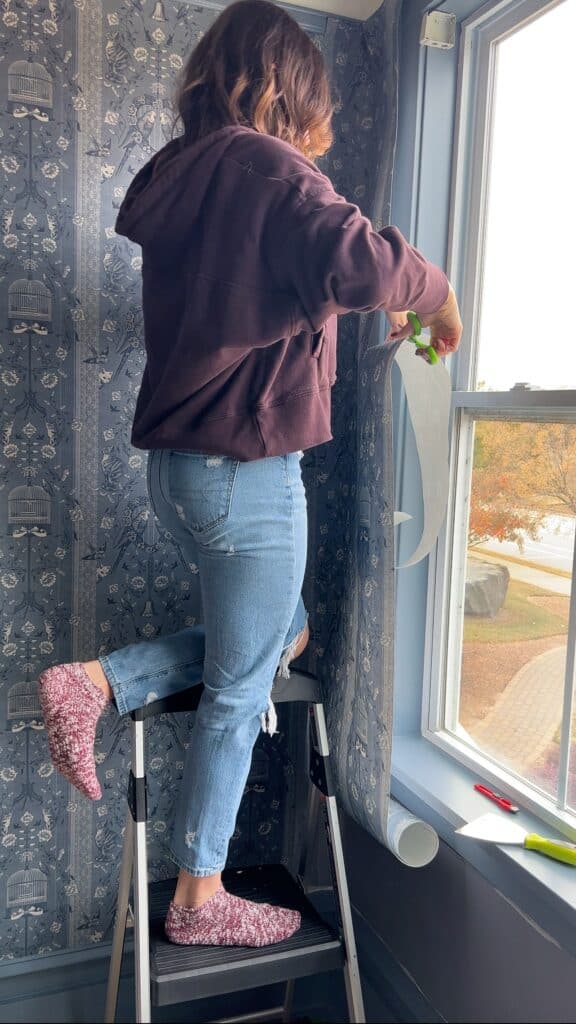
Wallpapering around obstacles
If there was anything I learned about wallpapering around windows and doors, it’s to cut off majority of the excess before hanging it!
You can see in the photo below I was cutting it off while it was up and that was not ideal! I fussed with this one panel for a half hour!
Wallpapering around windows and doors
For windows/doors I found it was easiest the pre-cut the panel if it was a lot smaller in width. Just be careful with your measurements and be sure to leave extra to trim off!
My wallpaper was on the stiff side, so it was just too difficult to work with when there was a lot extra!
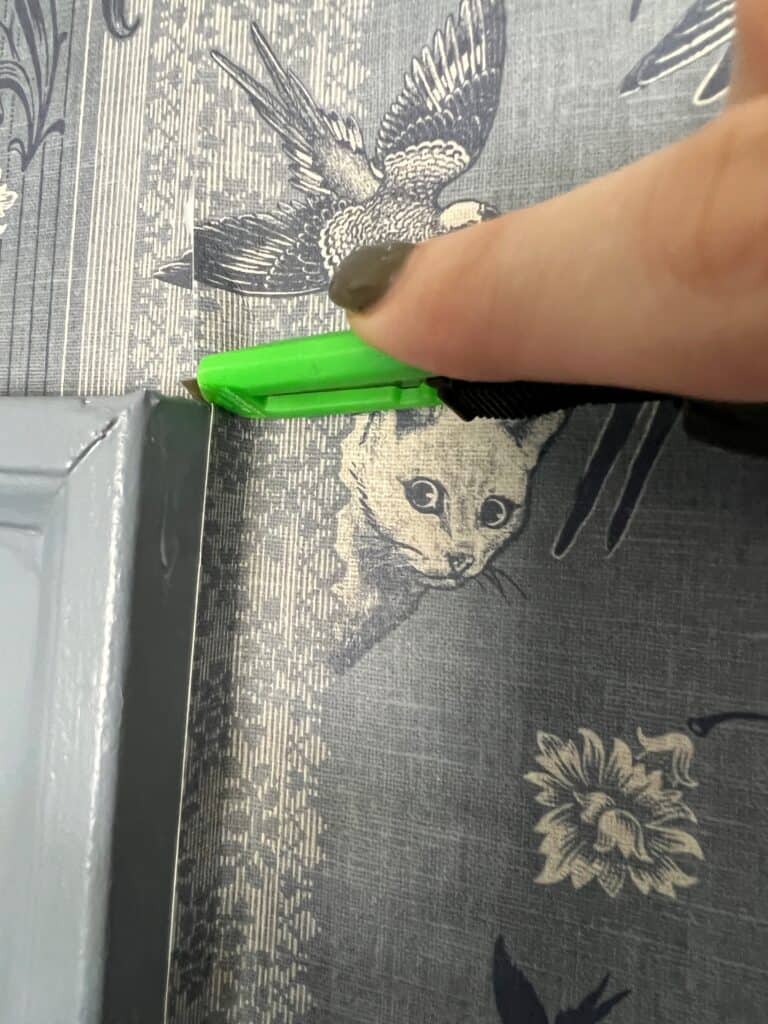
When working around an angle like the door frame below, I’d use the wallpaper smoother and pushed the wallpaper into the door frame. Where it turns, I would carefully cut into the wallpaper with my utility knife!
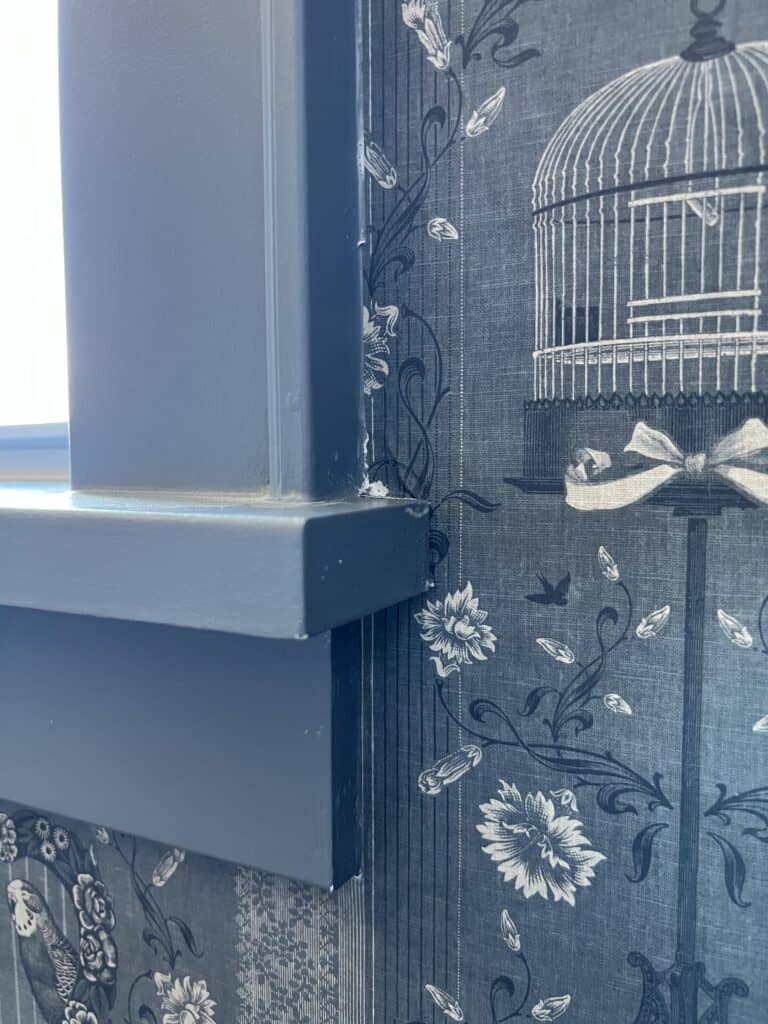
Our window frames were a little tricky due to the shape! It’s not perfect. You can see where I tore the paper a little, but I just touched that spot up with paint later on… no big deal!
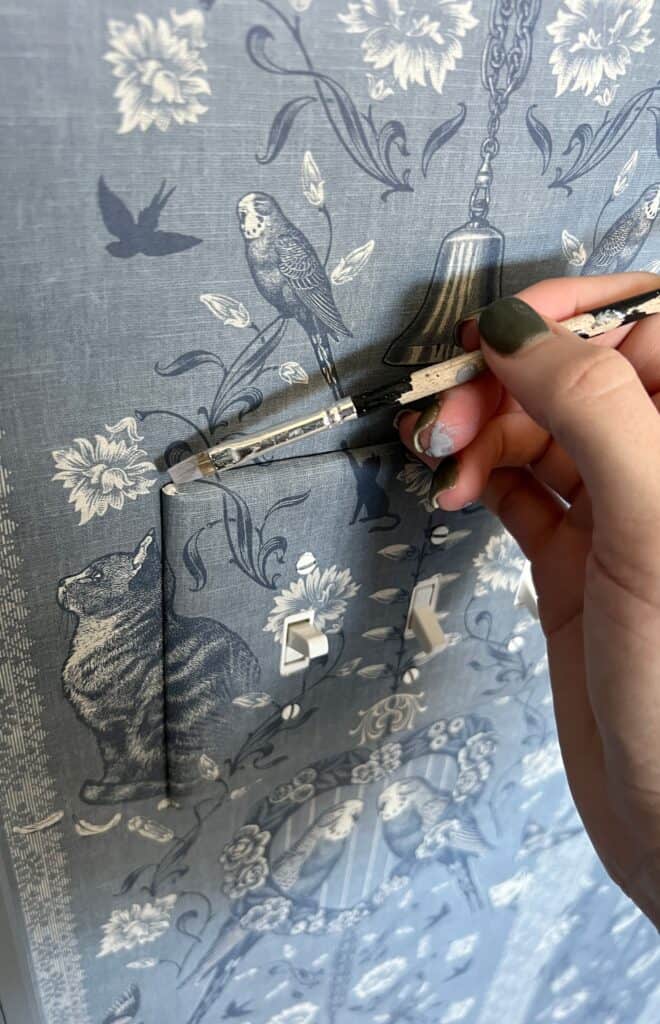
Wallpapering around outlets/light switches
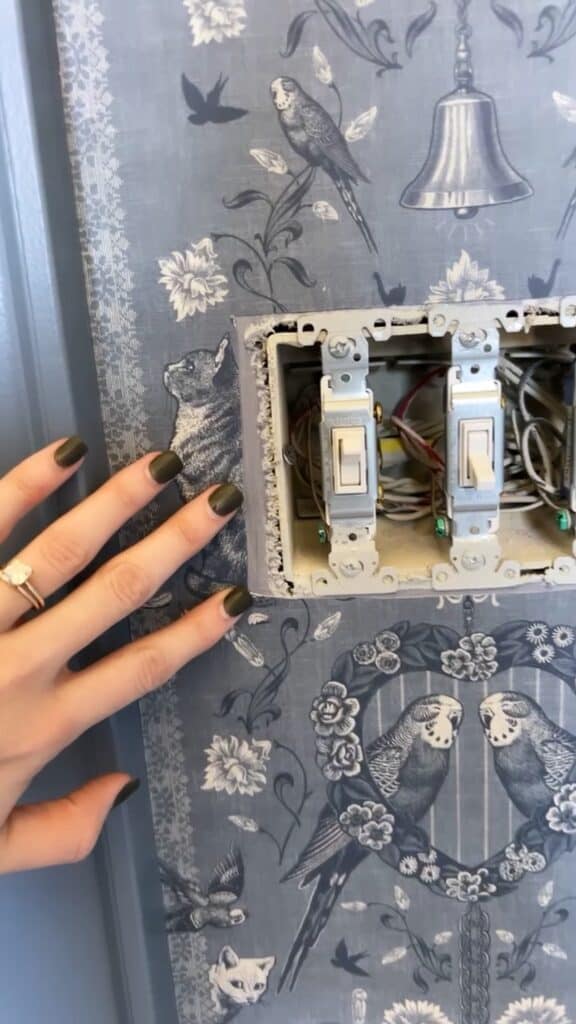
Smooth the wallpaper down until it’s right above the outlet or light switch. With a sharp blade, start small and cut a little slit in the center of the switch or outlet where you know you’re not cutting too far out!
Once you cut in and can see what you’re doing, just go slow and cut around the opening. Take your time! I cut too far out for my first light switch. (This was my first panel that I ended up re-doing anyway!) If this happens to you, you can always get a bigger light switch!
Wallpapering corners
Why can’t you just wrap the wallpaper onto the next wall?
Most walls and corners aren’t straight, so if you wrap your wallpaper onto the next wall, it’s very likely it won’t be level which will throw off the rest of your panels!
Wallpaper also tends to lift more in corners over time so it’s best to avoid that!

How do you wallpaper inside corners?
For inside corners, I used the double cut method. The double cut method means you’ll overlap two wallpaper pieces in the corner and cut through both!
You’ll want your first panel that hits the corner to overlap 1/4″ to 1/2″
Next, you’ll overlap the second piece.
Using a sharp blade, you’ll cut right down the middle. First you’ll pull off the overlap from the top piece (left photo) and then pull off the overlap from the bottom piece (right photo) which will be underneath.


After I pulled these off I would go back in under the paper with more glue and then smooth into the corner with the wallpaper smoother!

As you can see below, my corners didn’t turn out perfect, but I was pretty proud of them and I don’t think anyone would notice they’re just a little off!
How to wallpaper around corners
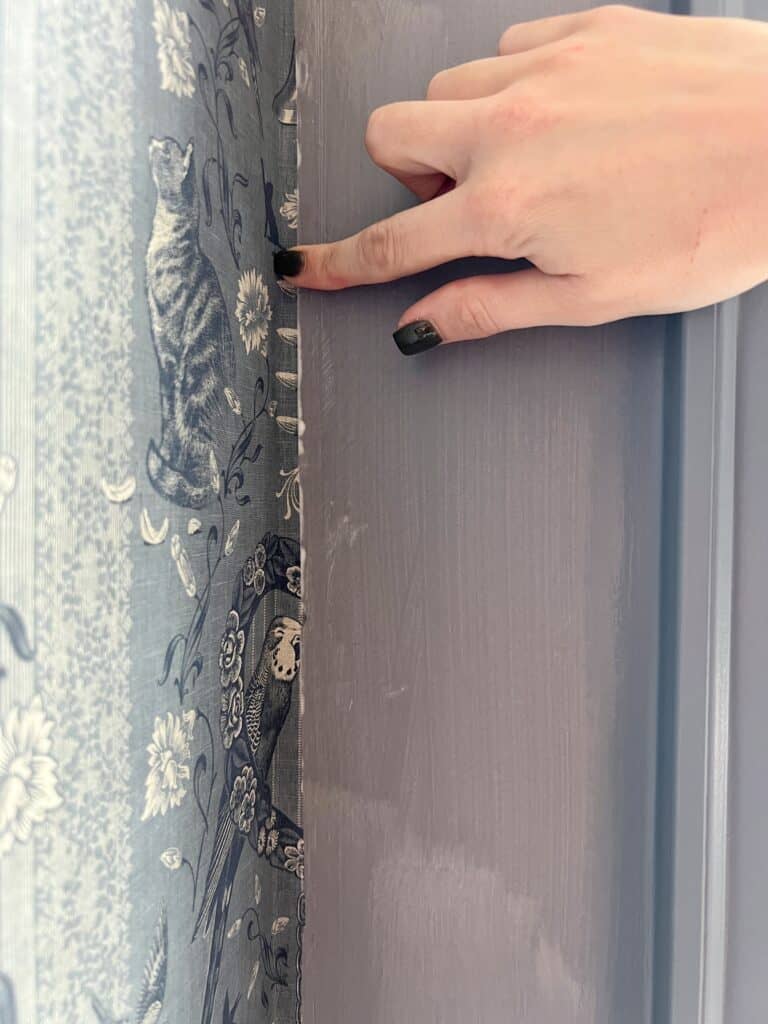
Outside corners are much more profound than inside corners, so I felt it would look best if the wallpaper folded right around the edge. I cut my panel so it extended 2″ to 3″ beyond the corner. This way, the next overlapped piece isn’t too close to the edge.
You really want to make sure the wallpaper is pressed firmly around the corner and not loose in any areas. I found that using my wallpaper smoother at an angle, and firmly pushing upwards, really helped with this!
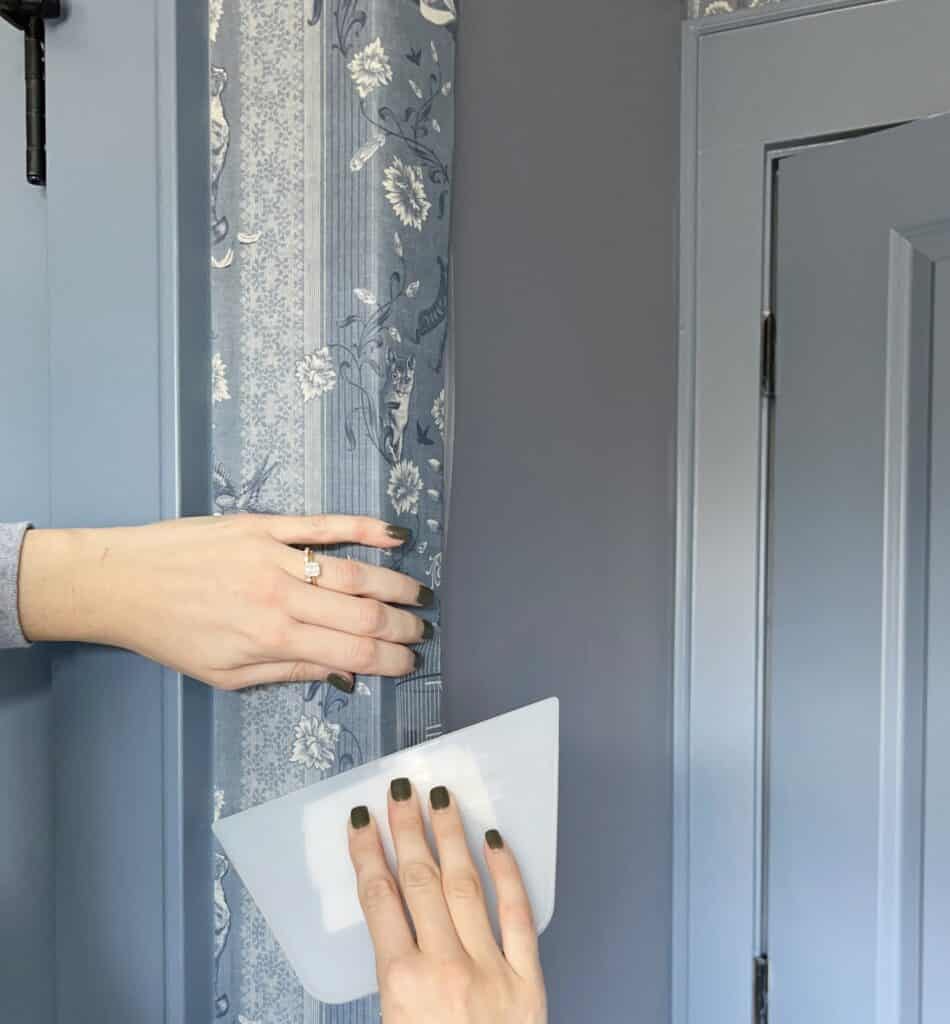
After this, you’ll need to cut a panel lengthwise to overlap. It’s really important to cut this as straight as you can, because these seams are more visible.
Be sure you have your laser level set up for this piece. Smooth into place, trim, and firmly use the seam roller on the overlapped area!

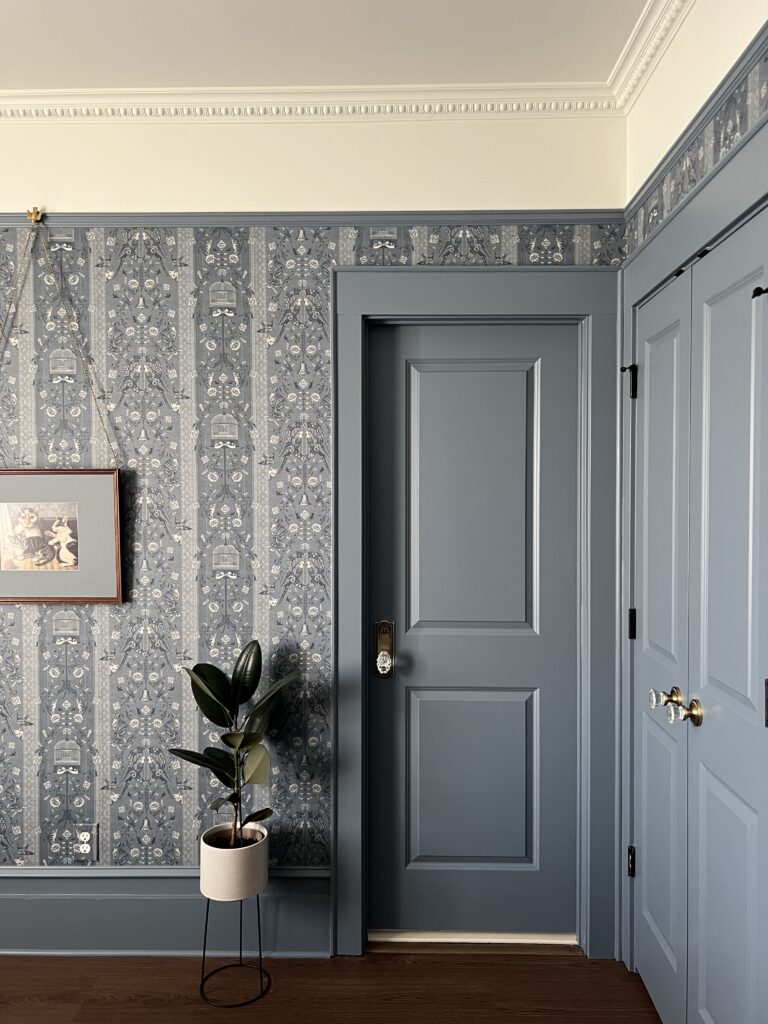
If you look closely to the right of the closet doors, you can see the seam! The outside corners are really the only places you can see the seams in the whole room!
Step Five: Wallpapering Outlet Covers
It’s little details like wallpapered switch covers that really make a space. Plus, it’s such a great way to use up some of that scrap wallpaper you have laying around!
To match the pattern, I would find a scrap piece that was in the right section and I’d keep trimming it down until there’s an inch or two extra on each side. You definitely don’t have to line up the pattern, but I wanted to because that’s just who I am!
Once you trim down enough, fold it around the edges of the cover to really match the pattern. When it’s in the right spot, make a crease around the edges of where the cover is to mark it!
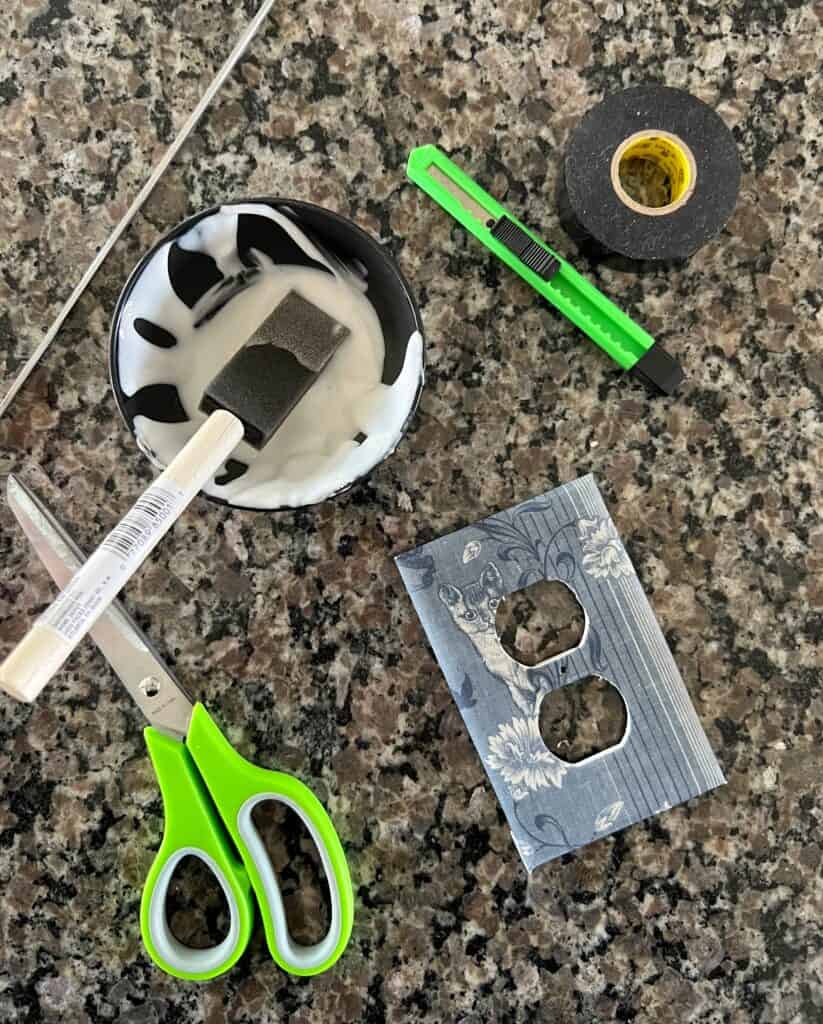
For adhesive, I used wallpaper glue. When researching I saw that you could also use a spray adhesive or double lined adhesive paper!
I applied the wallpaper glue to both the plate and the wallpaper with a foam brush and shifted it into place. I cut out the corners so I could fold the edges around and tape into place using electrical tape.
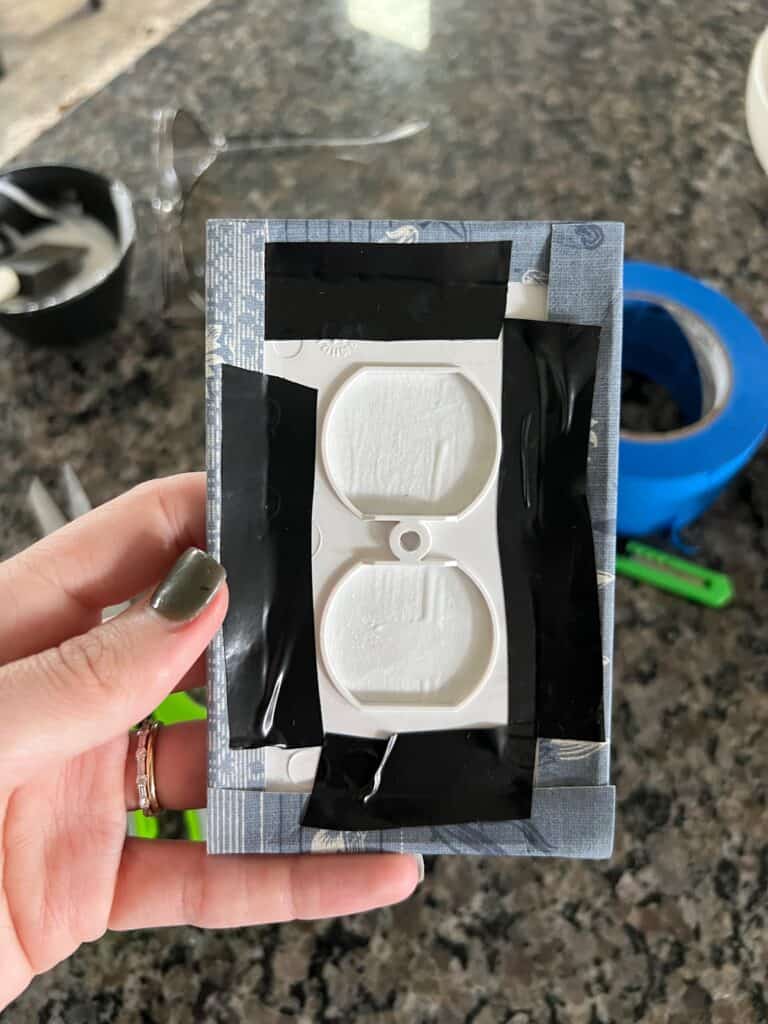
Using a sharp blade, I cut out the holes for the switches (or outlets) with a utility knife (an exacto knife would probably work even better!) from the back and used a metal skewer to pock holes for the screw holes!
Here’s a quick video of the process:
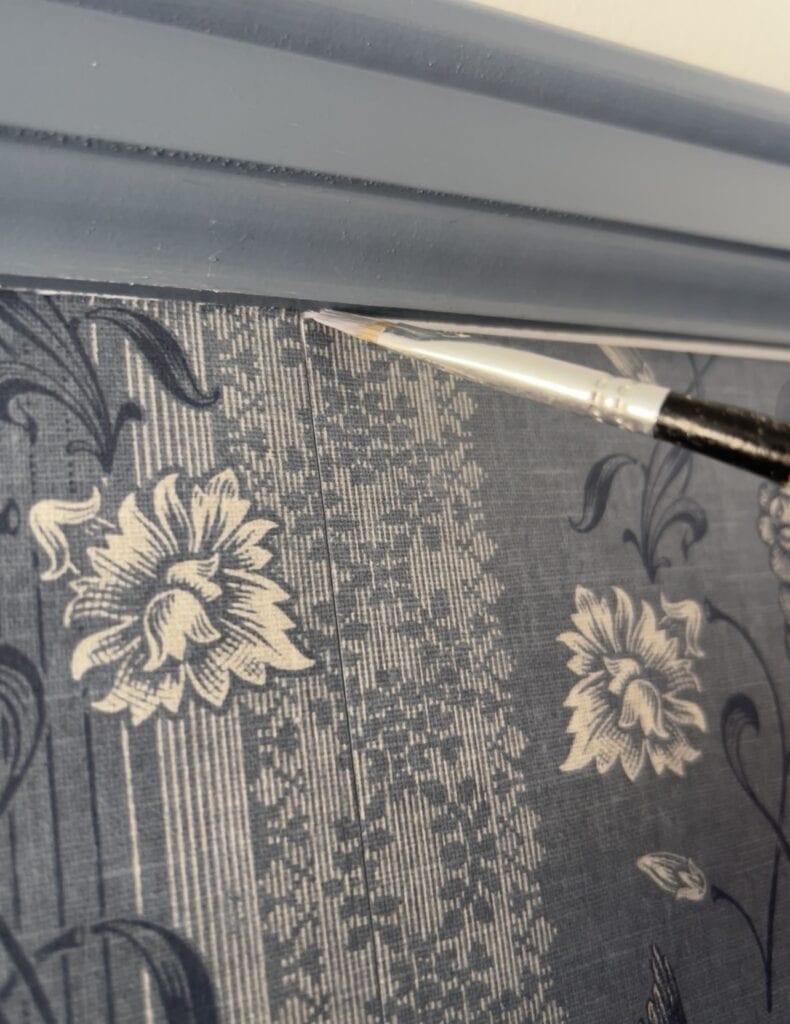
Step Six: Touch Ups
My projects usually end with a tiny brush! There were just a few areas that needed some paint.
I clipped too far in on the corner of this light switch cover so instead of re-doing it, I figured I’d just use a little paint! You’d never know!
Here’s another area where I didn’t get the primer up to the top of the wall so there was a tiny white strip!
Lastly, there were a few areas where the wallpaper tore a little. This is why changing your blade as much as possible is important!

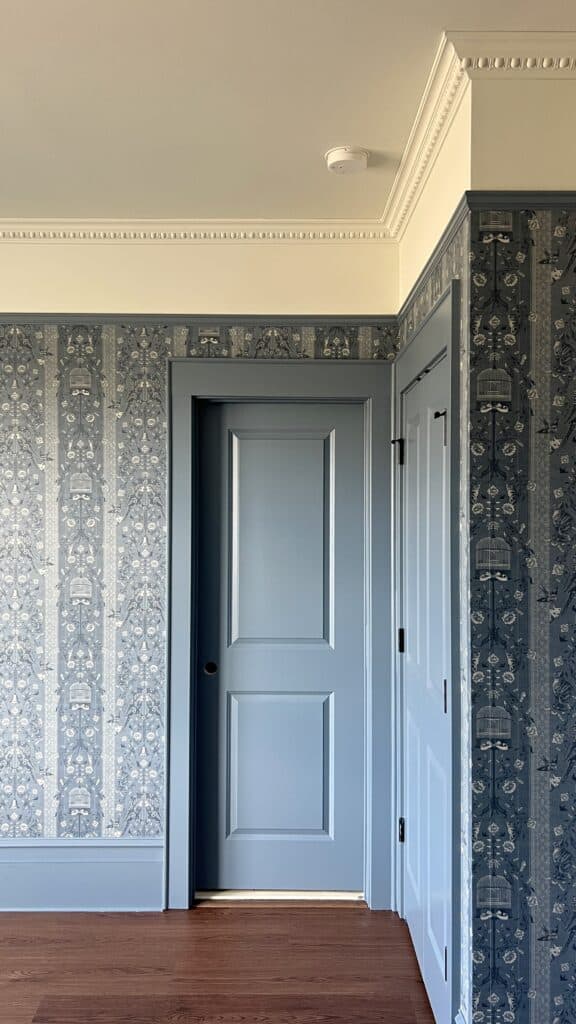
Here are some photos of the space! I’m incredibly happy with how the wallpaper turned out!
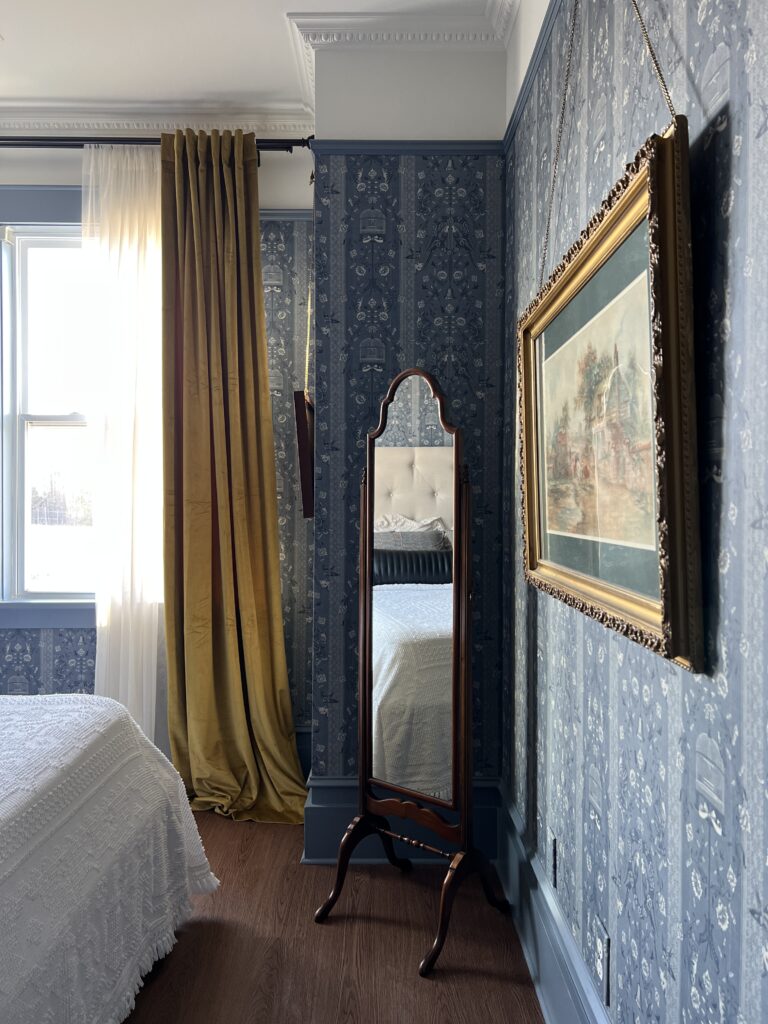
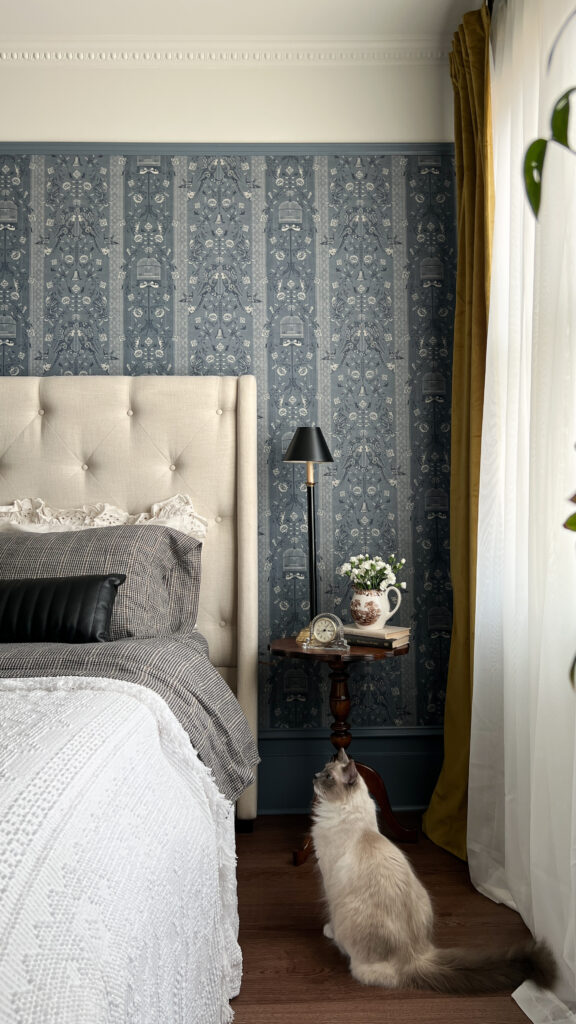
Please let me know if you have any additional questions!! I’m always happy to help!
Thanks for being here,

Love this! Two questions-
1) does the primer or adhesive have sting smells? Trying this is a baby room, and planning sleeping situations.
2) where you put wallpaper adhesive on part of the previous panel for the next, did you just wipe off the excess each time?
Thanks so much!! Love it!
Hi Katelyn!! The wallpaper glue definitely doesn’t have a strong smell and I don’t believe the primer did either… if anything, the primer might smell similar to paint. I’m pretty sensitive to smells and I don’t recall feeling bothered by it! And yes, great question, I kept an old towel nearby for the whole wallpaper installation and any excess that got on the paper I would quickly wipe off! Best of luck and reach out with any other questions! <3