

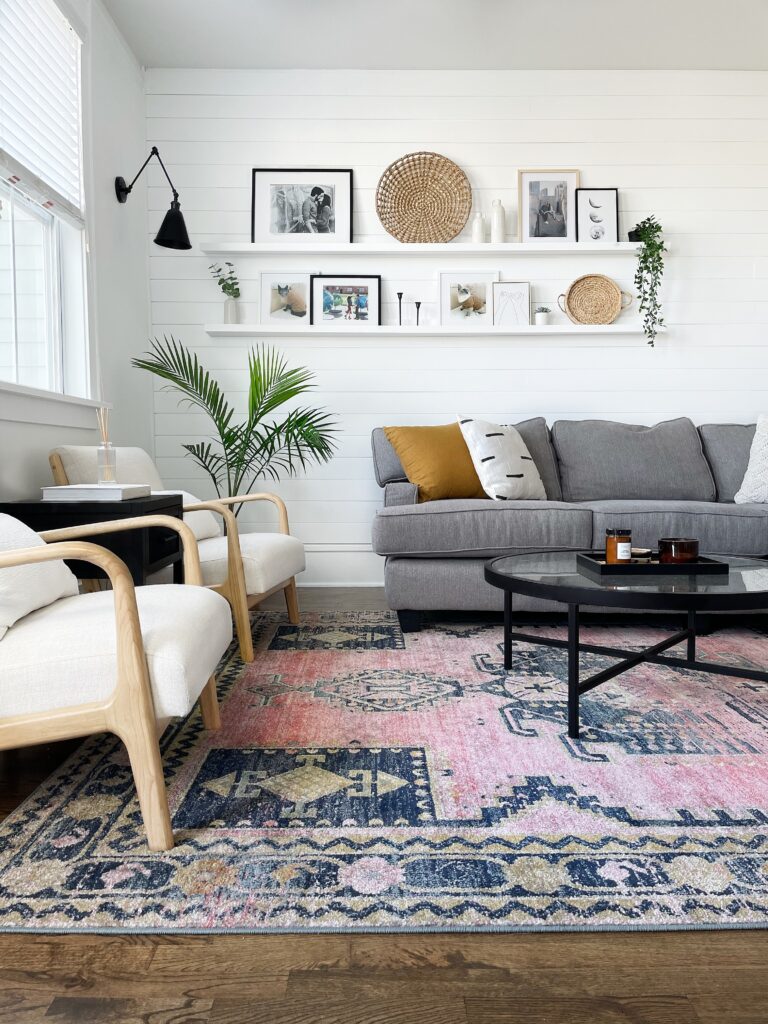
Do you crave change like I do? The very first project we tackled when we moved into our townhome (about 1.5 years ago) was horizontal shiplap in the living room. Within a year, I knew wanted something new… something a little more sophisticated. I was also noticing a shift in my design style from modern bohemian, to more modern traditional.
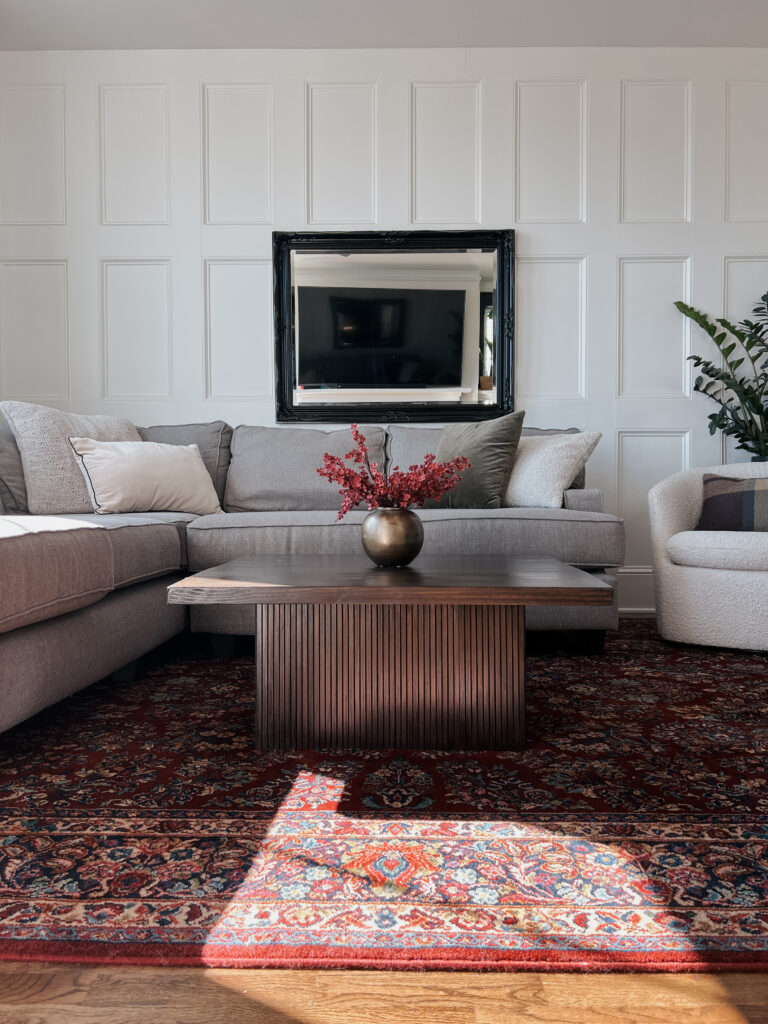
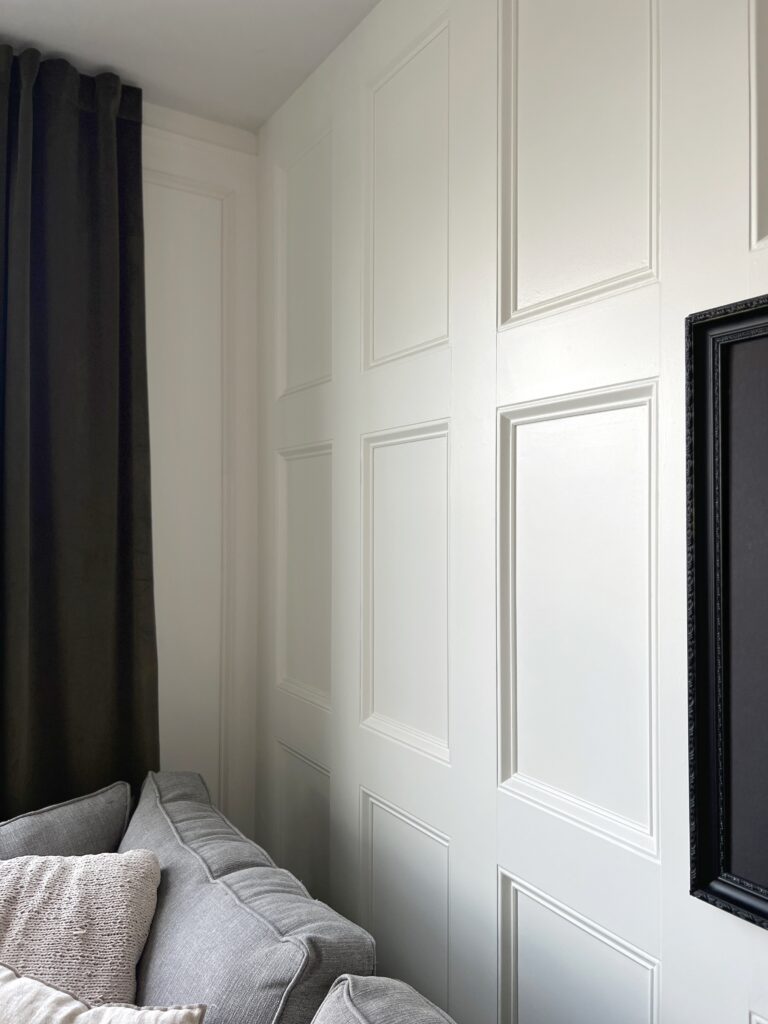
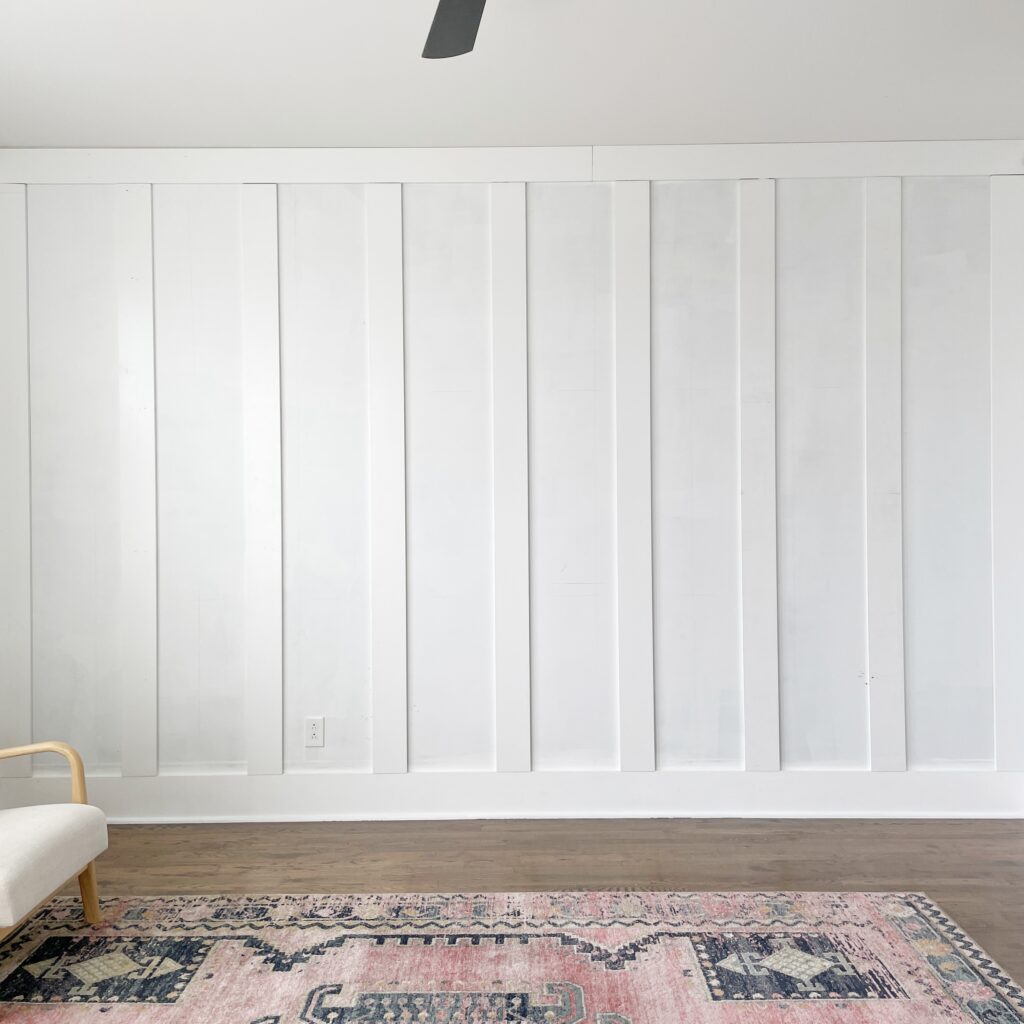
That’s when I decided to go with this recessed wainscoting panels accent wall. Is that what you even call it?! Who the heck knows, but I love this wall treatment… that much I know!
Walls with recessed wainscoting panels are a step up from the traditional board and batten! The extra trim within the panel just gives it a more traditional and elegant feel!
Disclaimer: This post contains affiliate links. This means, if you purchase something from a link I provided, I will receive a small commission. This is at no extra cost to you! Thank you for your support!
Tools:
materials:
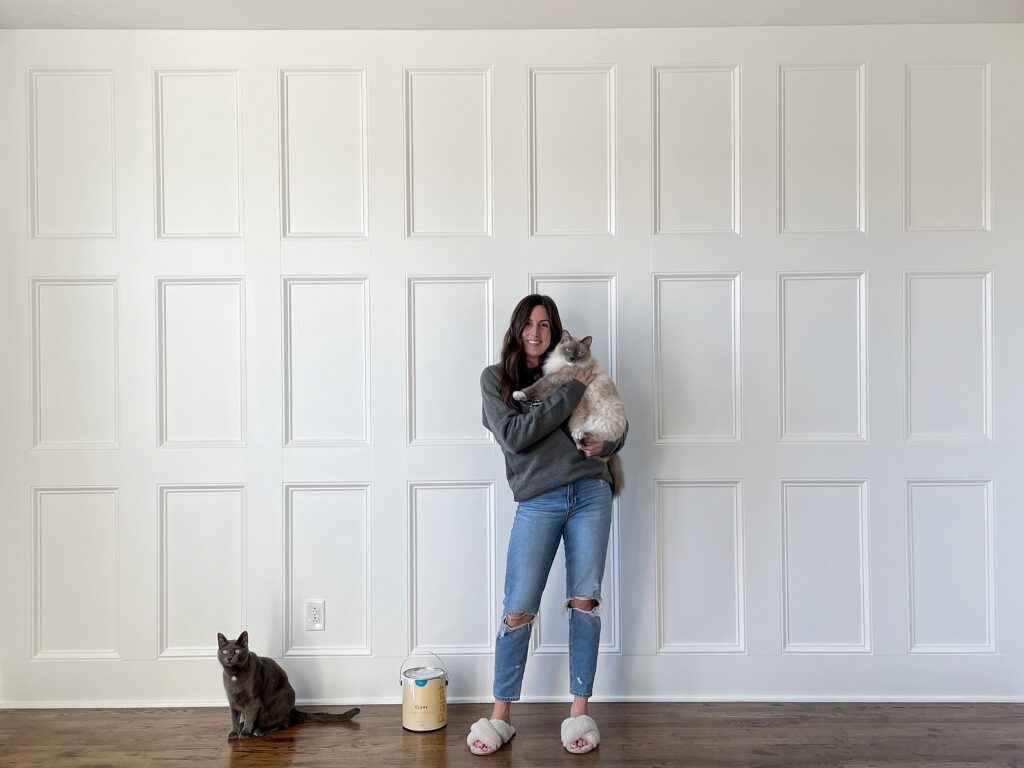
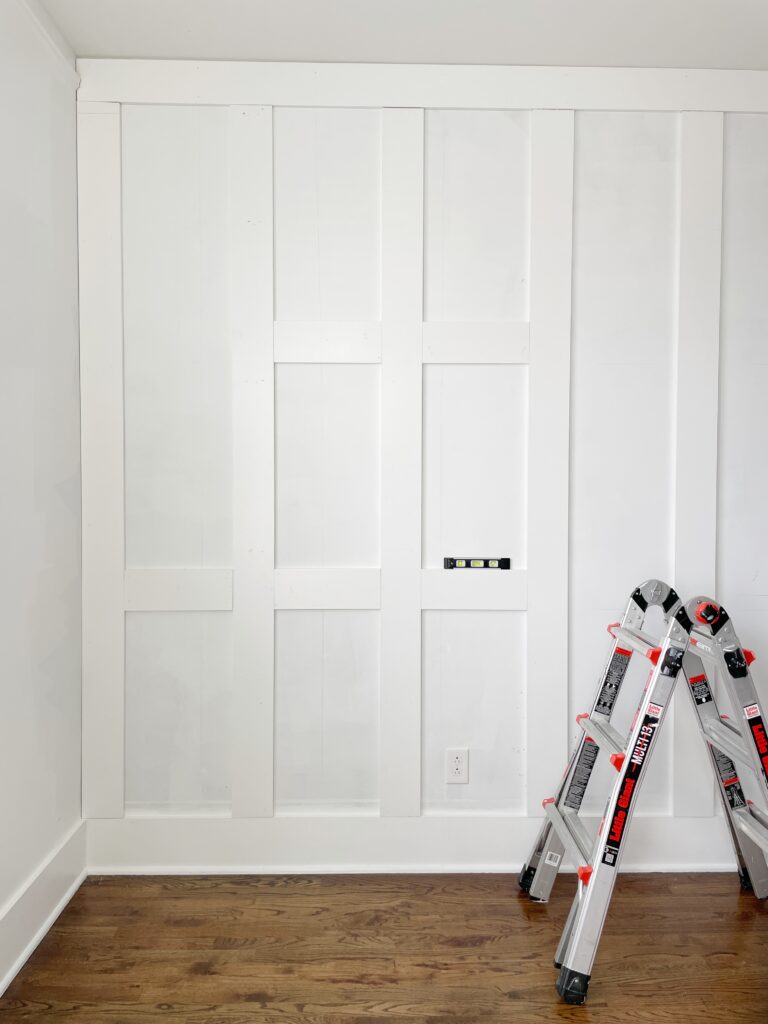
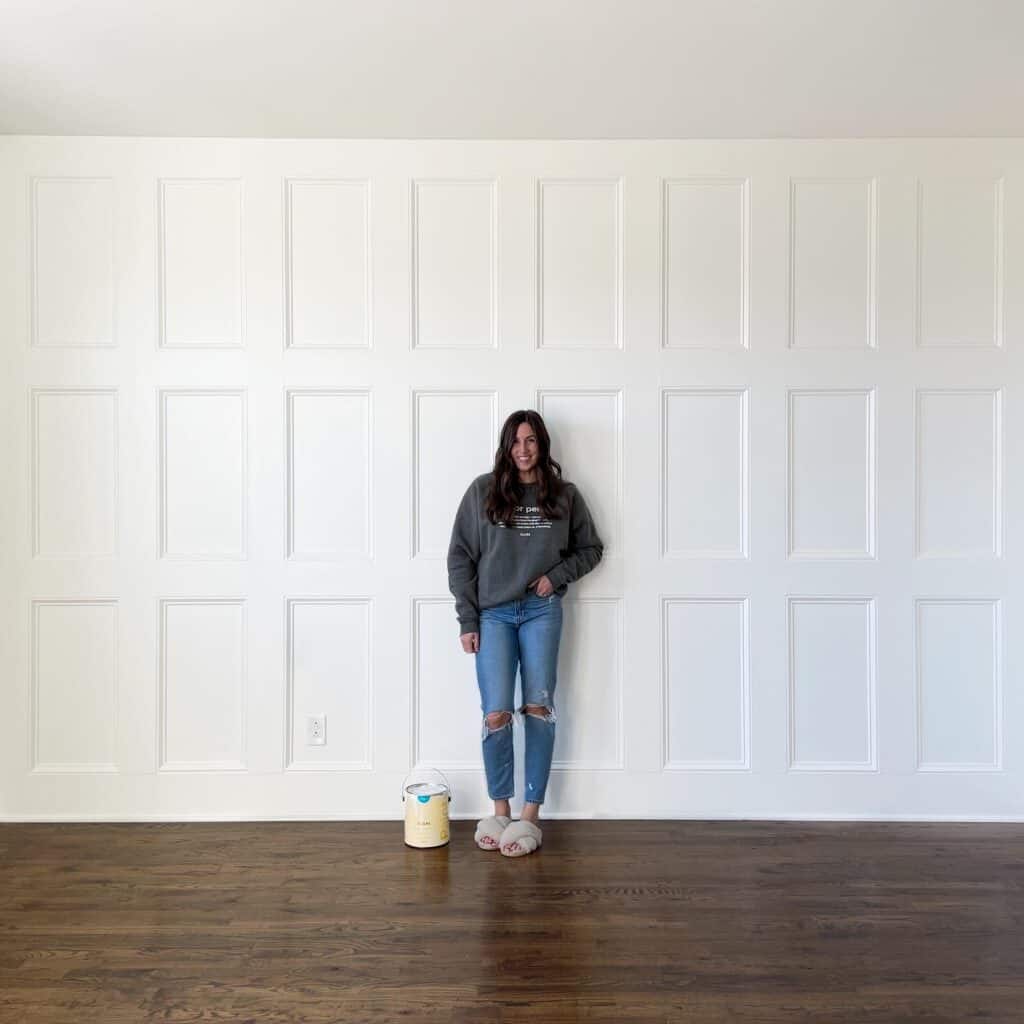
DIY Recessed Wainscoting Panels: Before and After
Here’s a before our living room with the horizontal shiplap wall:
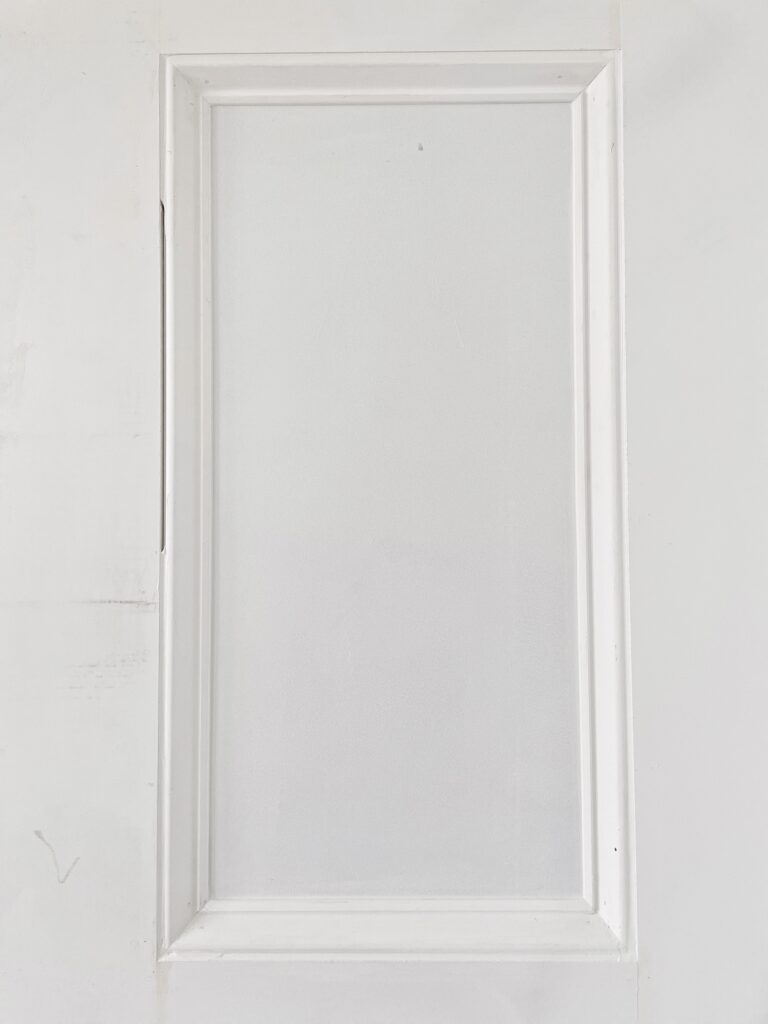
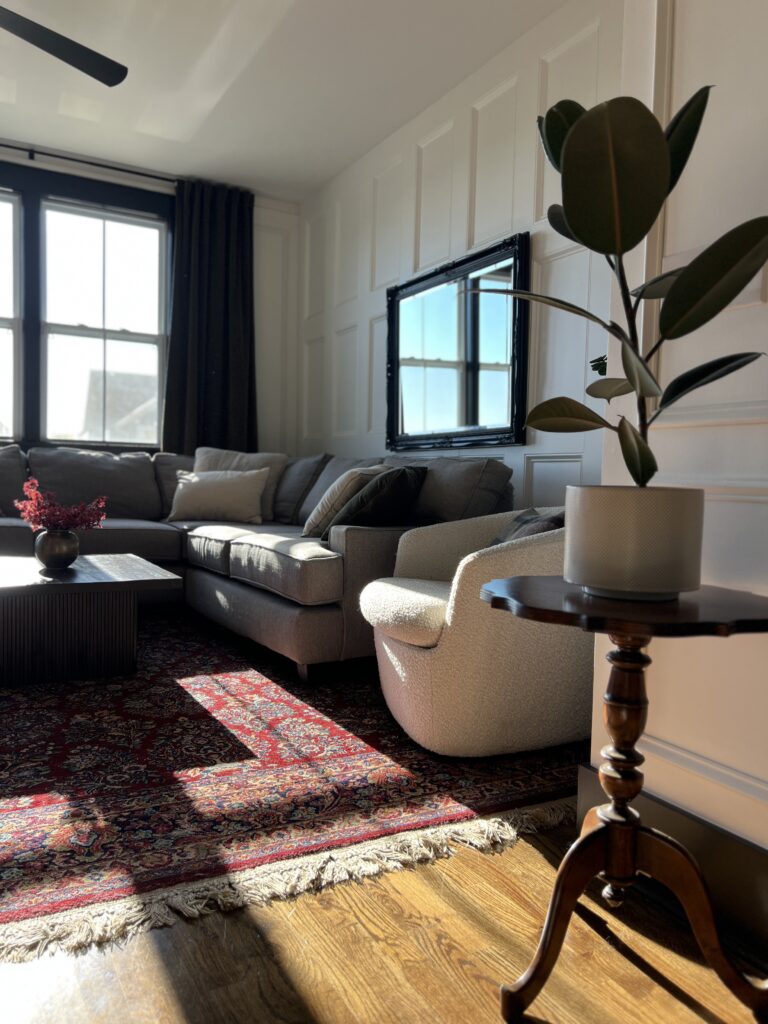
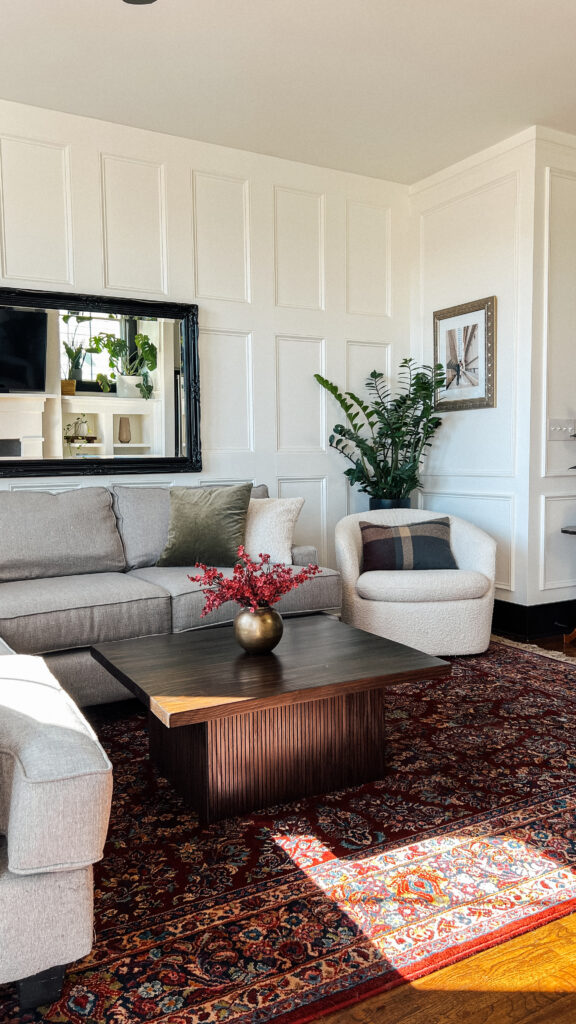
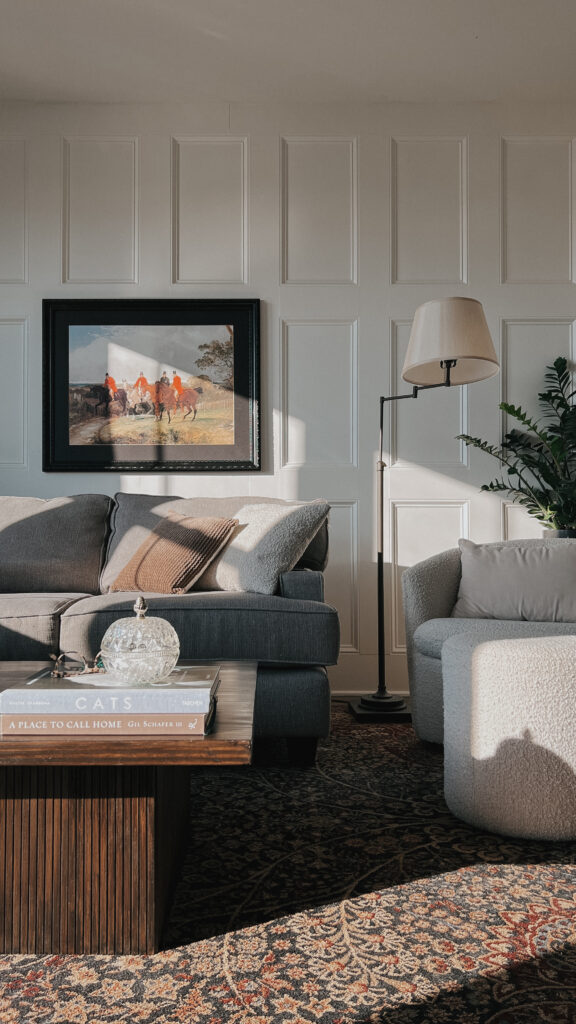
…annnd the after!!! Our living room has a completely different feel as i’m sure you can tell!
Step One: Determine the Design
I used three methods to help me visualize my design for my recessed wainscoting panels…
Method #1: Inchcalculator.com
Once you get to inchcalculator.com, follow these steps:
- Click on “Construction & Garden Calculators”
- Choose “Wainscoting Layout Calculator”
- Enter your wall width (choose the proper measurement), stile width (this is the width of your boards), and the desired number of panels (you can play around with this part)
- Once you enter that in, you’ll see something like this:
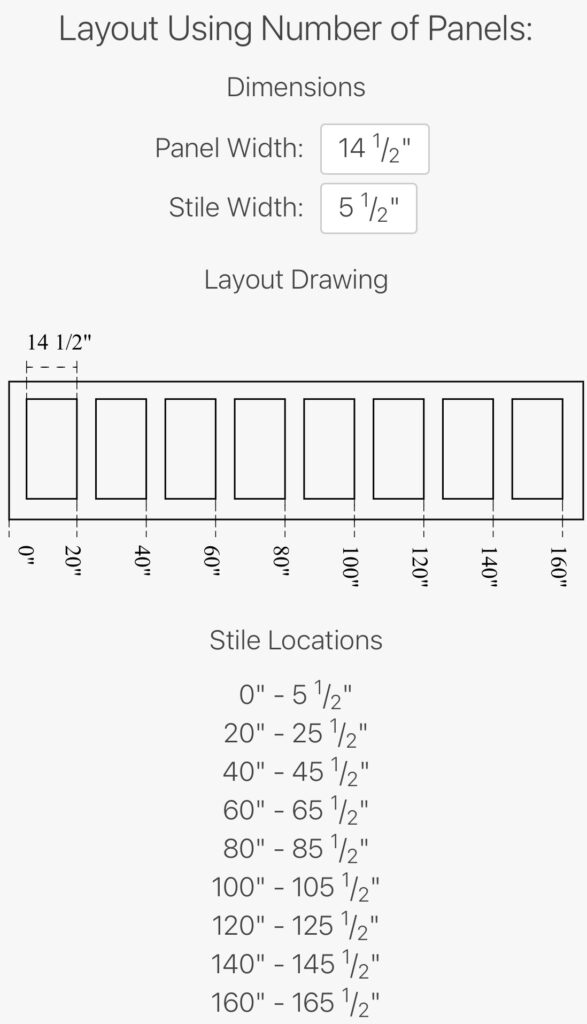
This not only gives me a visual of the paneling, but it also shares all the measurements and the placement of each board!
You can keep going back and changing the number of panels until you find a desired look! How cool is that?
Method #2: Draw an elevation
This method isn’t for everyone!
I’m very much a pen and paper kind of gal, and as a former high school Interior Design teacher, floor plans and elevations are an important part of the process!
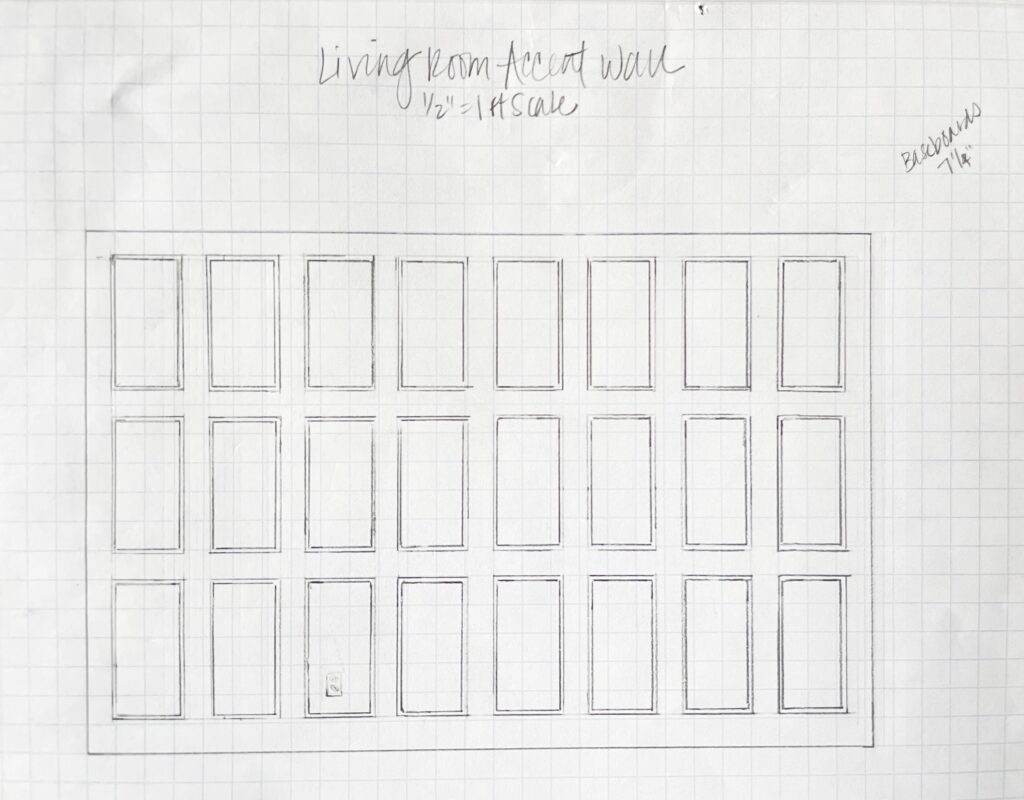
You’re probably thinking “I have no idea how to make one of these!” That’s fair, maybe you don’t, but they’re actually SO easy to do.
I drew this at a 1/2″ = 1ft scale. This means, if you’re using 1/4″ graph paper, two boxes on the paper are equal to 1ft in real life.
Since my ceilings are 9ft high, I drew a vertical line that was 18 boxes in length. Make sense? If not, feel free to check out my Design Tips highlight on IG!
Method #3: visualize with painter’s tape
If you’re a heavily visual person, this might be your preferred method!
It’s also very simple to do. If you know your measurements/spacing, you can put tape on the wall to represent where the boards would go!
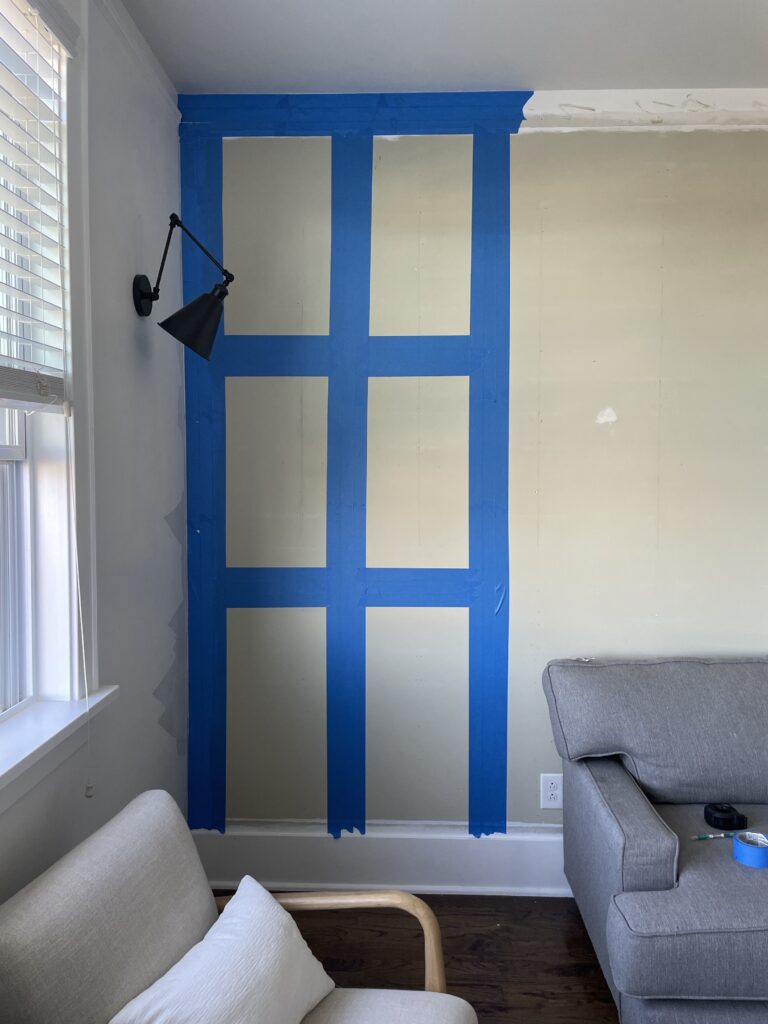
I only did a couple rows just to get a general idea of the scale. Not to mention I felt guilty about how much tape I was using!
Seeing this confirmed that I was ready to go forward with this design.
Step Two: Calculate the Materials
You always want to calculate how much you’ll need for materials in advance. Project materials can add up, especially with the increase in lumber prices! Pro tip: always get at least a little extra material just in case! (specially when you’re making cuts!)
Now that I have the design and measurements planned, it’s easy to do the math. I sketched this out quick for another visual:
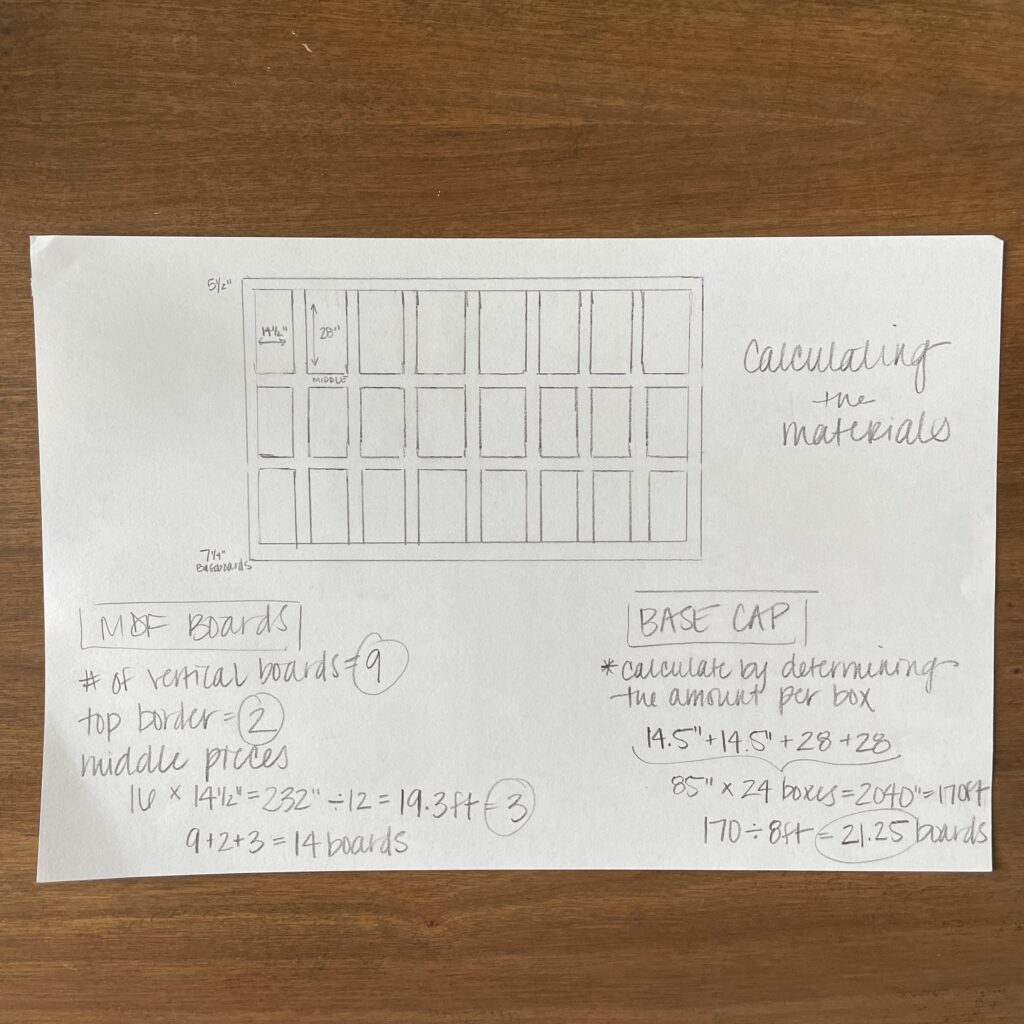
Calculating the MDF- I used 8ft boards
First, I calculated the vertical boards. Our ceilings are 9ft high, so with a 5.5″ board on the top and the 7.25″ baseboards, I needed just under 8ft long for my vertical boards. Just by looking at my sketch, I can see that I’ll need 9 vertical boards.
Next, I looked at the top border. Since the wall is about 13ft long, I knew by simple math that I would need 2 more boards.
Lastly, I looked at the diagram above and counted how many horizontal pieces I would need. There are 16 and they will measure 14.5″ long. If you multiply 16 x 14.5″ you get 232″ which is also 19.3ft.
Since the boards are 8ft long, I needed at least 3 boards for the horizontal pieces. If you add these all together, I need 14 boards. To be on the safe side, I got 15.
Calculating the Base Cap Molding- I used 8ft boards
You can’t tell by my sketch above, but with my more detailed elevation under step one, you can see that there’s small trim pieces framing out each section.
Knowing that, I calculated the amount I needed for each “box”. Refer the image above to see how I did the math. I ended up needed 21.25 boards, but since I knew I’d be cutting a LOT of angles (a new challenge for me) I got 25 boards.
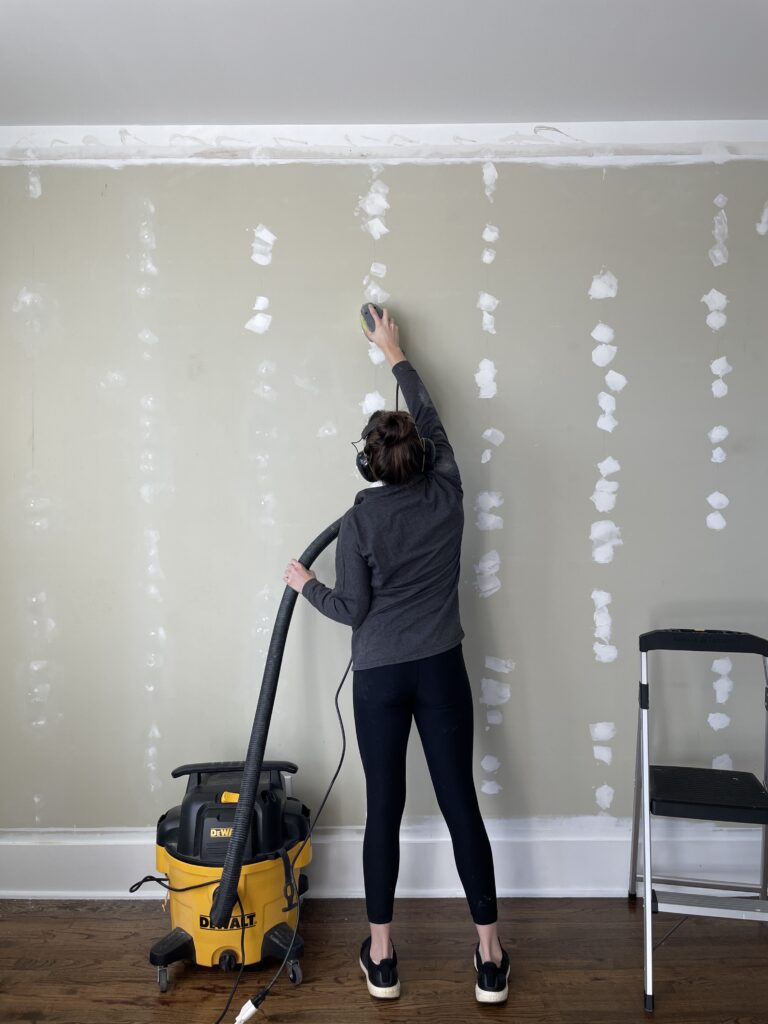
Step Three: Prep the Wall
Remember when I ripped off that shiplap? Well, that left the wall in somewhat rough shape which means a little extra prep work me! (This step might not apply to you)
Lots and lots of nails…
Luckily we didn’t use any sort of adhesive when we installed the shiplap, but boy were there a lot of nails. They were also nailed right into the studs so it was surprisingly hard to pull them out with pliers.
I ended up buying some end nipper pliers which cut the nails down. This is a great tool to have! It cuts the nails very easily.
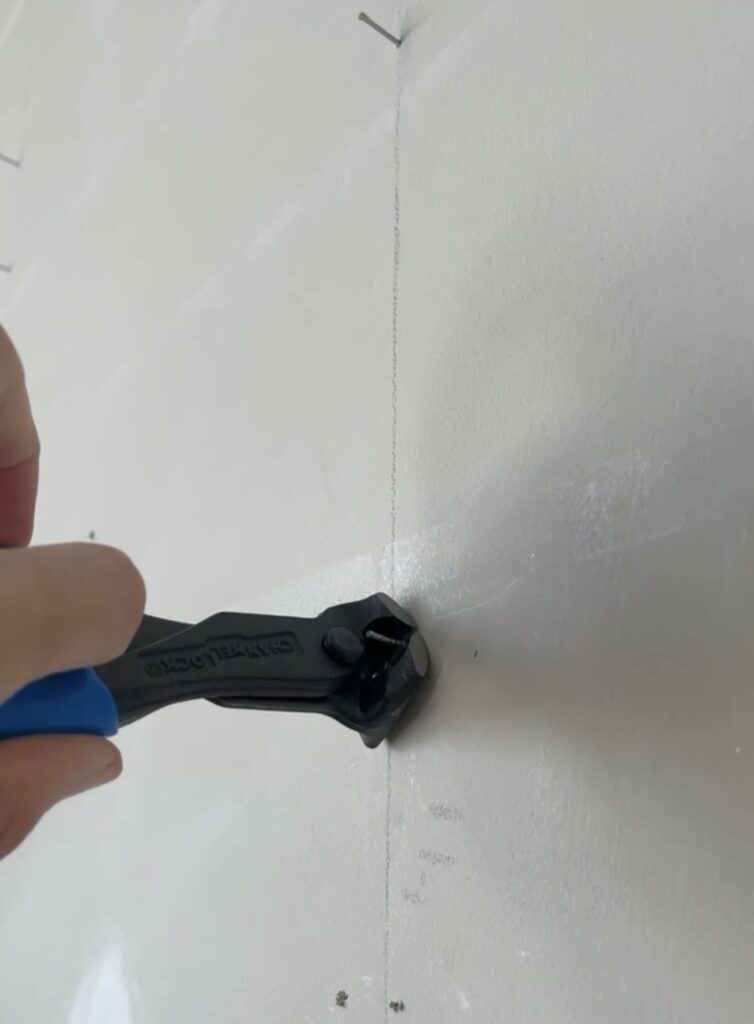
Even after this step, there were some areas where the nail still stuck out the tiniest bit. For those areas, I used nail sets and a hammer to push them in. The goal is to push them in far enough where you have a little hole to fill.
Filling the holes
Certain areas of the wall were in rough shape because the drywall had been broken into a little. Because of this, I chose to use joint compound to repair all the imperfections. I used a small putty knife and just slightly overfilled the holes so that I could sand it down smooth.
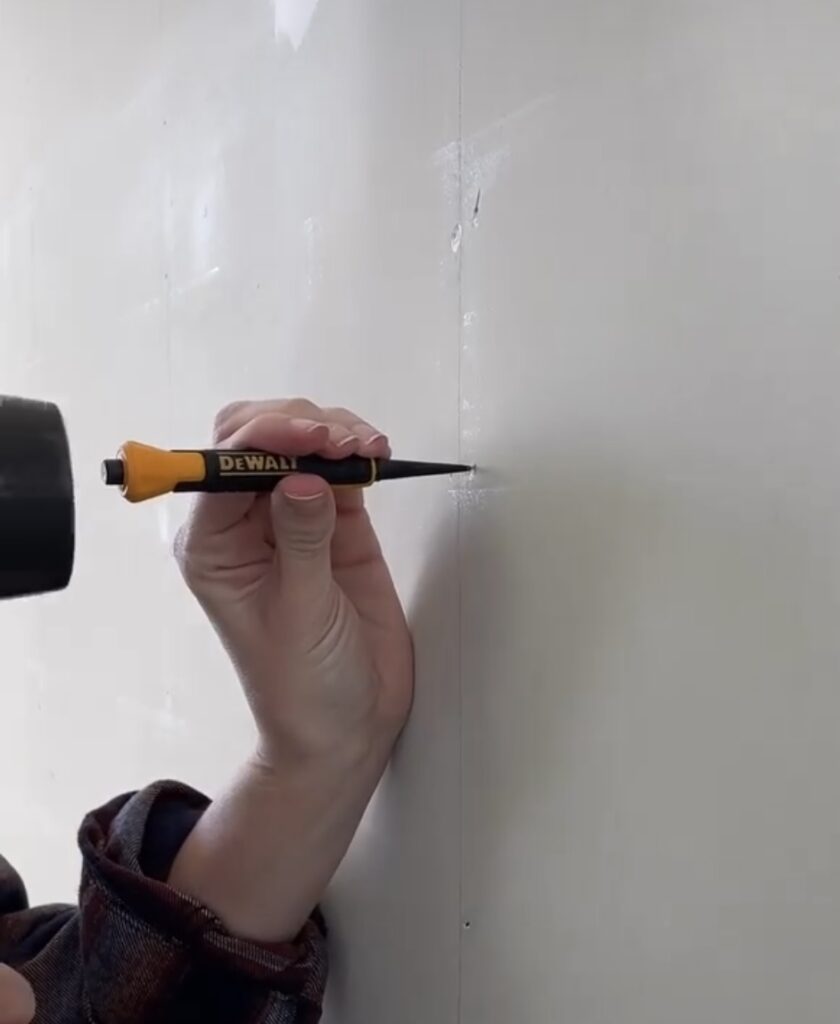
Sand it smooth
Since discovering this dust-free sanding hack, I no longer get stressed about having to sand inside!! I hooked up my shop vac to my mouse sander using this PVC adapter.
You can use 180 or 220 grit sandpaper and just make sure the wall feels smooth to the touch. Any sort of bumps or imperfections will show up more prominently after you paint.
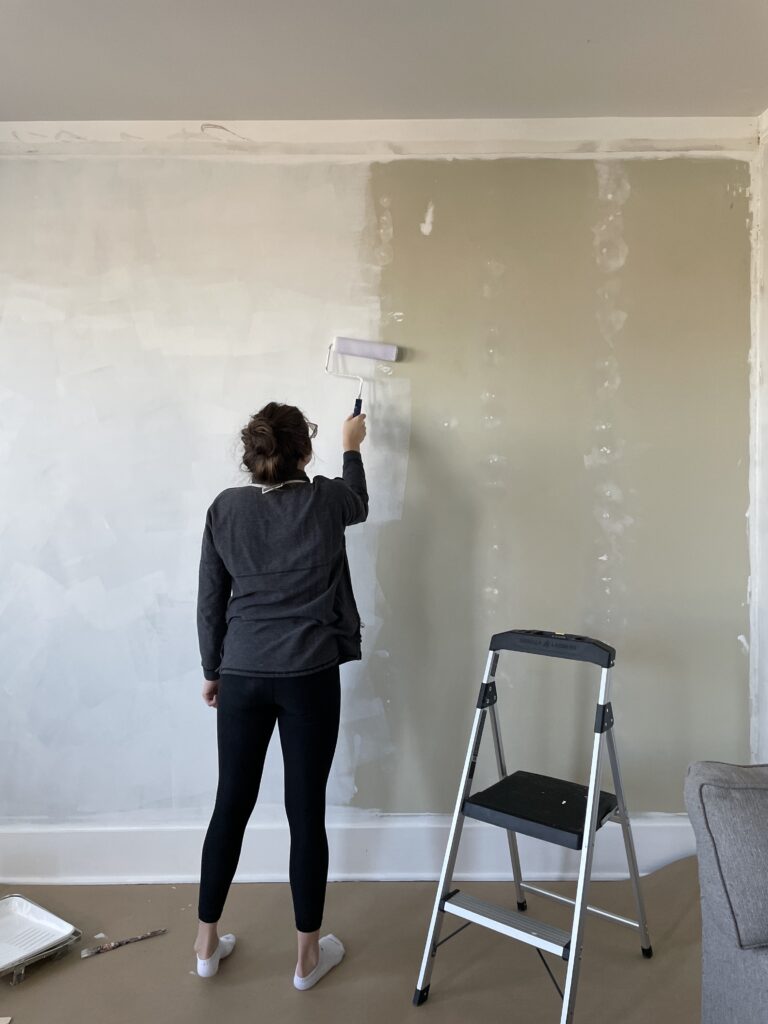
Prime the wall (if necessary)
In my case, the wall needed to be primed. Not only did I just add joint compound, but this greenish color was also the original paint from when we first moved in.
I knew it would be MUCH easier to prime before I put all the boards up. Plus, all the boards were already primed as well. I used this water-based, multi-purpose primer
Step Four: Install the MDF Boards
The border
When starting with the MDF, I bordered out the wall by installing the top horizontal piece first. Next, I did the vertical board on the left-hand side of the wall. One new thing I learned is that MDF boards can be heavy. I definitely struggled to get this first board up on my own!

I chose not to use any liquid nails for install, so I tried to nail into the studs when I could.
When I couldn’t, I would put two nails in slightly angled towards each other so that they latch on behind the drywall. This is a great little trick when you don’t have studs to work with!
The vertical boards
After these two boards were up, I then measured and marked the placement for the rest of the vertical boards.
According to my plan, there should be 14.5″ between each vertical board, but this is a good way to verify that those numbers are accurate before putting them up!
I measured 14.5″ over, marked, and then used a scrap piece of MDF to trace the width and so on.
As I mentioned before, the space was just under 8ft, so I did have to trim off some of the length for these to fit. The vertical boards are always the easiest.
The horizontal boards
Even though I may think my measuring and cuts were perfect, I know that each of these columns aren’t the exact same measurements.
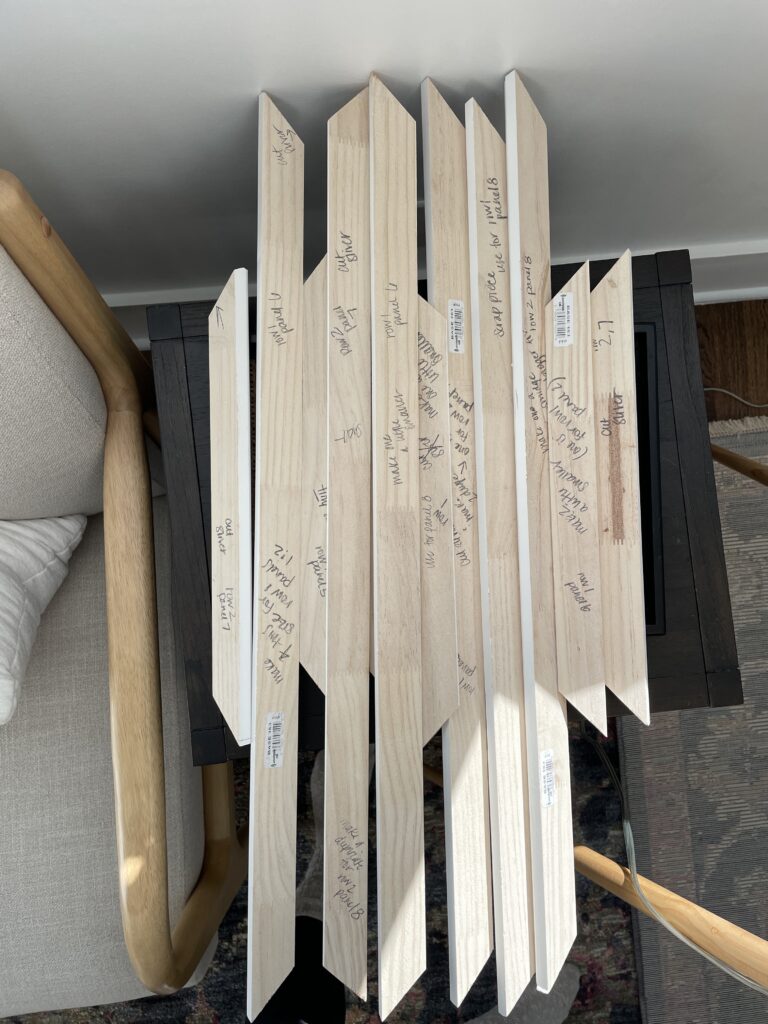
With that being said, I measured and cut the horizontal pieces one panel at a time.
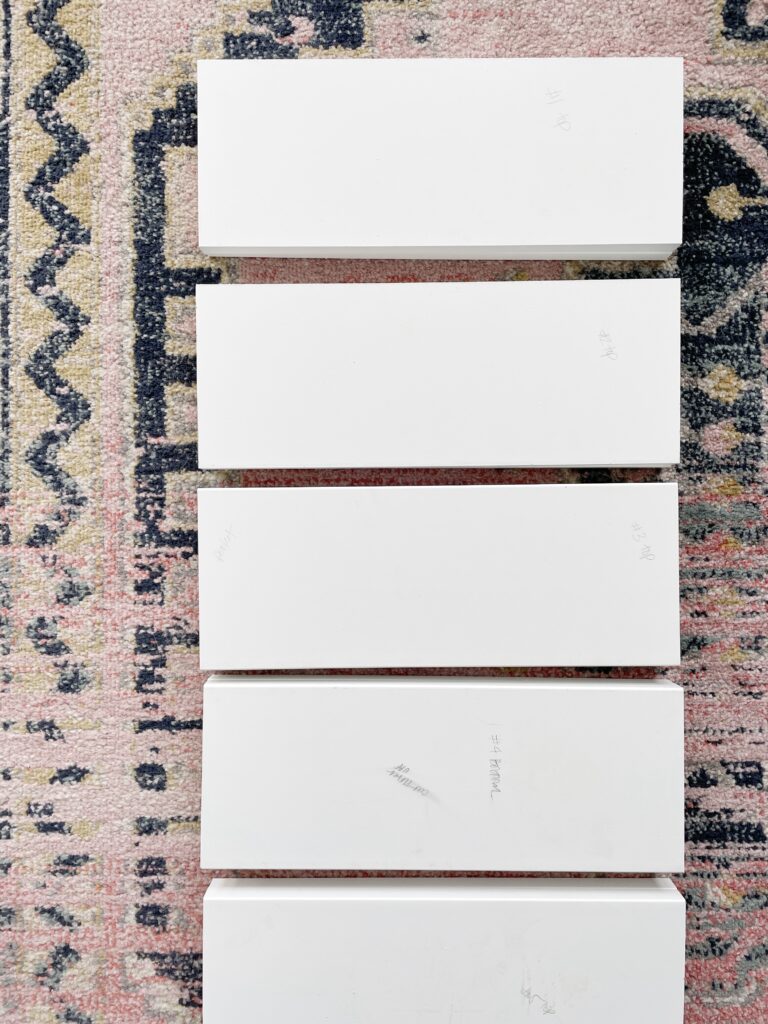
The # represents the column and I also specified if it was the top, middle, or bottom piece! Having the pieces cut, labeled, and stacked really helped the install process go much smoother.
Once all the MDF was up, I thought it would be easiest to fill the seams and nail holes before installing the trim so I knew I’d have to sand again. Luckily, my husband Dan was kind enough to help out!
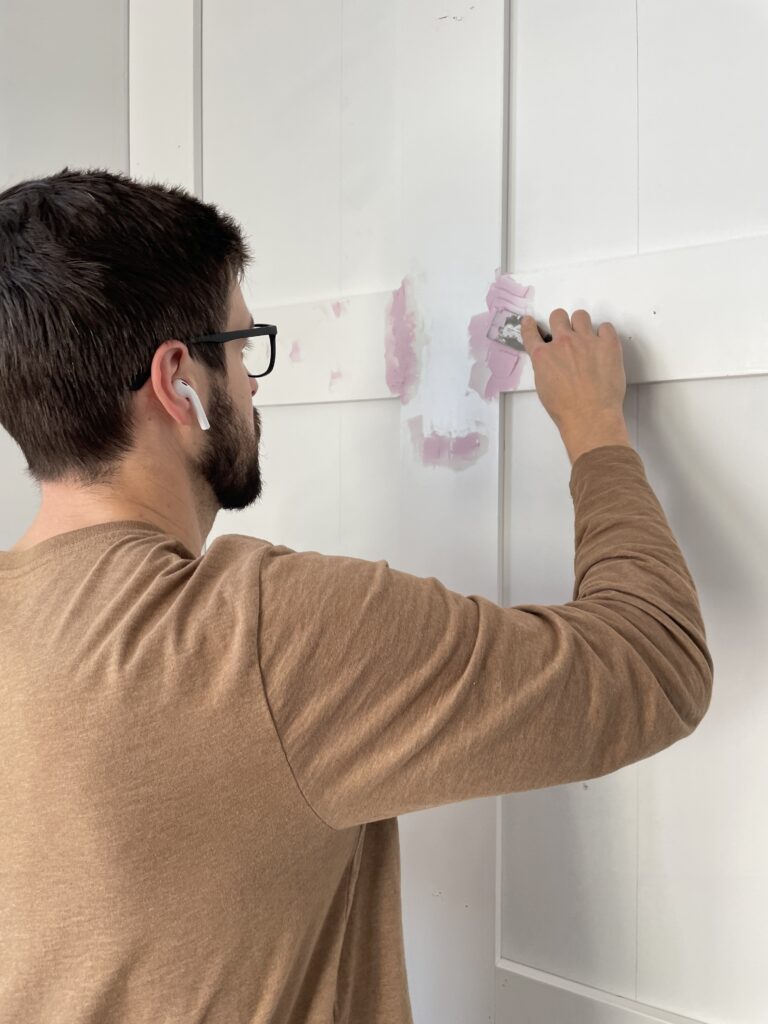
Dan used this spackle to fill everything. It’s cool because it goes on pink and dries white so you don’t have to guess whether or not it’s ready to sand
Once it was all dry, I sanded it down using 220 grit sandpaper. Once again, my dustless sanding hack came in handy!
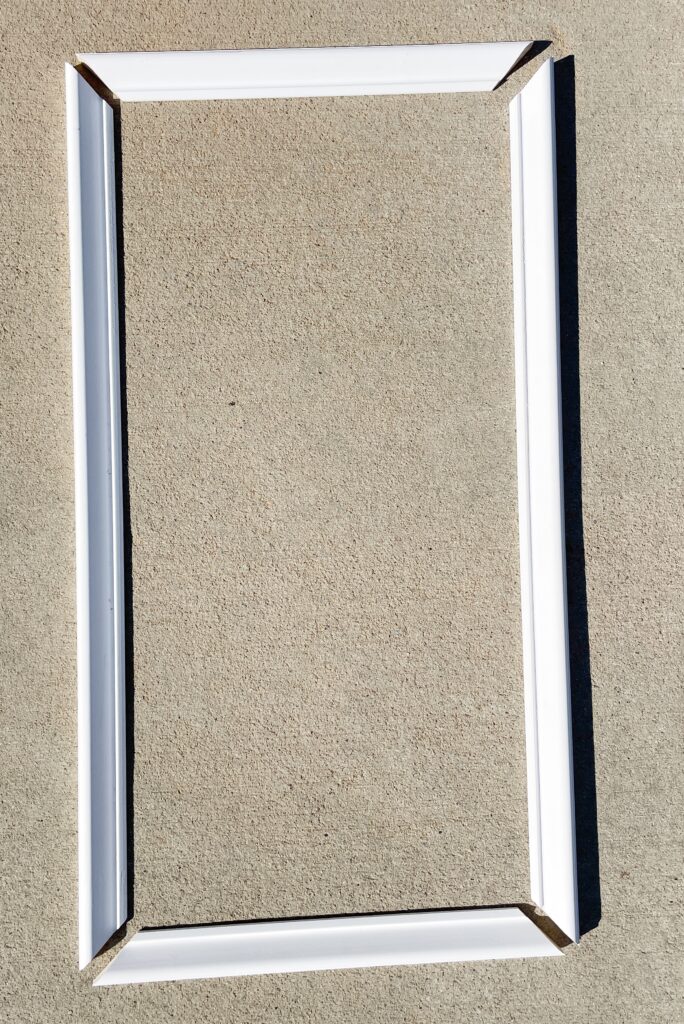
Step Five: Install the Trim
This is where it can get a little tricky if you haven’t worked with angles much. Which I hadn’t!
However, after having to cut 96 angled pieces, I started to really get the hang of it! Luckily, all the pieces will be cut to 45 degrees which keeps it simple!
Trial and Error
Sometimes cutting angles can involve a lot of trial and error. Especially when you’re new to it!
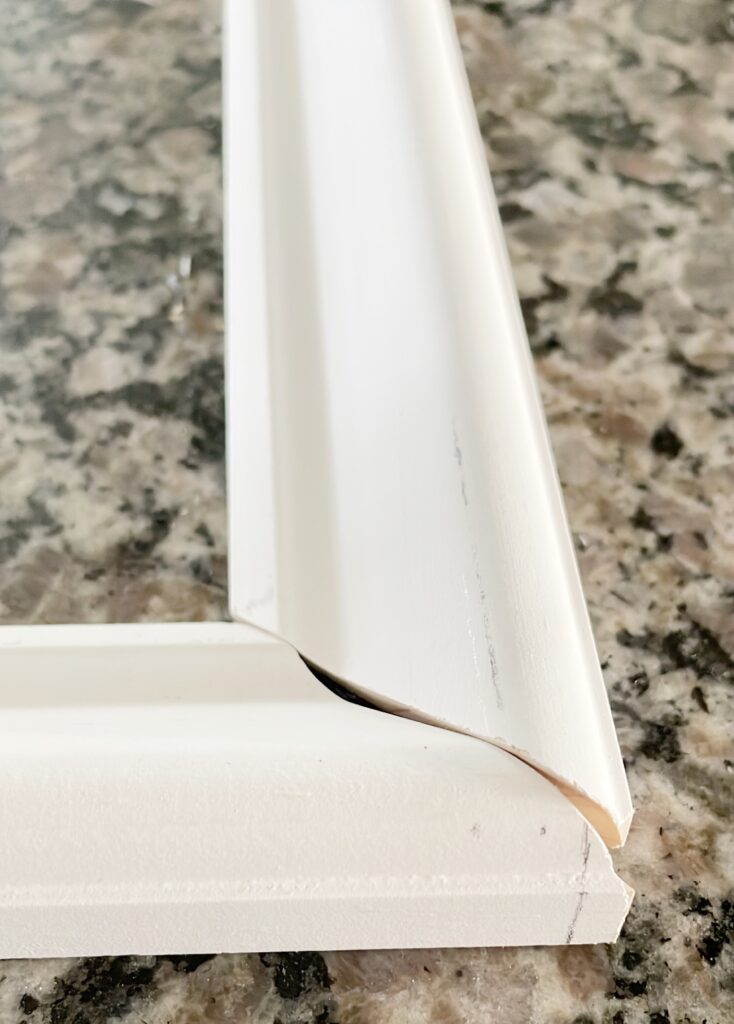
At first my cuts were looking like this! I couldn’t figure out why.
Eventually I realized I was making a simple mistake. I wasn’t pushing the trim up against the fence of the miter saw before I cut.
Once I made that small adjustment and kept trying, it really wasn’t so bad! I’m glad I got the practice since I had to cut more angles shortly after for my beadboard entryway makeover.
Measuring and cutting
Here are some visuals for where I marked and cut the trim pieces:

I found it most helpful to mark on the flat edge of the trim piece. One thing I love about our miter saw is that it casts a shadow line showing where the blade will cut through the wood. You can see it in the photo below!
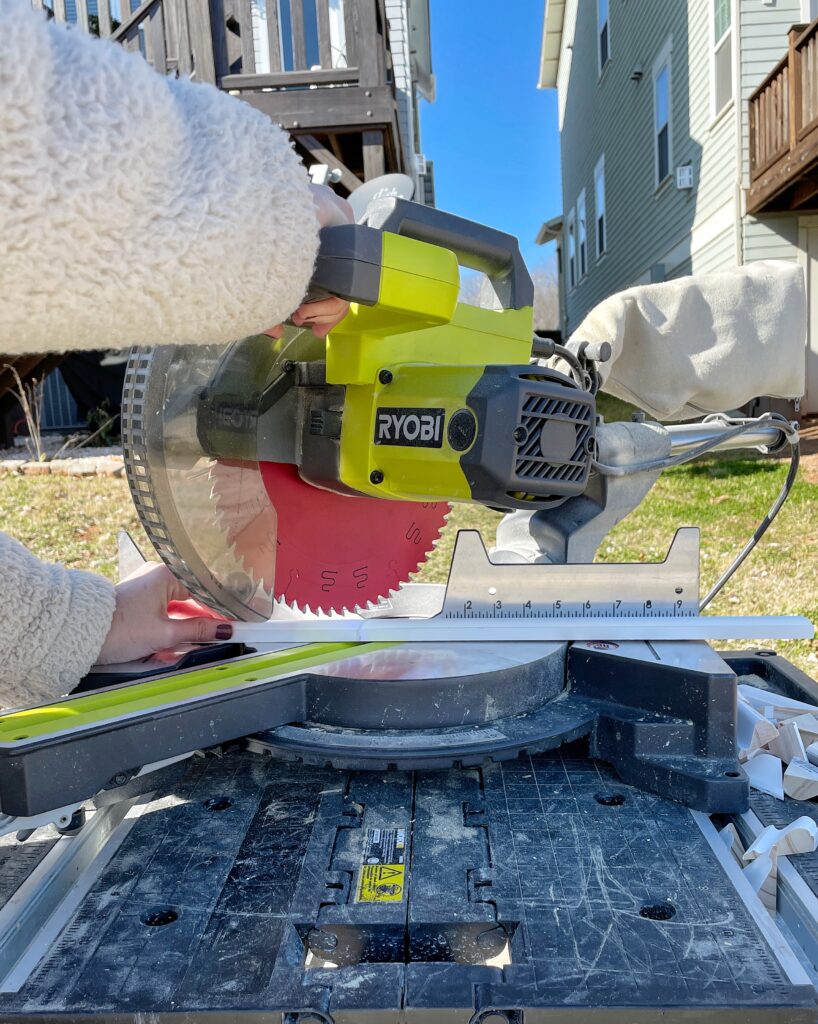
You may notice that the shadow is lined up just to the left of where I drew the line. I did this because the blade is 1/8″ thick so I don’t want to cut into my measurement, making the piece too short!
To cut the other side, I shifted the miter saw to 45 degrees on the other side!
Dry fitting the trim
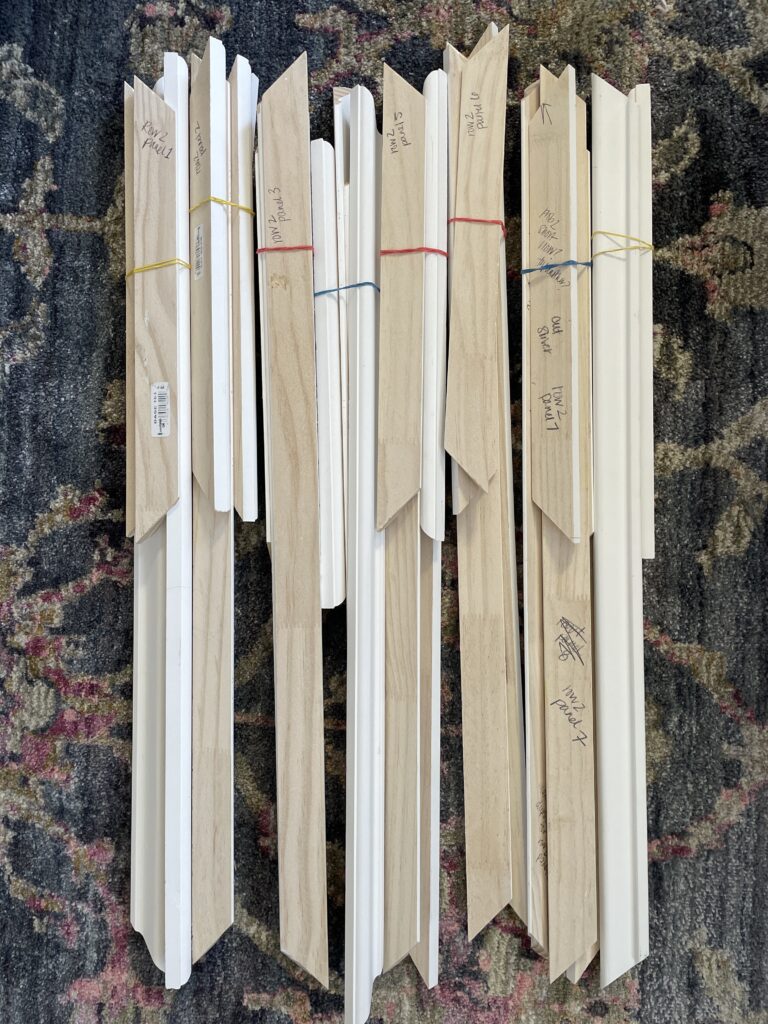
About half way through cutting the trim, I started dry fitting the pieces and labeling which panel they fit into. This system worked great for me and helped me keep track of everything!
Surprise, surprise! My cuts weren’t all perfect. Here’s my proof:
While dry fitting, I made a lot of notes on the back if they were too long, too short, or maybe I needed a duplicate that exact size.
Installing the trim
This part was simple since I had already dry fit/labeled all my pieces!
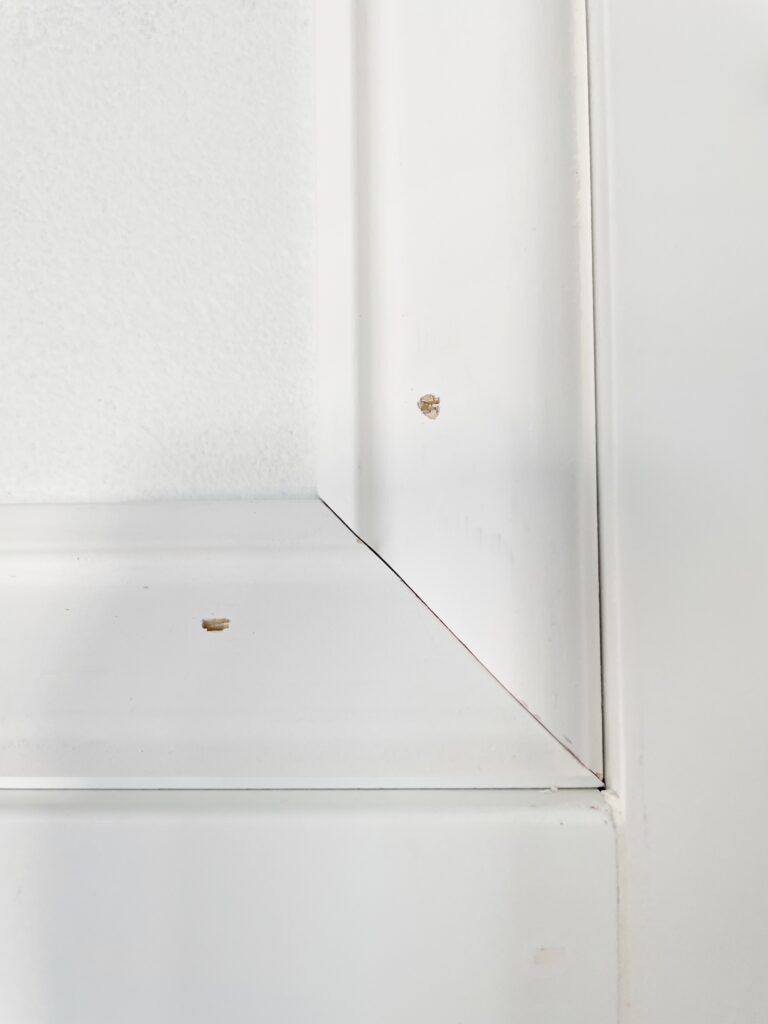
For each panel, I would first put all four trim pieces in and then I used my brad nailer to secure them in at the corners. I tried to nail them on the smoothest part of the trim so it would be easy to fill the holes! These trim pieces are light, so I didn’t feel that I needed nails in the middle of the pieces, just the corners!
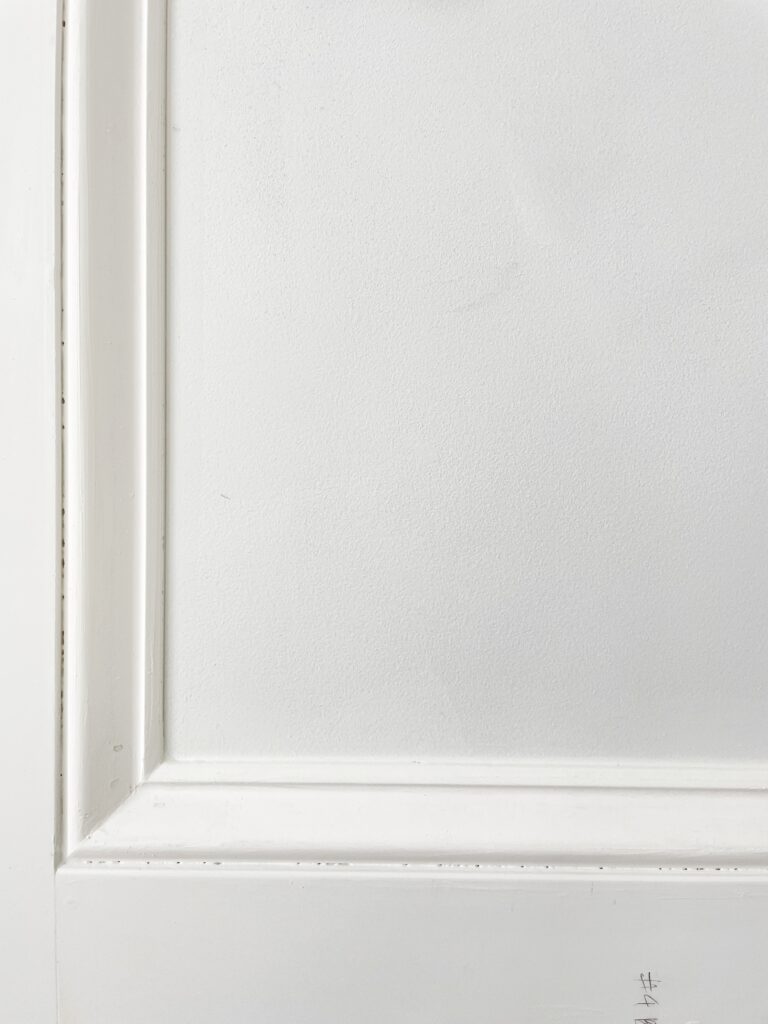
Isn’t it amazing the difference a little extra trim can make?

Step Six: Filling and Caulking
I won’t lie to you, this part took a few days to do and I may have even questioned my sanity for deciding on a design that required so. much. caulking.
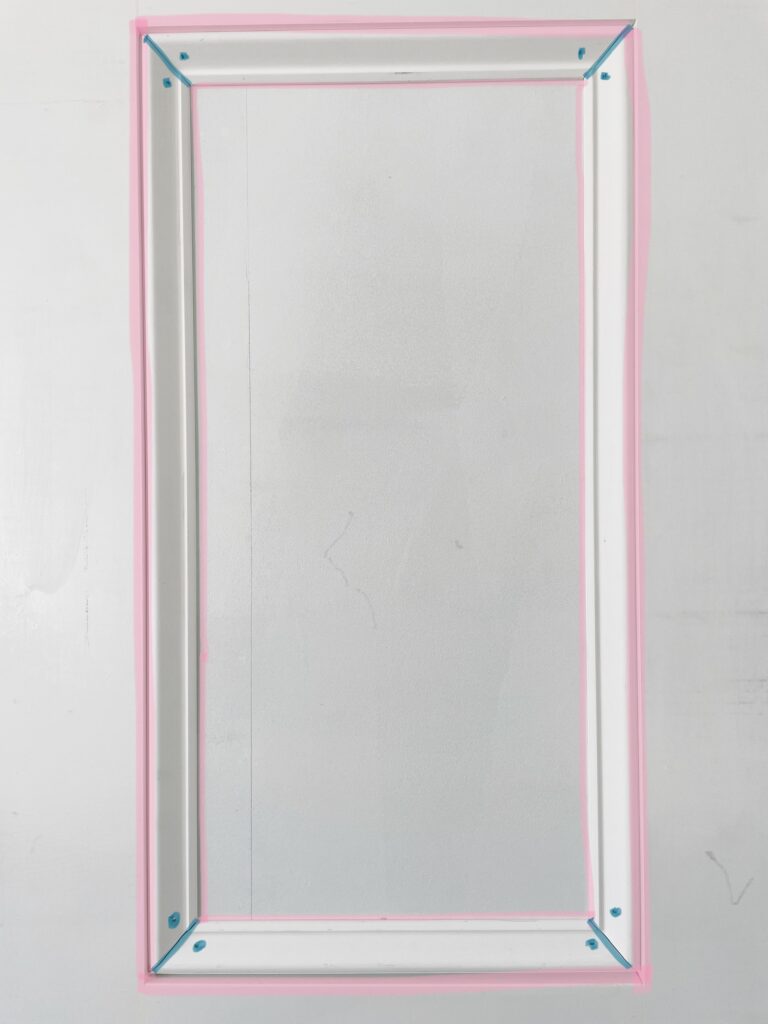
But I got through it and it was worth it! The photo below shows what I did for each panel! (Pink=caulk and blue=spackle!)
Spackling
Before caulking, I filled all the nail holes and seams with this lightweight spackle. I applied it with my finger. After that I cleaned it up a little with a small putty knife!
This type of spackle doesn’t require sanding, but I did do a light scuff sand with a sanding sponge after it was dry just to smooth everything out!
Caulking
Yes, caulking is a lot of work, but just look at the difference it makes:
Some of the gaps around the outside were pretty big (again, my cuts aren’t always perfect!) so I noticed after the first day that they would need a second coat of caulk.
In case you didn’t know, caulk shrinks as it dries so you always want to check before you start painting.
Do you see those tiny little holes? That told me a needed a second coat! Luckily not all of the panels required a second coat…but most did!

Lastly, you’re going to have to caulk around the edges of the wall itself.
You could also use a small trim if you wanted, but I was going for a cleaner look. Some of the gaps were pretty large, so for those areas I used backer rod before caulking!
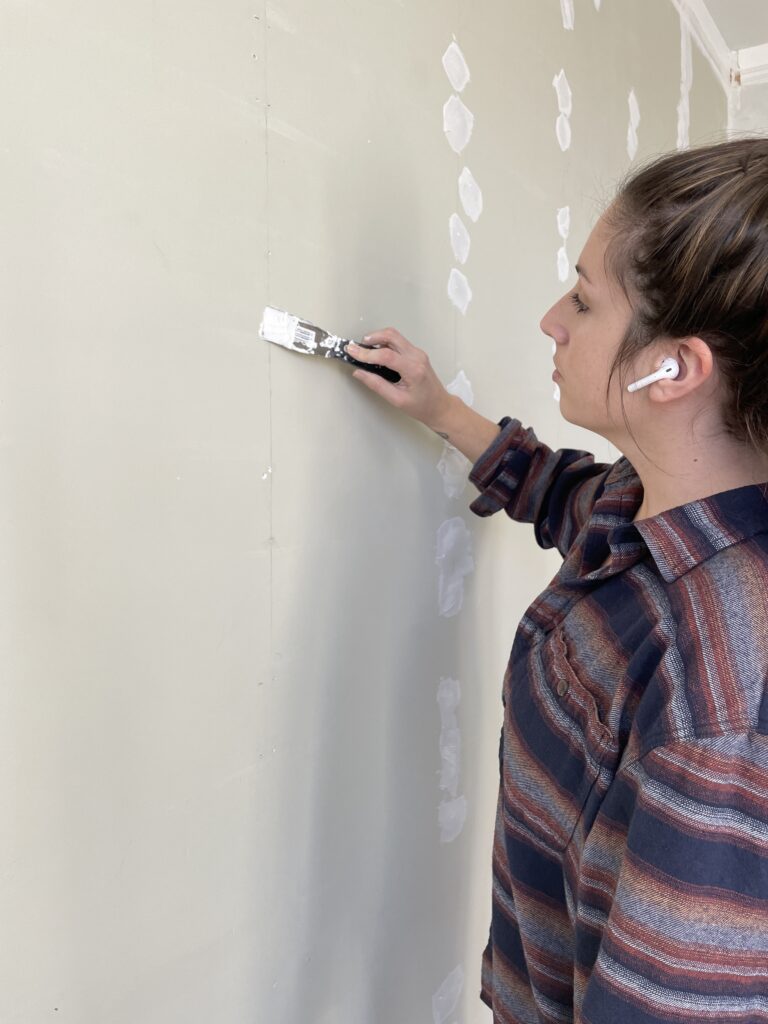
Step Seven: Paint
Finally…the part I very patiently waited for!
I decided to stick with white since we have an open concept first floor and I want everything to flow nicely. BUT! I did make the shift to a beautiful, warm white and I swear it made all the difference!
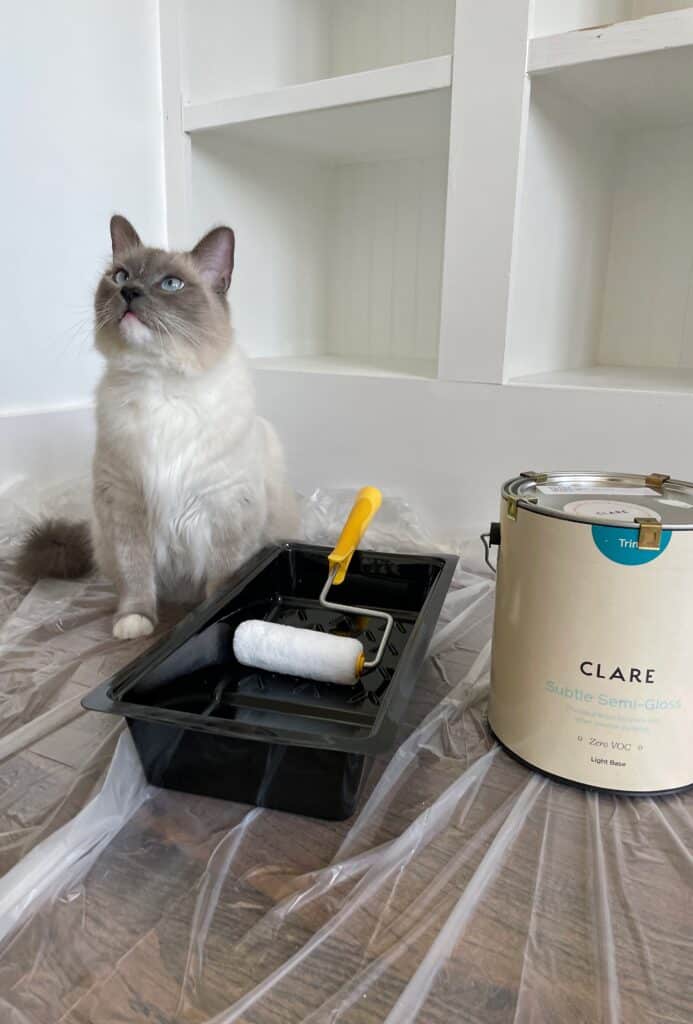
We ended up painting the entire living room with the color Whipped by Clare paint. I loved it so much that the following week I just went ahead and painted the entire first floor.

Before going in with a roller brush, I used a small angled brush to paint the trim.
For everything else, I used a small roller brush. We painted into the night if you couldn’t tell!
What do you think? Did I make the right choice by removing the shiplap?
I personally couldn’t be happier with how this DIY recessed wainscoting panels accent wall turned out!
Hopefully I covered everything for you, but if not, check out my living room highlight on IG to see everything in action! Let me know if you have any questions!
As always, thank you for being here!

Oh my world! This looks sooooo good!!! ????????????
I love that you give so much details with everything that you did, it almost makes me want to try it too ????
This turned out so amazing!
Awe, thank you Cristina!! You could TOTALLY do this! <3
Thnank you SO much Rachel! Sorry I’m just now seeing this!
Wow, marvelous look. I like much. Very useful information share. Very well do you doing work. I am glad! Beautiful design. Good idea.
Thank you so much Raj! I’m so glad you like it!!
What a beautiful accent wall. Good job!!
Thank you so much! We love it!! 🙂
Fabulous wall. !! Can I ask what thickness of mdf did you use on this ? . Thanks
Hi Judy! Thank you so much!! I actually linked the exact MDF I used under the materials section of this post in case you want to see but it’s 11/16″ thick!! 🙂