

My fiancé Dan was out of town for a week and I thought it would be fun to make some dramatic changes to the house because why not, right?! I love surprises!!
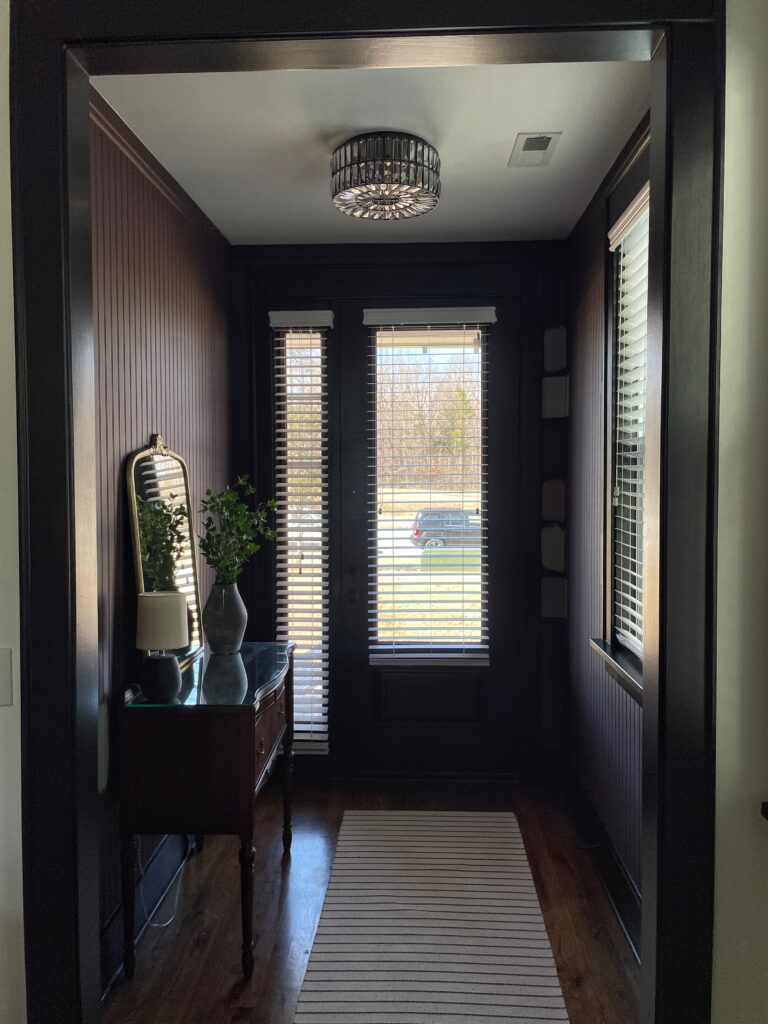
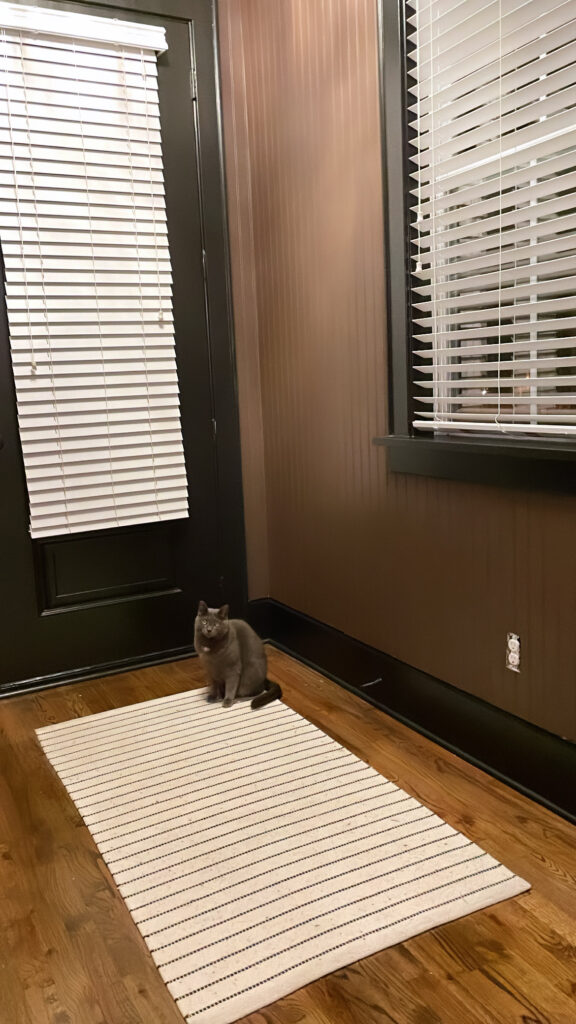
We have an open concept main floor and the first project I did was black contrast trim all throughout. See how it looks here!
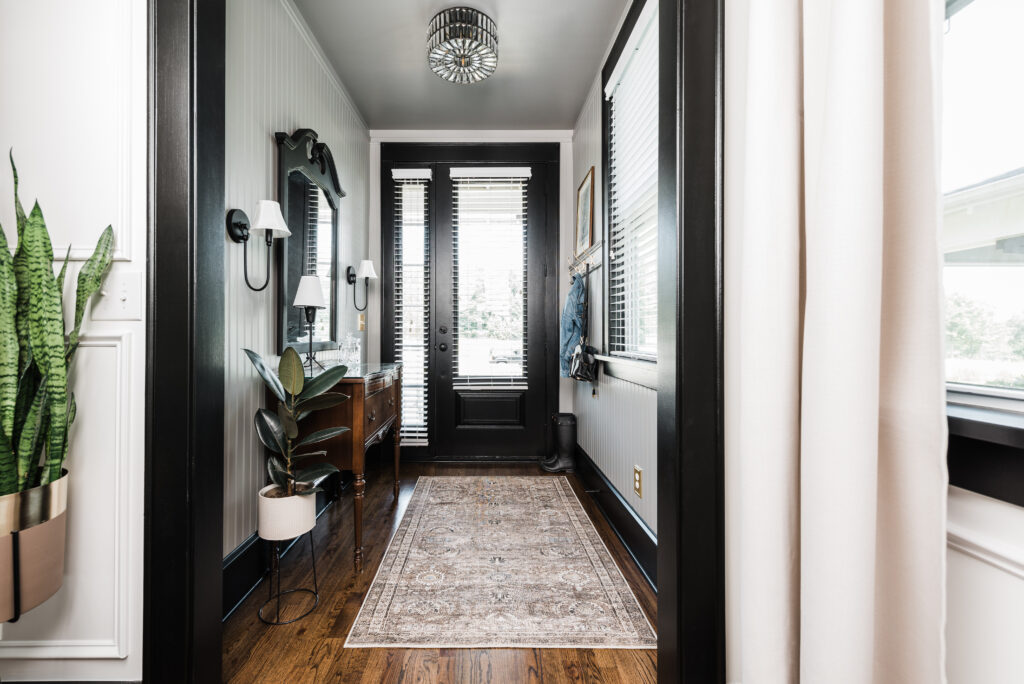
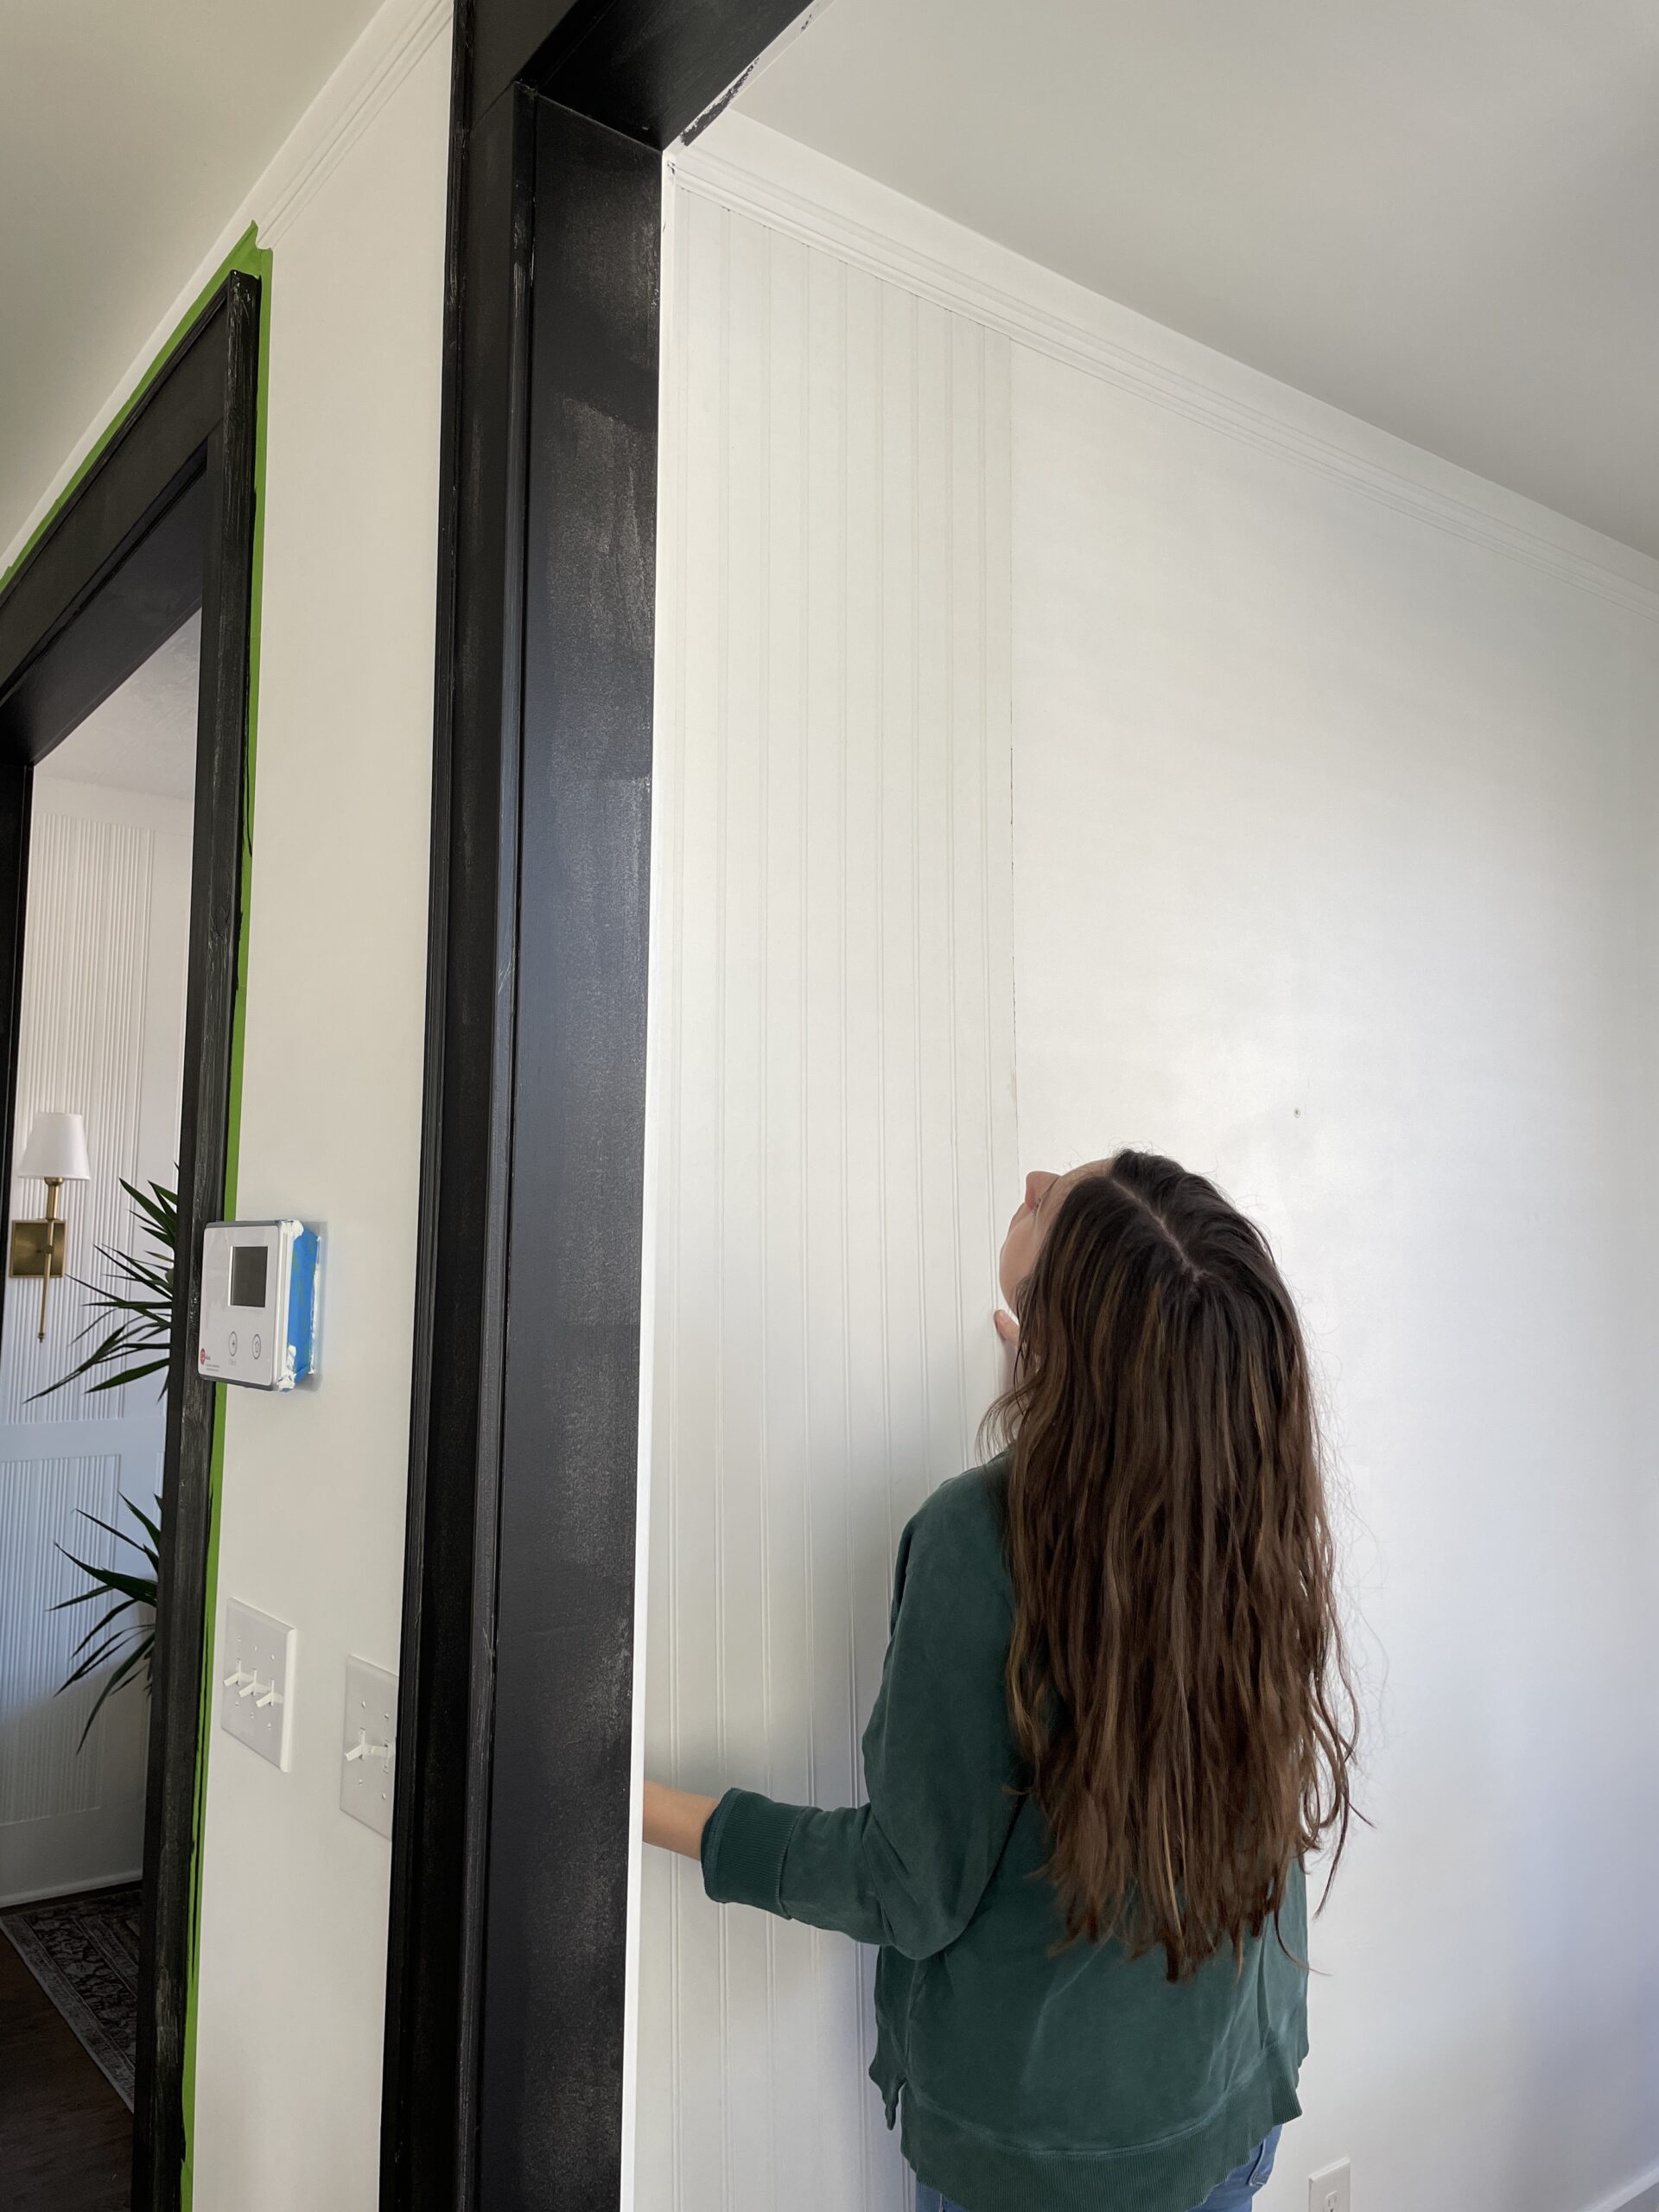
The second project was this DIY beadboard entryway makeover!
Part One: Establish Entryway Goals
Goal #1: make it bold
This seems to be a goal for most of my projects… what can I say? I’m into bold design statements!
Beadboard is one of my favorite wall treatments- it’s timeless, inexpensive, and easy to install.
What did I do to make it bold? Installing it floor to ceiling! This makes the ceiling look taller and therefore the space looks more grand. Also… paint and trim! We’ll get into that later!
Goal #2: make it more my style
My design style has definitely evolved over the last year and I’m finally feeling in tune with what I love. I’m drawn to the mixture of old and new.
Modern with traditional touches and vintage pieces. To me, it’s the perfect balance!
Goal #3: Make it welcoming
Of course, this is the first space people see when they come over! It should be welcoming!
I replaced the black accordion rack with nice, sturdy brass hooks on trim detail. The outlet and light switch covers also got upgraded to a pretty satin brass. The sconces, warmer tone woods, and decor will also provide more coziness to the space.
Inspiration
Disclaimer: This post contains affiliate links. This means, if you purchase something from a link I provided, I will receive a small commission. This is at no extra cost to you! Thank you for your support!
materials
- Beadboard
- Liquid Nails
- Base Cap Moulding
- MDF Board
- Spackle
- Shoe Moulding
- Chair Rail Moulding
- Caulk
- Paint
- Hooks
- Sconces
- Brass Outlet Cover
- Brass Switch Cover
- Construction Screws
tools
Part Two: Install the Beadboard
This is actually my first time using beadboard on a wall. The only other time I used it was on the landings for our DIY stair makeover!
Unfortunately I can’t fit 8ft x 4ft sheets of beadboard in my car, so I took advantage of Lowe’s services and had them rip down the sheets to be 8ft x 2ft!
Our ceilings are 9ft tall but the beadboard is only 8ft so I had to get creative. It helps that we have tall baseboards… 7.25″ to be exact.
Do you see that piece of base cap trim at the top of the wall? I ended up placing the beadboard right up to that which also helped account for some of the space.

Even still, the beadboard was about 1/2″ short of the baseboard as you can see in the left side of the photo above.
I had some leftover base cap moulding from my living room accent wall and I thought that would be the perfect solution to this problem. I’ll share more on how I installed that later!
Installation
You’ll want to use both an adhesive and brad nails for installing beadboard.
I used liquid nails for most of my panels, but I ran out and used wood glue for the last few. Clearly I was having fun with the liquid nails, but ideally you’d want to apply it in long, continuous lines about 10 inches apart.
Cutting around Outlets
The first panel was simple to put up, but the second panel had an outlet in the middle.
I tried out a little trick I’ve seen others used to help mark where to cut. All I had to do was dab 4 dots of paint in the corners of the outlet hole and press the back of the beadboard panel (in its proper placement) up against it to transfer those marks.
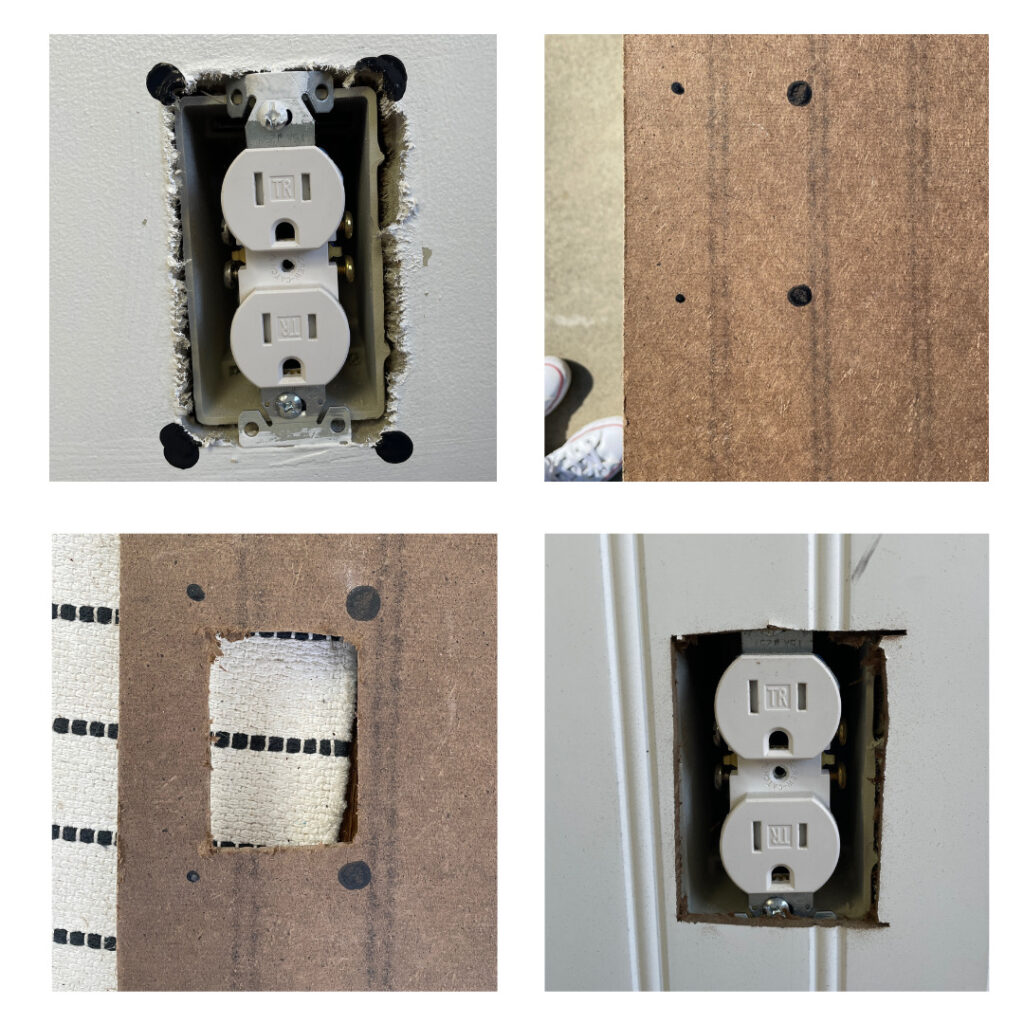

One important thing to note is that next time, I would make the cut out a tad bigger so that I have access to the top and bottom screws in the outlet in the event that I’d need to change it.
Other than that, this cut doesn’t have to be perfect because it will have an outlet cover over it.
Making Tricky Cuts
Unfortunately this wasn’t the last tricky cut that I had to make… this next one was the toughest!
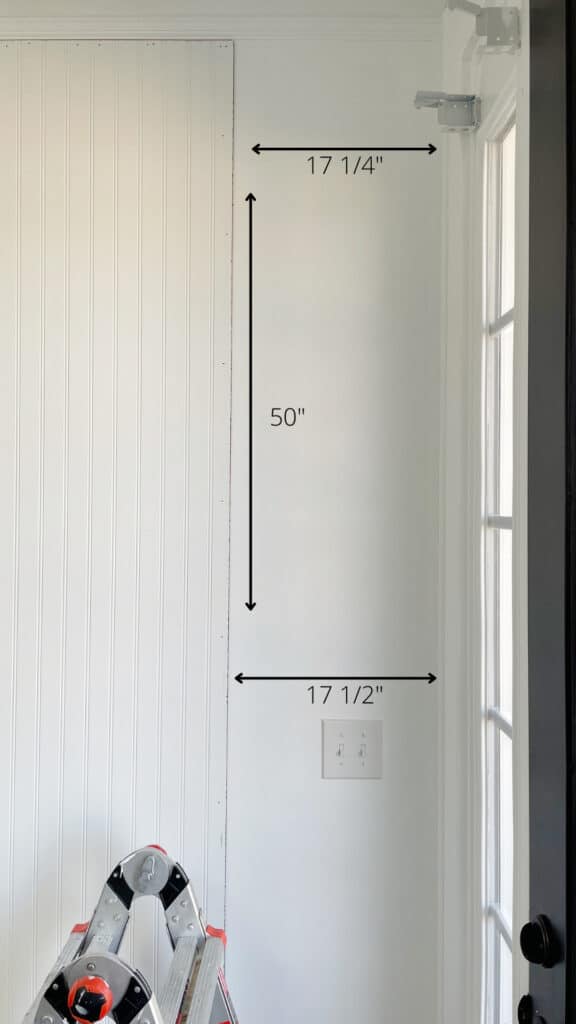
Not only did have a light switch to cut out, but I also had to shorten the width of the panel. First I measured from top to bottom to see if the space was even. Surprise! It wasn’t.
Walls usually aren’t unfortunately. As you can see above, the space gradually gets bigger towards the bottom.
The measurement on top was 17 1/4″ so I marked that first. It was about 50″ down that I noticed the measurement change to 17 1/2″ so I marked that next.
After that, I just used my long level to draw a gradual diagonal line down the beadboard and cut with my jigsaw. If that’s confusing, you can watch my entryway makeover highlight on IG.

There were at least 4 other cuts that I made using this marking method. Other than that, the picture below was my second most challenging cut.
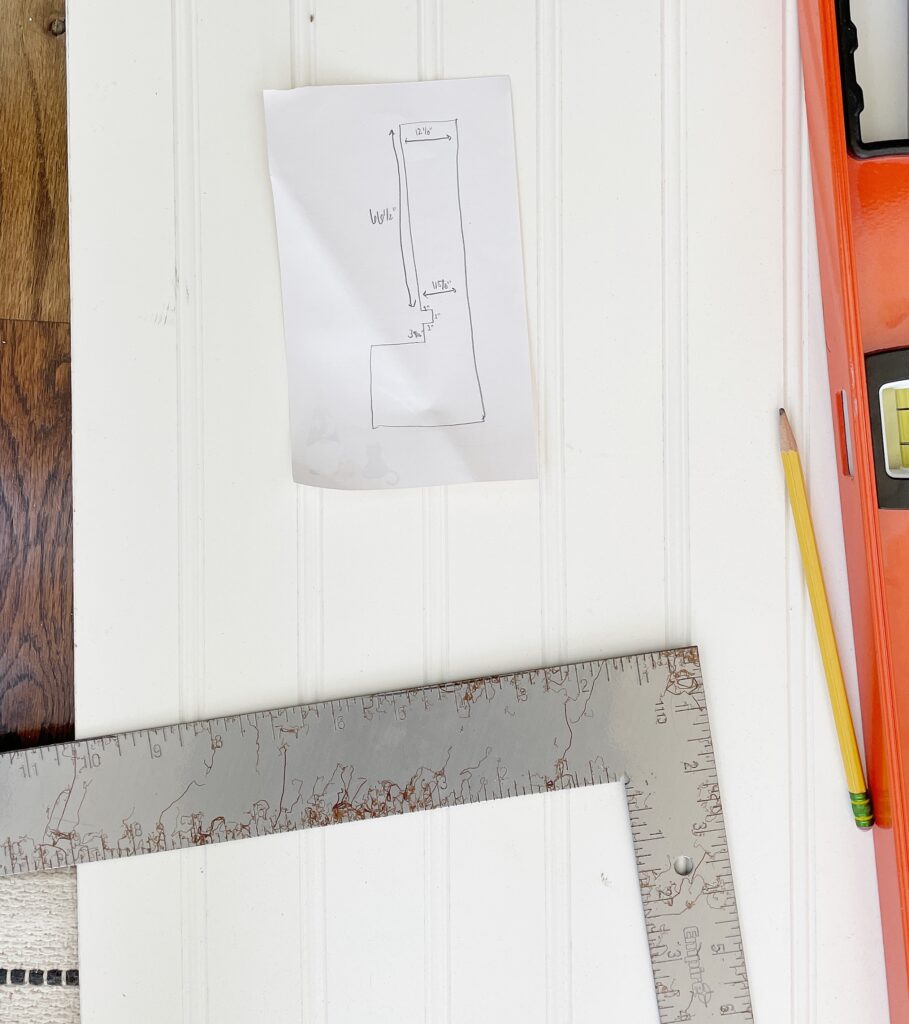
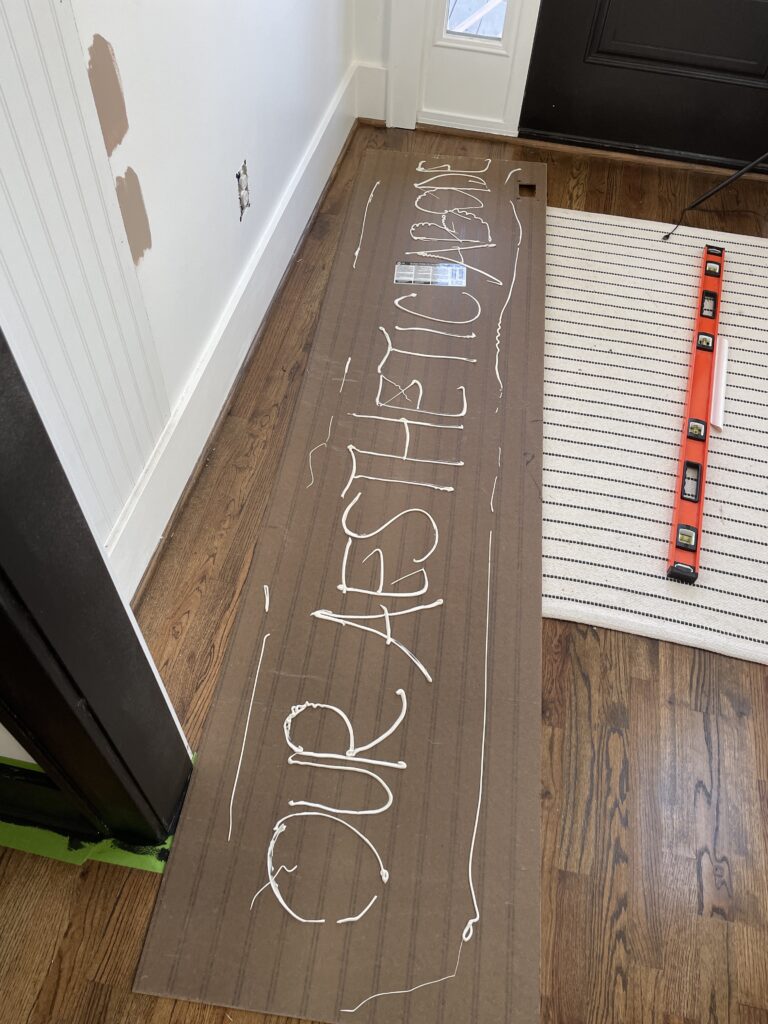
With odd cuts like this, I like to draw a rough sketch of the outline and just write down the measurements before drawing onto the panel itself.
I also triple checked my measurements because I really wanted to get this right the first time. Guess what??? I did!
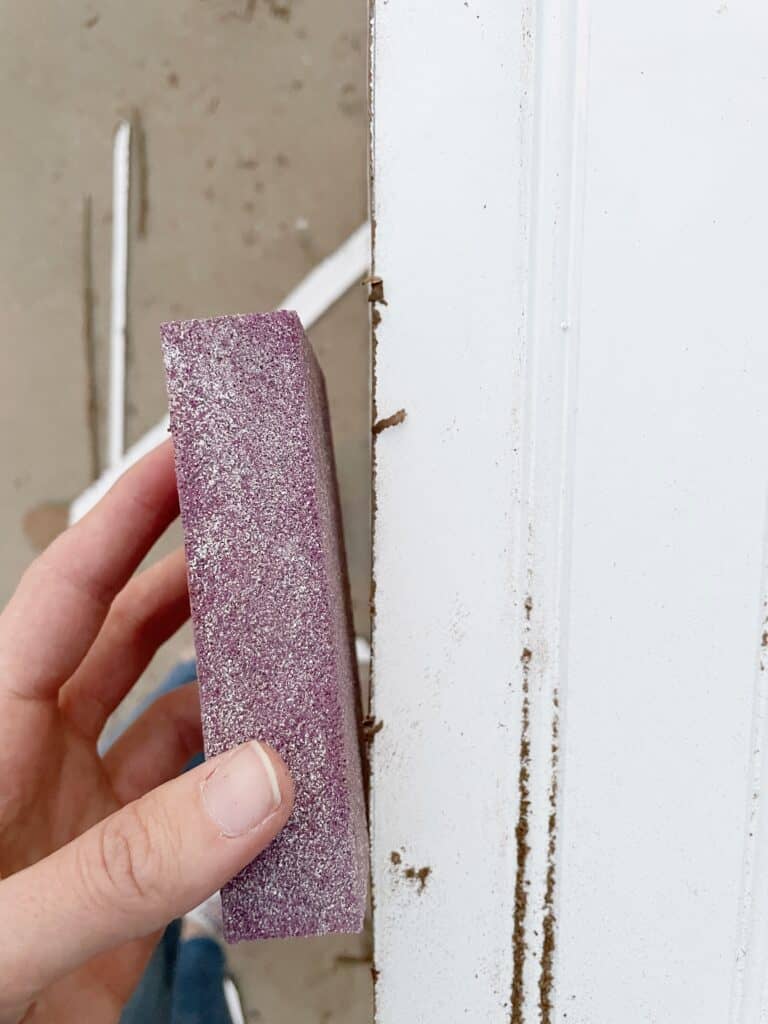
Tip: With MDF beadboard like I used here, It tends to “shred” when you cut it. After I made my cuts, I used a sanding sponge and just run it along the edge to smooth it out.
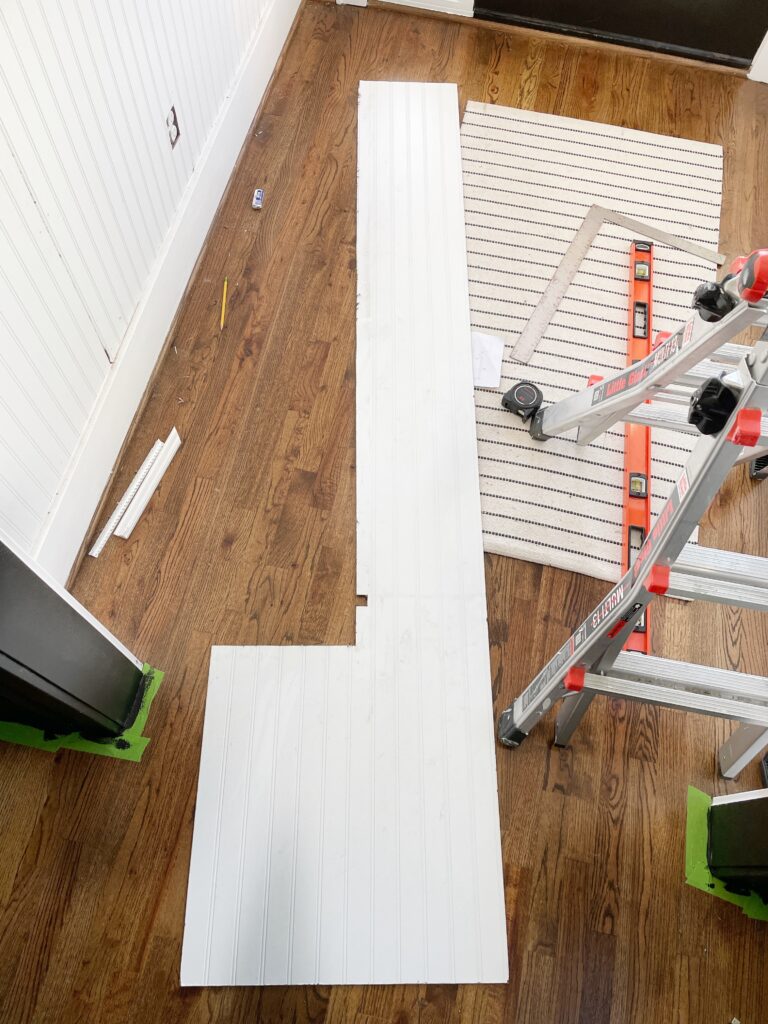
Here’s how it looked once it was all up! Remember, I was doing this beadboard entryway makeover as a surprise so I had a deadline of two days.
I finished installing all the beadboard day one, but it was dark by the time I was done. Normally, I prefer to take my time with projects.
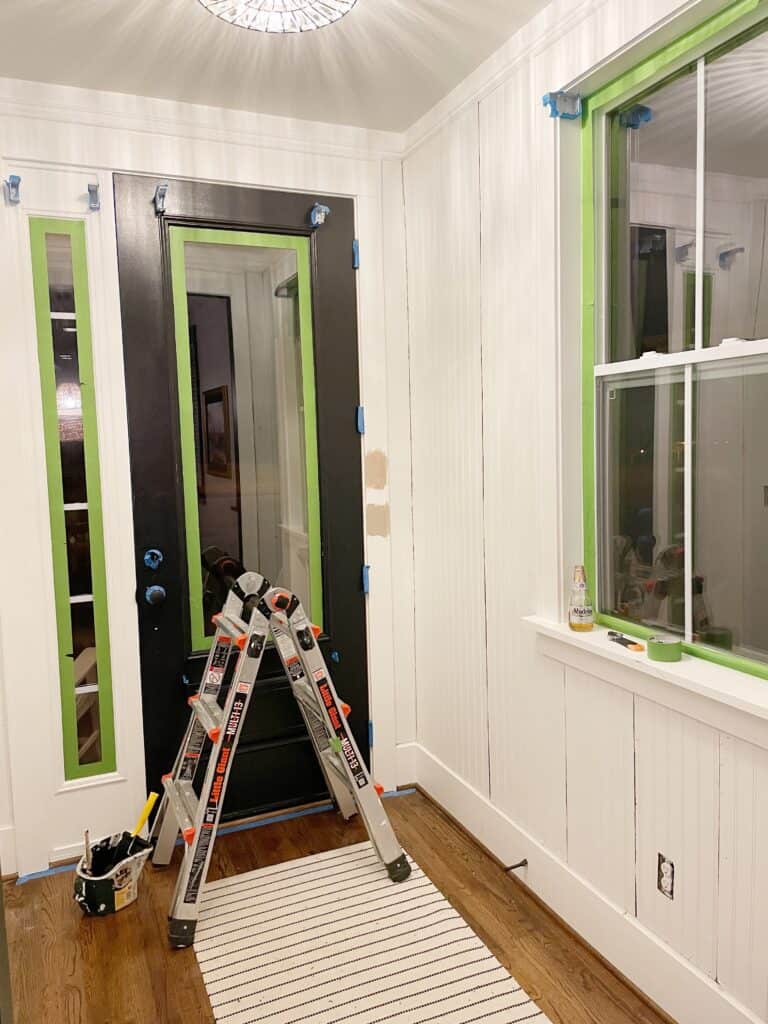
Part Three: Paint the Trim
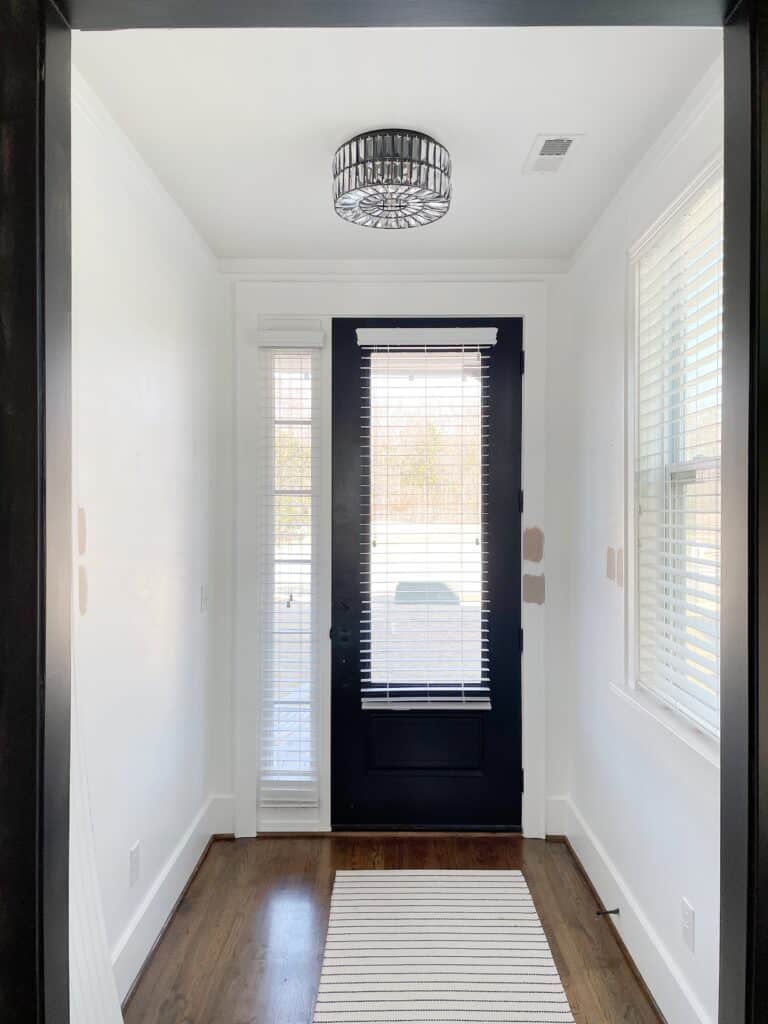
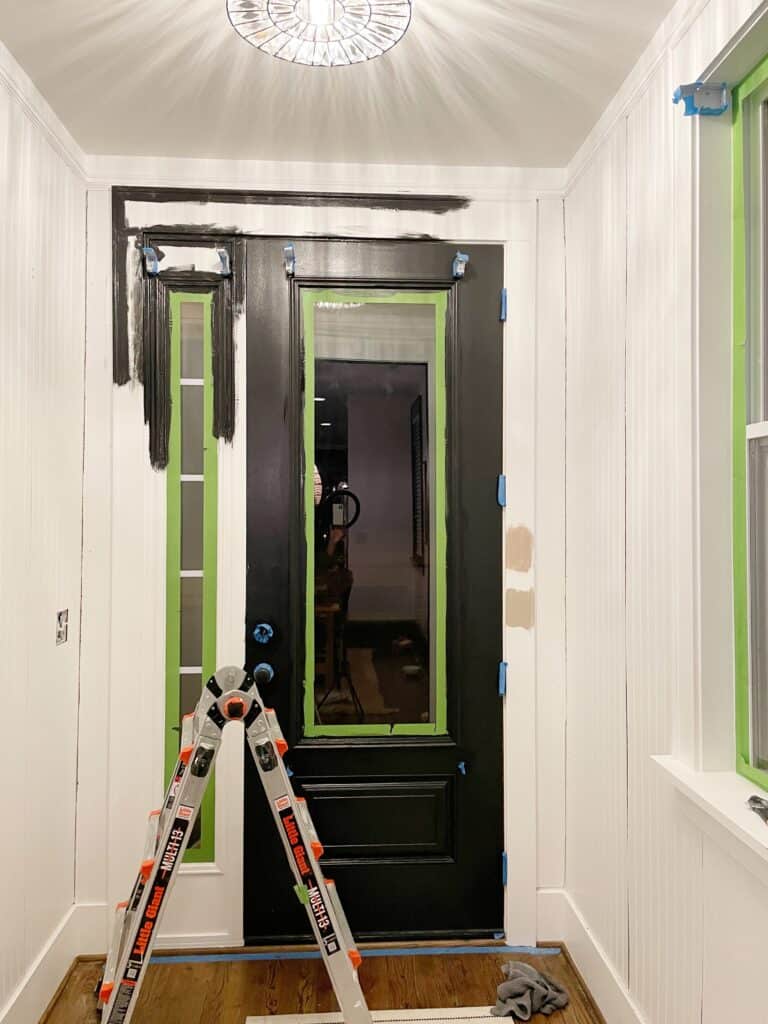
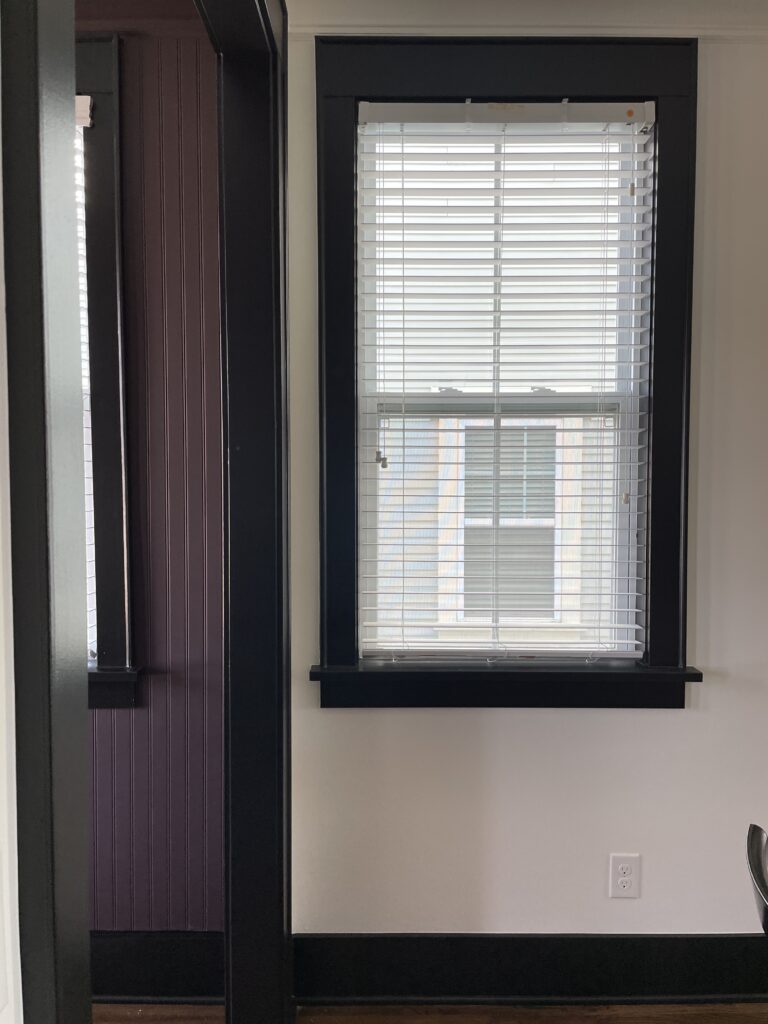
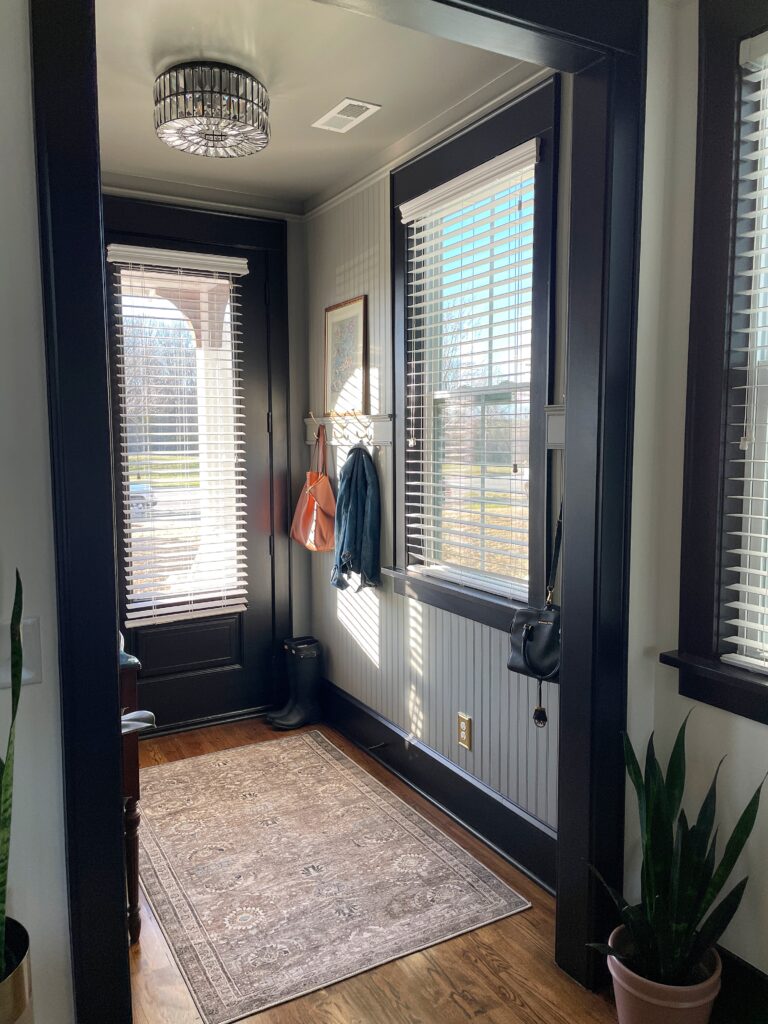
The door was already black, but I wanted the paint the trim around that, the window trim, and the baseboards.
With all the trim I had been painting, I felt like a pro at this point. Check out my blog post on how to paint trim and my favorite finish!
Part Four: Prep the Walls
Prepping for paint is so much work, I know!! But these steps are just as important as anything else, so let’s get into it:
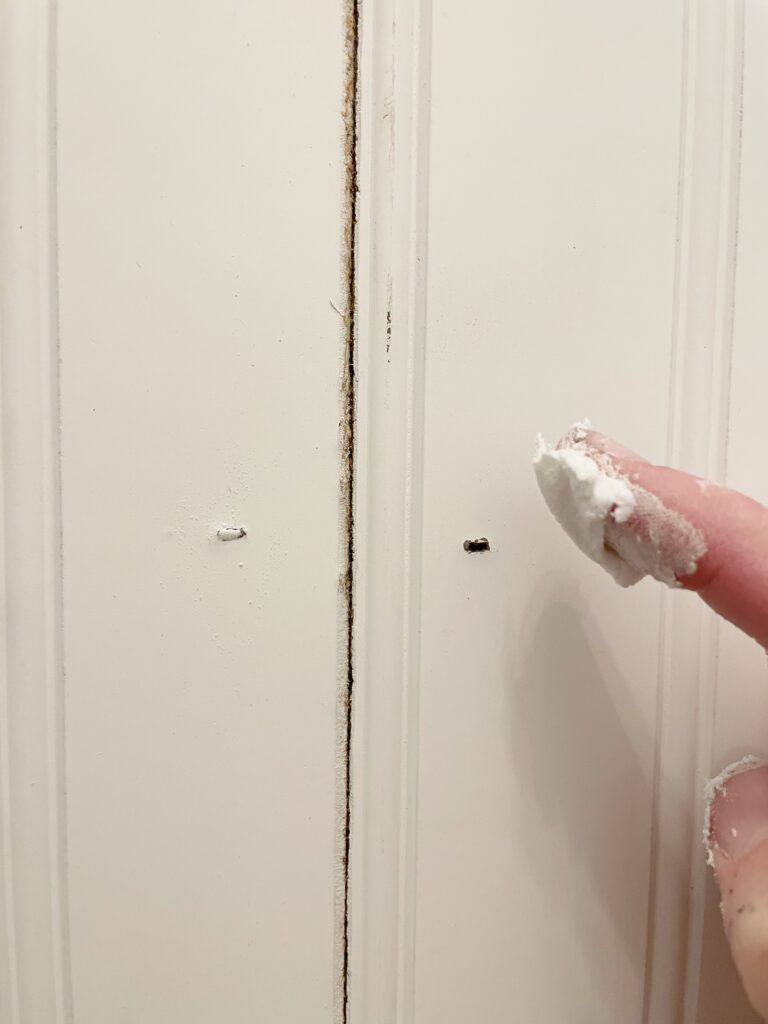
Nail Holes
This part is a breeze! I’ve been using this spackle lately and it’s really nice because you don’t have to worry about sanding after. It doesn’t shrink as it dries so if you fill the nail holes nice and flush, you’re good to go!
Tip: you can wipe off the excess with a damp rag or baby wipe!
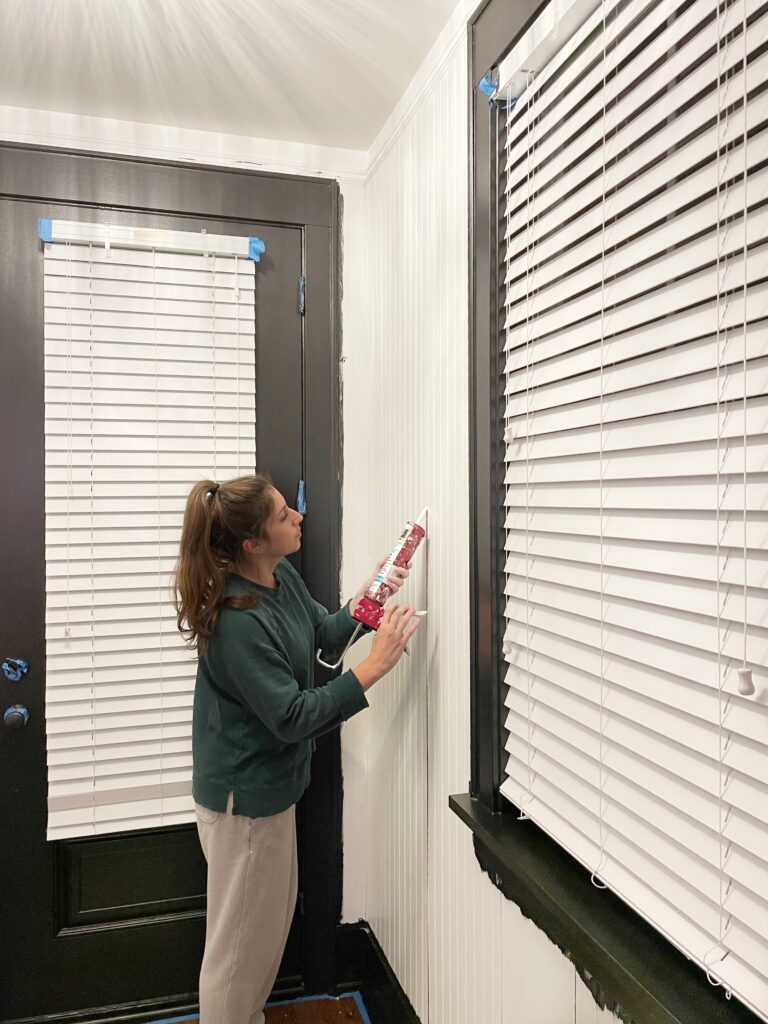
Caulking
Ahhh, caulking! It’s a love-hate relationship, but it makes the biggest difference. Especially for this beadboard entryway makeover.
Any seams where two panels of beadboard meet, you’ll need to caulk. I also caulked where the beadboard hits the window, door, and crown moulding trim.
Sanding
Just like I did the with trim, I used a 220 grit sanding sponge and used it on all of the beadboard, not just the seams and nail holes. This will roughen up the surface a little so the primer has something to stick to!
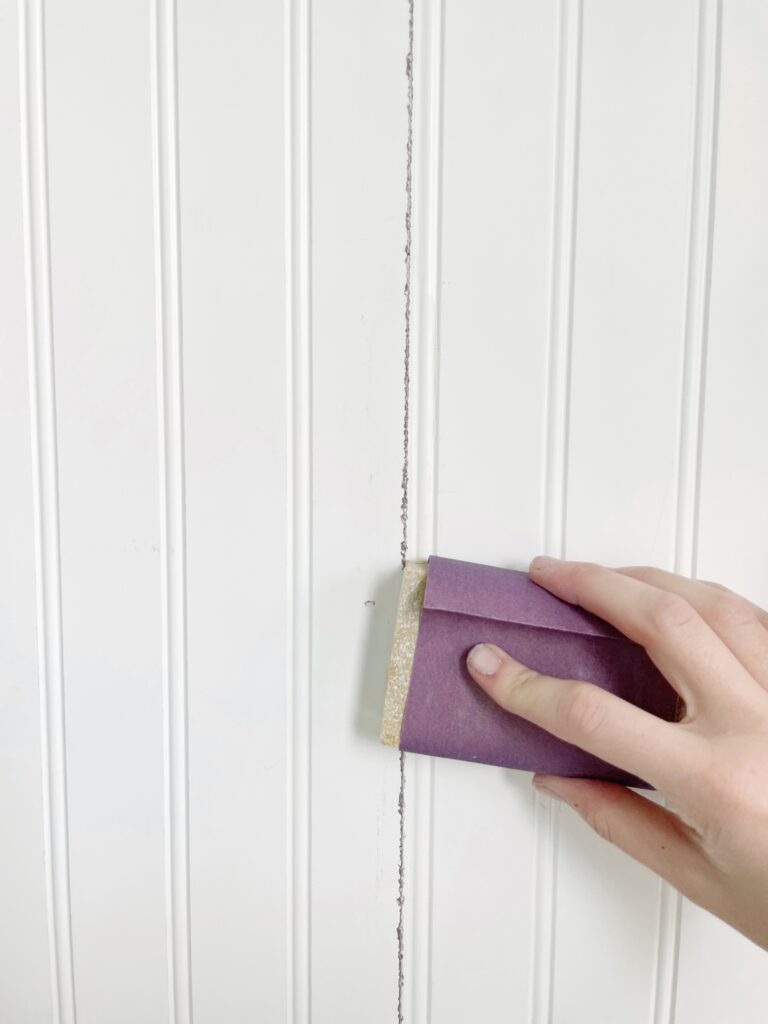
Tip: When my sanding sponge gets old, I just wrap a piece of sand paper around it. It’s less expensive than continuing to buy sponges!
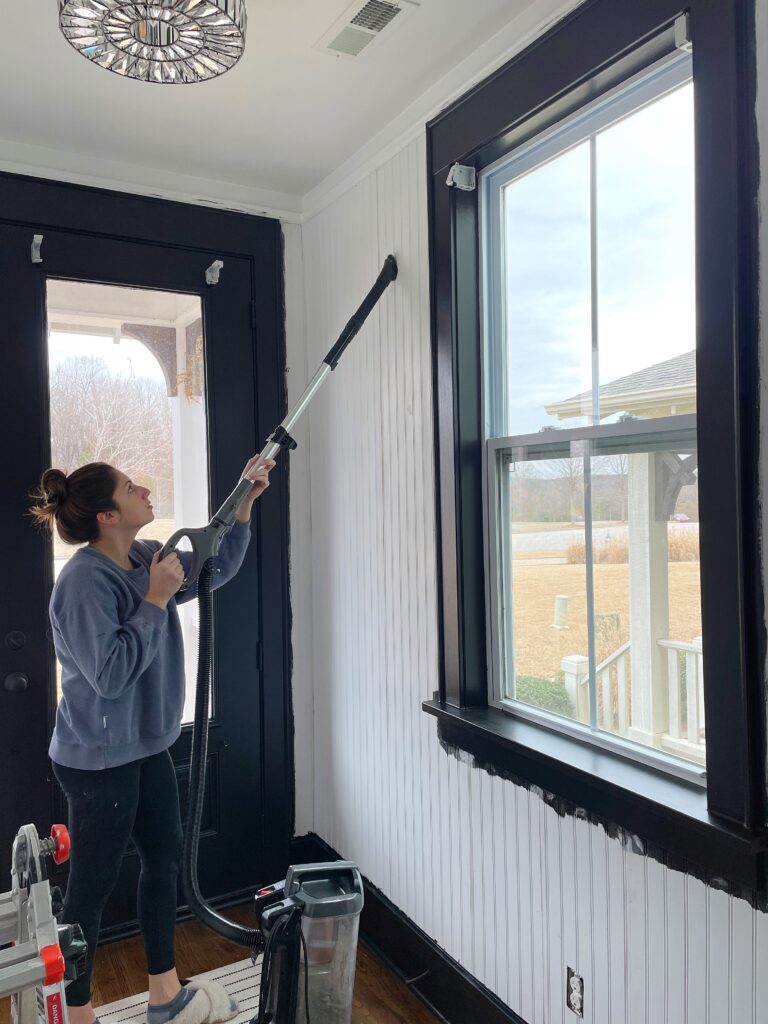
After sanding, I vacuumed the dust off the walls and wiped them down with a damp rag.
Priming
It is recommended to use a primer on beadboard, so I decided to use this shellac-based primer that I had on hand. It was tinted for a previous project (the tint is helpful if you’re painting with a dark color) and has come in handy multiple times since!
Part Five: Trimwork
Just a little disclaimer- I painted this whole entryway purple before I did the trimwork. (I was in a hurry to paint for the surprise reveal to Dan!)
Ultimately, I decided not to keep to the purple. I’ll explain more on that in part six!
Beadboard Entryway Coat Rack DIY
An important piece of this beadboard entryway makeover was adding a DIY coat rack!
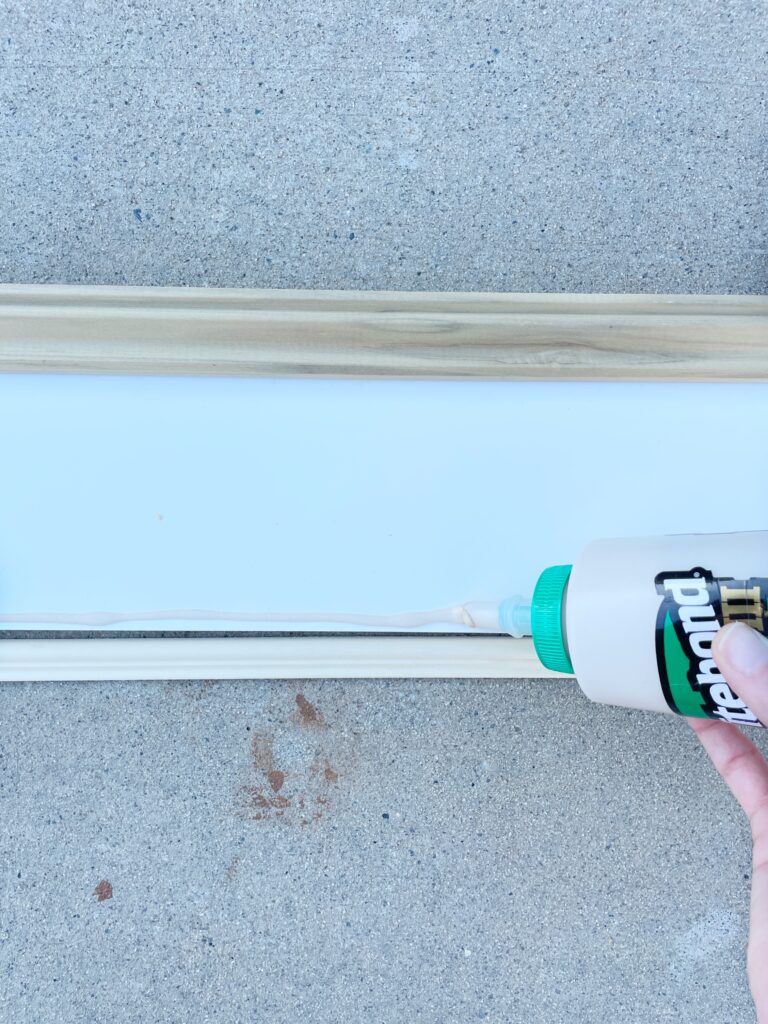
This trim is what I originally wanted, but it was pretty pricey and it took a while to ship. Then it hit me- why don’t I just make a trim similar to that! Here’s what I used:
Since I already had the MDF and glue on hand, it only cost me $15 to make this! Not too shabby!
Once the glue dried, I was able to cut the trim to size. Before installing, I used my stud finder and marked the location of the studs and also made sure it was level.
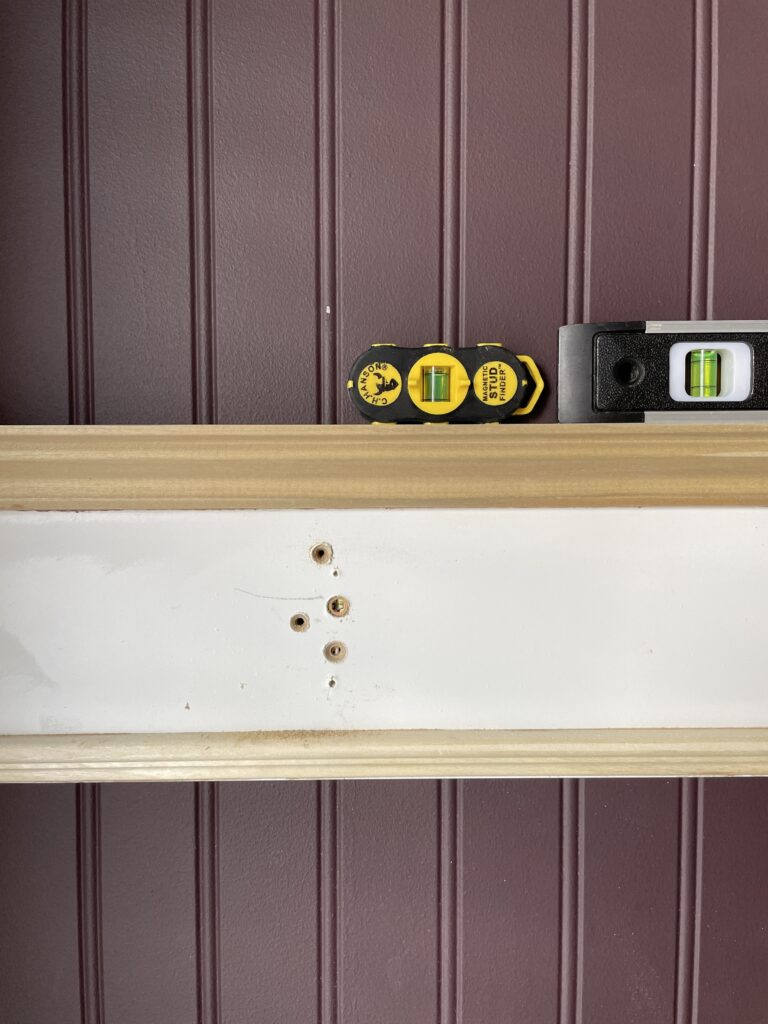
I used 2 1/2″ screws to install the trim.
Are you wondering about all those holes in the photo above? I was having a little trouble getting the screws to countersink, so I tried a few different spots. Oopsies! Nothing a little spackle can’t fix, right?!
Base Cap Moulding
As I mentioned earlier, I had to add some extra moulding to account for the gap between the beadboard and the baseboard.
This will solve that problem and make the entryway look more grand. You can never have too much trim! But, I will say, I struggled to get the angles cut properly. I’m still new to angles, so I’ll do my best to explain what I did…
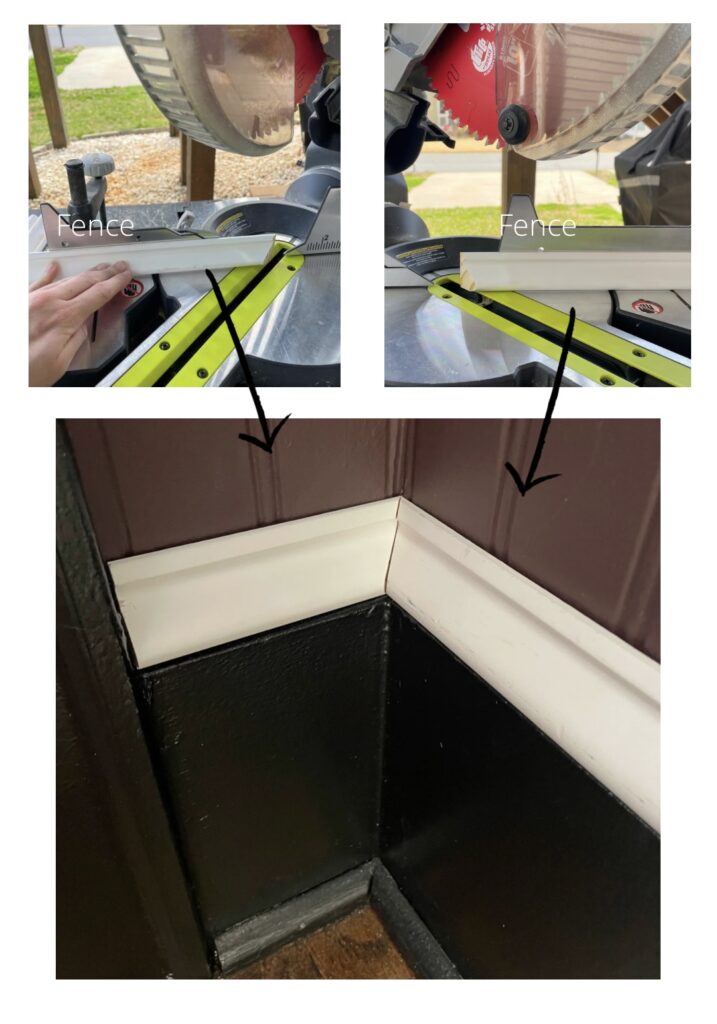
Refer to the photo above to see how I set the trim up on my miter saw. Normally these would each be cut at 45 degree angles, but for some reason when I tried that it had a gap.
Trial and error is sometimes the only option and it’s exactly what I did in this scenario. I cut the left piece to 44 degrees and the right to 46 degrees. I know it seems odd, but it worked for all corners of the room.
After talking with my community on IG it’s possible that my miter saw blade isn’t perfectly level leading to weird cuts. Anyway, usually two 45 degree cuts will do the trick.
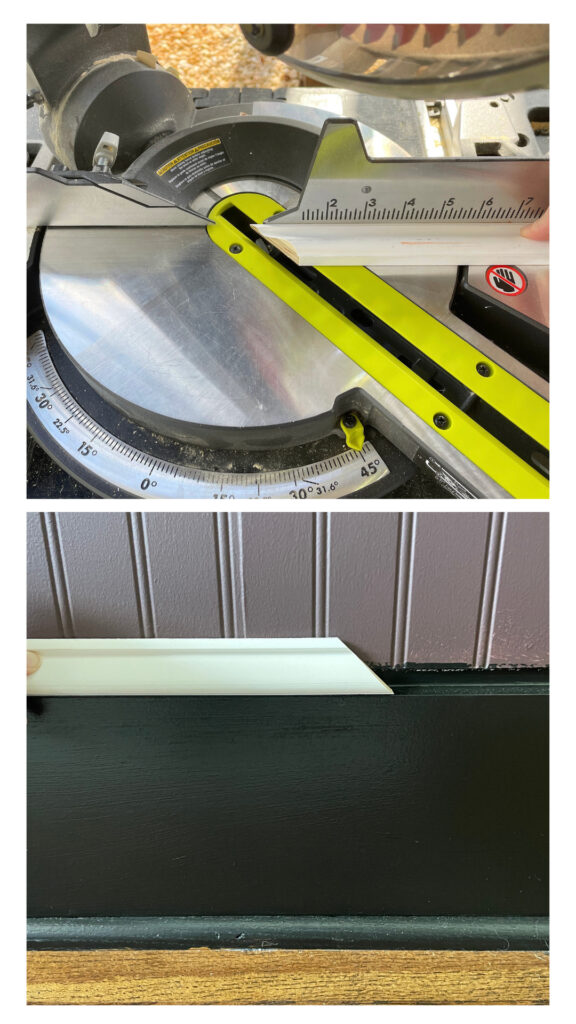
There were certain areas where I had to join two pieces of trim together. For these, I did a 45 degree miter cut.
See the photo above! Notice how I placed the trim on the table instead of the fence for these cuts. Here’s how I measured and marked for cuts like this:
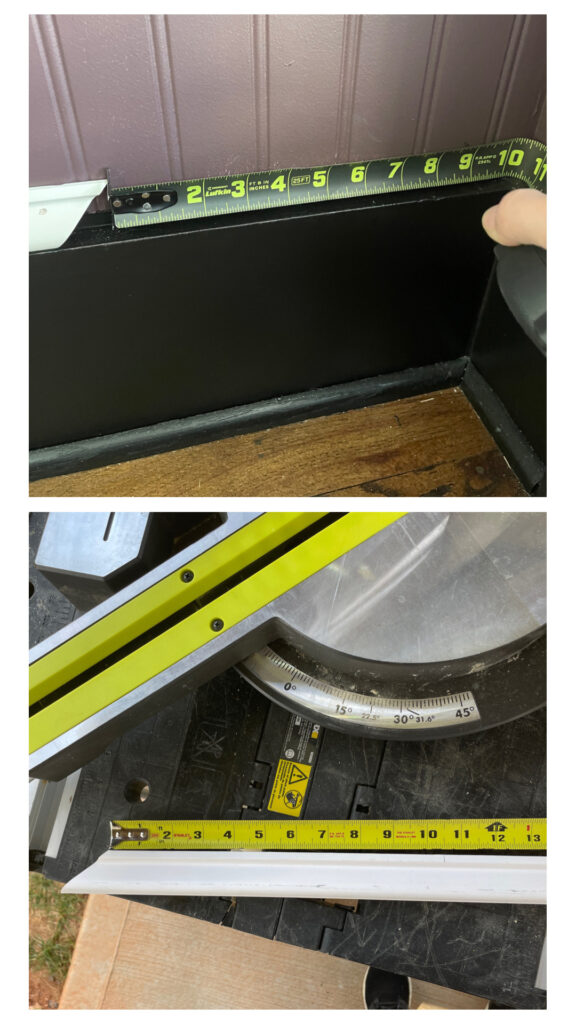
At first, I just cut one angle and left the other end straight until I knew for sure it would fit! Once I got it to fit, then I’d cut the angle for the corner. Hopefully this makes sense!
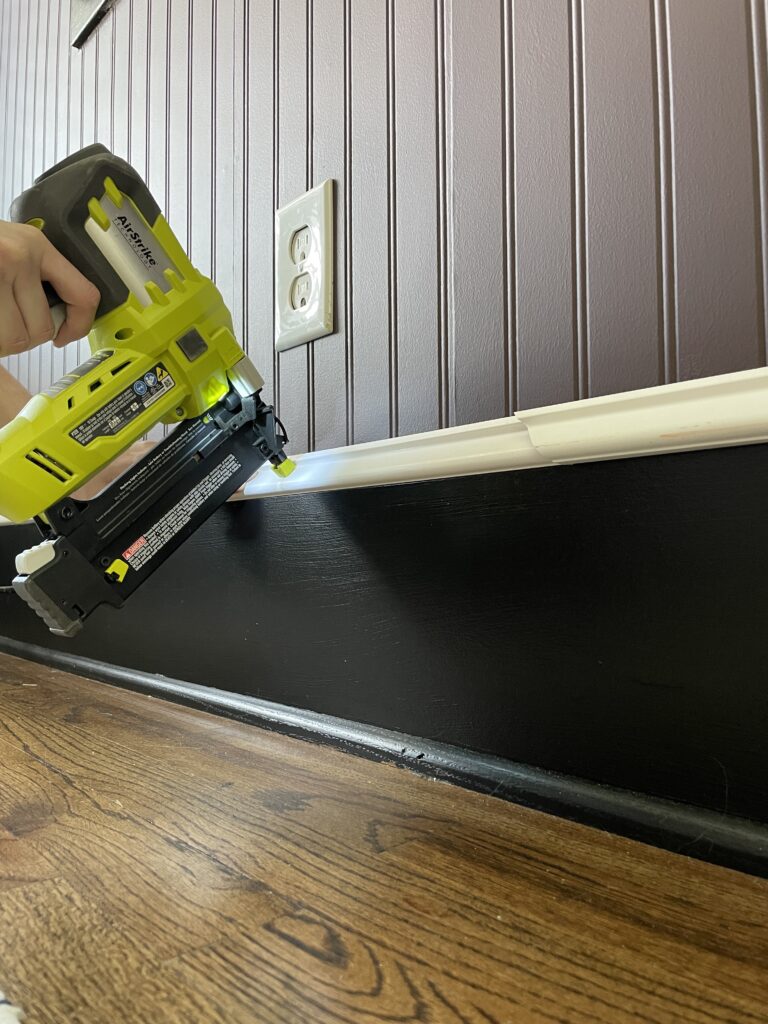
Once I dry fitted the pieces, I nailed them in place. Then I filled the nail holes with spackle, and caulked the seam where the trim meats the beadboard.
Part Six: Painting
So what happened with the purple?
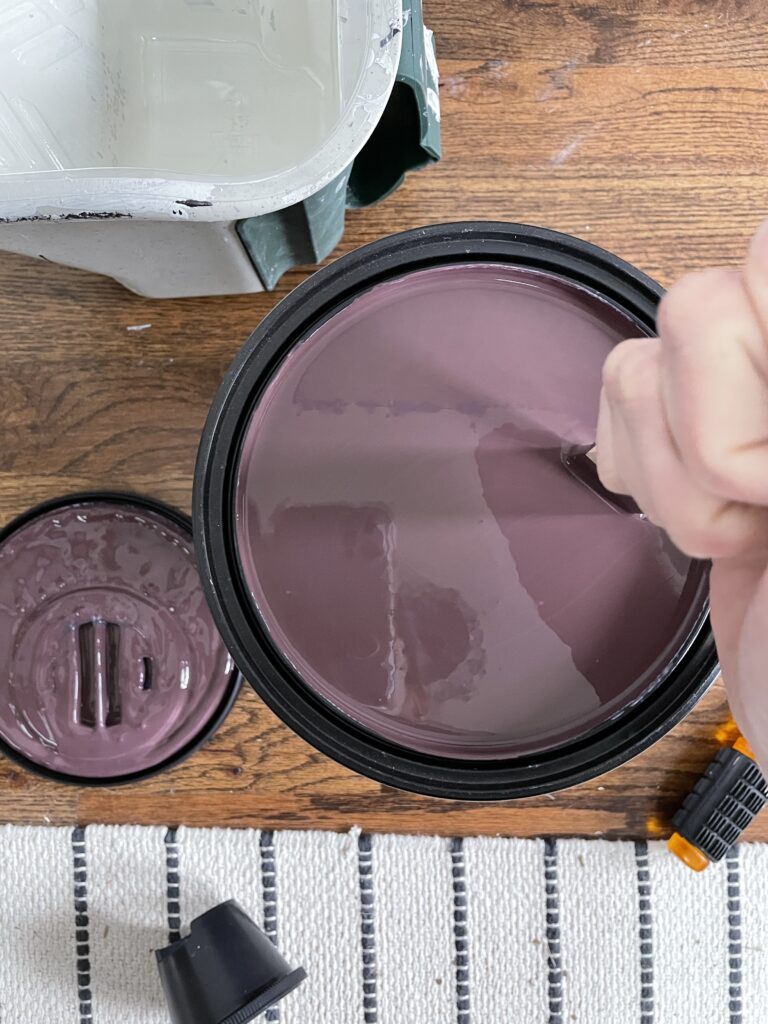
This Behr Aubergine color is truly beautiful… just not for my space.
It looked perfect in certain areas of the room at certain times of day, but for the most part it was just too dark. Let me show you a few examples of when I liked how it looked vs. when I didn’t:
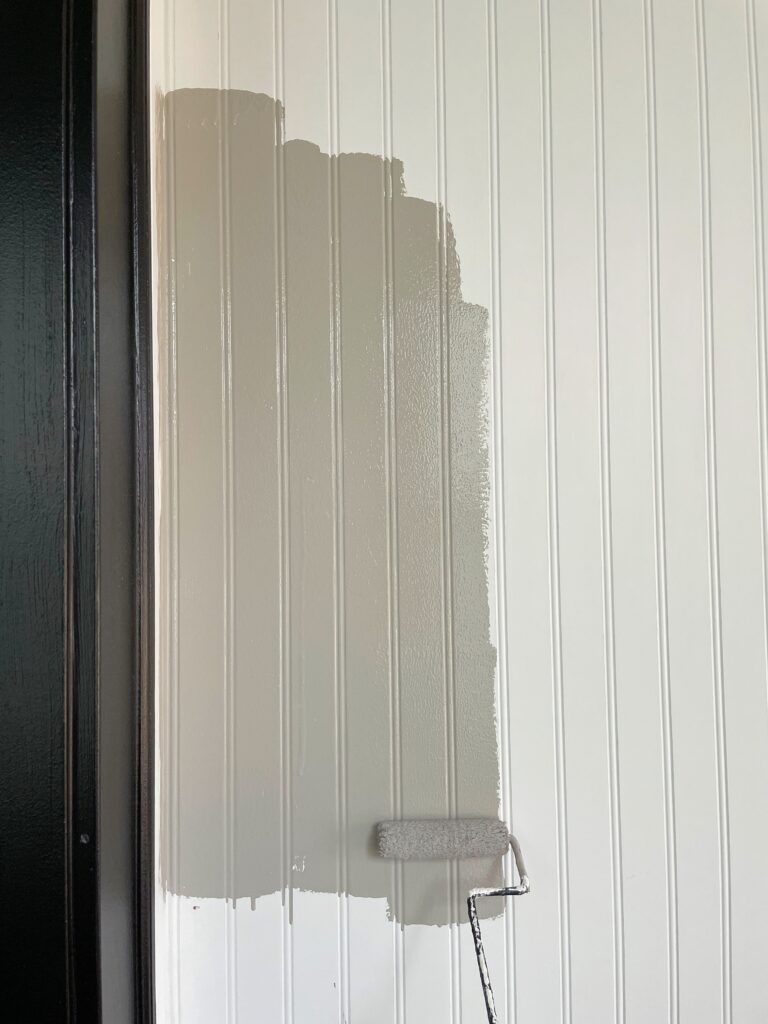
After testing a lot of samples…
I decided to go with the color Shade by Clare paint. It’s their darkest greige and I love how well it compliments the black trim! It also looks perfect with the wood and brass details.
Since I’d previously primed and painted the walls, I wasn’t going to worry about priming again. I just did a quick scuff sand and wiped everything down clean before beginning.
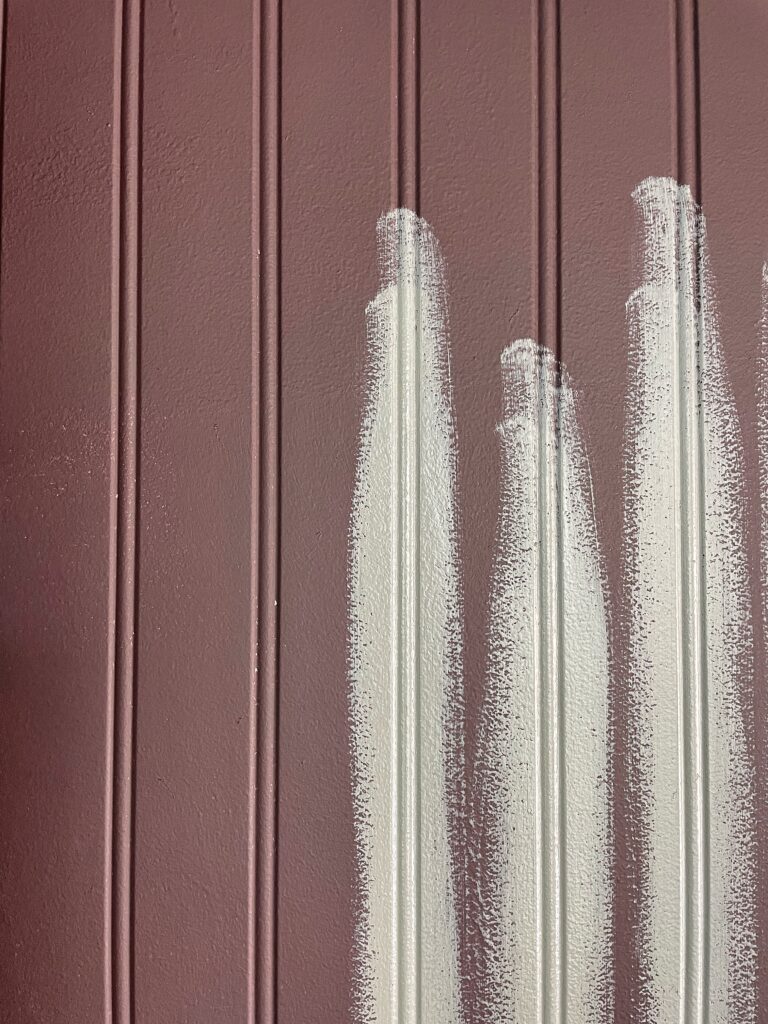
When I painted the entryway purple, I only used a roller and as you can see on the left side of this photo, I didn’t get full coverage.
This was my opportunity to correct that mistake and first use a small brush for all the grooves! I’m not going to lie, it took a while, but I got full coverage this time!
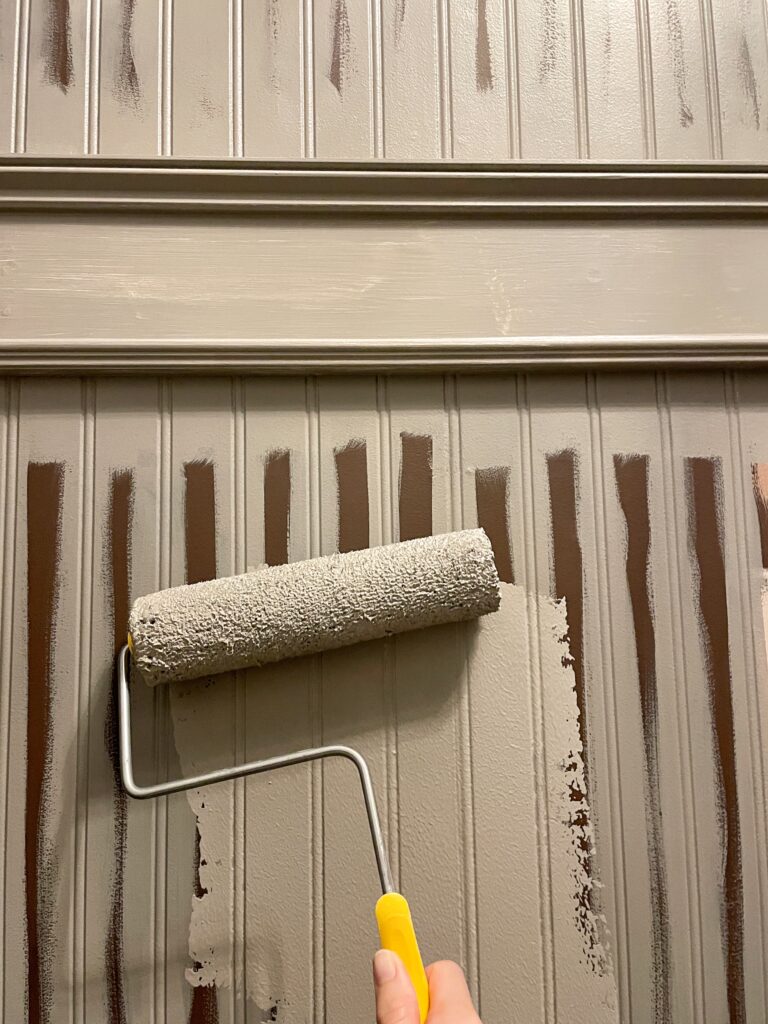
After I painted the grooves, I used a 3/8″ nap roller brush to do the rest!
I let the first coat dry overnight and then I did a light sand with a 220 grit sanding sponge. For the second coat I didn’t worry about painting the grooves again. It seemed to work just fine that way. I also decided to paint the ceiling too!
The Final Part: Styling
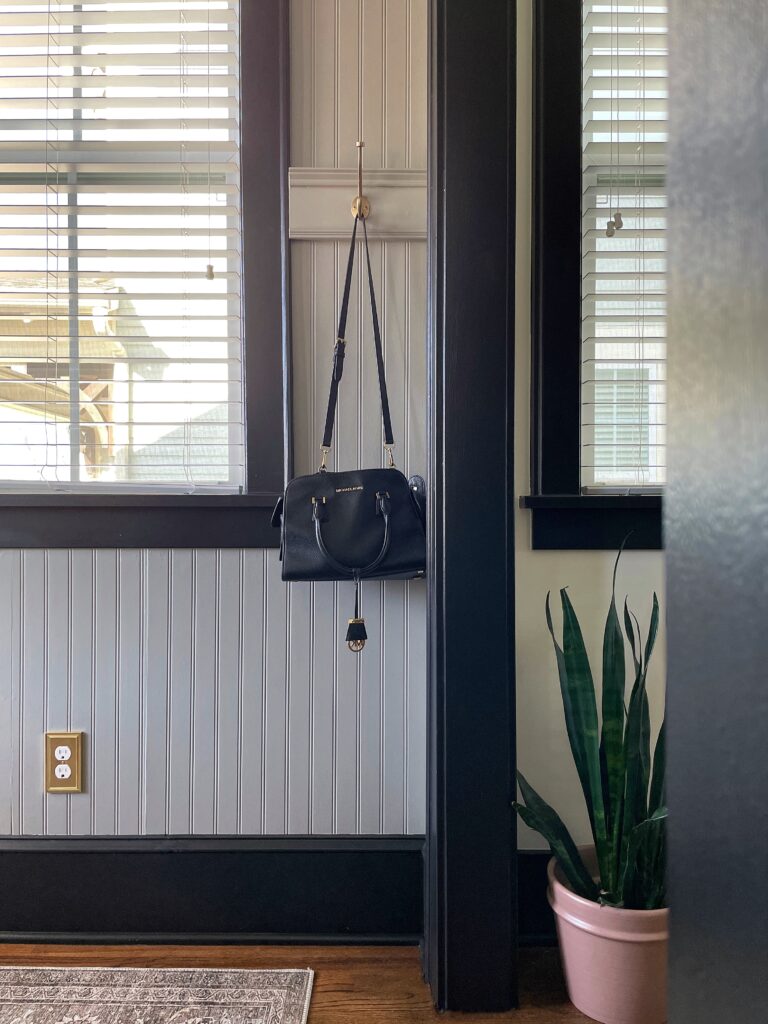
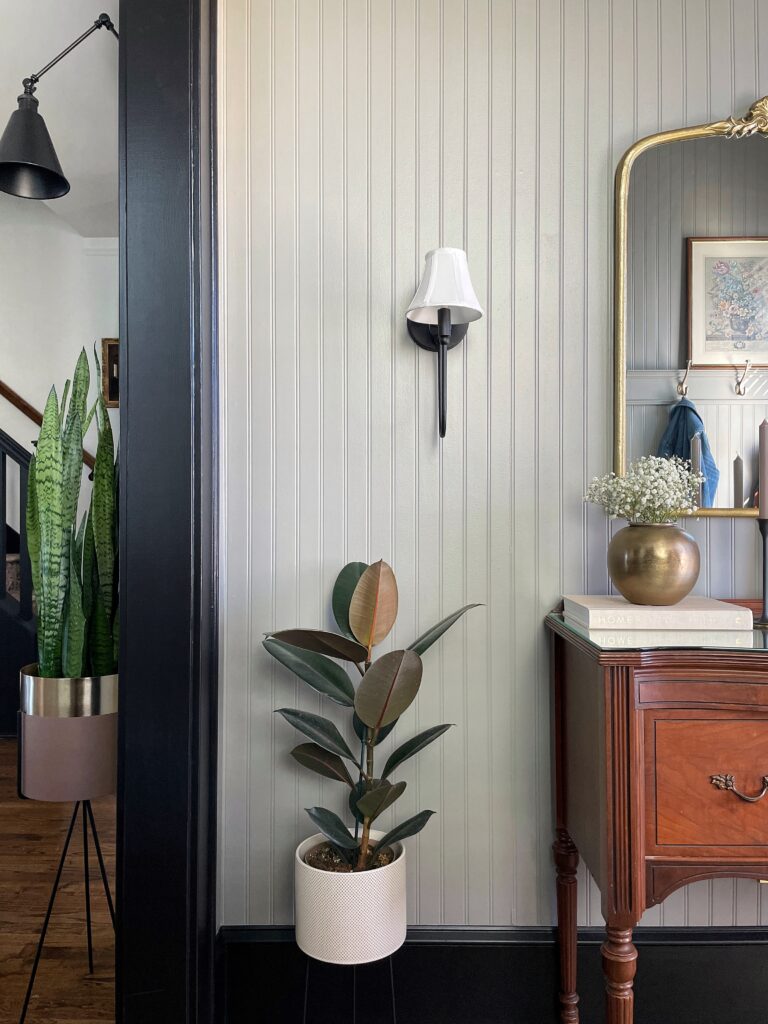
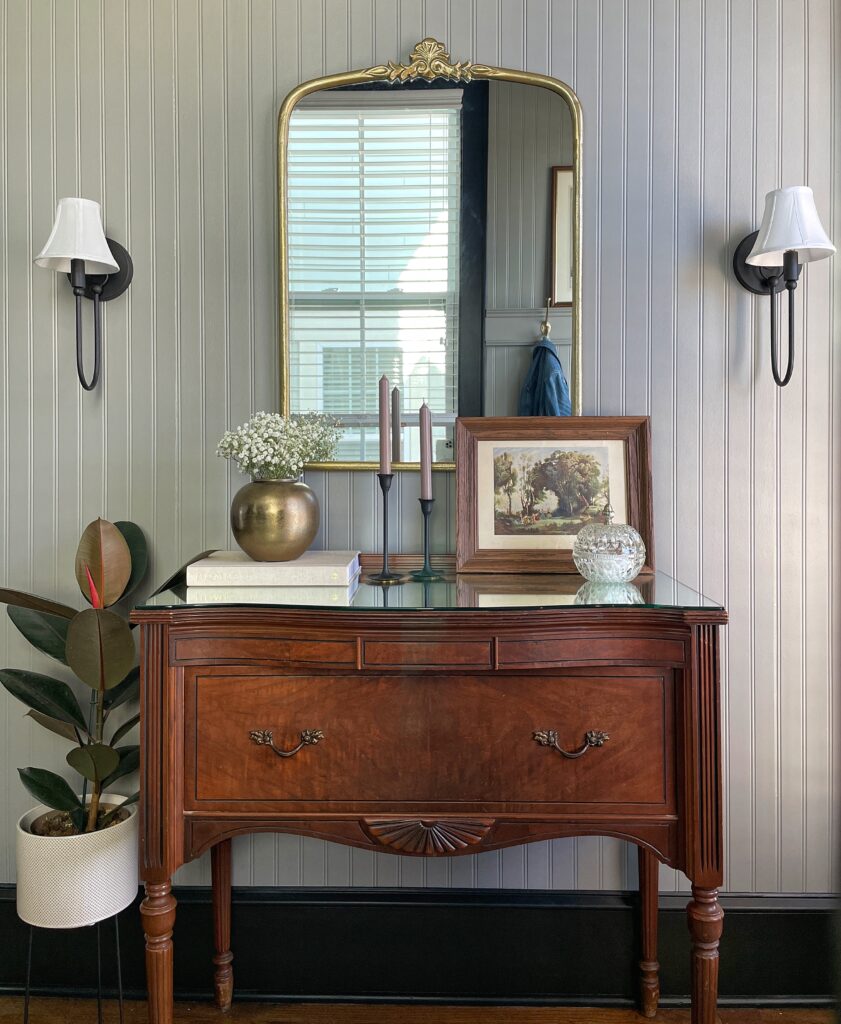
Brass details
The custom trim with these hooks is definitely my favorite detail in this beadboard entryway makeover. I love how oversized and durable they are. Durability was a must with the amount of stuff I store in my purse!
The art above the trim was a thrift find. It’s a vintage floral print for the month of May. It may be hard to tell, but the wood frame has a gold beaded detail to it… it’s SO pretty!
To make it even more special, this is the month we get married, the month we bought our first house, the month of my dad’s birthday, and also the month I lost him. May will always be significant to us.
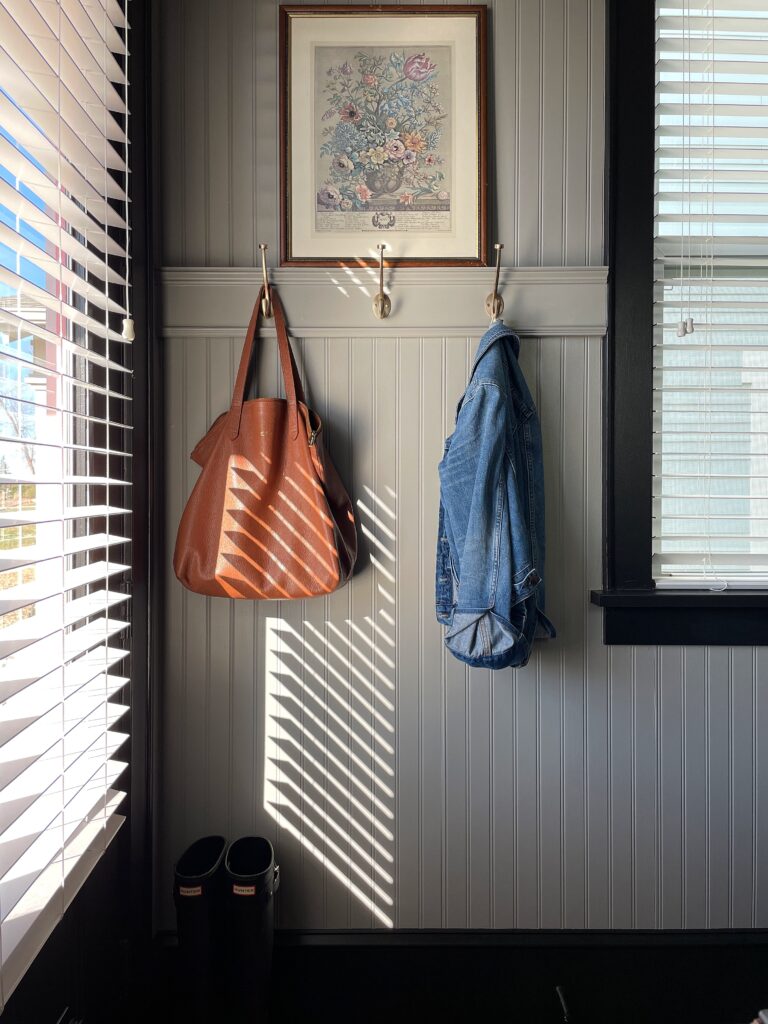
I’ve been dying to use some brass outlet and light switch covers somewhere in our house. They can add up, so I figured I’d try them out in a small space like this.
I’m so glad I did! I just adore how they look and now I want more. The planter isn’t really a part of this space, but I figured I’d link it for you because it’s one of my favorites!
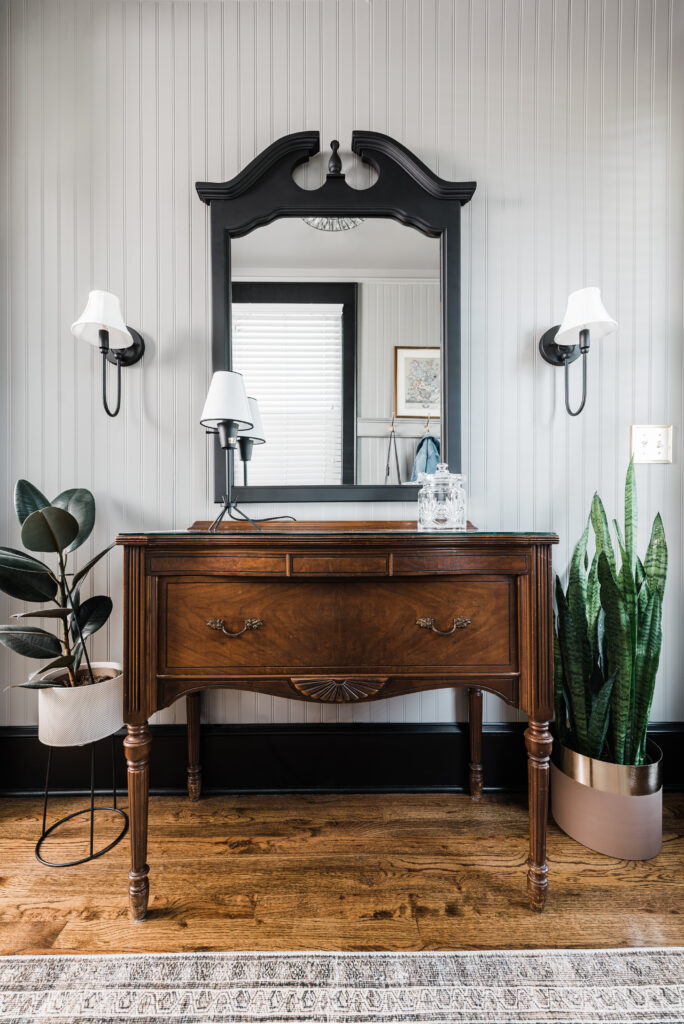
Sconces
Can I first just say how much I love this view with the black stairs peeping through? I should have moved the planter so you could see it better!
Anyway, let’s chat about these sconces. To answer your question, no, they’re not wired! Anytime I use sconces, I either do the puck light trick, use battery operated light bulbs, or I just don’t use anything! In this case, I knew I wouldn’t use them so I didn’t worry about it.
I love the sconces I bought, but I didn’t love the shade that came with them. They were a very cool white and almost looked blue. Luckily, I found these cute little shades instead. I loved the more whimsical, traditional look!
Decor
Gotta have an entryway mirror, right?! This one has a vintage feel, which I love!
I will say, I’m considering painting it black because I feel like the metals are competing with each other. When you mix metals, it’s important to have one dominant metal, and in this case, I think it should be black. I feel that it would tie in nicely with the black trim.
Quite a few of these items were thrifted; the candlesticks, the crystal jar, the art, and the star of the show… the beautiful vanity. The vanity was an incredibly lucky Facebook marketplace find. We may or may not use it to store all of our candy.
Update: I swapped this gold mirror out for a thrifted wood mirror that I painted black. I couldn’t love it more!
Links to all the decor:
One positive to having an open concept space is that I get to enjoy this view from many places within our house. I’m admiring it right now as I sit on the couch typing this!
I’m so happy with how this DIY beadboard entryway makeover turned out and I can’t wait to have our first guests!
Please let me know if you have any other questions! Thank you for stopping by!

This looks great, Elisha! Thanks for sharing all the steps!
It looks great!! I love the beadboard detail and the color you chose. ????
Ah, thank you SO much Natalie! Thanks for being here <3
Thank you SO much Gina! I really love how the color panned out too 🙂
Hahaha always good to have your candy right by the door 😉
Hahaha grab n’ go!!
Simply beautiful! And so informative, great job 🙂
Thank you SO much Clare!!! <3