

When my husband and I closed on first our home, we bought several 5-gallon buckets of cheap white satin paint and went to town using it as both the wall paint and the trim paint… I cringe at the thought of it now!
But as new homeowners with no DIY experience, we didn’t know the best paint finish for trim or walls! If you’re in that same boat… don’t worry! I’ve got you covered. This post will help you understand the different paint sheens, why I think satin is the best finish for trim, and everything you need to know about how to paint trim and doors!

Disclaimer: This post contains affiliate links. This means, if you purchase something from a link I provided, I will receive a small commission. This is at no extra cost to you! Thank you so much for the support!
Understanding the different sheens
First, it’s important to know that “sheen”, “finish”, and “gloss” are often used interchangeably. They’re referring to the amount of shine (or luster) a paint will provide.
Another way to look at it is how much light reflects off of the surface. For example, a low sheen (aka flat sheen) means it’s not very shiny because not much light will reflect off of the surface of the paint.
We’ll start with the least shiny and work our way up!
Flat
Flat sheens have the least shine and are a great choice for ceiling paint. Due to the minimal light reflection, it hides imperfections!
While perfect for a ceiling, a flat finish is very vulnerable to scuffs so I don’t recommend using it on walls. If you do choose to use it on a wall, you’d want it to be in a low-traffic area!

In our French vintage guest bedroom, I installed wallpaper up most of the wall and decided to get a flat finish for the upper portion. So in this case, flat paint is used on the walls, but it’s up high enough that it won’t be susceptible to stains.
Matte
Matte paint finishes have a tiny bit more luster and therefore are more practical in terms of washability.
Bedrooms, living rooms, and home offices would all be the perfect candidate for matte paint. My entire office is painted using Sherwin Williams emerald matte paint!
Do you see how smooth and soft the matte looks? If I used a higher sheen, the seams on my Ikea Billy Bookcase Hack would definitely be much more noticeable!
A matte finish is also a good choice for a textured wall like my DIY fluted wall panel. Higher luster sheens might make this wall look overwhelming.

Eggshell
Eggshell finishes are my favorite to use for interior walls. Think of an actual eggshell… that’s the type of subtle shine this finish will provide!
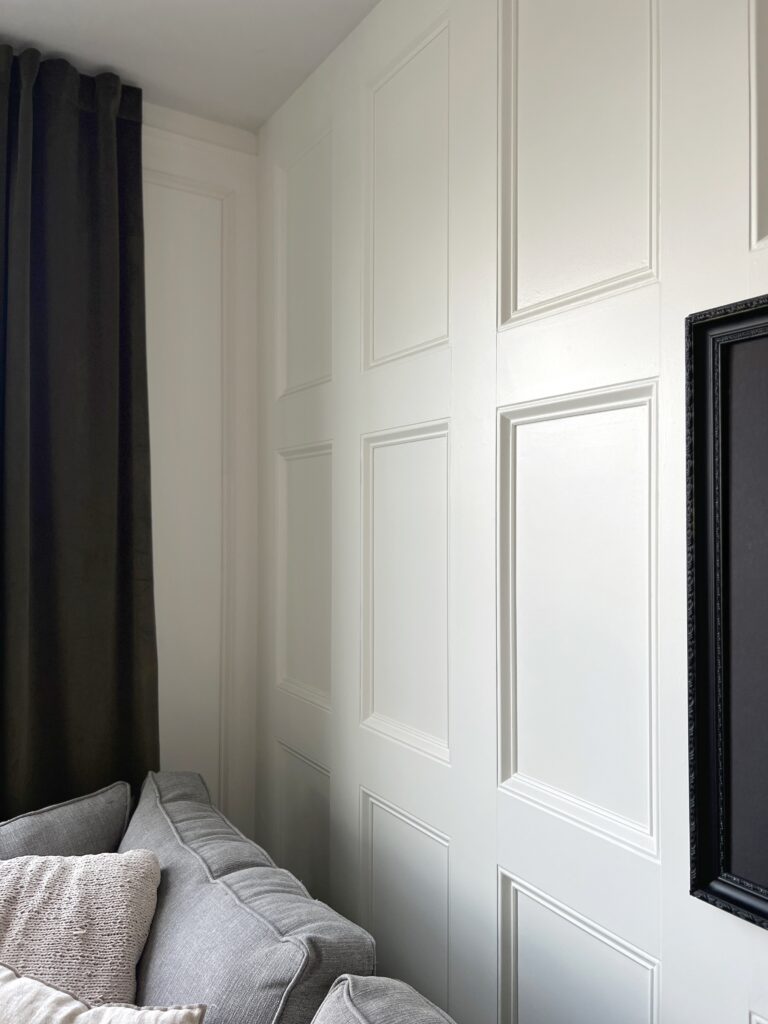
The seams on my DIY recessed wainscoting panels are slightly visible in this sheen, but that doesn’t take away from the beautiful soft glow it provides! I used this white paint in an eggshell finish throughout my home!
An eggshell paint finish is very versatile and can be used in bedrooms, family rooms, dining rooms, offices, and hallways.
In most scenarios, I prefer using a matte or eggshell sheen on the walls and satin paint for trim work!
Satin
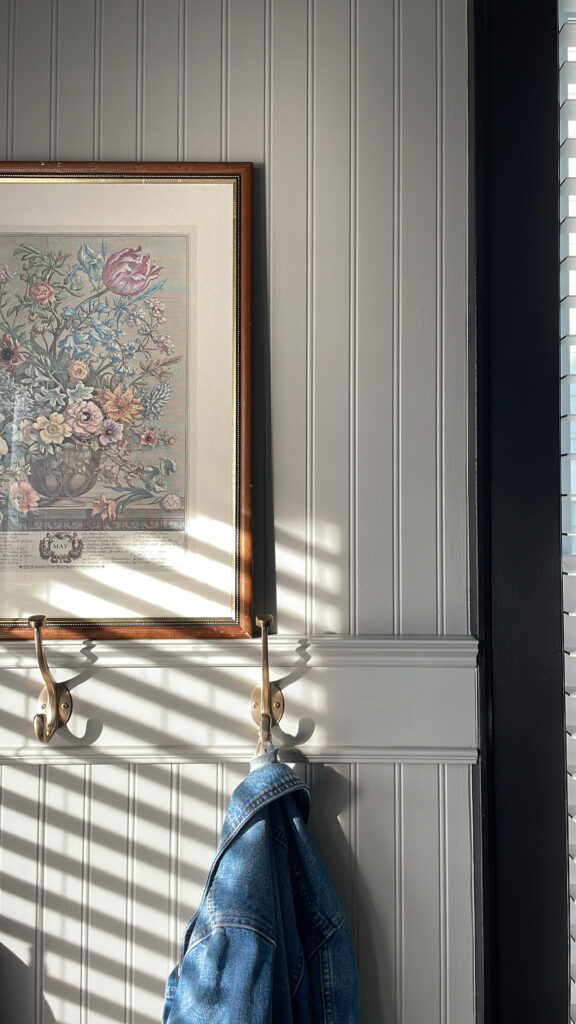
Satin paint finishes have a velvety smooth glow that I think is perfect to use on trim and doors!
A satin sheen stands out just enough to highlight your beautiful trim, while also disguising minor flaws better than a semi gloss paint would.
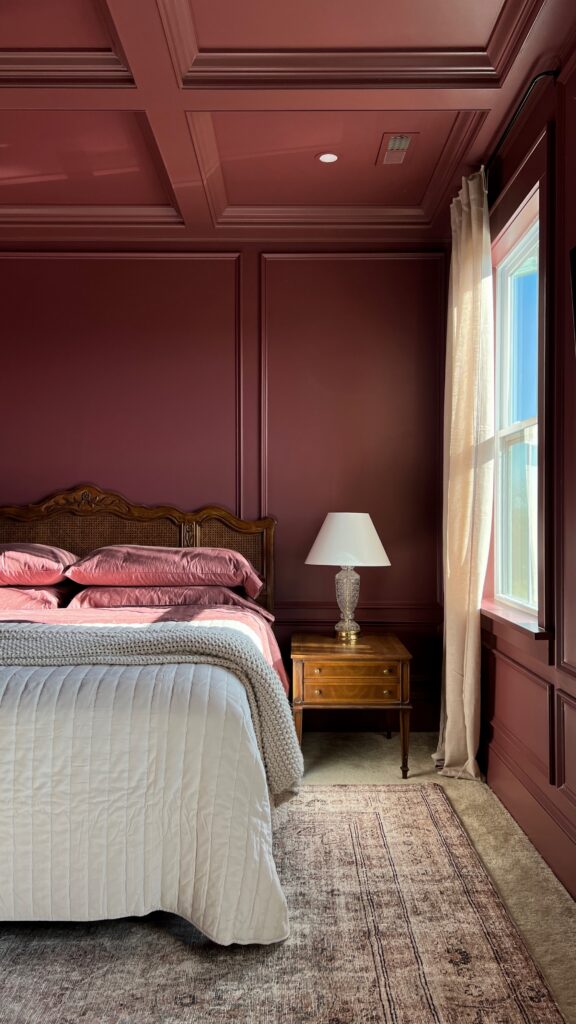
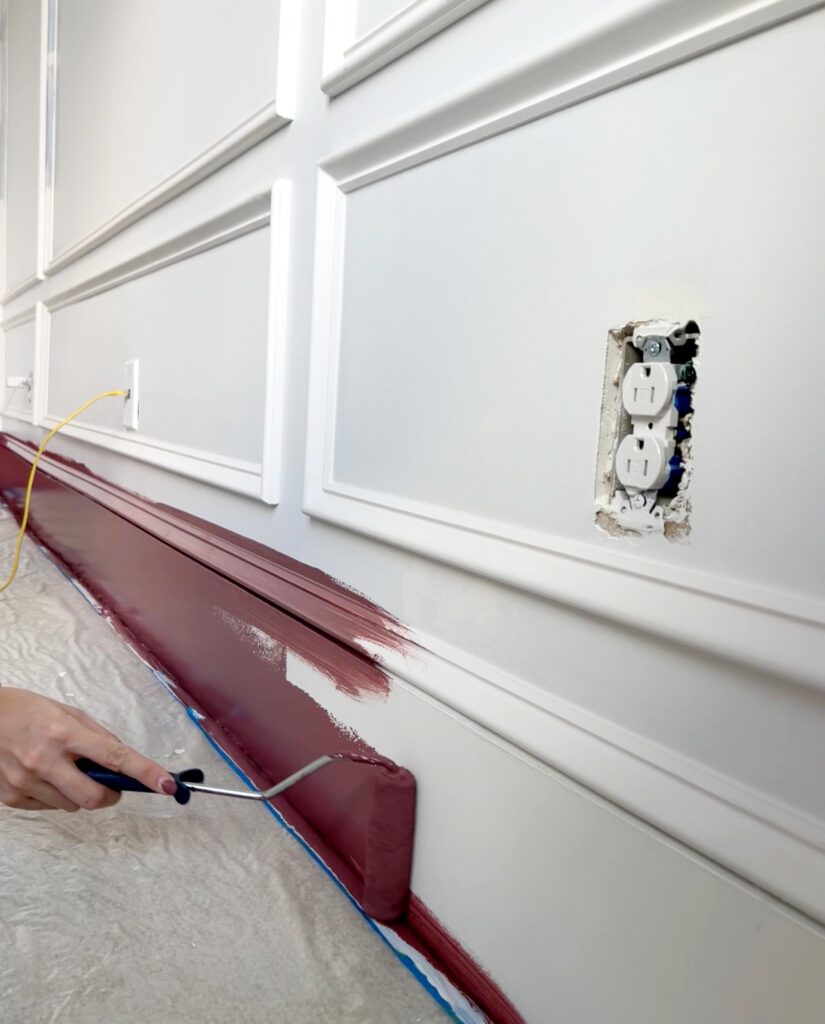
In our burgundy bedroom, I used a satin finish for the trim (moulding, baseboards, coffered ceiling beams, etc.) and everything else is eggshell paint! See the difference? I think it’s easiest to tell with the crown moulding on the coffered ceiling!
This post is obviously about satin being the best paint finish for trim, but what about for walls?
Satin paint can also be used on interior walls. It’s especially ideal for high-traffic areas like kitchens, bathrooms, laundry rooms, etc. since it’s easier to clean than low luster sheens like matte and eggshell.
However, I avoid using satin finishes on walls as much as possible because it not very forgiving. Unless you do a perfect job painting, or use a paint sprayer, you’ll be able to see some roller marks and any imperfections on the wall.
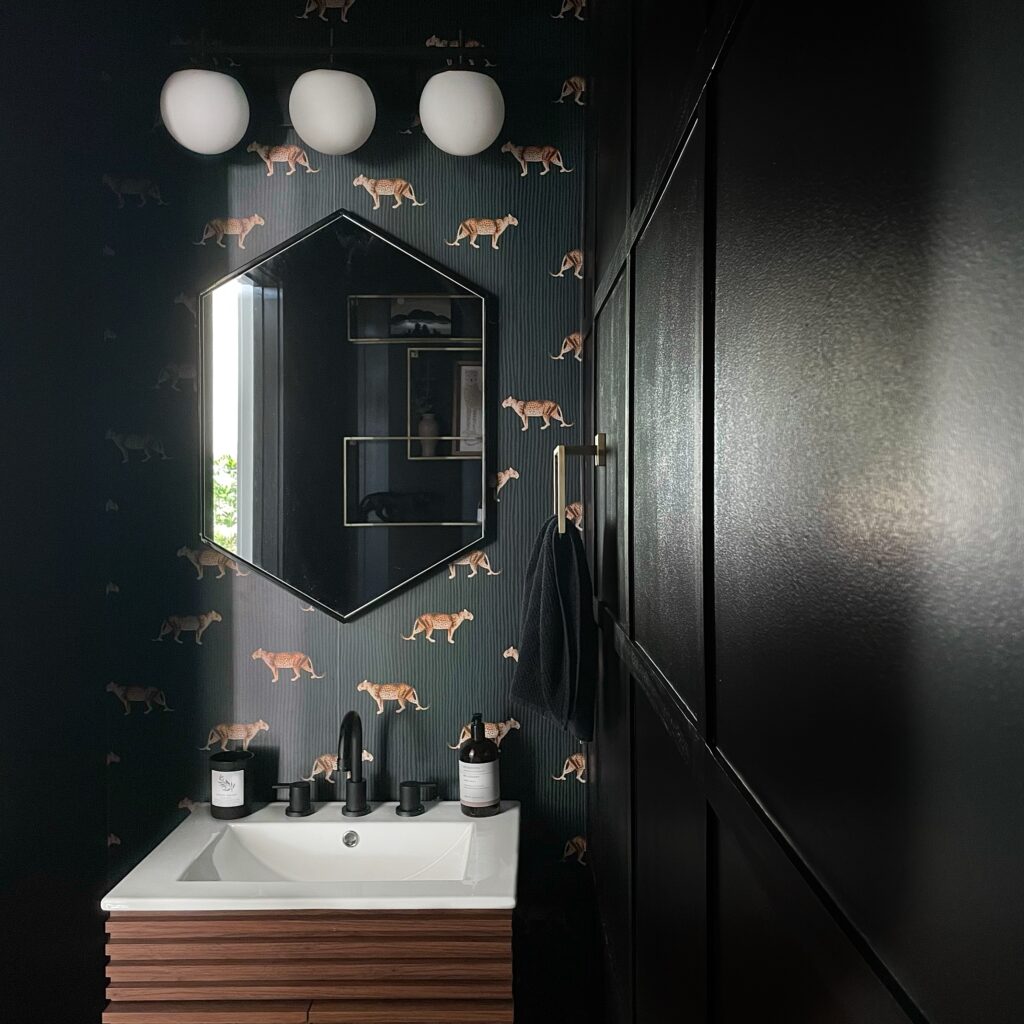
But in a room where the walls will eventually need to be scrubbed, satin paint is the way to go! I used a satin finish in my moody black powder room.
Semi Gloss
Of the few high sheen paint finishes, semi-gloss finish is used most often. It’s highly durable and moisture resistant, making it easy to clean and therefore a great contender for kitchens, bathrooms, exterior doors, etc.!
Painting your kitchen cabinets? Semi-gloss would be a great option since the glossy surface repels dirt and stains! Semi-gloss paint is also traditionally used to enhance architectural details like trim and intricate moldings. It’s also great to consider for cabinetry or furniture!
While it does highlight details, it also highlights imperfections so just keep than in mind when choosing a paint finish!
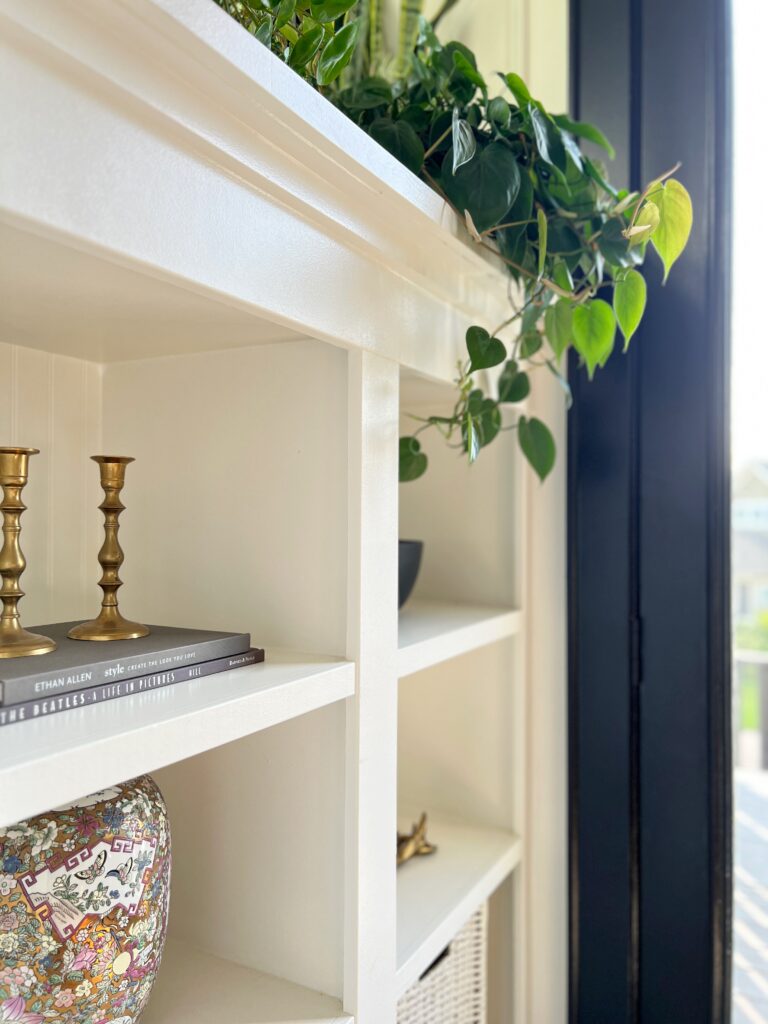
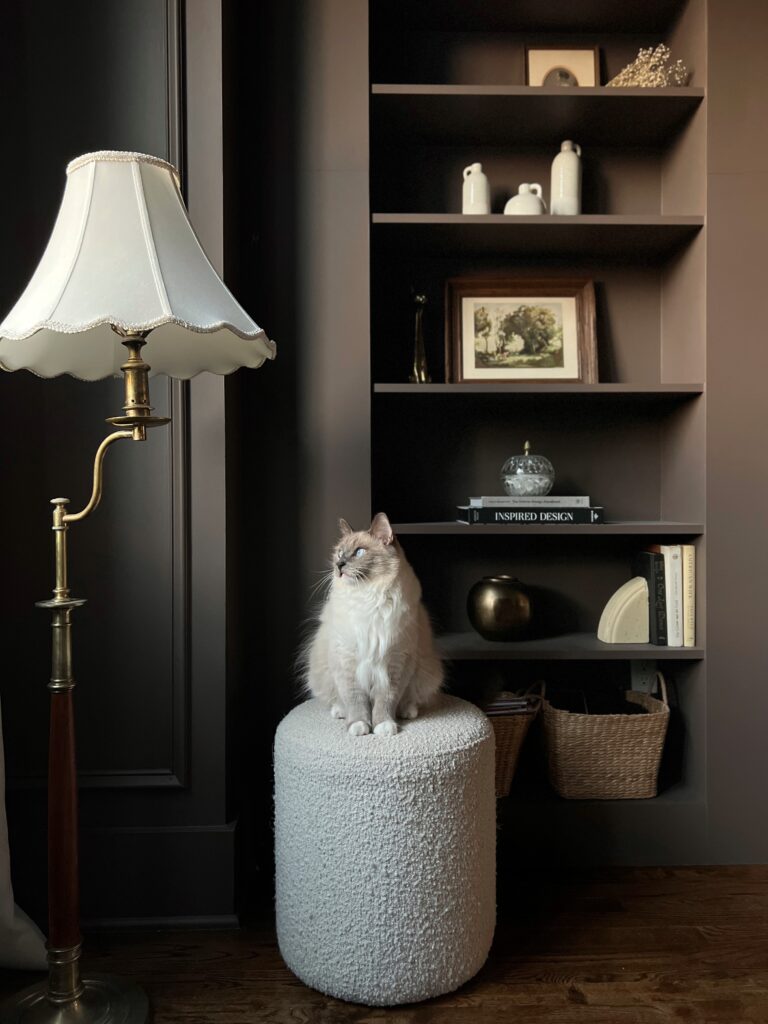
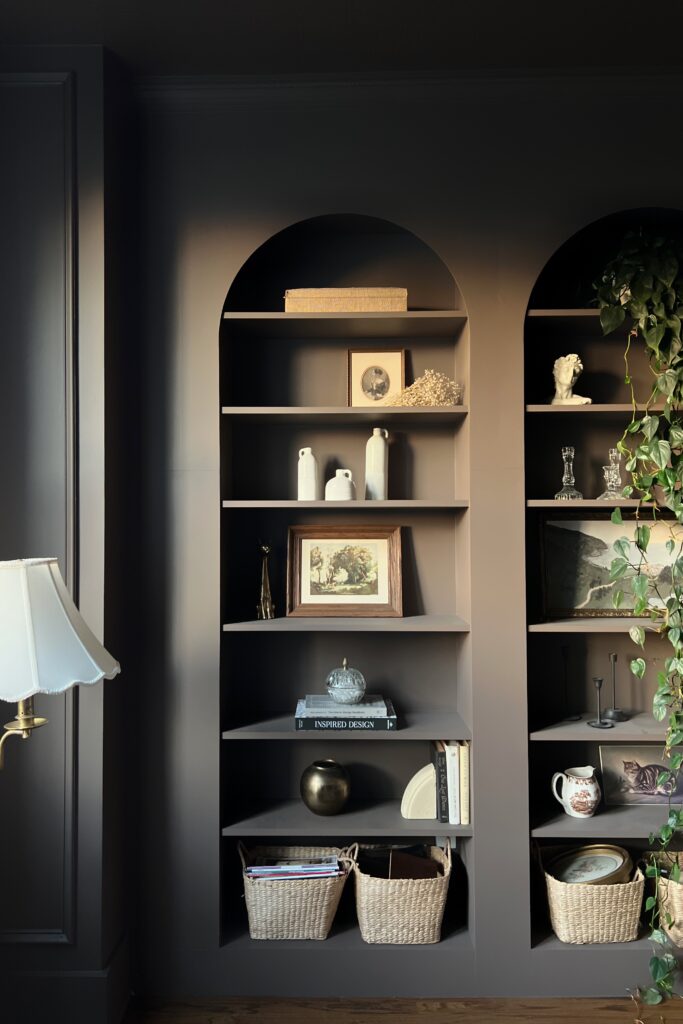
On our living room built-ins I used a semi gloss paint. See how the letters from the book are reflecting off of the surface? So pretty!
High Gloss
High gloss paint is the least used paint sheen. But watch out because it’s making a major comeback in interior design and I am SO here for it.
And when we’re talking high gloss… I mean high gloss.
Like, so shiny it looks like glass. You cannot match the luxury, high-end feel this glossy paint creates. It just adds the coolest texture to a space and it’s make it incredibly durable and easy to clean!
You might see high gloss paint used on front doors, in kitchens, on furniture, cabinetry, and even walls!!
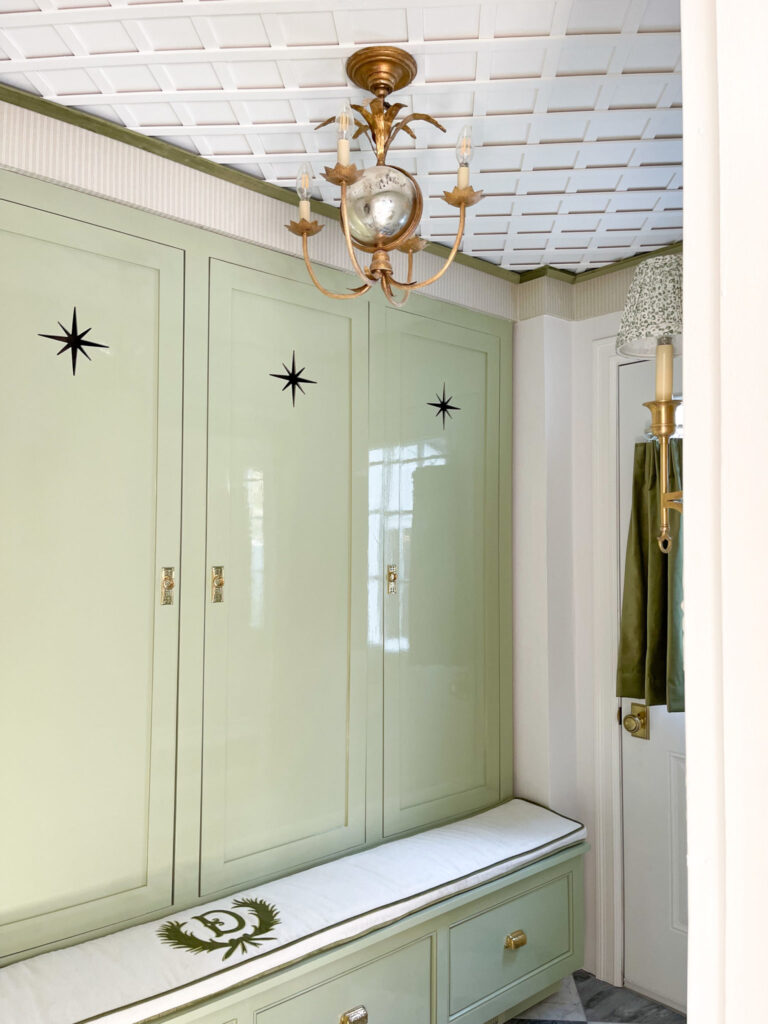
My friend Gail is the queen of using high gloss paint. Check out how she used it in her glam mudroom!
Cons of high gloss paint? It’s extremely unforgiving when it comes to imperfections so your surface needs to be as smooth as a baby’s bottom if you want the best results.
The application process is also no joke. I consider myself a pretty fearless DIYer, but I’ve yet to brave using high-gloss paint in my home… one of these days I’ll get the courage!!
Chris Loves Julia shared a painful learning experience using high gloss paint. Read about it here!
Summary
When trying to choose the right paint sheen just remember, the glossier paints have a more durable paint finish, but they’re less forgiving. The flat finishes hide more blemishes, but aren’t as easy to clean.
It’s a good idea to identify your high and low-traffic areas and make the best choice for you and your family situation.
What is the best paint finish for trim?
Semi gloss or satin for trim? That’s the big debate!
In my opinion, satin paint is the best finish for trim in most scenarios. It has perfect velvety finish, it’s durable and easy to clean, and it’s more forgiving than semi gloss.
However! Semi-gloss would also be a great choice for trim! It’s really comes down to personal preference. The glossy finish of semi-gloss paint creates a brighter, more polished look. It’s a popular choice for trim because it holds up to a lot of wear and tear! But again, higher gloss paints reveal all the flaws.
There’s really no one-size-fits-all answer to the best trim paint finish. At the moment, my vote is satin paint for trim. But who knows?! Down the road when we have kids running around, I might feel differently!
How to Paint Trim and Doors
Once upon a time, my husband went out of town for a week so I decided to surprise him and paint all our trim and doors black. Totally fun and normal, right?!
Let’s just say I didn’t get much sleep that week because as i’m sure you’re aware, painting trim is a lot of work! But it’s worth it… trust me! After painting all the trim in our home, I’ve got it down to a science at this point so I’m here to share how to get a nice, smooth finish while painting trim with a roller!
My favorite supplies for painting trim
The type of paint and materials you use are definitely going to play a role in the outcome! If you choose low quality materials, you’ll get low quality results.
Here’s my favorite dynamic paint brush duo:
If you prefer a long handle paint brush, try this one!
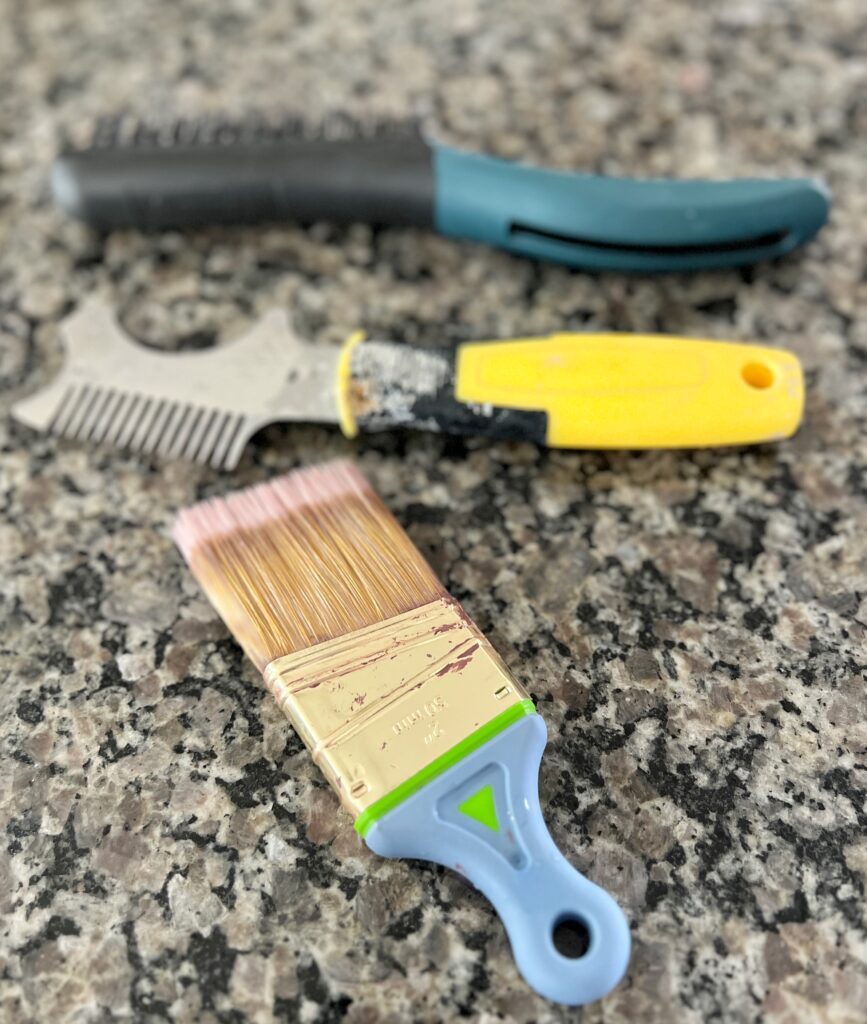
Brushes are expensive so don’t forget to take care of them so they last! These tools work so great for cleaning brushes:
What’s the best paint for trim and doors?
The best option for painting trim and doors is an enamel paint like Benjamin Moore Advance, Sherwin Williams Urethane Trim Enamel, or HGTV Home by Sherwin Williams Cabinet and Furniture paint! Enamel paints dry smooth and hard, making them the most durable option.
Oil-based paint is another great, durable option for trim! The downside being the odor, longer dry time, and messy clean up.
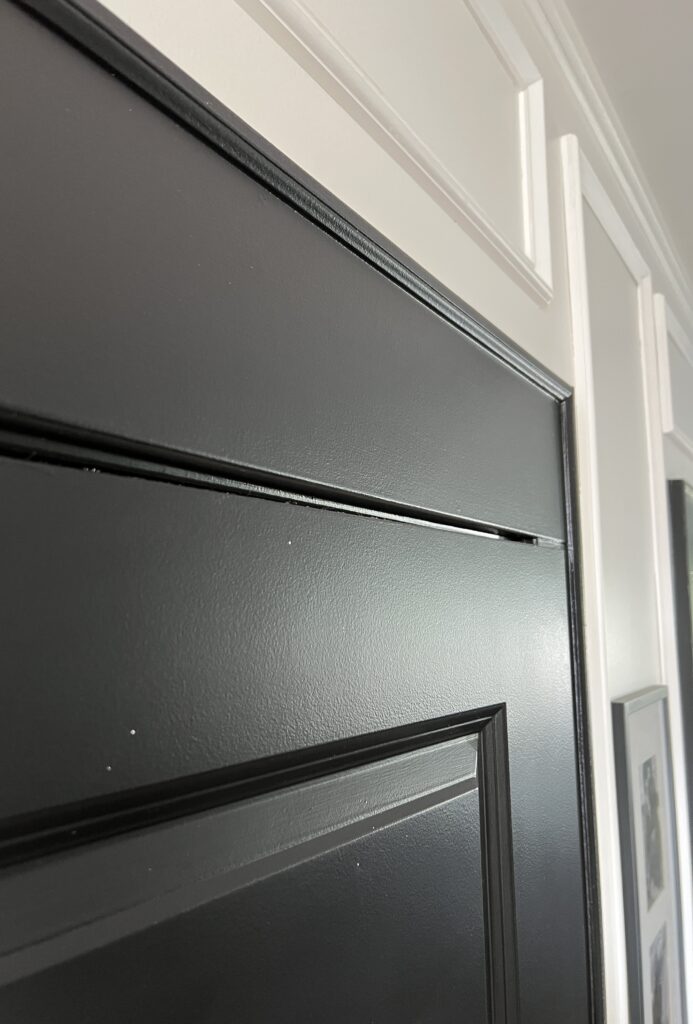
Water-based paint can also be used for trim. Just make sure it’s a good quality paint and you prep properly! This is actually the route I took when painting our interior trim and doors black. But even with the proper prep, I still have to do little touchups here and there! You can see an example of that below.
Enamel paint is the best interior door paint and going forward, it will always be my first choice!
Step One: Remove hardware and clean
The first thing you’ll want to do is remove any hardware like door hinges, window treatment hardware, etc. Doors, baseboards, and window trim, and all collect a lot of dust so it’s very important to clean with a degreaser like this.
I won’t lie to you… I don’t always remove the door knobs and hardware. But I always regret it when I don’t.
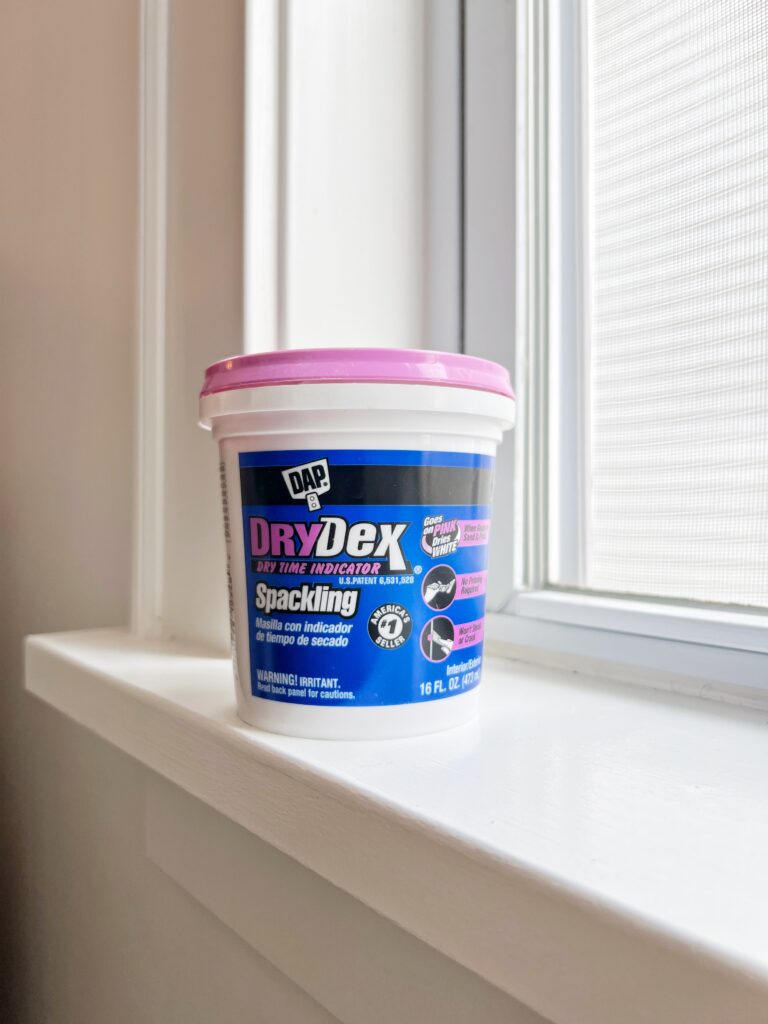
Step Two: Fix imperfections
Take a good look at your trim and doors! If there’s any nail holes, dents, or cracks, you’ll want to use some spackle to fill them in before moving to the next step! Keep an eye out for paint drips too. Those should be scraped off with a putty knife.
You want your surface to be as smooth to the touch as possible so any raised area or rough patches should be addressed!
Step Three: Sand
You’re probably thinking… sand?!? No thank you! I get it. But it’s really not that bad and doesn’t take as long as you might think! If you had to use spackle anywhere, sand those parts first. If not, all you need is a light scuff sand to smooth everything out.
I prefer to use sanding sponges for this part. They’re easy to use and have a little flexibility for corners, etc. Sanding is incredibly important because it helps prepare the surface for adhering to the paint or primer!

Before moving to the next step, you’ll need to wipe off any dust from sanding. Tack clothes are the best thing to use for this! If you don’t have any, you can use a microfiber cloth, vacuum, or a damp rag!

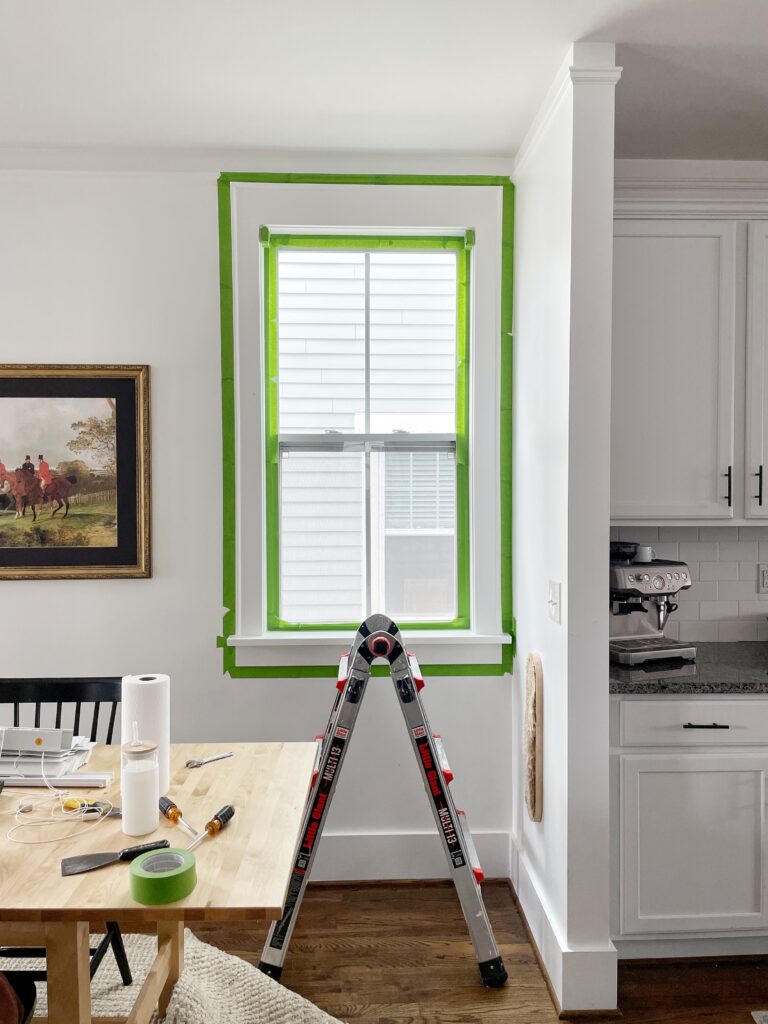
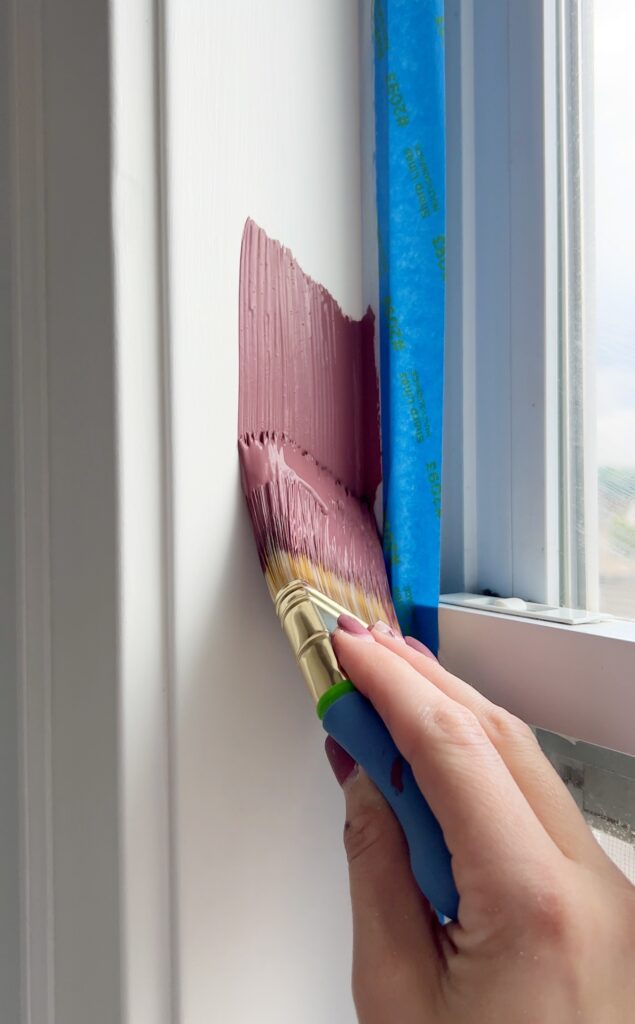
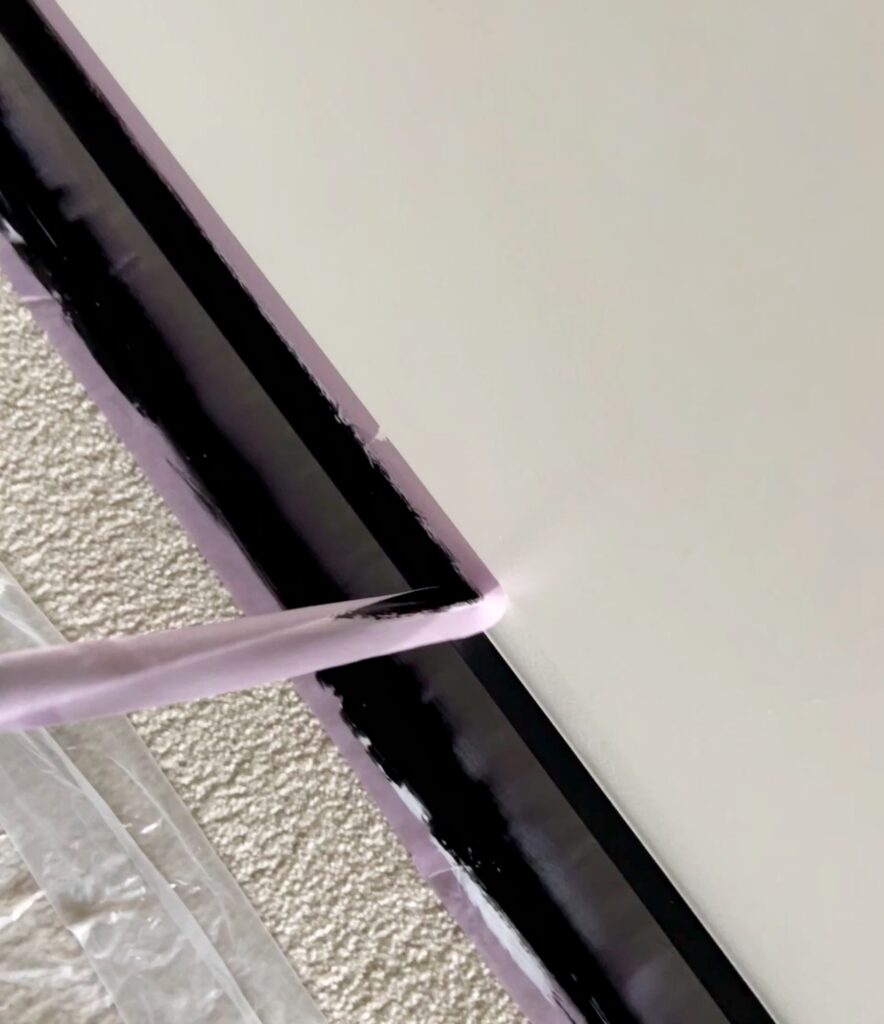
Step Four: Painter’s Tape
Painter’s tape isn’t for everyone… I get it! But I’m a big believer. Especially when painting trim black or any dark paint colors for that matter. But yes, you can paint the trim without painter’s tape if you have a good brush, like this one I shared earlier, and a steady hand.
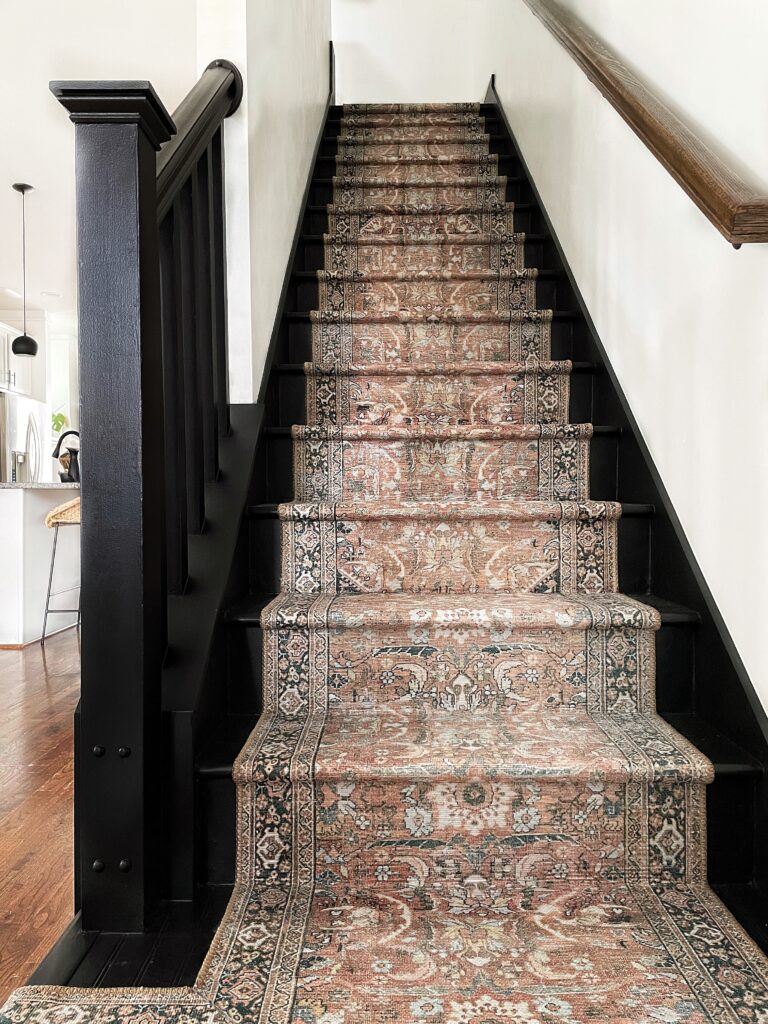
I still feel that painter’s tape provides the cleanest lines. You can’t tell me you can get as crisp of a finish as I did on my easy DIY stair remodel by freehanding it?!
How to get crisp paint lines
For one, I take my time applying the painter’s tape. I try to enjoy the process and just listen to a good podcast or audio book. It’s worth it.
Here’s the game changer: I drag a putty knife (or an old gift card, etc.) along the tape after to firmly seal it. Watch this video to see what I mean!
Taping windows for painting
For windows, you’ll tape off on the outside (around the window casings) and inside (on the glass). I also had to tape off the hinges for our blinds because I was admittedly too impatient to remove them. Oops!
Taping baseboards
Taping baseboards is pretty straight forward unless you have carpet to deal with! When painting baseboards on carpet, i’ve had the best experience using a combination of a carpet shield and multi-surface painter’s tape.
You can also just use painter’s tape alone and tuck it under the baseboard. Sometimes i’ll do two widths of tape because I can be a messy painter!
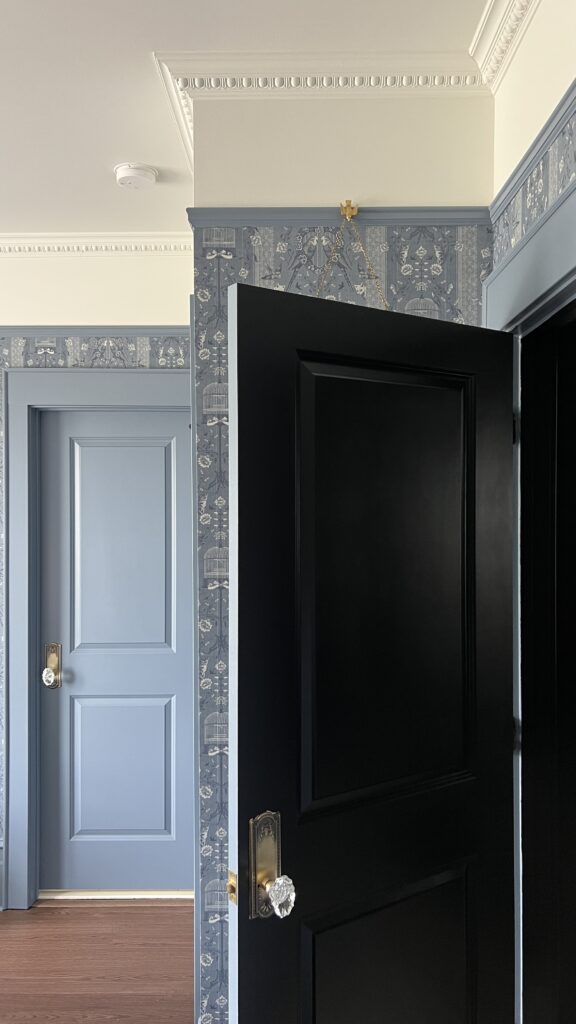
Taping doors for painting
You’ll first want to determine where you want the paint to end on the both door and door frame.
For example, do you want to see the paint color on the inside of the door thickness? Is that confusing? If you’re curious about this, watch my Instagram highlight on my trim. I shared how I chose when to stop the paint on the doors!
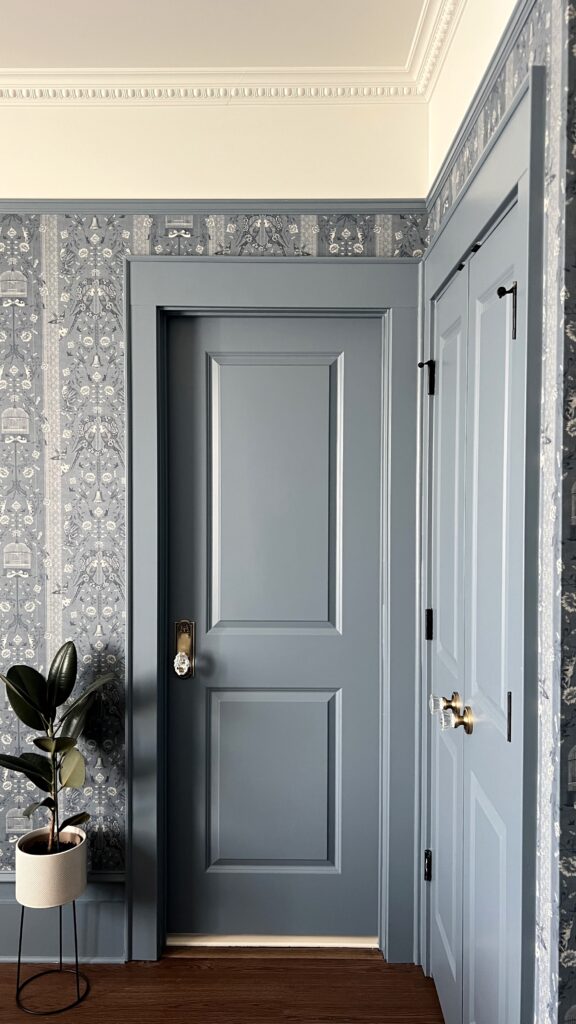
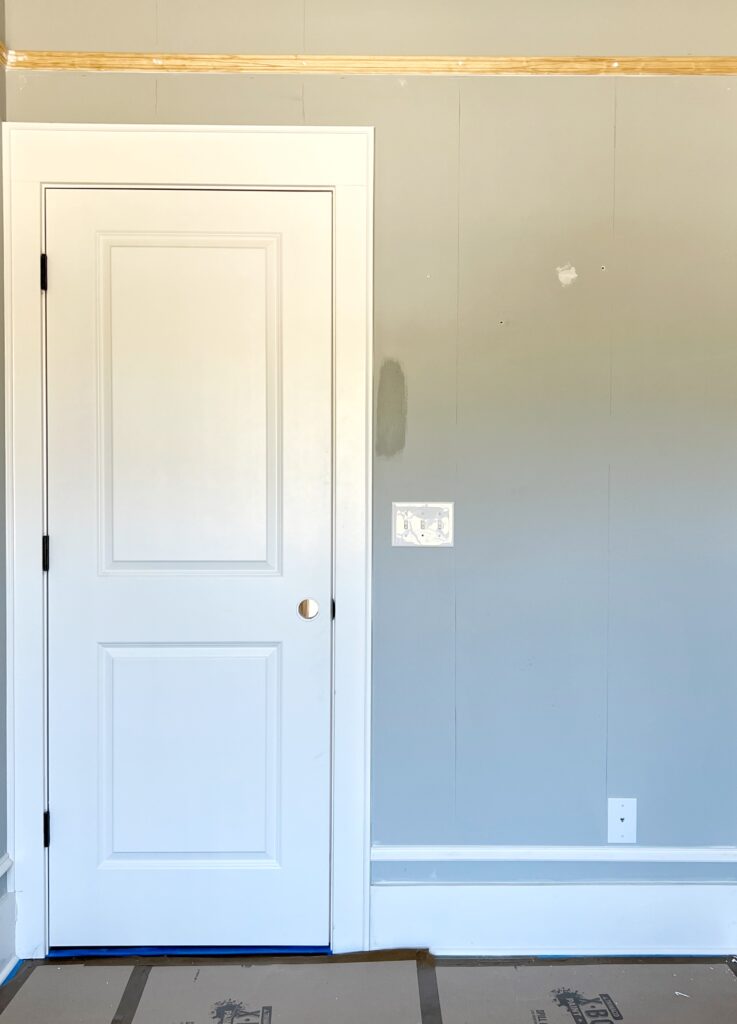
Here’s an example! We have blue doors in our guest bedroom and black interior doors in our hallway. Take a close look at where I decided to start and end each color on the door and casing.
Step Five: Prime
Do you need to prime for trim?
If you have wood trim, or the paint on the trim is oil-based, you’ll definitely need to prime! Also, if you’re painting a light color over dark it’s helpful to prime so you don’t have to do as many coats.
But if your trim was previously painted with latex paint, you’re okay to just paint! Sometimes I still use primer on trim even when I don’t ‘have to’ because it never hurts.
Tip: If you’re going light to dark, get your primer tinted! They’ll do this at the paint counter for you. This will help with coverage for the dark paint. It could mean the difference between 2 and 3 coats!
Do you need to prime for interior doors?
For best results, prime your interior doors before painting. Doors need to withstand a lot of traffic!
We have hollow core doors with a smooth, factory finish. This isn’t the ideal surface to for paint to adhere to so I always prime.
The best primer for doors is this shellac-based primer. As a disclaimer, it does smell and it’s expensive, but it’s an incredibly durable primer that’s worth using on a door that gets used a ton!
For doors you use less often, an all-purpose primer like this is fine! When the primer dries, do a quick sand using a 320 grit sanding sponge. Don’t forget to clean the dust off before painting too!
Should I caulk when repainting trim?
This will depend on how your trim is looking! Our home is young so the caulk didn’t need to be touched up yet, but older homes may need this update.
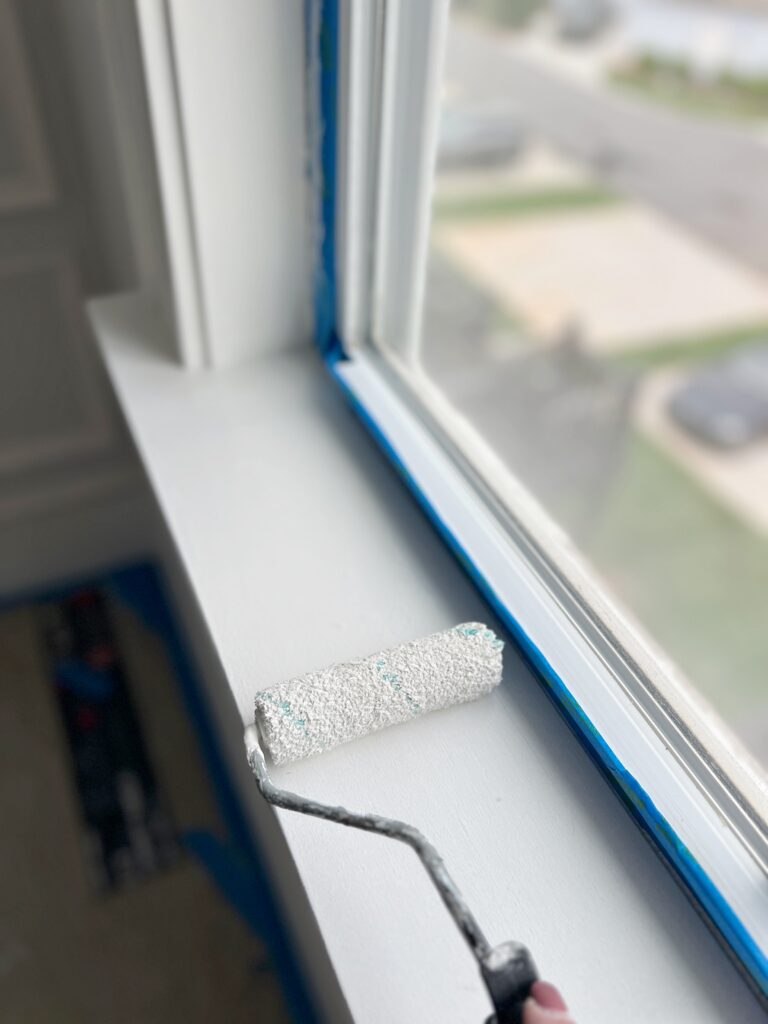
Step Six: Paint
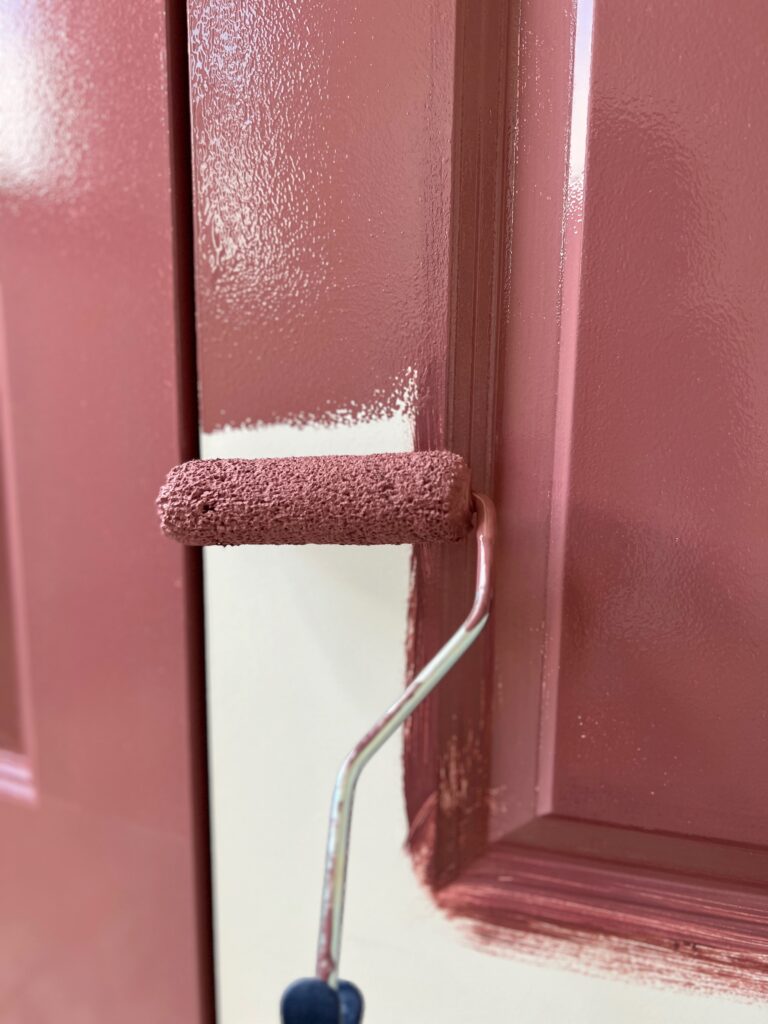
For both trim and interior doors, you’re first going to cut in, going with the grain, using an angled brush to get the corners and details. Make sure you have a good amount of paint on your brush too!
What i’ve more recently learned is that it’s best to work in small areas at a time instead of cutting in the entire window or door like I did here below!
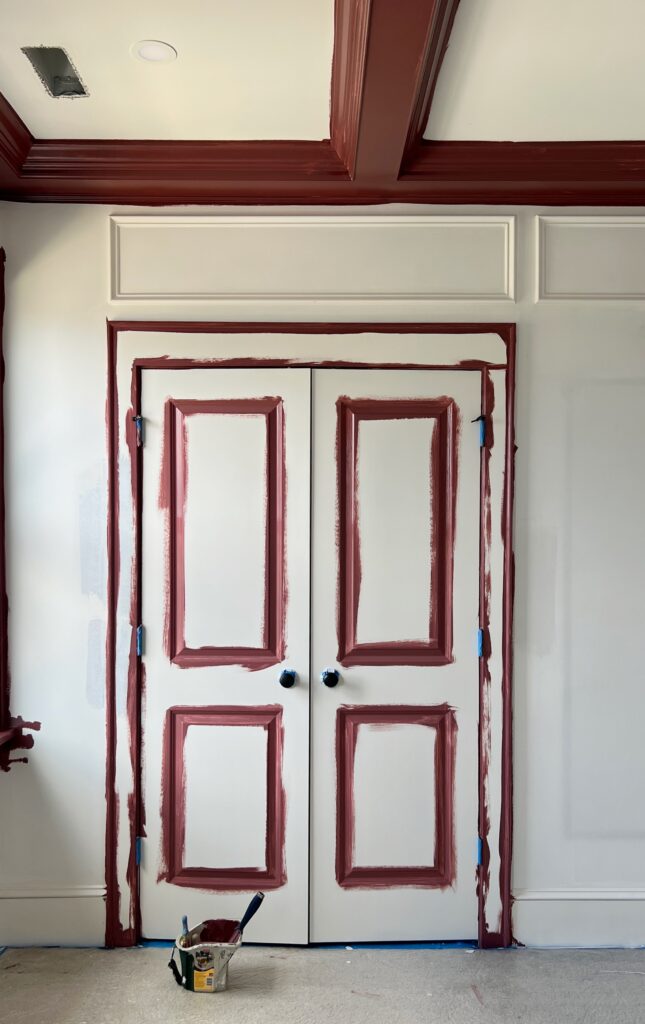
The reason why is because the paint is going to start drying before you get the roller brush out, increasing your chances of having visible brush strokes.
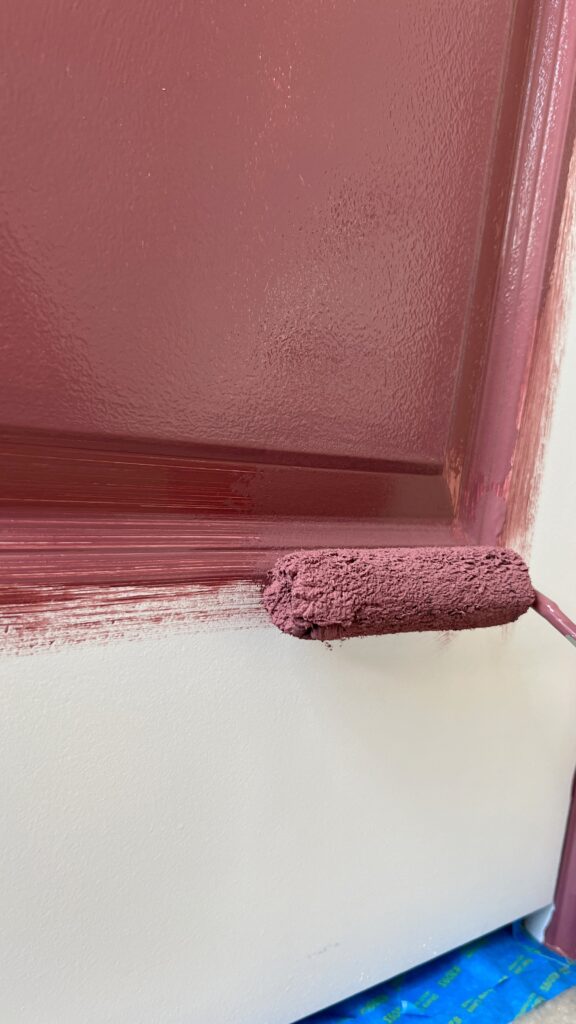
When rolling the rest, try to go over any of the brush strokes from the previous step! This will give better coverage and a smoother finish!
But you can see below that the brush marks have already started to dry. This is something I notice slightly now that it’s fully dry.
How many coats do you need to do?
You’ll need at least 2 coats, but sometimes 3! Just give your trim and doors and thorough inspection in good lighting once it’s dry.
When do you take painters tape off?
This seems to be a big debate, but I always have best results removing painters tape when the paint is wet… immediately after your last coat!
When i’ve removed masking tape after the paint dried, it always starts peeling off some of the paint with it. But if you forget and notice this starting to happen, try scoring the seam with a utility knife before peeling the tape.
Tip for getting the most professional finish:
In between coats, do a very light sand using a 320 grit sanding sponge! Don’t forget to use a tack cloth before your next coat!
Step Seven: Seal (Maybe!)
If you want, you can seal your trim and interior doors. It’s up to you! Consider how much use your doors or window casings might get.
When using an enamel paint, this isn’t necessary! But I do think it’s a smart idea to protect your doors with a top coat if you used latex paint! This is my go-to Polycrylic. I will say, if you decide to seal them, make sure to test out a small area first. A poly coat can change the look of your paint color!
Interior paint colors in my home
As i’m sure you’ve noticed, I have a lot of different trim colors going on 🙂
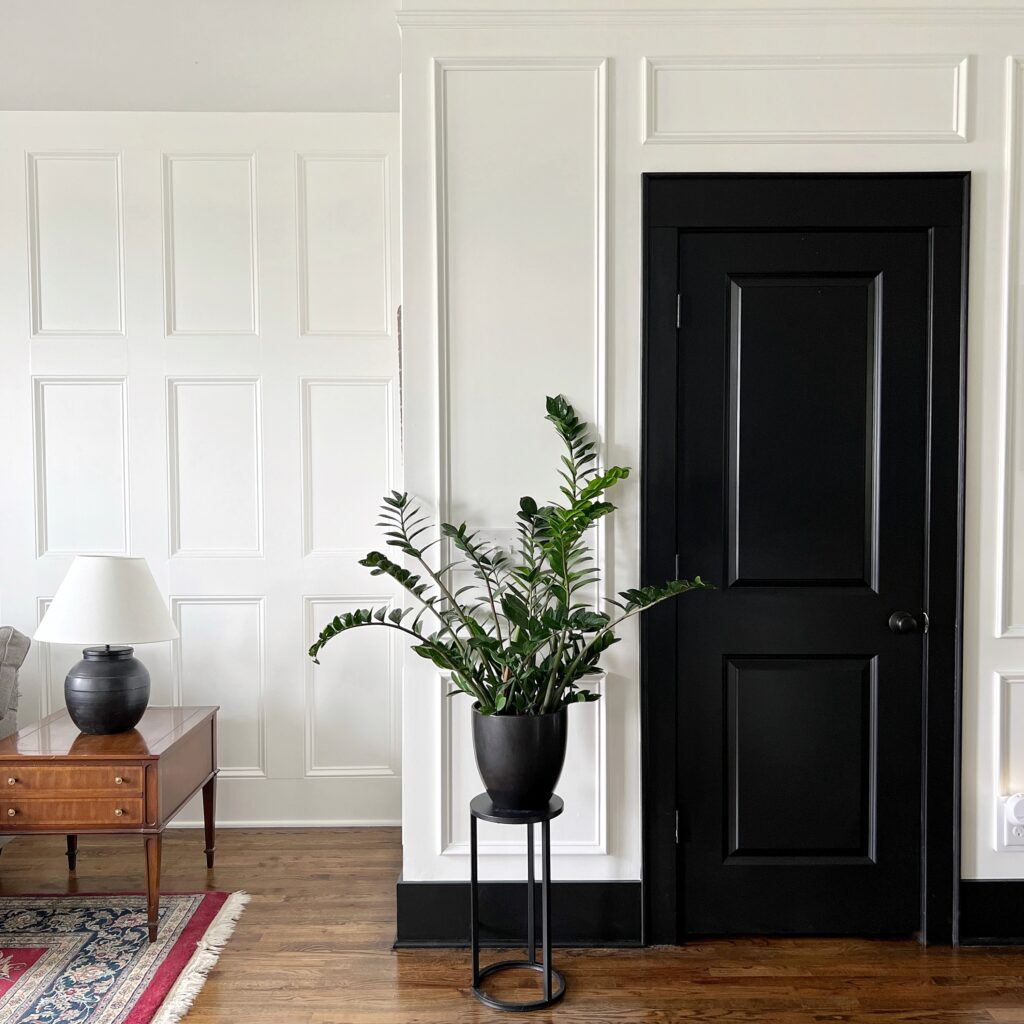
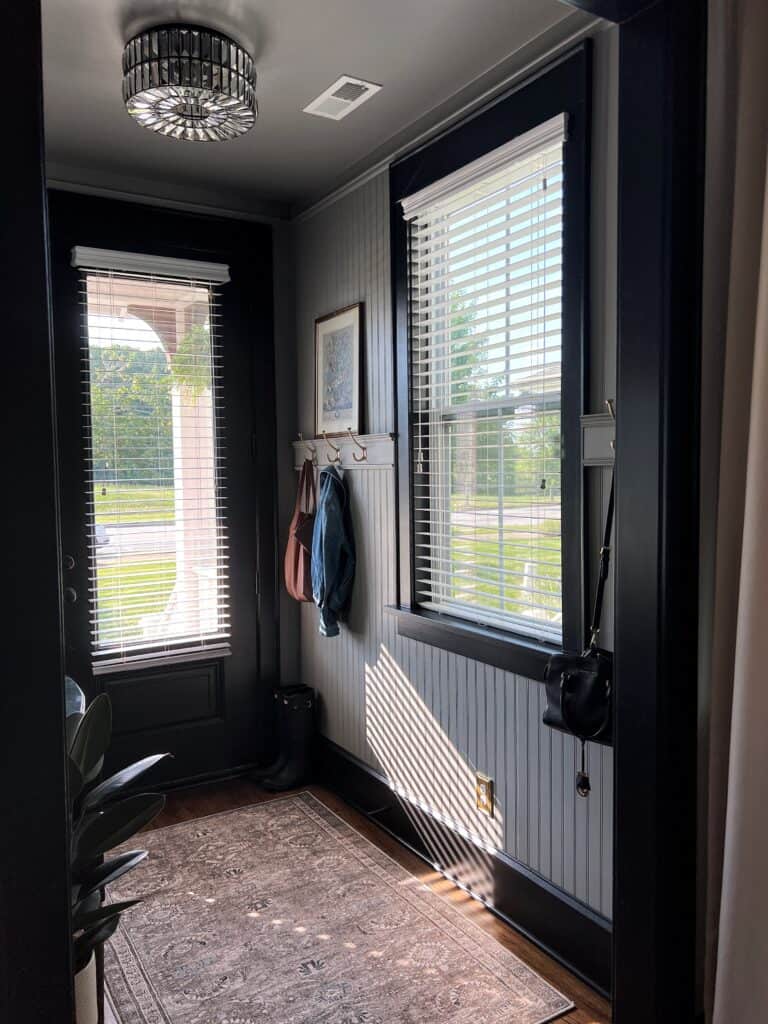
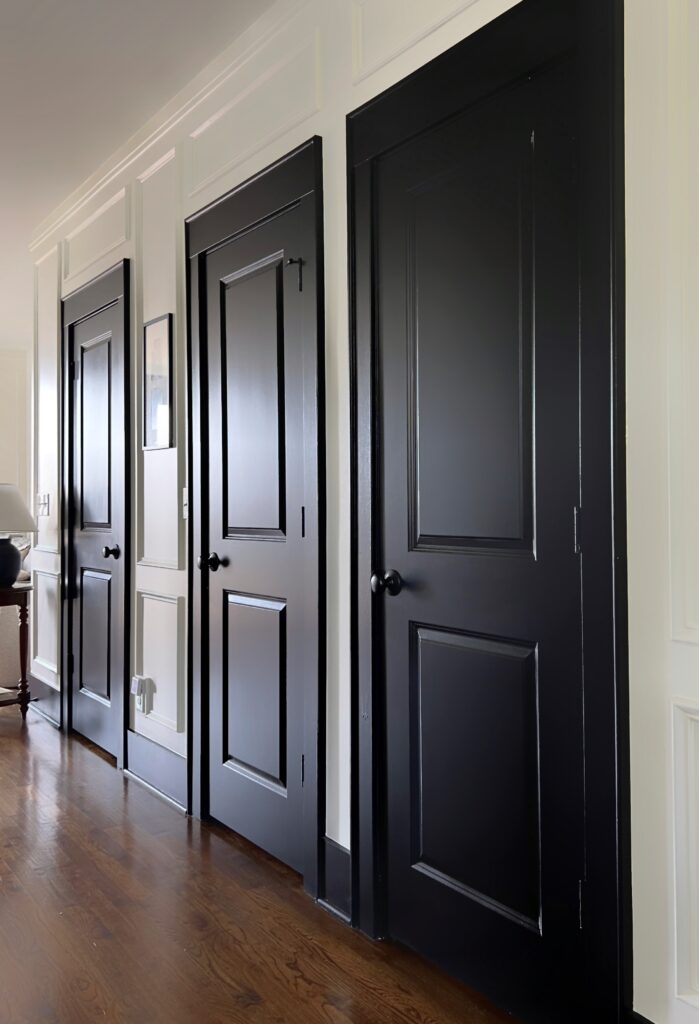
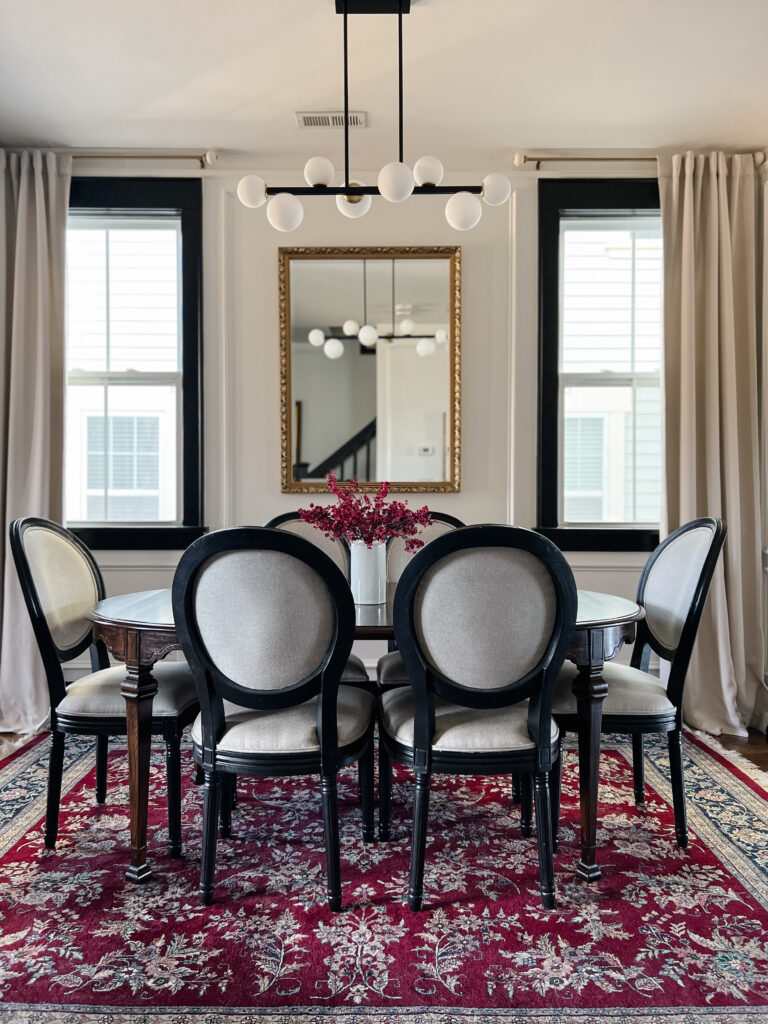
Throughout the open areas of our home, I’ve totally embraced the white walls, black trim aesthetic. I have to say, painting my trim black was truly my favorite, and most impactful, design decision I’ve made in our home so far! These are the paint colors I used:
Because of how neutral our main areas are, I wanted to use different colors in the bedrooms, which is where these colors came in:
Hopefully I’ve inspired you or given you some tools to create a bold and elegant look in your home! As always, thank you for being here and please let me know if you have any additional questions!

This is a great tutorial! Love your trim Elisha!
Love it!. After spending a few thousand on a remodel project there is very little left for finishing touches. This is the perfect answer. Already have a gallon of tricorn black.
Awe thank you so much Jess! SO glad you love it!
Oh my goodness I can only imagine! Yay! That is perfect- I love Tricorn Black!!!
This is all great information we will definitely use when we purchase our new home in the near future. Thanks for all the details….so helpful!
Yay, so glad it was helpful!!
Love your tutorial! It’s very insightful! May I have a question here if possible? I have laminated bedroom doors and trims. Can I still paint it over? Love to hear from you. Thank you!
Wow, this is just beautiful. Thank you for the information! I wonder if you might consider a blog post on painting and/or ebonizing cabinets? I have cherry cabinets that I believe I am going to ebonize this fall. Would love some hand holding and the more info the better!
Hi Shereen! Awe, thank you so much! And YES, of course. We have laminate doors. Just make sure you follow all the steps I listed for prepping the doors before painting- including using a primer! The primer is really important for creating a surface in which the paint will stick to. Hope that helps 🙂
Hi Lisa! Thank you so much for the kind words! That sounds like such a fun project!! I’ll have to keep that in mind- you might beat me to it though! Our kitchen cabinets are laminate and I’ve definitely considering painting them however it may be a different process since yours are cherry!
I am in love with the black paint. A little scared, but am planning on using it in a home I’m remodeling. Outside of trim and doors, where else should I use the Limousine black? I’d love your input. It would seem to be too dark in the kitchen, but trying to figure that out. Any suggestions?
Thank you for the ideas. Love the blog and your site.
Hi Kathy! Thank you so much! I’m in love with the black paint too! Just to help you brainstorm, I’ve also used this color for my stair makeover, my dining chairs, and a little cabinet. You could always paint a sideboard or statement piece of furniture. I also think using some black fixtures helps tie it in too! I hope that’s helpful <3
i really enjoyed your article. I just painted my living area and kitchen white and it looks unfinished. I will definitely try some of your suggestions.
Hi Van! I’m so happy to hear that! I know you’ll make it great 🙂
Hi Elisha! Thank you for the great tips, they were all so helpful. I will painting my room for the first time and the white wall with black trim is what I am going for I’m super excited. I did have a question, Did you also paint your ceiling with the Whipped color too or did you use a flat white paint for the ceiling like you mentioned as an option?
Hi Jacqueline! Yay! Funny you ask as I’ve been painting my walls/ceilings/trim in our hallway this week. So for the ceiling I just used Clare’s flat white ceiling paint (no color options)! If you aren’t using Clare paint, you could use the same color as your walls if you want- as long as it’s flat! Happy painting 🙂
Loved this post! I’ve been embarking on a DIY painting project and was unsure about which finish to choose. Your explanation of satin being the best finish for trim really helped me make a decision. Can’t wait to see how it turns out!
Hi, the link to your bedroom color just brings up samplize’s main page. Would you mind sharing what the color is? Thanks!
Oh no so sorry about that! Thank you for telling me! The color is New London Burgundy by Benjamin Moore! Check out this post too because I had a whole paint saga you should be aware of: https://ouraestheticabode.com/modern-vintage-bedroom/
This was the most helpful article! Do you suggest doing trim or walls first if you’re doing both? I see conflicting information online!
Oh i’m so glad to hear that!! Honestly, I’m not surprised! I feel like it’s a matter of preference! I’ve done both but I typically like to do walls first and then trim 🙂
Great post! I appreciate the tips on using satin finish for trim—it really does give such a nice, elegant touch. I hadn’t considered the prep work before painting, but that definitely makes sense. Can’t wait to try these techniques in my own home!
Thank you 🙂 So glad you found it helpful!
Great tips on painting trim! I never considered using satin finish before, but your explanations make a lot of sense. Can’t wait to try this on my next project—thanks for sharing!
Great tips on painting trim! I never considered satin finish before, but your explanation of its durability and aesthetic appeal makes perfect sense. Can’t wait to try this in my next DIY project! Thanks for sharing!
So glad it was helpful!