

Before this DIY chair makeover, I didn’t necessarily know how to reupholster!
But, I figured, I have to start somewhere and thought a simple chair would be a good candidate vs. a more complicated wingback chair!
What made me slightly nervous about this upholstery project is that I wasn’t working with an old chair or a thrift store find.
This dining chair was already in really good shape and I loved the modern, clean lines. Sadly, the finish didn’t match any of my home decor and I always imagined how it would look with new fabric.
tools:
- Sewing Machine
- Krylon Snap & Spray
- Seam Ripper
- Fabric Shears
- Hand Stapler
- Optional: Rotary cutter, mat, and ruler
- Pins
materials:
Disclaimer: This post contains affiliate links. This means, if you purchase something from a link I provided, I will receive a small commission. This is at no extra cost to you! Thank you so much for the support!
Disassemble the Chair
The first thing you’ll want to do is take your chair apart! That is of course going to look different for everyone, but here’s how that process looked for me:
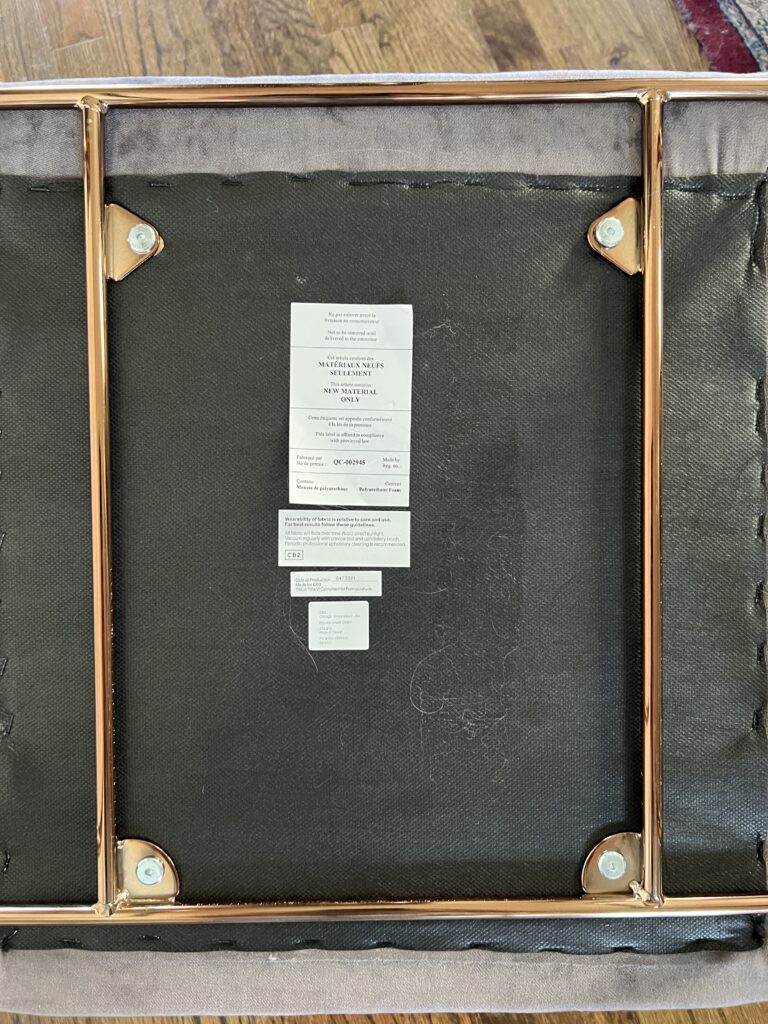
I flipped the chair upside down and used a hex wrench to loosen the screws that held the frame to the seat cushions. The frame completed separated from the chair seat. Easy peasy!!


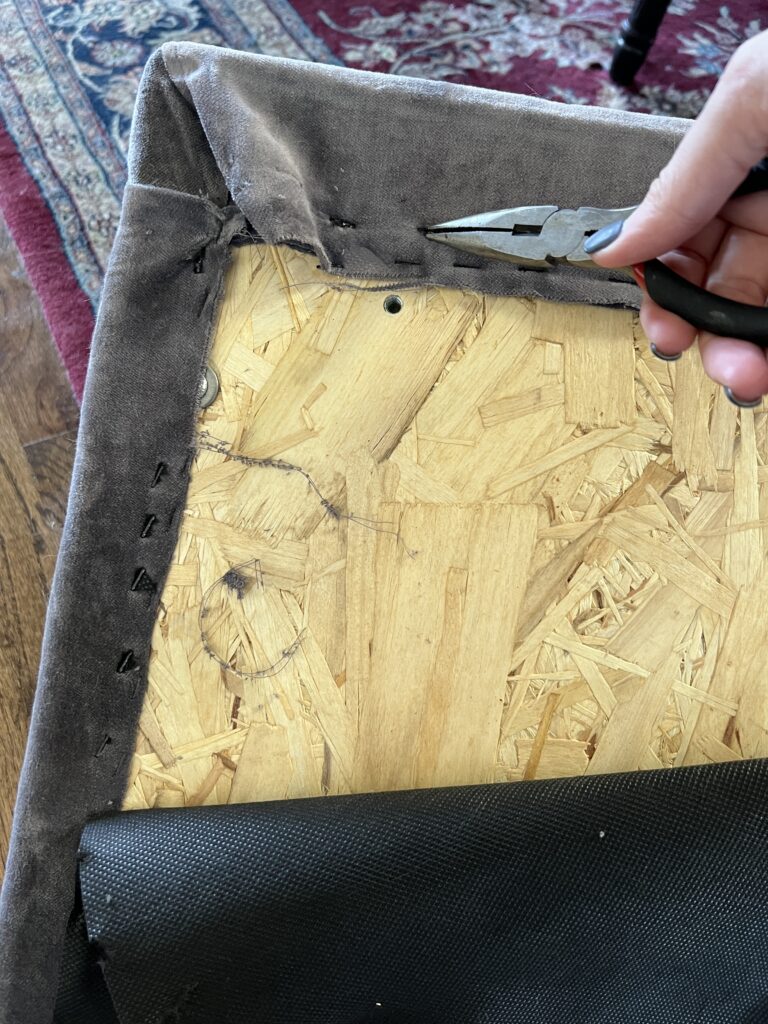
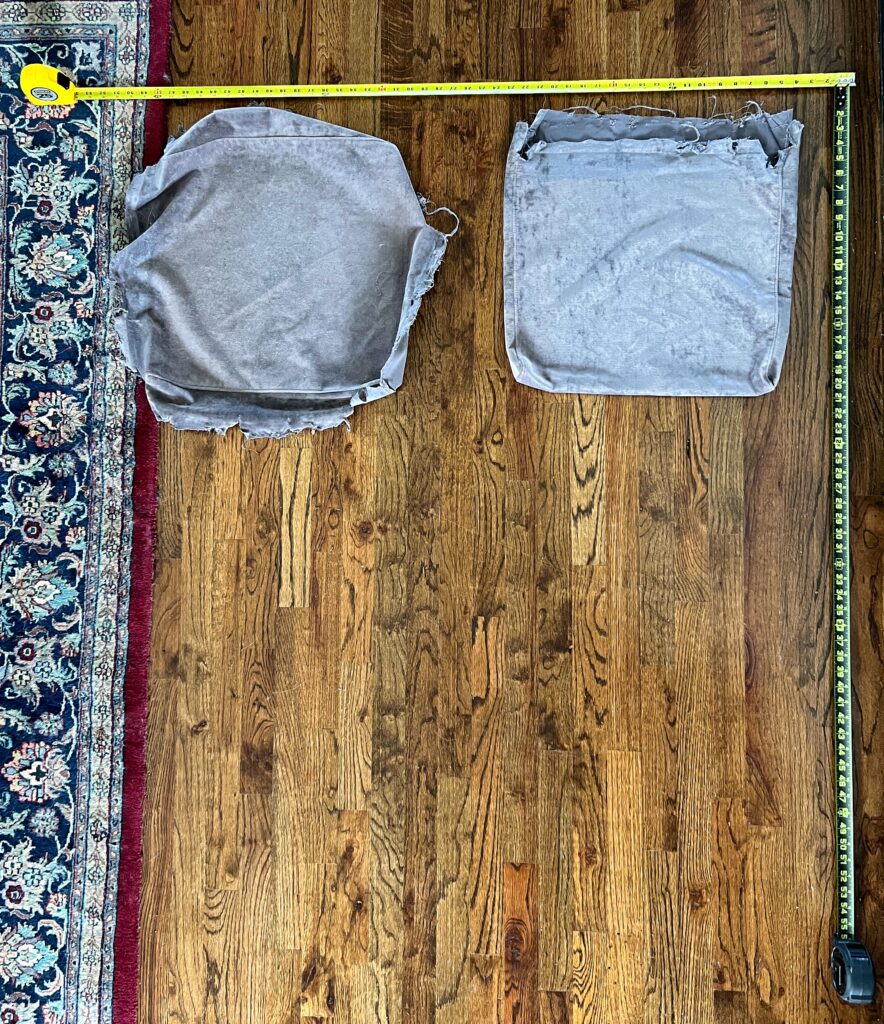
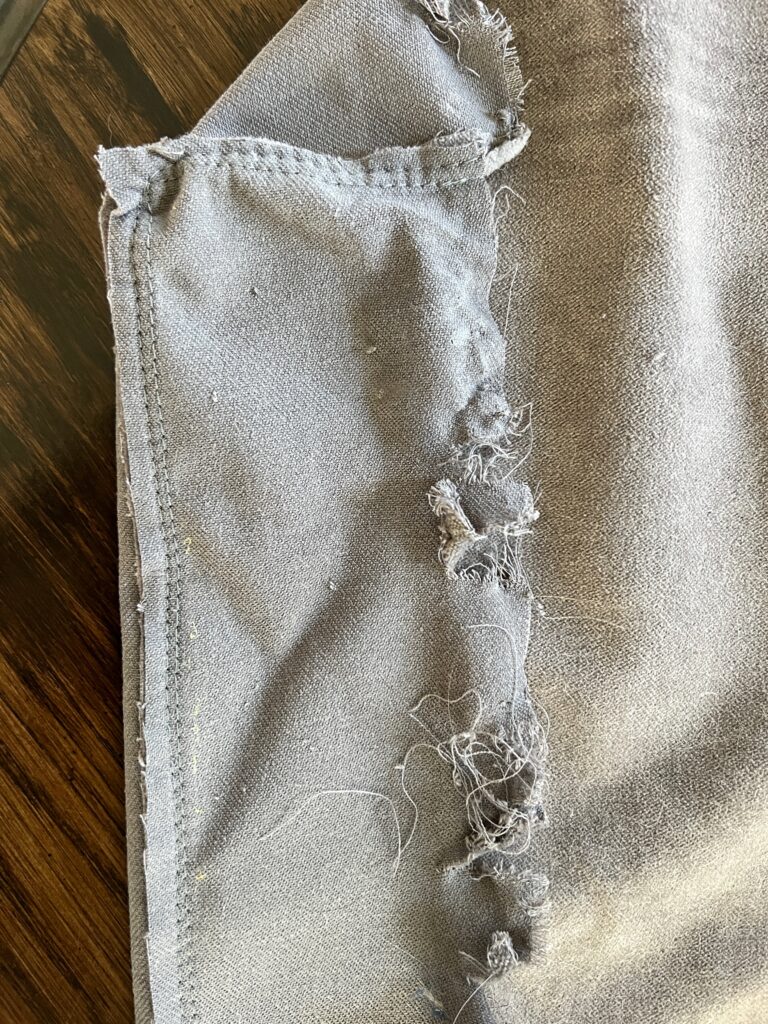
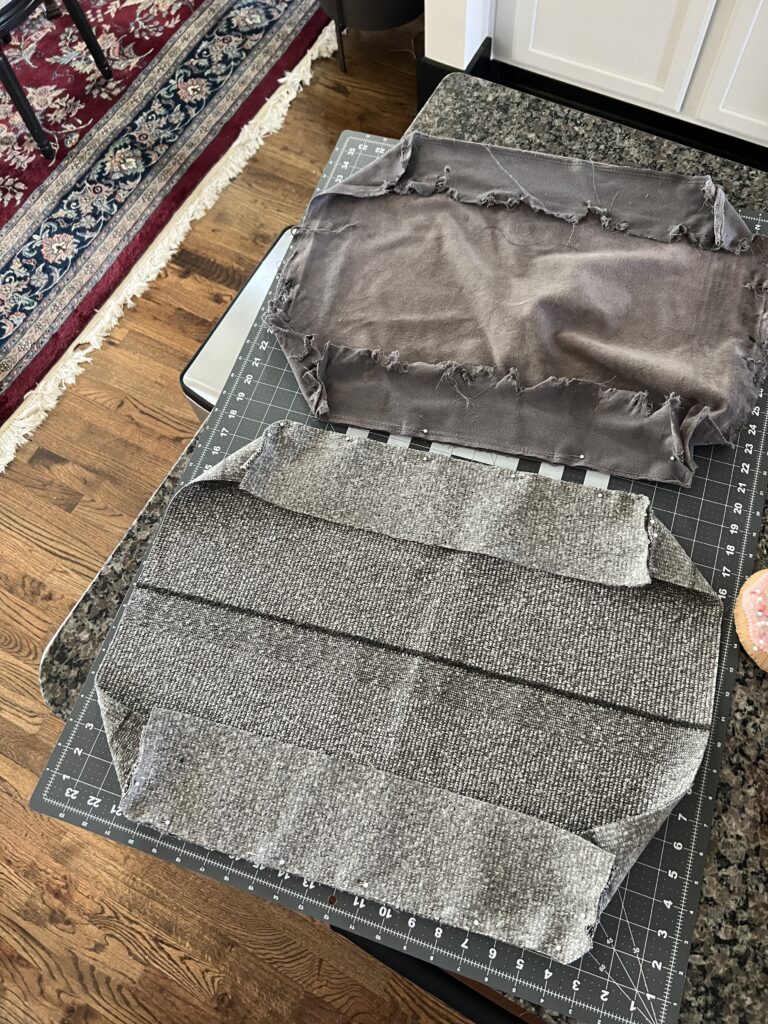
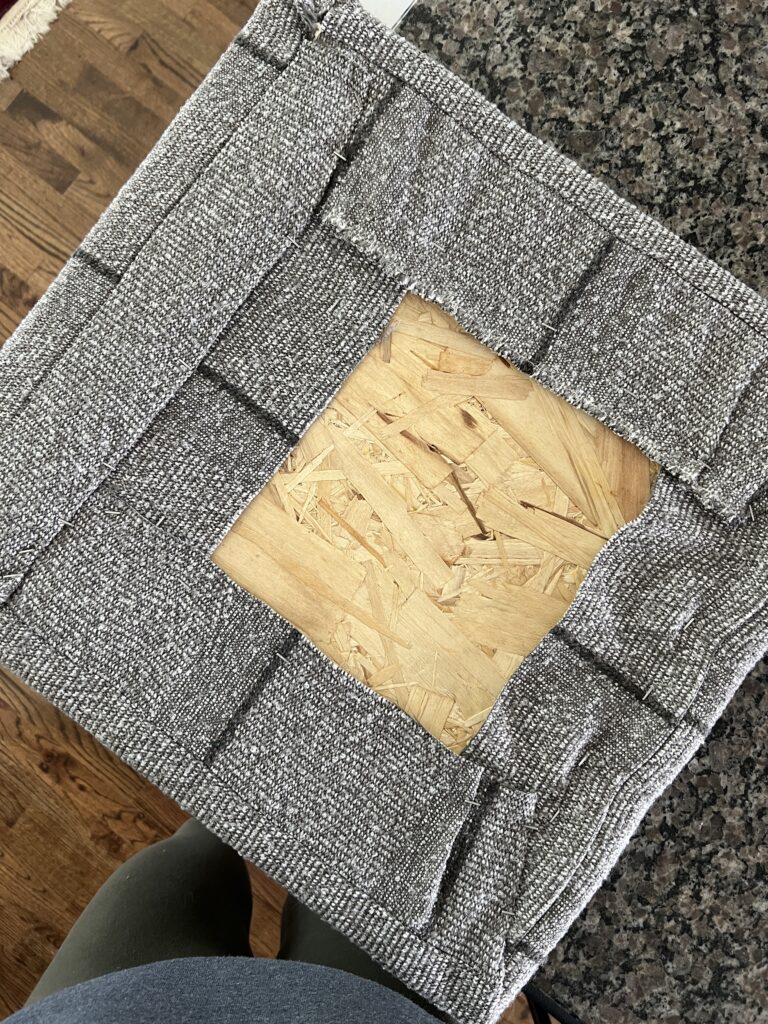
Remove the Old Fabric
This part was simple! I used needle nosed pliers and got to work removing all the staples. The whole process took about 30 minutes to do.
You can also get a staple puller made specifically for reupholstering like this one. Using a staple remover like that would probably be the easiest way to do it!
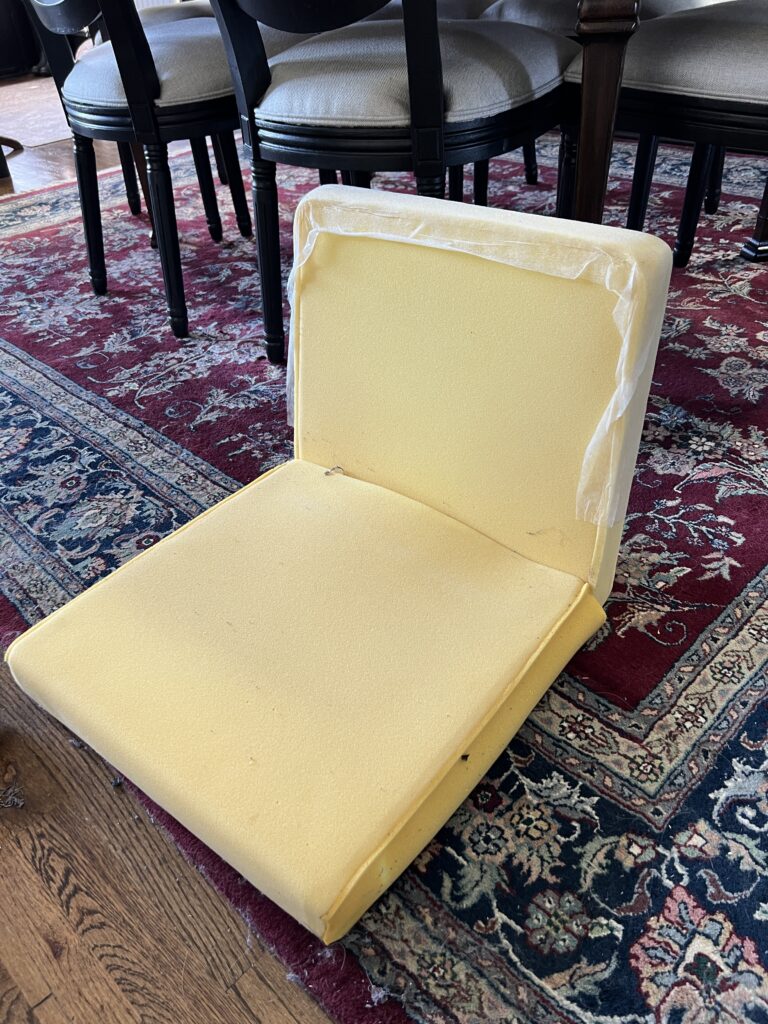
Here’s how it looked after I removed the fabric!
Choose + Measure Upholstery
What is upholstery fabric?
Upholstery fabric is specifically for furniture and soft furnishings such as curtains or pillow cushions. Therefore, it is thicker, stiffer, and more durable than other fabrics.
How do I choose fabric for a chair?
First consider how much you’ll be using your chair(s). If it’s more decorative, you’ll have more options. If it’s a chair you plan to use every day, you’ll want to take durability very seriously!
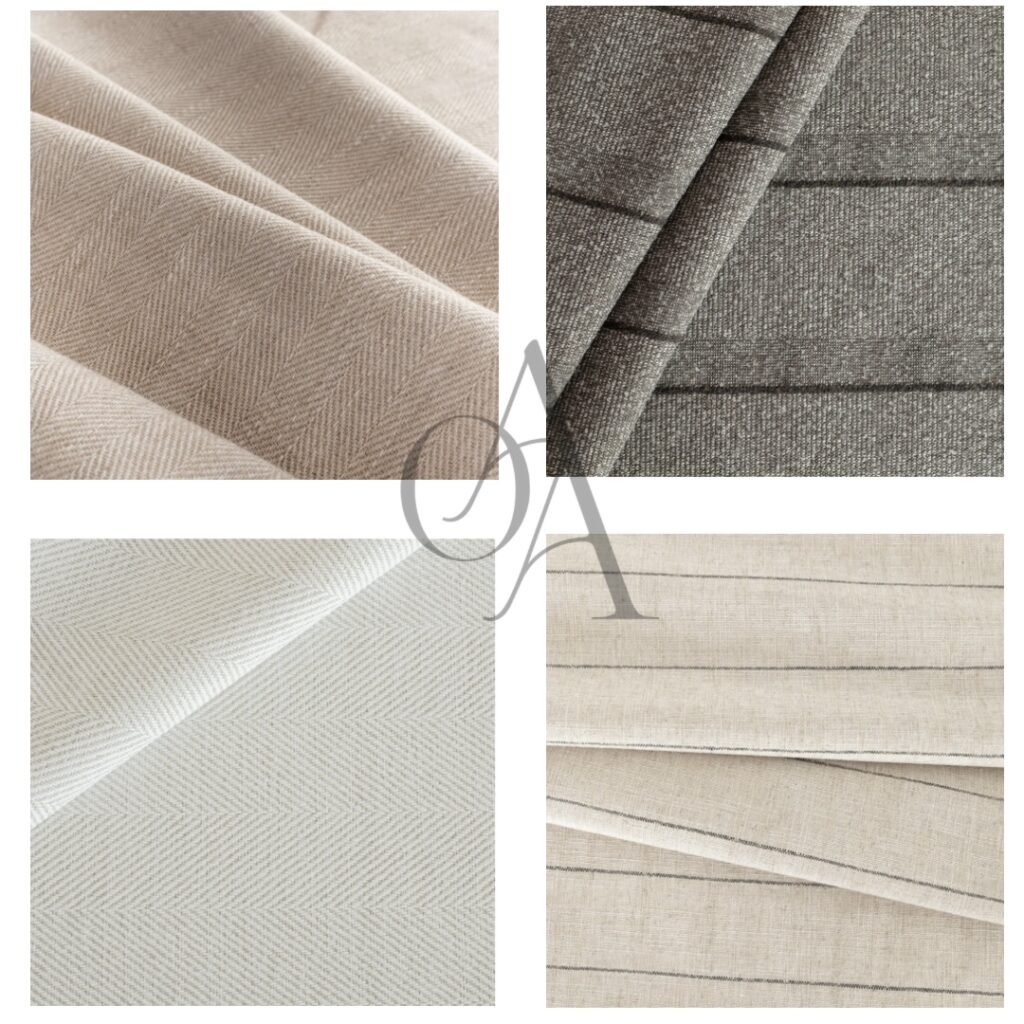
A durable upholstery fabric will be tightly woven with a high rub score. Learn more about rub scores and pilling classes here!
In my case, this chair definitely doesn’t get daily use as it’s more of an accent chair. However, I want the upholstery to last and I have two cats so I wanted something durable!
I went with this high performance, 100% olefin fabric which is a very durable upholstery material! I’m also in LOVE with the design!
How do I measure for fabric?
Every project will look different of course, and I’m no expert, but here’s how I figured out how much fabric to order:
Find out the width of the fabric you’re using
Fabric is most commonly sold by the yard, but the width varies and it’s definitely important to know!
My fabric has a width of 54″ so I set one measuring tape to that length, and another to 36″ for one yard.
Once I did this, I realized 1 yard wasn’t going to be enough, so I set it to 1.5 yards and figured i’d just have a little extra fabric which never hurts! I’m explaining that more in this video:
Consider the pattern
Don’t forget to take into consideration the pattern. Since I chose a striped fabric, I needed to know which way the stripes were going and the direction I wanted them to go on my chair!
Using a solid color or random print fabric such as florals would be easier than a striped or grid pattern!
Frame of the Chair
Choosing a spray paint
This is the fun and easy part! I used Krylon’s Fusion All-in-One because of it’s strong adhesion, durability, and fast drying time!
As you can see, I had a few options I tested out first! Krylon has a ton of colors to choose from so I tried these neutrals:
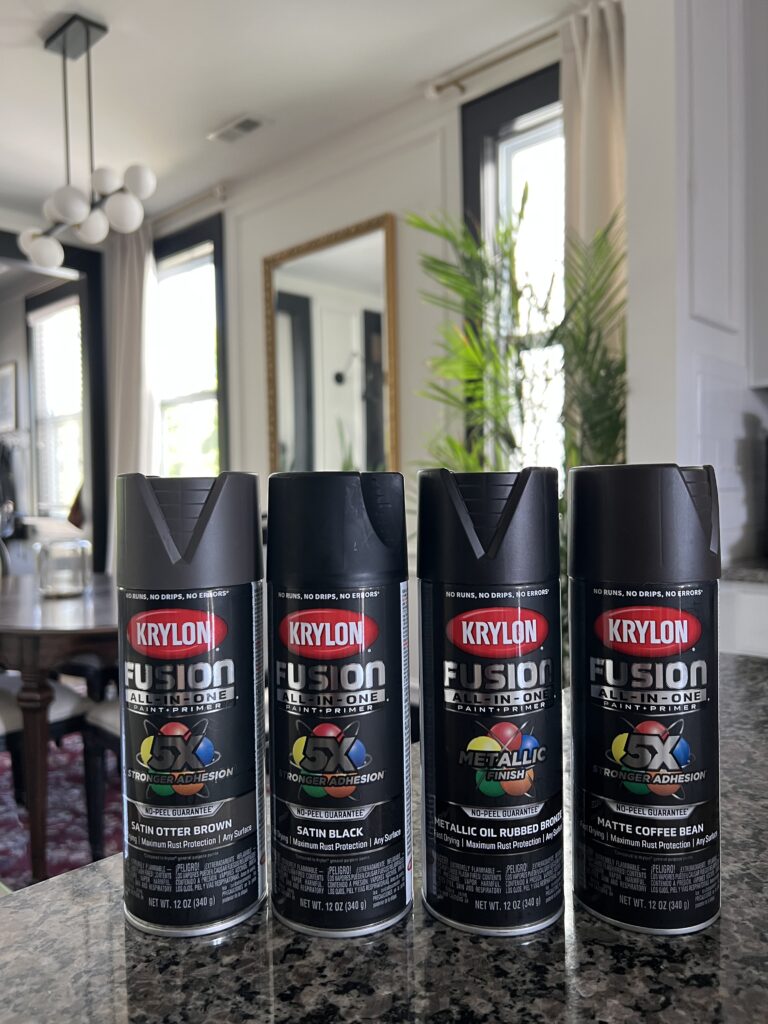
At first I tested them out on some scrap wood trim!
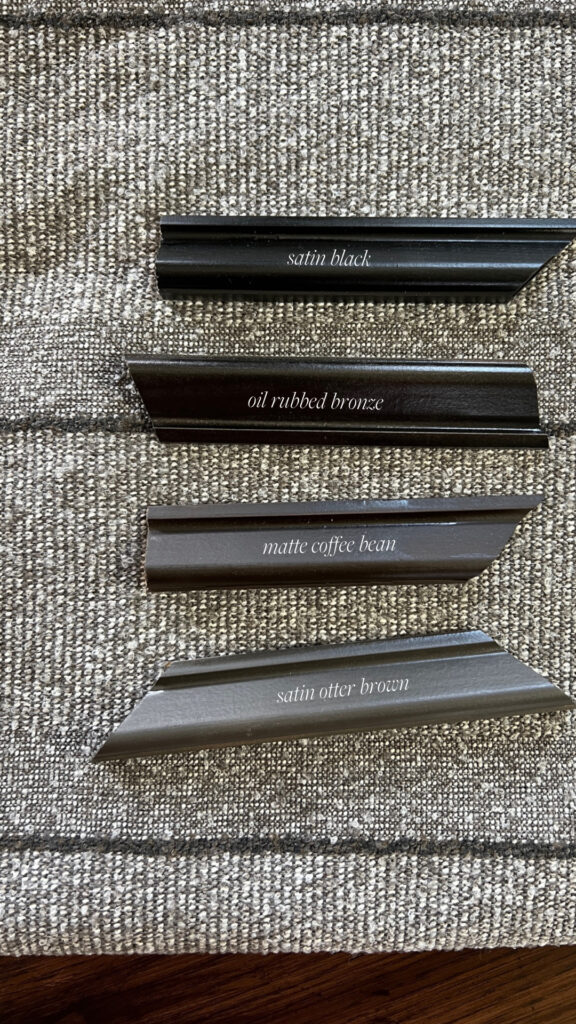
I decided the otter brown was too light for what I was going for, so I narrowed it down to the other 3 options.
The satin black i’ve used many times as it’s my favorite black spray paint! So I tested the oil rubbed bronze (left) and coffee bean (right) on metal to get a better idea.
Look how shimmery the oil rubbed bronze is! It’s gorgeous!
Ultimately, I decided to go with the satin black because I felt it would match the aesthetic of my house better!
Tips for a smooth spray paint finish
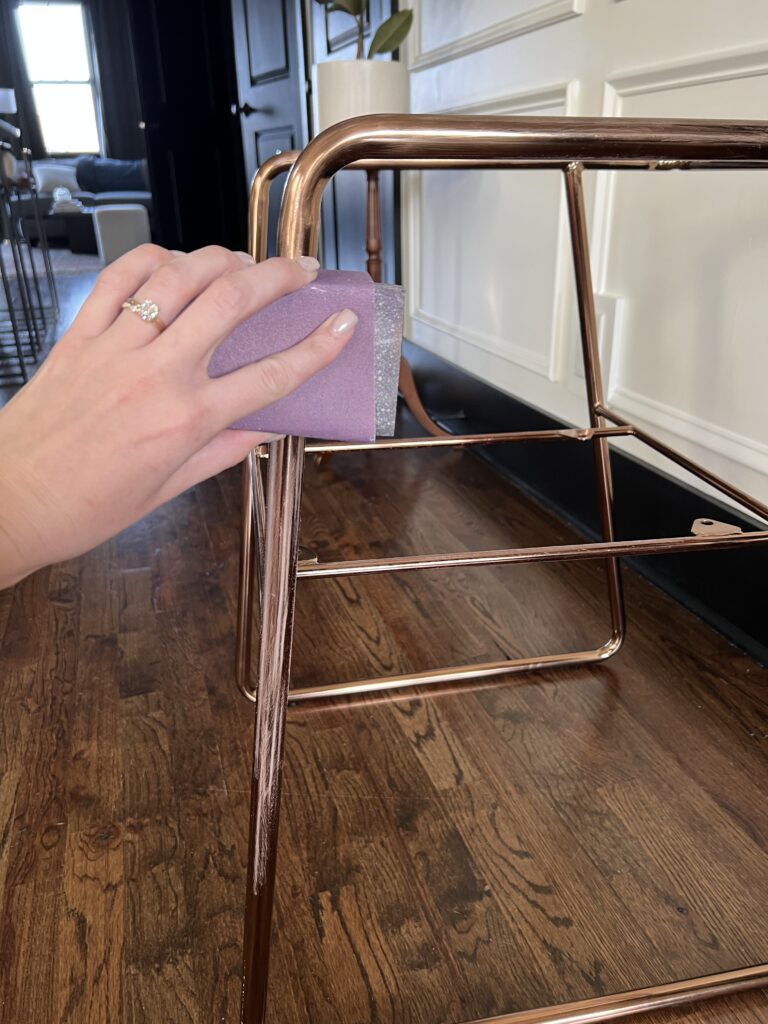
Before anything else, I cleaned (this is my go-to cleaner!) and scuff sanded! Since this metal was already so shiny and smooth, I wanted to dull the surface a little for better paint adhesion.
You’ll notice it scratches up the metal a little but that’s perfectly fine! It’ll go away once you spray paint!
Be sure to use a tack cloth to get all the excess dust off before you spray paint!
For best results:
- Avoid spray painting on a windy day
- Shake the can well and test on cardboard before starting!
- Keep the can 10″ to 12″ away
- Use quick and steady sweeping motions
- Do multiple thin coats
- Try out this awesome spray paint gun!
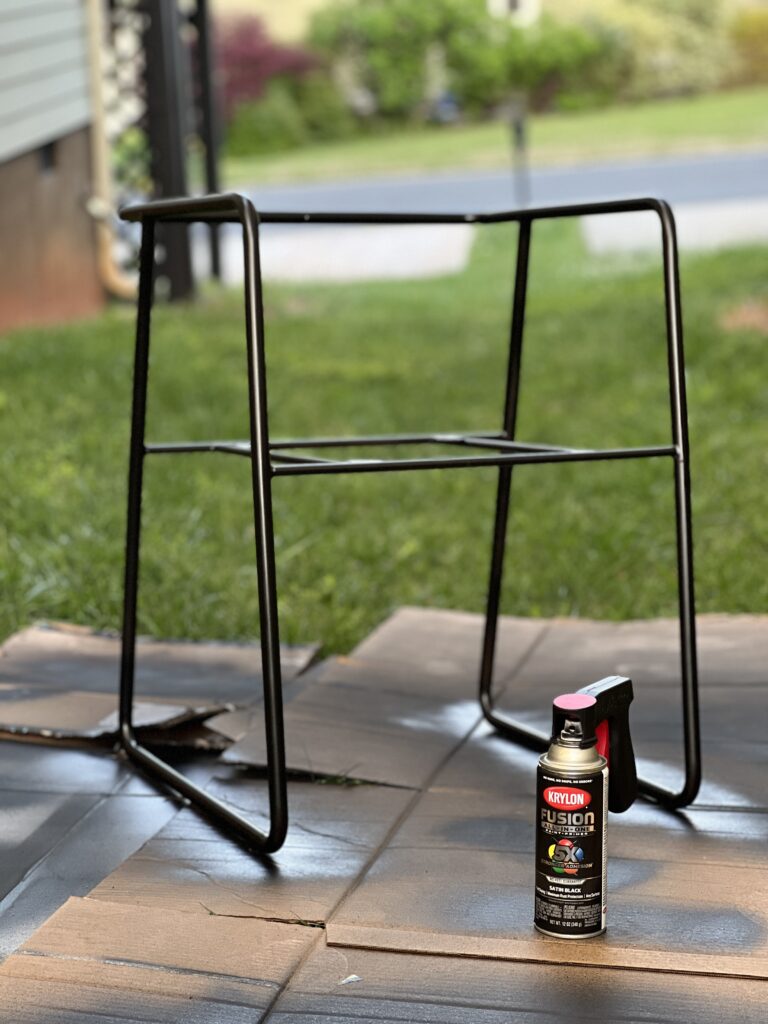
This is how it looked after one coat! I ended up doing two coats and used just under one can of spray paint. Easy peasy!
Reupholster the Seat Cushion (Step-by-Step Guide)
Full disclosure: This is my first time reverse engineering a piece of furniture. Reverse engineering is basically using the existing fabric as a guide for sewing the new pieces.
So this upholstery tutorial is for all the other beginners out there!
Step One: Take pictures!
The first step, and the most important step before reupholstering anything, is to take pictures of the stitching in the original upholstery.
There’s likely going to be moments where you’re confused about how to join two pieces of fabric together, so this is a great way to help you through that confusion!
Step Two: Seam rip the old upholstery
I personally love using a seam ripper and really enjoyed this part! You just have to take your old fabric, put it inside out, and and start ripping the seams!
Be careful to not rip the old fabric too much though because you’ll likely end up using it for templates.
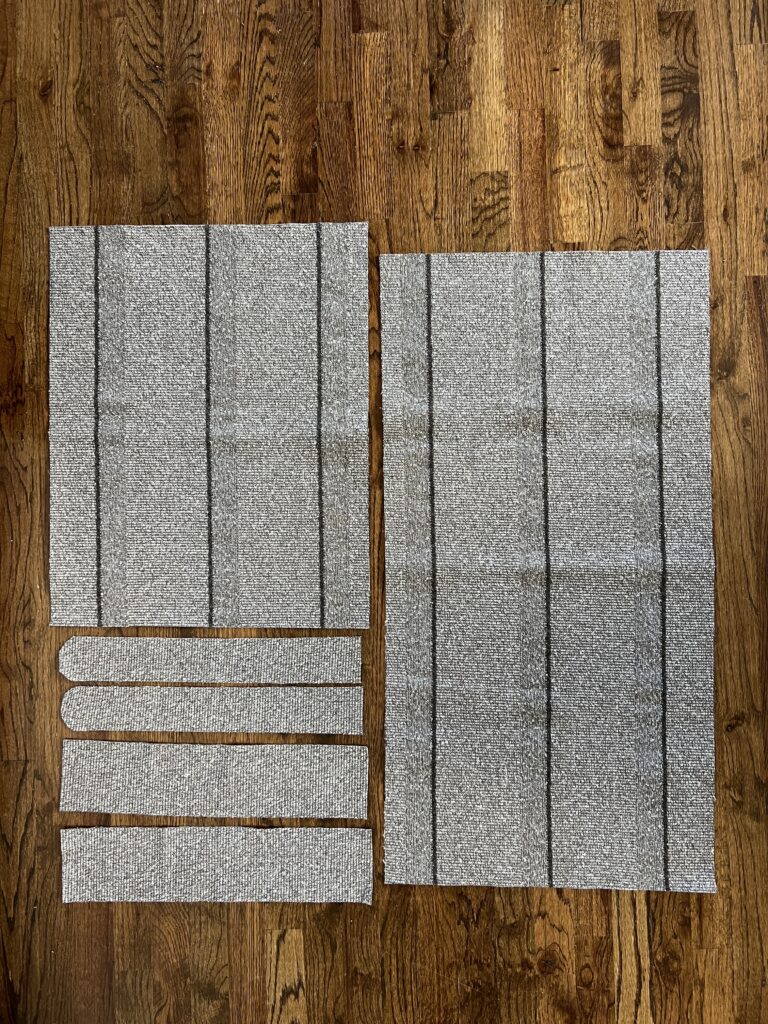
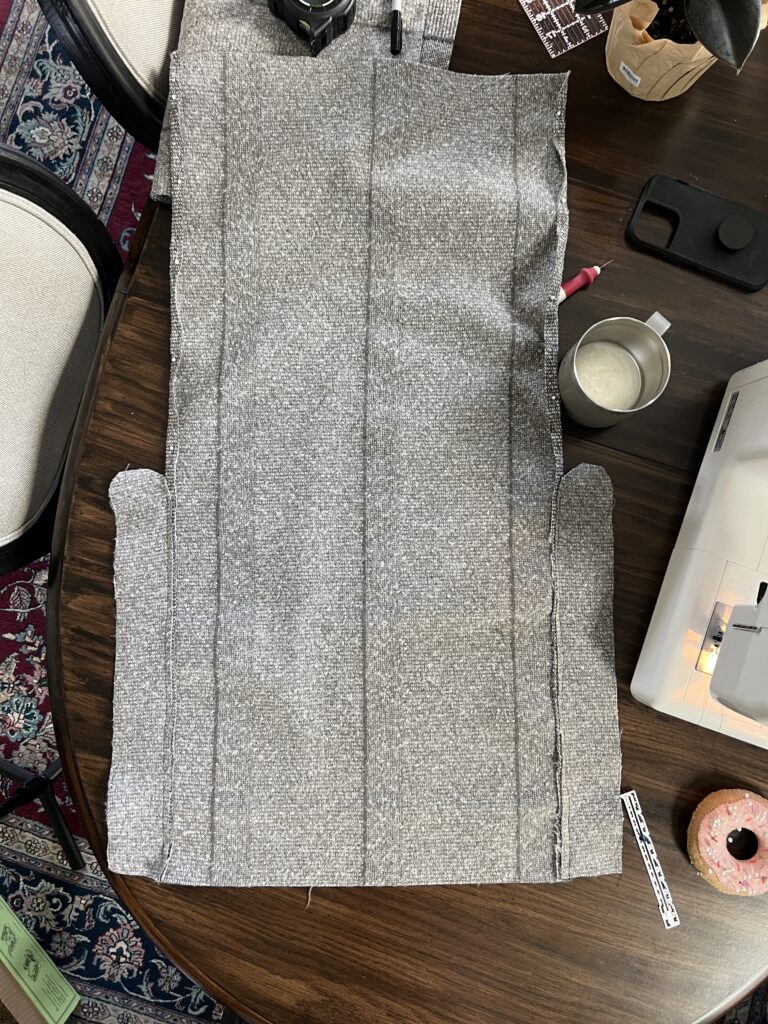
Step Three: Make a plan for your cuts!
The next step is laying out your new piece of fabric so you can come up with a plan for your cuts! The goal is always to have as much leftover fabric as possible (just in case of mistakes and of course for future DIY projects) so keep that in mind as you do this!
Another thing to keep in mind is the pattern. Do you see how I laid the old fabric for the front and back of the chair? I wanted those 3 stripes to be centered on the front of the seat.
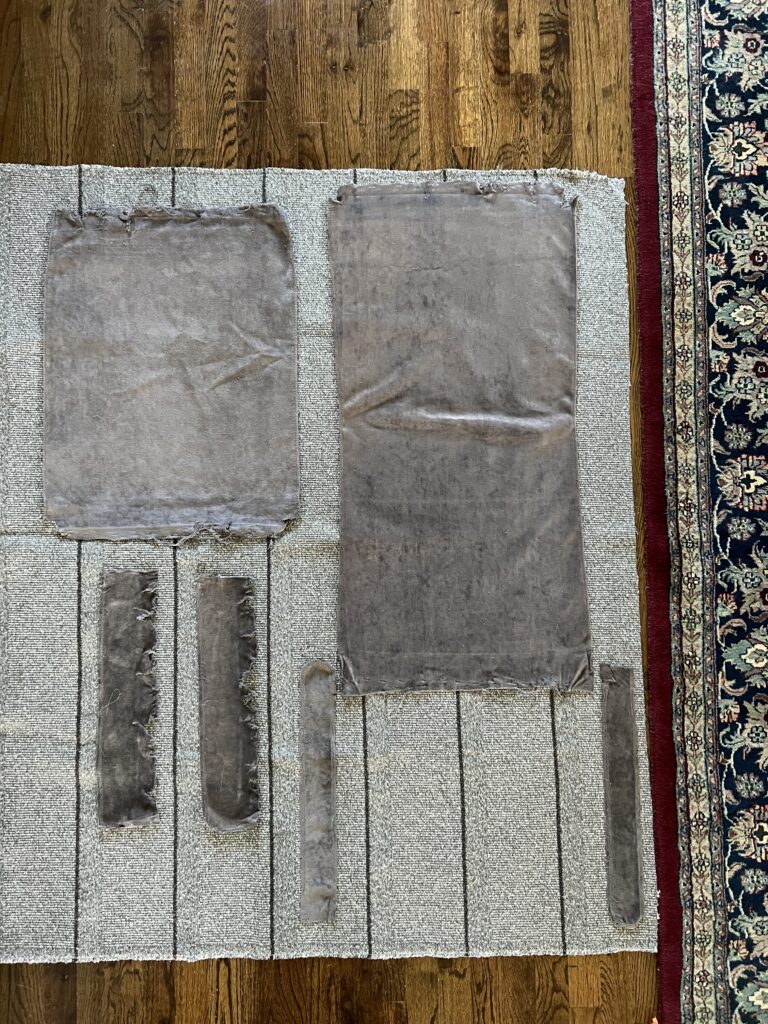
For the smaller pieces, which were the sides of the chair seat and chair back, I decided to cut those where where aren’t any stripes!
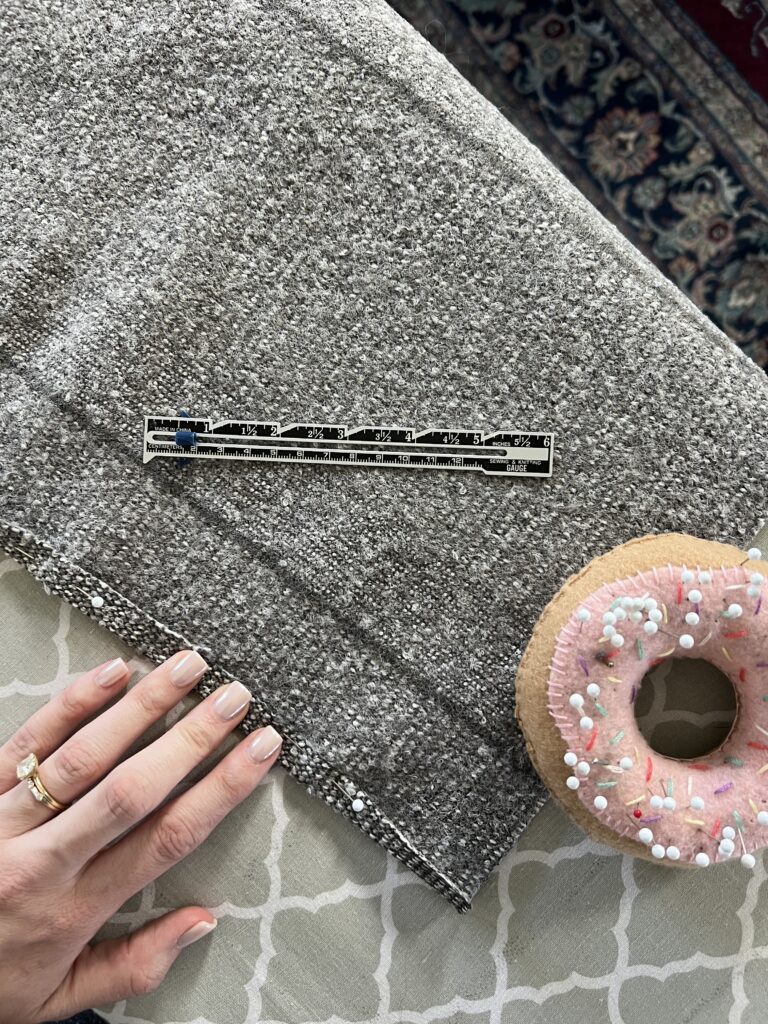
Step Four: Measure the old fabric pieces
Make sure your old pieces are completely flat and unfolded. You shouldn’t have to add any extra length for the seam allowance, but I did add about 1/8″ extra just to be safe!!
Note: If your original pieces of fabric are in good shape, you can just trace a straight line and cut. I did that for a couple pieces, but the ends of these pieces were pretty shredded up!
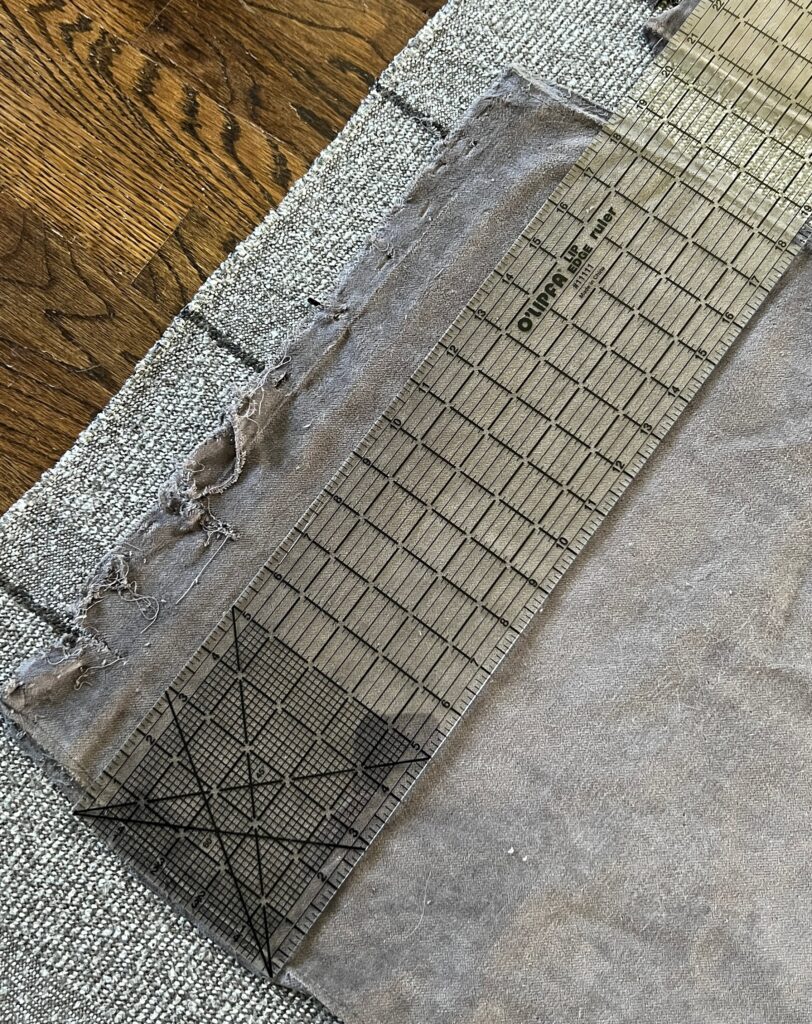
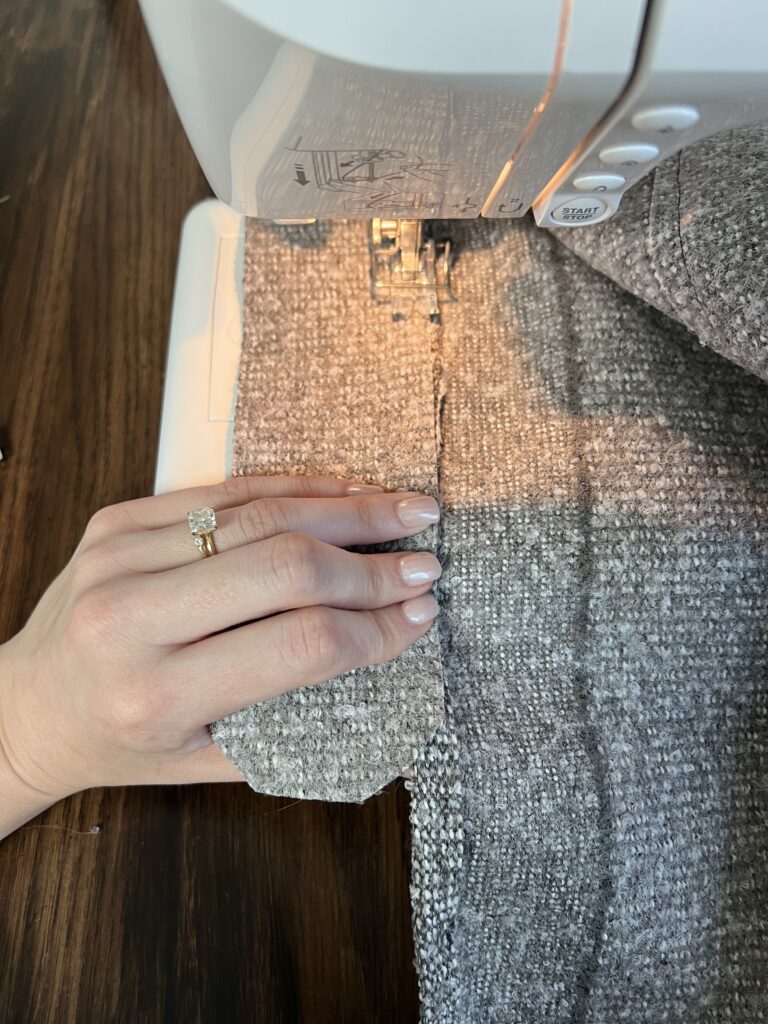
Step Five: Cut the new upholstery
An acrylic ruler, rotary cutter, and rotary mat are incredibly helpful for reupholster projects, but you don’t need them! You can easily get away with a ruler and fabric shears too!
Seeing through to the fabric is nice especially in this case- I was able to line up the stripe with one of the black vertical lines!
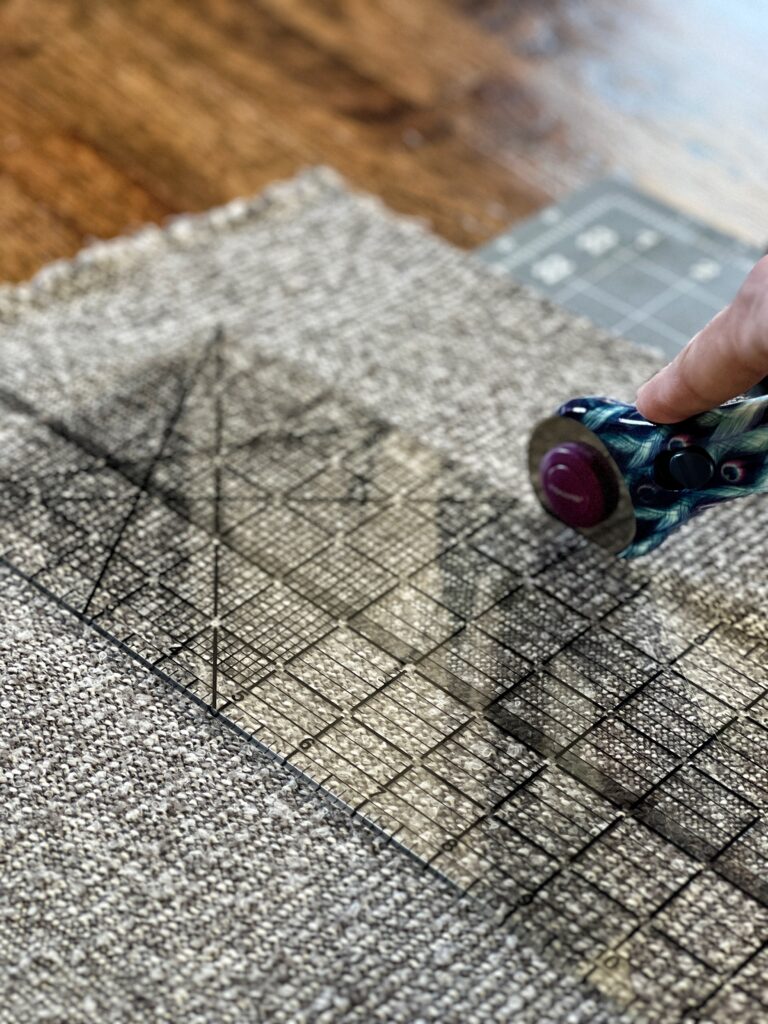
For the smaller pieces, I just layered two pieces of the new fabric and pinned the old fabric on top.
I used my rotary cutter to cut around the shape!
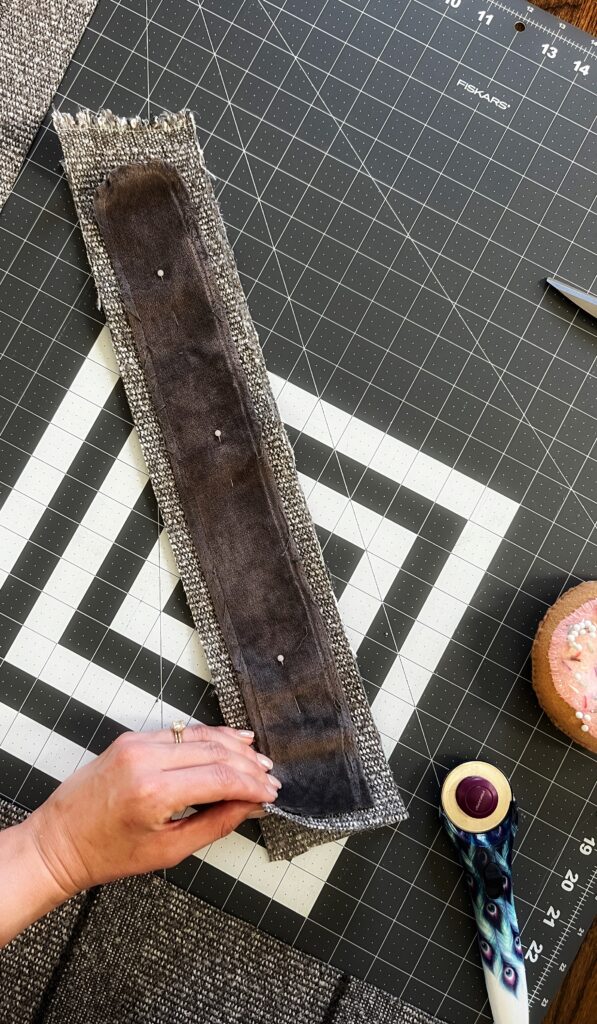
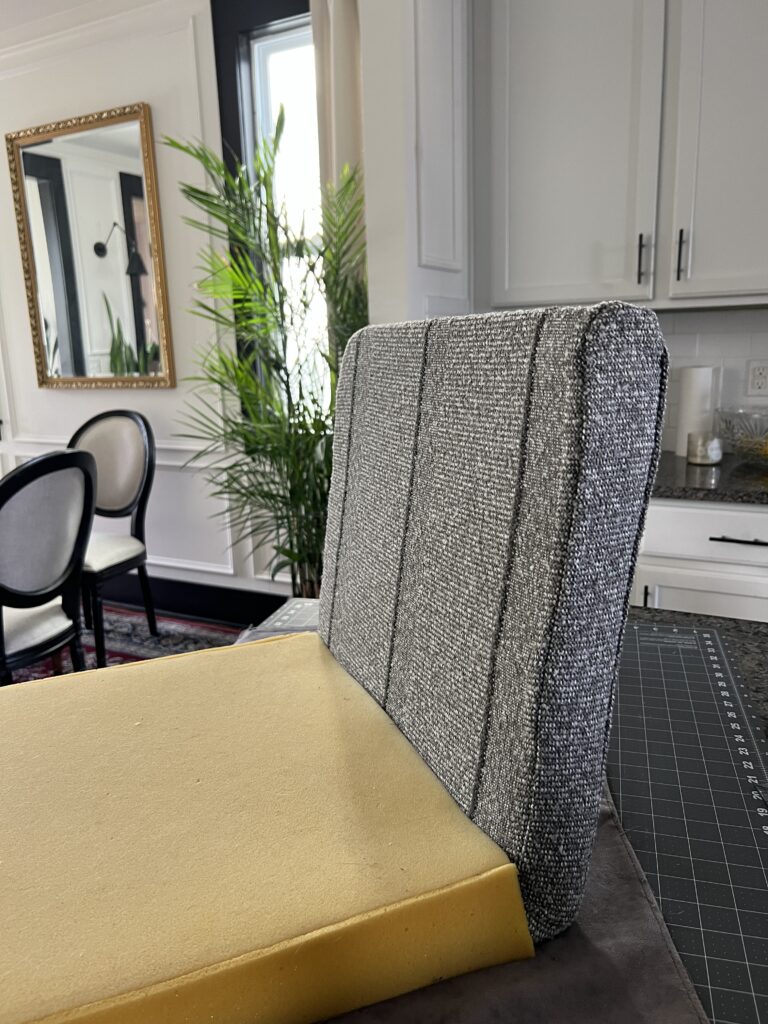
Step Six: The back of the chair
I started with the chair back first just because it looked a little less complicated than the seat base.
Referring to the old piece, I noticed the fabric was folded over 1/2″ before being sewn to the other pieces so I did that first using my seam gauge.
Normally I would iron first, but this fabric actually can’t be ironed… it melts. Ask me how I know ????
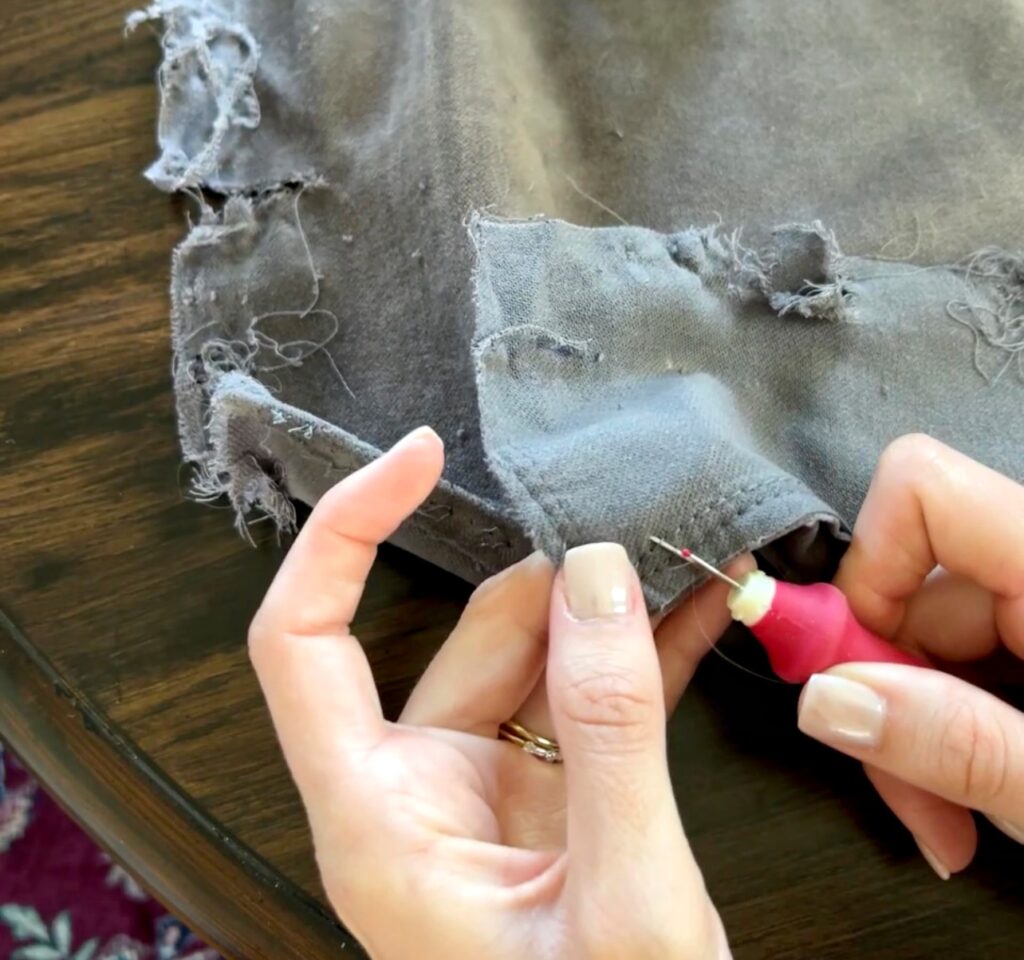
I then pinned the side piece to the hem, right sides of the fabric together.

I used a 1/4″ seam allowance and sewed up until about 1″ below where it starts to curve.
Once I did the same on the other side, I then had to carefully around the curve and down to the other end of the fabric.
This part was a little tricky, but manageable! I just went slow!
It was pretty exciting to flip it right side out and try it out of the back of the chair! The fit was nice and snug and I was definitely feeling proud!
Step Seven: The chair seat
I’m glad that I did the back of the chair first, because the chair seat puzzled me a little more.
What I ended up doing was really examining the previous fabric, pinning the fabric pieces back together just to get a better idea of how it was constructed.
Once I figured it out it was simple to sew! I had to go around and sew in a U-shape on each side of the chair seat.
What I had to go back and fix
I’m not sure how this happened, because I cut the new fabric pieces the same size (a little bit bigger even) as the old fabric pieces.
But there wasn’t enough excess fabric to reach the chair frame. I think it’s because the fabric isn’t quite as stretchy as the previous one.
Luckily this was an easy fix! I sewed an extra fabric piece to each side of the chair seat.
I didn’t worry about the pattern or direction of the fabric, because I knew it would be hidden underneath the chair.
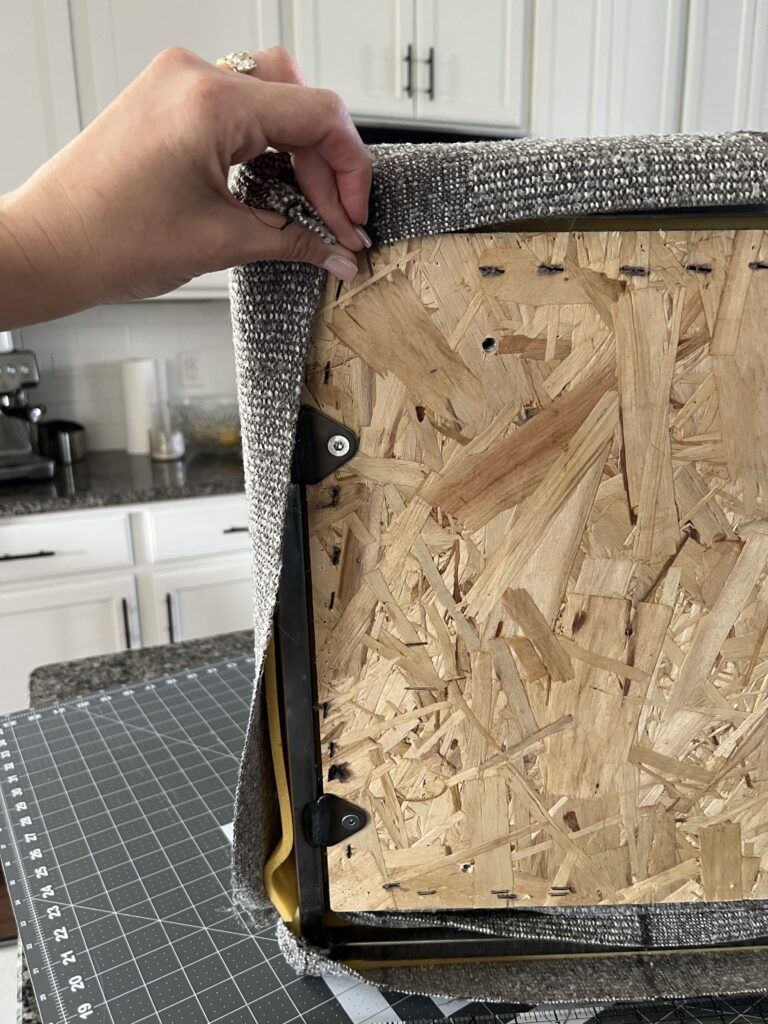
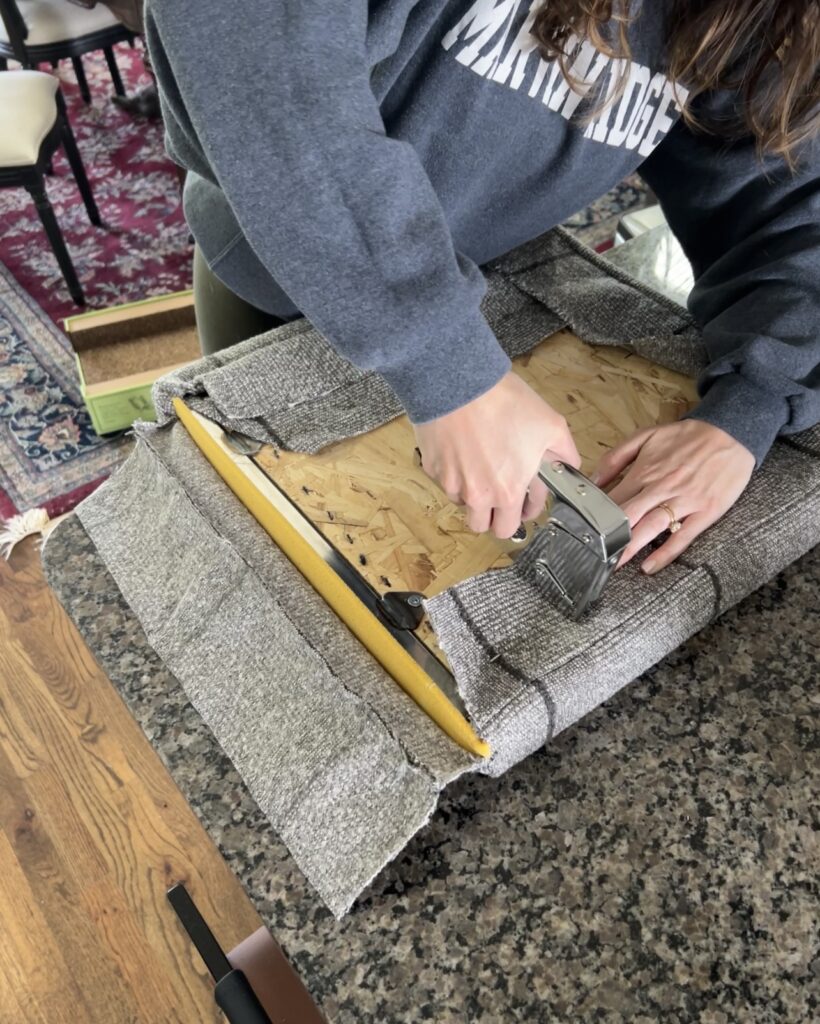
Step Eight: Staple to the frame!
The last and easiest step!!
Simply pull the fabric tightly to the bottom of the chair, folding in the corners when necessary. Use a generous amount of staples to hold it in place!
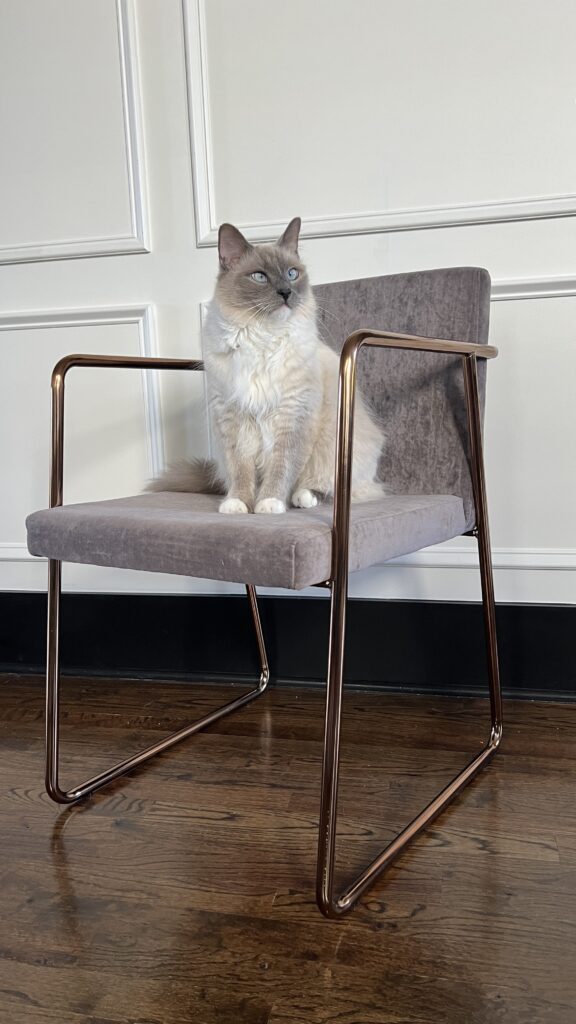
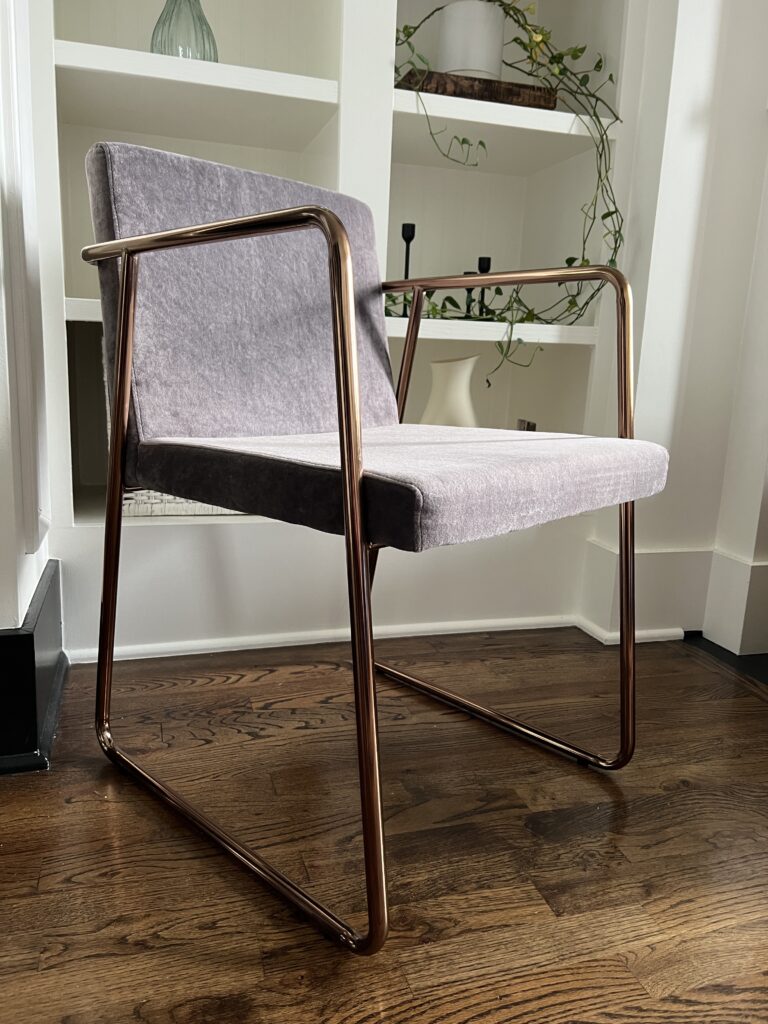
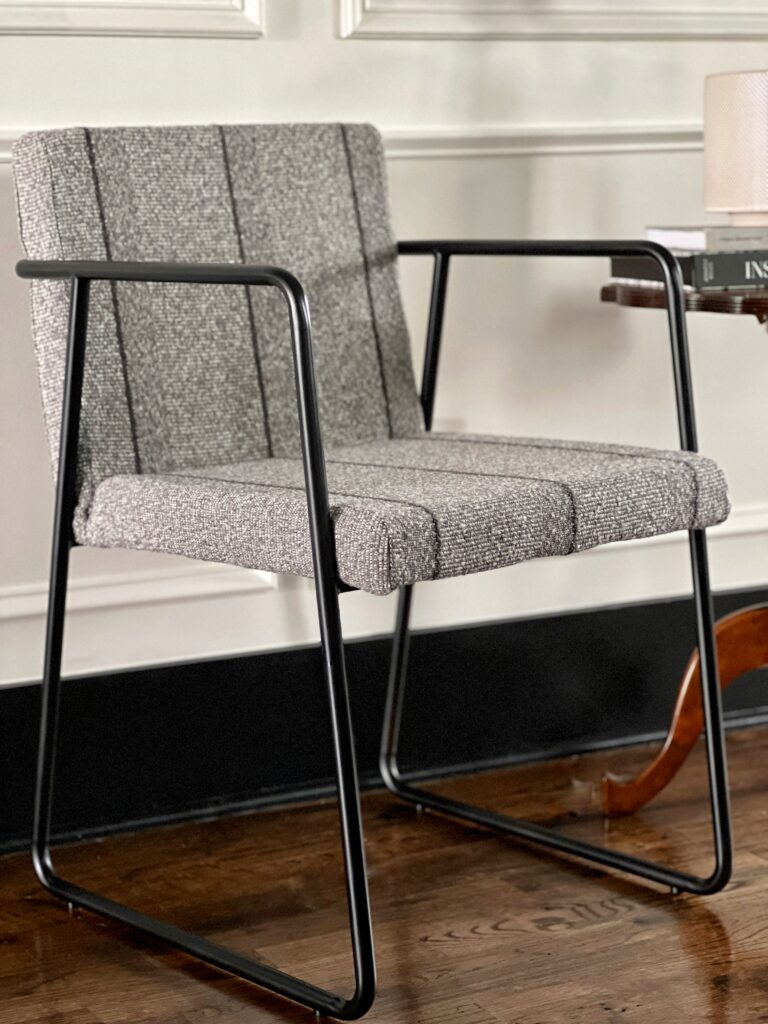
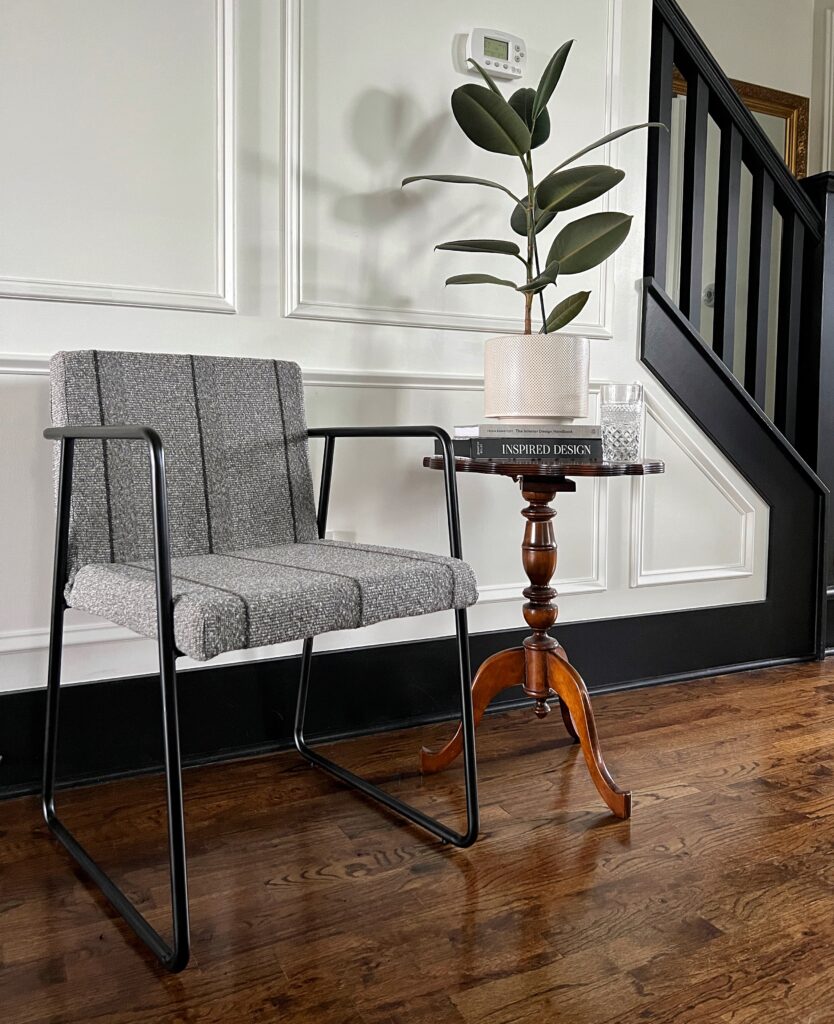
DIY Chair Makeover: Before + After
My favorite part about this DIY chair makeover is that I got to give it new life and create a custom look specifically for my home!
With just a little effort, and a total cost of $55, I couldn’t be happier with the end result!
Before
After
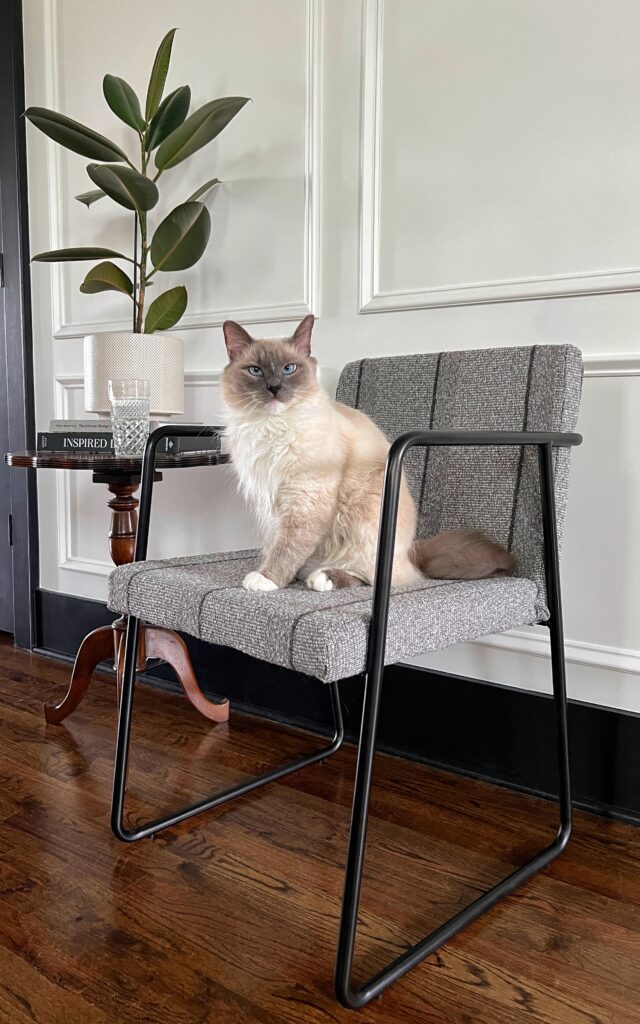
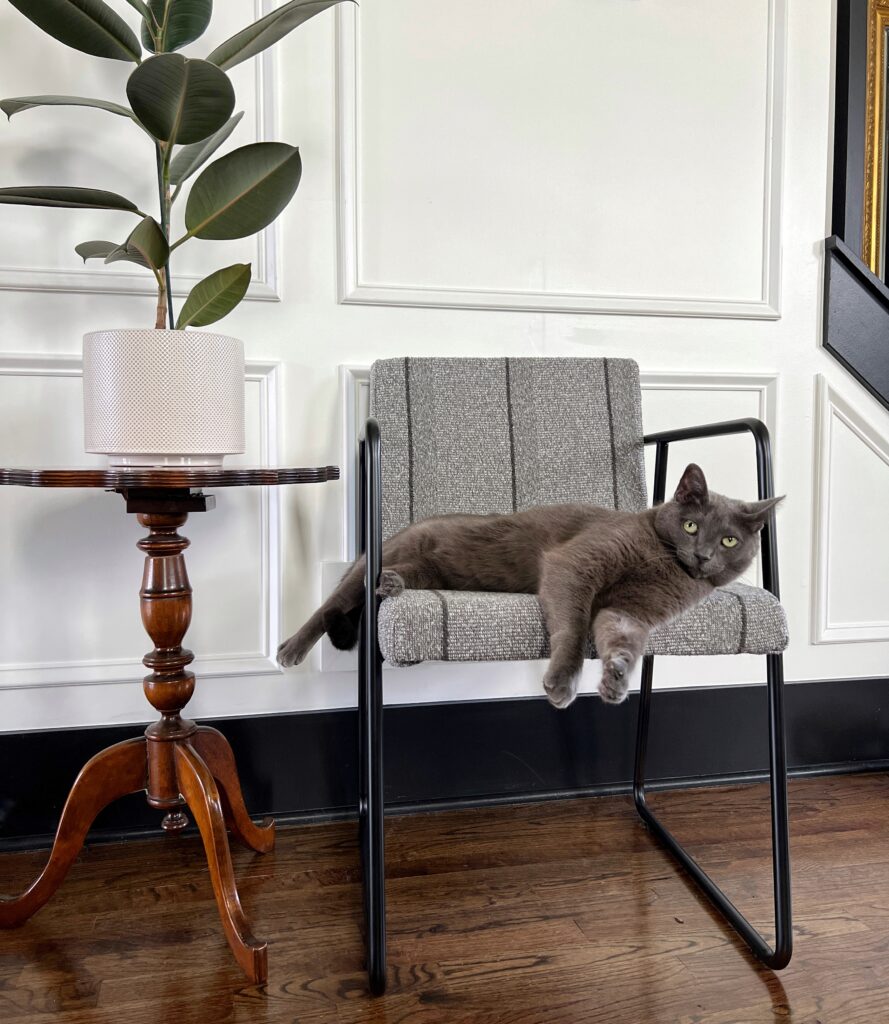

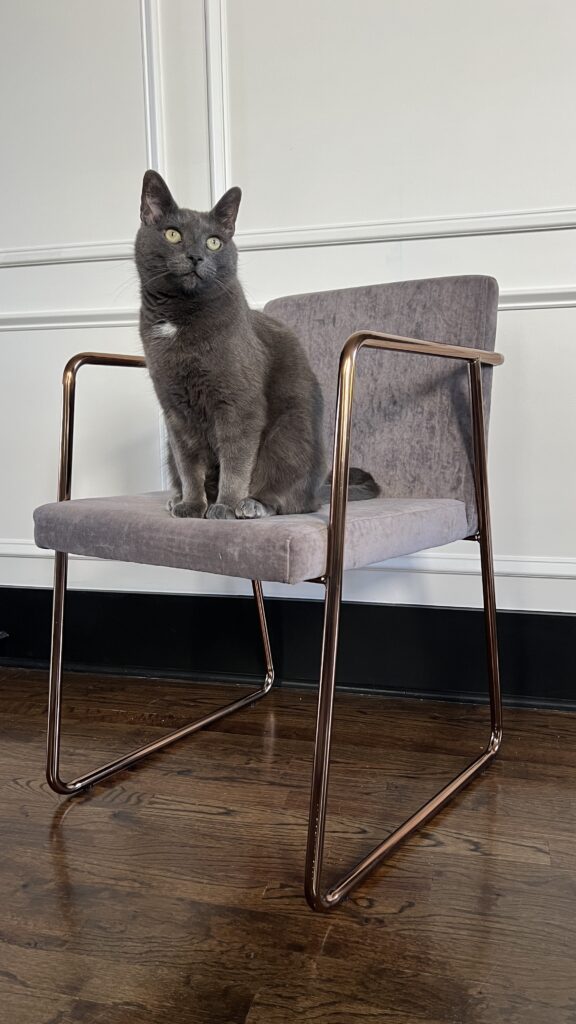
It’s evident that our cats love it, but we do too! I hope you found this step-by-step tutorial helping for your next reupholstery project!
If you have questions, let me know in the comments!
