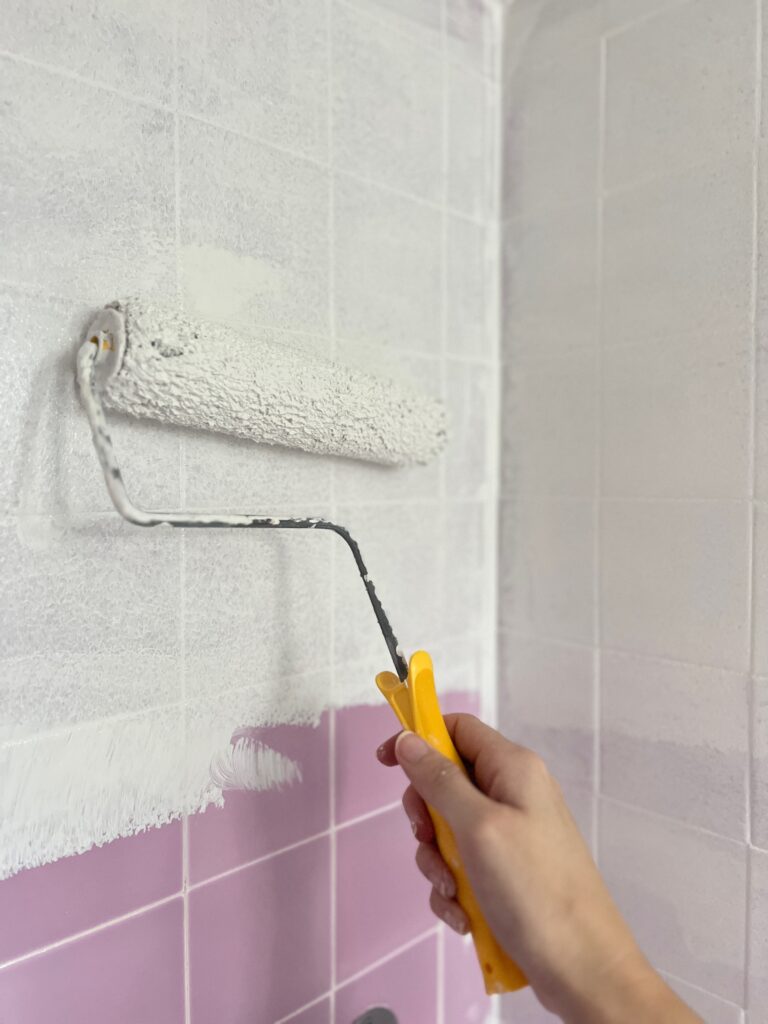
Painting tile can give your bathroom a fresh, updated look without the need for messy demo or expensive new tile! Prior to starting our bathroom tile makeover, I did a lot of research on how to paint shower tile because let’s be real… it feels risky! But after almost five years of DIYing, i’m a firm believer that almost anything is possible with proper prep, products, and most importantly… patience!
When you research how to paint tile, majority of the tutorials use a two-part epoxy paint or a tile refinishing kit. Those products are great, but the big issue (for me, anyway) is the lack of color options. With the method I’m sharing in this post, you can use any paint color you’d like! I’m sure you’re dying to know exactly how, so let’s get into it!
Disclaimer: This post contains affiliate links. This means, if you purchase something from a link I provided, I will receive a small commission. This is at no extra cost to you! Thank you so much for the support!
Bathroom Makeover Mood Board
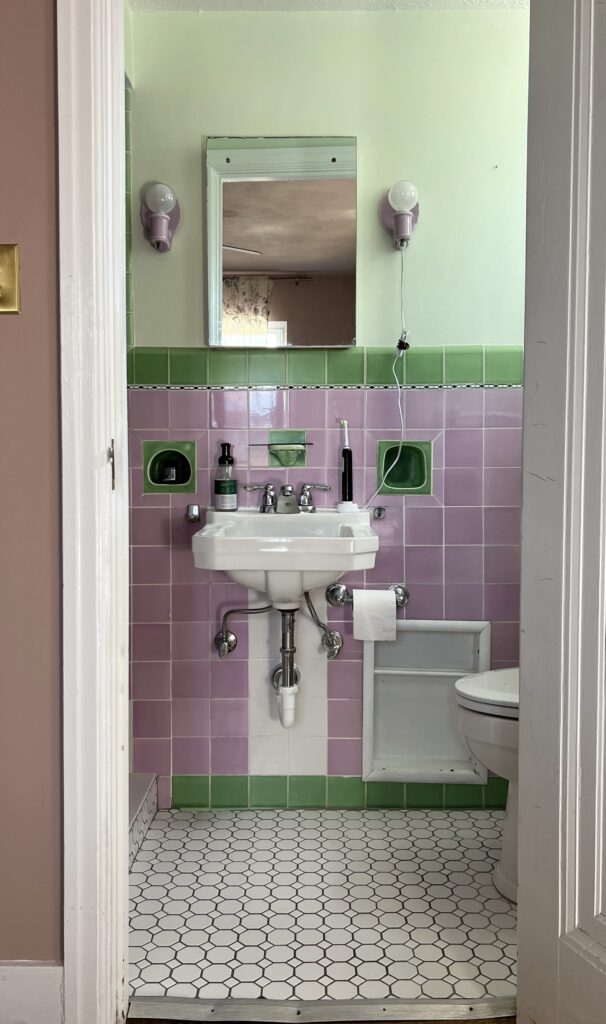
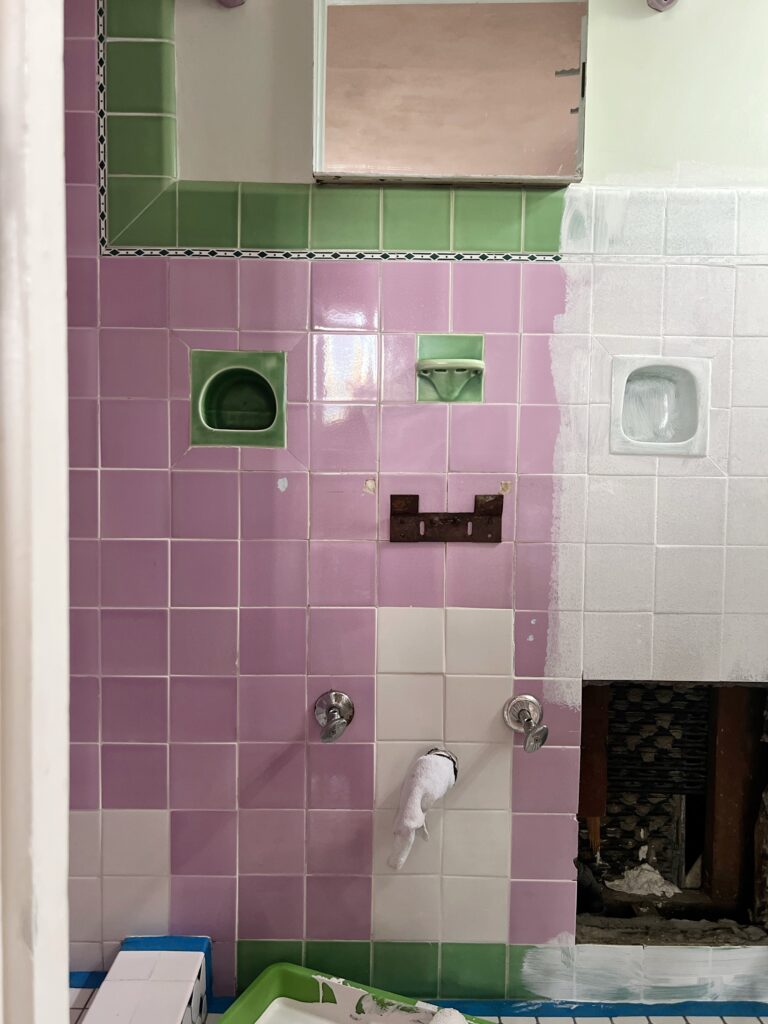
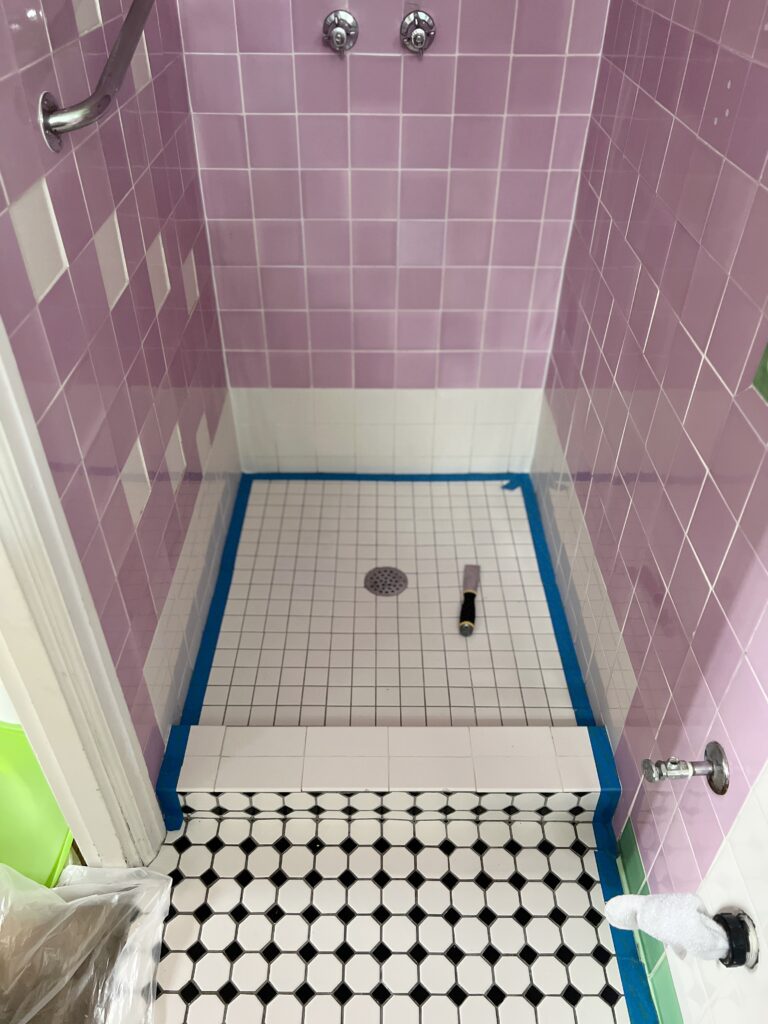
Our guest bathroom has a beautiful tile design, but the tiles themselves weren’t in the best shape. Not to mention, the colors were very… um, bold?!
I’m all about preserving the history of old homes and highlighting original features, but I also believe in color psychology. After living with this funky color scheme for a year, we knew it wasn’t something we wanted to live with forever. Our goal is to honor the character of this old tile bathroom the best we can. We hope to make it feel like it fits nicely into our 1930 home.
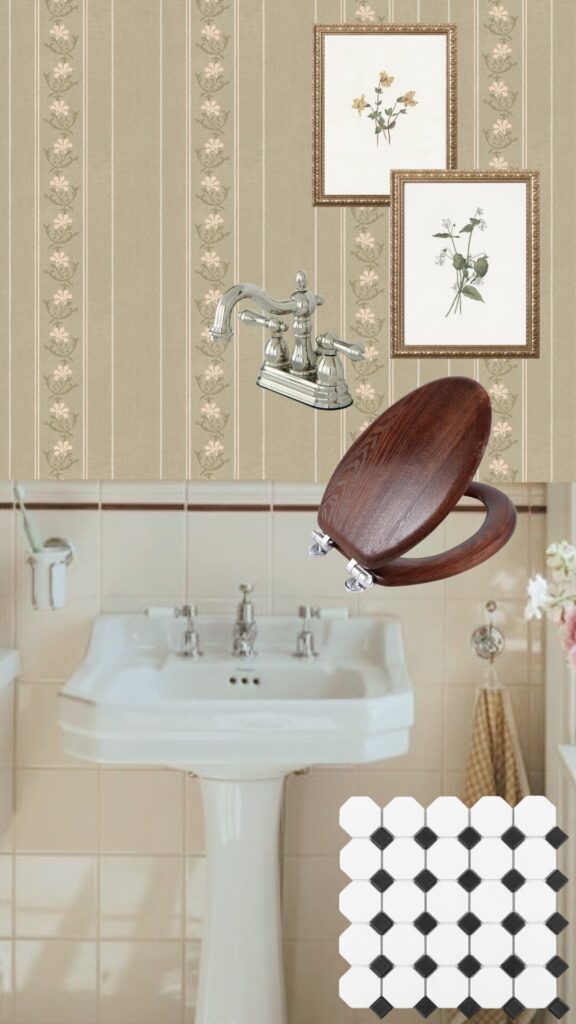
Before we dive into the process, I want to share my vision for this no demo bathroom makeover! Here’s my mood board. Play close attention to the tile designs and colors!
Painting Bathroom Tile YouTube Video
Here’s my video tutorial on how to paint bathroom tile! I definitely recommend watching the process first and then this blog post will hopefully answer any additional questions you might have!
How to Paint Floor Tile
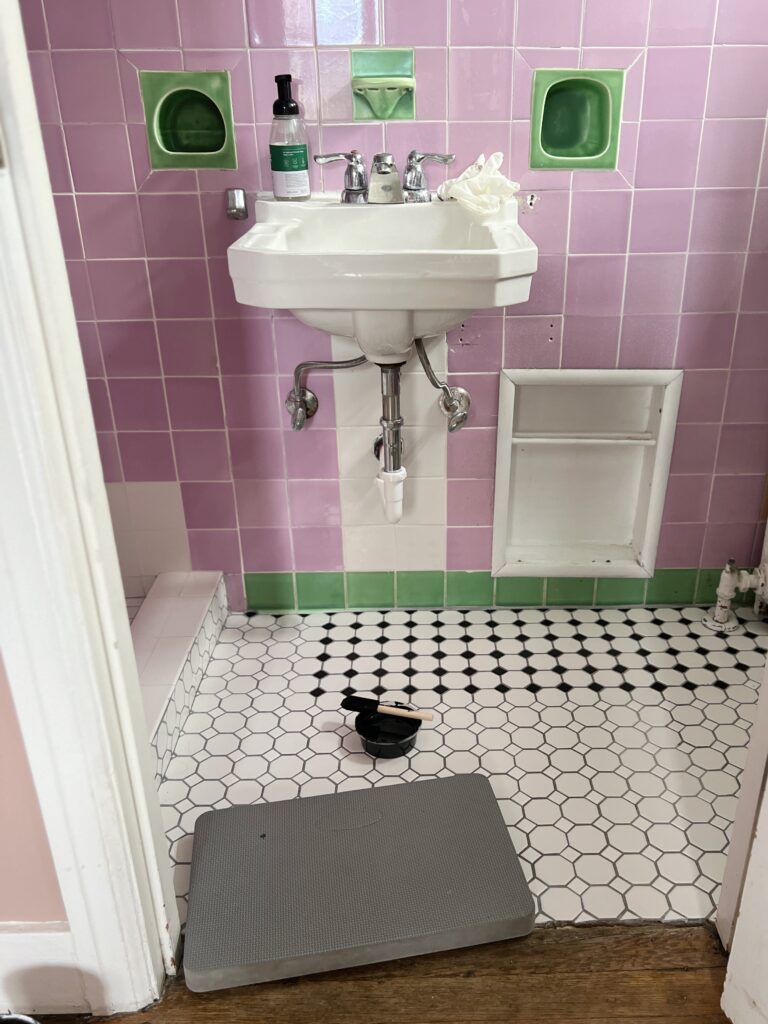
In part one, our bathroom floors got a very simple, but impactful update! I painted some of the bathroom floor tiles black to create the pattern you see in my mood board.
I’m still blown away by the transformation a little black floor paint made! Check out the stunning ‘after’ in my post: Bathroom Makeover Part One: How to Paint Floor Tile. In this post, I also cover different options for painting bathroom floor tiles and include a step-by-step tutorial for tackling your entire floor makeover!
Can you paint shower tile?
The answer is yes, of course! You can definitely paint shower tile with success if you prep properly and use the right paint. Lucky for you, I have all the information you need in this tutorial 😉
Is it meant to last forever though? No, especially not in high-use areas. Painting tile in general is more of a short term solution to eventually getting the tile you’d really like. But I’m feeling hopeful that this will last us a long time. I’m guessing a few years at minimum! I’ll definitely keep you updated as time passes.
This isn’t my first tile painting project, and it definitely won’t be my last!
How do you prep tile to paint?
I’ll admit, there’s a lot of prep work involved in painting shower tile. But if you want a long-lasting finish, it’s important not to skip any of it!
Thoroughly clean tiles
This first step is crucial because any soap scum residue left behind can prevent proper adhesion of the paint. The cleaning solution I used is one cup of Dawn dish soap and one cup of vinegar. This tip actually came from this painting shower tile tutorial! The type of tile she was working with was very different from mine, but I learned a lot from her video and followed her guide pretty closely!
Spray your bathroom tiles with the cleaning solution and let it sit for 5 minutes. Since I was dealing with a lot of wall tiles, I found it easier to do one section at a time. You don’t want the solution sitting on the tiles for too long.
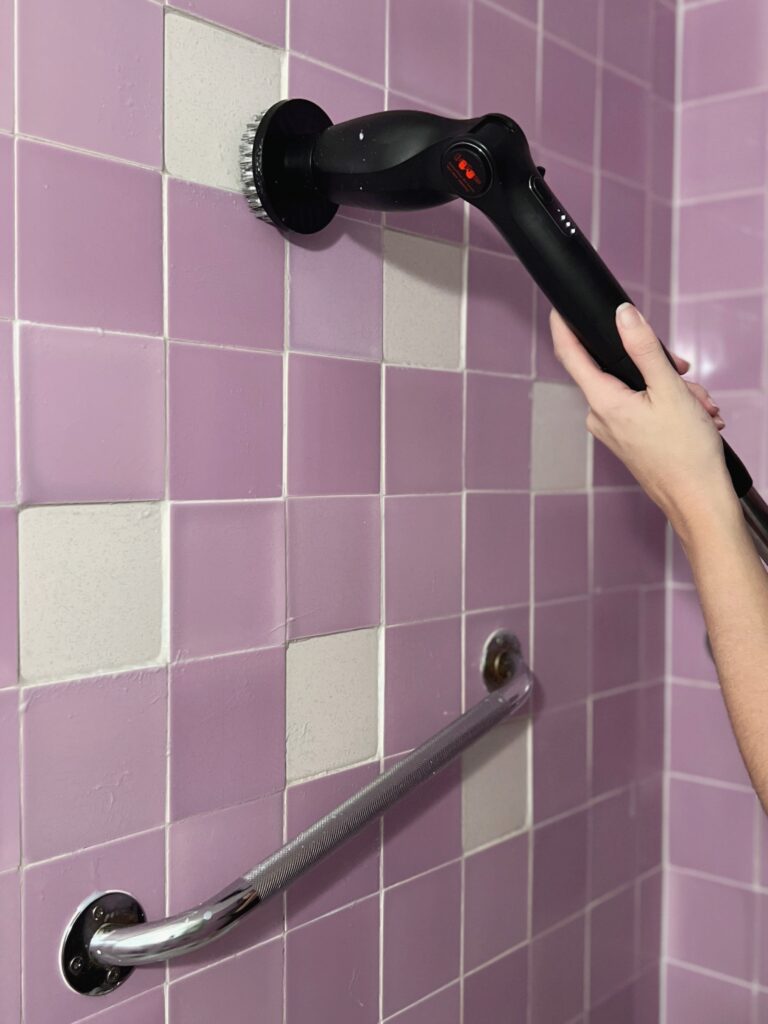
After this, you’ll scrub using a hard scrub brush. I used an electric scrubber brush which definitely made this process a bit faster and easier!
Grab a bucket of warm water and a microfiber cloth to rinse off the tiles, and make sure to change the water frequently so you’re always using clean water! Even though you’re not dealing with harsh chemicals, I recommend keeping an open window for ventilation since it smells a bit funky.
After cleaning, you’ll want to wait at least 24 hours to allow the tile and grout to fully dry. It’s not ideal to do this on a rainy or humid day, but I had to because of my timeline, so I put a dehumidifier in the bathroom over night!
Fill holes and cracks in ceramic tile
The next step is to repair any tile damage before starting the painting process. Ours definitely weren’t in perfect shape, which is another big reason I decided to paint our tiles.
My original plan was to use bondo all-purpose putty to fill the ceramic tile holes, but it wasn’t in stock at any Home Depot in our area, or even online! But that is an option to consider if you can find it!
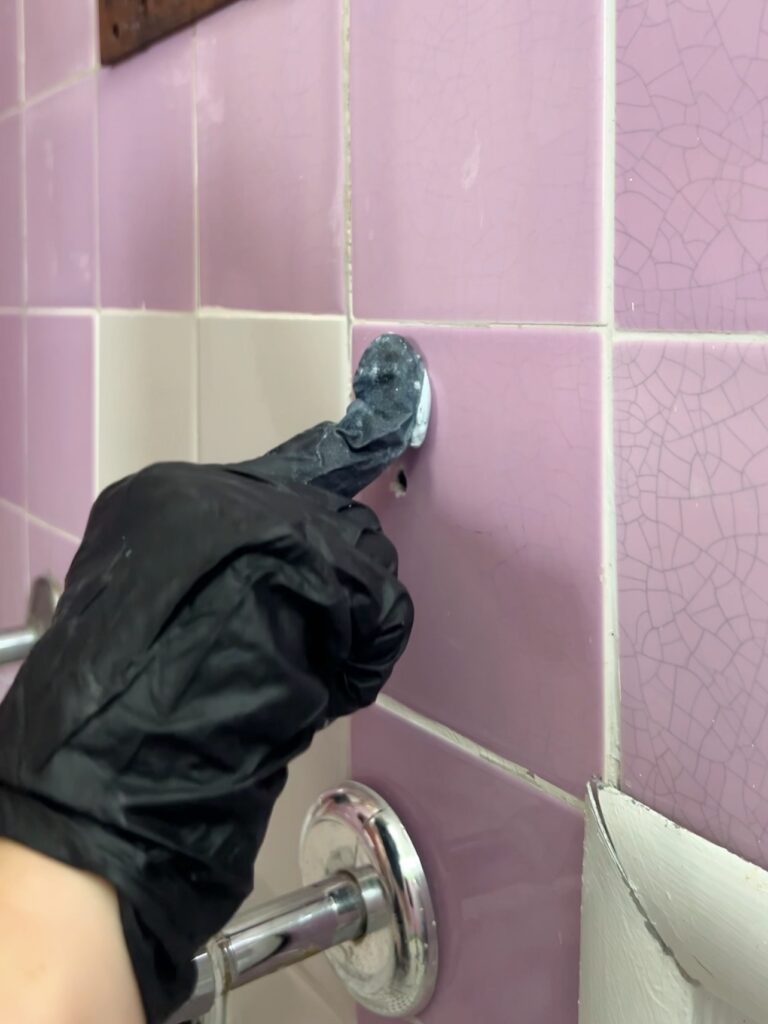
Instead I used Loctite epoxy repair putty for the first time. It comes in a tube and has a clay sort of texture. You knead the two colors together until they’re mixed and then you have about 5 minutes to work with it. I only mixed a little at a time for this reason! I just wore gloves and worked the product into the hole or crack and used a putty knife to wipe off the excess. You can also wet your finger or a rag to sort of smooth it out.
The areas I repaired are of course still a little noticeable, but it’s all getting painted anyway!
Caulk grout gaps and shower wall seams
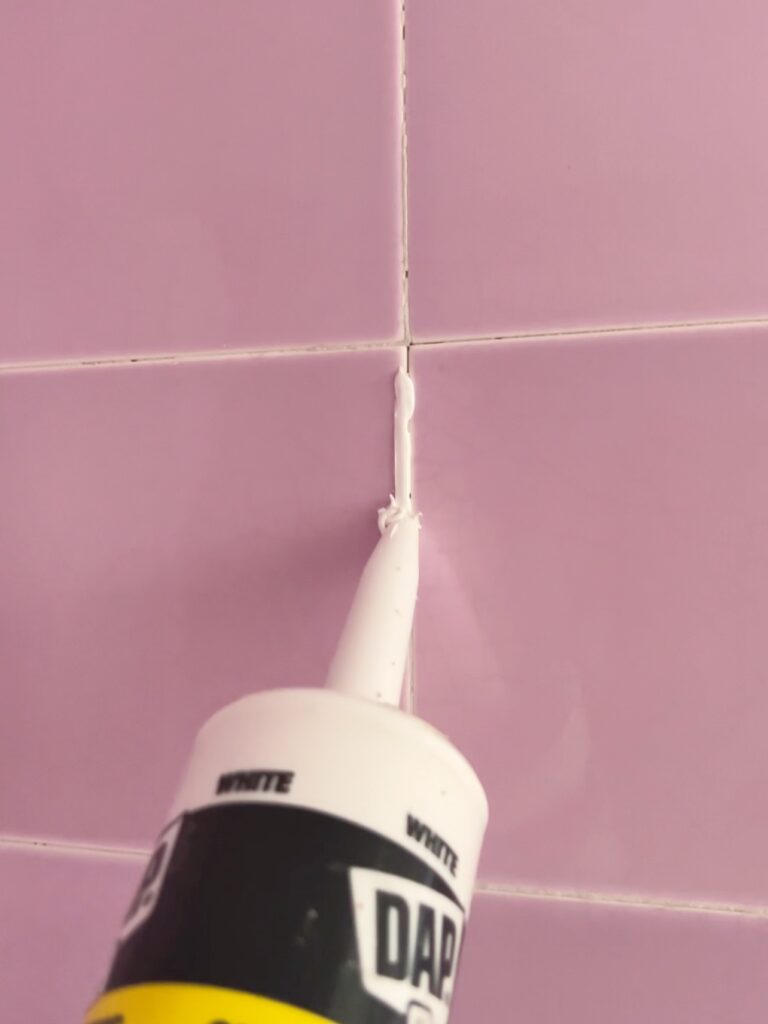
You’ll also want to fill any gaps in the grout before painting your tile. Be sure to remove any loose or cracked grout before filling! Latex caulk will work great for this since it’s paintable and flexible! Just apply a small amount and work it into the grout with your finger. Have a wet paper towel or rag nearby and clean off any caulk that gets on the tile.
Check the condition of your caulk in the corners of the shower walls and around faucets, etc. If it’s in decent condition, but maybe needs a little touch up, you can just go over it with latex caulk. If it’s falling out, like mine was, you want to scrape out what you can and re-caulk it with silicone caulk. I used this paintable silicone caulk for this part.
Do you have to sand tile before painting?
Not necessarily, no! But it also never hurts. If you’re painting tiles using the method I shared in this blog post, you don’t need to. However with really glossy tiles, it’s a good idea to do a quick sand. Our tiles were pretty glossy so after we filled the holes in the tile, we sanded down the tiles with 220 grit. It didn’t seem like it did much though… maybe I needed a lower grit. Either way, I don’t think it’s a big deal if you follow all the other steps closely!
Clean a second time!
Before priming the tile, you’re going to want to clean again! You don’t have to do a full blown clean like you did in step one, but after repairing the tiles it’s likely there is caulk and oils just from touching the tiles.
For this part I used krud kutter, which is a great degreaser perfect for cleaning before painting. They also make this product which is specifically a “pre-paint cleaner”. Either will work!
After this, I gave the tiles one final wipe down with warm water and a microfiber cloth. This is just to make sure none of the residue from the krud kutter was left behind.
Lastly, tape off any areas you don’t want paint. In the tutorial I watched, she said not to tape anywhere where there’s caulk, because the paint is more likely to peel in those areas. I only taped where the tiles hit the floor and just free handed the rest.
How to Paint Bathroom Tile
Apply two coats of a bonding primer
A high quality bonding primer is necessary when it comes to painting shower tiles. My go-to is always Sherwin Williams extreme bond primer, which is meant for adhering to shiny surfaces. But i’ve also heard great things about this primer, which is a bit less expensive too!
Apply the primer using a good quality brush and a 3/8″ nap roller brush. Use the angled brush for the edges of the tile and the grout lines. Then come in with your roller brush to blend it all in. Work in small sections at a time so the primer doesn’t start to dry before coming in with the roller brush.

You’ll want to do two light coats and allow about 24 hours of drying time before applying the second coat. After the first coat is dry to the touch, check all of your grout lines. You might find some gaps you missed. If so, now is the best time to caulk those!
Before doing the second coat, I did a light sand with 220 grit sandpaper. You can probably get away with not doing this, but sanding in between coats always results in a smoother, more professional finish. If you decide to do this, make sure you wipe up all the dust with a tack cloth after!
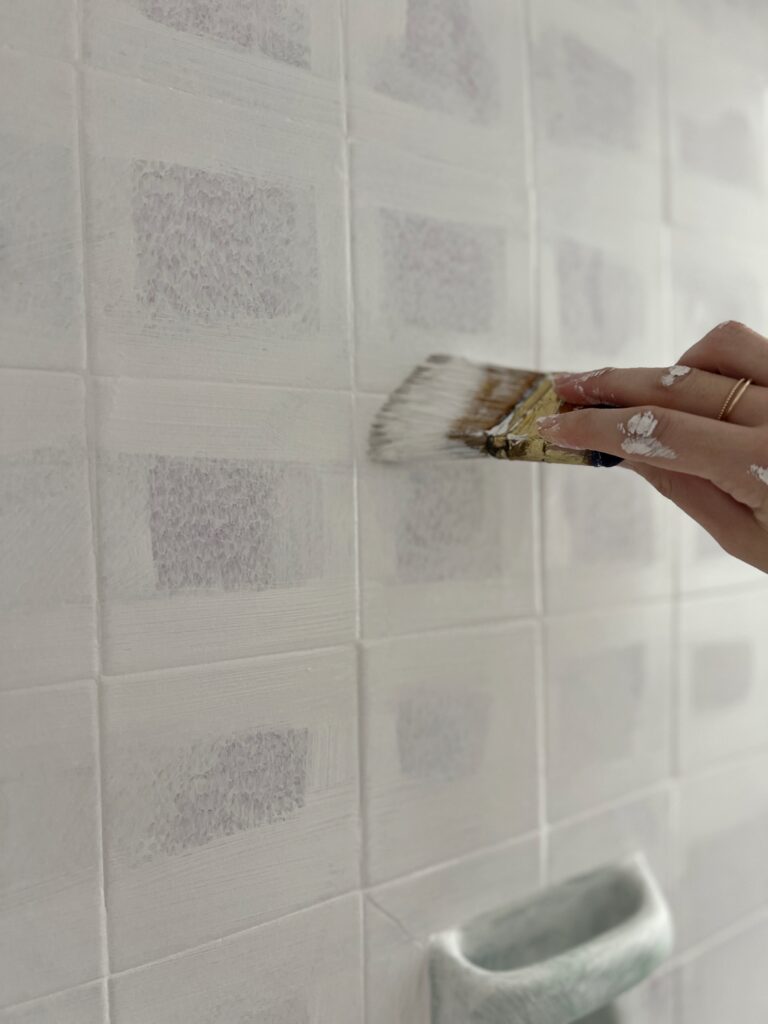
Once you’ve done your second coat of primer, allow at least 12 hours of dry time. I’d also recommend repeating the 220 grit sanding process in preparation for paint. If you notice any of your old tile color showing through, be sure to spot prime those before paint!
What is the best paint for shower tile?
The type of paint I’m using might surprise you. Oddly enough, I’m using Sherwin Williams porch and floor enamel in a satin finish. This is the same paint I used to paint the concrete during our front porch makeover! I mean… it makes sense! If this porch paint is meant to withstand all the tough conditions of outdoor use, it can definitely handle moisture from the shower.
A huge benefit to using this type of paint is you have endless paint colors to choose from! I went with the color Sherwin Williams Divine White. By the way, I just got the coolest reusable paint tray and I love it! It has a silicone cover to keep my paint fresh in between coats (it really works!) and I’ll never have to buy plastic paint trays again!
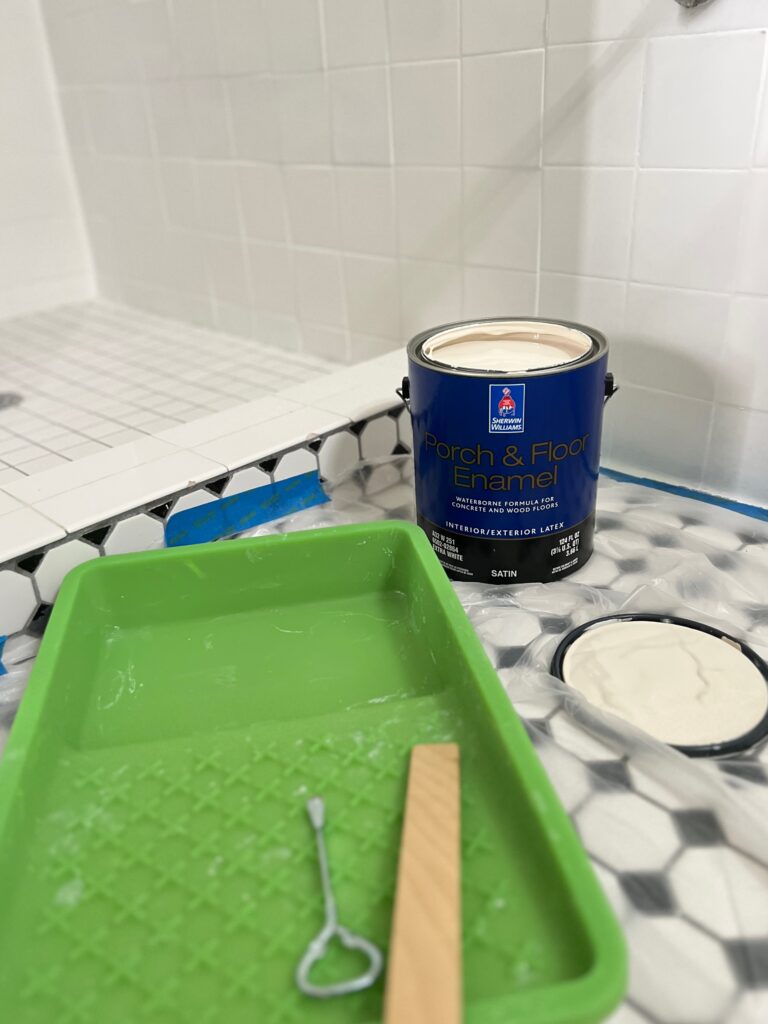
This type of paint was the best option for us, but you could also use an epoxy paint product like Rust-oleum tub & tile refinishing kit or DWIL tub & tile paint. I’ve also seen people use an enamel paint, which would also allow for endless paint color options!
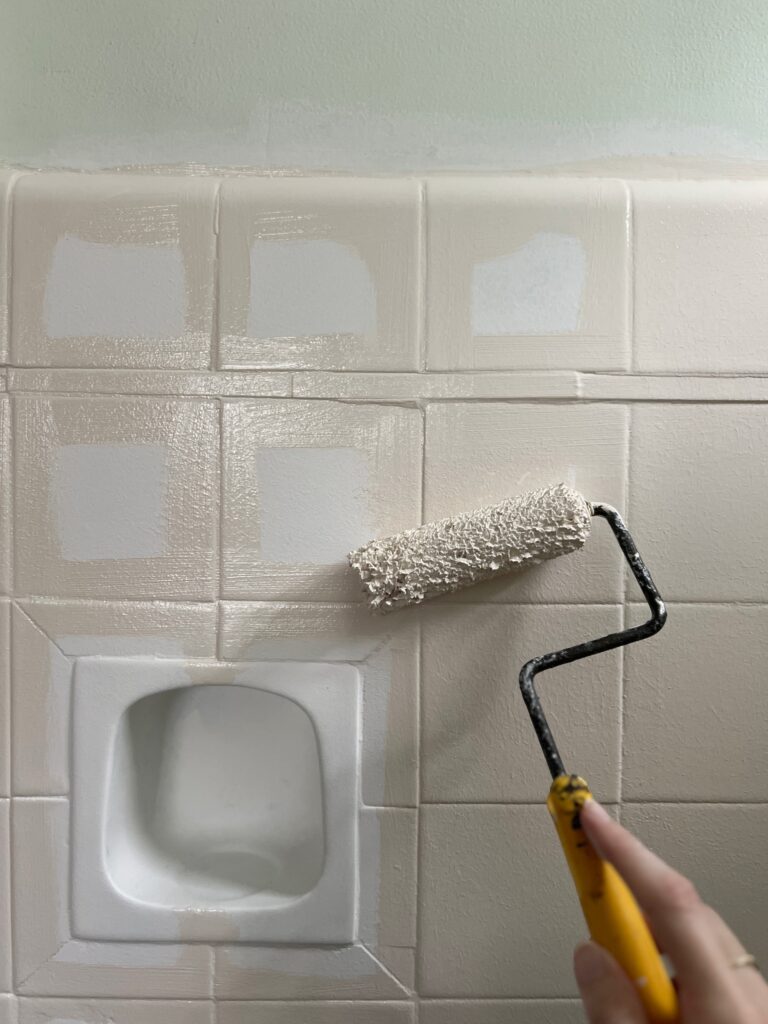
Apply two coats of paint
Just like with the primer, I went in first with my angled brush and then came in with a roller brush. Another reminder to work in small sections so you can’t see the brush marks! This is the small roller cover I used! Let the first coat dry overnight.
Before starting the second coat, lightly sand with 220 grit sandpaper and wipe away the dust with a tack cloth. You know the drill by now 😉
Tile detail
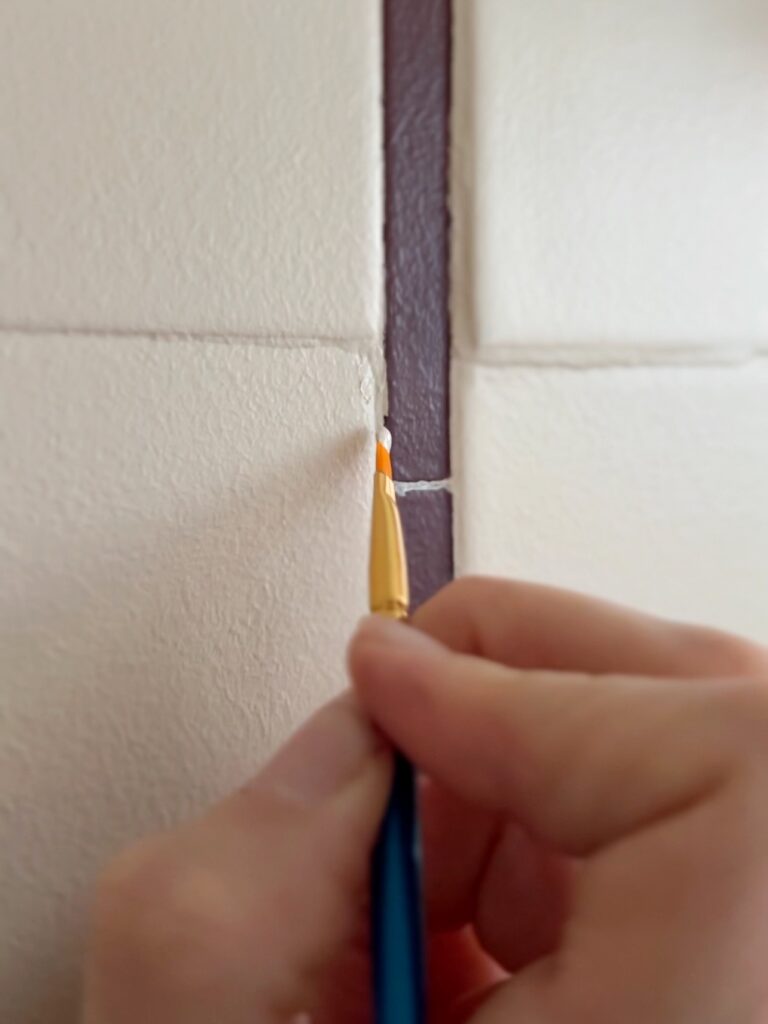
Since I was painting the tile, I decided to have some fun with it and use two colors. For the skinny tiles that create a stripe design, I used the color Sommelier by Sherwin Williams. For this part I actually used an enamel paint only because it’s a more versatile type of paint and I barely used any for these little tiles!
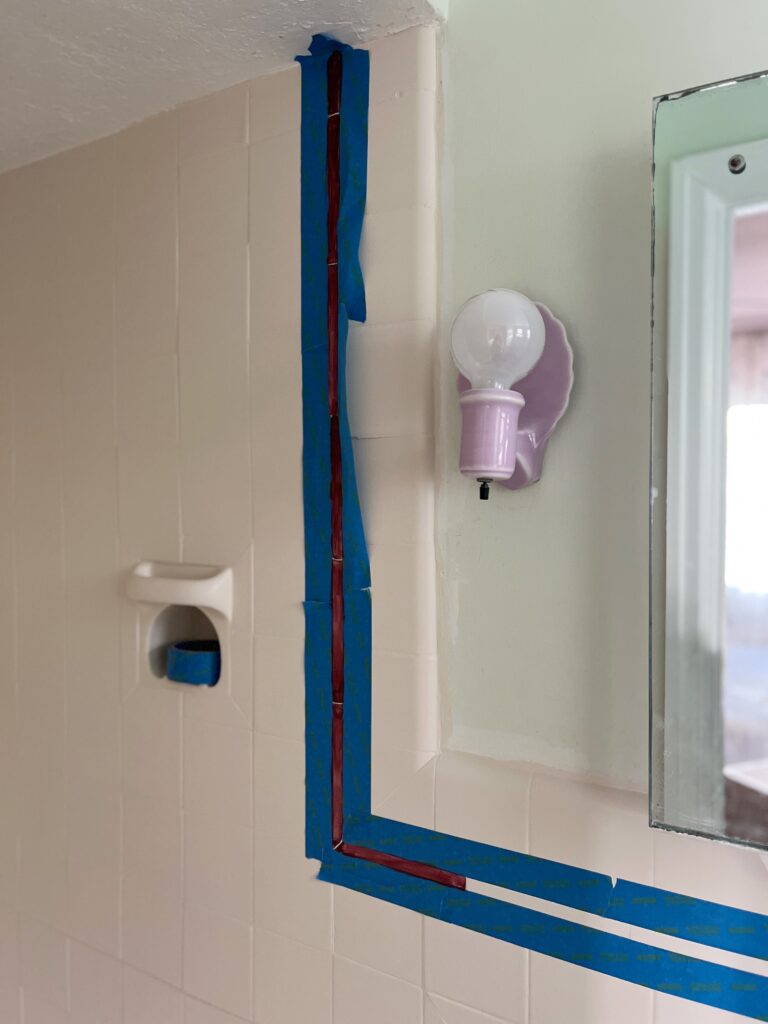
I had a use a tiny craft brush for this part because I wanted to leave the grout lines unpainted! Since the craft brush applied thinly and it was dark paint on light paint, I ended up doing five thin coats of this color. Some of the red bled through so I also spent a couple hours touching up those areas with a tiny brush. It was a tedious paint job, but worth it. The bold pop of color adds so much!
If I were do something like this again, I would try using a small roller brush to paint all of it and then go in and paint just the grout lines. I think that would be a lot faster! You live and you learn 🙂
Does tile paint need to be sealed?
If you followed the above steps, a sealer isn’t necessary! The porch paint is meant to handle all the water and moisture. But I chose to use polyurethane for a few reasons; extra protection, easier cleaning, and added shine.
For the top coat, I used Minwax polycrylic in a semi-gloss finish. To apply the poly, I used a combination of a synthetic angled brush and a good quality foam roller. First I went in with the angled brush for the edges and corners and then I came in with the foam brush. After that, I smoothed it all out again with the brush. I did this because I was nervous those little bubbles would dry that way. It worked well!
Could you just use an angled brush then? Yes, you could, but I feel like the foam roller application is more even and faster. Since this is a water-based poly, you have to work pretty quickly since it dries fast. For best results, work in small sections at a time and try to maintain a wet edge. With a glossier finish like this, you can definitely notice any areas you missed or areas that were overworked.
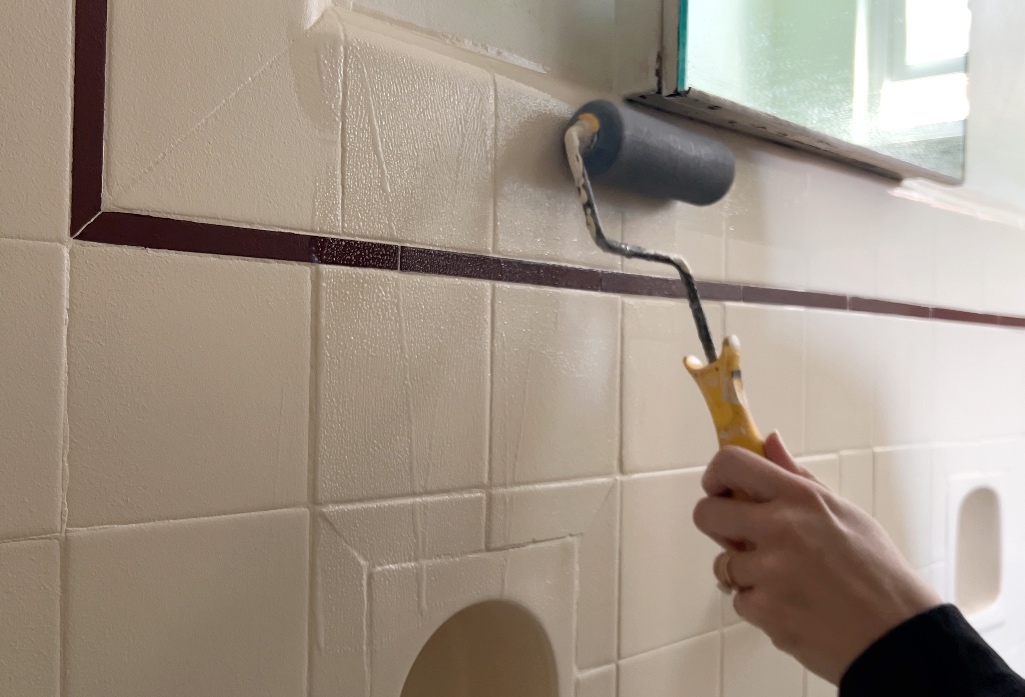
Don’t forget to check often for drips! They’ll get ya! You want to smooth those out before they dry. You can see I have some in the photo above.
Apply two to three coats (I did two) and sand in between with 320 grit sandpaper.
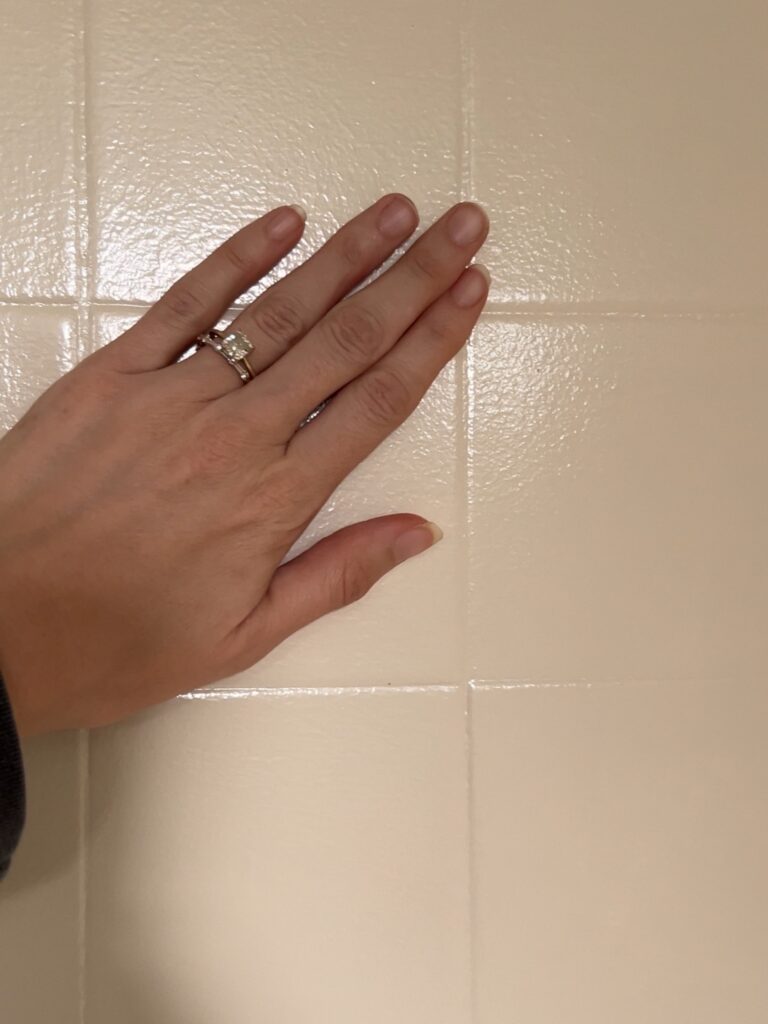
This ended up being the best part of the process, in my opinion! The glossy finish makes it look less like painted tile and it just feels more finished to me. Also they’re SO smooth to the touch, I love it!
Painting Bathroom Tile Before and After
I’ve since finished this no demo bathroom remodel!! Click here for all the tutorials and details 🙂
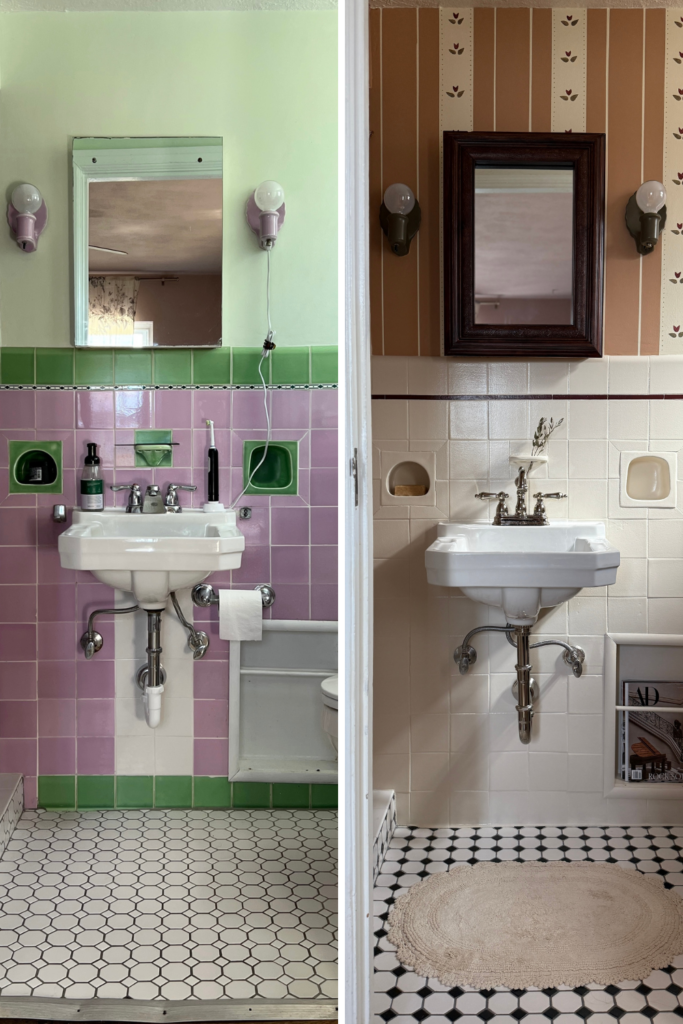
Do you see what I mean about the tile floor?! It looks like it was meant to be that way!
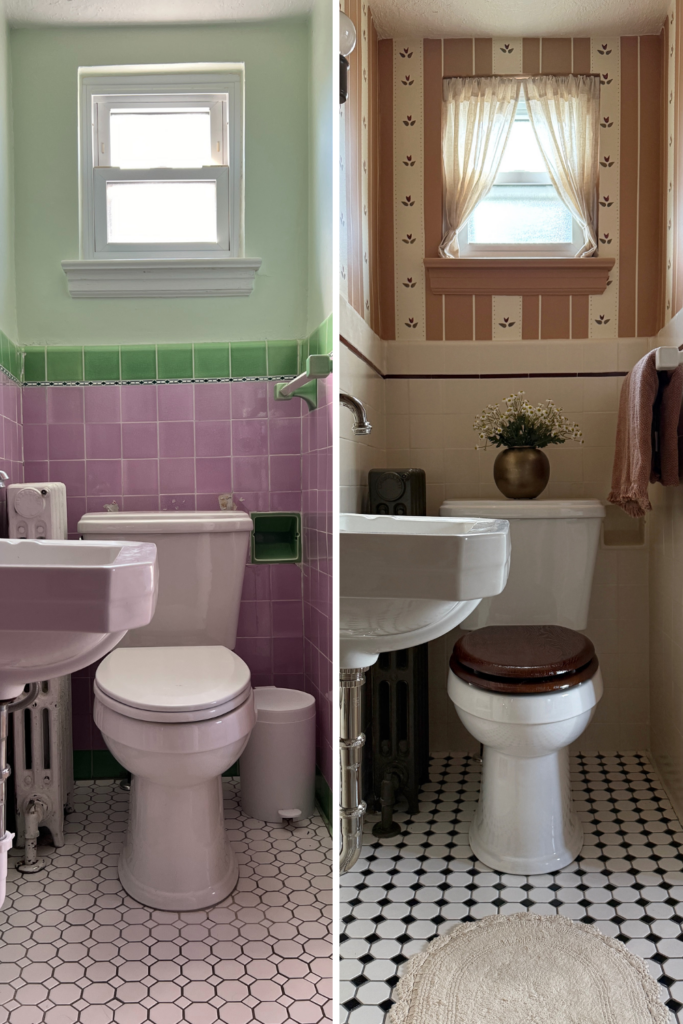
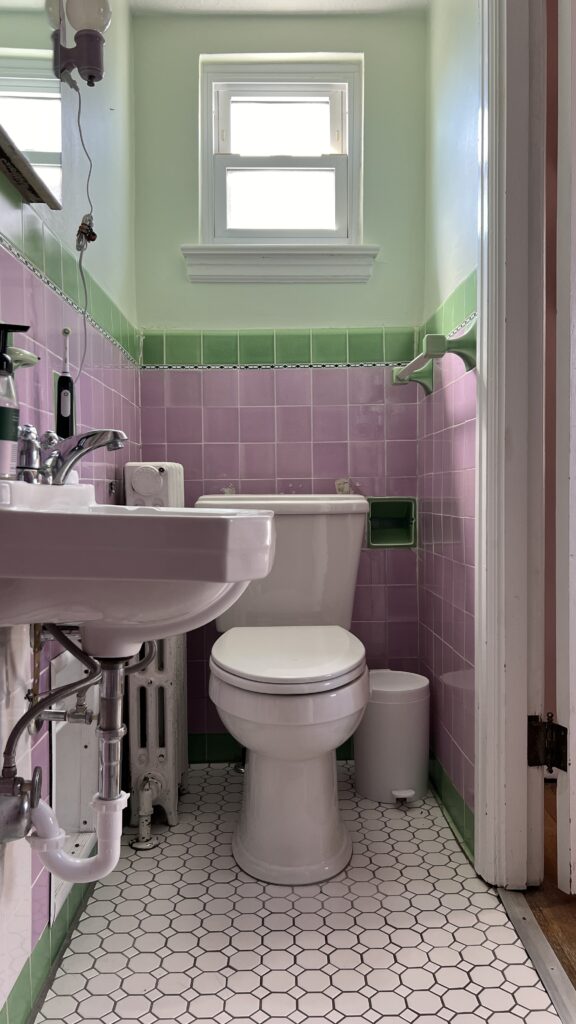
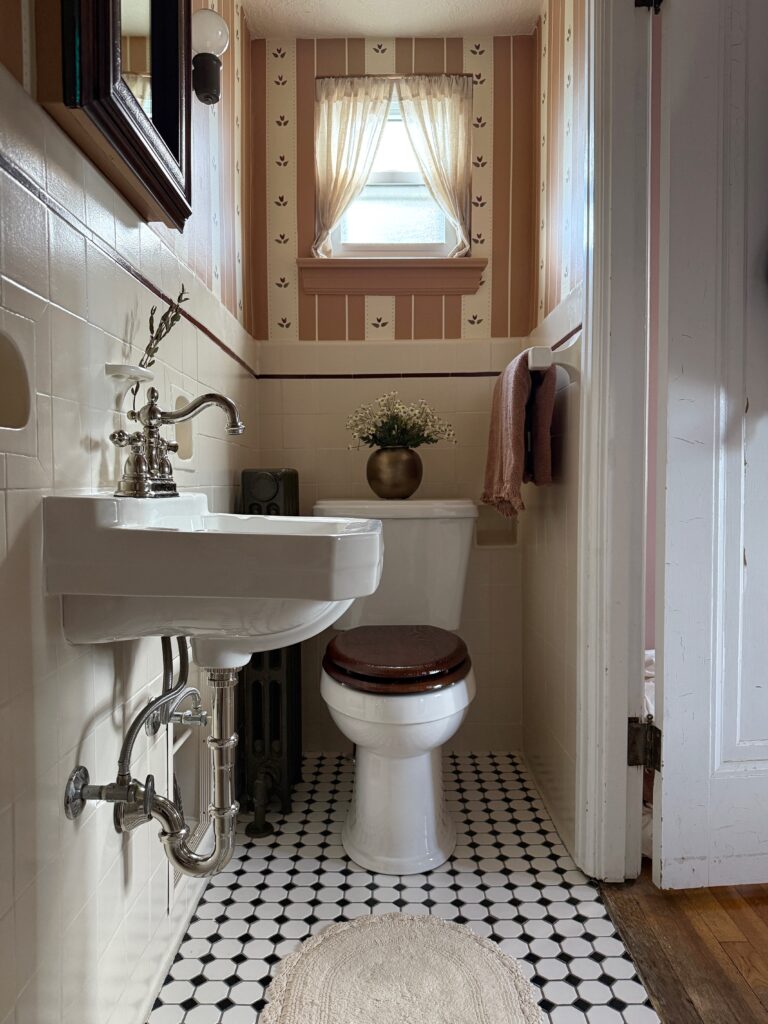
As i’m writing this, it’s been 10 months and everything has held up beautifully! I have no regrets with the painting shower tile and I feel confident that it will continue hold up really nicely 🙂 Click here for all the details on this vintage tile bathroom makeover!
What do you think? Would you paint your bathroom tiles? I hope I inspired you!! Please let me know if you have any questions!! Thank you for being here!
Elisha
Thank you for sharing! We are going to try painting our whirlpool tub tile instead of demo! You gave tips and walked us through the process!
Oh i’m so glad to hear it was helpful!! Good luck!! 🙂