

There’s definitely an art to painting Ikea furniture, especially when it’s a laminate surface.
Once you see my Billy bookcase before and after, I know you’ll be convinced that you can make an Ikea piece look expensive and high end.
I’ve done a few Ikea hacks, but my favorite one to date is this Ikea Billy Bookcase Hack. I’m incredibly proud of how smooth and professional the finish turned out on these so I want to share exactly how I did it!
Disclaimer: This post contains affiliate links. This means, if you purchase something from a link I provided, I will receive a small commission. This is at no extra cost to you! Thank you for your support!
materials:
- Ikea Billy Bookcase
- Cleaner
- Spackle
- Wood Filler
- Caulk
- Primer
- Paint
- Paint Color
- Tack Cloth
- Painter’s Tape
- 220 Grit Sanding Sponge
- 800 Grit Sandpaper
- 1,000 Grit Sandpaper
- Polycrylic
Tools:
Before and After Painting Ikea Furniture
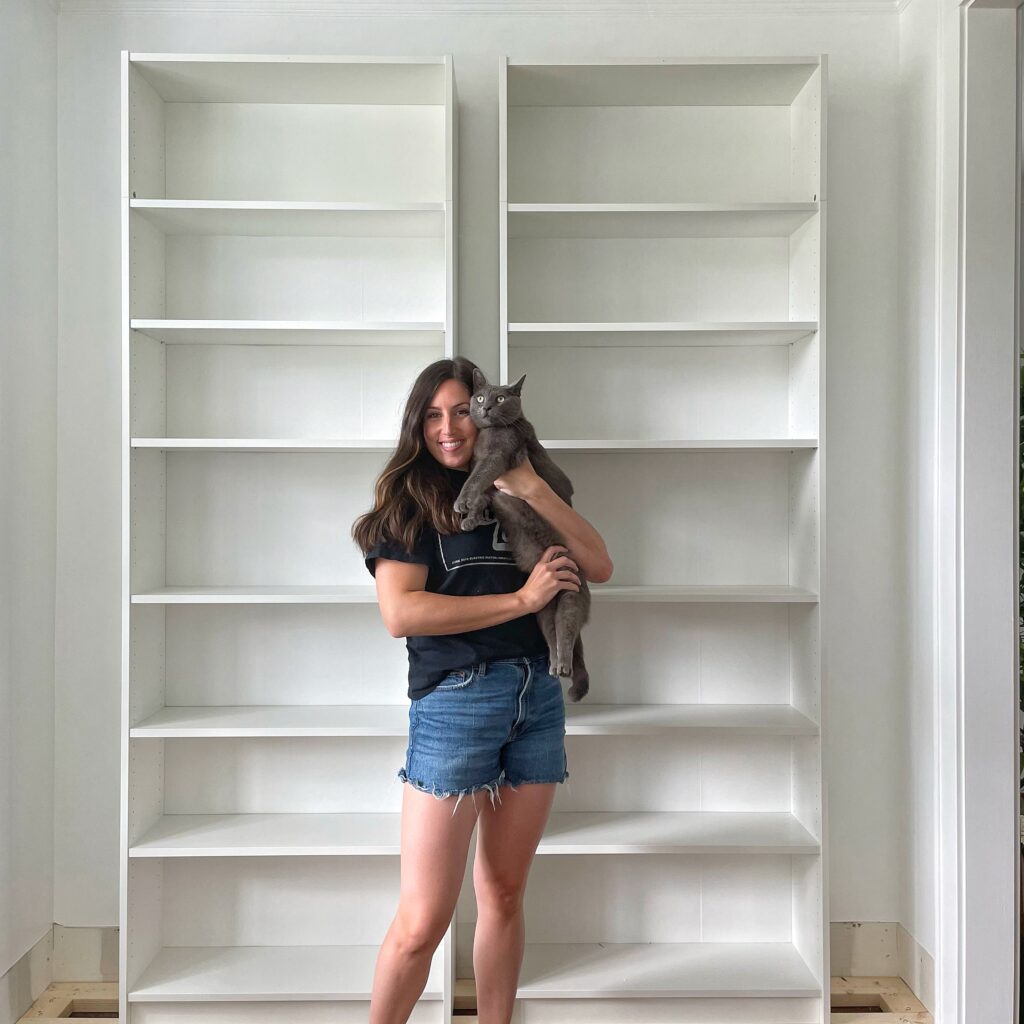
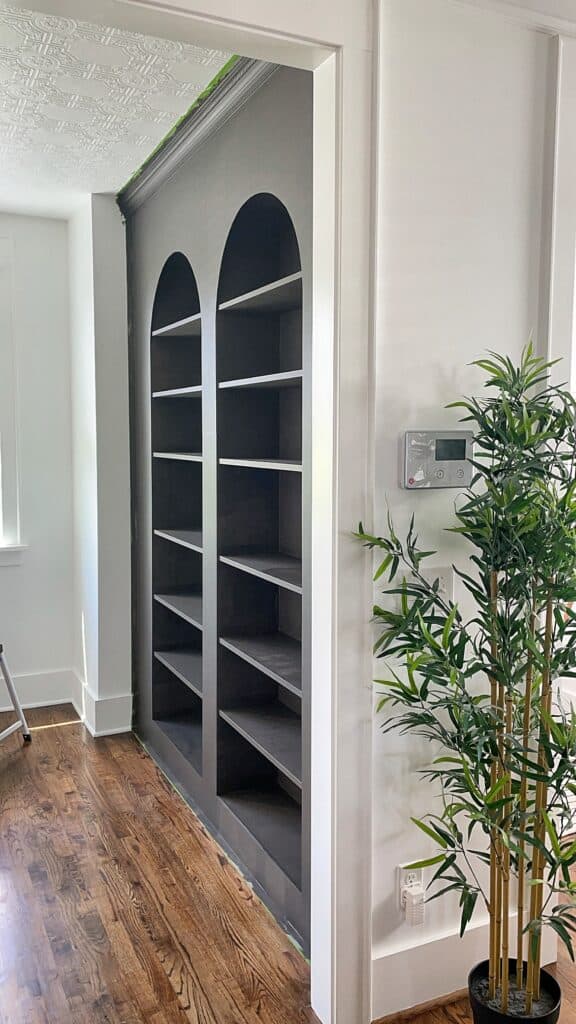
Here’s the MAJOR before without any of the framing done:
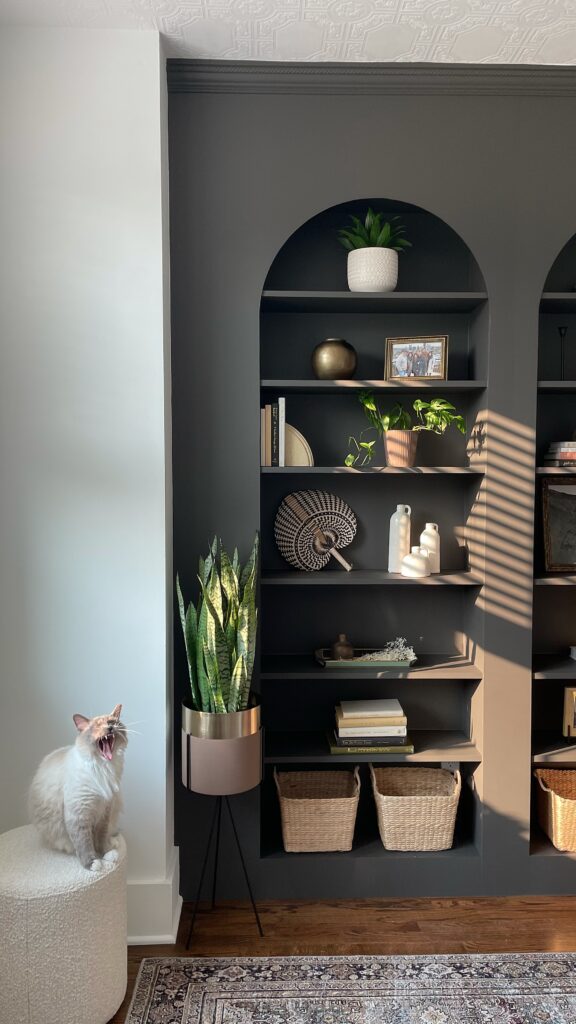
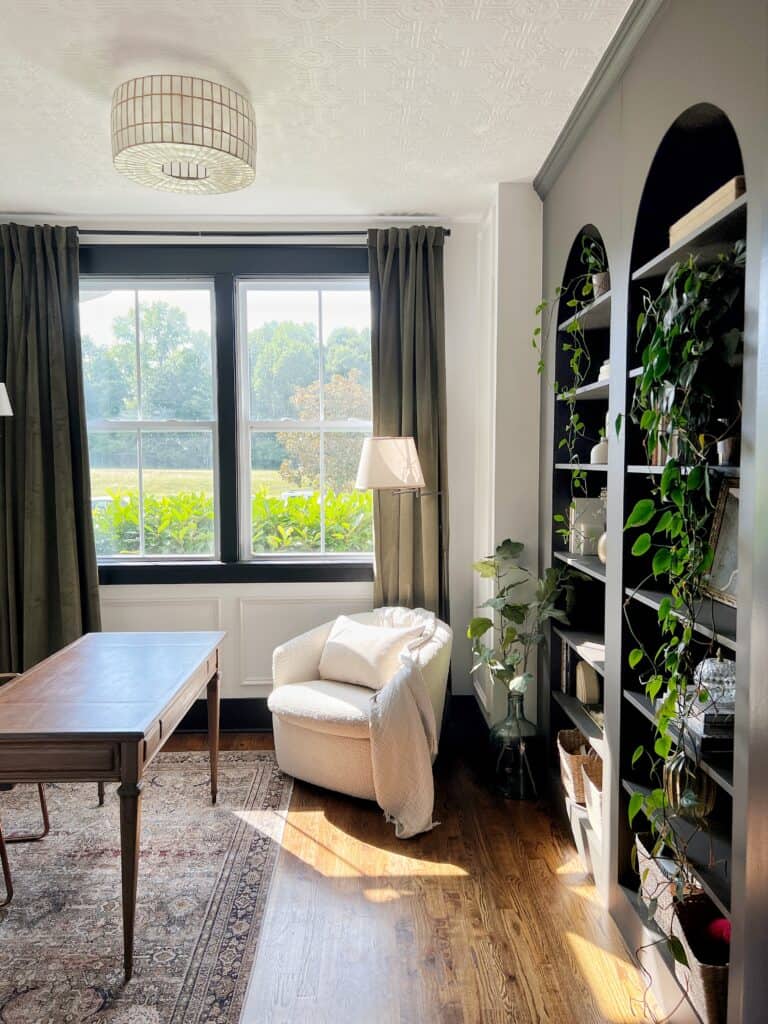
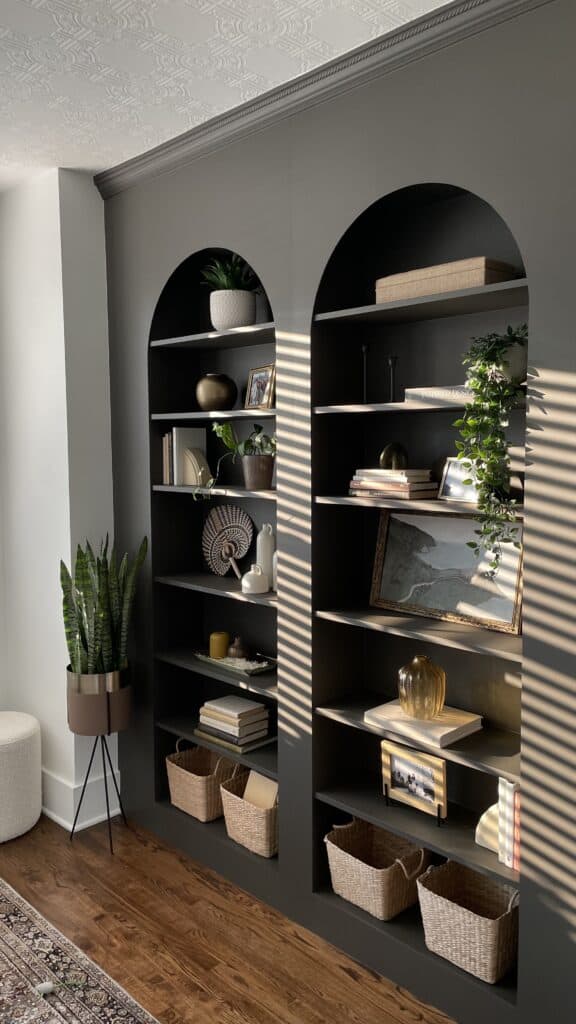
…And the after! Can you even believe these are Ikea Billy bookcases?!?
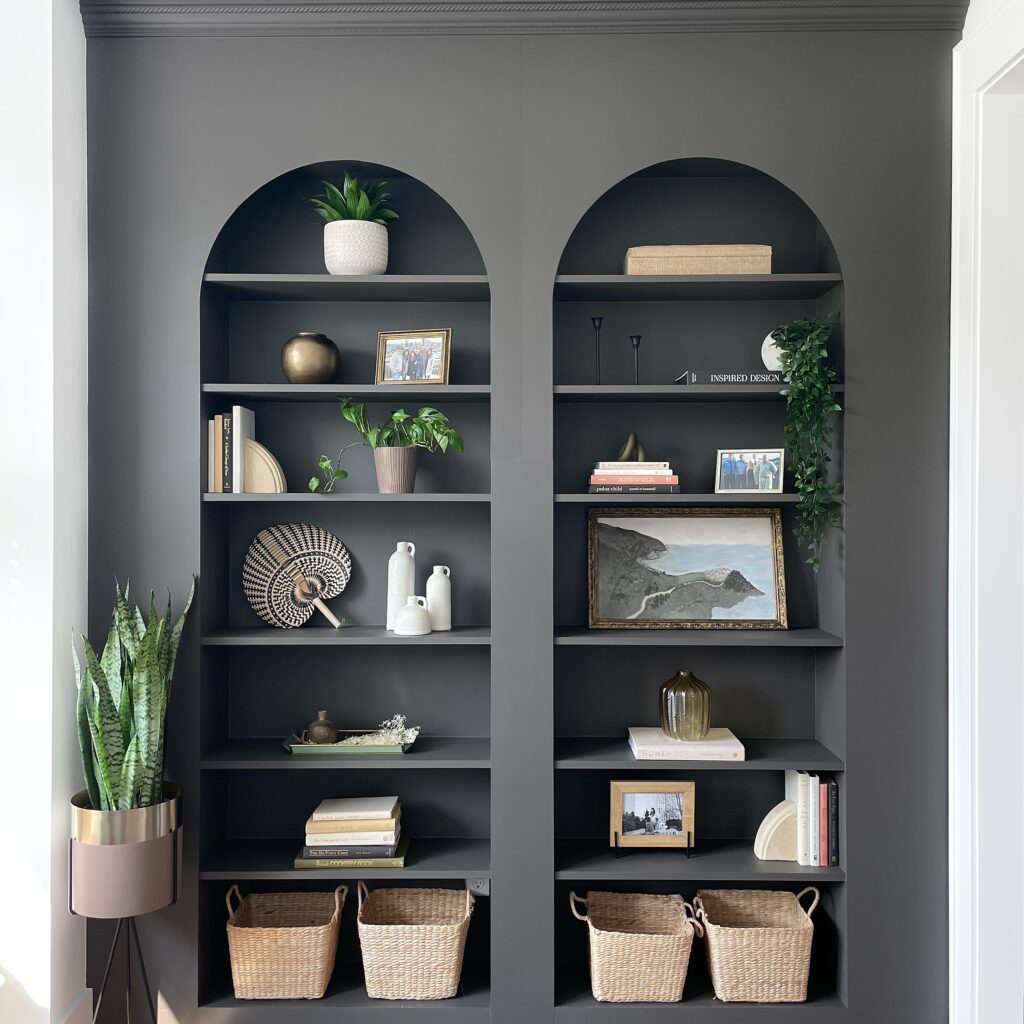
Oh, I painted them a second time 🙂 This is the color I went with!
Step One: Prep for Paint
Before you can start painting, there’s a few things you’ll need to do first! I’ll admit, there’s a lot of steps to this entire painting method, but it’s worth it! Just be patient and try to enjoy the process and you’ll be rewarded with a long lasting, professional looking paint job!
Clean
Give your Ikea furniture a good little cleaning. This is my go to cleaner!
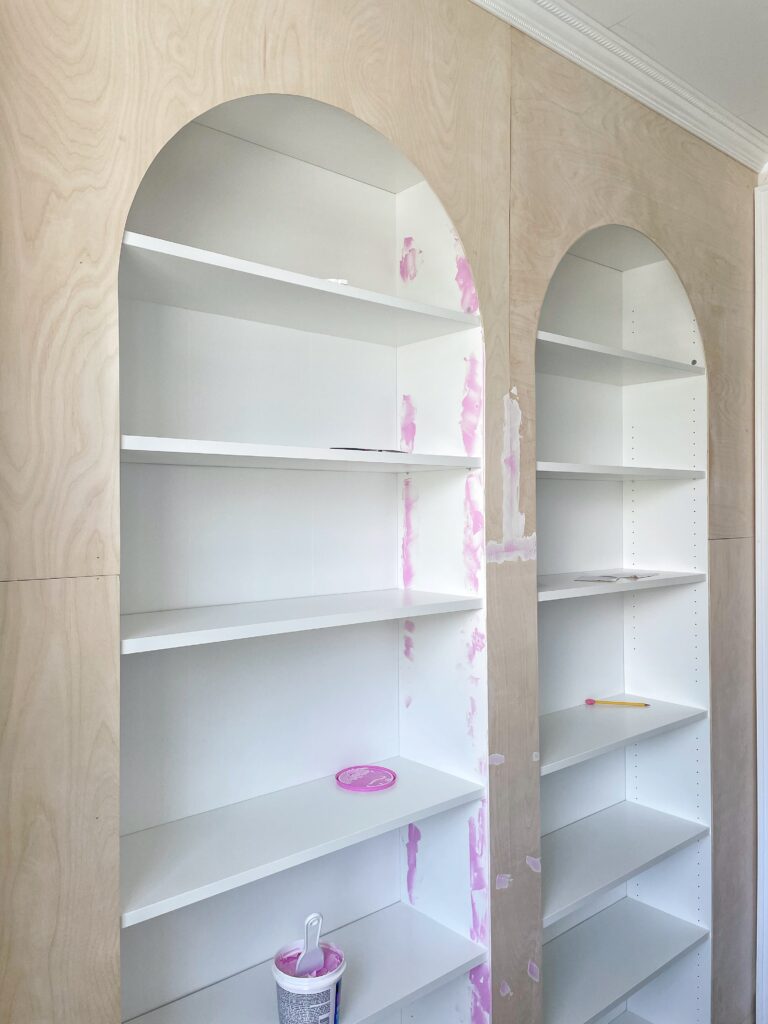
Filling any holes
For this project, not only did I have to fill the nail holes, but I also had to fill the holes for the adjustable shelves. Filling these holes is optional especially since you can’t ever make any adjustments to the shelves! But it in my opinion, it’s worth it to disguise the fact that this is an Ikea piece of furniture.
I used this spackle to fill all the holes. One of the reasons I love this product is that it goes on pink and turns white when it’s dry!
Important note: I recommend trying a heavy duty wood filler for the seams on the facing if you do these ikea built ins! I used spackle and the following winter it cracked. (see step five in this blog post)
Caulking
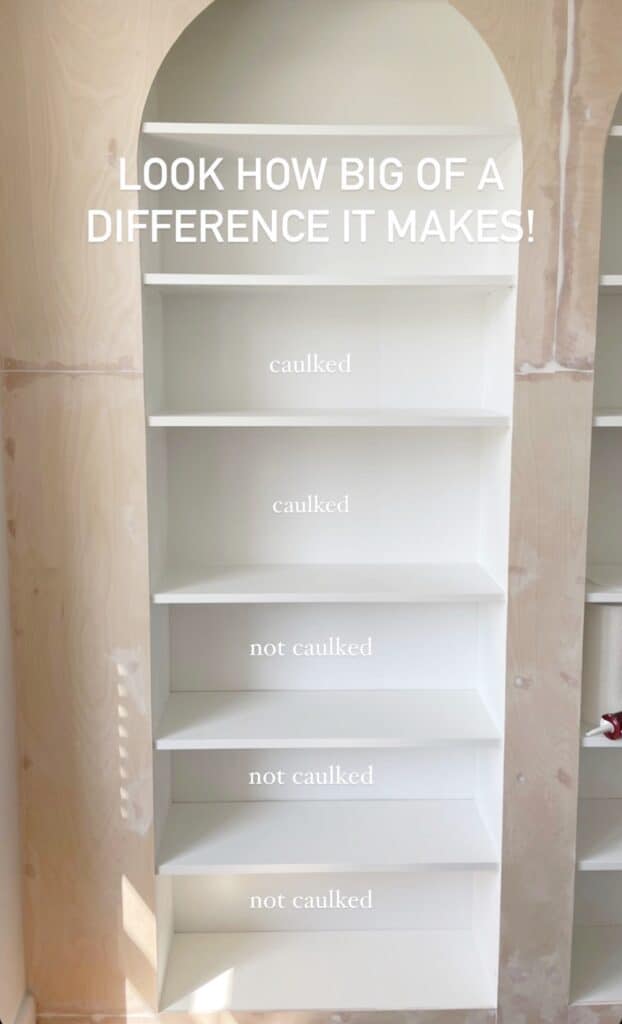
Caulking is definitely one of those tasks that a lot of us dread. Regardless, it’s an incredibly important step if you want your finished project to look good!
If you feel especially frustrated with caulking (like I used to) I would recommend getting a dripless caulk gun. This definitely changed the game for caulking! Check out this post: How to Apply Caulk Like a Pro
Here’s a before and after caulking photo to prove how much of a difference it really makes!
Sanding
Sand down the spackle, wood filler, and all the surfaces. I used my multi-tool for this because it’s small, gets into corners, and it’s cordless! I used a 180 grit sandpaper.
You could also use an electric sander (a mouse sander will get into corners too!), a sanding sponge, or sandpaper. I’ve since learned this awesome hack for dust-free sanding inside, so I would use this trick next time for sure!
Do you have to sand Ikea laminate furniture?
The answer is yes. You won’t be doing an intense sand, but just a scuff sand to roughen up the surface at least a little bit. For this part, a 180 or 220 grit sanding sponge works fine! The point of doing a light sanding is to help the primer adhere better.
Clean Surface
After sanding, you’ll want to vacuum any of the excess dust. After that, wipe down all the surfaces with a tack cloth.
Tape
This part is optional, but I always recommend it. Especially in the case where you’re painting something darker than it’s surrounding areas. It just gives a cleaner look and nothings beats the satisfaction of a nice tape pull!
Here’s my hack for getting the best crisp paint lines.
Step Two: Primer
The best primer for Ikea laminate furniture
When painting Ikea furniture, Zinsser bin shellac based primer is key. It’s the strongest and most durable for this type of project. I used a regular paint roller to apply this. This is a shellac-based primer and I’m going to warn you- it has a strong smell to it! I highly recommend wearing a mask when you use it.
Don’t be alarmed when you notice how thin and watery this primer is! That is normal. Once you see how this hardens after drying, you’ll know you chose the right primer!
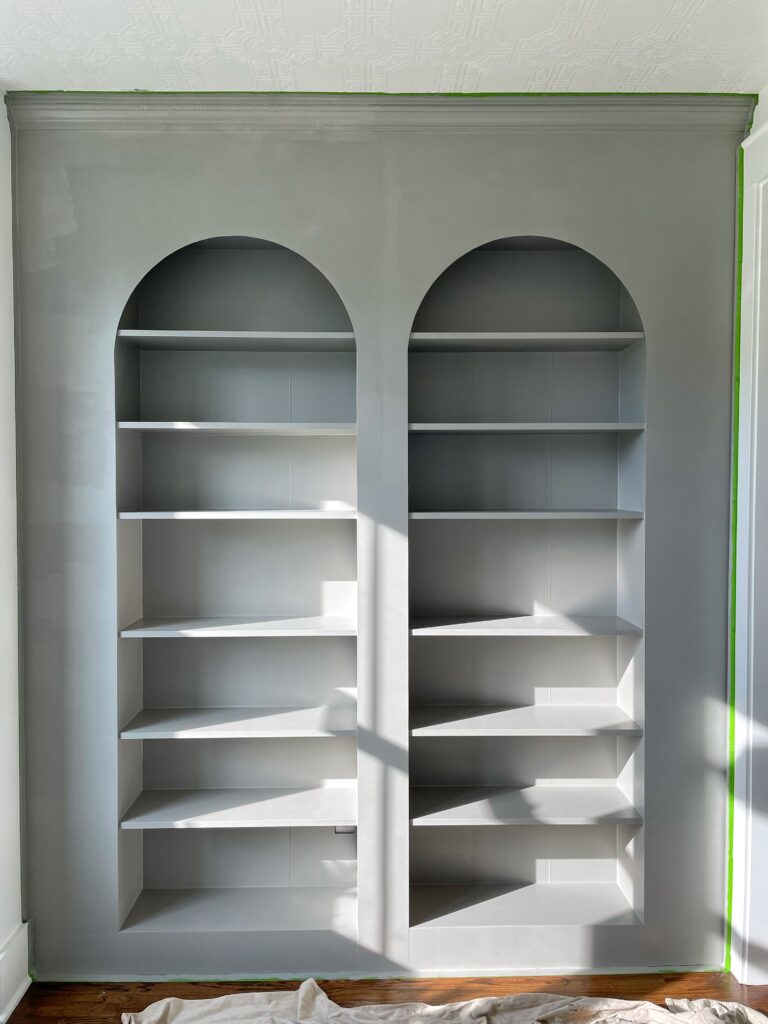
Pro tip: Did you know you can ask Home Depot or Lowes to tint your primer at no extra cost? That’s why my primer is gray! I had them add just a touch of Sherwin Williams Urbane Bronze. This helps with coverage if you’re using a dark paint color!
Allow the primer to fully cure
If you look on the back of the Zinsser primer, it’ll tell you it’s dry to the touch in 20 minutes and can be recoated in 45 minutes. Both are true, but to fully cure it needs 1 to 3 days. I waited 24 hours before sanding in preparation for paint. Again you’ll do a scuff sand with a 220 grit sanding sponge.
It’s up to you if you want to do a second coat of primer! My Ikea built ins have held up really nicely with just one coat, but two would never hurt! If you do decide to do a second coat of primer, do a light sand in-between coats! (I’d suggest 320 grit)
After your primer has fully cured (at least 1 day), wipe down the surface with a damp cloth or a tack cloth and move on to the next step!
Step Three: Paint
If you want the best results for flipping your piece of Ikea furniture, the type of paint is important!
What’s the best paint for Ikea furniture?
It’s hard to know what kind of paint to use when there’s such an overwhelming amount of options out there. Here’s a few popular options:
- Chalk Paint– this is a popular suggestion because it usually doesn’t require sanding or primer, but it’s not the most durable so I don’t recommend it.
- Enamel Paint– This is the most durable option. If I were doing DIY built ins in an area with more traffic, i’d use this paint! It levels so nicely and creates a strong finish.
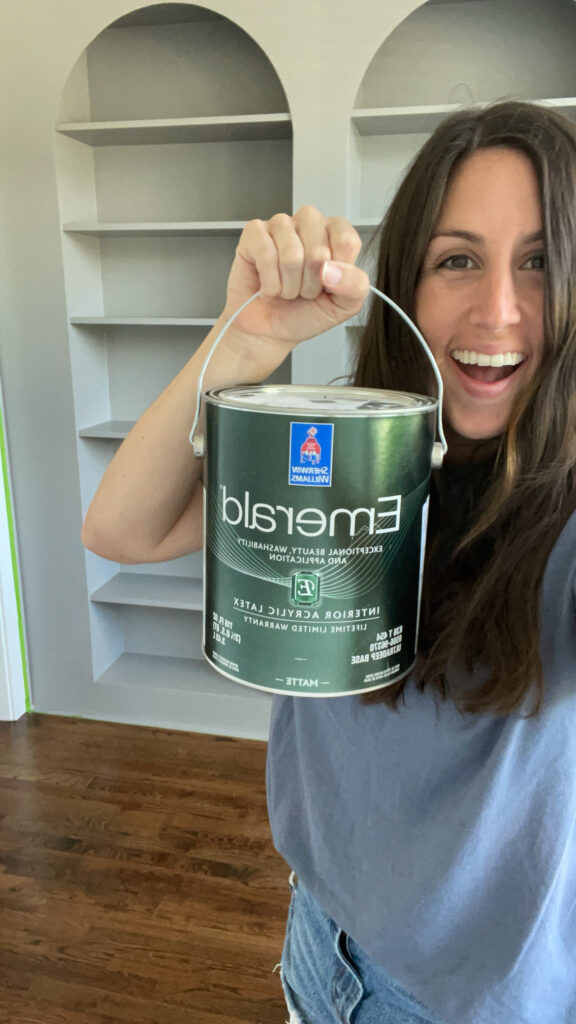
- Latex Paint– I used latex paint (regular wall paint) and I had great results since I prepped and protected properly. More specifically, I used Sherwin Williams Emerald paint in a matte finish. The matte finish was great for hiding imperfections (like the seams on the facing of the built-ins).
If you’re not sure what paint finish to use, check out this blog post!
What paint color did you use for your built-ins?
The paint color is Sherwin Williams Urbane Bronze and it’s one of those beautiful chameleon colors that always looks a little different, but every version is beautiful. I’d describe it as a gray with bronze undertones.
What’s the best way to paint Ikea furniture?
A paint sprayer is always a great option for painting anything! It provides an incredibly smooth finish. Not to mention, it’s much quicker. I have this paint sprayer and it’s amazing! I’ve also used this one, which is a great budget-friendly option!
However, you do want to factor in prep work which is very time consuming. When you use a paint sprayer indoors, you have to cover all surrounding areas with plastic due to overspray… I learned about overspray the hard way!
But not everyone has a paint sprayer, so I’m going to give you all the tips you need to get a professional finish without a paint sprayer.
How to get a professional finish without a paint sprayer
For starters, do not skip any steps in both the prep and the painting. This is important if you want to do it the right way and have a perfect finish.
The first thing you’ll do is go in with a small angled paint brush (use a good quality brush like this) and cut in around all the edges. I also used the small paint brush for the crown molding since it had so many details.
After you’ve cut in, you’ll then use a roller brush for everything else! I used these microfiber roller brushes with a 3/8″ nap. I do not recommend using a paint brush for your project because brush strokes will be visible.
Be sure to continuously check for any drips in the paint. It’s best if you can smooth these out before it dries!
Allow each coat to full cure
Giving the coats of paint the proper amount of drying time to fully cure is crucial. I know this requires some patience, but it’s worth it in the long run. I waited at least 24 hours in between each coat of primer and paint. If you can swing 2 or 3 days, even better!
Sand in-between each coat with a fine grit sandpaper
Yet again an extra step! I’m sorry! The good news? This sanding process is going to contribute to that overall smooth finish.
After my first coat of paint fully cured, I did a light sand with an 800-grit sandpaper. For subsequent coats, I used 1,000 grit sandpaper. Did you know they made sandpaper with grits that high?!
When you’re sanding you can just fold the sandpaper in half and rub it along all surfaces of your project. If it feels smooth to the touch, you’re good! If you can feel a rough surface, keep smoothing it out. Make sure you use a tack cloth to grab any dust after each time you sand!
How many coats of paint do I need?
This will depend, but 2-3 coats is typical. Originally I only did two coats. After a while I noticed that some of the shelves needed a little more coverage, so I ended up doing three coats total.
I think it’s a good idea to do three coats of paint, especially if it’s a high traffic area! As long as you’re allowing one full day of drying time and sanding in between each coat!
Step Four: Sealing
If your DIY project will get a lot of use, it’s a good idea to apply a polyurethane or polycrylic top coat.
My biggest advice with using a top coat is to test it out in a small hidden area before covering your entire project. Sealers can completely alter the look of your paint finish. Here’s proof:
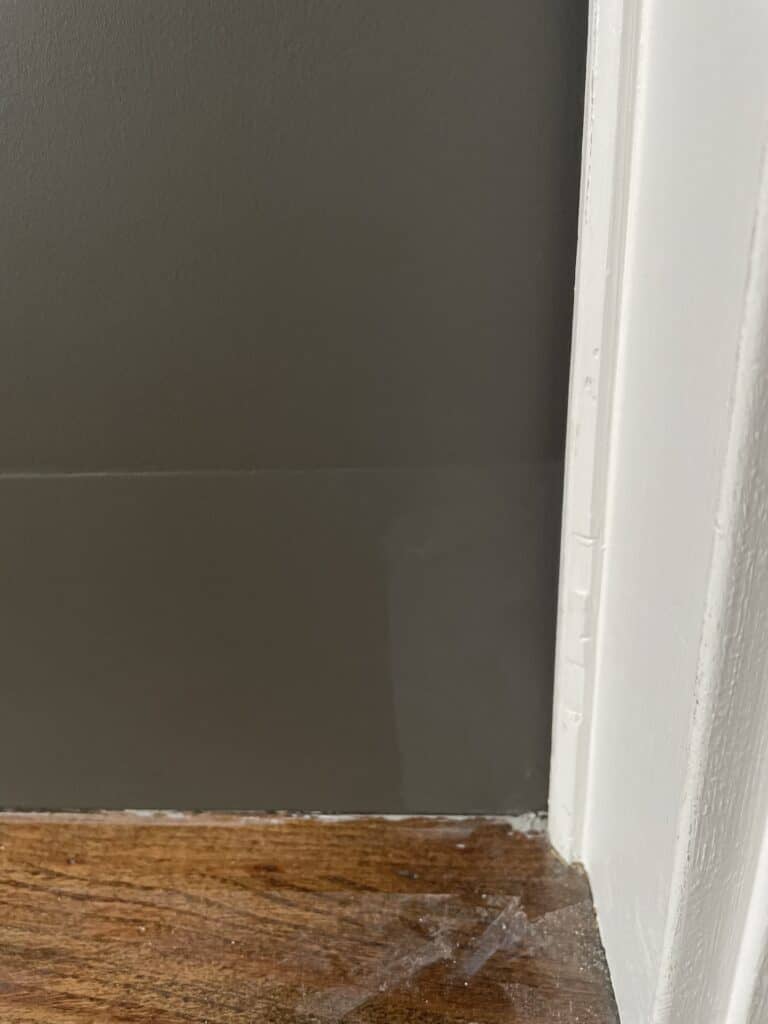
If you look to the bottom right corner you can see where I tested out some water-based poly and it lightened the color of the paint. Due to this, the minimal traffic the built-ins get, and the quality paint I used, I decided not to use a top coat.
What type of sealer should I use?
If you do choose to use one, I recommend trying this water-based poly! It can be used over oil-based paint, but just allow the paint to fully cure (I would wait a few days!).
How many coats of sealer do I do?
This will depend on how often you’re using your ikea piece. If it’s a dresser, for example, you’re probably using it often and I would recommend three coats. If it’s a furniture piece that doesn’t get a lot of use and it’s more just for aesthetics, you can get away with 1-2 coats.
I will say, it never hurts to have extra layers of protection!
How do I apply the sealer?
Follow the instructions on the back of the poly you decide to use! Most sealers recommend a synthetic brush or a foam roller for application.
A couple other important things regarding sealer:
- Don’t shake the can- this will cause bubbles!! Gently stir before using
- Allow enough time for the poly to fully cure before doing the next coat.
- Do a light sand with a high grit sandpaper in between coats
I know painting ikea furniture involves a lot of steps and requires some patience, but can we admit that it’s worth it for this smooth finish? It’s honestly hard to believe there’s laminate Ikea furniture under there!!
Please let me know if you have any questions!

So wonderful you share it’s paint idea. Very helpful & usefully describe of paint. Totally information sharing you. I like. Iam interested.
So glad it’s helpful!! <3
Did you sand first or caulk first? Wondering if the sanding will mess up the caulk.
Hi Charisse! Great question! I sanded all the filler and then caulked! 🙂
Such an informative blog! All the information provided by you is really very helpful. I agreed that tack cloth is the best cleaning tool. It easily removes dust and dirt particles from the surface. Thank you for sharing! Keep posting!
Hi there! Oh my goodness that is so nice of you, thank you!! I absolutely will 🙂
How much paint did you end up using? I’m doing all my research before painting my 4 bookcases
Hi Laura! I actually only used about 1/2 gallon for these!
Do you remember how much primer you used? Debating whether to get the quart or gallon
Also thank you SO much for your detailed tutorial. Can’t tell you how many times I’ve come back to your post during this project, and it turned out so well! Pretty amazing considering we are definitely beginner DIYers.
Hi Victoria!! Yay!! So glad to hear that! I only used mayyybe 1/4 to 1/3 of a gallon of primer. It’s so tricky to know! I will say, I easily used the rest with projects afterwards because I almost always have to use primer! Hope that helps! <3
Love it!
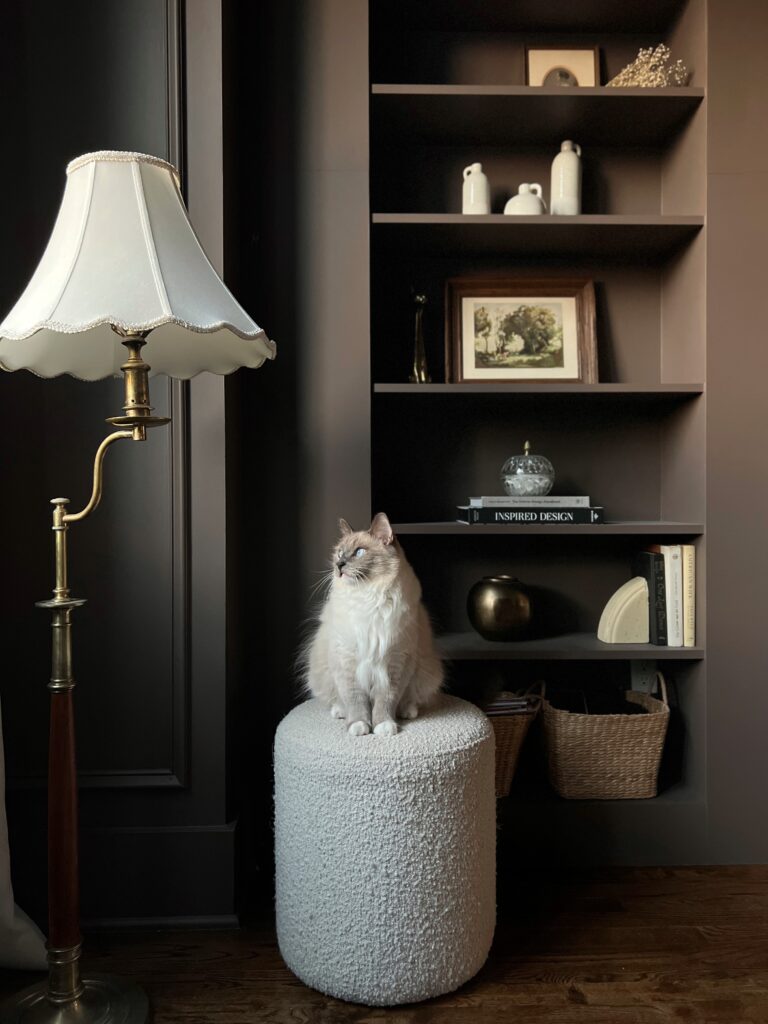
Where did you get the baskets from? They fit so perfectly on the billy shelves.
Hi Amy! Thank you so much! They’re actually from Target 🙂 They don’t sell the exact same ones anymore, but these are very similar and would fit too!! Here’s the link: https://rstyle.me/+qg_mUHw9IptHPYJpl65R-A
This is one of the most in depth set of instructions I’ve found, thank you so much!
Oh this makes me so happy to hear! You’re very welcome!!! <3
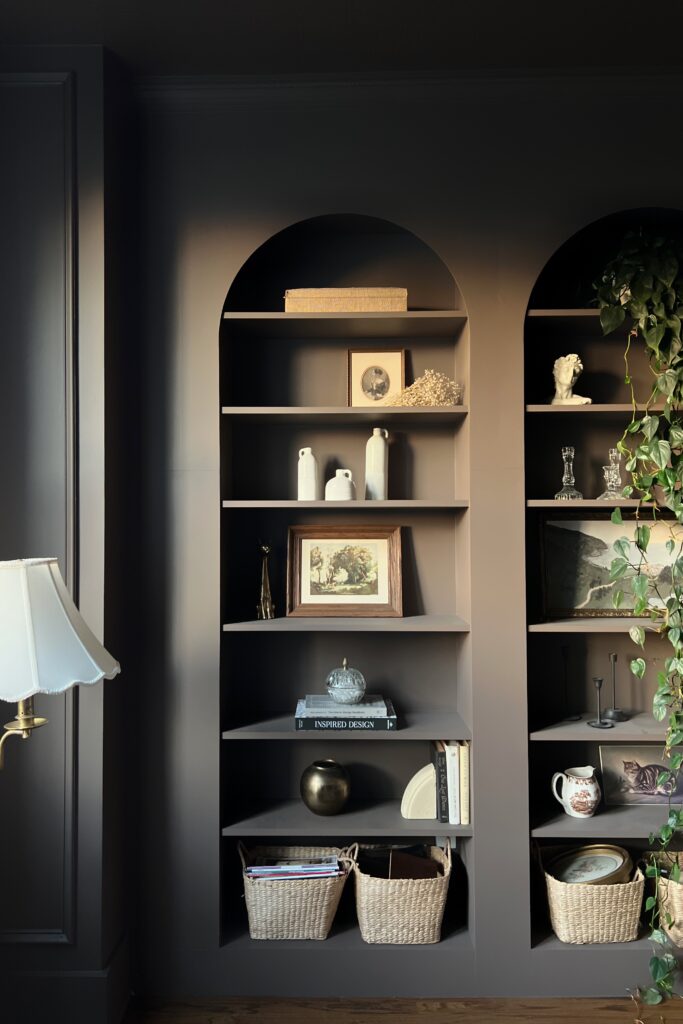
Question: In this tutorial, you say you used SW Urbane Bronze, but in the tutorial for the built-ins you say it is FB London Clay. Did you re-paint later? Great Color.
Hi Kelly! Yes, I re-painted them recently! They were originally the Urbane Bronze and now they’re London Clay 🙂
These turned out beautifully. I’m about to caulk my seams and noticed my backing isn’t tight in some areas and shifts when pushed against. Did you have that same problem? I’m afraid if it gets bumped hard it will split the caulk and tear paint. Any suggestions? Thanks!
Hi Melissa! Thank you so much!! I’m not sure if you nailed the backing into the shelves, but I did that and it helped a lot! Although, I do remember there were a few spots like that when I was applying the caulk and I was a little nervous too but once it dried it was fine and has held up great! I believe I also did 2 coats too! Hope that helps!
What kind of wood did you use on the front facing surface to create the arch? Is it a thin (~1/4”) piece of wood or is it plywood?
Hi Victoria! Yes, it was 1/4″ plywood that I used!!
Hi! 🙂 This detailed tutorial is awesome! I know there are many variables to this, but how long did this project take you? I want to do it, but I have to plan it when I have the time, or else consider starting and stopping over a series of weekends.
Hi Teresa! It’s hard to remember exactly because it was a few years ago now, but if you’re referring to the arched billy bookcase built-ins, I want to say I completed the project over a few weekends, with one of the weekends dedicated to painting! Hope that helps 🙂
Hi! Just curious – it’s hard to tell in the photos but I’m assuming you painted the backing that comes with the bookcases and not the wall? I’m prepping to do something similar in my house but I’m doing a corner as well and I have to have the back piece due to the distance from the wall.
Hi Kimberly! Yes, I painted the backing! Best of luck with your project 🙂