

If I knew how easy it was to make a decorative vent cover, I would have made so many by now! Because let’s be real- the typical air vent covers are usually an eyesore. Why not make it pretty?! The great thing about this DIY air vent cover is that you can finish it in less than a day! You also don’t need any woodworking experience.
In this tutorial, I’ll walk you through exactly how I used decorative metal sheeting with simple moulding to create a custom DIY vent cover that looks way more expensive than it really was. Let’s do it!!
Disclaimer: This post contains affiliate links. This means, if you purchase something from a link I provided, I will receive a small commission. This is at no extra cost to you! Thank you so much for the support!
TOOLS:
MATERIALS:
- Base Cap Moulding (or any kind of trim!)
- Decorative Metal Sheeting (other options below)
- Wood Glue
- Wood Filler
- Super Glue
- Spray Paint
Step One: Plan Your DIY Air Vent Cover
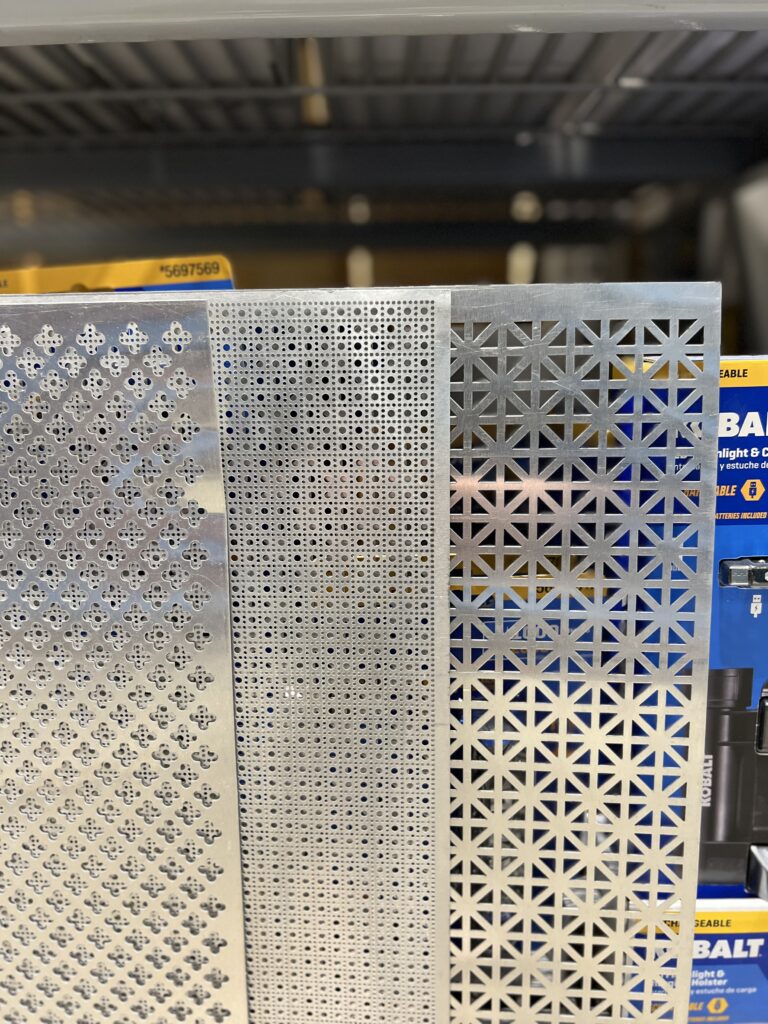
The first step is of course to remove your current air return cover. This way, you can measure the vent opening and find out how much material you’ll need. Ours was just a tiny bit smaller than a 2ft x 3ft decorative metal sheet, which worked perfect! They also have a couple 3ft x 3ft aluminum sheet options at Home Depot, if you’re in need of something larger.
Below are the options they have at Lowes! I loved them all, but decided to go with the one on the far right. Here’s the link to the middle option and the left option!
You can also choose whatever trim you’d like to use! I decided to use this base cap moulding, because I love the traditional look, but you can even use scrap wood 🙂
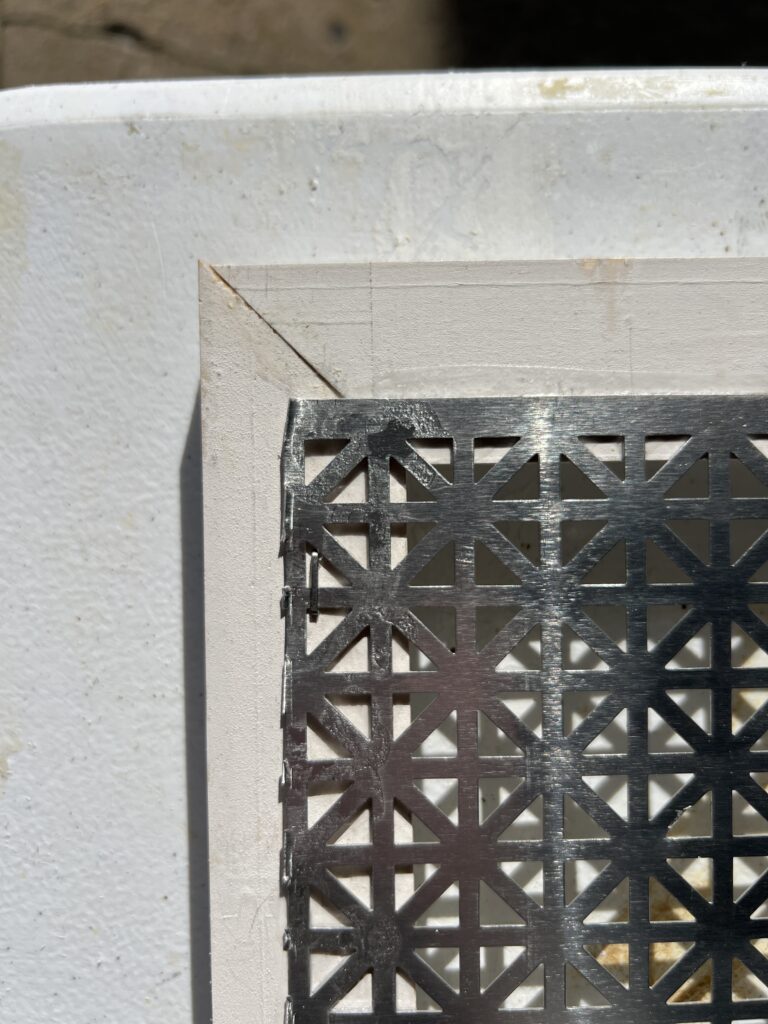
Step Two: Assemble the Frame
Use your existing cover to help with determining your exact measurements!
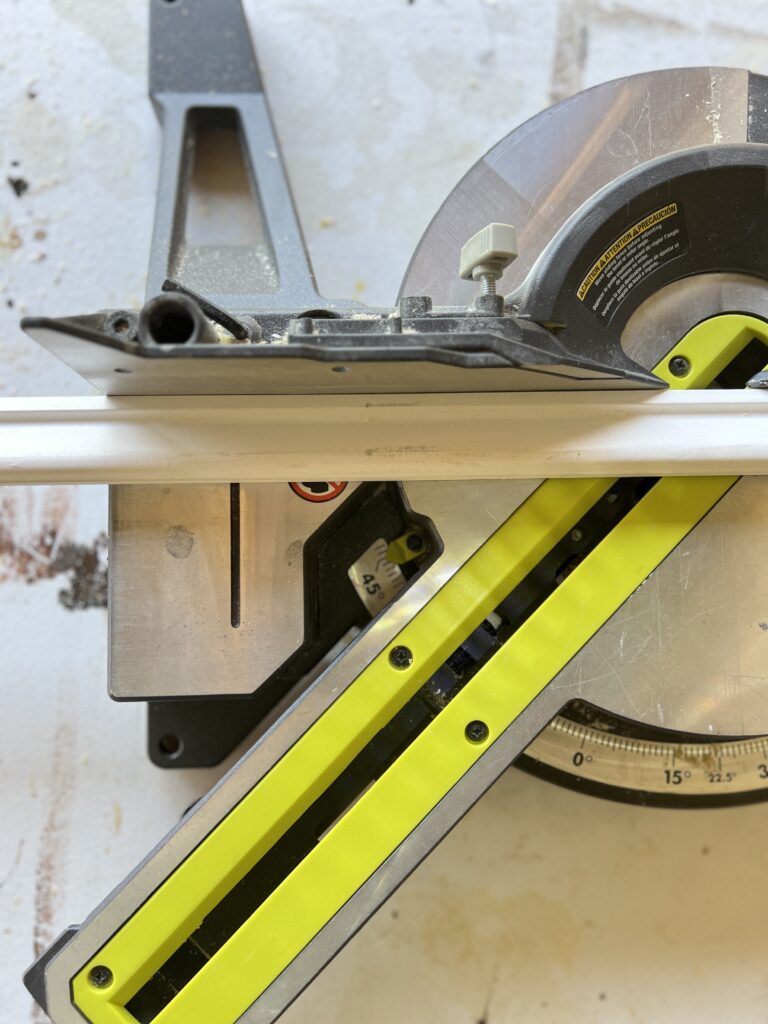
For the trim, you’ll just cut your pieces at a 45 degree angle. I used my miter saw for this, but if you don’t have one you could try miter shears or a saw with a miter box!
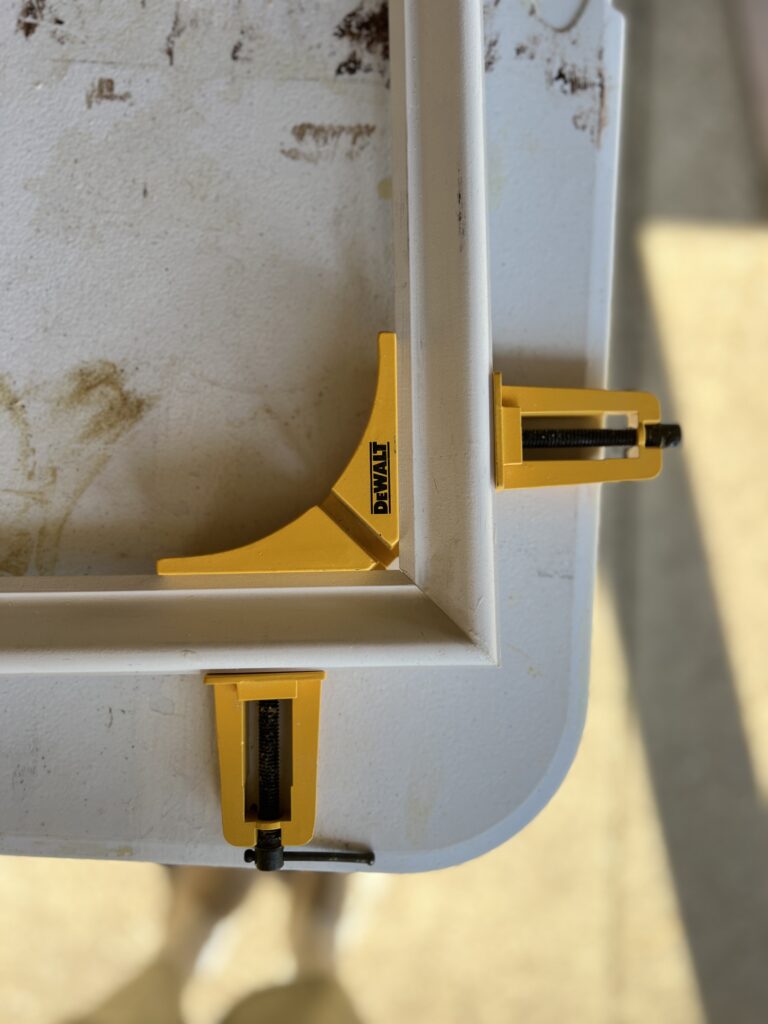
To assemble the frame, I find it’s easiest to use gorilla glue and these corner clamps! Let the glue set while clamped for at least 30 minutes before handling. Use wood filler for the mitered corners!
Step Three: Attach Decorative Metal Sheeting
Before attaching the decorative sheet metal, you’ll likely need to cut it to size. I used tin snips to cut mine, but you could probably get away with using strong scissors! Just be careful of those sharp edges after cutting!
Since the metal sheeting is really lightweight, you don’t need much to attach it. I used a combination of this super glue and some staples and that did the trick! You wont ever see the back of the vent cover so it doesn’t have to be pretty.
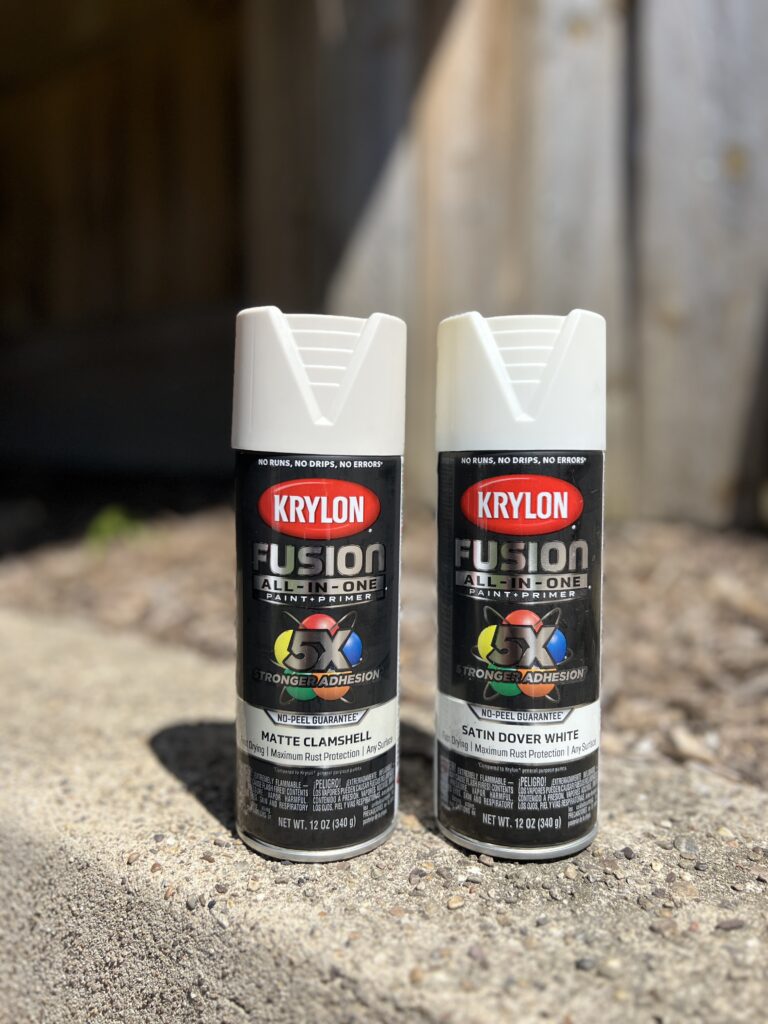
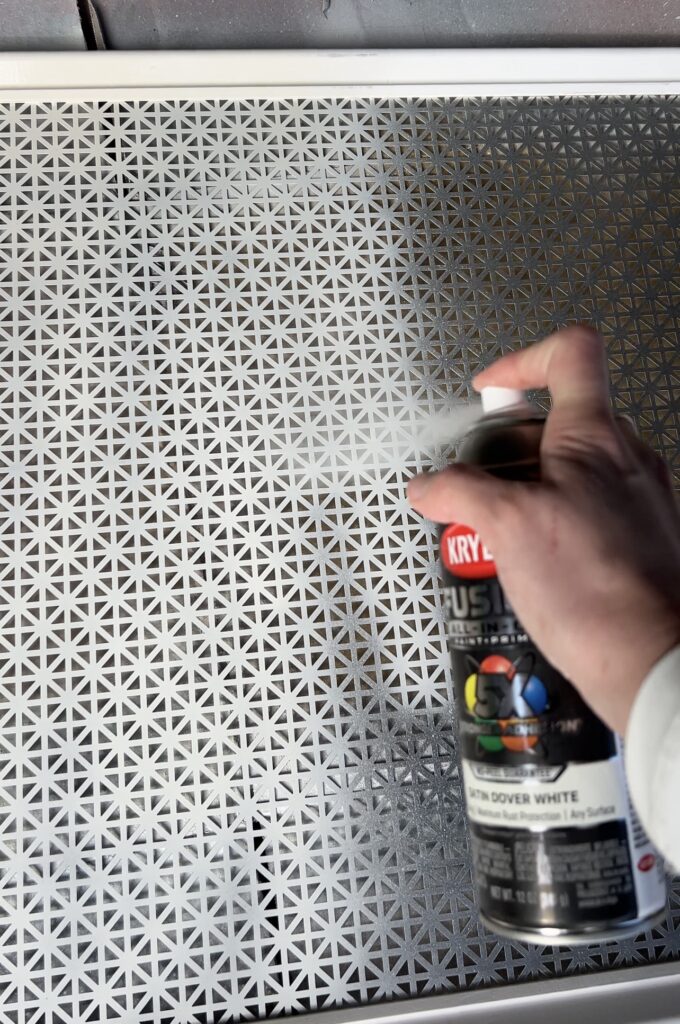
Step Four: Spray Paint the Vent Cover
The next step (and most fun!) is to paint it the color of your choice!! Spray paint is the simplest way to do this! If you prefer a wood look, use unprimed wood trim and stain the frame. If you have wall vents, they’re even more noticeable, so you can really get creative with making them decorative 🙂
Our air vents are on the ceiling so I didn’t want to use a contrasting color and have it stick out like a sore thumb. In an effort to blend in nicely with the ceiling paint, I decided to go with a shade of white! After testing two colors, I went with satin dover white, which is a perfect creamy white. The matte clamshell was also really pretty, but a little too dark for this particular project.
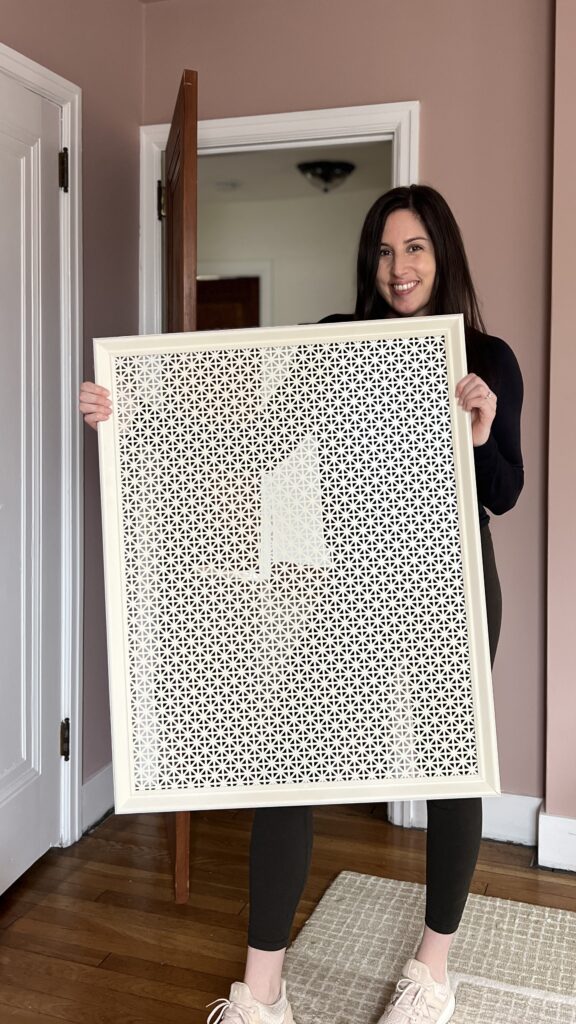
This is when it starts to become a really pretty vent cover!
When you’re spray painting, keep the can about a foot away from the vent cover and use quick, sweeping motions. If you get to close or hold too long at one time, the dried paint will have drips!
I ended up doing two coats because it was hard to tell what areas I missed until I stepped back and looked at it from all angles. You’ll be able to see what spots need a little extra!
Step Five: Install Your DIY Air Vent Cover
Once it’s dry, it’s ready for install! We don’t need to access our vent opening, so we actually just nailed ours into place with brad nails. It would be really easy to take down if we do need to get up there.
If you need to access an air filter, these command strips might be the best solution! They’re like velcro so you can remove the vent cover as needed. Just make sure you use enough to accommodate the weight (each size strip holds a specific weight) of your DIY air vent cover.
Another idea to make this vent cover removable is to use magnets! That’s what I did for this DIY medicine cabinet frame!
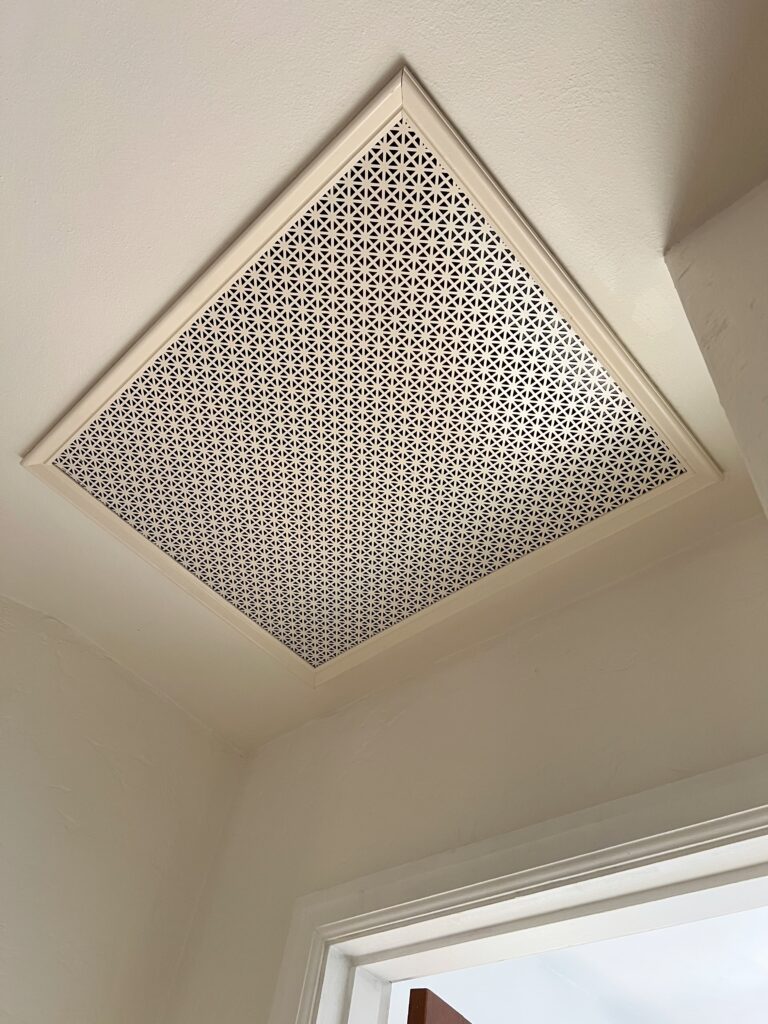
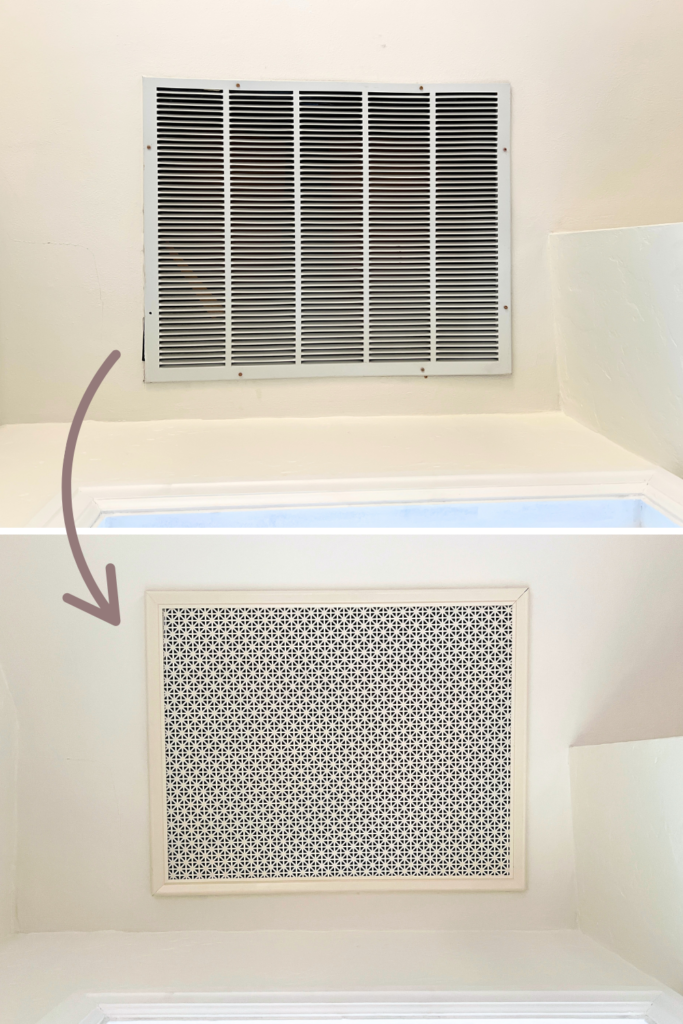
Decorative Air Return Cover Before and After
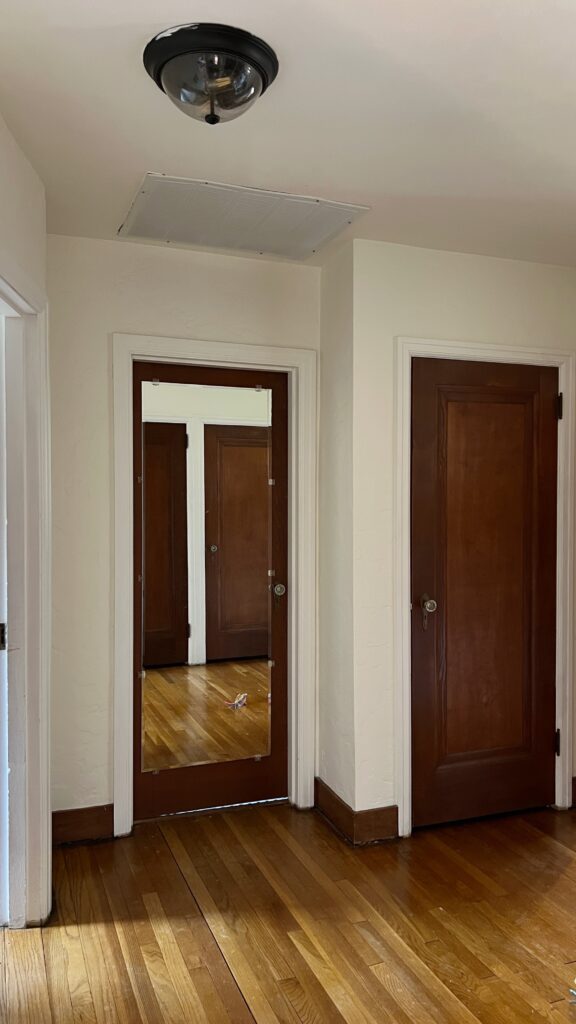
Once we decided to make a DIY air vent cover, we figured we might as well update the light fixture and add a rug too 🙂 Here’s how our hallway looked before:
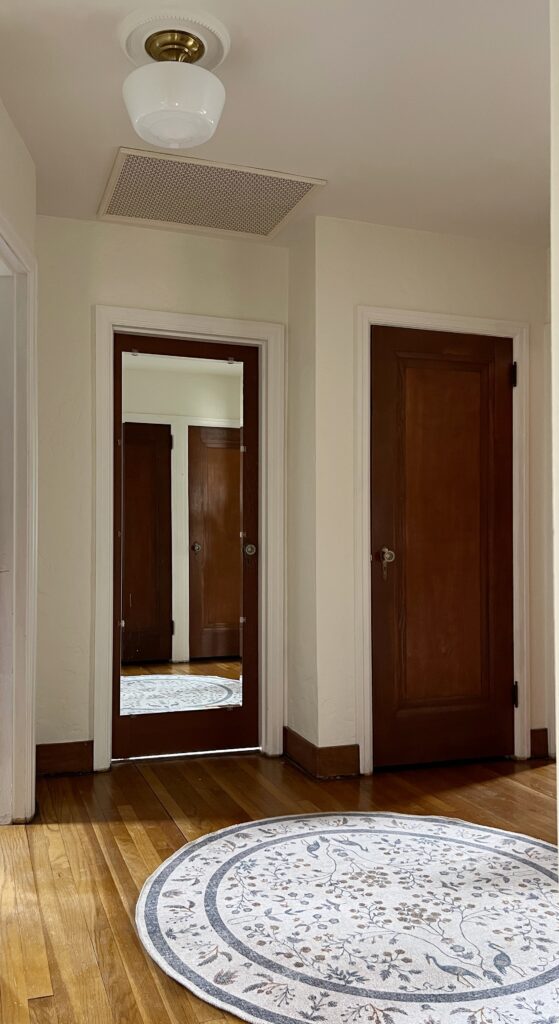
And here’s the after!! It’s crazy the impact just a few small changes can make! In case you’re wondering about any of these items, here’s the link to the light fixture (my favorite for simple and budget friendly!), the ceiling medallion, and the round rug.
This is one of the easiest and quickest DIY projects i’ve ever done!! I’m so pleased with the end result! What do you think? Are you ready to make your own DIY vent cover?!
Elisha
