I’m the first to admit that woodworking is not my favorite type of DIY and I have a lot to learn. But this is a great project for intermediate DIYers that have a couple basic power tools!
This coffee table build was quite the journey for me. It took me 8 months to finish (I was very distracted with wedding planning). After I assembled it, I ultimately decided I didn’t like the style of it anymore (my style has evolved in the last year) and was just done.
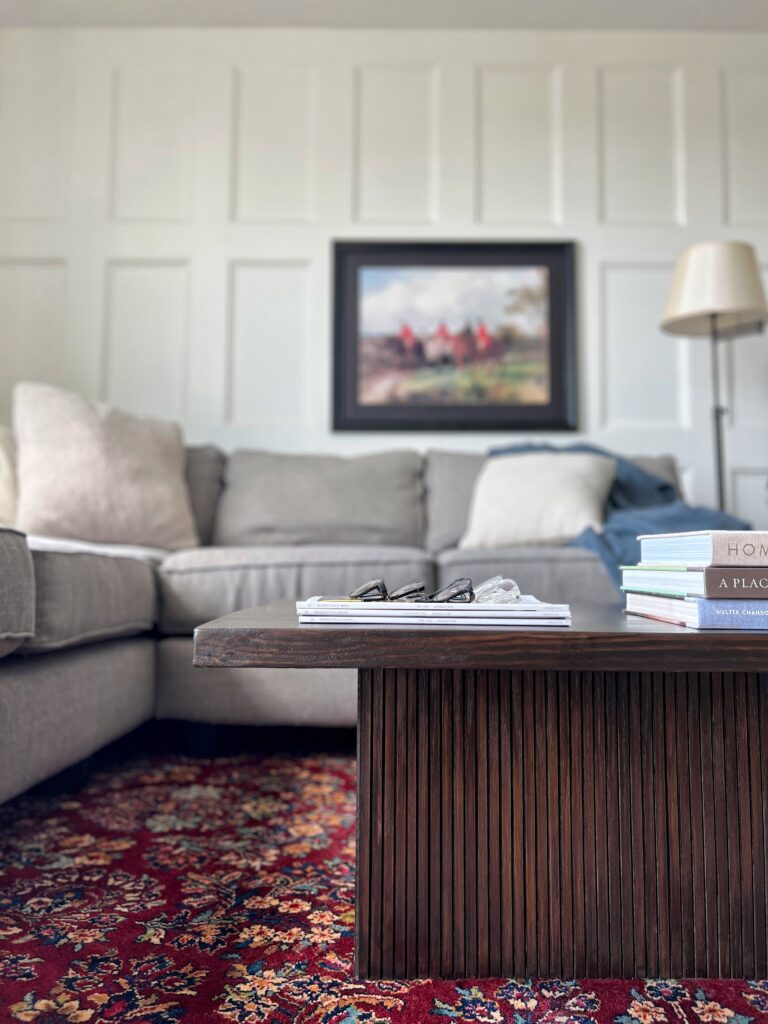
My lovely Instagram community convinced me to at least stain and sell it… they had a point! But then I remembered I had this awesome pole wrap that needed to be used so I decided to make it a DIY fluted coffee table!
Once I added the pole wrap, I fell in love all over again. You can watch it all unfold here on my IG stories. The big question is- did I end up keeping this DIY fluted coffee table for myself or did I sell it? I guess you’ll have to keep reading to find out 😉
Earlier this year I saw Rebecca and Mike from @imrebeccahart make this DIY Restoration Hardware coffee table and I fell in love! I figured this would be a good budget friendly opportunity for me to practice my woodworking skills so I used Mike’s tutorial to help get me started on my own DIY coffee table!
Disclaimer: This post contains affiliate links. This means, if you purchase something from a link I provided, I will receive a small commission. This is at no extra cost to you! Thank you for your support!
Tools:
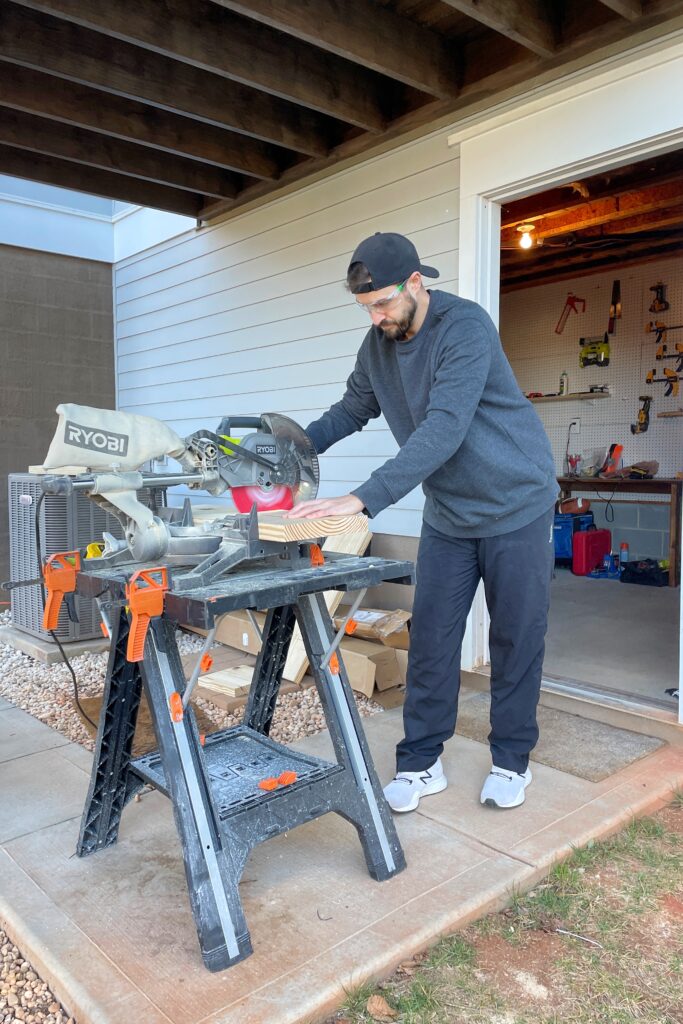
- Table Saw (or a circular saw)
- Large Clamps
- Sander
- Drill
- Nail Gun
- Miter Saw (with fine finish blade)
- Small Paint Brush
- Sponge Brushes
Materials:
- 2×12 Wood
- Wood Glue
- Screws
- Multiple Grit Sandpaper
- Wood Filler
- Wood Stain
- Craft Paint
- Pole Wrap
- Polycrylic
What Type of Wood is Best for a Coffee Table?
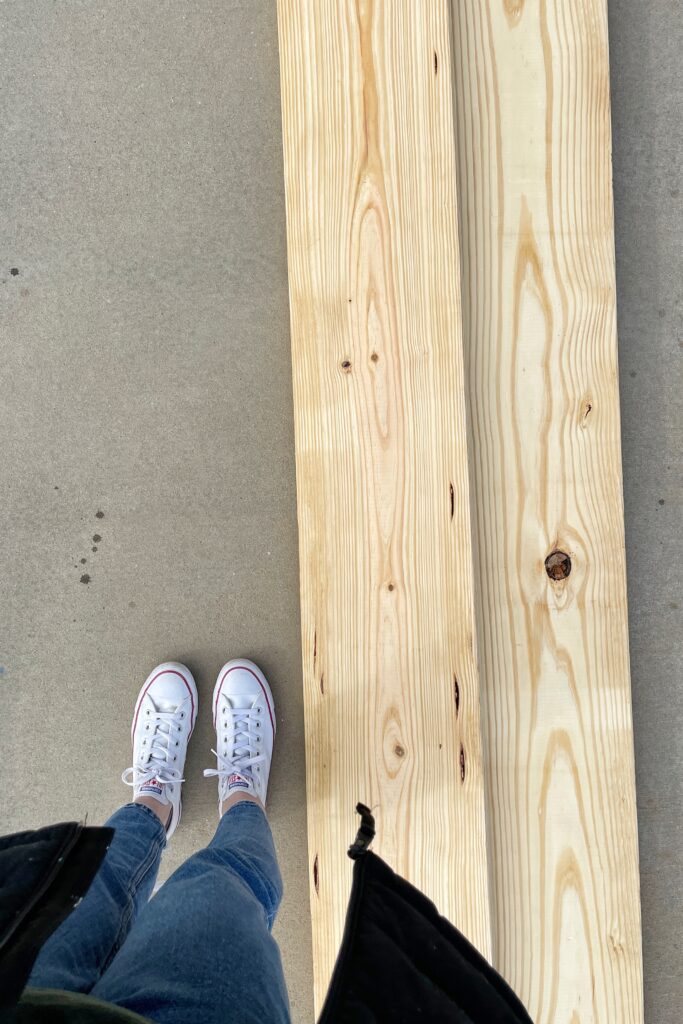
The best wood you can use for a coffee table would be a hardwood such as oak, maple, mahogany, cherry, or walnut. But of course these woods are more pricey and possibly harder to find. Since it was my first time building something like this, I decided to make an inexpensive coffee table using pine.
My original plan was to get spruce from lumberyard, but I went there and they weren’t able to cut the boards down to 8ft for me. (Sadly, that’s all we can fit in our car!) So I went to Home Depot and picked up three 2″x 12″x 8′ yellow pine boards.
However, I would recommend spruce (or even a hardwood!) over the pine. Spruce is straighter and less likely to warp than pine. My boards did slightly warp! 🙁
Step One: Make the Table Top
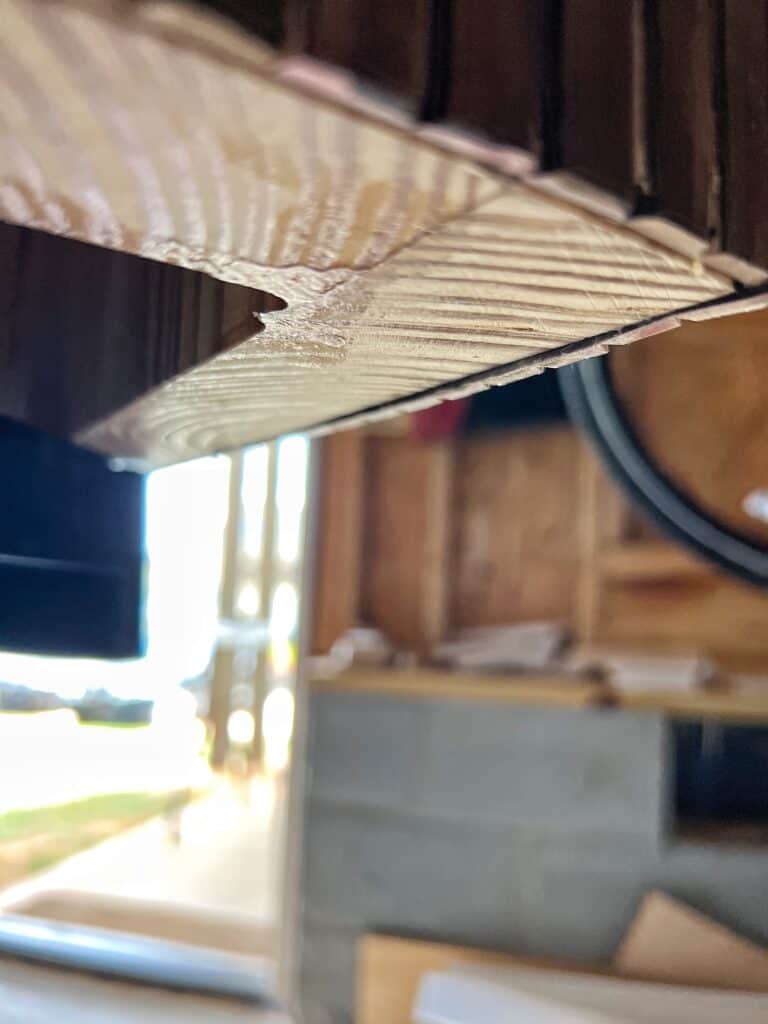
I wanted the dimensions of the table top to be about 3ft x 3ft. The boards are 12″ in width, so I glued three boards together lengthwise.
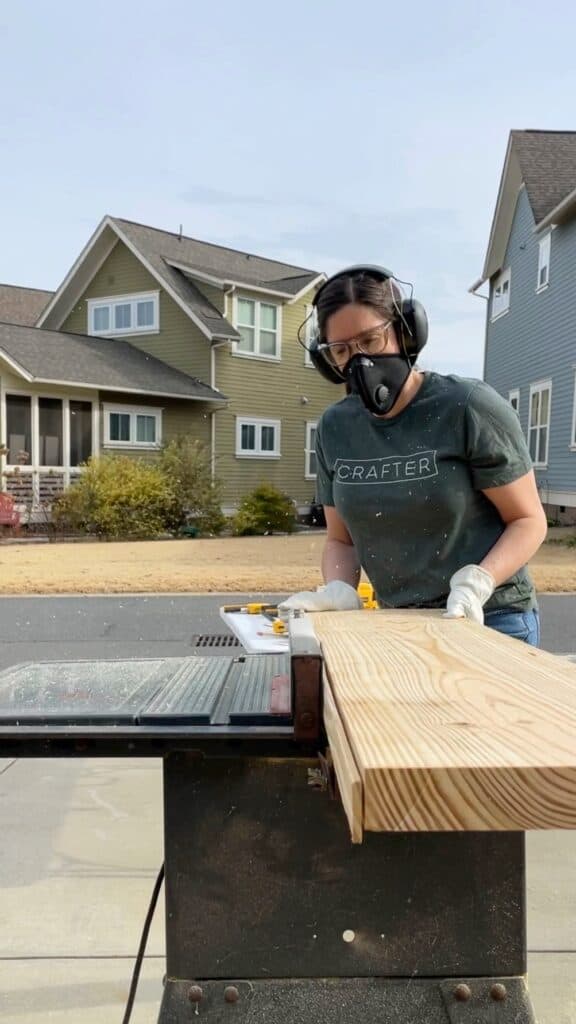
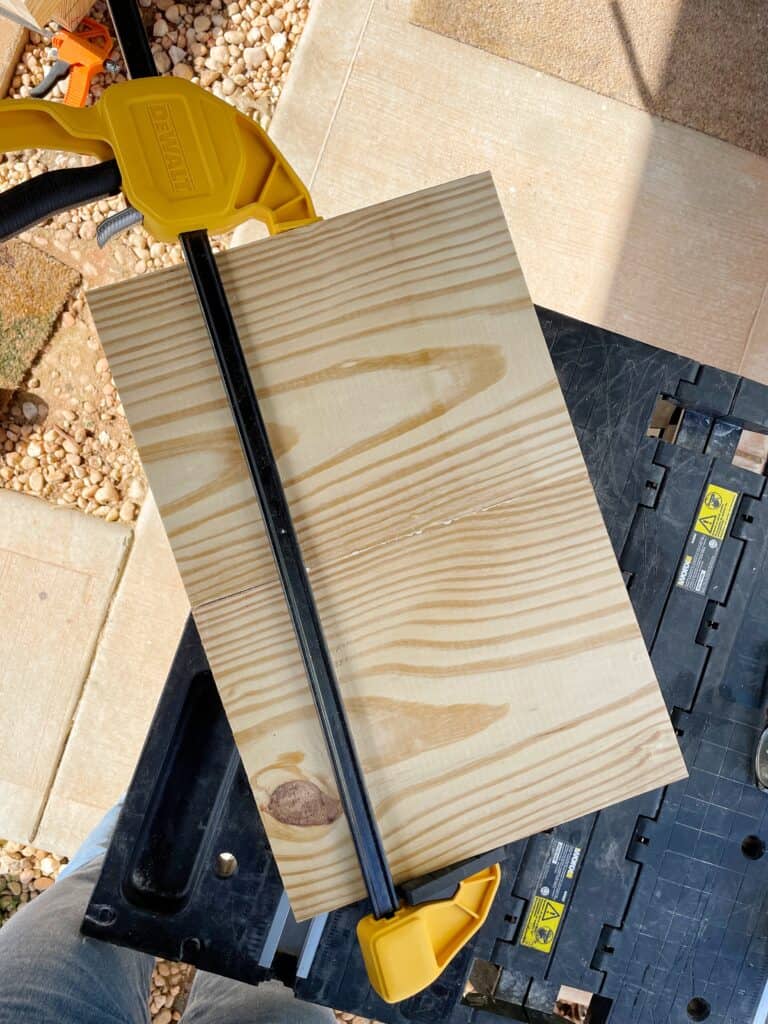
Rip down the edges
Since the edges of my pine boards were slightly curved, I had to rip down the edges first! I trimmed about 1/2″ off each side. This will allow for a more seamless fit when I glue them together.
I had a table saw from 1970 (we got it for $30) that I used to do this. It actually broke down during this project… lol! It was a blessing in disguise because I never felt very safe using it. If you don’t have a table saw, you could use a circular saw or a jigsaw!
My brother bought us this table saw for our wedding and I am SO excited to use it! If you’re in the market for a table saw- this one is lifetime warranty and I’ve had it recommended but many others!
Important note: In the photo below you can see that the 1/2″ part is against the fence. I’ve since learned that you want to have the wider part of the board against the fence to prevent kickback!
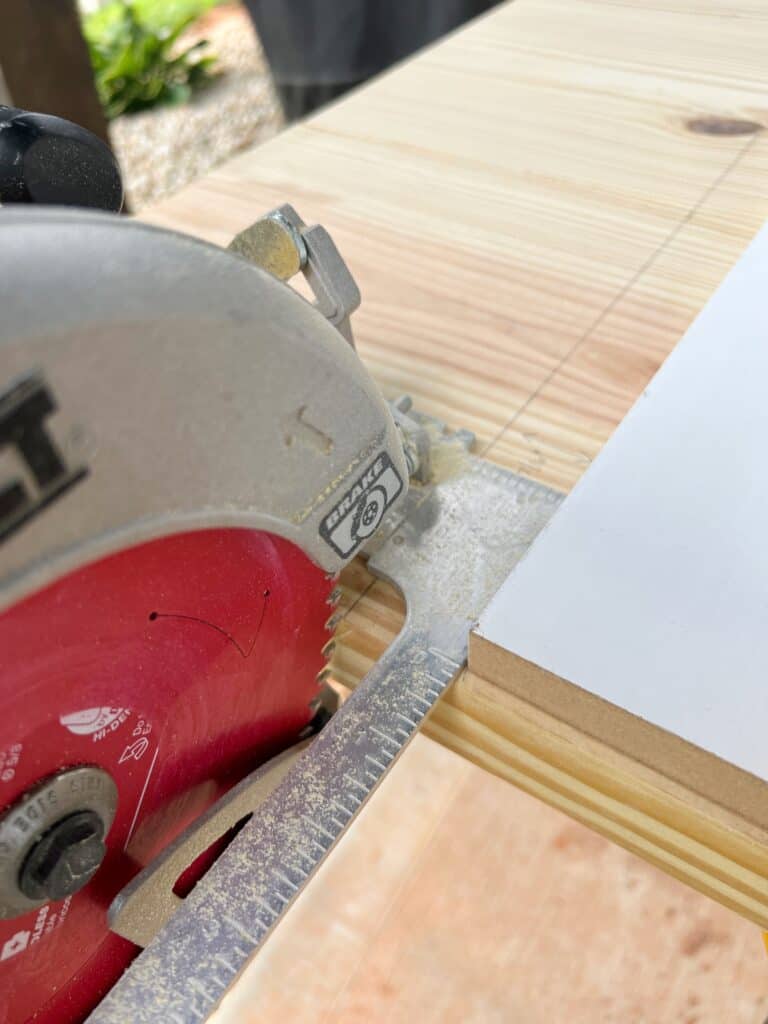
Cut the boards down
Before gluing the boards together, I cut them since they’re 8ft in length and the table top is only going to be 3ft. I cut them in half (ish) to about 4ft so I had a little extra to work with and also enough to cut eight 2ft pieces for the table legs!
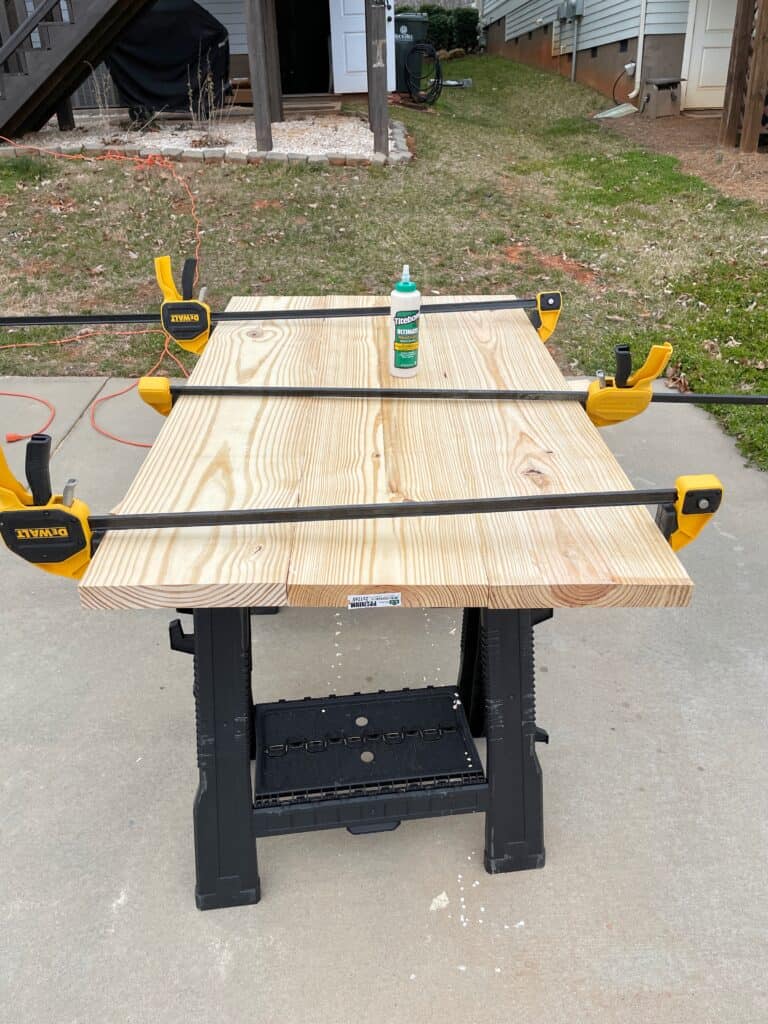
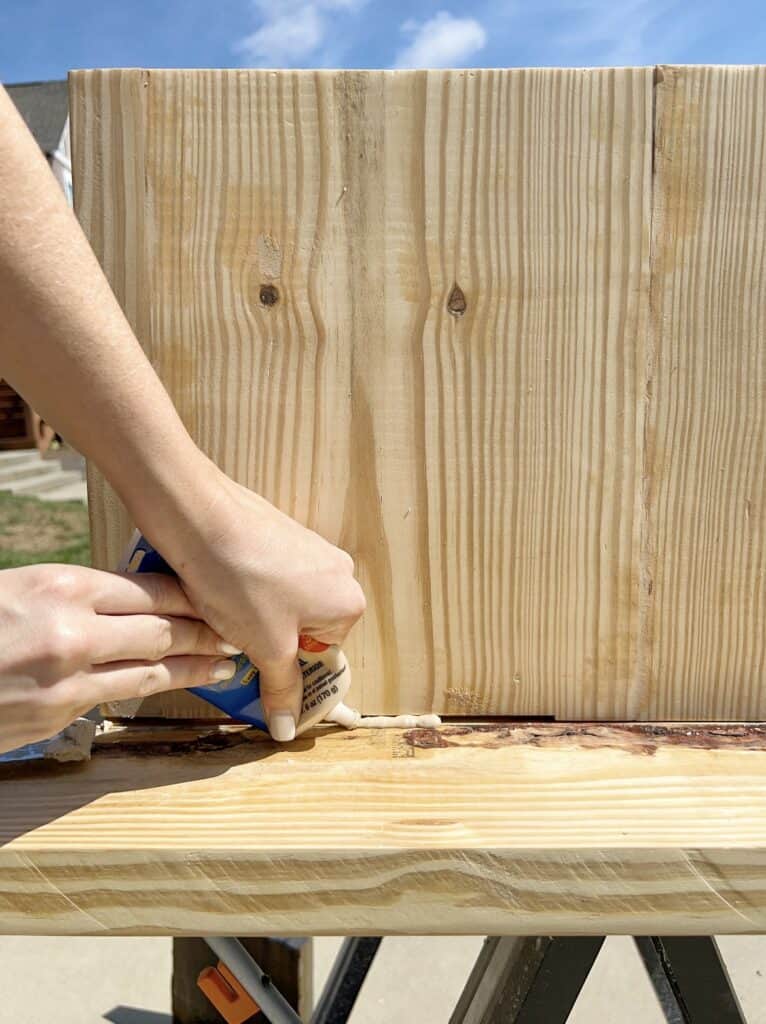
Glue the boards lengthwise
Choose a layout with your boards- paying attention to the grain and knots. Make sure the nicer looking sides are together and become the top of the table.
Check out the photo below- that side definitely became the bottom of the table!
If you don’t have some already, I highly recommend investing in some large clamps. You’ll need them for this project, and you will definitely use them again in the future. You can never have too many clamps!
Cut the table the size you want it!
Once the glue has completely dried, you cut down the table top to the size you’d like it!
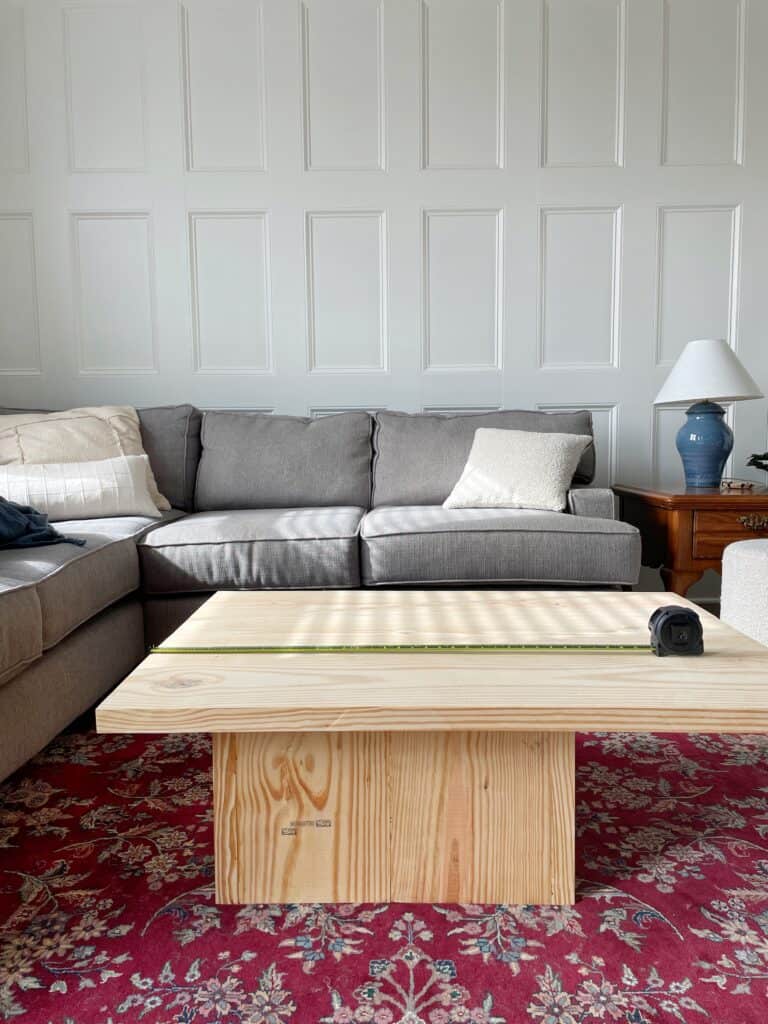
First I brought the table top and base (not attached) in my living room to get a visual. I ended up deciding on 32″.
I clamped a straight trim piece to the table top and used my circular saw to cut it down- trimming off the part that looked the worse in terms of gaps in seams, knots, etc.
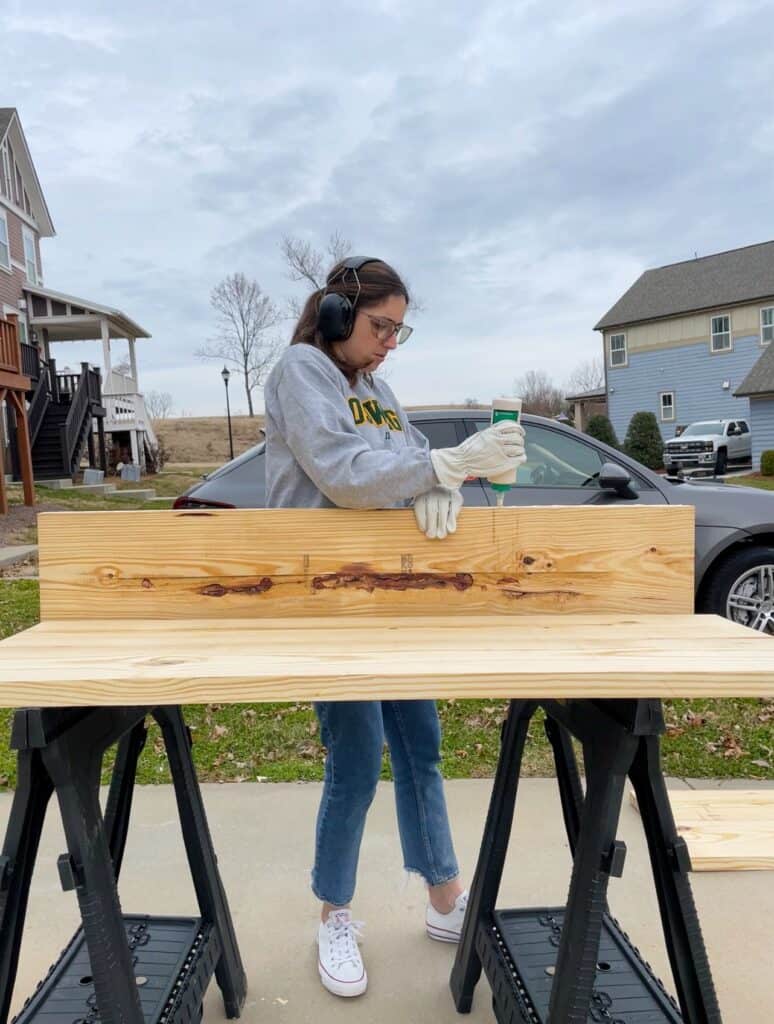
Did you know you can make your own wood filler?
I made my own wood filler for the first time! It’s so easy and convenient- but most of all, it matches your wood! All you need to do is mix sawdust with wood glue! I didn’t really measure, but just mixed it until it as a similar consistency to a wood filler I’d buy at the store.
I mixed with a popsicle stick and applied it to and seams or dents in the wood. You have to work quickly with it because it hardens within 10 minutes or so!


Once the wood filler is dry, sand the table top down smooth. Start with a low grit sandpaper like 80 and work your way up to 150 grit.
Pro tip: buy your sandpaper in bulk from Amazon so you always have all the different grits on hand!
Step Two: Make the Table Base
Making the table legs
I wanted the height of the table to be 15″ (that’s what our previous coffee table was). With the table top thickness being 1.5″, my table legs had be 13″ high.
Two of these 13″ pieces glued together = one table leg so we needed 8 pieces total.
Try your best to make sure these pieces are exactly the same size! I recommend creating a stop block with your miter saw if you can! (You can see this method in my tool talk highlight)
Just like the top of the table, you’ll glue and clamp the pieces together! I was intentional about having the grain go vertically. Also, don’t forget to hide the ugly sides so they’re hidden on the inside of the table.
Creating the base
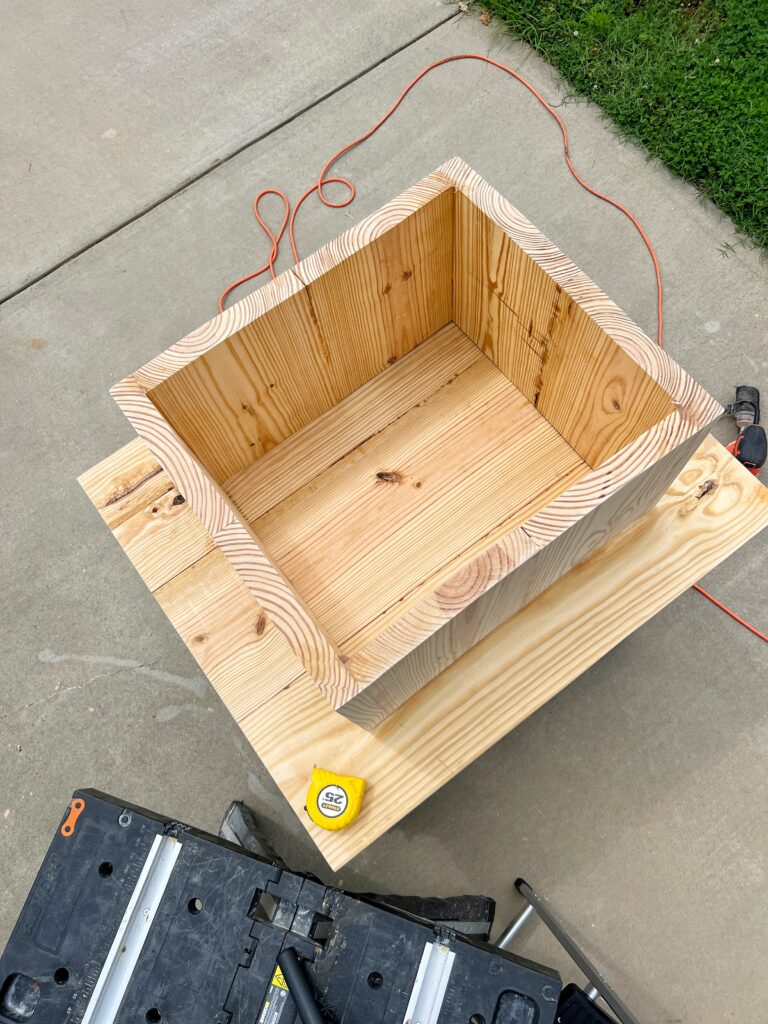
To create the base, you have to assemble the 4 table legs together into a square.
Originally I was planning to miter the corners, but I decided to just do butt joints instead and that worked great! I set the pieces on a flat surface and just glued and clamped them together!


Lastly, use wood filler on any imperfections and when that’s dry, sand the base down just like in step two!
Step Three: Assemble the Table
This step is where it gets a little hairy and I would definitely do some things differently next time. That’s what I’m here for… to make the mistakes so you don’t have to! 😉
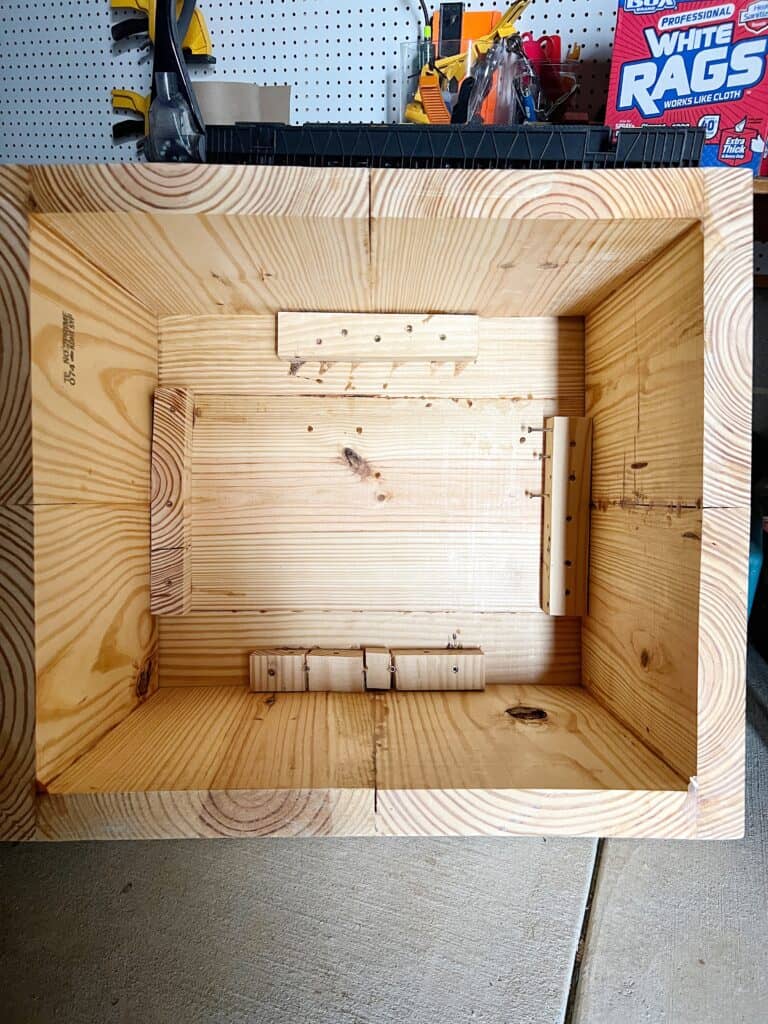
I laid my table top down (bottom side up) and placed the coffee table base one top (also bottom side up). I measured to make sure the base was centered on the table top before attaching the two together.
Support pieces
For the support pieces, I just used scrap wood from the boards. This is a great budget-friendly approach, but you could also use heavy duty metal L-brackets instead.
I glued the support pieces first and then used 2 1/2″ screws to drill them into place. I drilled both straight down (as you see in the photo below) and also perpendicular into the table legs.
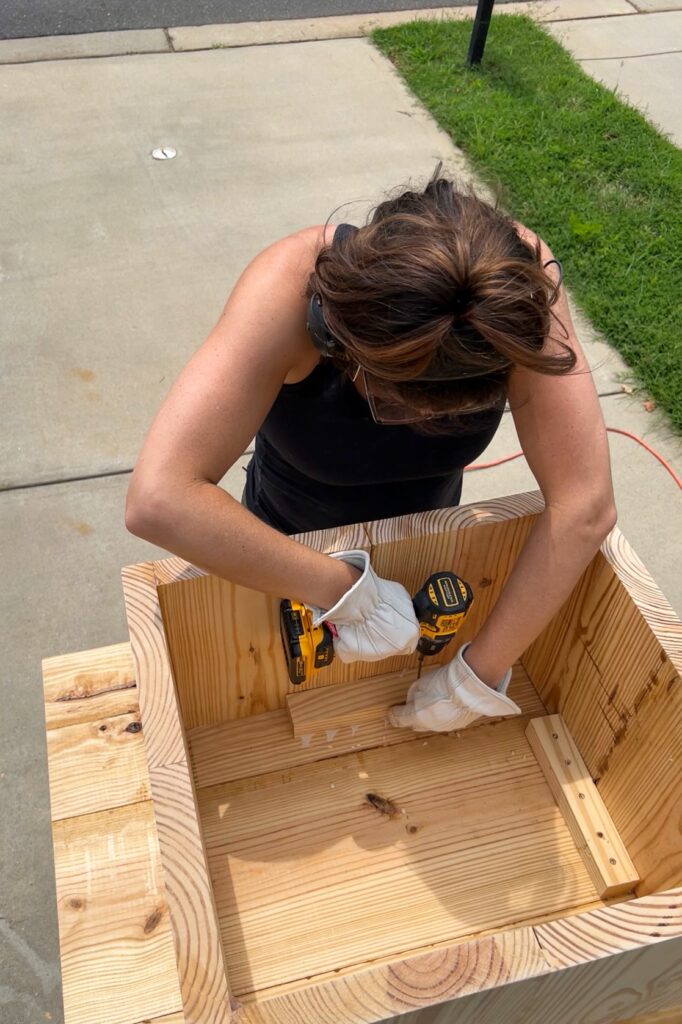
I’m going to be frank here- I did not do a good job with this step! I used screws that didn’t require a pilot hole, so I didn’t bother making any. But since this wood is so soft and I was drilling against the grain, I should have made pilot holes. You can see below how scary it looks underneath.
Not making pilot holes resulted in broken pieces and screws that didn’t go in fully. Aye Yai Yai! Not to mention- I completely forgot to add additional support pieces in the corners.
While it may look rough, this DIY coffee table has been going strong for 3.5 years as of now!! But don’t be like me- use pilot holes, add additional support pieces, and use L-brackets if you can!
Lastly, I had to take care of any gaps between the table top and the table base. (If all of the boards were cut to the exact same size, this probably wouldn’t be an issue!)
I decided to use this wood filler because it’s incredibly durable, uses real wood fibers, and doesn’t shrink or crack.
Step Four: Flute the Coffee Table
Now for the fun part! I’m going to share all the details so you can make your own fluted coffee table! You can even apply these methods and make a fluted side table or dining table!
What can I use to get a fluted look?
At the time that I’m writing this, the pole wrap I used is currently out of stock in most areas in the US. (Let’s hope just temporarily!) But be sure to check if it’s in stock at your local Home Depot or Lowes and if not, get on the email list to be notified when it is!
The fluted trend has been going strong for a while and I don’t see it going anywhere anytime soon! There are plenty of options for achieving a fluted look. Here are a few:
dowels
I used these wooden dowels on this DIY fluted dresser and my Ikea shoe (wine) cabinet

I used these half dowels on my DIY fluted vanity
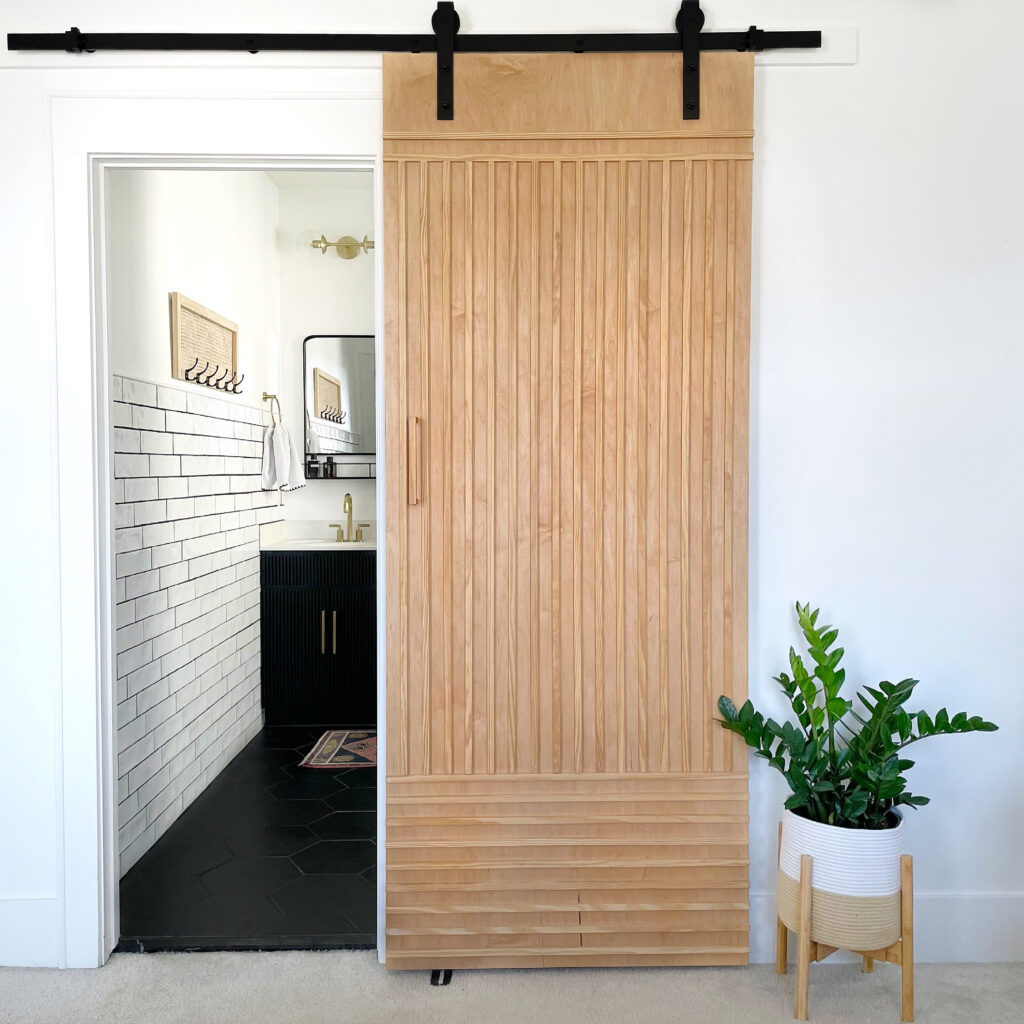
Trim Pieces
I used these trim pieces on my DIY barn door
I used these trim pieces on the fluted wall in my office
Applying the pole wrap
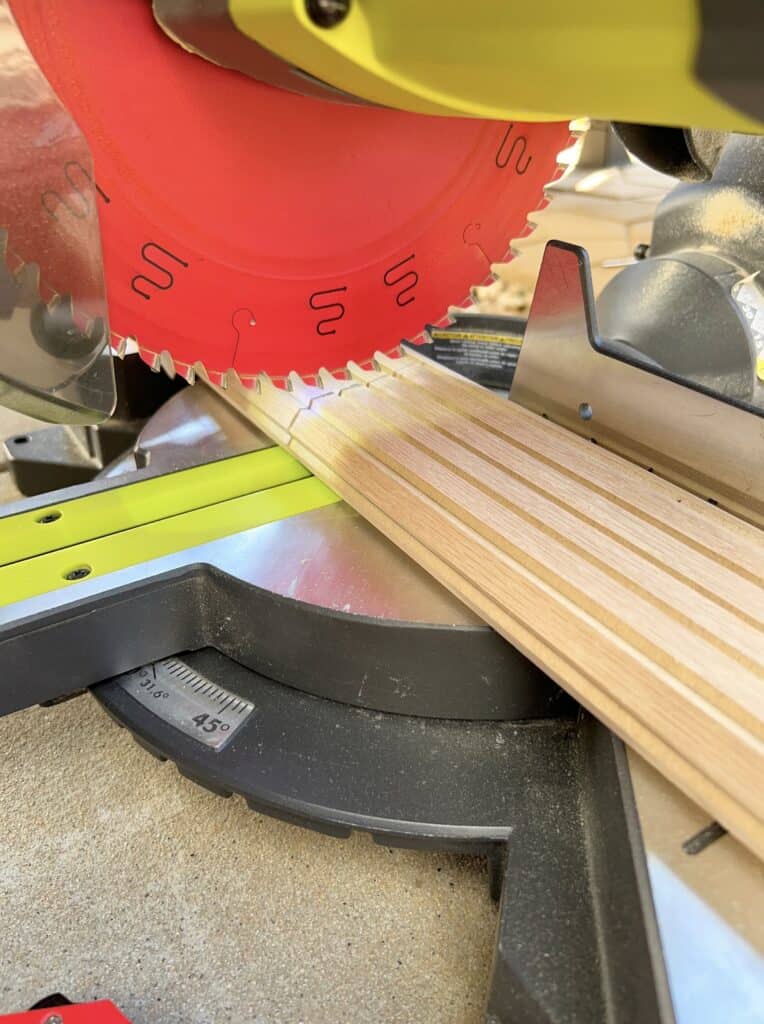
The pole wrap was one 8ft x 16″ piece. I needed my pieces to be 13.5″ high for the table legs. I rolled up the pole wrap and just cut it with my miter saw… so easy! Just make sure you use a fine tooth blade for a clean cut.
Before gluing the pole wrap, I did a dry fit to see the how all the pieces would fit and if any would land on the corner.
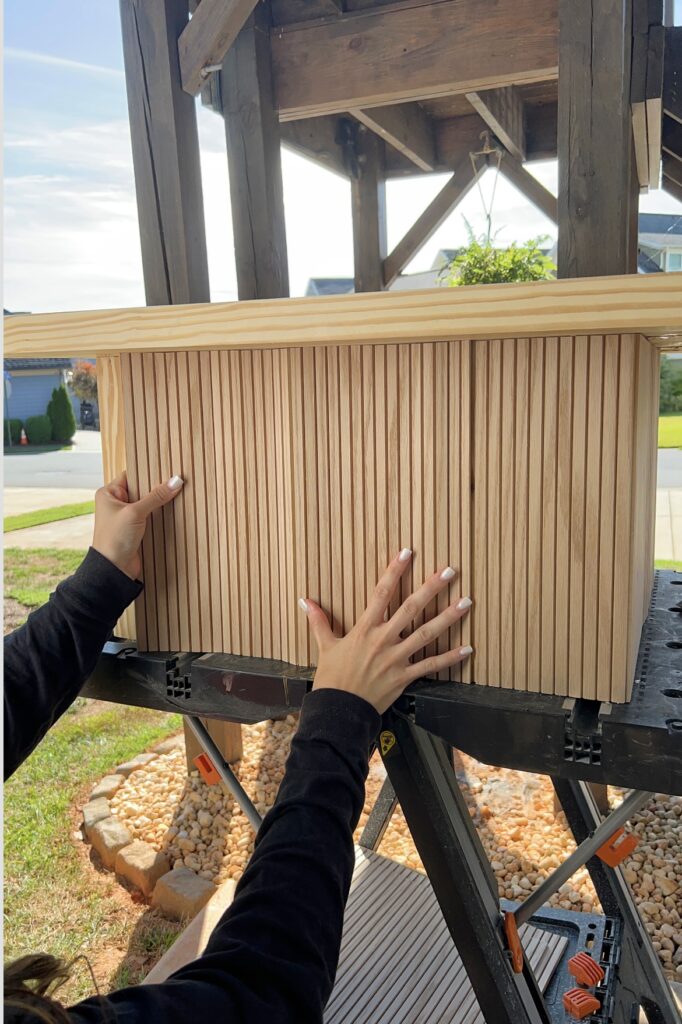
It’s important to use a generous amount of glue! I applied it on the back of the pole wrap as well as on the coffee table base. I decided not to use nails in addition because I felt the glue would be secure enough for this project.
The pole wrap can be easily cut lengthwise through the back with a utility knife!


In some areas, you might have to get creative!
I had a weird gap left so I cut an edge piece (the edge piece is just a tiny bit smaller than the rest) and had to glue that in. If you look close up, you can see there’s no gap between two slats where I added it.


Something I’d do differently…
Next time I would apply the pole wrap with the top of the coffee table face down. This way, I could make sure the pole wrap was flush with the bottom.
Mine wasn’t flush all the way around so I noticed two pieces of pole wrap that got dragged and started to pull off at the bottom edges of the table.
To fix this, I clamped down the loose pieces and used my multi-tool to trim off the excess. It worked great!
After that I secured the two loose pieces with 1″ brad nails and wood filler. Before I used the brad nailer, I tested it out on scrap pieces first.
I’m glad I did because the first nail didn’t go fully into the pole wrap! I adjusted the nail depth and tried a couple more times until I got it right. Then I just filled the nail holes with wood filler!


Step Five: Coffee Table Finish
This credenza in Chris Love Julia’s home was my inspiration for the finish of this DIY fluted coffee table.
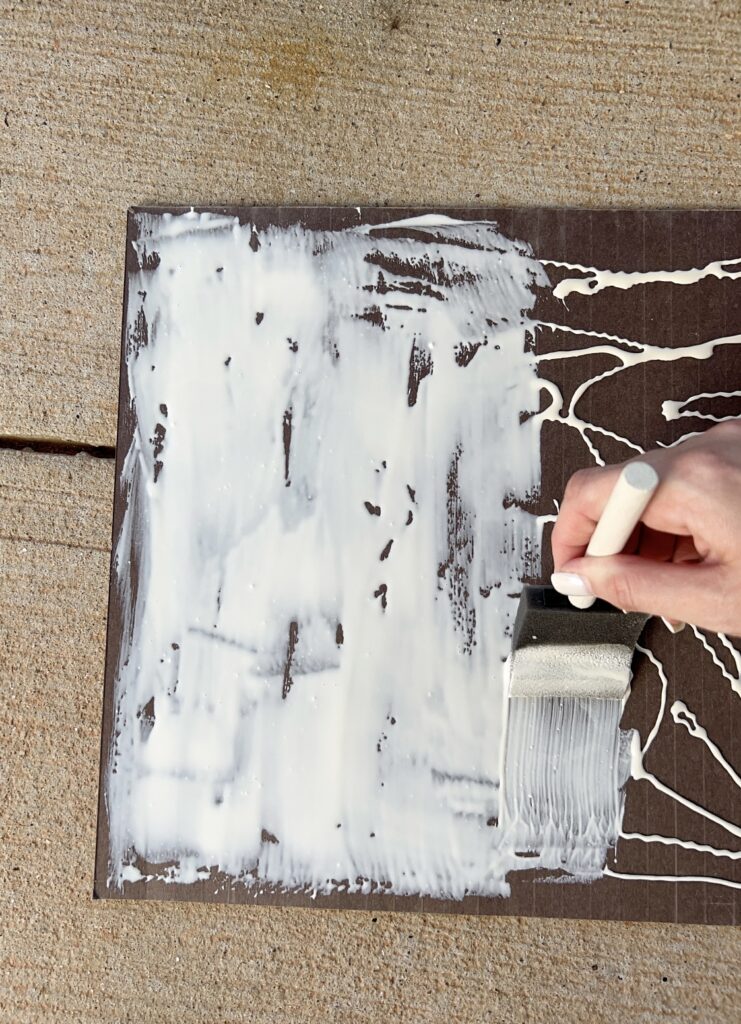
Paint wash + gel stain method
My biggest concern was not getting the stain to go on evenly since I had different materials and wood filler spots all over the table. This is why I decided to go with a paint wash and a gel stain. I tested it out on scrap pieces first to make sure I liked it!
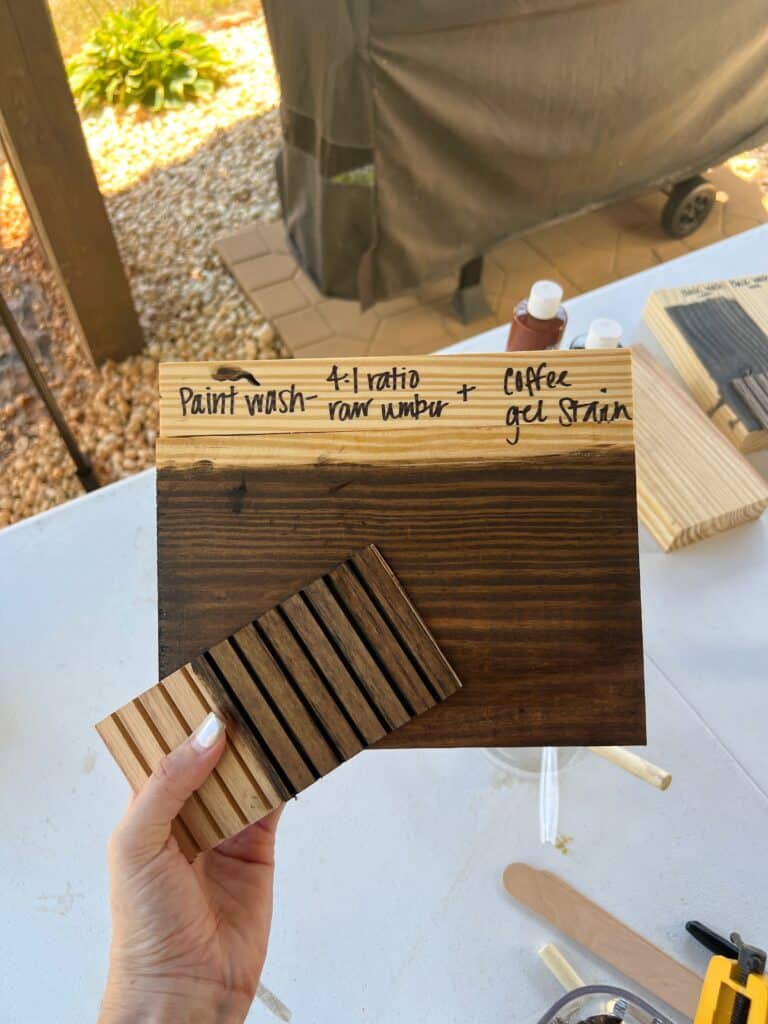
step one: paint wash
The goal for the paint wash is to use a color as close to the stain color as possible. Luckily I had this burnt umber craft paint on hand and it ended up working perfectly with my stain! Big win!
I used a 4:1 water to paint ratio for the table top. For the pole wrap, I ended up using mostly paint with a little bit of water. After testing on the scrap pieces, I noticed the pole wrap didn’t take the watery mixture as well.
At first I applied the paint wash with a small sponge brush but I wouldn’t recommend it. I would use either a rag, a roller, or even a paint sprayer if possible! I switched to a larger sponge brush and that helped.
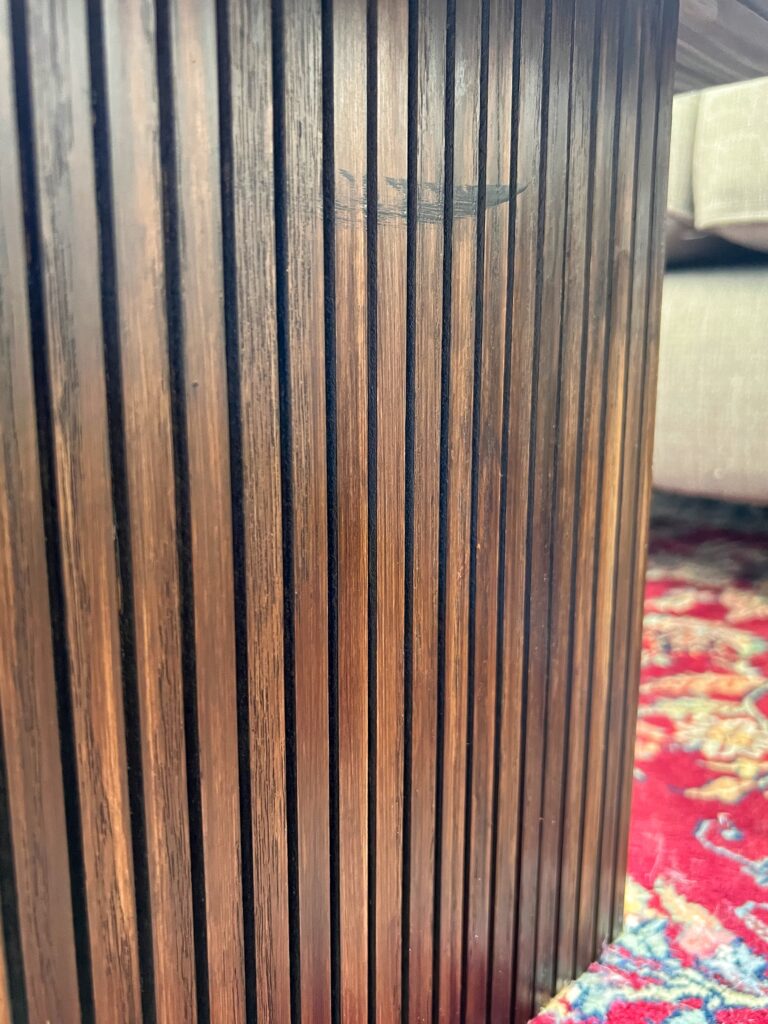
See the darker spot in the middle? I should have done long, continuous strokes instead. I learned my lesson! I had to sand it down and do it over.


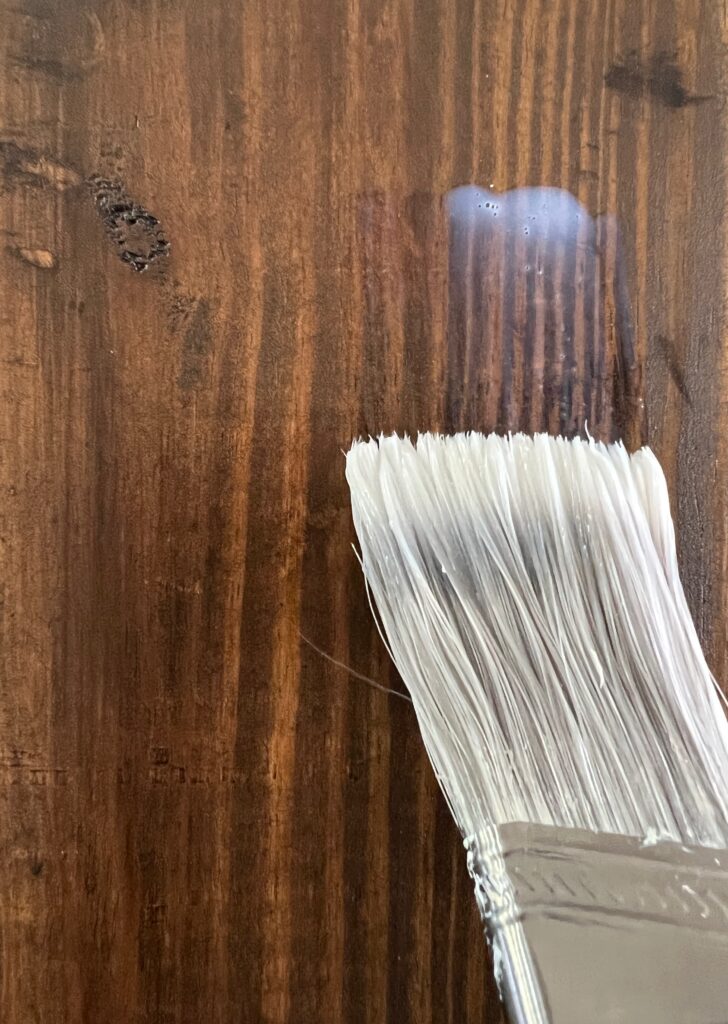
Step two: gel stain
Gel stain is different from regular stain in that it sits on top of the surface verses soaking into the wood. That’s why it’s always a great option if you have a piece of furniture that uses multiple types of wood.
I’m a huge fan of this coffee gel stain. It has such an expensive-looking finish!
For the table top, I applied the stain with a large foam brush and ultimately decided not to wipe it off. At first I tried to but then the wood filler spots became more visible, so I went back over it. That’s one plus to using gel stain- it’s easier to manipulate.
For the pole wrap, I generously applied the stain into the ridges with a small brush. I did multiple rows at a time, smoothed it all out with a foam brush, and then wiped off the excess stain with these rags.

Make sure you do a good job of wiping off the excess stain! It was starting to get dark when I did it and I missed a spot 🙁
Polycrylic
Lastly, you’ll want to use a polycrylic to protect the table and give it a finished look! Don’t skip this step!
When you’re applying a water-based product over an oil-based, you need to allow the table to cure for a few days before applying it. Tip: before using the poly on your finished product, test it on a hidden area or scrap piece!
I did three coats total. This step actually really brought the table to life and made the color look even richer! This is my go to polycrylic.
Frequently Asked Questions
Would you do anything differently next time?
Yes, lots of things! I would…
- use a better wood like spruce
- use L-brackets instead of my scrap support pieces
- be more precise with my measurements
- apply the paint wash to the table top with a roller brush or paint sprayer
What was the total cost of this project?
- 3x 2″x 12″ x 8ft pieces of pine= $54
- Pole Wrap= $70
- Wood Glue= $6
- Wood Filler= $5
The rest I had on hand so it was a total cost of $135… not bad!!
Can I make a round coffee table version of this?
Yes! I’ve seen many others on social media make a beautiful round fluted table! Most of them used a concrete form tube as the base. You can also buy a large circular wooden board to use as the table top or you can find a round table on Facebook marketplace and use that!
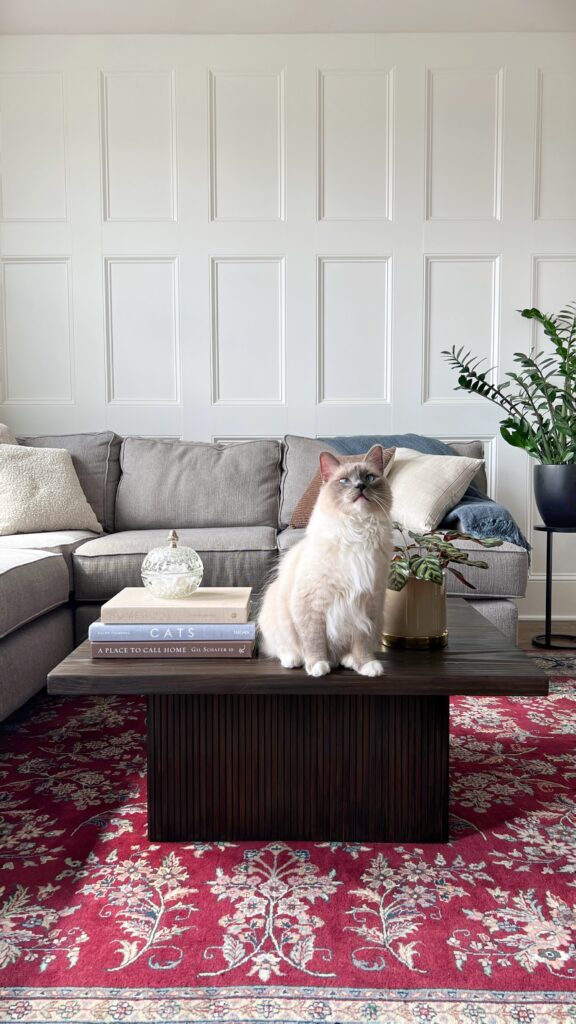
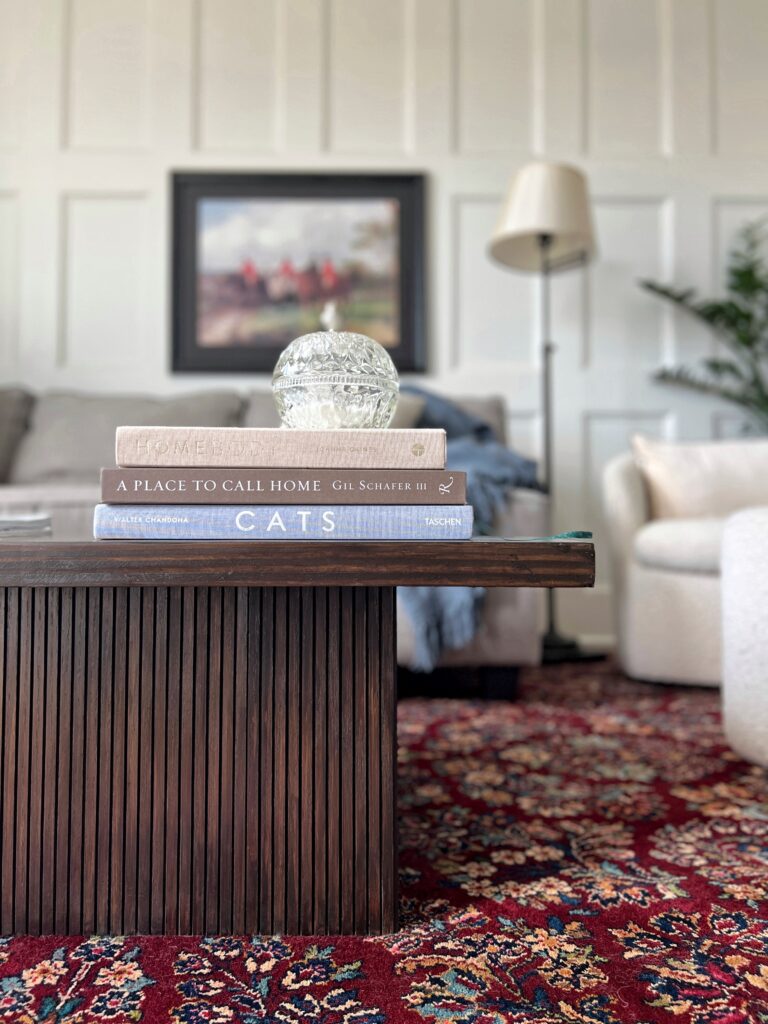
Are you going to keep it or sell it?
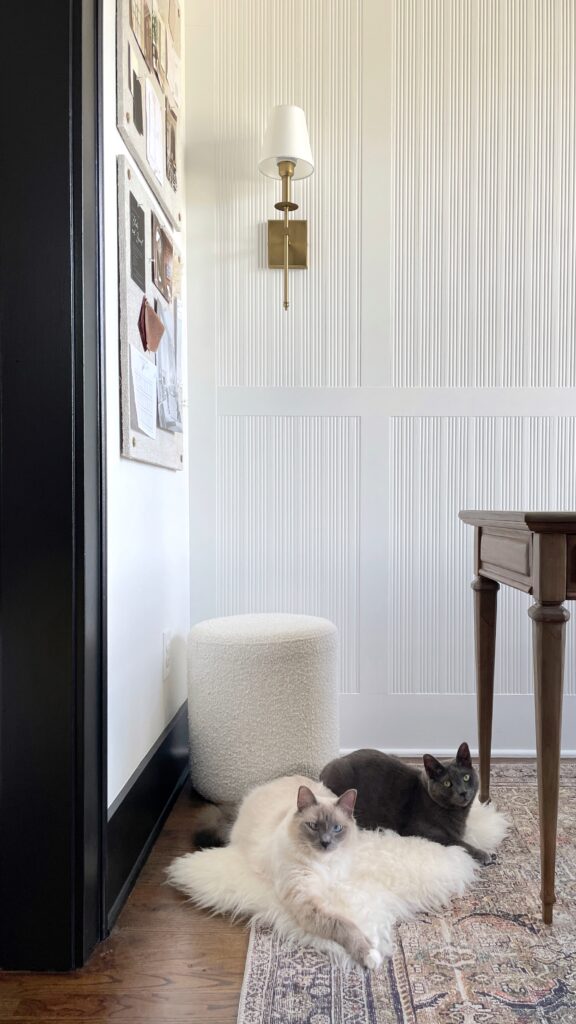
Oh, I’m keeping it! I truly love how it turned out. The modern fluted look also adds a nice contrast to the more traditional wall treatment I did in our living space!