

If you didn’t know by now, I’m a big fan of trimwork! It’s my favorite kind of project and the end result is always so substantial. Box molding (sometimes called picture frame molding) has been on my mind for a while now. It’s such a classic, elegant touch to any space.
My original plan was to put it in our dining area to make it feel like it’s own separate space since we have an open floor plan. But once it went up in there… I suddenly needed box molding everywhere.
Disclaimer: This post contains affiliate links. This means, if you purchase something from a link I provided, I will receive a small commission. This is at no extra cost to you! Thank you for your support!
MATERIALS
- Base Cap Molding
- Spackle
- Caulk
- Paint
- 2″ brad nails
- Outlet Extender Box (optional)
TOOLS
- Miter saw
- Brad Nailer
- Laser Level
- Measuring Tape
- Angle Finder (optional)
Step One: Planning the design
Seek Inspiration
I spent a lot of time examining box molding all over Instagram and Pinterest. I paid attention to the number and placement of boxes, how far apart they were spaced, type of molding used, etc.
What I learned is that there really aren’t many rules when it comes to installing box molding. Everyone seems to do it a little different, yet most almost every variation I saw looked beautiful.
Here’s a few examples; all of which are a little different!
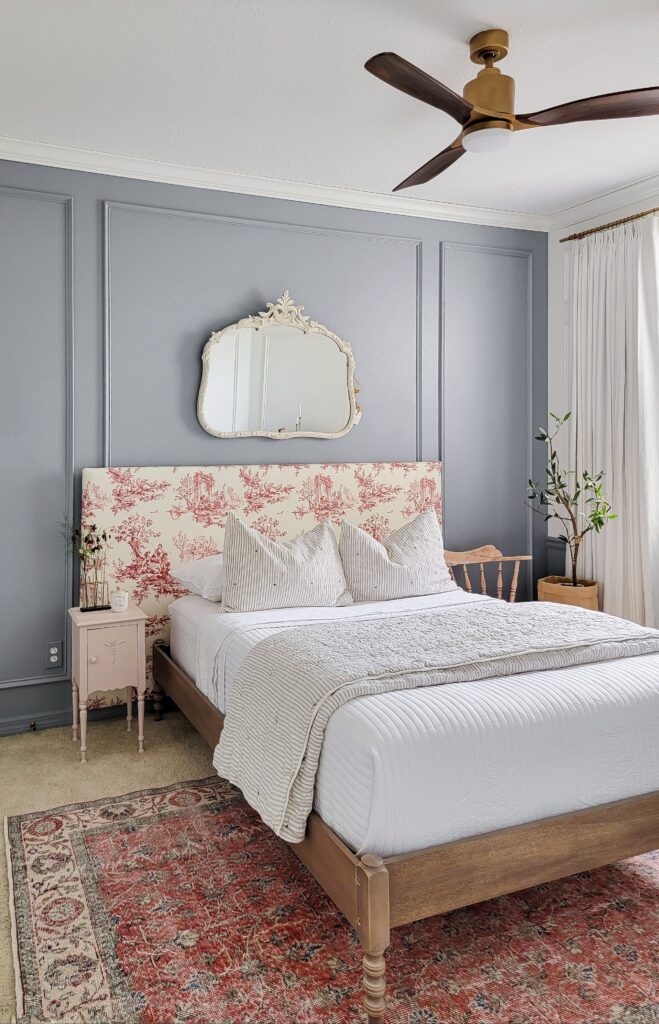
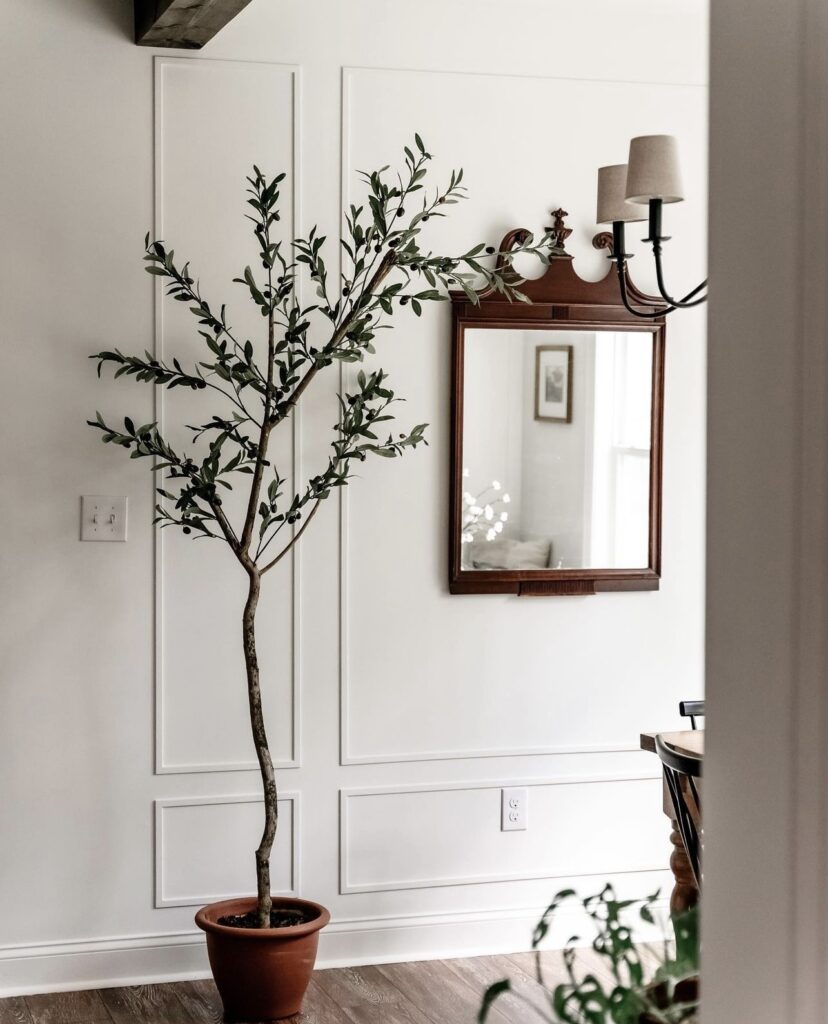
Van @percivalinbloom is proof that even single boxes totally enhance a space. I LOVE this room!
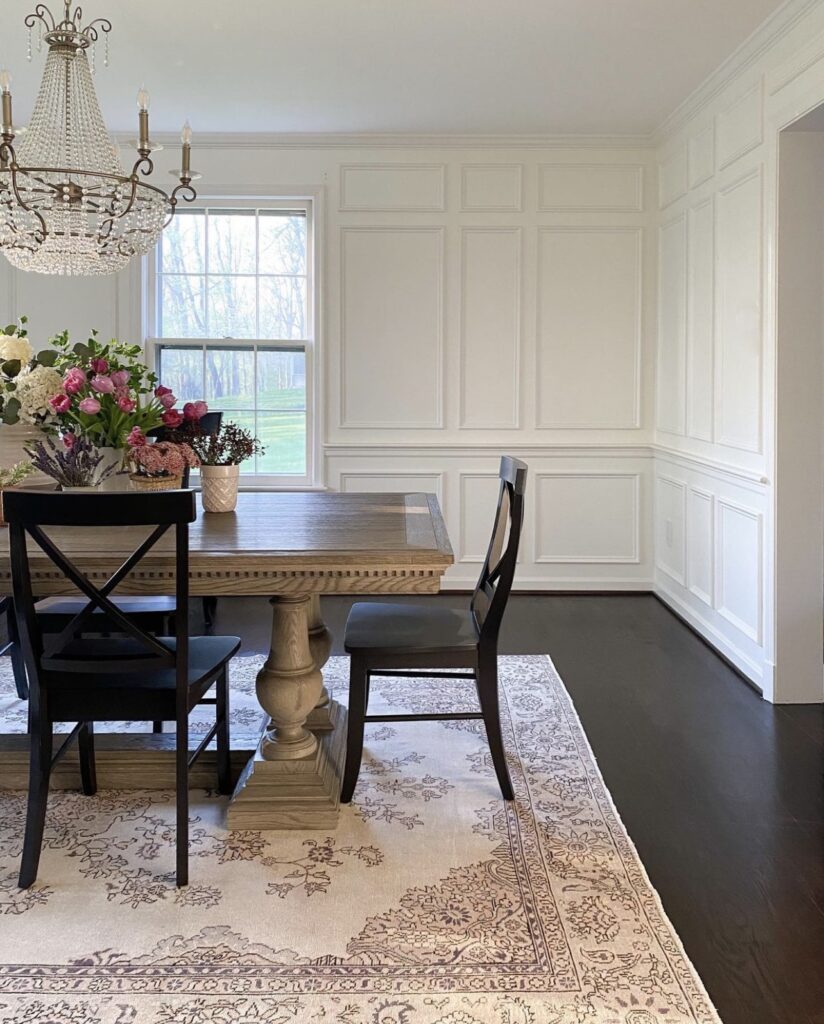
Karla at The Fisher House used two rows of box moulding in her cute as ever breakfast nook! She used a modern, boxy trim!
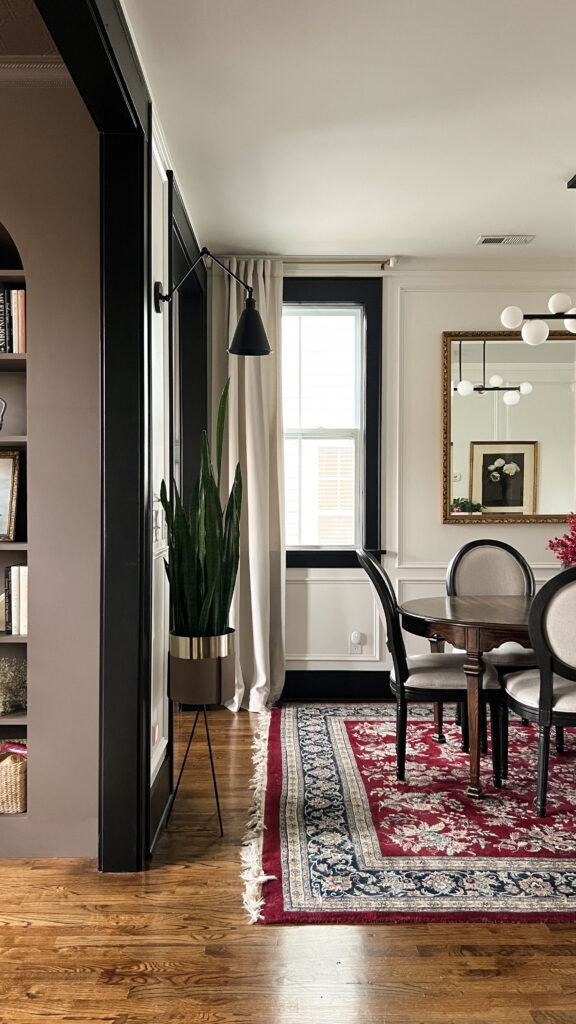
Ligia @our.colonial.casa has a gorgeous dining room featuring three rows of moulding and chair rail. So elegant and classic!
Map Out a Design
Normally I get all fancy and draw an elevation to scale to map out my design.
This time, I took a more casual approach and simply sketched the outlines of the walls, windows, and doors and jotted down the measurements! Since I was doing the entire first floor, there were just way too many areas to draw everything to scale.
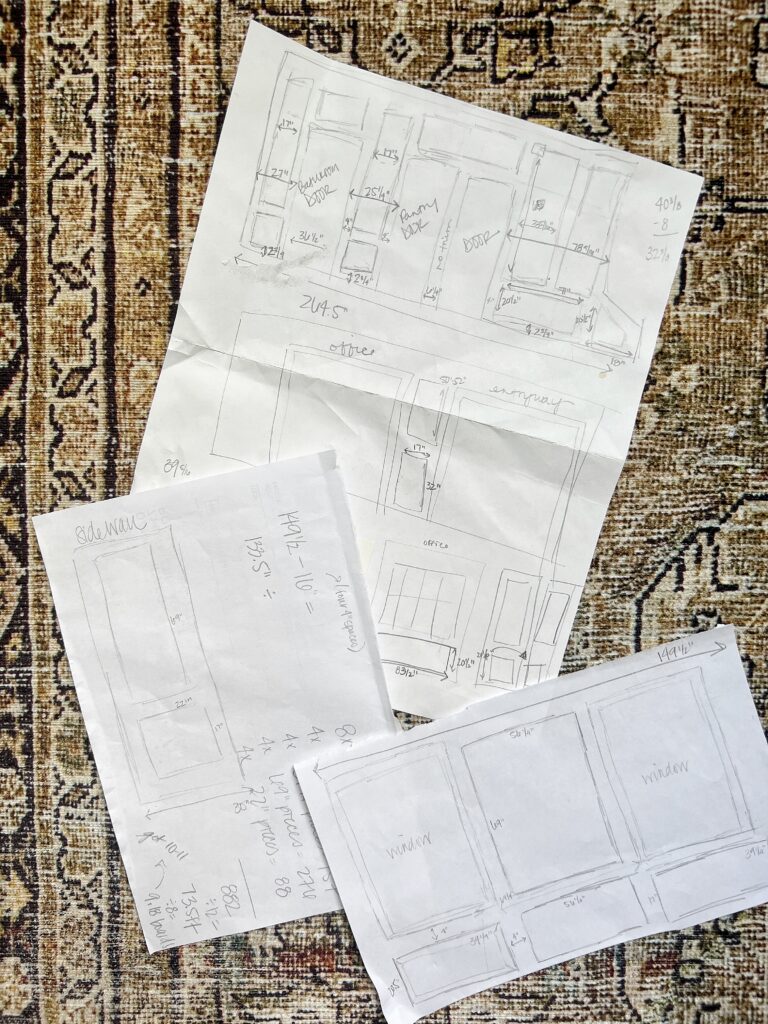
There were two big walls I was working with; one underneath my stairs and the other in the dining area.
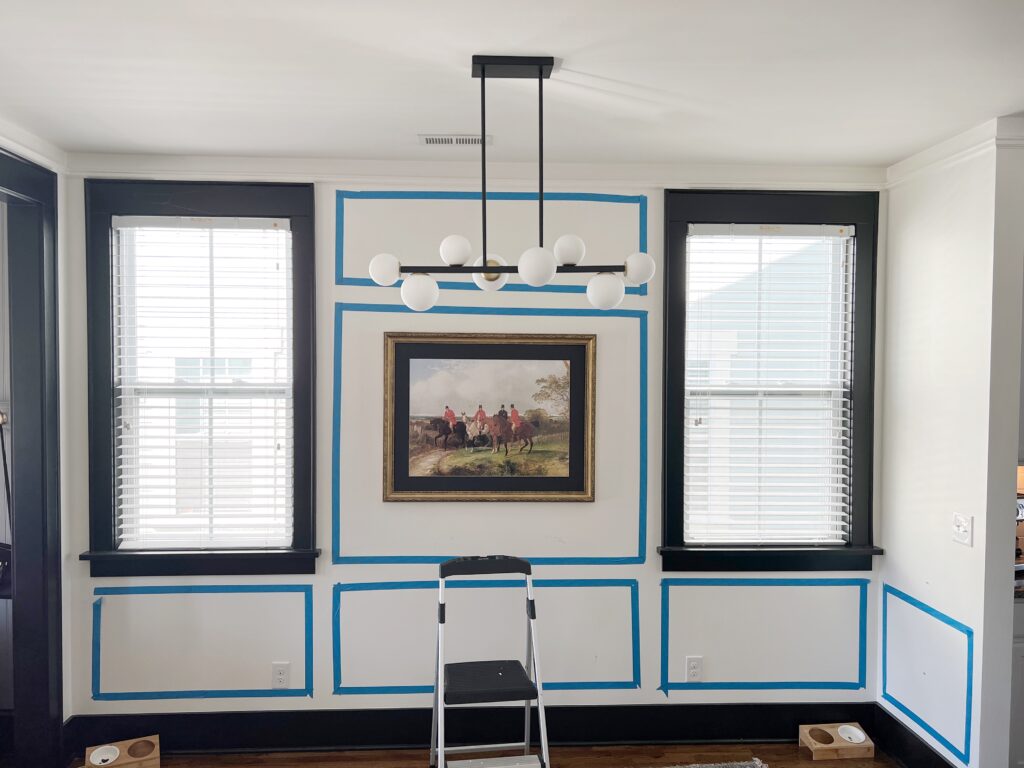
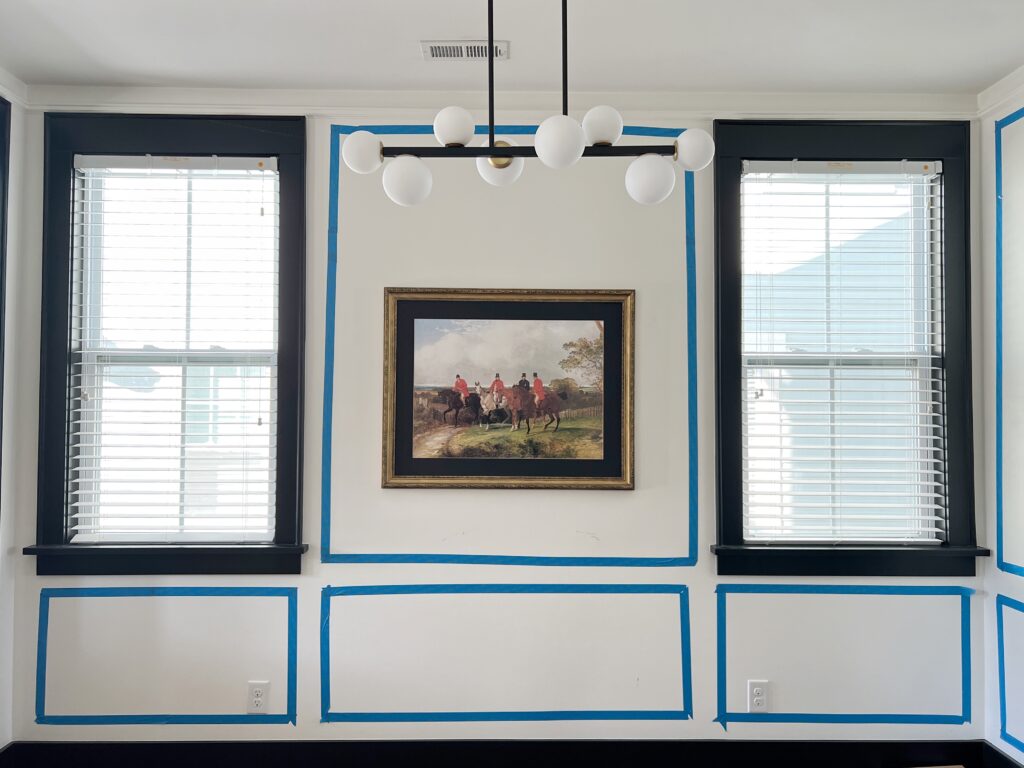
The bigger the wall, the more design options there are. For these walls, I used painter’s tape to help me visualize my options. I was going between these two:
Things to Consider:
Budget
Especially with how expensive wood is right now, it’s important to consider your budget as you’re planning out your design.
The more boxes you have, the more expensive it becomes.
Space
Typically the more wall space you have, the bigger the boxes should be. An odd number of boxes (usually 3) tends to look best.
With lower ceilings, it’s likely better to just do single boxes to give vertical emphasis on the space. If you have higher ceilings, two or three rows of boxes would help divide the room in a pleasing way.
Trim
There are many trim options to choose from.
I prefer to use base cap molding for a more traditional, ornate look.
They also make a PVC version of this which means you can use miter shears to cut them and therefore you don’t need a miter saw for this project! Say what?!
If you’re going for a more simple or modern look, you can use this screen trim like my friend Karla did. This option is very budget-friendly and you can use the miter shears!
Step Two: Calculating measurements
Before you head to the store to buy your trim, you’ll need to know how much to get. Let’s focus on the wall in my dining area and how I calculated for that space.
Deciding on Spacing
First you’ll want to come up with a general idea of how much spacing you want between the boxes.
On average, there’s usually around 3″-6″ space in between boxes. My goal was to have 4″ spacing throughout, but a few things got in the way of keeping that consistent:
The dang outlets
Due to the placement of the outlets, I could only have 2.5″ of space between the trim and the baseboard.
I could have extended the outlet (we did do that for a couple- I’ll share how in step four) but doing that 5+ outlets just sounded like a lot of work. Plus, it looks just fine!
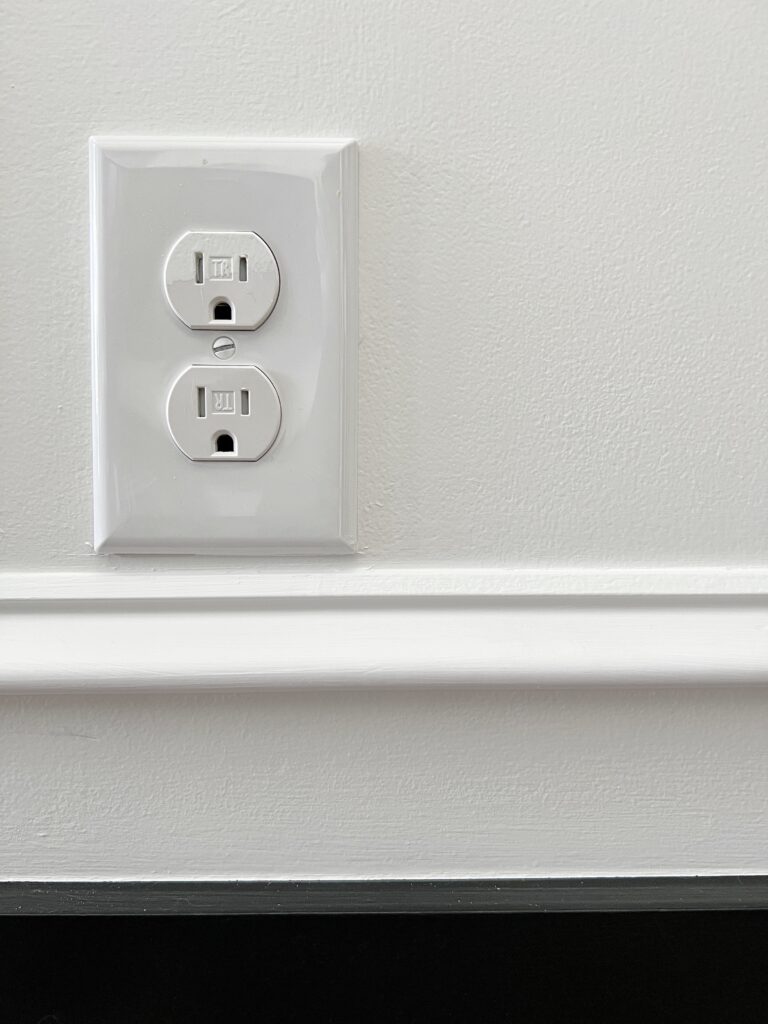
Since most of the outlets are placed at the same height, the space between the baseboard and trim stayed consistent throughout the whole first floor.
The dang light switches
These are just as much of a pain as the outlets.
I had to cut down my spacing on this small wall here due to the light switch. Again, I could have extended it, but I didn’t think it was worth it for this little wall.
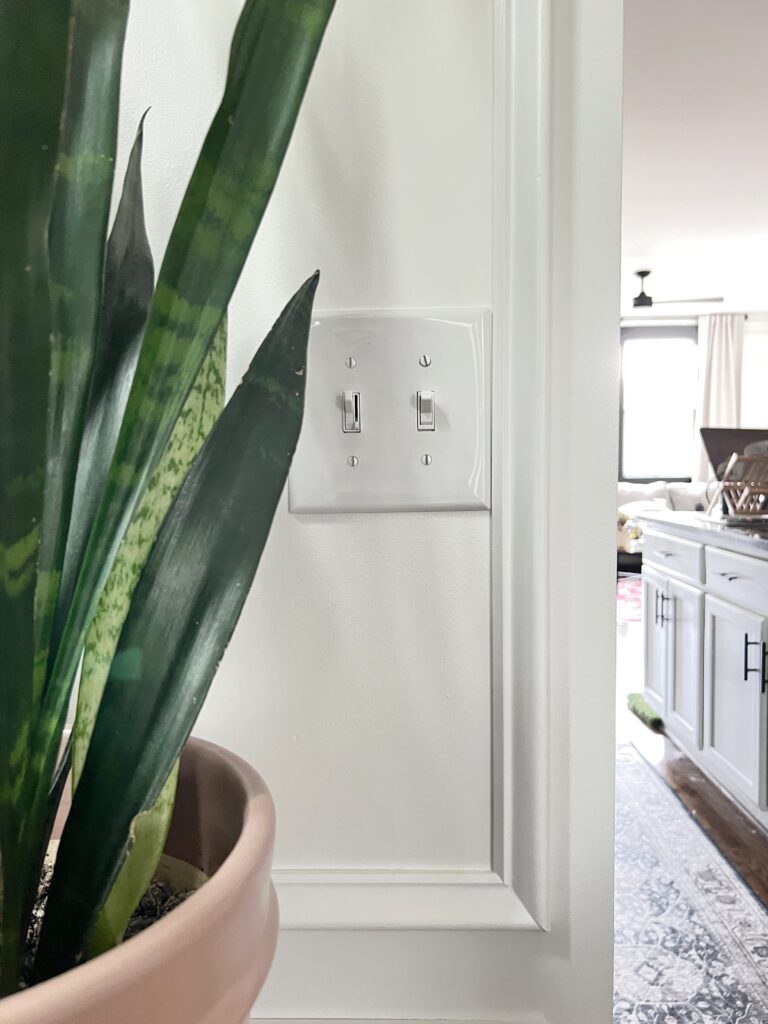
Ultimately you have to do what feels right to you! I knew it wouldn’t bother me to have smaller spacing in some areas, but if it will bother you, I’d come up with a plan B!
Doing the Math
Let’s take a look at my drawing. Since I’m doing wider boxes in the middle of the windows, I’m going to focus on that space first.
I measured the wall space from window frame to window frame and that was 64.25″. I’m having 4″ of space on each side so I subtracted 8″ and got 56.25″ which is the measurement for my horizontal boards.
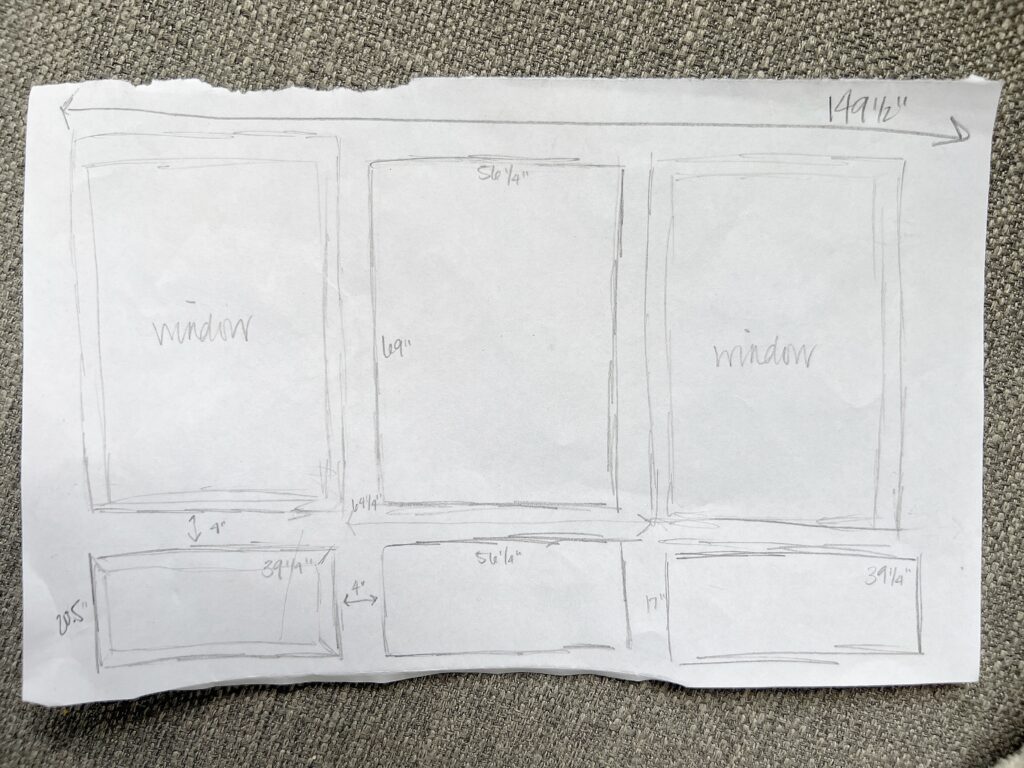
As for the vertical boards, this was another judgement call. Originally I thought I’d want the box to be the same height as the windows, but our entire first floor has this piece of trim up by the ceiling.
I didn’t want it to be too close to that, but I also felt that 4″ below it seemed odd too. I decided to do a 2.5″ space here.
Let’s say you had one large wall and wanted three even width boxes, you would take the width of the wall, subtract the total amount of spacing, and then divide by the number of boxes (three).
This would give you your horizontal board measurements. Vertical measurements will be the same concept except you’ll measure the amount of vertical wall space you’re working with.
If you have crown molding, you’ll measure from the bottom of that to the top of your baseboards.
Calculating the Materials
Once you’ve decided on your box placement and measurements, now you need to figure out how many boards to buy. Let’s add up the trim pieces for my dining room wall as an example:
- two 69″ pieces= 138″
- four 56.25″ pieces= 225″
- four 39.25″ pieces= 157″
- six 20.5″ pieces=123″
138″ + 225″ + 157″ + 123 = 643″
Divide 643″/12″ to get the # of feet: 53.58 ft
If the boards are 8ft, 53.58/8= 6.69 boards… I’d buy 8 boards for this wall (extra to be safe!)
Step Three: Cutting angles for trim pieces
Lucky for me, I had a lot of practice cutting angles when I did this recessed wainscoting accent wall in our living room.
Box molding is a simpler version of that project so this was somewhat of a breeze for me! Practice, patience, and pushing yourself out of your comfort zone really does pay off!
If you don’t have a ton of experience. I recommend making a little drawing or having a template nearby (see below) for reference. Also keep in mind that with base cap molding, the thicker, curvier edge is going to be on the outside of the box.
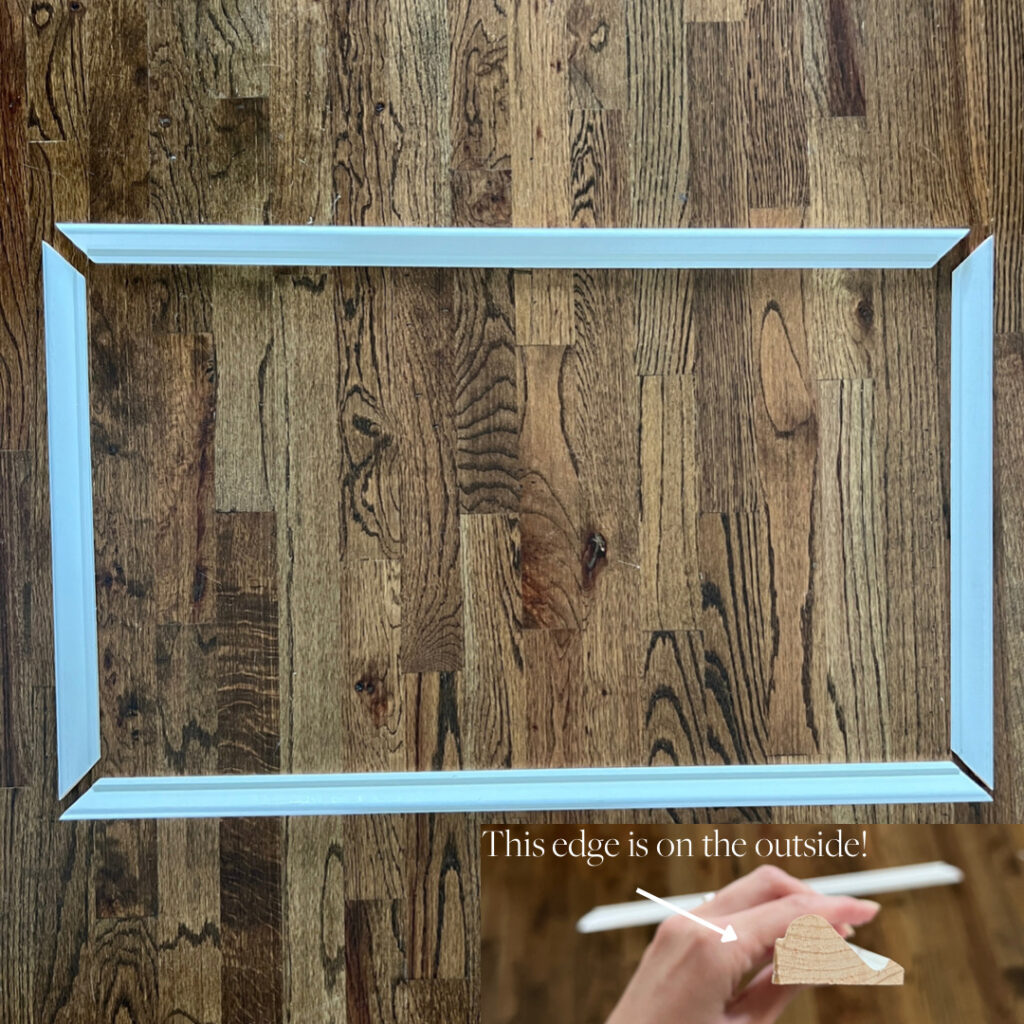
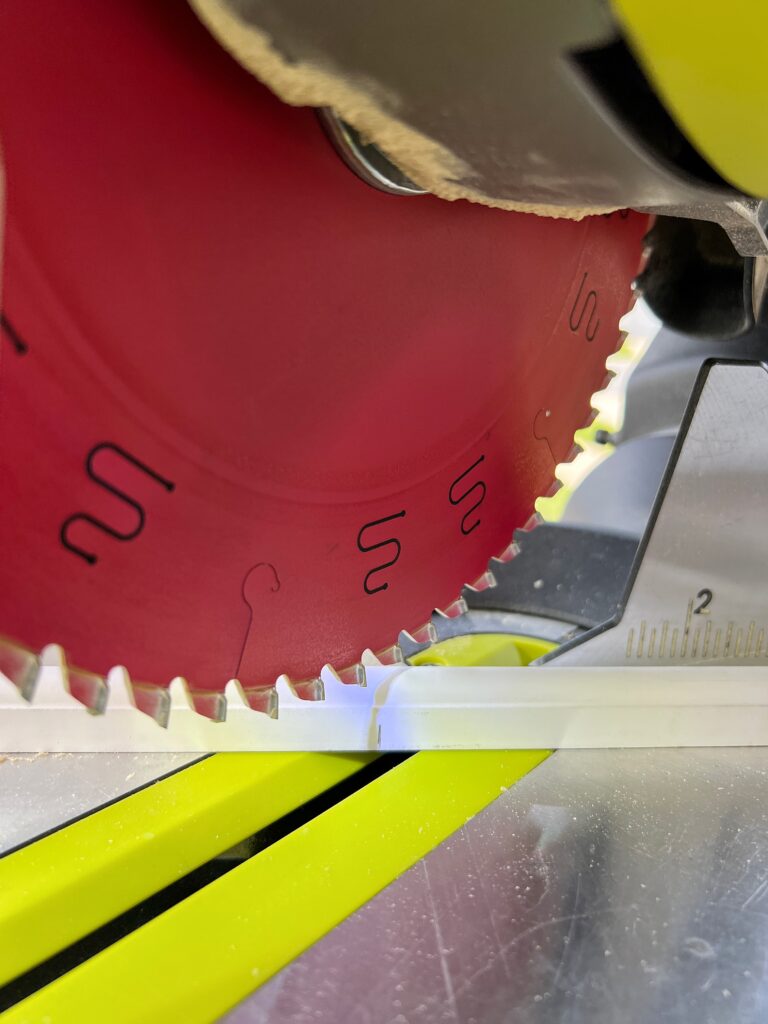
Here’s a little video of me cutting a piece of trim. First I cut off the end of a board with the miter saw set to 45 degrees on the right side. Then I marked my measurement.
I find it’s easiest to place the trim in the miter saw with that thicker edge closest to me. It’s the perfect place to mark a line! Lastly I switch my miter saw to 45 degrees the left side and make my final cut.
My miter saw has an LED light that casts a shadow where the blade will cut through. This is incredibly helpful in getting accurate cuts.
Since the blade is about 1/8″, I make sure to line the shadow up just to the left of my mark so I don’t cut into my measurement.
Cutting Weird Angles
Luckily there was only one box that required cuts other than 45 degrees. I’m also lucky that Dan was willing to take charge of this as I installed the rest of the trim. With that being said, I didn’t do this myself so I’m going to do my best to explain based on what he told me.
Full disclaimer: It took Dan a couple hours to do this one box. We’re both still new to DIY and this was a first for us. It required a lot of trial and error… and patience 🙂
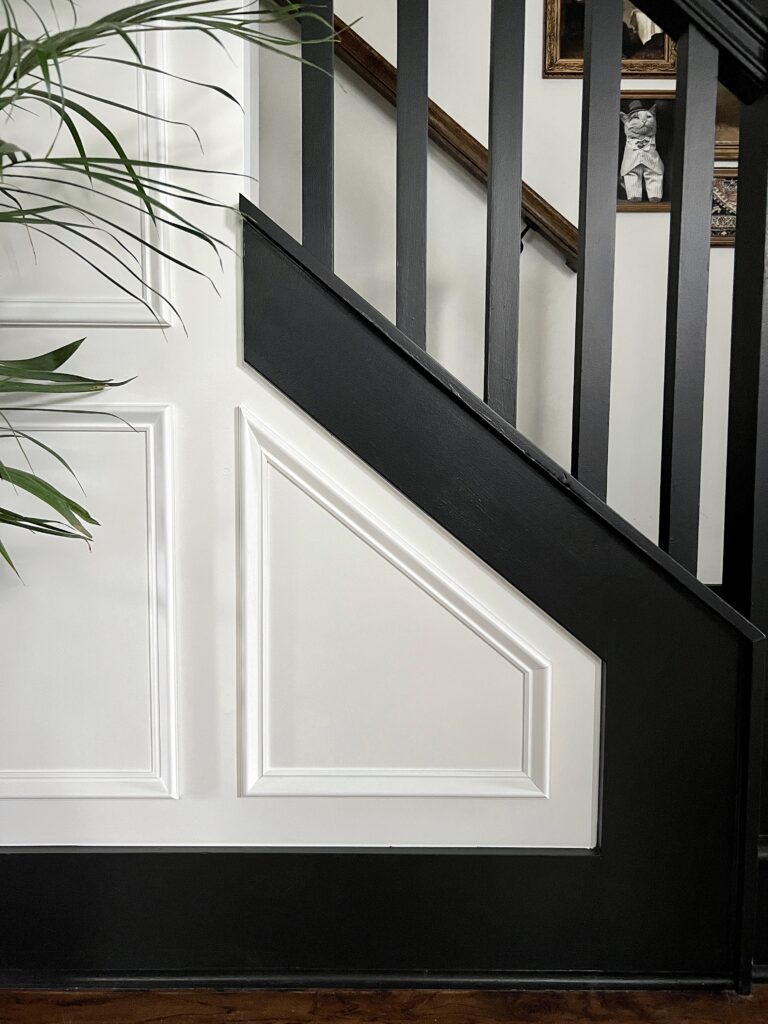
If you have tricky angles like this, I recommend getting an angle finder. We used one and it told us that the top left angle was 65 degrees. Okay, now what? Our miter saw only goes up to 47 degrees…
I’m sure there’s other ways to do this, but Dan did some research and found a cool method.
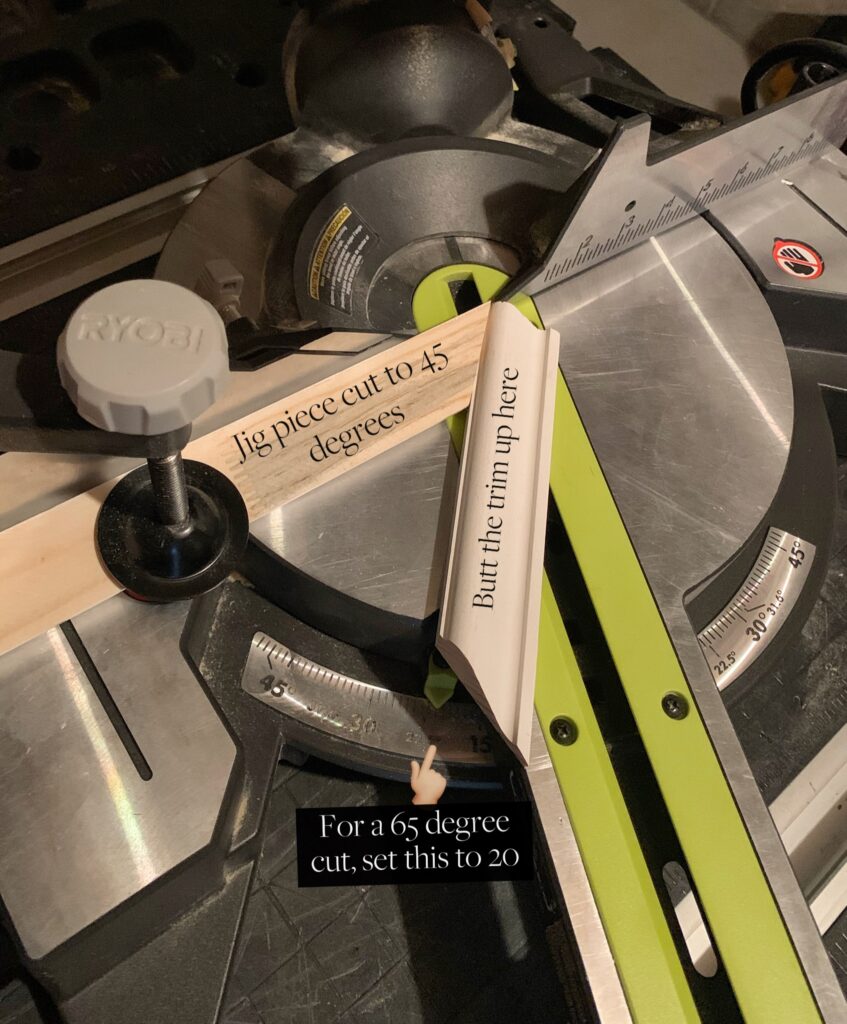
What you do is cut a piece of trim to 45 degrees and use that as a jig. Then you’ll set the saw to the additional degrees needed.
For example, to cut a 65 degree angle, you’d subtract the 45 and set the saw to 20. Then all you have to do is butt your trim piece up to the jig and make your cut! Hopefully that makes sense. I haven’t tried it myself yet, but I’m excited to!
If you still want more tips, check out my recessed wainscoting accent wall post because I shared a lot about cutting angles in there!
Installing the trim
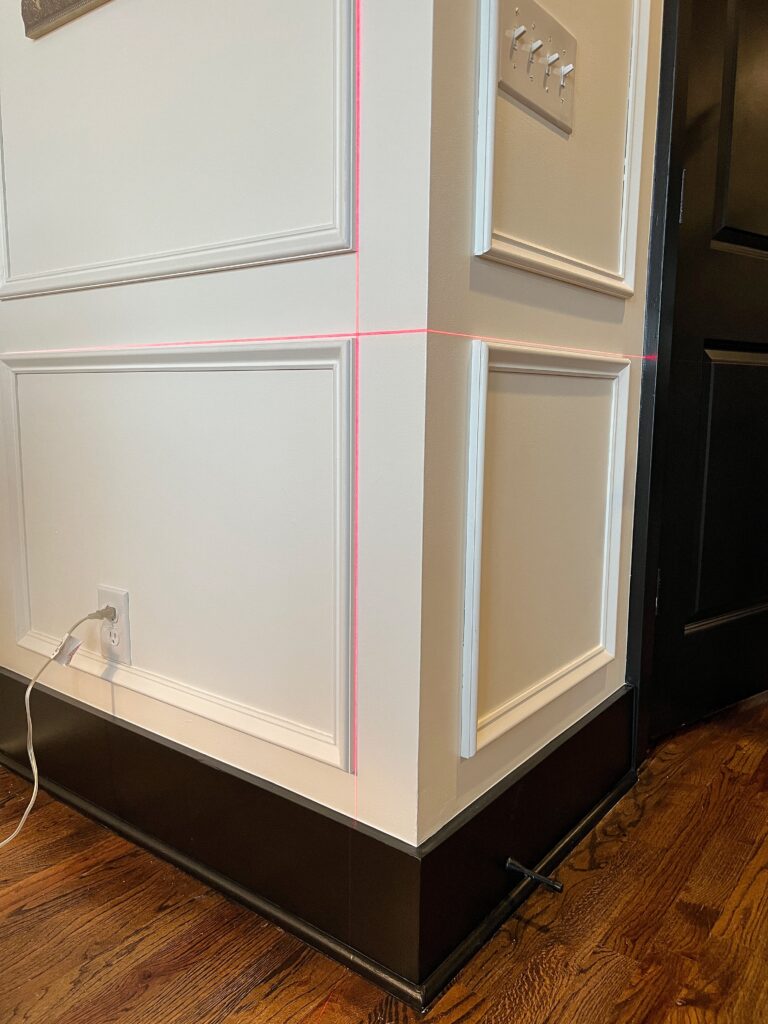
Laser Level to the Rescue
I mentioned in step three that this project “was a breeze” for me. I owe a lot of that to this laser level.
This was my first time using one and I honestly don’t know how I’ve lived without one all this time. It was especially nice for corners since the laser projects onto both walls.
Attaching the Trim
Usually I try to avoid using wood glue or liquid nails when I do wall treatments. (It just feels more permanent to me.) I also don’t think it’s important to nail them into the studs.
I used 2″ brad nails and nailed at a slight angle. After installing I always pull the trim to make sure it feels secure. If it doesn’t, I add more nails until it does! They’re not going anywhere! Tip: nail in on the wide, smooth part of the trim. It makes it easier to fill the holes!

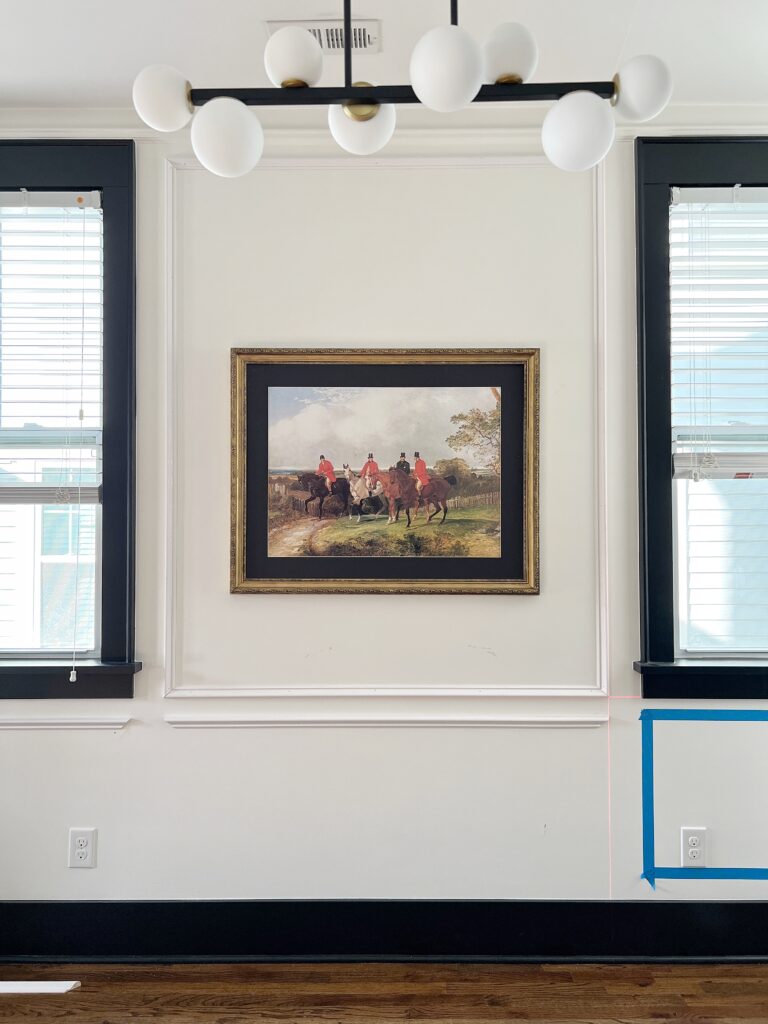
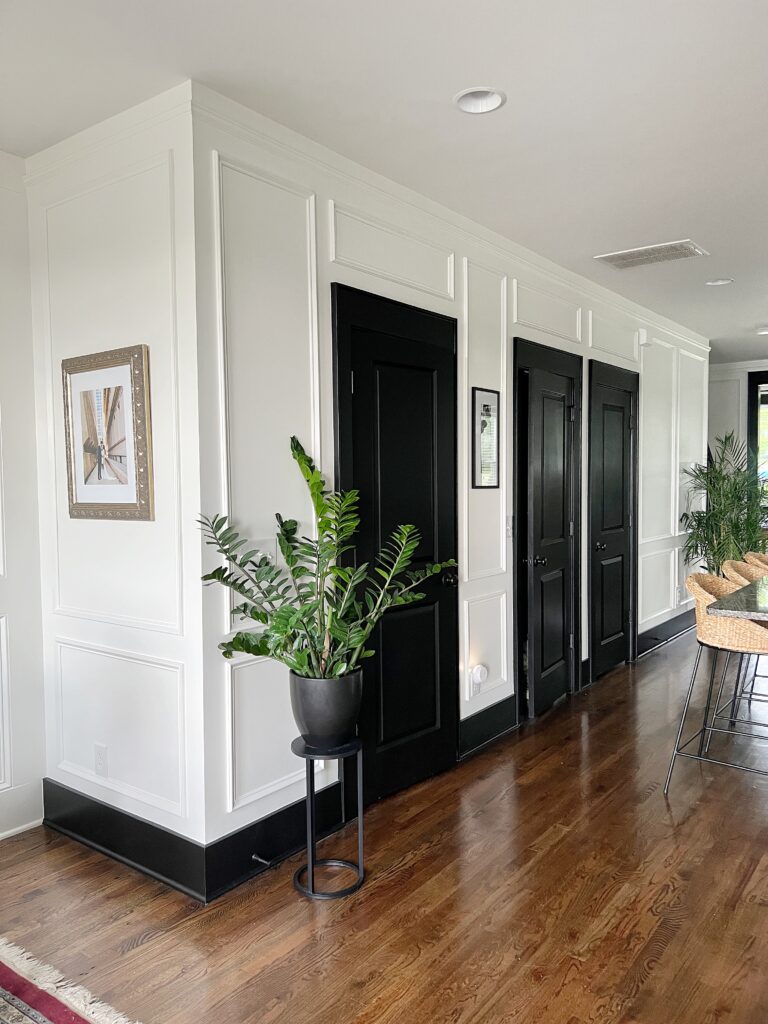
How to handle outlets
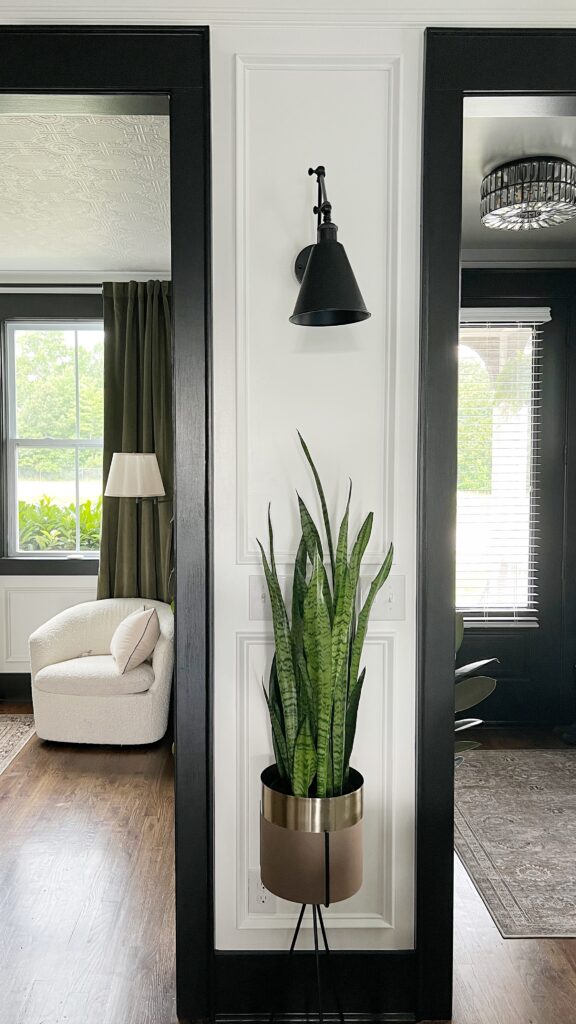
As I mentioned in step two, I did a lot to avoid outlets and light fixtures. For the wall in the photo below, I even built the molding right around them.
Hey… whatever works, right?! But there were a couple spots where I just couldn’t avoid them.
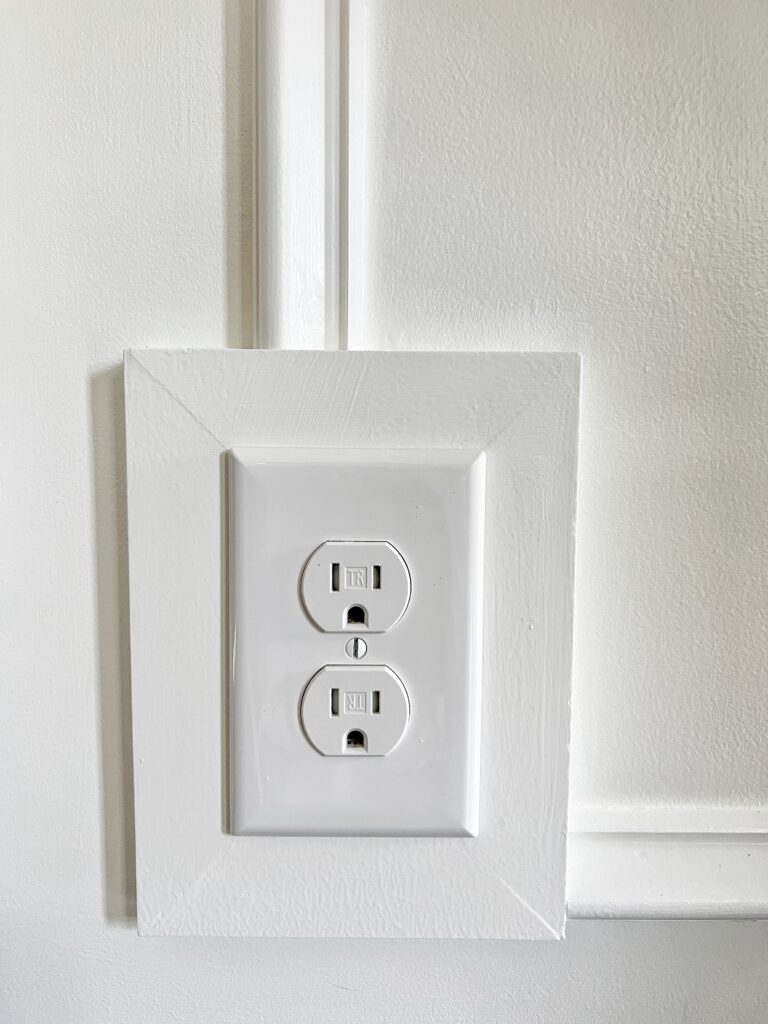
Again Dan came to the rescue for these as well. I sent him this video my friend Van made on extending the outlet for box molding and he made it happen!
All you need is one of these outlet extender boxes and and couple pieces of scrap wood. Just make sure you choose scrap wood that is thicker than the trim you’re using.
Step Five: Prepping for paint
Spackle
For filling the nail holes and seams, I used this spackle.
Here’s a tip: Instead of sanding down the spackle when its dry, I used a damp rag and just wiped all the spackle down until it was smooth! This was so much easier and less messy.
Caulking
I would be lying if I said I caulked all 144 pieces of trim already… but I’m totally I’m planning to get to it this weekend!
I’m a professional caulker by now and in comparison to the recessed wainscoting in the living room, this box molding is nothing. Let me show you the difference between the trim that is caulked vs. the trim that isn’t:
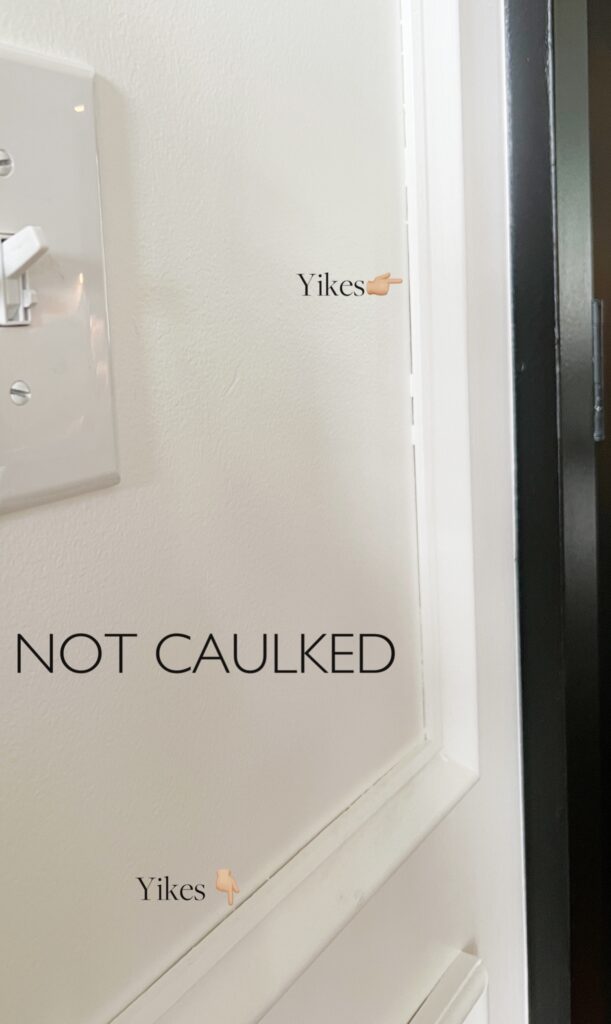
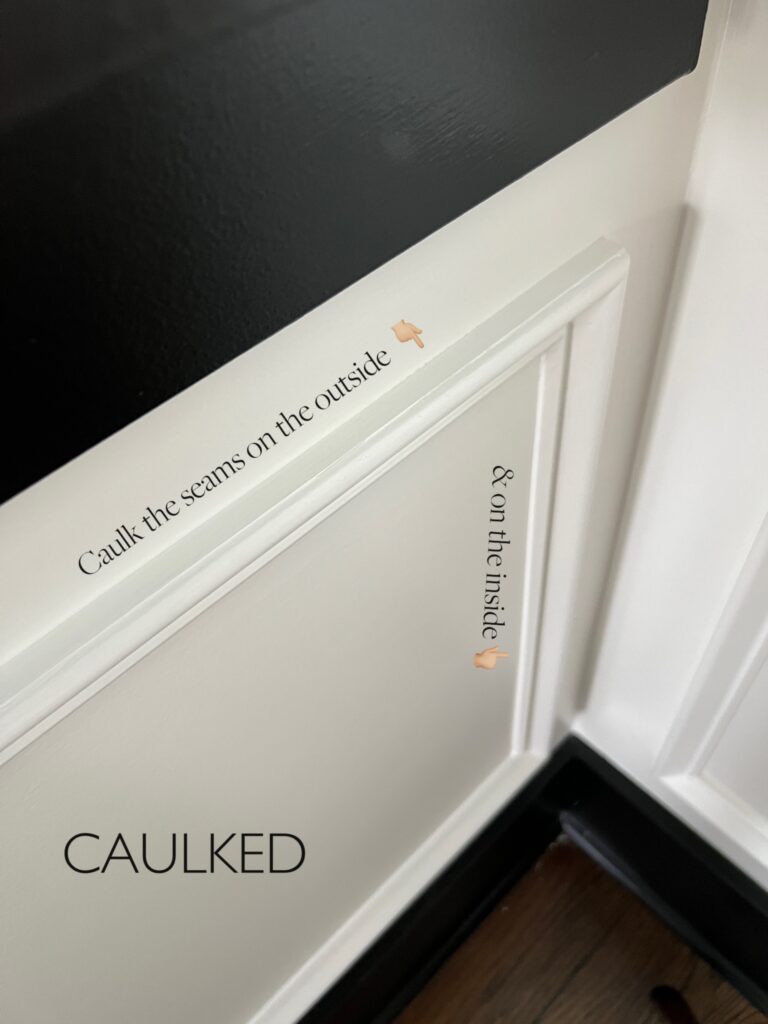
These are the two areas you’ll caulk!
Light Sand
Lastly, if you’re painting the walls too, give them a light sand with a 220 grit sanding sponge or paper. Just enough so that the wall feels smooth to the touch. Any bumps or uneven surfaces are going to be noticeable after the paint is up!
Step Six: Painting
This part goes the fastest! I use a small brush to paint the trim first and a roller for the rest.
Some people choose to paint the trim pieces before they put them up. I’ve personally never tried that! I think I’m always just so anxious to get them up… my walls needed some touching up anyway.
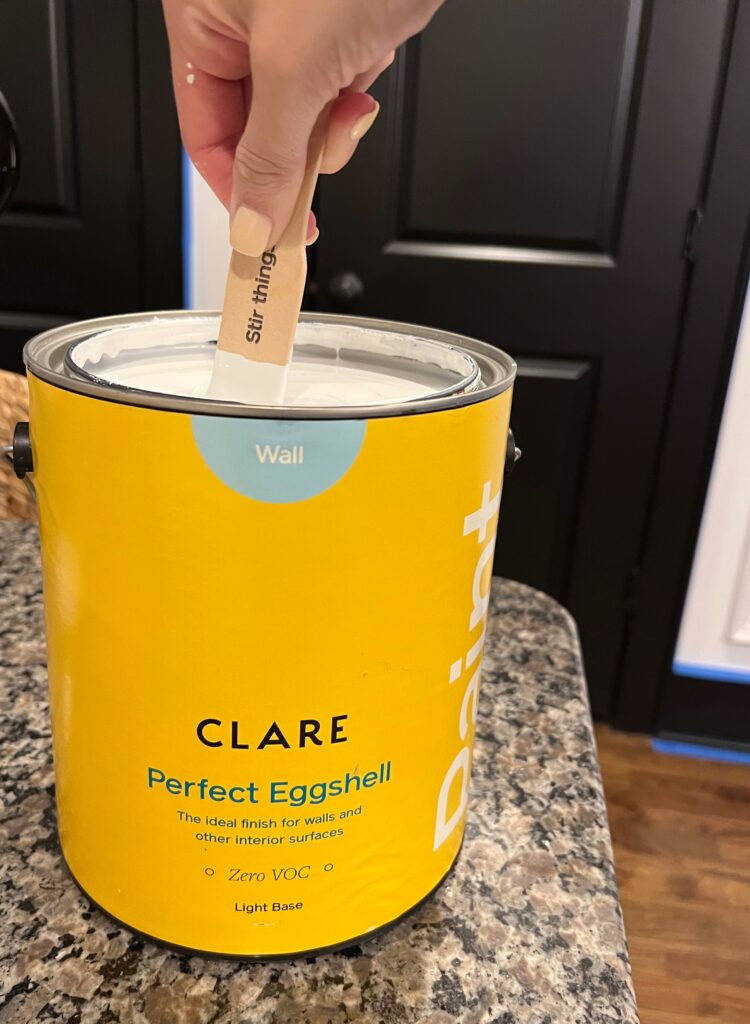
I used is Whipped by Clare Paint and I love it! It’s a soft warm white.
Would you put picture frame molding in your home?
Hopefully I’ve inspired you to tackle this project- I promise it’s very doable and the results are always worth it. Our ceilings seem taller and the whole space is just so elevated now. I would do it over and over and over again!
Let me know if you have any additional questions! As always, thank you for being here!
Elisha <3

Hi it would be helpful to have some info on the trim work that is at the very top of the page the white wall the one with the wider board I love that style and not sure if it has a name your help would be great many thanks
Hi Robert! Yes, I actually have an entirely separate blog post on that one! Here’s the link: https://ouraestheticabode.com/recessed-wainscoting-accent-wall/
Hi Elisha,
I noticed you didn’t use a backer board (mdf); are your walls smooth coat? I don’t see any texture?
Thanks, it’s looks beautiful!
Hi Kimmarie! Thank you so much! You’re right… I didn’t use any. Our home happened to have smooth walls when we moved in! Although, I have many friends who did this with their textured wall and it still looked so beautiful! You just have to use a low sheen paint to not emphasize the texture. Hope this helps! <3
All your photos on your blog look fantastic!
I see you have some modern light fixtures which you are coordinating with picture frame molding which I would consider more traditional which I think looks great and gives me hope that maybe my plan is okay. I have a living room I’m trying to design with trim–one wall is fireplace, and one right now is just plain but has along it a more modern plain slab-style credenza in cream. The fireplace wall currently has old heavy painted paneling. I was thinking of removing and replacing with sheets of poplar, a white mantel and then picture frame molding. Would you be willing to provide an opinion? Do you ever apply trim to wood rather than drywall?
Hi Mary! Thank you so much! I LOVE a good mix of modern and traditional. I think that sounds like a great plan! I haven’t personally applied molding to wood, but you absolutely can! 🙂
Hi! Currently attempting to do box molding at my place. I noticed the link you have for the Brad nailer is actually a crown stapler. Is this the correct tool to use? Or would a Brad nailer be more appropriate?
Thanks!
Hi Puja! Oh my gosh, I’m so sorry about that! That was definitely an accident 🙁 A brad nailer is the one for the job!! Thank you for letting me know!