

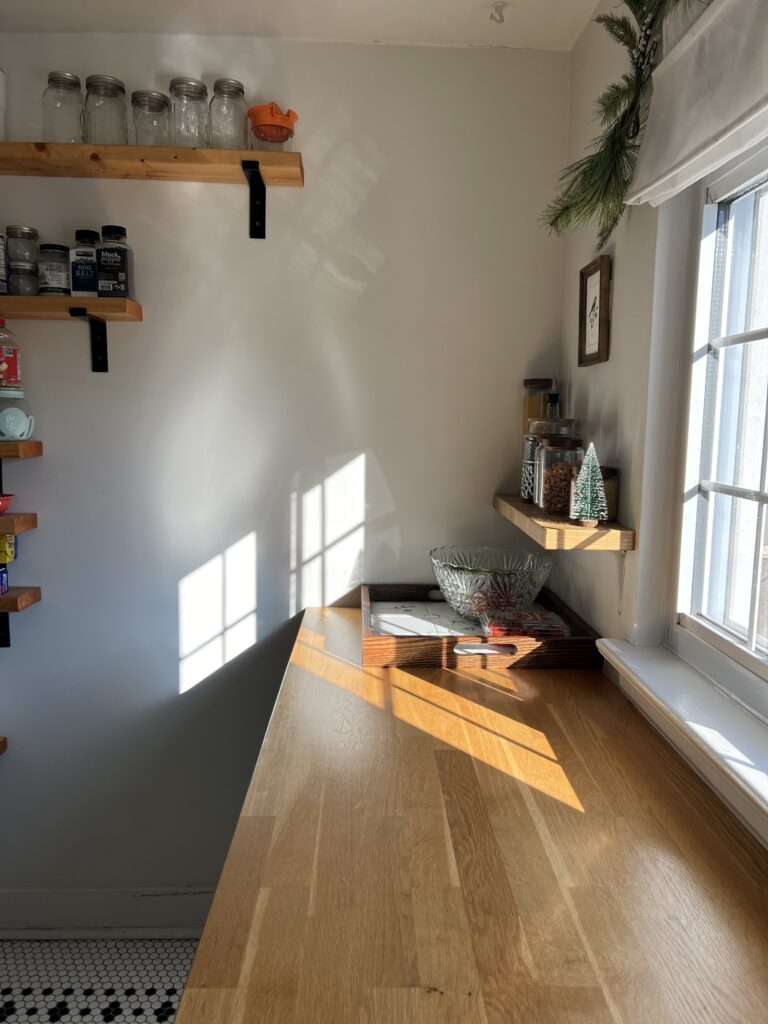
When we decided to makeover our walk in pantry/breakfast nook, I knew I wanted to give our butcher block countertop a new look. Instead of keeping its natural blonde oak, I was hoping for something richer and darker to complement the rest of the design. I wasn’t entirely sure how staining butcher block countertops would work, but the results turned out even better than I imagined! In this step-by-step blog post, I’ll walk you through exactly how to stain butcher block countertops, so you can achieve a gorgeous custom finish for your own space!
Disclaimer: This post contains affiliate links. This means, if you purchase something from a link I provided, I will receive a small commission. This is at no extra cost to you! Thank you so much for the support!
TOOLS
MATERIALS
Types of Butcher Block Countertops
Before we dive into how to stain butcher block countertops, it’s important to distinguish the different variations.
Solid Wood Butcher Block
Solid wood butcher block countertops are made entirely from hardwood! Maple, oak, walnut, and cherry are some of the most common types for butcher block. Find out what type of wood your butcher block is before staining because that will affect how it absorbs stain!
- Maple has a high density and is a closed-grain hardwood so it doesn’t absorb stain very evenly. Don’t skip the wood conditioner with hard maple!
- Oak is open grained and very absorbent so it’s easy to stain!
- Walnut is naturally dark and rich and also accepts stain nicely. Consider using a light stain to simply enhance it’s natural color.
- Cherry is known for it’s natural warm, reddish tone, so if you’re looking to tone that down, try a stain with cool undertones like gray or green. Cherry does have a tendency to blotch, so it’s a good idea to use a wood conditioner to help combat this!
Veneer Butcher Block
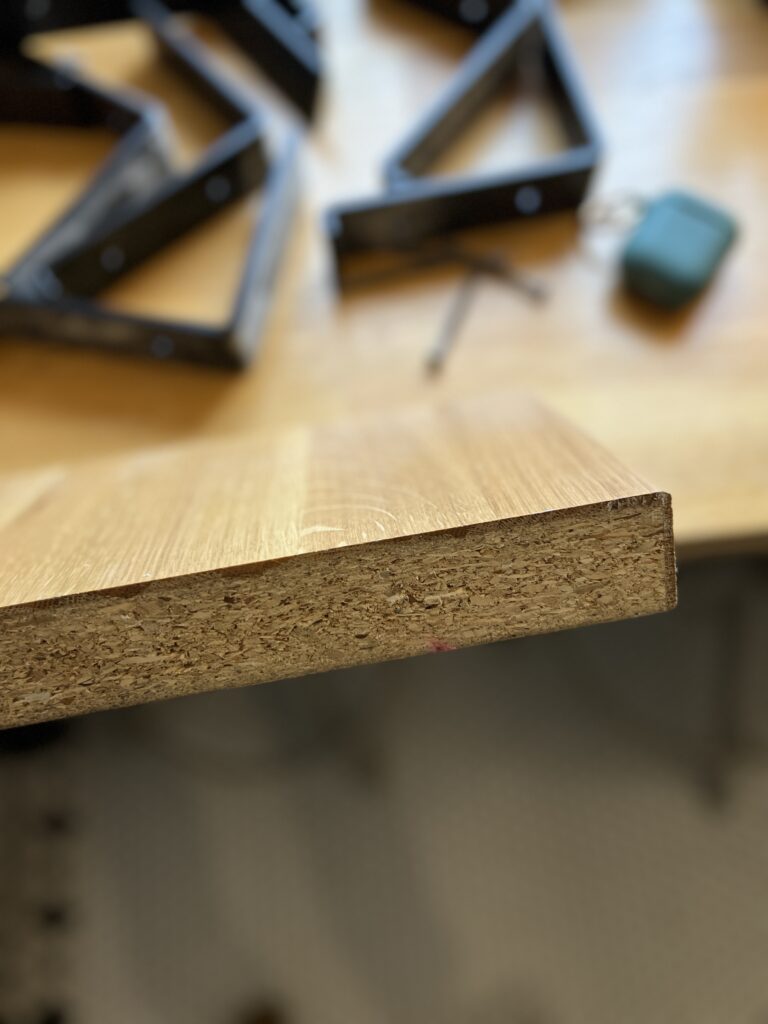
In this tutorial, I’m staining a veneer butcher block. More specifically, Ikea’s Karlby butcher block in oak. In you’re unfamiliar, a veneer butcher block is constructed with a thin layer of real wood bonded to a core material, such as MDF, plywood, or particleboard. This option is more budget friendly and also less likely to bend or crack since it’s not as sensitive to humidity!
Can you refinish veneer butcher block? Absolutely. The top layer is solid wood so it can be sanded and stained as needed.
Just as a heads up- not all the butcher block options from IKEA are veneer, so be sure to check! They also have laminate countertops that resemble butcher block.
Options for Staining Butcher Block Countertops
There’s more than one option for how to stain butcher block countertops so I want to be sure I cover those before sharing the method I used!
Butcher Block Stain
Some brands offer stains specifically for butcher block countertops! For example, this butcher block oil + stain product is a two-in-one stain and protection that’s also food safe. Sounds like a great option! The only con here is the limited color options.
Oil-Based Stain
Oil-based wood stains are a classic choice due to their rich pigmentation and excellent penetration into the wood grain. They’re easy to work with and tend to provide a nice, even finish. A couple cons would be that oil-based stains have a strong odor and take longer to dry.
Water-Based Stain
Water-based stains are a great alternative to oil-based stains since they’re low in VOCs (less odor and toxicity), dry quickly, and come in a wide variety of colors.
However, water-based stains can be more difficult to work with due to how fast they dry so it could be tricky to get an even finish on a large surface such as butcher block. I love water-based stain in the right scenario, but I personally wouldn’t use it to stain my butcher block counters.
Gel Stain
Gel stains have a thicker consistency and sit on top of the wood rather than penetrating into the wood grain, making this type of stain ideal for wood species that don’t absorb stain well. One thing I love about gel stain is you have more control over the finish than a penetrating stain, which is why I chose this option for staining my butcher block!
Options for Sealing Butcher Block Countertops
There’s so many different products out there, let’s talk through a few classic ways you can seal butcher block.
Mineral Oil
Mineral oil is a food-safe oil and very popular choice for sealing butcher block! Unfortunately you can’t use this option over top of stain, so this would be best used on raw wood to enhance the natural color and add a subtle sheen. Mineral oil also requires regular maintenance in order to stay water resistant.
Tung Oil
Pure tung oil is a natural, penetrating oil that creates a water-resistant, durable seal. It’s food-safe once cured and can be used over stain as long as the stain is fully cured! This is a great eco-friendly option for sealing your butcher block. You can also use dark tung oil which will result in a darker natural wood look.
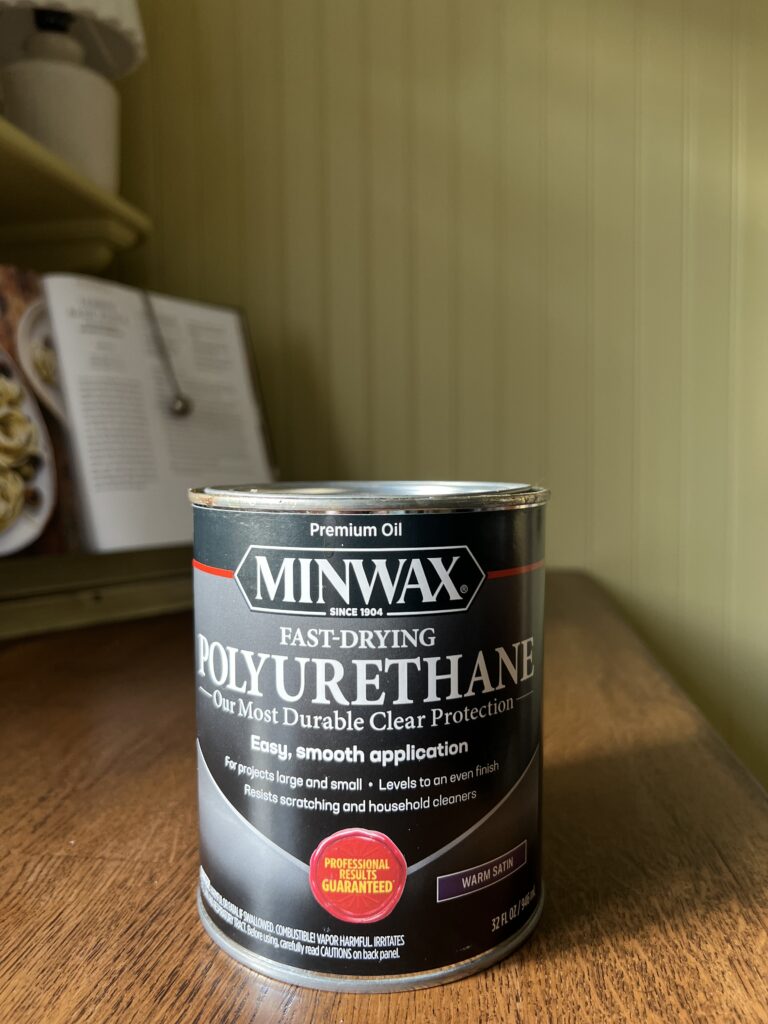
Polyurethane
Polyurethane is a durable, water-resistant finish that works great for sealing kitchen countertops. You have the option of both oil-based and water-based varieties, as well as a variety of sheens to choose from (matte, satin, semi-gloss, or high gloss finish). A benefit of using polyurethane is easy maintenance, but a con is that it’s not a food-safe sealer, so direct food preparation is not recommended.
How to Stain Butcher Block Countertops
As a reminder, i’m staining an IKEA veneer oak butcher block. The steps may have to be adjusted based on the type of butcher block you’re refinishing. See above to explore the different options for staining and sealing butcher block counters.
Step One: Prep the Butcher Block
We’ve been regularly using our butcher block counters, so the first thing I did was clean the entire surface using this product.
Since we were staining this butcher block as part of our breakfast nook makeover, we decided to remove the countertop entirely. This, of course, is not necessary but we had to since we were replacing our cabinets.
If your butcher block is staying in place during this process, be sure to prepare for the mess that comes with sanding indoors. Here’s a trick I use with my shop vac to help maintain the dust when I’m sanding inside. Don’t forget to also tape off the surrounding walls to avoid getting stain on them!
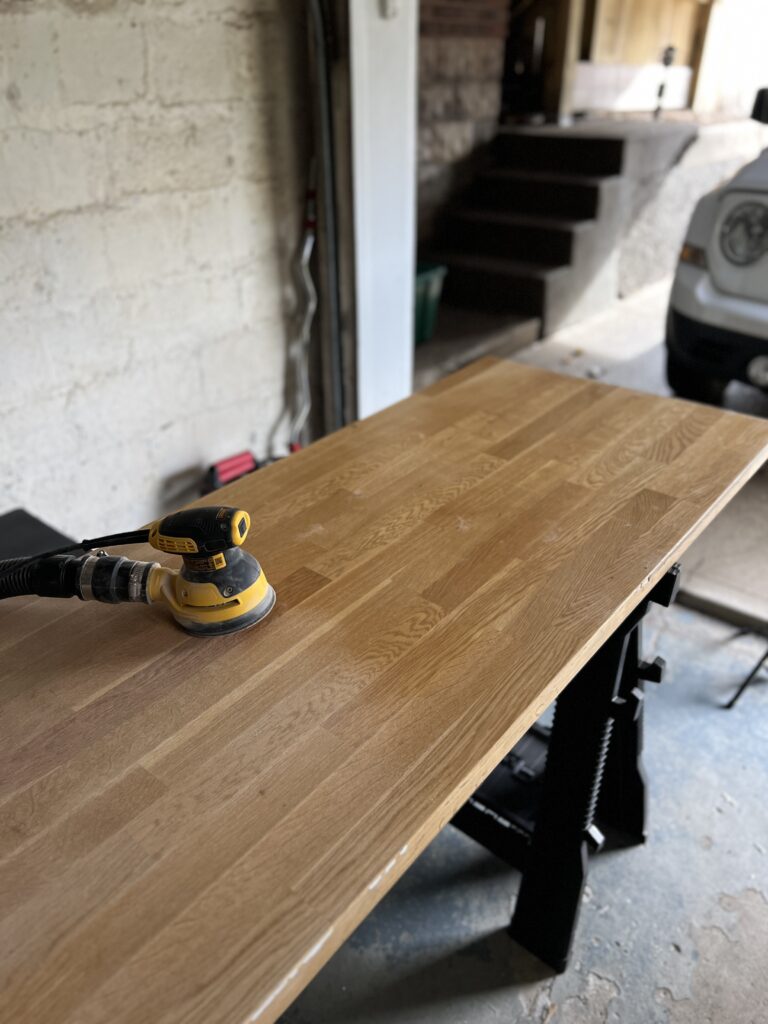
Step Two: Sand the Butcher Block
The IKEA Karlby butcher block has been pre-treated with a hard wax oil, so the goal was to sand through that to the bare wood. This is the grit sequence I used to sand our butcher block:
- 80-grit sandpaper
- 120-grit sandpaper
- 180-grit sandpaper
- 220-grit sandpaper
When sanding your butcher block, sand in the direction of the grain and let the orbital sander do the work! Before moving on to step three, use a tack cloth to remove the dust.
Step Three: Pre-Stain Wood Conditioner
Pre-stain wood conditioner is used to help ensure a smooth finish. It’s especially great for woods that don’t absorb stain evenly, like pine, maple, and birch. It’s not necessary for oak, but it never hurts so I almost always use it.
There’s both water and oil based wood conditioners, so make sure to use the right one! I’m using an oil-based gel stain, so this is the wood conditioner i’m using.
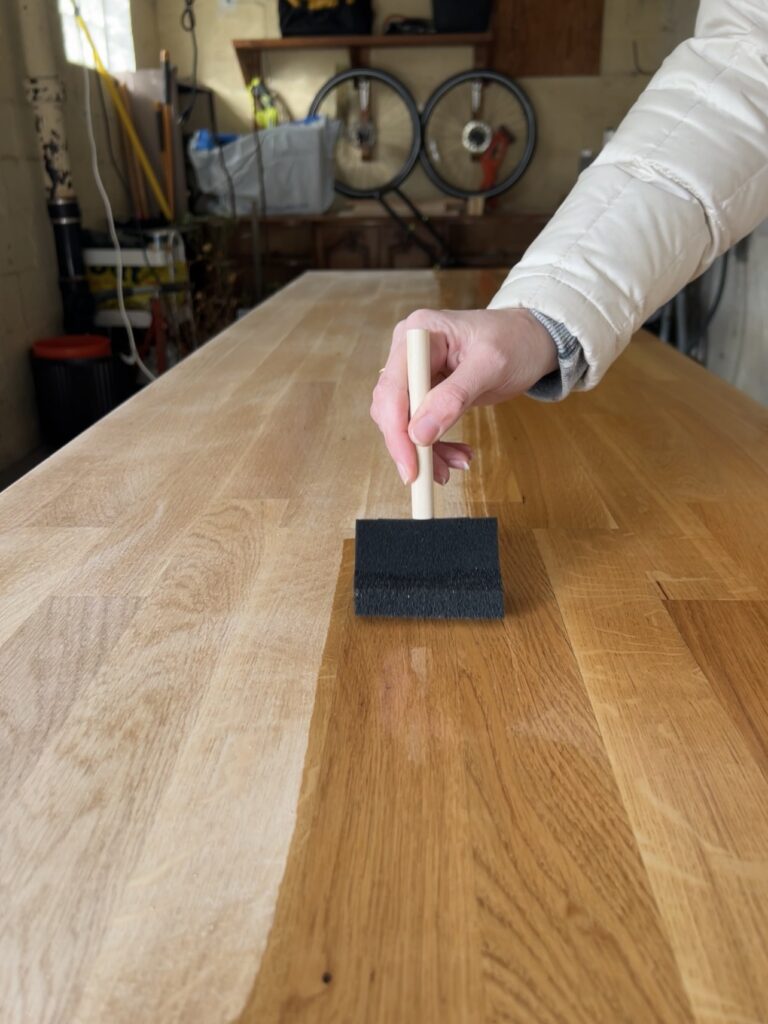
Follow the instructions on your wood conditioner! I applied mine with a foam brush, let it sit for about 10 minutes, and wiped off any excess with a clean rag.
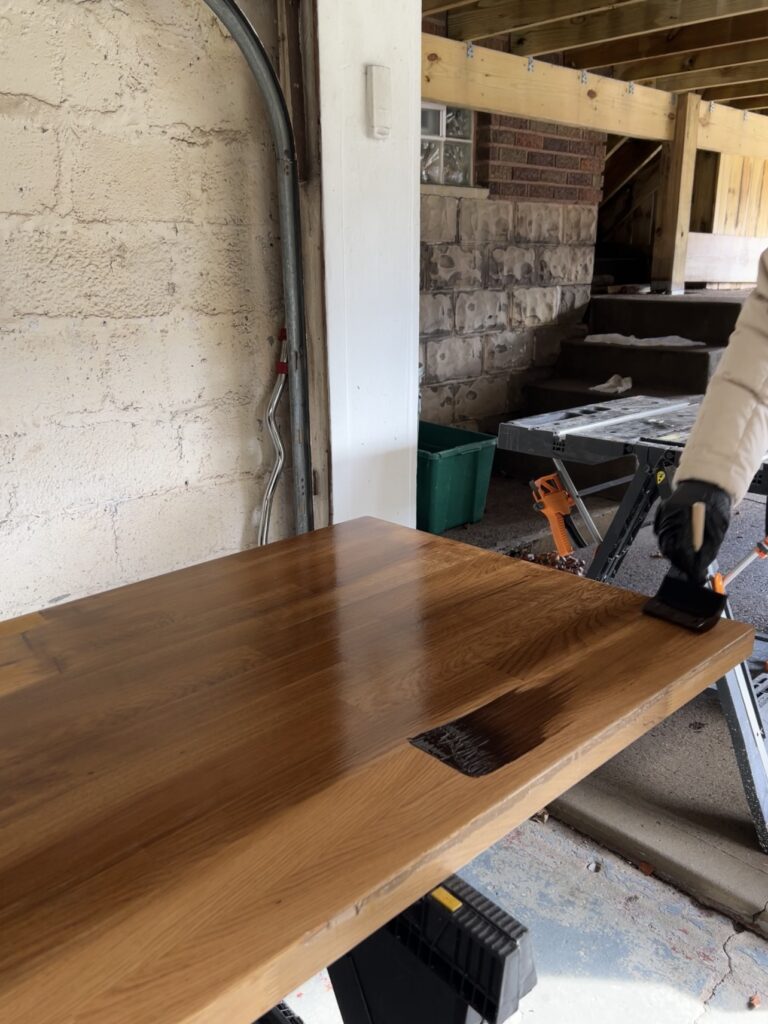
Step Four: Stain the Butcher Block
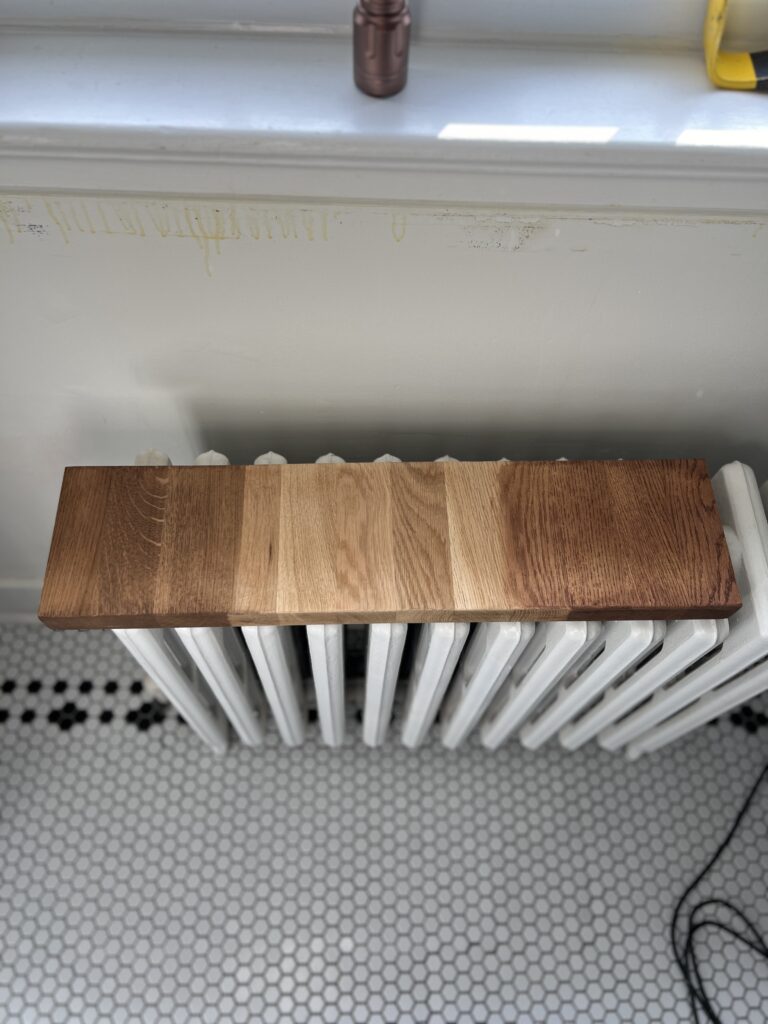
If you have a scrap piece of butcher block, I recommend testing some stain samples! On the left I tested chestnut gel stain and on the right I tested English chestnut oil-penetrating stain.
As a reminder, I chose to use gel stain to refinish my butcher block counter. It sits on top of the wood and you have a bit more control over the finish.
Have you ever tried layering stains? It’s a great way to achieve a custom finish! Especially if you’re like me and have a large collection of Minwax stains! Here’s a few other DIY projects where I layered stains; DIY Pantry Door Spice Rack, DIY Radiator Shelf, and DIY Wood Tile Tray.
For this project, I did the first layer of stain in chestnut and the second layer in walnut!
After some nightmare situations in the past, i’ve found this is the best way to apply gel stain:
Apply the stain in a thick layer using a a good quality paint brush. (I actually used a foam brush on the first coat of stain because I realized I didn’t have a brush on hand- this works okay too!)
Make sure you go with the grain and work pretty fast. Gel stain can get tacky pretty quick which leads to build up and ultimately an uneven finish. Let the stain sit for 5ish minutes and wipe off the excess with lint-free rags.
Our butcher block is about 8ft long so I quickly covered the whole surface in stain and by the time I was done I was ready to start wiping off the excess where I started. If you’re working with a larger surface than this, I would do small sections at a time because again, you don’t want the gel stain to start drying by time you get around to wiping the excess.
I waited 24 hours before the final coat to be safe, but 8 hours would likely be fine depending on the humidity/temperature in your workspace.
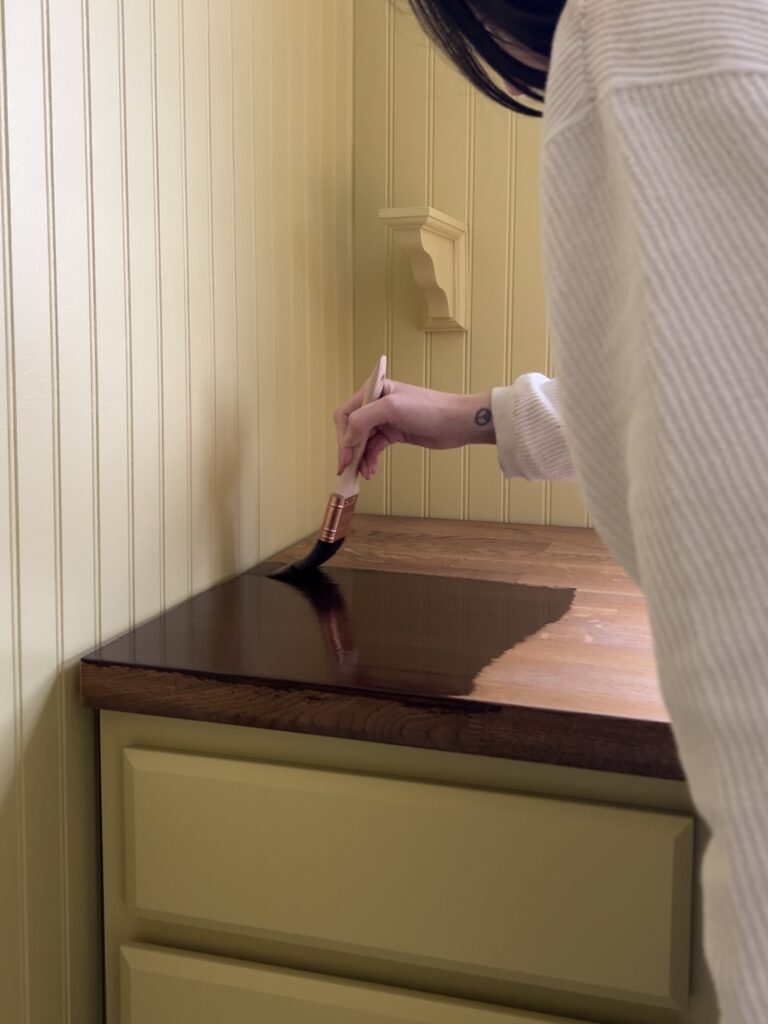
Step Five: Seal the Butcher Block
Before applying the polyurethane, I waited another 24 hours to ensure the stain was fully cured!
This is my favorite oil-based polyurethane. It has a hint a warmness to it and I also think satin is such a perfect wood finish. If you’re looking for an alternative to oil finishes, try this water-based poly! (If you do, I recommend doing at least four thin layers)
To apply the polyurethane, I used the same brush I used to apply the stain. I always apply in a thin coat with long strokes, always working pretty fast to maintain a wet edge.
The most important thing to remember when applying polyurethane is to sand in between coats!! I’m telling you, this makes a HUGE difference if you’re looking for a smooth finish. It doesn’t take much time at all, either! I just used a 220 grit sanding sponge followed by a tack cloth. It’ll look foggy after sanding but don’t panic- that’s normal. Once you add the following coat it will go back to looking beautiful.
I did three coats of polyurethane total. After the last coat, don’t sand!
Just as a reminder, if you use polyurethane to seal you butcher block, don’t use it as a cutting surface because it’s not technically food-safe. Also, don’t place hot pots directly on the wood countertop. On the bright side, regular maintenance isn’t required when you use polyurethane!
Staining Butcher Block Before and After
Before
After
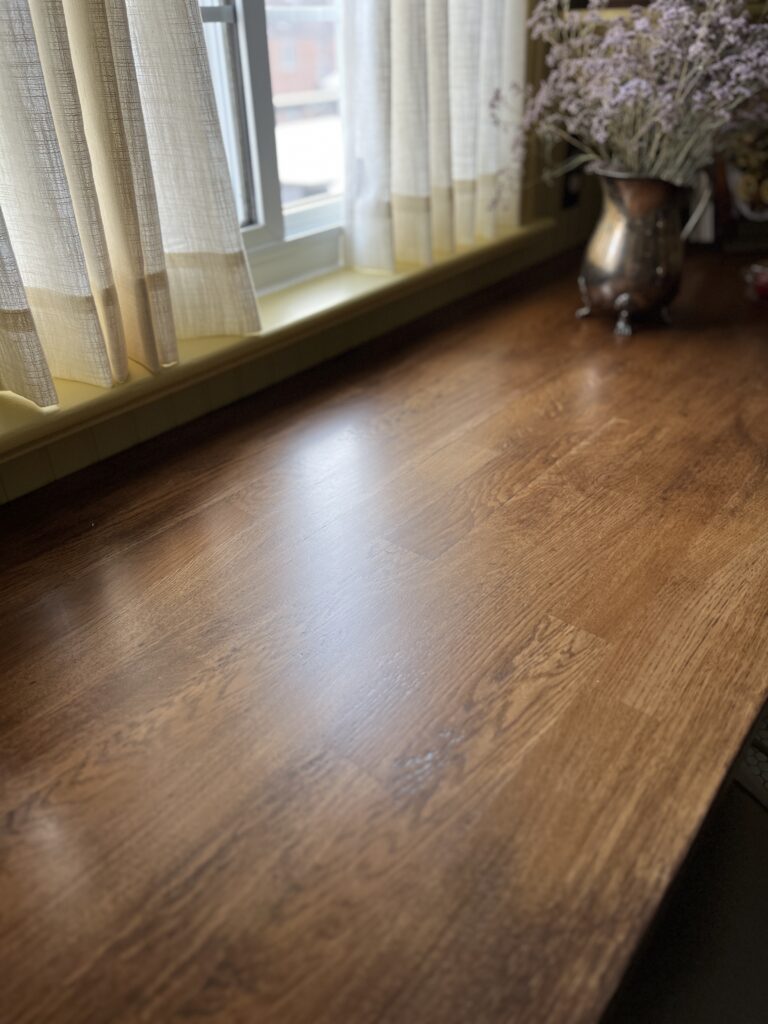
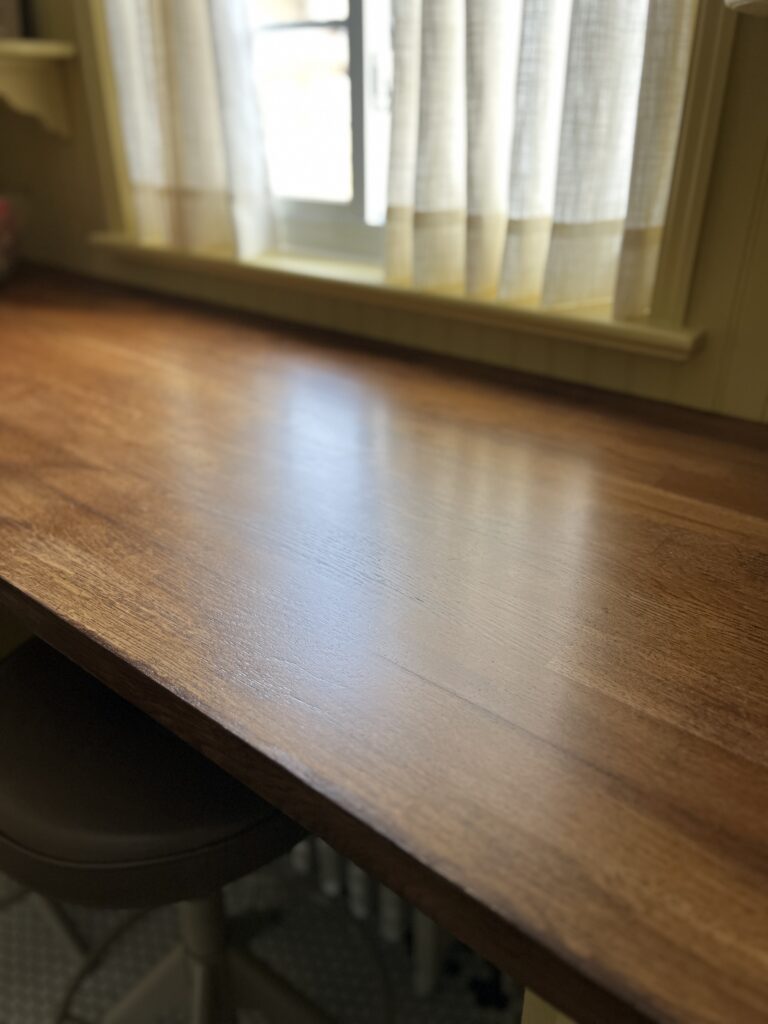
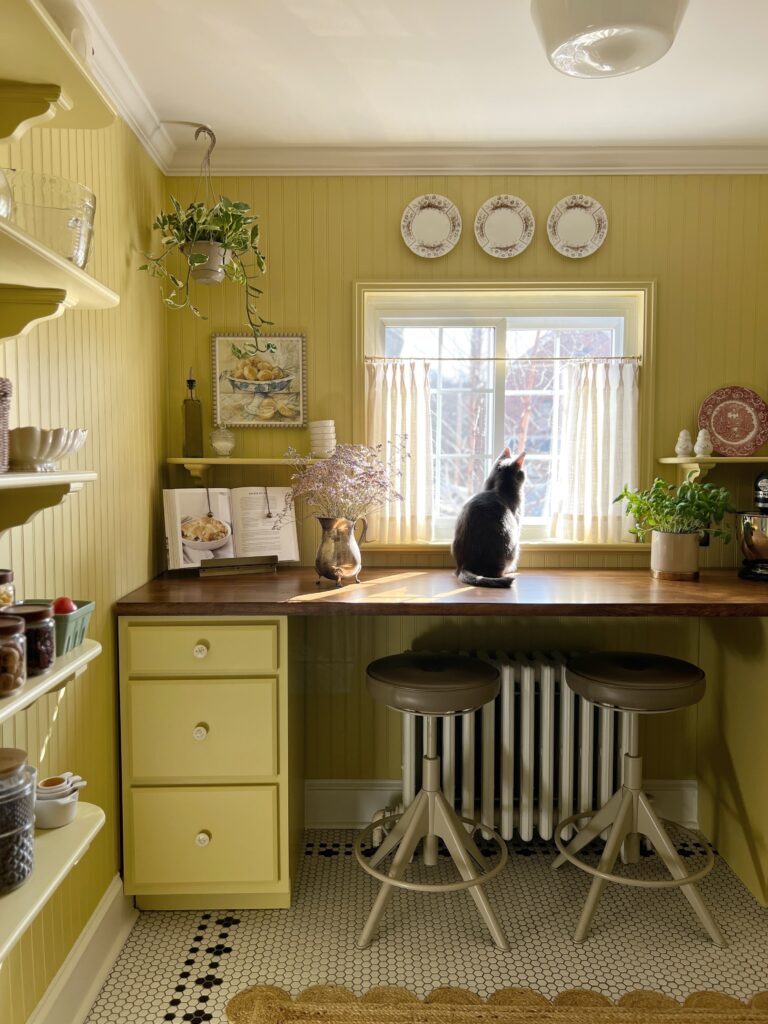
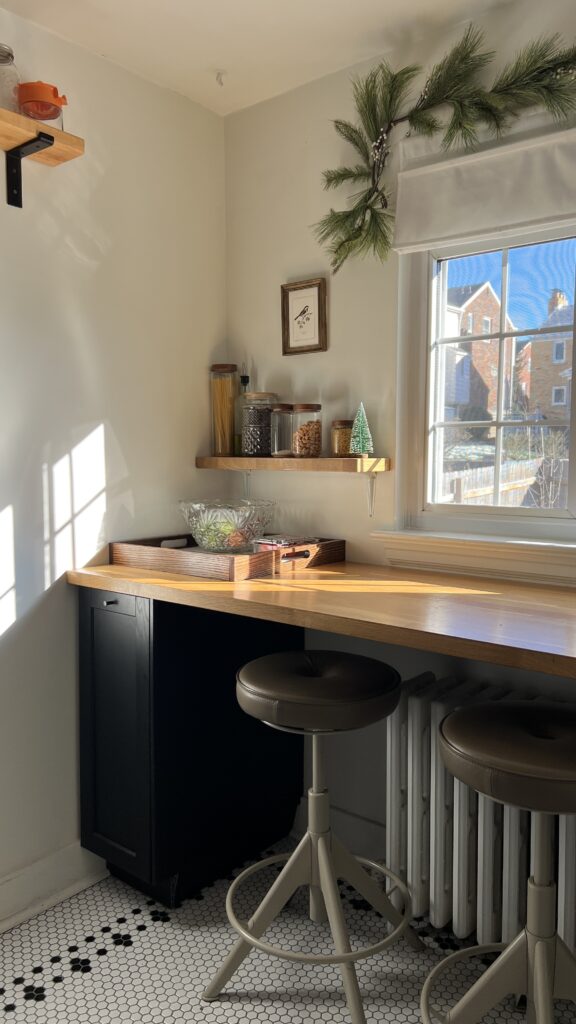
When I started on this DIY walk in pantry makeover, I considered getting new countertops, but I’m so glad I didn’t!! I couldn’t be happier with how this turned out. It honestly looks like a brand new butcher block! PS if you’re a more visual learner, I shared some clips of how to stain butcher block in this YouTube video!
I hope you find this tutorial helpful! Please let me know if you have any questions 🙂
Elisha
