

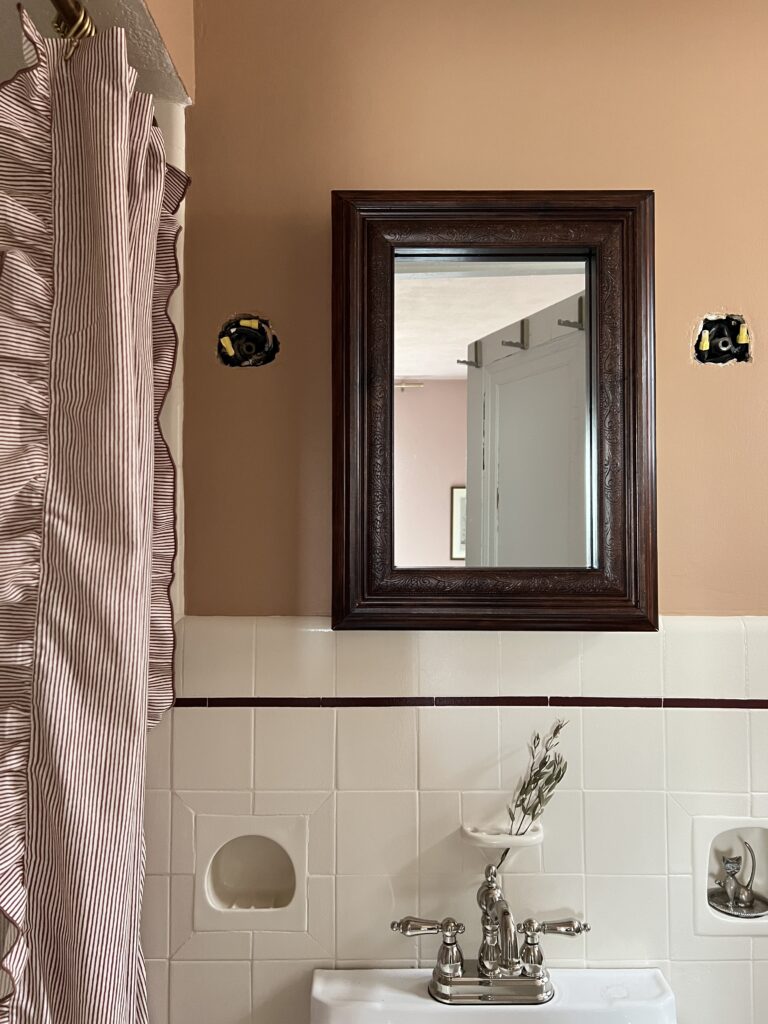
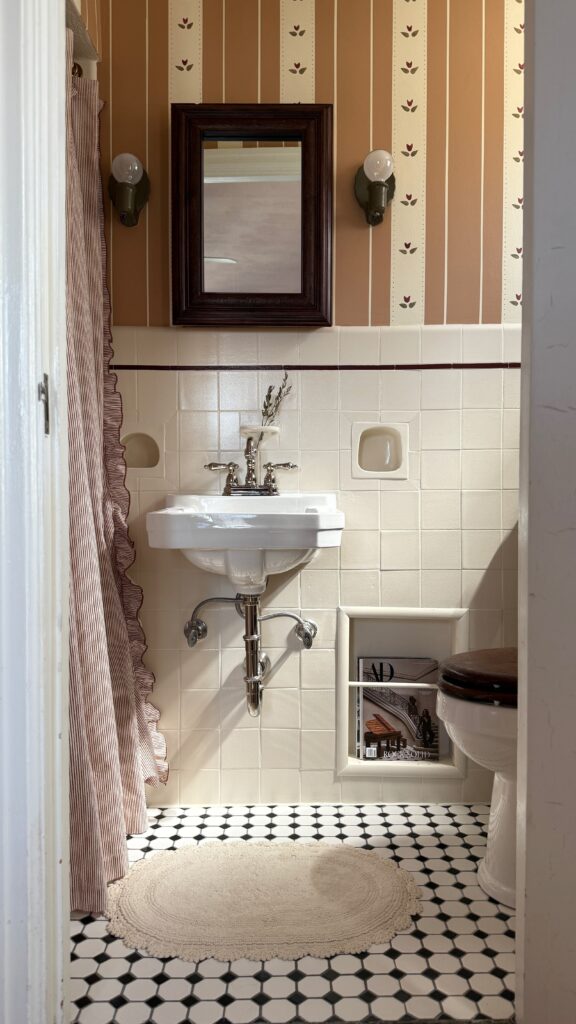
We live in a 1930 home, which means our small bathrooms rely entirely on medicine cabinet storage. In other words, those old medicine cabinets are essential to us 🙂 Sure, we could replace them, but I love a good DIY project that gives a space a new look without the mess and expense of demo! If you feel the same, and you’re wondering how to frame a medicine cabinet, then this DIY medicine cabinet makeover tutorial is for you!!
Disclaimer: This post contains affiliate links. This means, if you purchase something from a link I provided, I will receive a small commission. This is at no extra cost to you! Thank you so much for the support!
TOOLS:
- Miter Saw (Optional)
MATERIALS:
- Baseboard Trim
- Decorative Chair Rail (cheaper alternative)
- Tiny Chair Rail
- Wood Glue
- L-Brackets
- Wood Conditioner
- Gel Stain
- Polyurethane
Framing a Medicine Cabinet Video Tutorial
If you’re a visual person, we also have a YouTube video of this medicine cabinet makeover! I always recommend watching it first and then you can come back to this post for more of the nitty gritty 🙂
Step One: Plan Your Medicine Cabinet Makeover Design
The fun part about doing a medicine cabinet makeover is that you have complete freedom to design it however you’d like!!
Our bathroom needed some warmth so I decided to make a chunky wood DIY antique frame. And guess what? If you’re not a big DIYer, or don’t have the time to make a frame, you can do this the easy way and just buy a custom picture frame! That’s really all this is. Etsy has tons of options! Here’s a few options that I favorited:
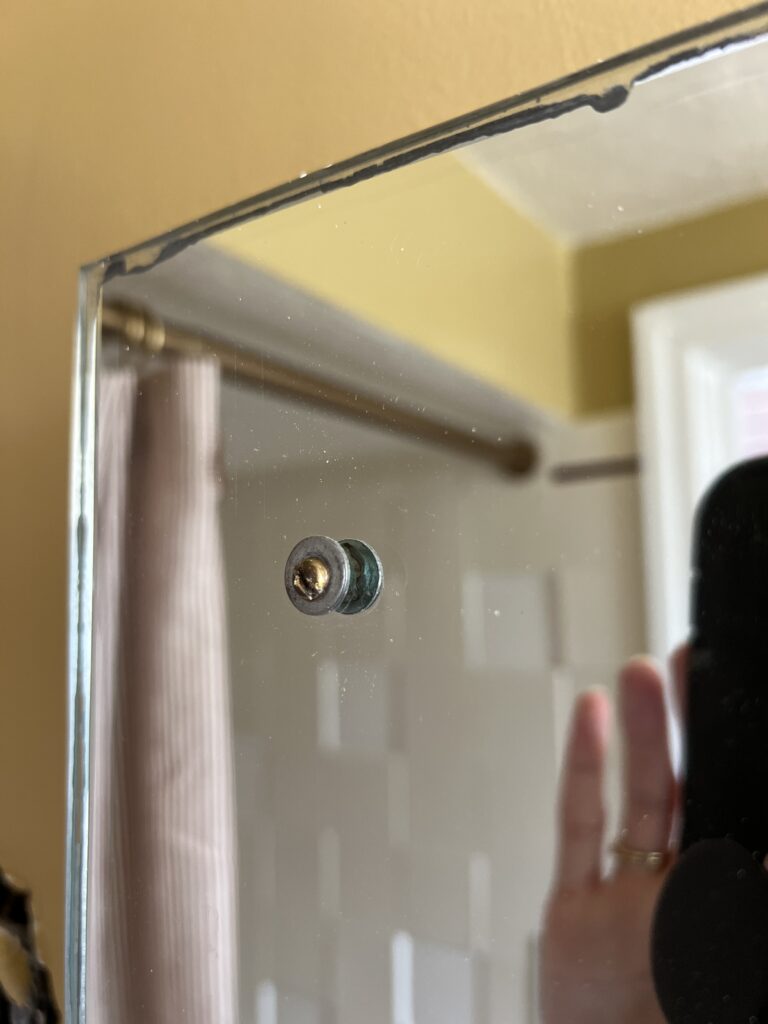
Be sure to get out your measuring tape and take a closer look at your medicine cabinet beforehand! One big issue I ran into was the screws on the front of the mirror. In order to cover those up, I knew I needed trim that was at least 3″ in width.
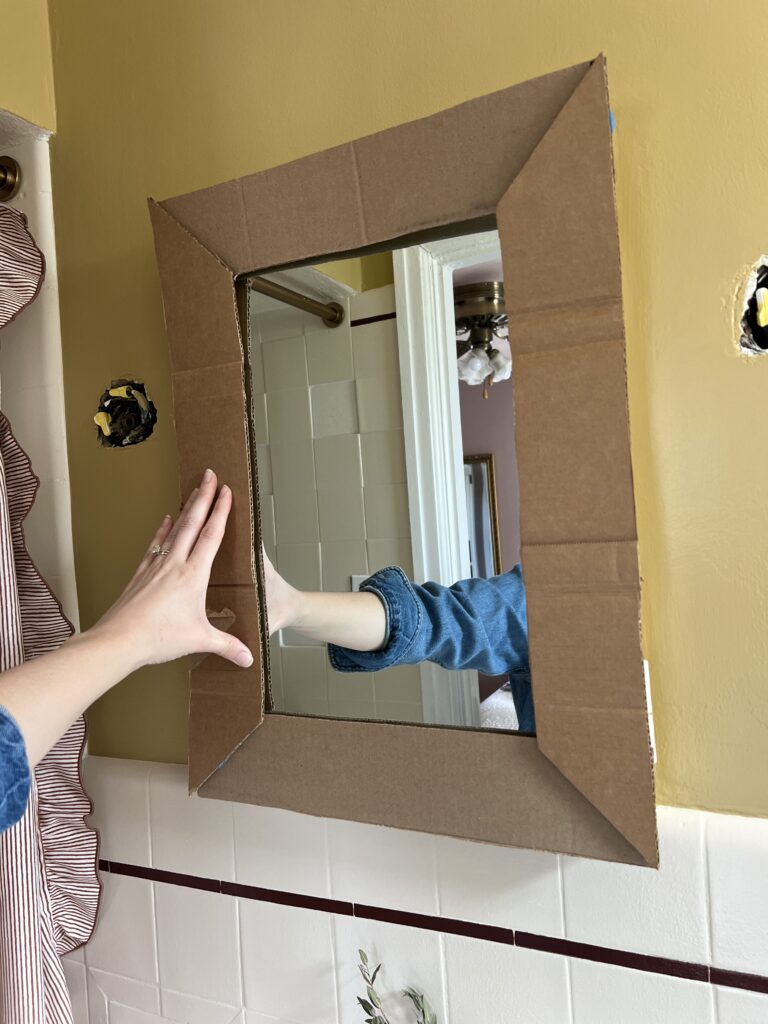
Once you get your measurements, I recommend making a cardboard template! This will help you visualize and also ensures you’ll have a perfect fit once it’s made.
Step Two: How to Make Your Own Ornate Trim
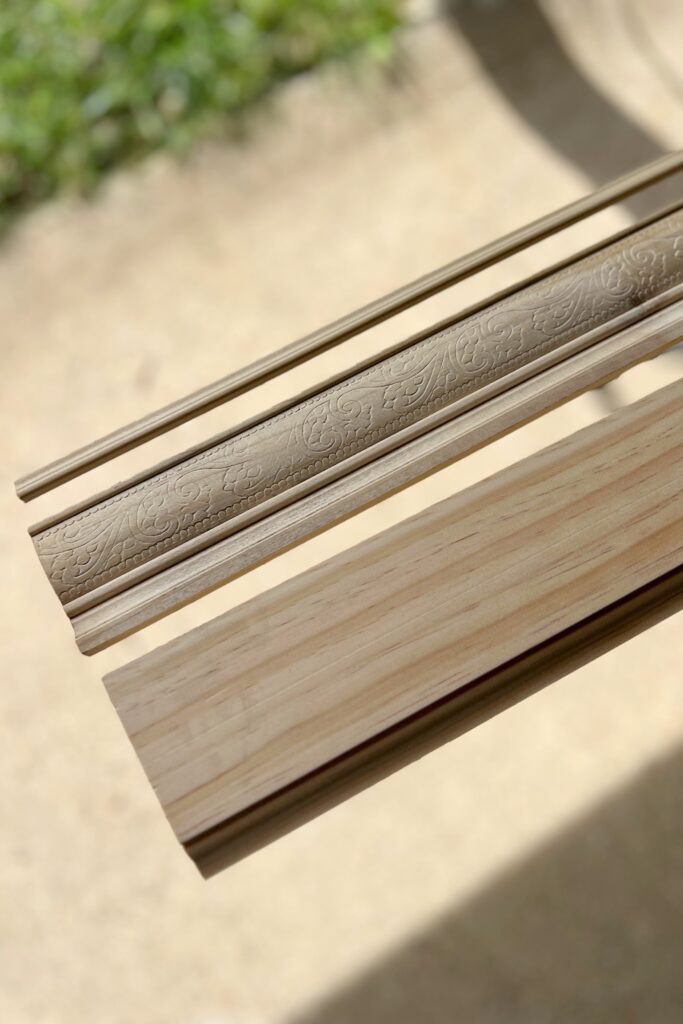
You can totally just buy whatever trim you’d like, but I like to be complicated so I made my own 🙂 Just kidding (sort of), but I was going for a custom look and already had some really pretty chair rail just begging to be used!
My medicine cabinet mirror is pretty small (16″ x 22″) so I only needed an 8ft board of each trim piece. These are the three pieces of wood I used for my DIY trim:
- Baseboard Trim
- Decorative Chair Rail (Here’s a less expensive alternative that’s the same size!)
- Tiny Chair Rail
It’s really important to check for warping and find boards as straight as possible for this medicine cabinet frame!
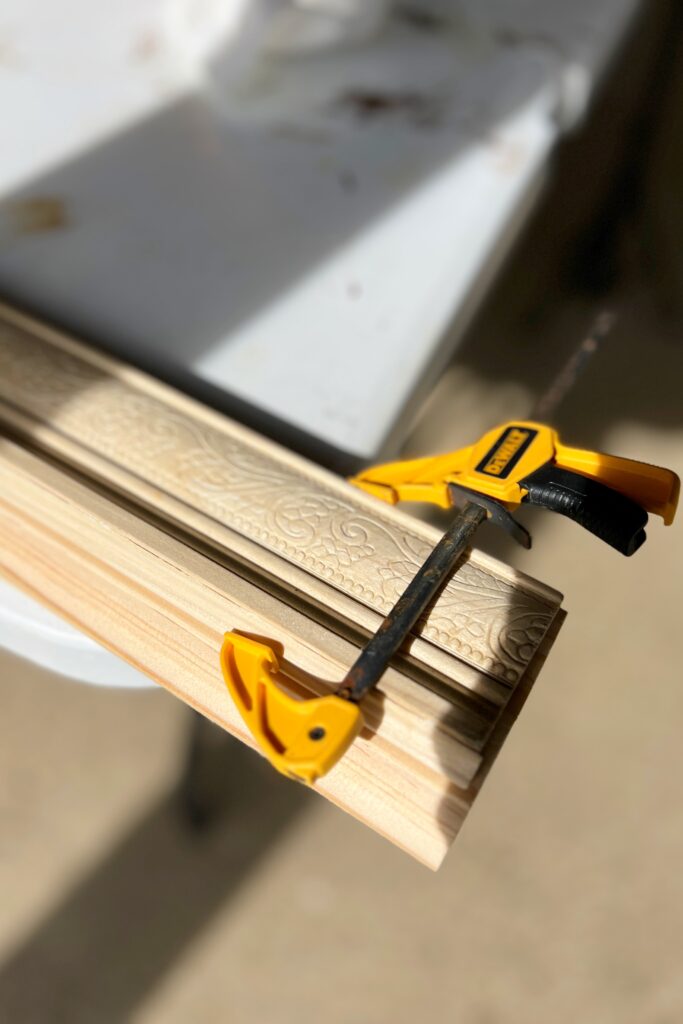
The first thing I did was glue the decorative chair rail to the baseboard trim. I used a generous amount of glue on each piece and spread it out with a foam brush before joining them. Check up and down the board to make sure the edges line up nicely, clamping as you go.
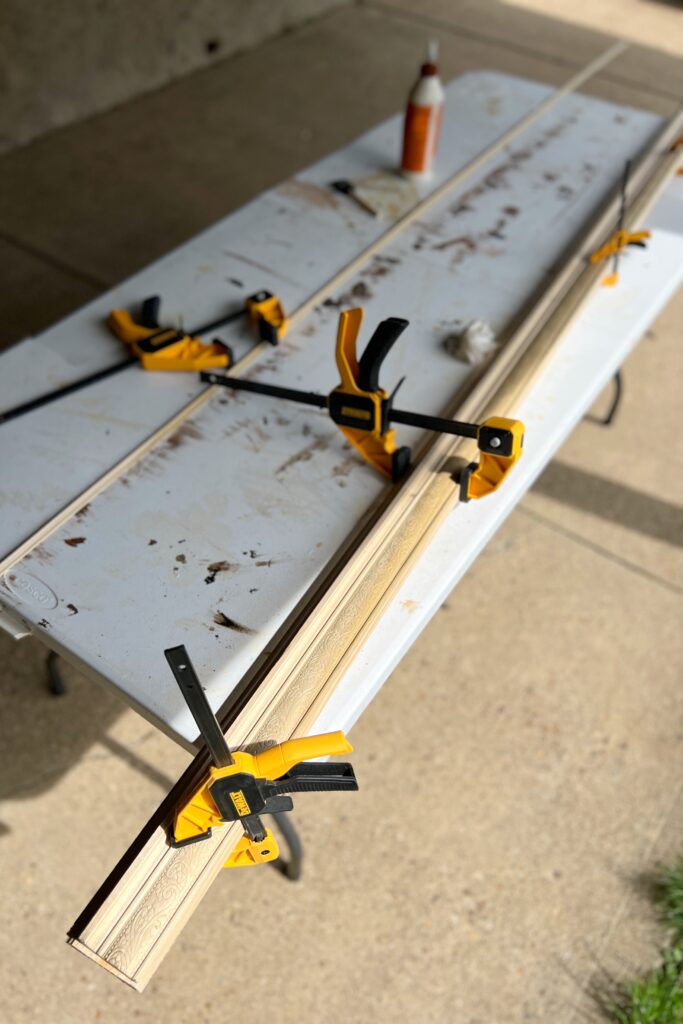
After leaving the clamps in place for a least 30 minutes, you can add the third piece of trim along the top edge of the chair rail. Again, apply your wood glue on each edge of trim and use clamps to hold it in place.
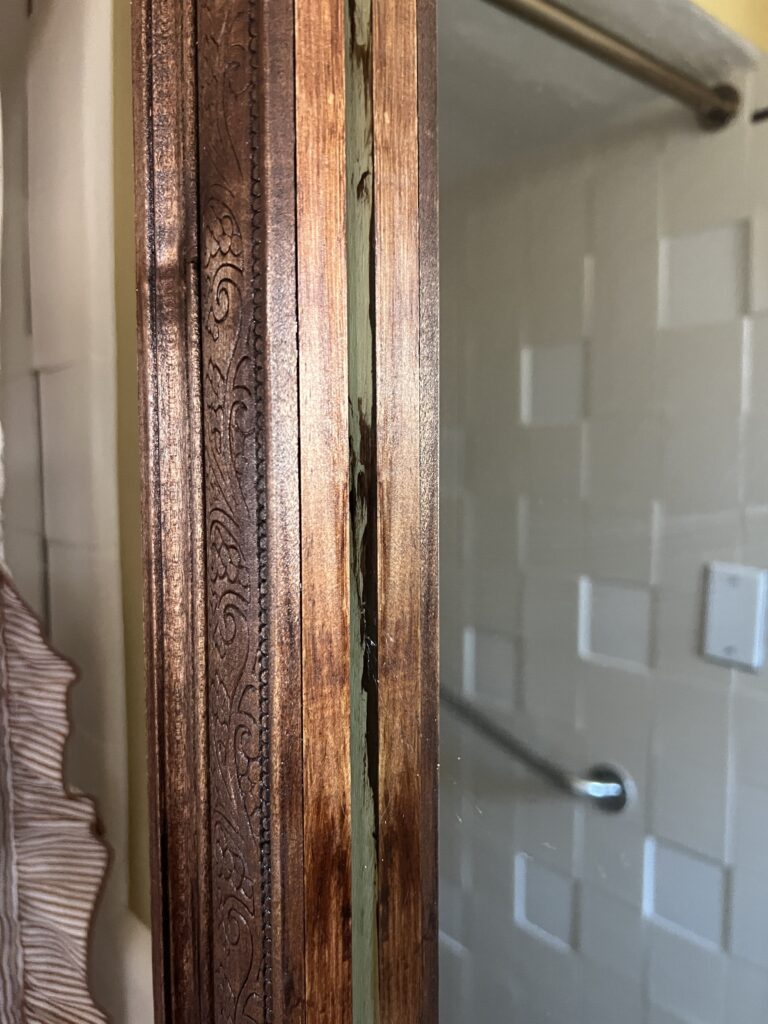
Before I get into how to make the frame, I have to mention that if I were to do this again, i’d do one coat of stain on the front and back of the trim before cutting and assembling. Why? Wood glue doesn’t accept stain, and there’s always some leftover on the seams. This is very obvious when you’re using a dark stain color. So i’d do one coat, cut and assemble, and then do a second coat.
I already learned my lesson when I made this DIY Spice Rack, so i’m not sure why I forgot this time. Oopsies!
Step Three: Assemble Your DIY Antique Frame
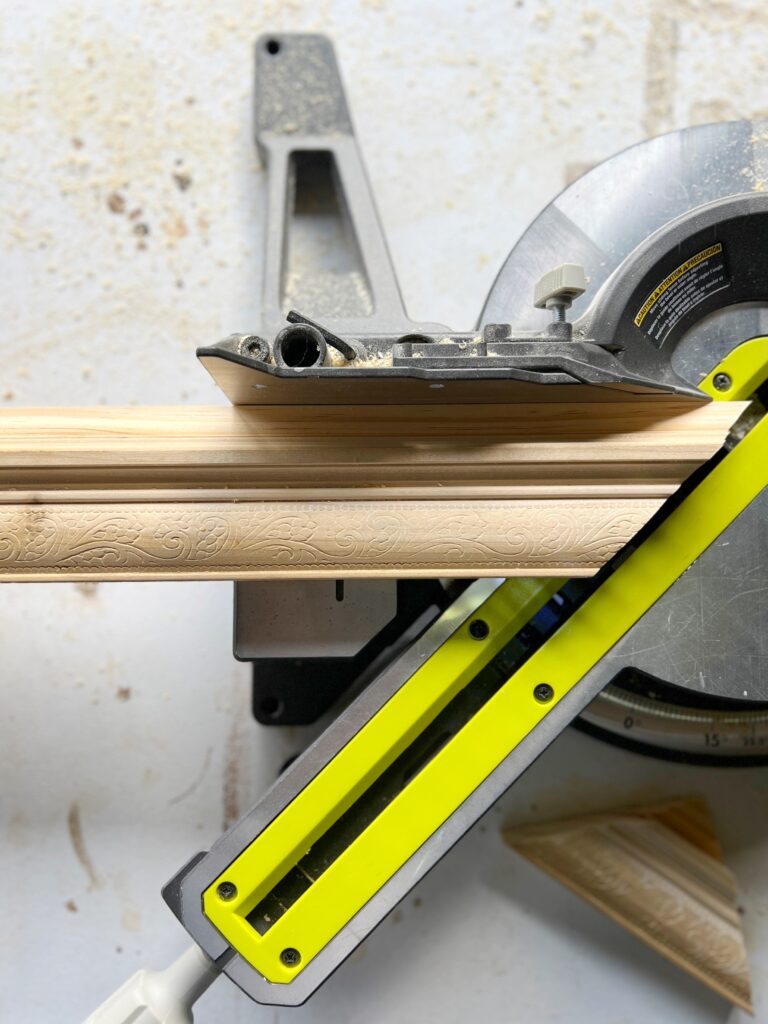
The next step is to make the frame! I used my miter saw to cut 45 degree angles. If you don’t have a miter saw, you can use a miter block and saw!
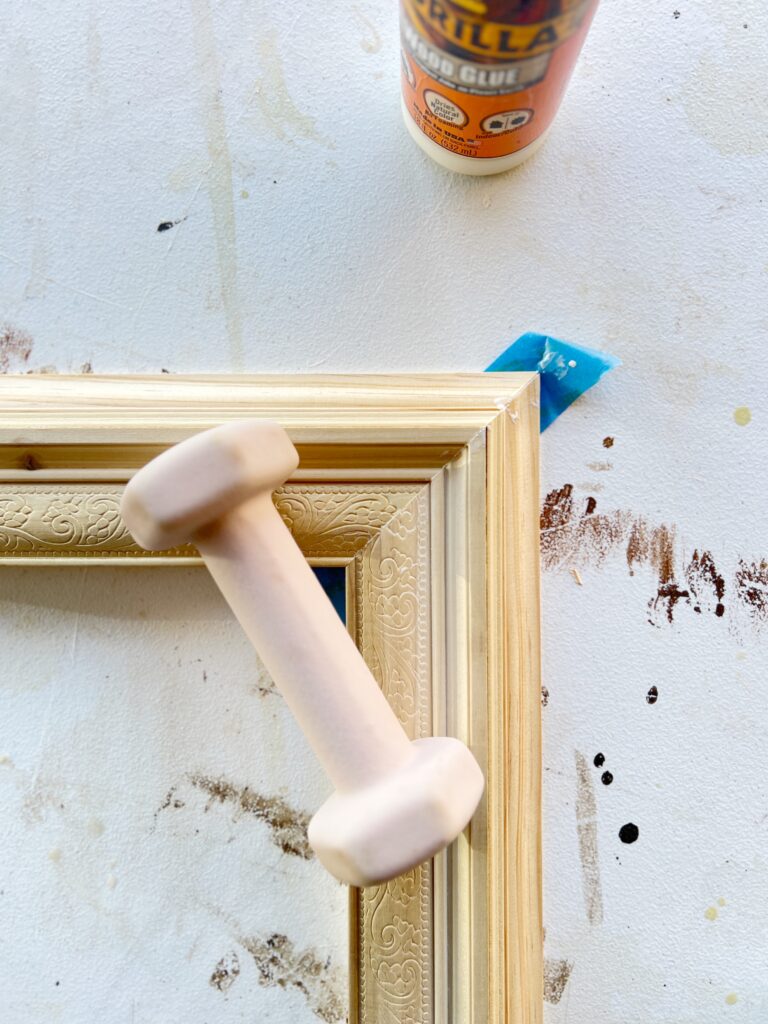
Normally, i’d just use wood glue and corner clamps to assemble the frame, but my corner clamps only fit trim that’s 3″ wide 🙁
So I tried a different method instead! Working with one corner at a time, I placed a piece of painter’s tape on the backside of the seam, ensuring the angles matched up nicely first. I also used a square inside the frame to make sure I had a 90 degree angle! Then I just opened the seam, added wood glue to each side, closed it back up and added a small weight to hold it in place.
After the glue set for each corner, I secured them even more using L-brackets! (You can find them at Lowes, Home Depot, or any local hardware store.) This might have been overkill, but it was easy to do and made it extra sturdy!

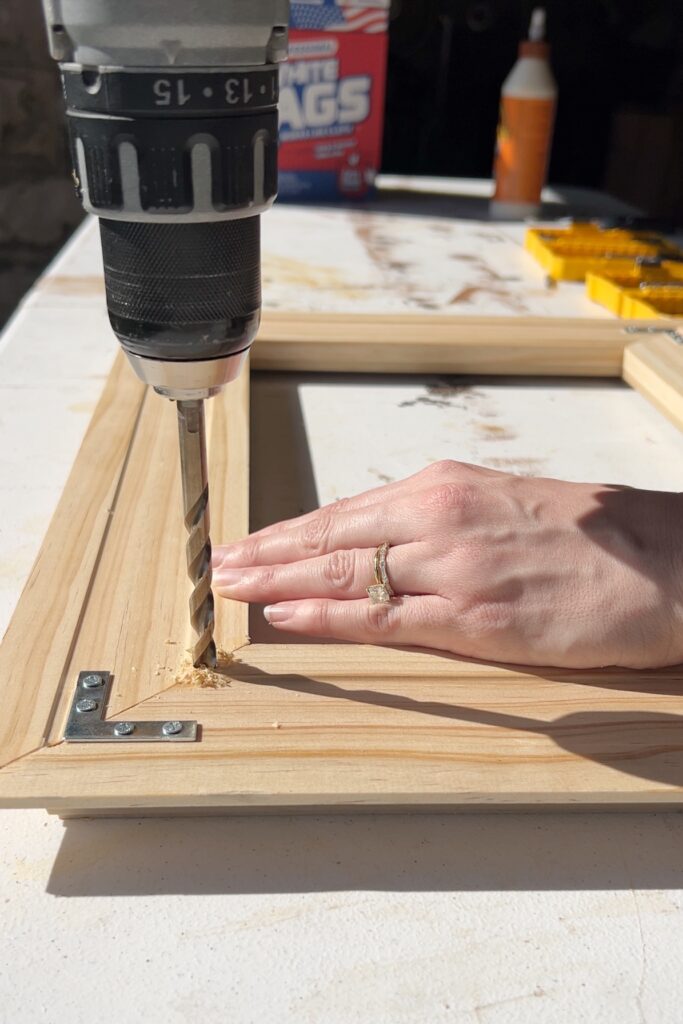
Okay, this part is not going to apply to everyone, but I figured i’d share just in case! Earlier in this post I mentioned that we have two screws on the front of the mirror. In order for the medicine cabinet frame to lay flat, I needed to create a couple little holes for them to sit.
To mark the exact placement of the holes, I put a dab of toothpaste on each screw and pressed the frame up against the mirror in the proper position. The toothpaste transferred to the back of the frame and that’s where I used a drill bit to make some little pilot holes, only the depth of the screw heads.
It’s up to you if you want to use wood filler in the seams of the frame, but I decided not to. If I were giving the frame a fresh coat of paint, I would! But with a dark color stain, the wood filler tends to draw more attention.
Step Four: Stain Your DIY Wood Frame
Whenever i’m staining something that involves various types of wood pieces, gel stain is my go-to! Gel stain doesn’t absorb into the wood, it sits on top, so you have more control over the finish.
As always, I like to test samples first. I totally thought i’d go with the walnut, but after seeing the samples I decided that mahogany was more the aesthetic I was going for.
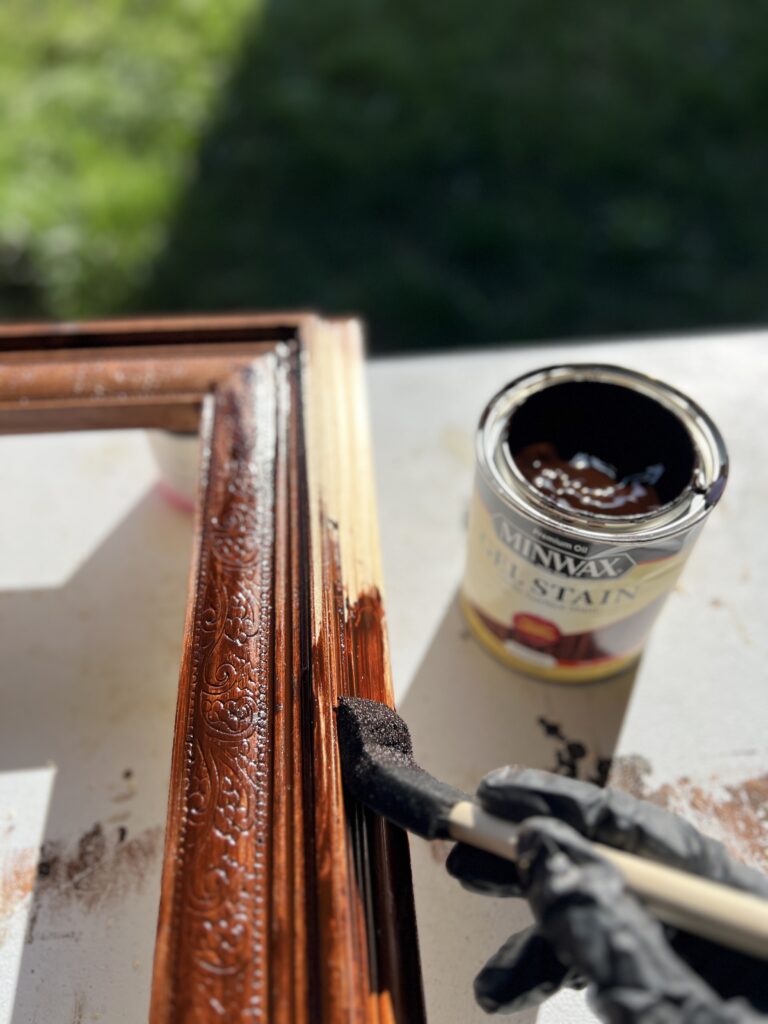
Before applying stain, I always like to use pre-stain wood conditioner. This just helps ensure an even finish! If you’re using a water-based stain, make sure you get a water-based wood conditioner.
I applied the stain generously, let it sit for about 5 minutes, and wiped off the excess with a clean rag. If you do a similar DIY vintage frame like I did, just make sure you get into all the nooks and crannies amongst the layers of trim!
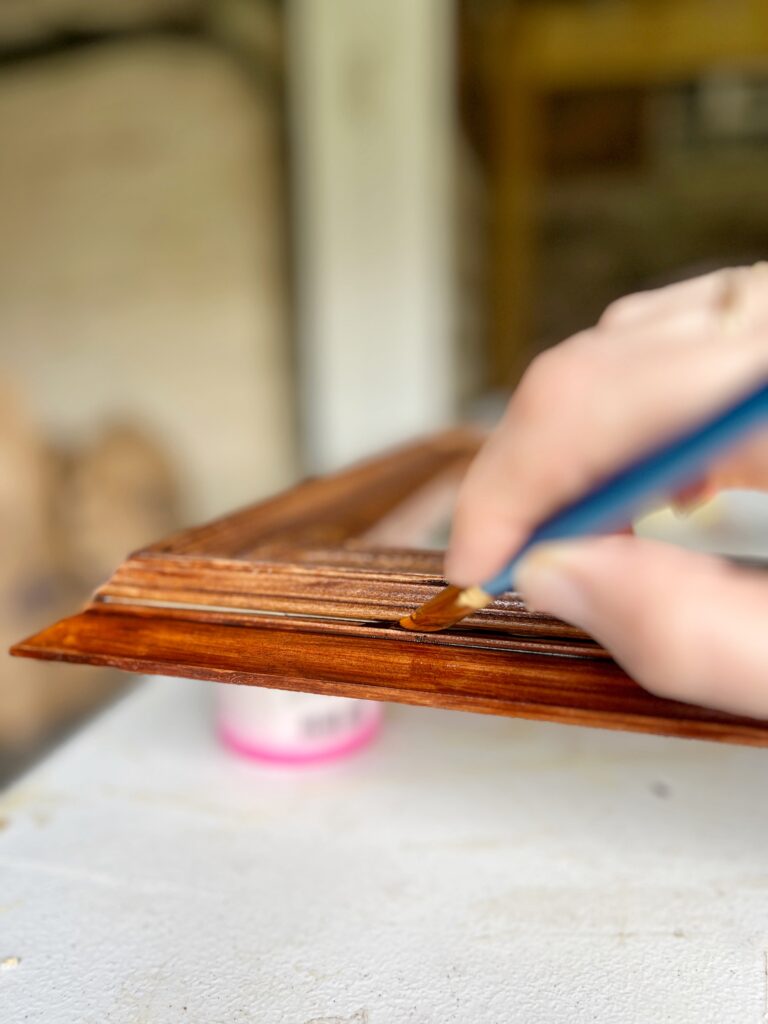
After allowing the stain to fully dry (I believe the can says to wait 8 hours, but I usually wait 24 hours), I noticed there were some spots that didn’t accept the stain very well and some spots that I missed. Because of this, I ended up doing a second coat with a little artist’s brush!
I was really hoping i’d be able to get away with only staining the front, but unfortunately you could see the reflection of the back of the frame in the mirror 🙁 So make sure you stain the back too!!
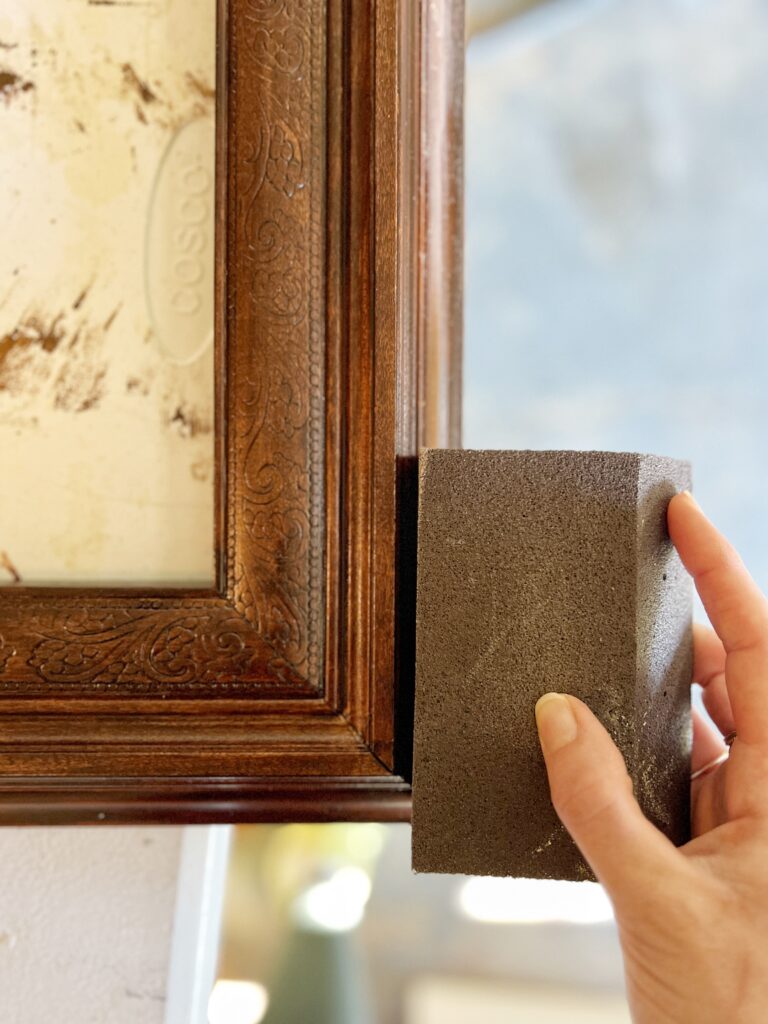
Since this is a medicine cabinet frame, above a sink, it definitely needs a protective top layer! I did three coats of my favorite Minwax warm satin polyurethane, sanding after the 1st and 2nd coats with a 220 grit sandpaper sponge. The sanding part is optional, but trust me, it makes a huge difference if you want a smooth finish.
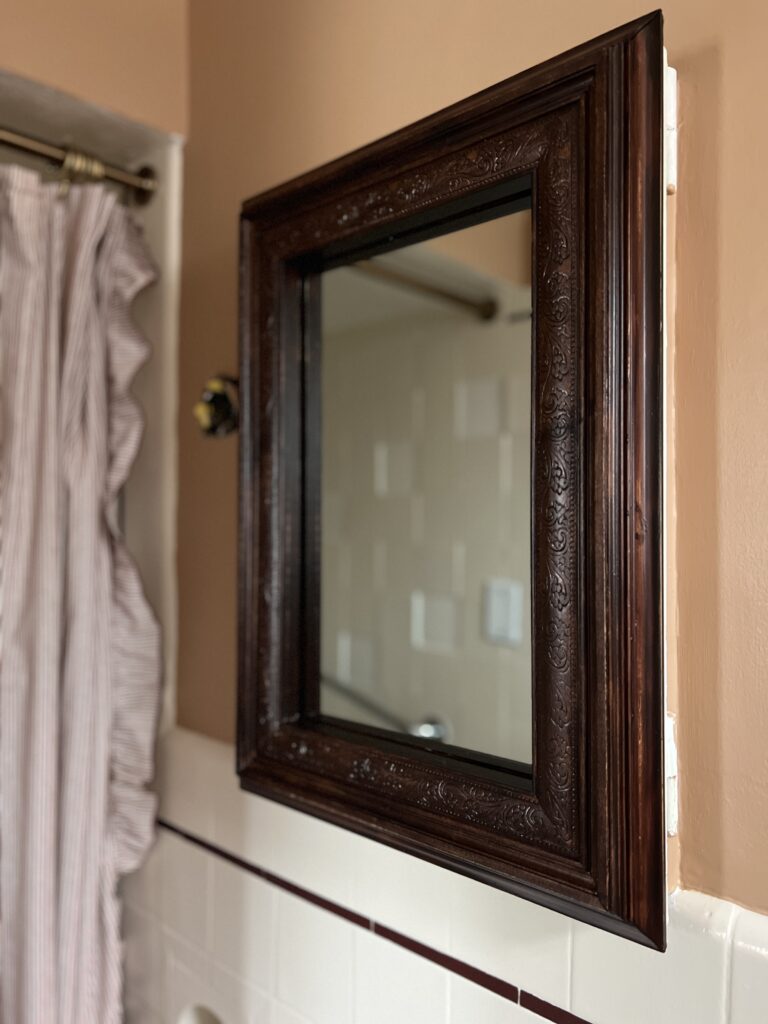
Step Five: Frame Your Medicine Cabinet Mirror
The final step is to hang the frame on your medicine cabinet mirror!! Originally I was planning to use construction adhesive to attach mine, but then I was thinking it’d be a good idea to do something less permanent. This way, one day I can use this as a photo frame if I want!
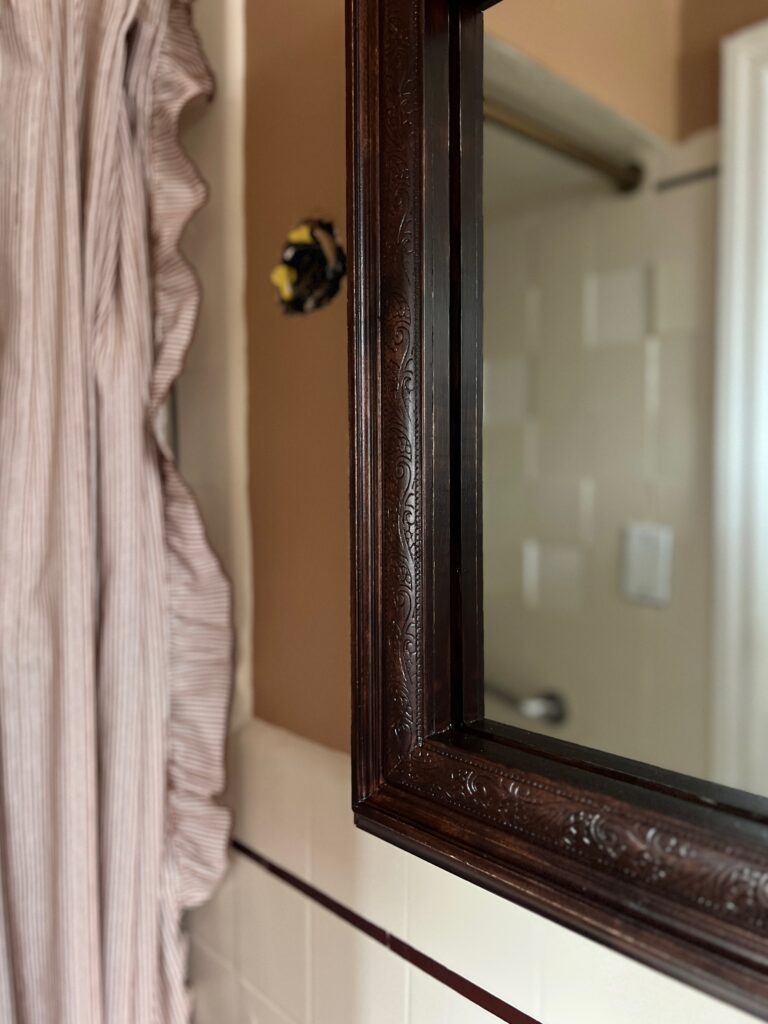
To make this a removable medicine cabinet frame, I used magnets! It was actually so simple. First I attached these strong neodymium magnets to the four corners of the wood frame using this super glue. They actually fit perfectly in the indentation on the back of the baseboard trim. I glued them as far as I could to the outer edges so they wouldn’t show up in the reflection of the mirror.

Then I just attached these metal plates to the mirror, making sure they lined up with magnets on the back of the frame. The plates came with a little alcohol wipe to clean the mirror first and then they just had adhesive tape on the back. Like I said, SO simple!!
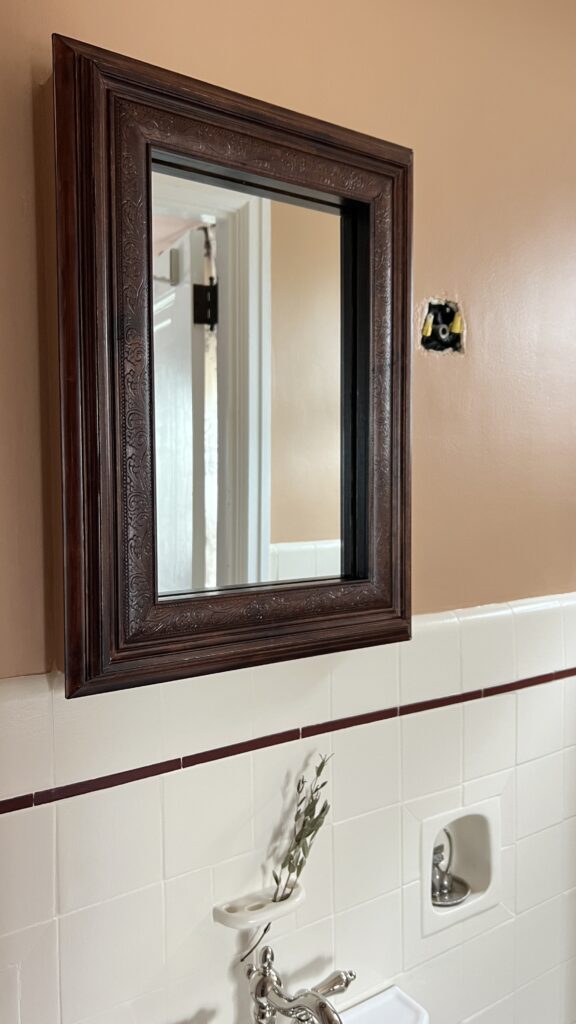
In case you’re wondering, our cabinet door can still be opened with no issues! Ours has a magnetic catch and when we open and close it, we usually just put our fingers behind the bottom left corner of the door. It still works exactly the same 🙂
Other DIY Medicine Cabinet Ideas
- Paint the inside of the medicine cabinet or add contact paper to the back panel of the cabinet!
- Make a DIY cabinet door or frame with a cute knob 🙂
- Make wood shelves for the inside of the cabinet.
- If you have a recessed medicine cabinet that doesn’t double as your vanity mirror, you could remove the cabinet door and use it as open shelving!
I’m so glad we didn’t go out and buy a new medicine cabinet because this was truly such a simple project with an impressive end result! Not only does it give our old medicine cabinet a polished look, but it also gives me peace of mind knowing I’ve worked with what I have. Those are always the most rewarding DIY projects in my opinion.
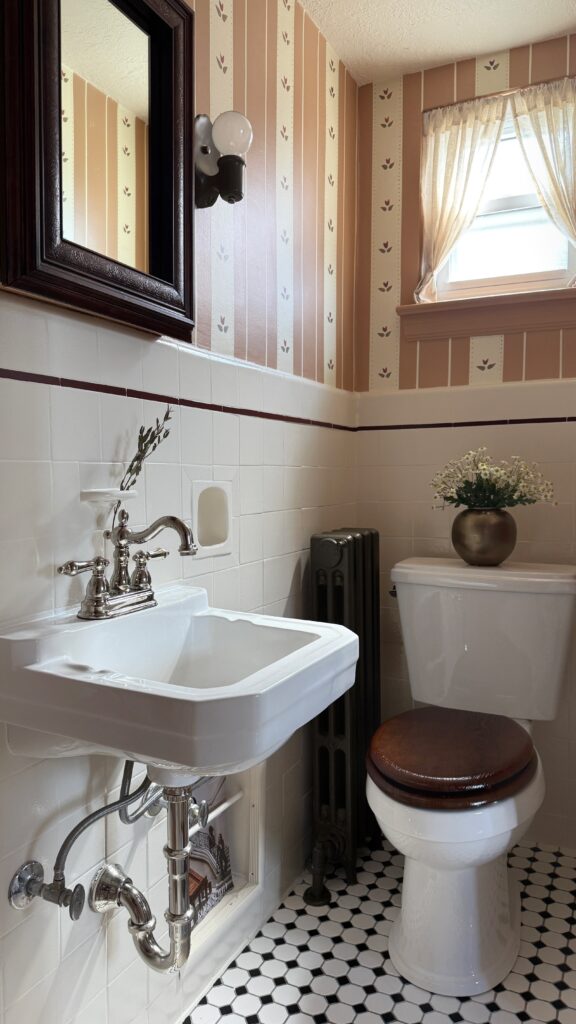
Also, this DIY vintage frame is officially my favorite bathroom decor detail in our recent no demo bathroom remodel! Click here for all the tutorials and details on this space!
I hope this post gave you all the information you need to give your outdated medicine cabinet a makeover! If you have any questions, please feel free to leave a comment!
Thanks for being here!!
Elisha

Your mirror looks amazing! We recently refinished the vanity in the bathroom and I would love to do something like this with our mirror! Using cardboard to see how the frame looks first is so smart, I never would have thought to do that. I can’t wait to get started! Thanks so much for sharing!
Hi Alex! Thank you SO much!I’m glad you liked the cardboard idea- I’m such a visual person so it’s always helpful to get an idea first! Good luck <3