

If you know me at all, you know I love good fluted look. My addiction started after I did a DIY fluted vanity in our bathroom. Since then, I’ve done a fluted dresser, a fluted coffee table, and a fluted wine cabinet. And likely a few other things in-between!
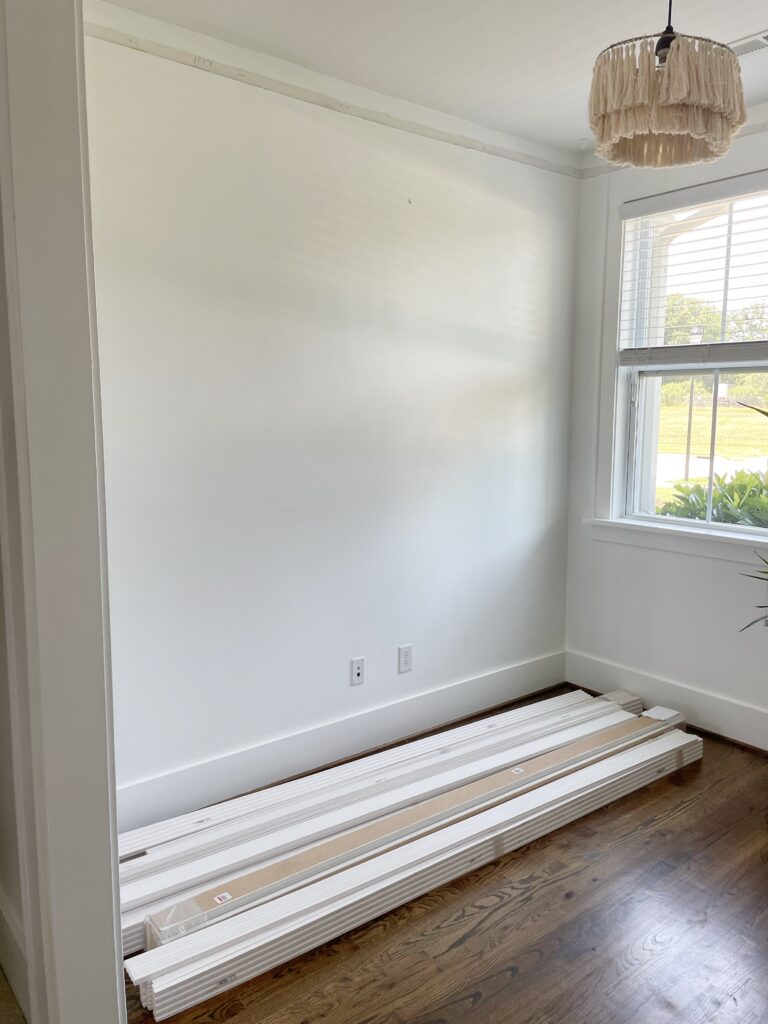
Having a fluted panel wall was a dream of mine and I finally decided to go for it when I was turning our front room into my office! I knew it would make the perfect feature wall!
Not to mention, it makes a great Skype background!

Disclaimer: This post contains affiliate links. This means, if you purchase something from a link I provided, I will receive a small commission. This is at no extra cost to you! Thank you for your support!
tools:
materials:
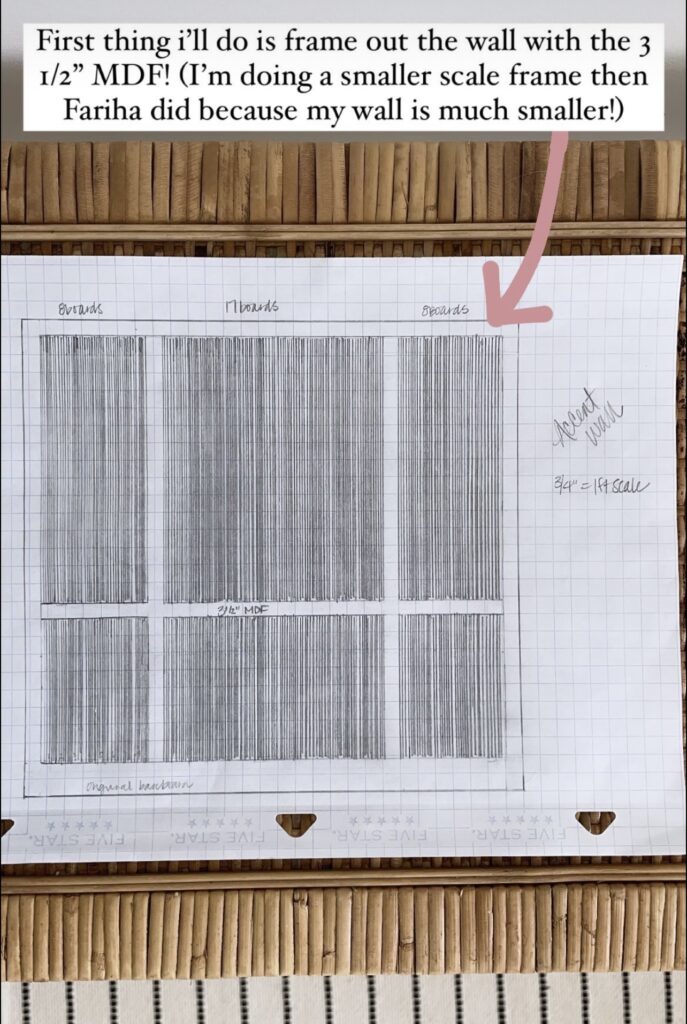
Step One: Plan a Design
This is my first step in every project! In order to determine what materials you need, you have to come up with a design first.
Find inspiration
Once I saw Fariha at Pennies for a Fortune do this reeded feature wall in her bedroom, I knew I had to have it somewhere in my home. I loved the look of her design, so I used that as my inspiration.
Consider the setup of the space you’re doing this in. Knowing the measurement of my desk, I planned for the middle wall paneling to be a little wider than that.
Measure your wall
My office is quite small! The wall I’m working with is 9 1/2 ft wide and the ceilings are 9ft high.
The size of the room is important for choosing the proper scale MDF. Since my wall is smaller, I decided to use 3 1/2″ MDF boards.
Important note: If you’re planning to keep your current baseboards (I did), see if you can find MDF and fluted boards that are the same depth so everything is nice and flush!
Calculate materials
As a reminder, my ceilings are 9ft high. I knew I would have 7″ baseboards, one 3 1/2″ board in the middle, and one 3 1/2″ board on top.
If you add those up it’s 14″, meaning that one 8ft board would be long enough to fit vertically. Did I plan it so that this could happen? You bet I did!! 🙂
In order to know how many of the fluted wood boards I’d need, I took the width of the wall, subtracted the width of the MDF boards (4 x 3 1/2″ boards= 14″) and divided by the width of the fluted wood boards(3 1/2″).
114″ (wall width) – 14″ (width of MDF) = 100/3.5= 29 boards. But always order extra for any mistakes!
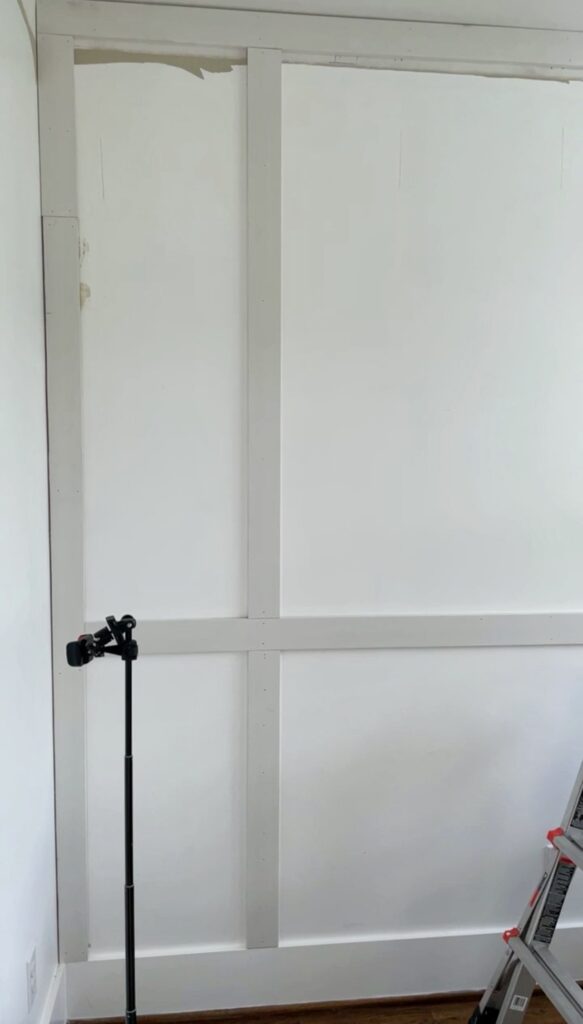
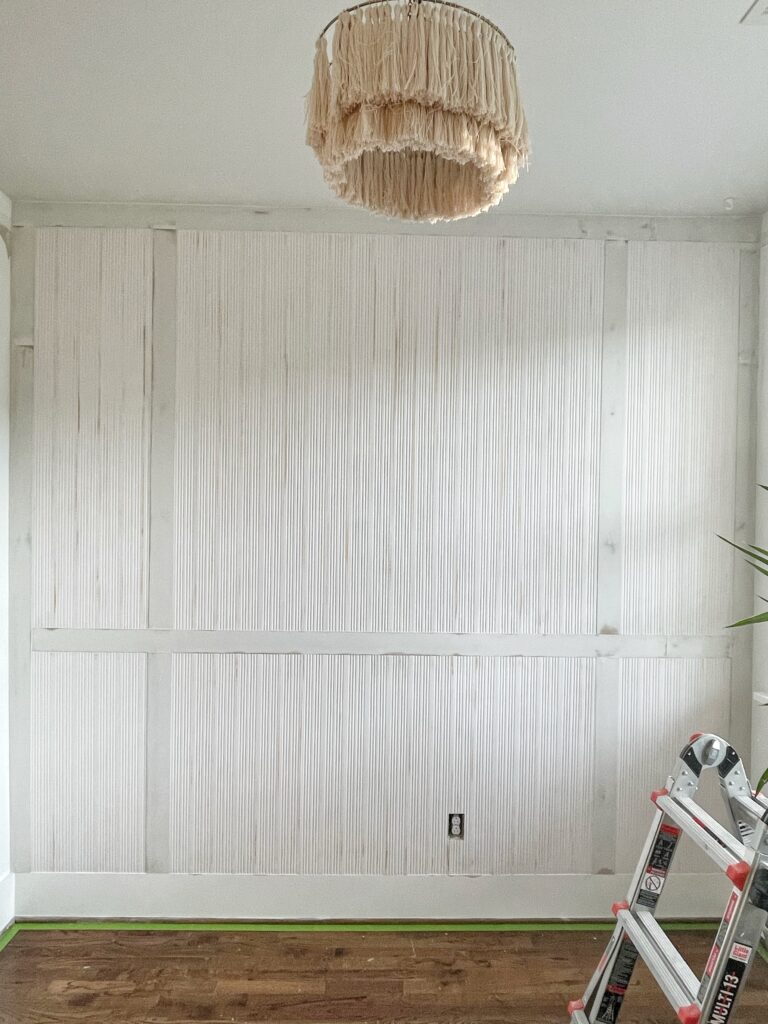
Step Two: Install MDF Boards
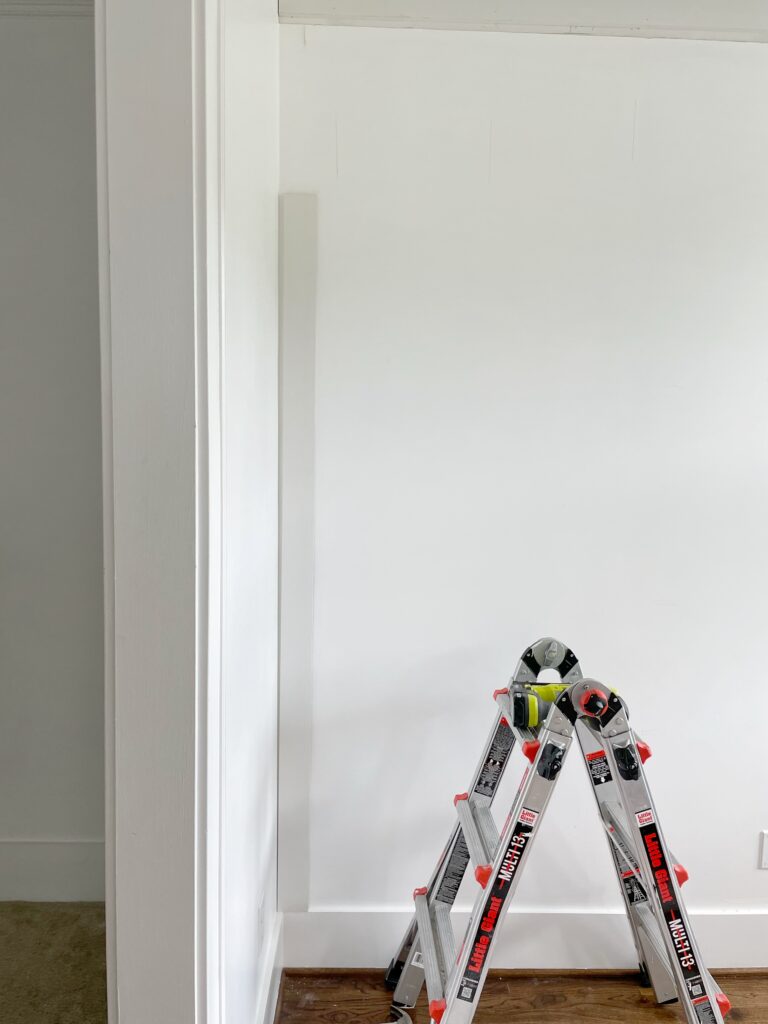
Here I thought the MDF panel installation would be a breeze, but I ran into an issue within the first 5 minutes. Wouldn’t ya know?! Our walls were uneven. In the photo below, you’ll see how the gap gets progressively bigger towards the the top!
Has this happened to you yet? If not, it will! It’s incredibly common for walls and ceilings to not be perfectly even.
What do you do if your wall is crooked?
See how it’s showing the board is level but there’s also a huge gap? Yeah. That’s just way too big of a gap for caulk!
Scribing is a technique used to mark and cut your wood to fit flush with the uneven wall.
This was my first time scribing anything, and if you Google it, there’s so many different methods. I used a washer! As i’ve advanced with DIY, I now use a pencil compass. Here’s my little video tutorial!
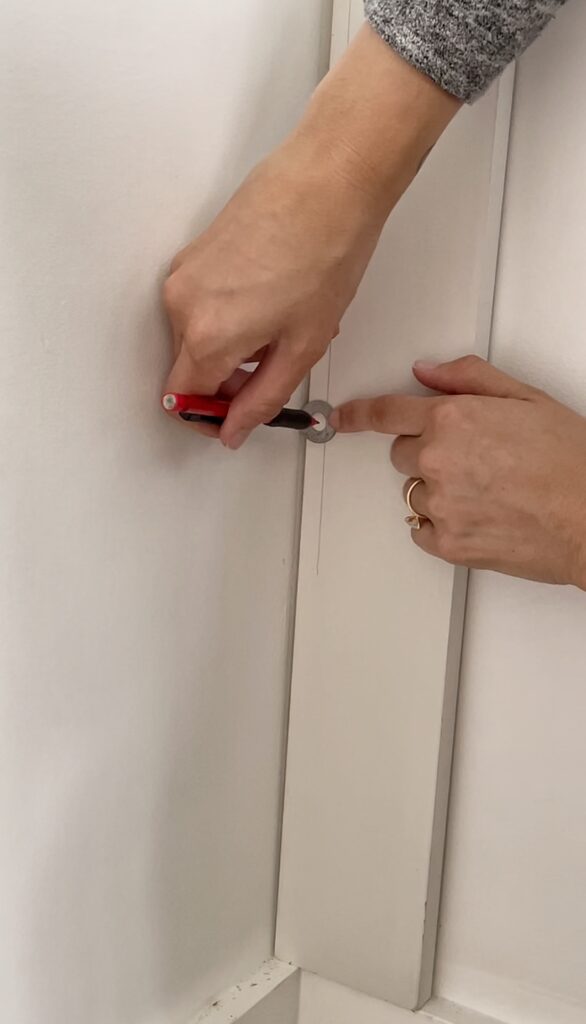
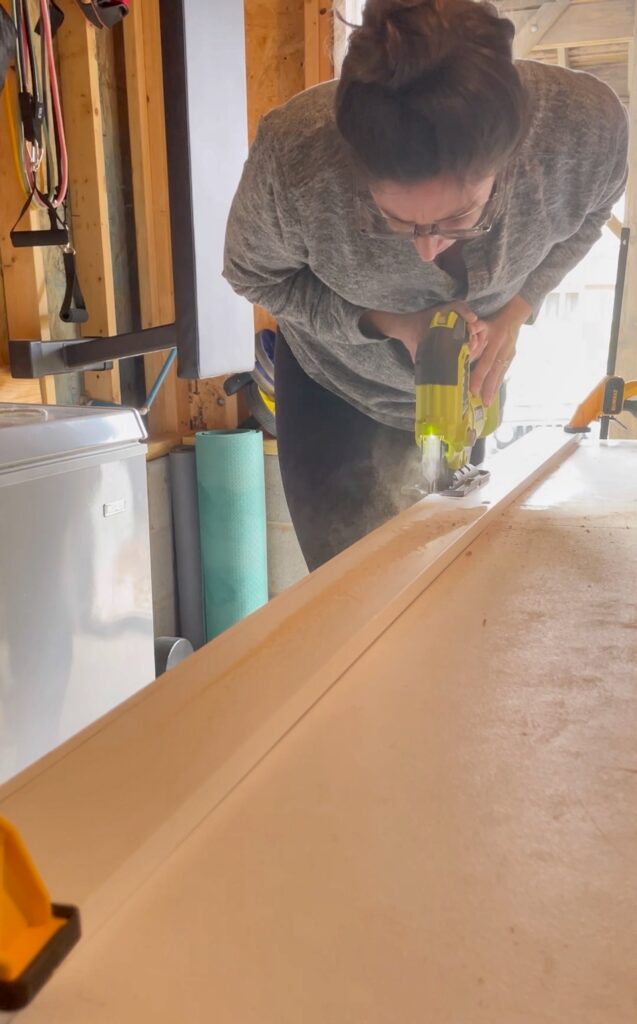
Then I just used my jigsaw to cut along the line I drew.
You’re probably wondering… “What about the 1/2” you just cut off… won’t that be noticeable? I was worried about this too! But honestly, once it’s up there you would never know. Trust me on this!
Do you need liquid nails for a feature wall?
For this project, I did use liquid nails in addition to nails. However, now that I’ve been DIYing a while, I always avoid using liquid nails on walls whenever possible.
Why? It’s just very permanent. If you change your mind one day, you’ll have a big mess on your hands. The glue can tear off the drywall and then you’re left replacing that.
We did a shiplap feature wall in our living room when we first moved in. Within less than a year, I just knew it wasn’t my style. Luckily, we didn’t use liquid nails so I was able to easily take it down! I did this recessed wainscoting accent wall instead and I’m absolutely in love with how it turned out.
How do you get the boards to stay without glue?
The best alternative is to mark the studs and nail into those. But that’s not always possible, especially with featured walls that have a vertical emphasis.
If you can’t nail into the studs, you can nail in at a slight angle. Alternate the angles of nails across from or near each other to lock the board into the drywall!
Do the top boards first!
I installed the top boards first so I know how long to cut my vertical boards.
Note: I just kept my baseboard, but if you don’t, I’d recommend installing your bottom piece(s) next!
Since my wall is over 8ft wide, I cut two pieces and just matched them up as perfectly as I could! We’ll take care of the seam later!
The first vertical board is key
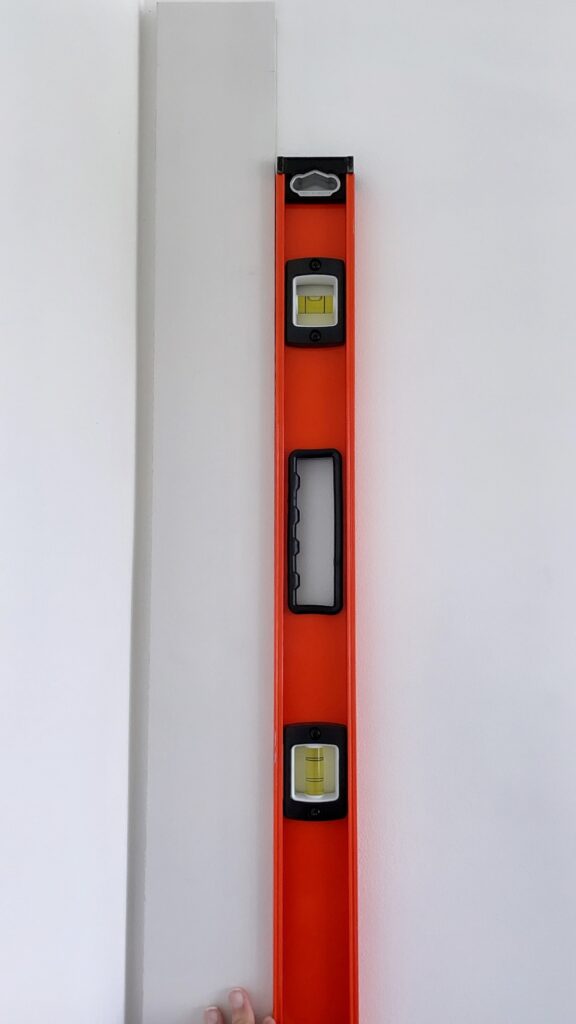
It’s incredibly important that your first vertical piece is straight. If not, the the entire wall will be off. Use a large level (or better yet a laser level) throughout the whole process… even after that first board!
The rest of the MDF grid
After the top and first vertical piece, I then installed the middle horizontal pieces. From there, I just measured and cut 4 smaller vertical pieces to fit in between the horizontal boards!
Step Three: The Fluted Panels
Now for the fun part! Just like with the MDF boards, I did use liquid nails in addition to nails when I installed these. However, if I were to do it again I definitely wouldn’t! It’s not necessary.
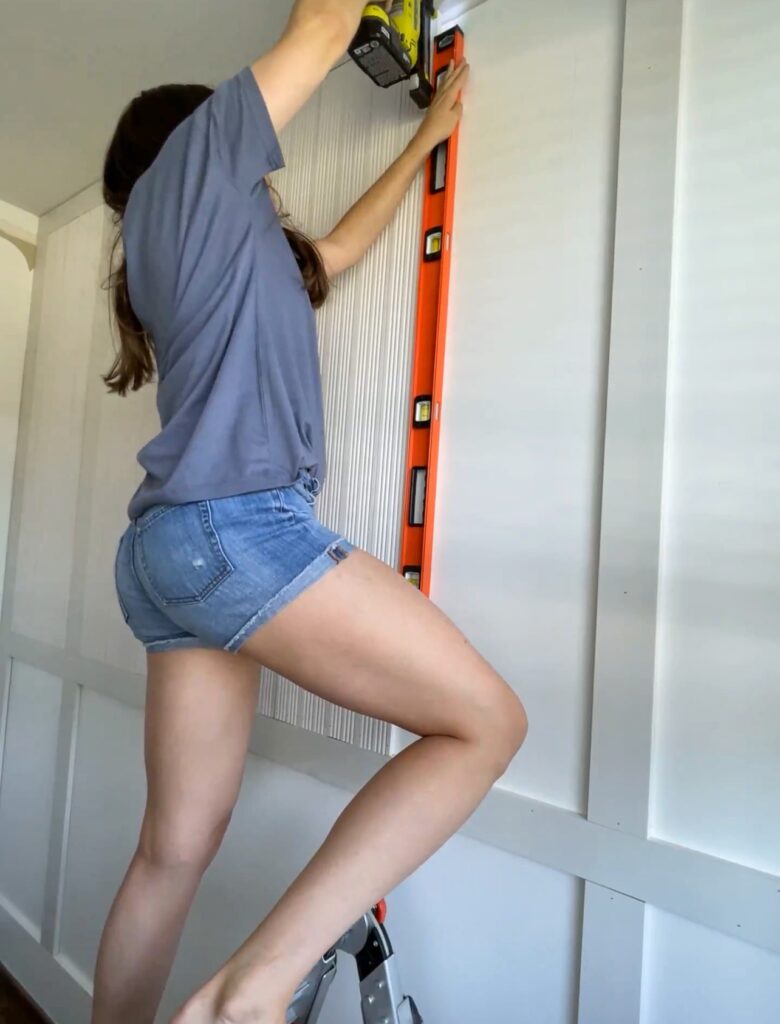
Make sure to use your level for every board! In some areas, in order for the board to be level, I would be left with a little gap towards either the top or bottom. That’s totally fine! It’s more important that they stay straight.
Tip for keeping the fluted boards flush
As you can see in the video below, to keep the fluted boards flush, I nailed in at an angle so that it attaches the to piece next to it!
What happens if your boards don’t fit perfectly in the panel?
This is likely going to happen unless you somehow get really lucky!
When it does, you’ll just need to rip the board down lengthwise. You can do this with a jigsaw or a table saw if you have one!
I used my table saw and did a very bad job! No really though… check out the video below. At the time I had a very old saw and it just didn’t work the best. It’s moments like these where I’m very thankful for caulk.
Cutting around outlets
Cutting around the outlets was simple! I held a board up to the outlet and marked were it hit the top and bottom. Then I just measured how far in the outlet will go into the board and cut it out with my jigsaw.

Note: Just make sure you’re not cutting to the size of the outlet cover, but more the size of the hole underneath the cover. As long as you can access the screws, you’re good!
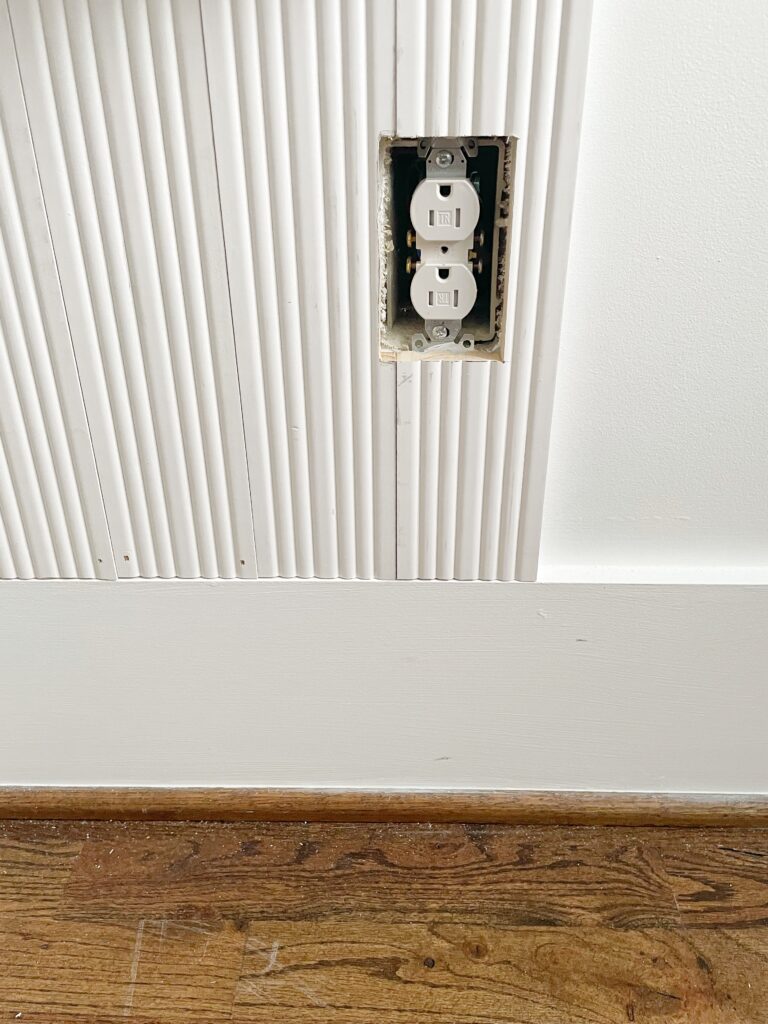
With a fluted accent wall like this, you’re pushing the wall out quite a bit. For a clean finish, we used an outlet extender box. I highly recommend it!
Step Four: Prep for Paint
Okay I’ll be honest… this part was incredibly time consuming. There’s a lot of caulking and spackling involved, but it’s absolutely necessary if you want a clean, sleek fluted panel feature wall.
Spackle
I applied spackle for all of the MDF seams, the nail holes, and some of the fluted panel seams. If the seam between fluted panels was bigger, I used caulk instead!
Sanding
Once the spackle dried, I sanded everything down with a 220 grit sanding sponge. It took a little elbow grease (as you can see towards the end of the video above), but I didn’t want to use my circular sander because that could have sanded down the fluted detail.
You could also used a multi tool with a sanding attachment because that’s much smaller and you’d have more control.
Caulking, caulking, and more caulking
Caulking was what took the most time with this feature wall! I recommend a good dripless caulk gun for this project… and just in general. I got this one a while back and it’s been a game changer!
The first thing I did was put backer rod in the large gaps. Backer rod is a foam strip that helps account for some of the space so you’re not wasting a bunch of caulk or having to do a million coats. It’s awesome!
All you do it use a painter’s tool to push it in!
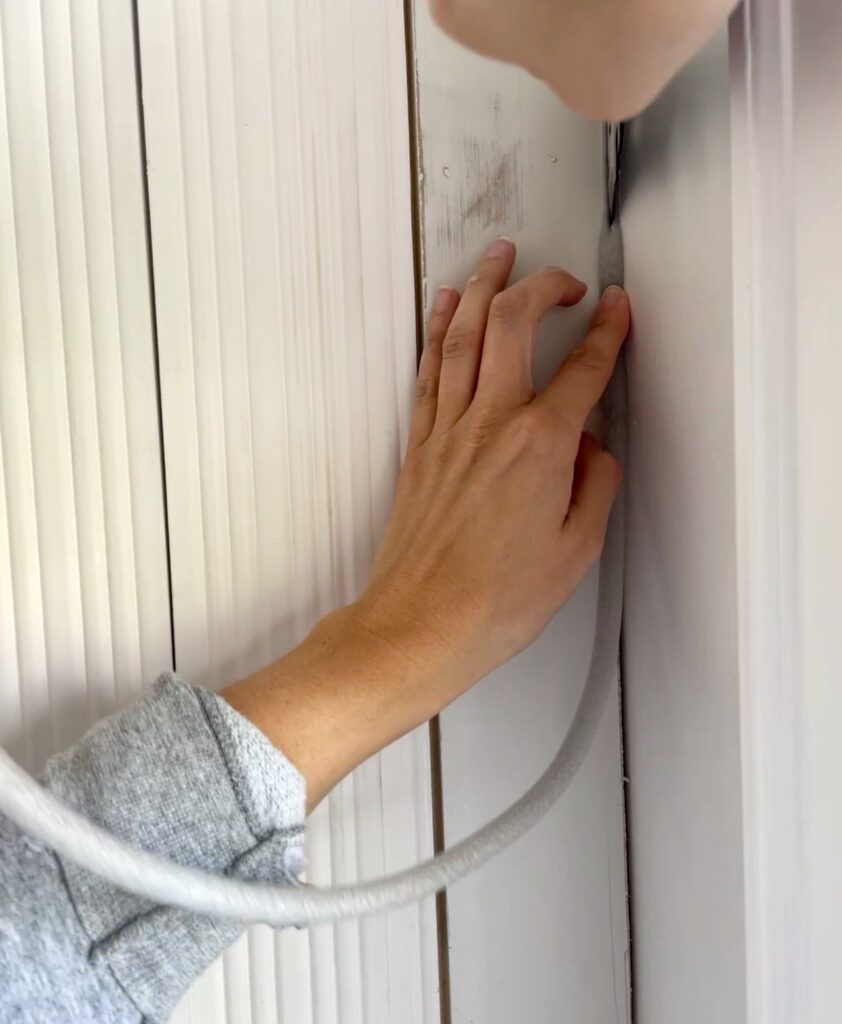
After the backer rod is in, you’ll just caulk like normal.
The caulking will be done on the edges of the MDF (where it meets the ceiling and the walls) and in the bigger seams between the fluted panels. Here’s a quick video to give you a better idea.
Some of the seams between the fluted panels did require two coats. Not fun… I know!!
Watch until the end of the video to see how I caulked where the fluted trim met the MDF. That part was a little tricky but I eventually learned a system that worked.
My caulk finisher tool was a huge help and then I used my finger to smooth it out at the end!
Step Five: Paint
This is the most satisfying part of the whole project because this feature wall looks rough before it gets paint. Here’s proof:
Do you have to prime?
It depends on the boards you use! Both my MDF and fluted panels were already primed, so I didn’t worry about it! Although, it can never hurt!
Do you have any tips for painting?
First I cut in around the edges with a small angled brush. This one is my favorite!
After that, I used a small roller brush for the rest of the accent wall. You can of course use a large roller brush too, but for whatever reason I wanted to use a small one. I like to make things harder on myself.
Either way, I recommend using a microfiber roller brush. Since there’s so many grooves in the wall, you’ll want at least 3/8″ nap to help get in all the crevices.
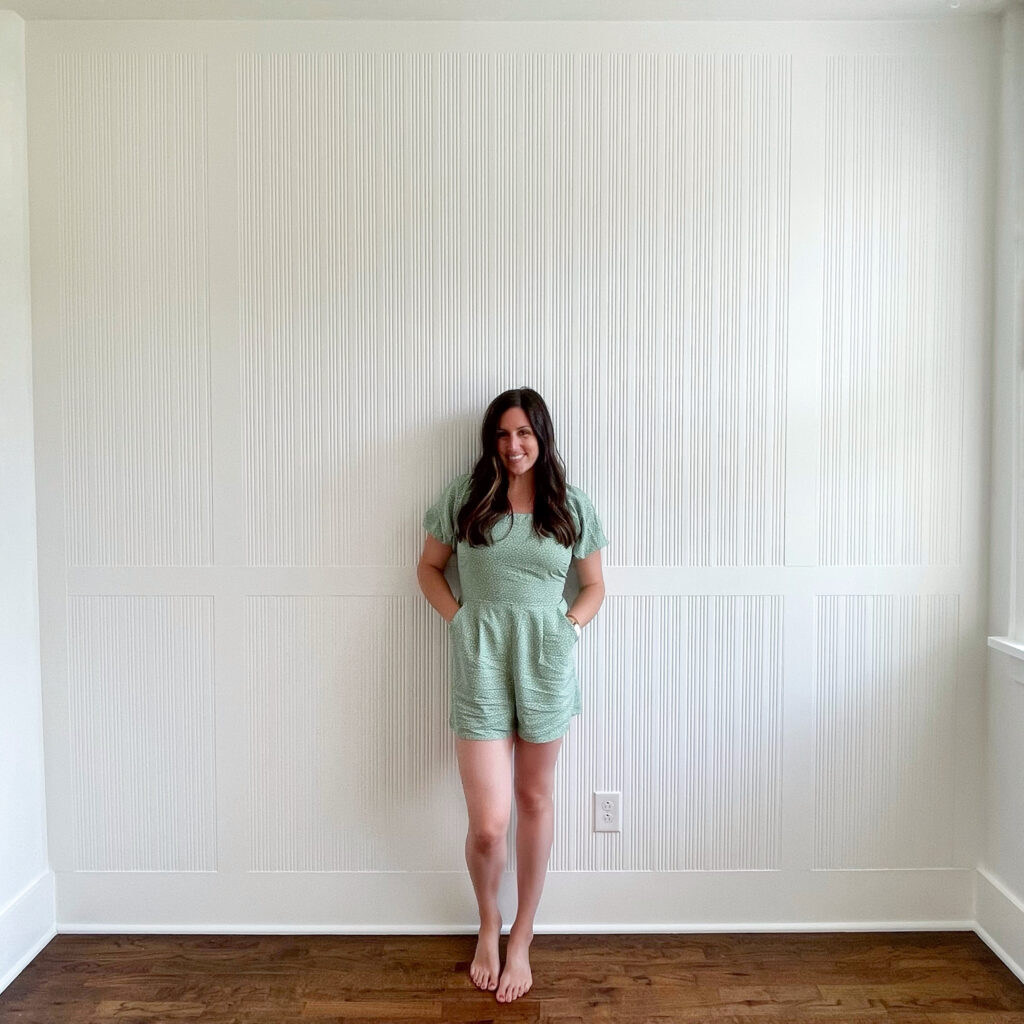
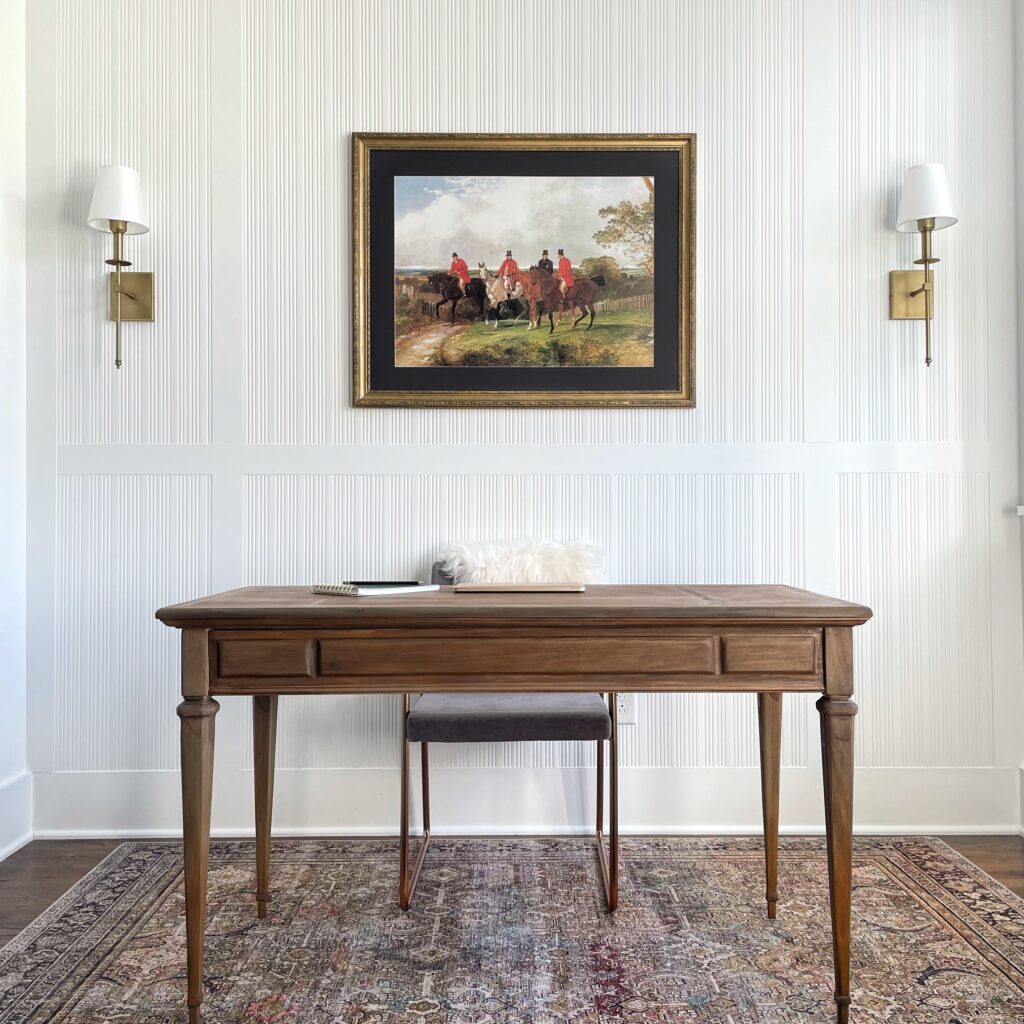
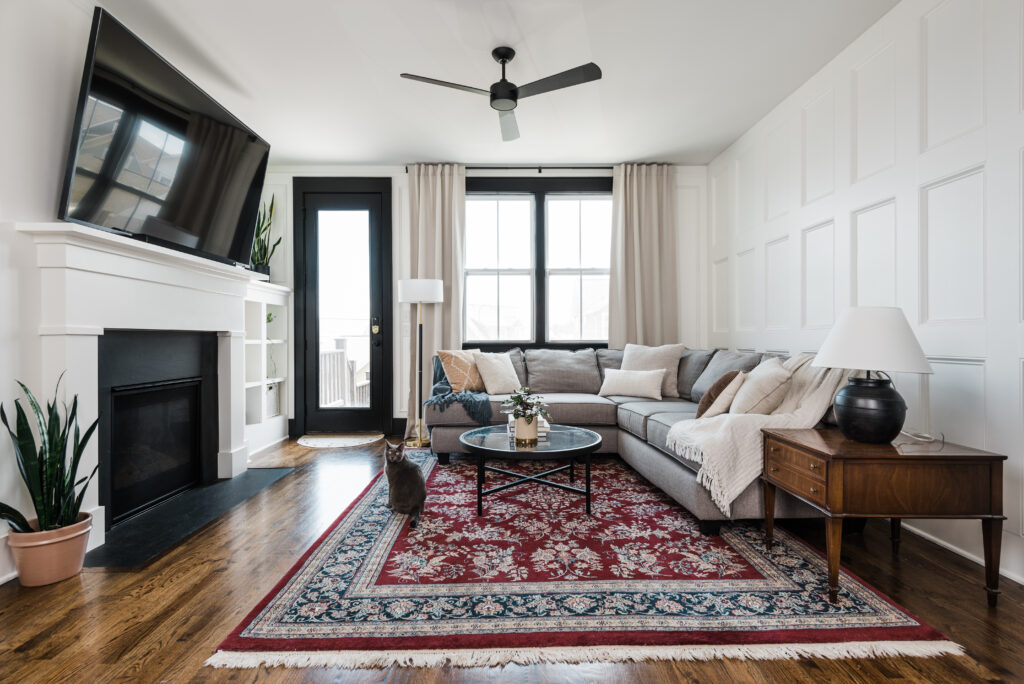
Can you believe how good it looks after it got some paint on there? In case you’re wondering, I used Sherwin Williams Pure White in this room.
How is it holding up?
It’s holding up great and is definitely one of my favorite feature walls. (The only competition being my recessed wainscoting accent wall)
The one thing I will note- the first winter after doing this I noticed that some of the seams were starting to crack. Unfortunately this is incredibly common and hard to avoid. Changes in temperature cause the wood to expand and contract which leads to cracking.
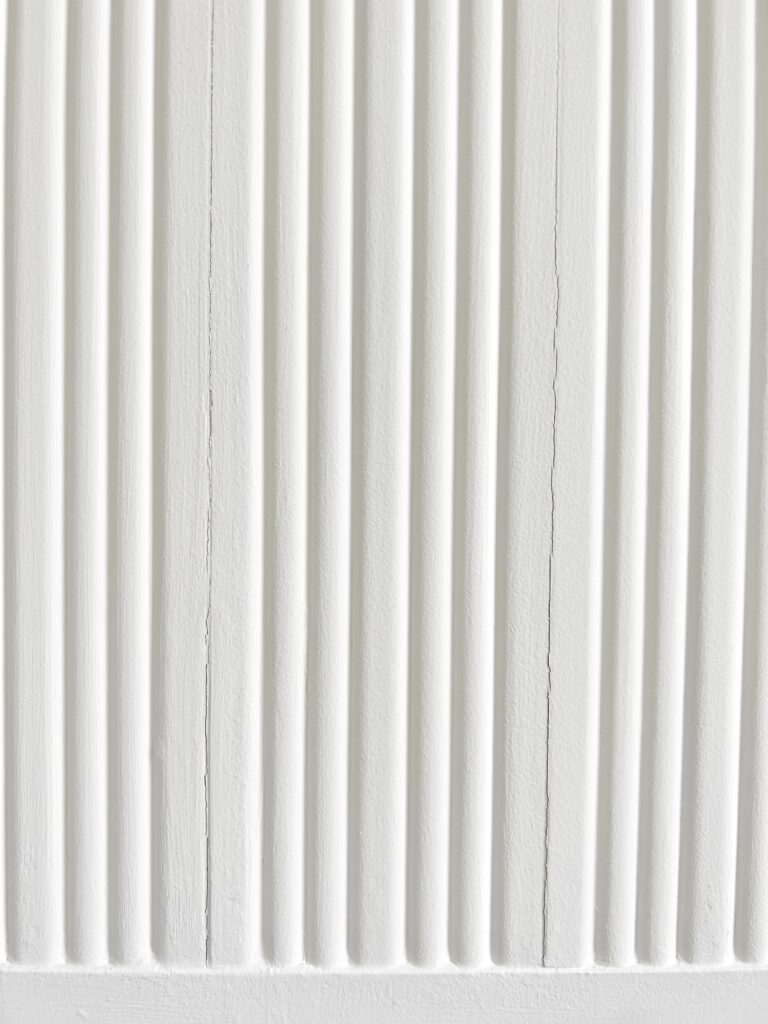
The photo above is one of the bad areas so as you can see it’s not terrible.
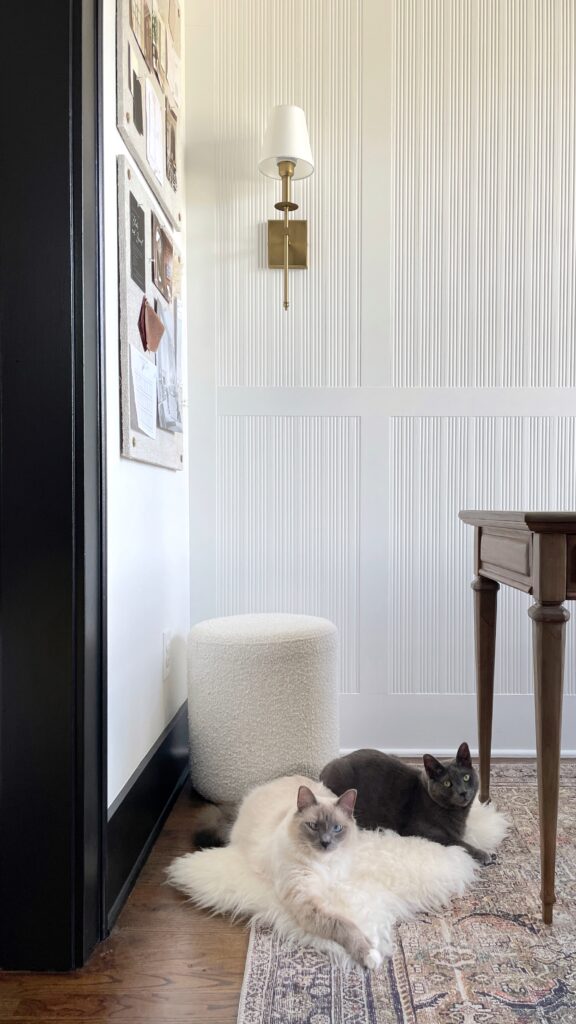
New paint color!
UPDATE: I’ve since done some re-caulking and painted this fluted panel wall a new color!

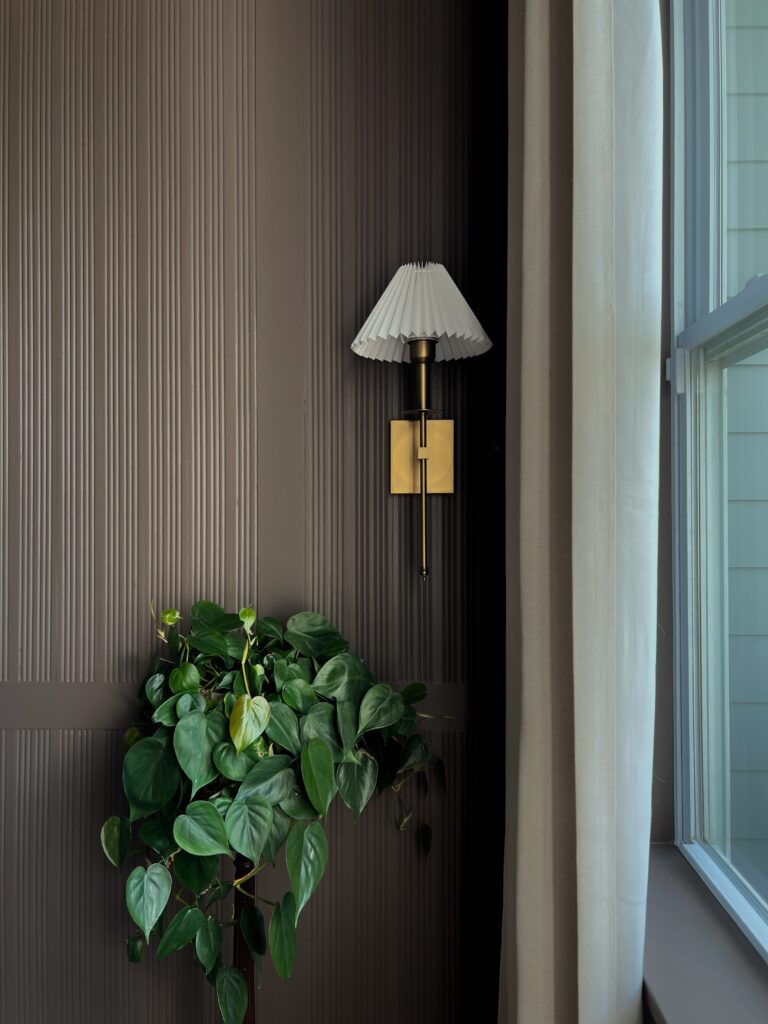
The new color is London Clay by Farrow & Ball (I got it color matched at Sherwin Williams). It’s a warm brown color with magenta undertones and makes for such a cozy office.
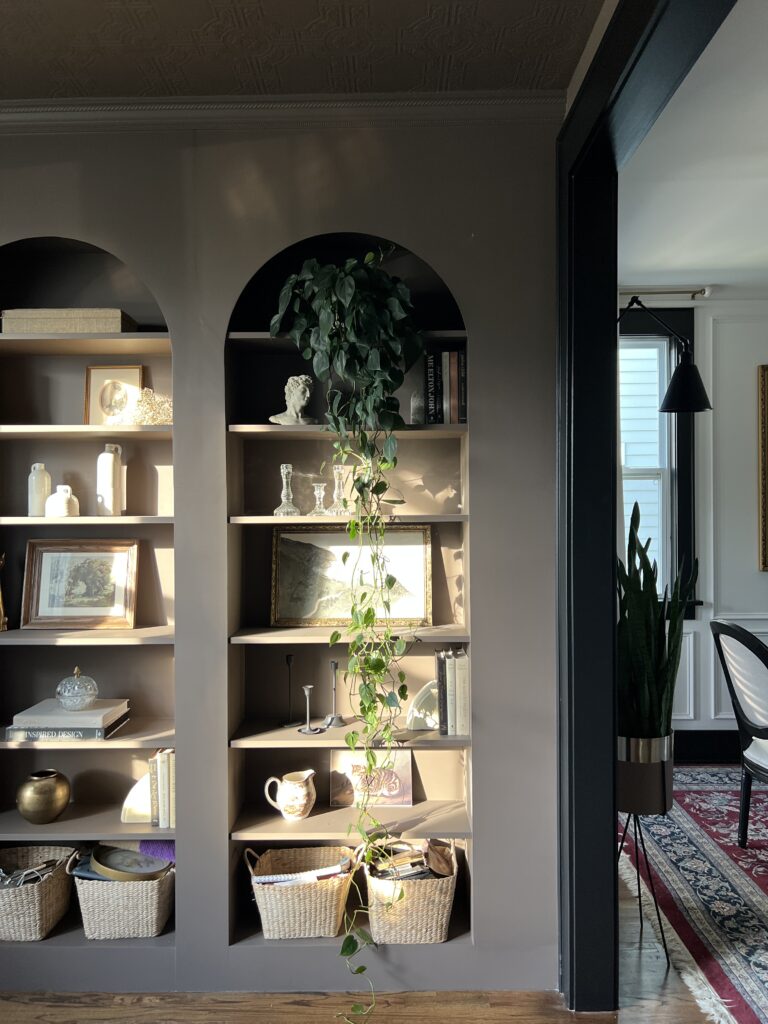
My arched Ikea billy bookcases also look stunning in this color!
Anyway, I hope this fluted wall panel tutorial was helpful for you!!! If you’re more of a visual learner, you can check out my Instagram highlight for this project.
If you have any additional comments or questions, let me know 🙂 Thank you for being here!

gorgeous!! What trim did you use for this wall?
Hi Amy! Thank you! If you go to the top of the post under materials I linked a few options! Option 3 is most similar to the trim I used 🙂
Hi Amy, I’m attempting such a fluted wall. Thanks for the tutorial, it’s quite helpful. I was wondering what are the measurements for the grid? What is the length of the longer rectangle and what is the length of the smaller rectangle at the bottom ? Thanks in advance.
Hi Vasavi! So glad to hear this is helpful! Okay just measured and fluted trim in the top rectangle are 5ft in length and 34″ for the bottom fluted boards!
What rug is that?
Hi Nina! If you go to my home page and then to “shop my favorites”, you can click on office and get the link!!
This may seem obvious, but what is the width of the MDF boards? do you just try to get some that are the same with as the baseboards? And then the material the same as that? Thank you so much for this tutorial. Great help!
Hi Ashlynn! Great question! They were 11/16″, but yes that’s exactly what I did… I measured my baseboard width before choosing the materials to make sure it would all be flush!! So glad you found this helpful 🙂
Hello, Love your wall design! I’m wondering if you can help me. I see you have an outlet and I’m running into the issue of the outlet being to far in the wall. Did you have to pull your outlet out more to be flush with the wall?
Thanks
Thank you so much Kristina! Yes, we did have an outlet!! Google “outlet extender box” and thats what you can use to push it out 🙂 Good luck!!