

Renovating a historic home comes with a unique set of challenges and rewards, especially when it comes to preserving and enhancing its original features! Hardwood floors can add character and warmth to any home but often require some TLC to bring them back to their natural beauty. Floor refinishing is very intimidating, but don’t worry! We made all the mistakes during our first DIY staining hardwood floors experience, so you don’t have to!
With careful preparation and the right tools, you’ll be admiring your new hardwood floor in no time! This post will guide you through each step of the staining process, including where we went wrong, so you have the knowledge you need to confidently tackle this rewarding project in your own home! Let’s dive in!

Disclaimer: This post contains affiliate links. This means, if you purchase something from a link I provided, I will receive a small commission. This is at no extra cost to you! Thank you so much for the support!
Tools
- Shop Vac
- Safety Glasses
- Respirator with VOC Blocking Filters (especially if you’re using oil based stain)
- Disposable Gloves
- Shoe covers
Materials
- Plastic Sheeting (if needed)
- Tack Cloth
- Mineral Spirits
- Stain
- Paint Brush
- Stain Applicator
- Wiping Rags
- Polyurethane Sealant
- 1/4″ Microfiber Roller Brush
How to Sand Hardwood Floors
This post is focused on DIY staining hardwood floors, but if you’re interested in how to sand and refinish your solid hardwood floors down to the bare wood, check out our Beginner’s Guide to DIY Hardwood Floor Refinishing or our YouTube video! We shared all the tips and tricks with using a drum sander, the grit sequence, and of course any challenges we faced 🙂
Stain Options for Hardwood Floors
Another difficult part about this DIY is trying to find the best wood stain for your hardwood flooring. There’s a lot of options to sift through and a few things you should consider.
Water-Based Stain
Originally I was hoping to use a water-based stain on our hardwood floors only because of the low odor. We were staying in our home while refinishing the floors (which i’d avoid if at all possible) so the strong odor of an oil-based stain wasn’t ideal.

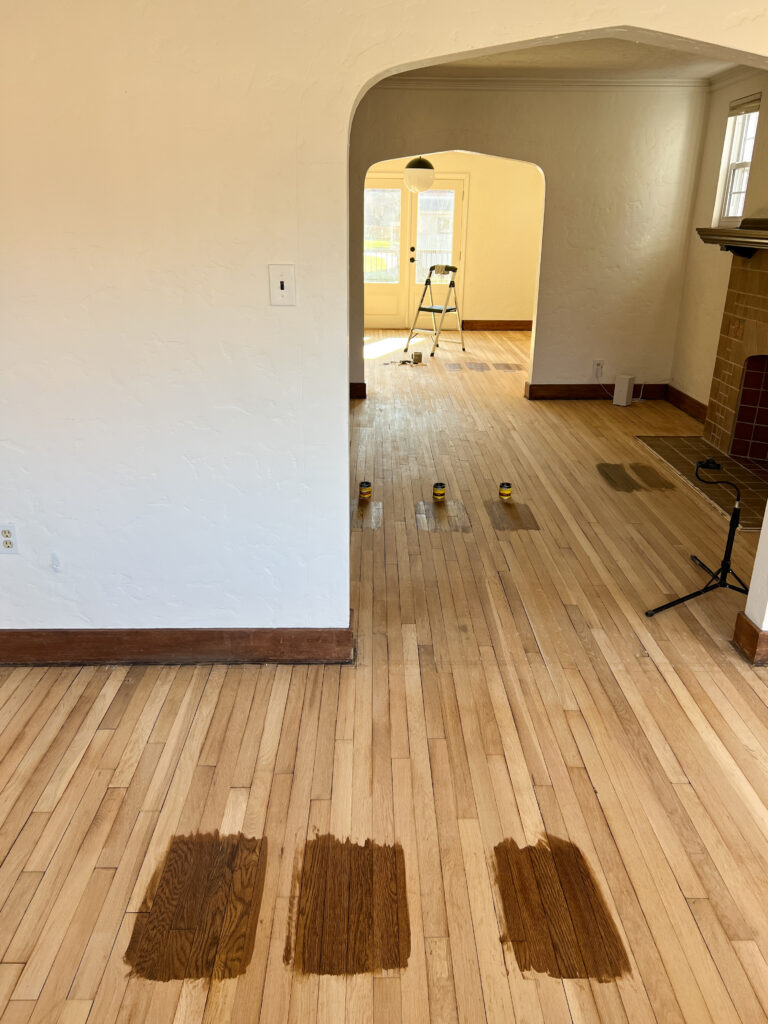
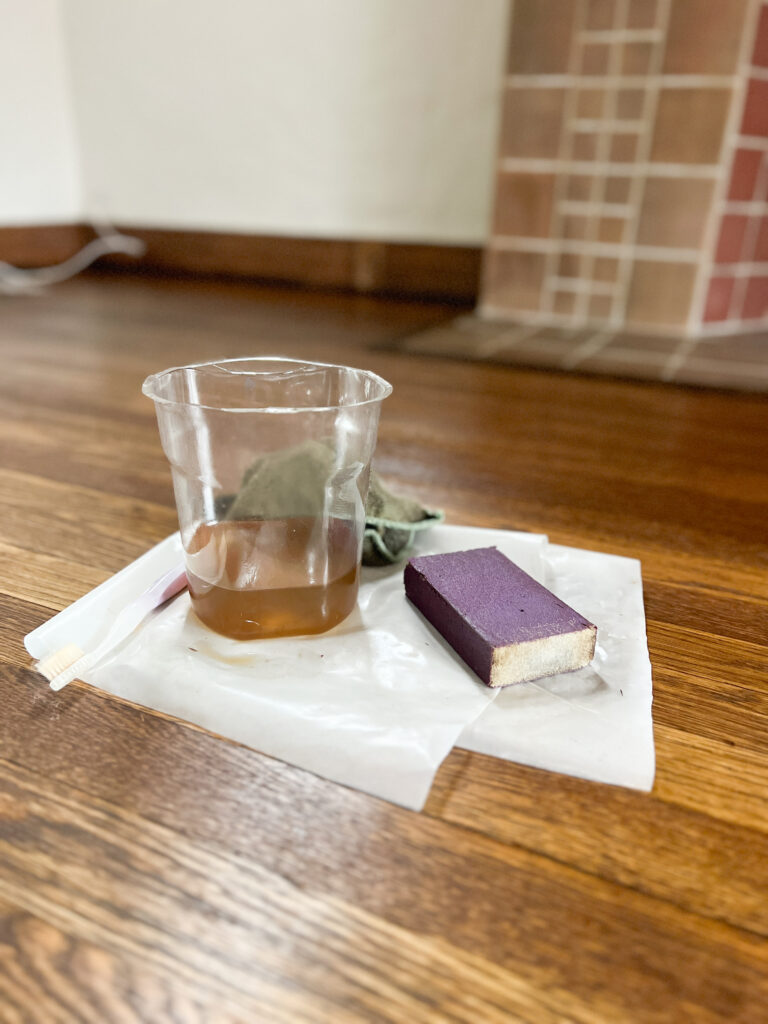
Unfortunately I just didn’t love how the water-based stains looked. They had green undertones and just weren’t as rich in color as my oil-based stain samples. You can see what I mean in the photo below! The oil-based stains are on the left and the two water-based stains are on the right.
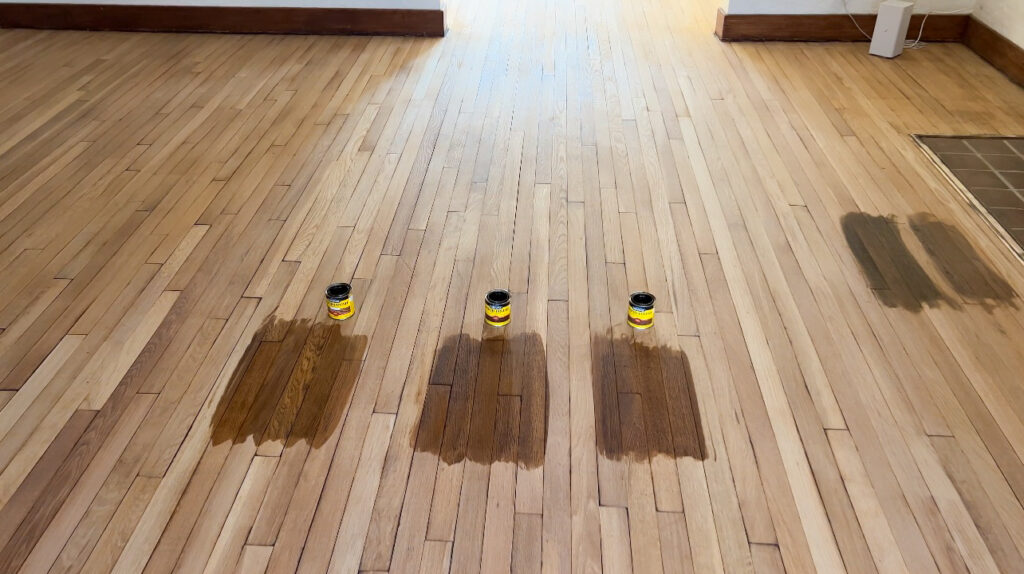
Additionally, I wasn’t seeing a lot of research on applying water-based stain to hardwood floors, but with my general DIY knowledge I know that water-based stain is tricky to use on large surfaces. It dries very fast which means you have less time to work with it.
For small areas I think it would work great, but it would be very difficult to get an even finish across the entire floor. After seeing a TikTok video of someone who used a water-based stain and ended up having to sand and start completely over due to extreme blotchiness, I decided to go with oil-based!
Oil-Based Stain
The benefit of using an oil-based stain on your hardwood floors is that you’ll get a beautiful, rich color. It also has a longer dry time which can be both a pro and a con… a pro in that you have more time to work with it and a con in that you have to wait longer for it to dry! Another big con, of course, is the strong odor.
Oil-Modified Stain
When we refinish our upstairs, we plan to try a new stain! If you’ve done any research about refinishing hardwood floors, I’m sure you’ve come across Bona products. Bona is a very trusted brand when it comes to hardwood floor products.
I’m interested in trying the Bona DriFast stain which is an oil-modified stain! Oil-modified stains combines characteristics of both oil-based and water-based stains. It dries faster and has less odor than the traditional oil-based stain but you still get that rich color… it sounds perfect! I’ll definitely be updating this post when we do get around to trying it 🙂
Prep Your Hardwood Floors
Have a Plan
It’s no secret that staining hardwood floors can get messy so having a plan is important! We planned it out so that the last room we stained was our living room, because that’s where the stairs are. Since we knew the stain would take somewhere between 12-15 hours to dry, we timed it so that we landed upstairs in the evening and the floors would dry while we slept. Or at least, we thought 😉 Keep reading!
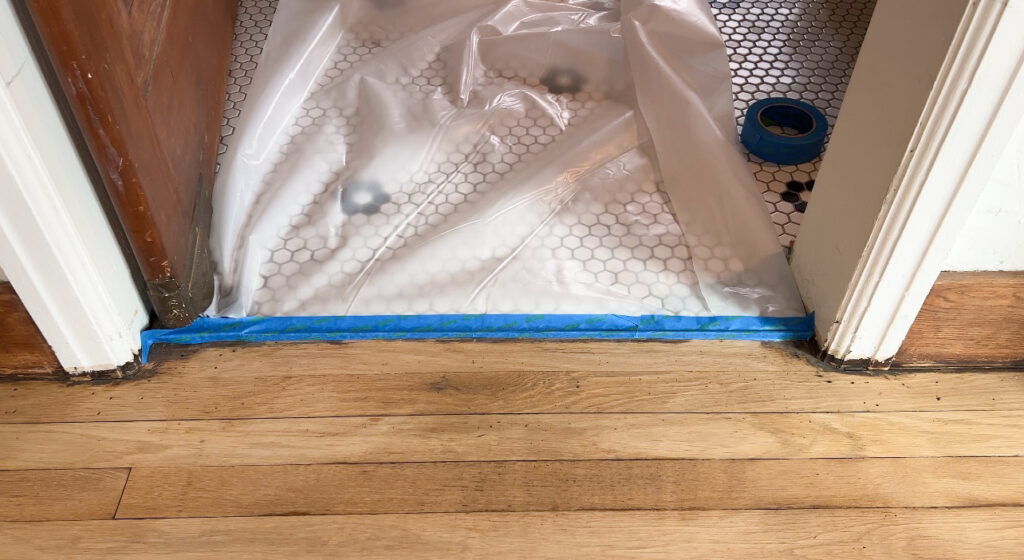
You also want to cover any areas you don’t want stain. You can use painter’s tape and plastic sheeting! For us it was really just the transitions into the kitchen. Having this plastic sheeting to walk on in there was helpful too! It gave us a place to take off our shoe protectors before stepping onto the tile floors.
Prepare for fumes
As I mentioned before, we were staying in our home during this process which I was incredibly nervous about. I did a lot of research on best precautions to take in this scenario and here’s what we came up with:
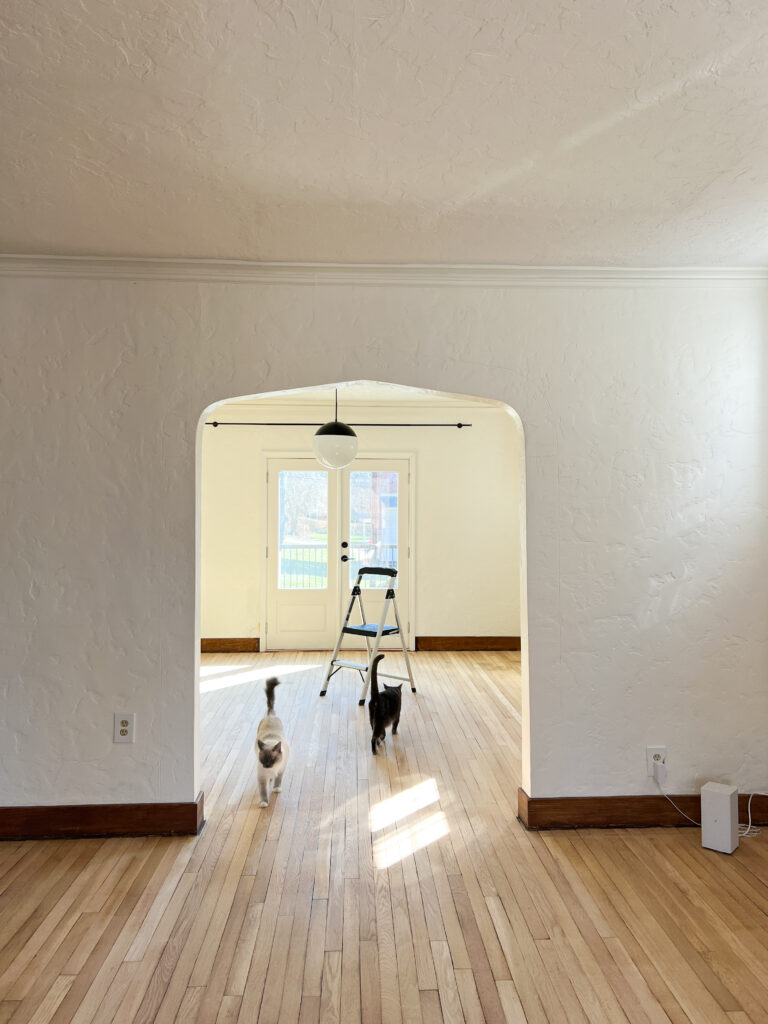
Our cats were situated upstairs in our bedroom. We used a plastic doorway barrier both at the top and bottom of our stairs and well as extra heavy duty plastic sheeting to block off the stairs entirely. Additionally, we placed a box fan at the top of the stairs facing out an open window. We were actually really impressed by how well this blocked the odor from coming upstairs!
Whether you’re staying in the house or not, you’ll want proper ventilation (open windows and use box fans) and a VOC blocking mask! (We used this mask with these filters)
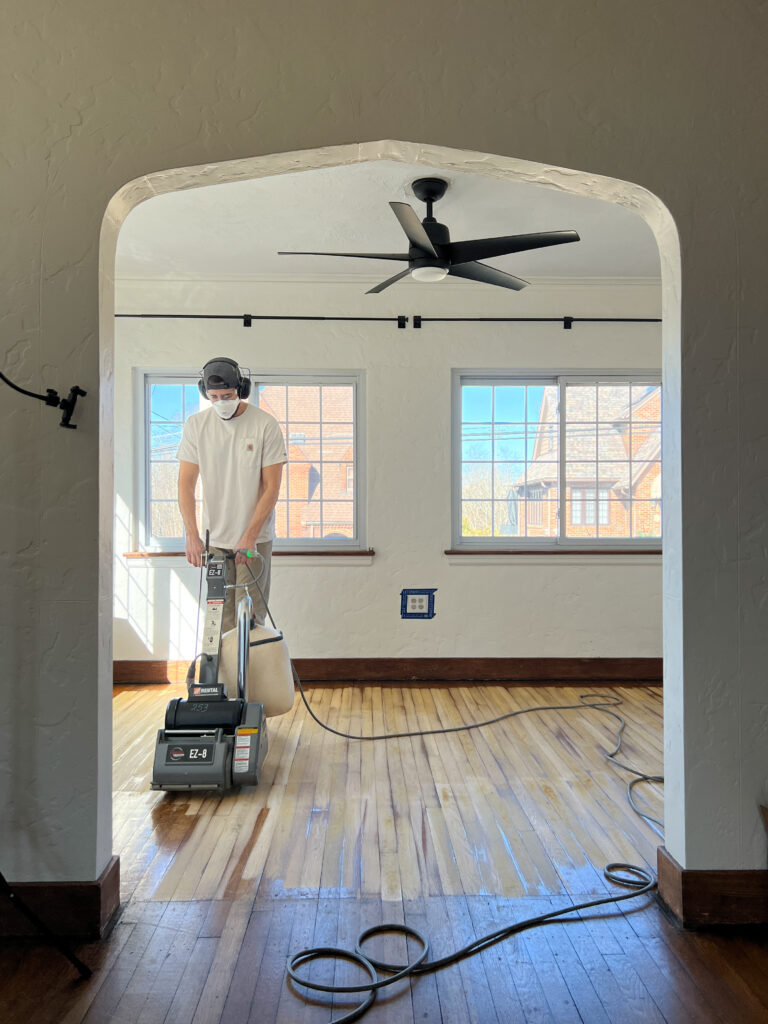
Final Sand
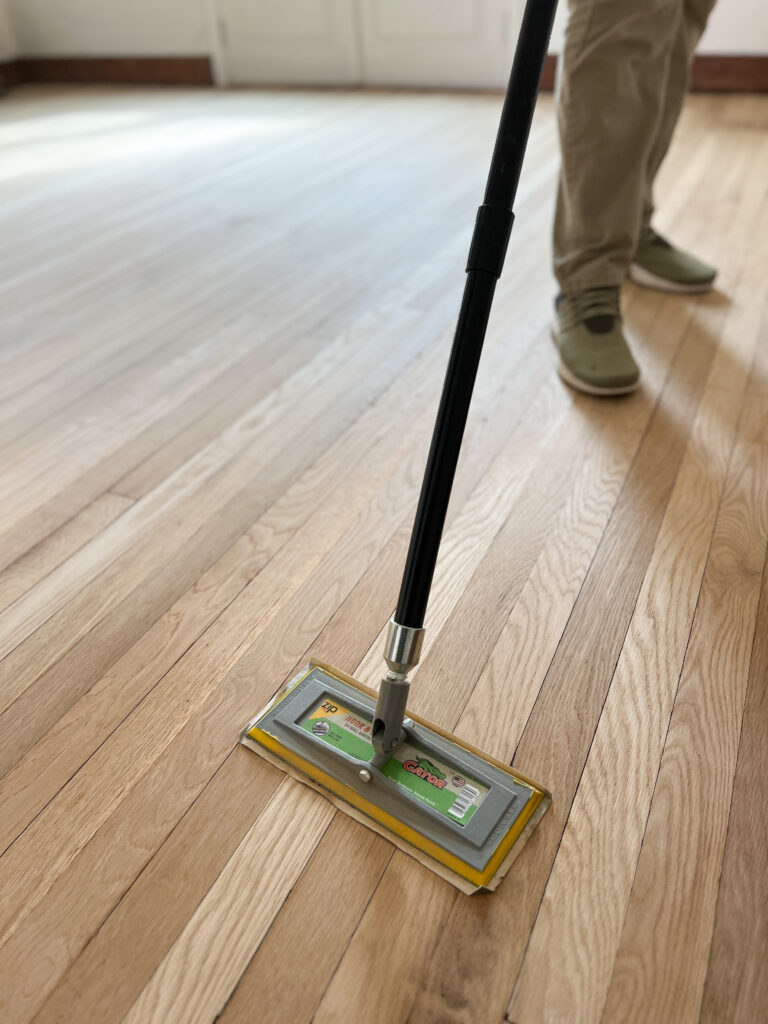
Before staining, we did one final sanding coat with a pole sander and 120 grit paper! This will help ensure a smooth finish and doesn’t take much extra time!
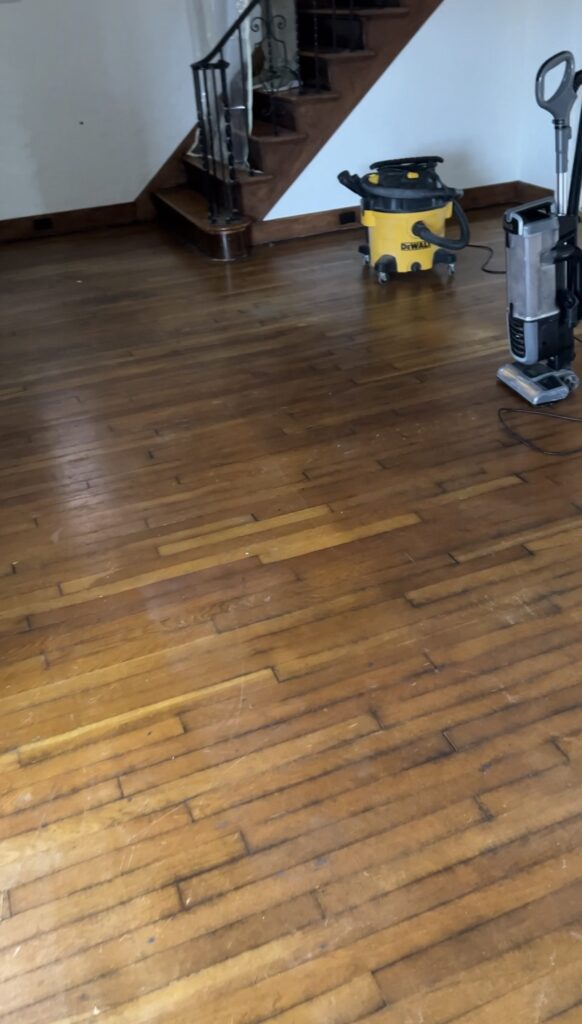
Rid of Dust
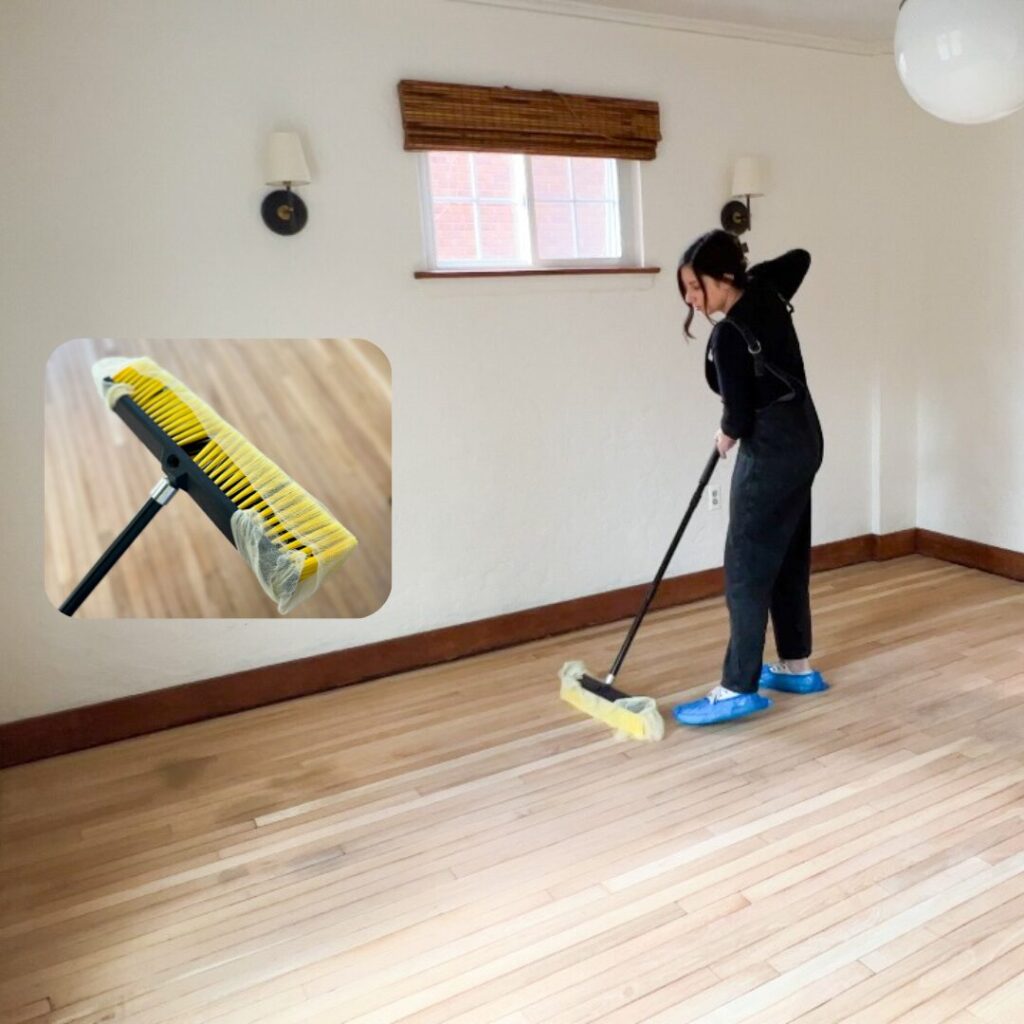
Its really important to ensure the surface of your floors is clean and free of dust and debris. First I vacuumed with my shopvac and then I came with a tack cloth! To make this part easier, I ordered large tack clothes and attached them to a large broom with rubber bands. I’d highly recommend not skipping this step because it’s crucial to have a clean surface for staining.
Applying Stain to Hardwood Floors
Let me just preface by saying that we made some big mistakes during this part, but we learned a lot. We’re going to share the good, the bad, and the ugly with you so you can learn from our suffering LOL! The good news is it all worked out in the end! If you want to watch it all unfold in more detail, definitely watch our YouTube video!
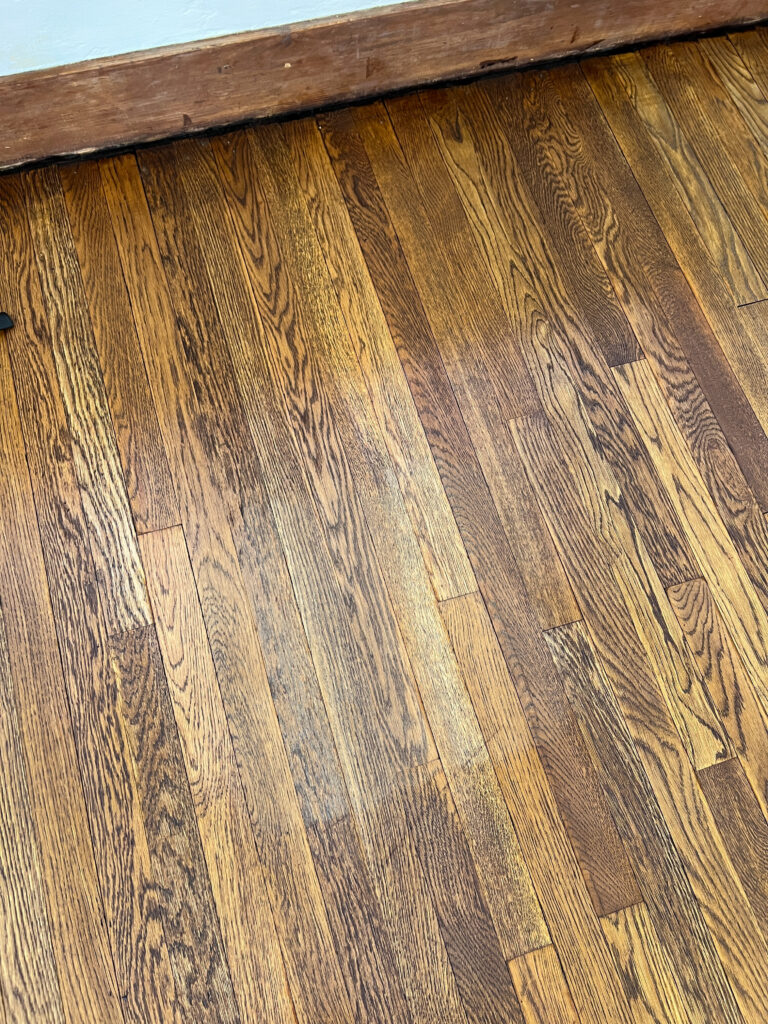
We went with Minwax provincial for our hardwood floors! I really had my heart set on this stain color from the beginning and I’m so happy with it 🙂 Before getting started I gently, but thoroughly, stirred the stain to ensure an even distribution of color pigments. Avoid shaking the can vigorously, as this may create air bubbles.
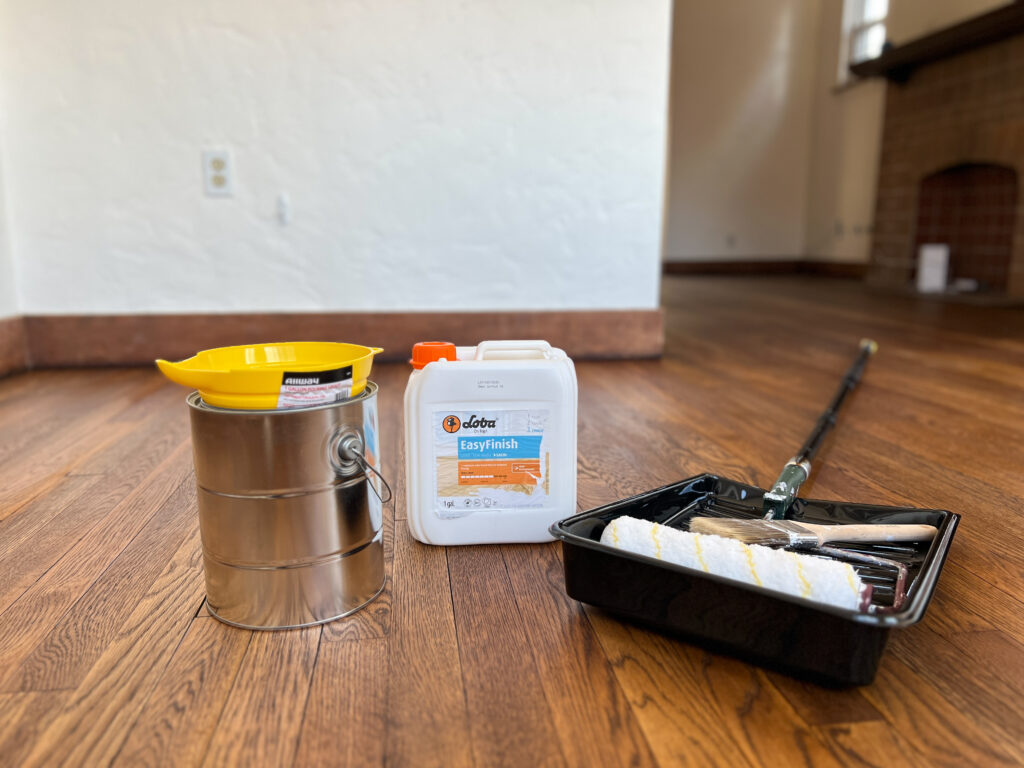
Gather your materials
Make sure you have everything you need before you get going! Here’s what I had ready to go:
- Paint brush for cutting in
- Stain applicator on a pole
- Mineral spirits
- Sponge mop (I used this to wipe the excess stain)
- 2 trays (for the applicator and mop)
- Plastic to set this all on
- Don’t forget to gear up with your mask, shoe protectors, and disposable gloves!

Applying the Stain
The method we used for applying the stain came from a YouTube floor refinisher. He has tons of videos on all things floor refinishing! If you go to the comments section of his videos there’s lots of knowledge there because he’s always answering questions. Click here for his page!
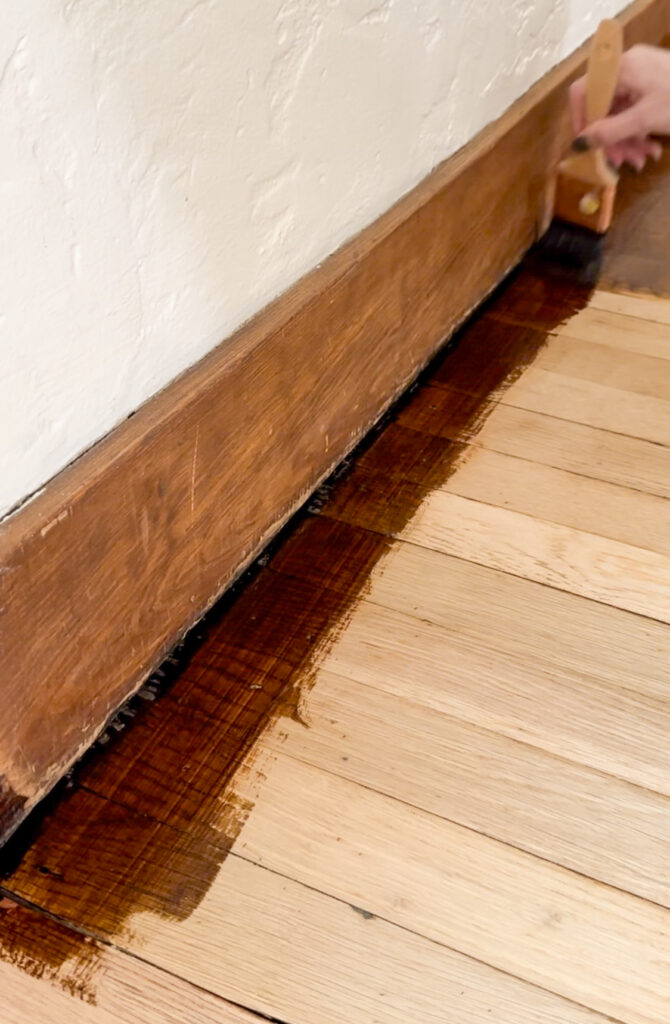
A great way to start is in a corner of the room! We used a paint brush to cut in because it was easier to get the edges of the floor than the applicator was. You’ll want to work in small sections at a time so you’re able to reach!
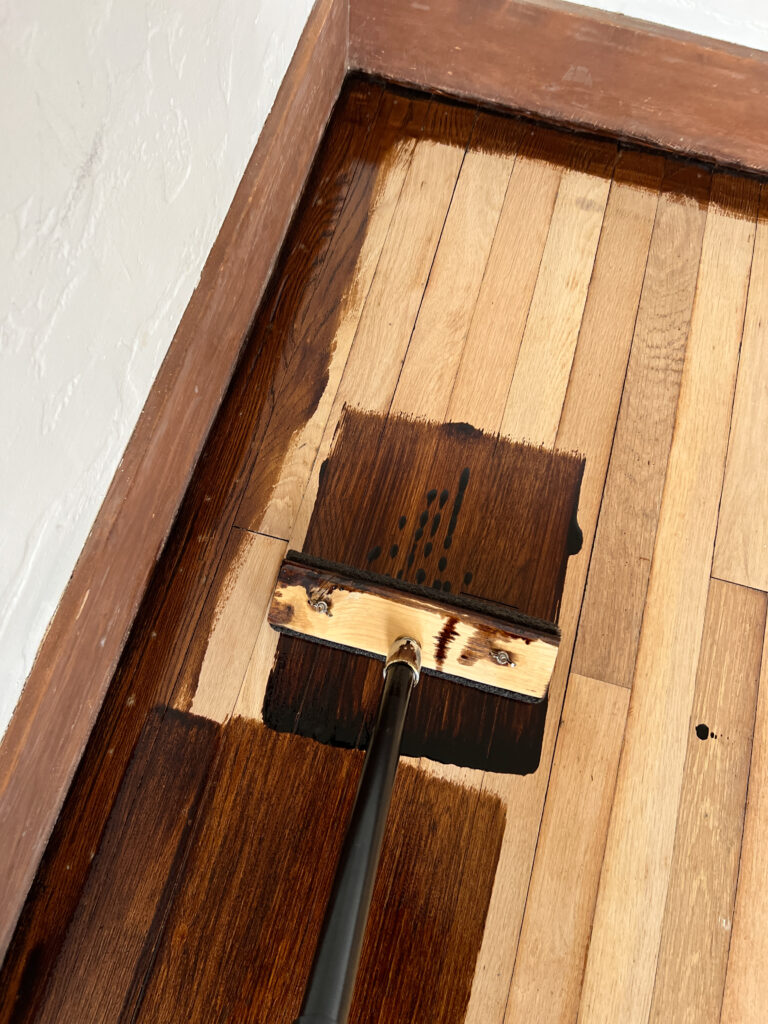
Before using the floor applicator for the first time, dip it in mineral spirits first! This will help the stain glide nicely from the very start! Use long, smooth strokes in the direction of the wood grain to ensure uniform coverage.
To prevent lap marks and ensure a seamless finish, always maintain a “wet edge” while applying the stain. This means working quickly and continuously along the length of the boards without stopping in the middle of a section.
When you’ve applied your stain, use a sponge mop or cloth to wipe off the excess stain. The idea of using a sponge mop came from that same YouTube channel. I thought it was such a good idea because you don’t have to bend over and wipe up the stain, but we made the mistake of not getting enough excess stain up off the floor. It may have been user error, though!
If you decide to use this method, be sure you to go over your floors a few times and continue wringing it out to get as much stain up as possible.
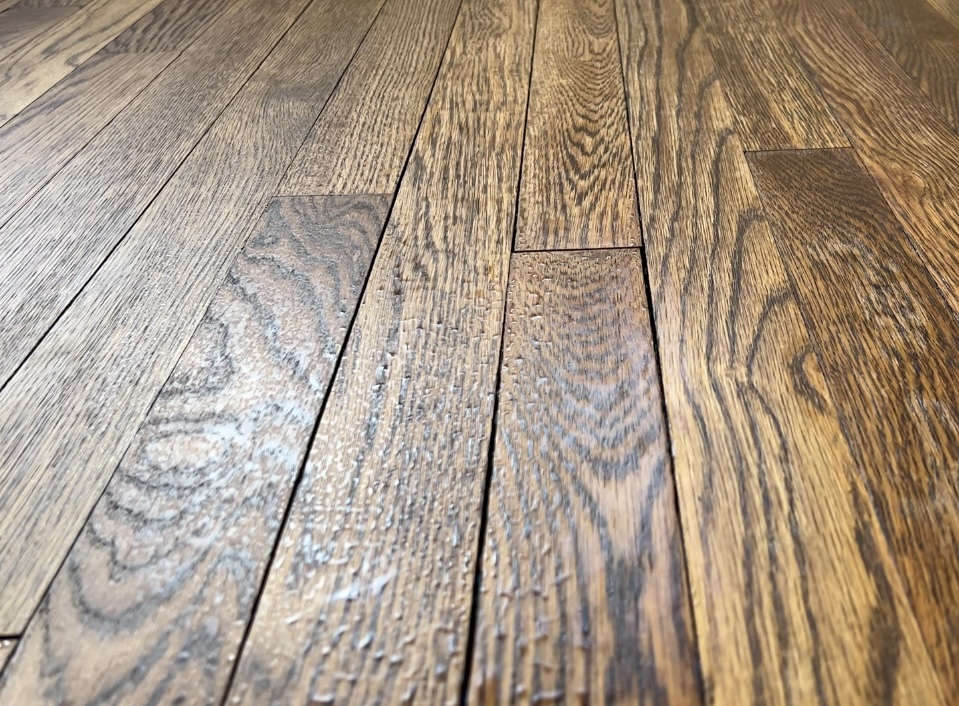
Things took a turn for the worse when we woke up the next morning and noticed that the floors were still not dry. At this point, it had been 15 hours so I knew we made a big mistake.
Where we went wrong
There were a couple things that contributed to this mess! For one, we definitely didn’t wipe off enough of the excess stain. Next time i’ll do it the old fashioned way and just wipe off the excess with a rag instead of using the sponge mop method.
Another huge contributing factor was the fact that the temperature in our home wasn’t ideal for proper drying. Most stains dry best somewhere between 68°F and 72°F. We did this project in the winter, we had all of our windows open, and the heat was turned off. I think our house was somewhere around 50°F… not ideal! Don’t be like us! LOL.
How to Remove Excess Stain
If you accidentally apply too much stain to your hardwood floors, don’t panic. It can be fixed! Use a rag and/or sanding sponge dipped in mineral spirits to wipe away excess stain. Another option is to apply more stain and wipe away the excess, but I didn’t want to deal with the strong odor all over again.
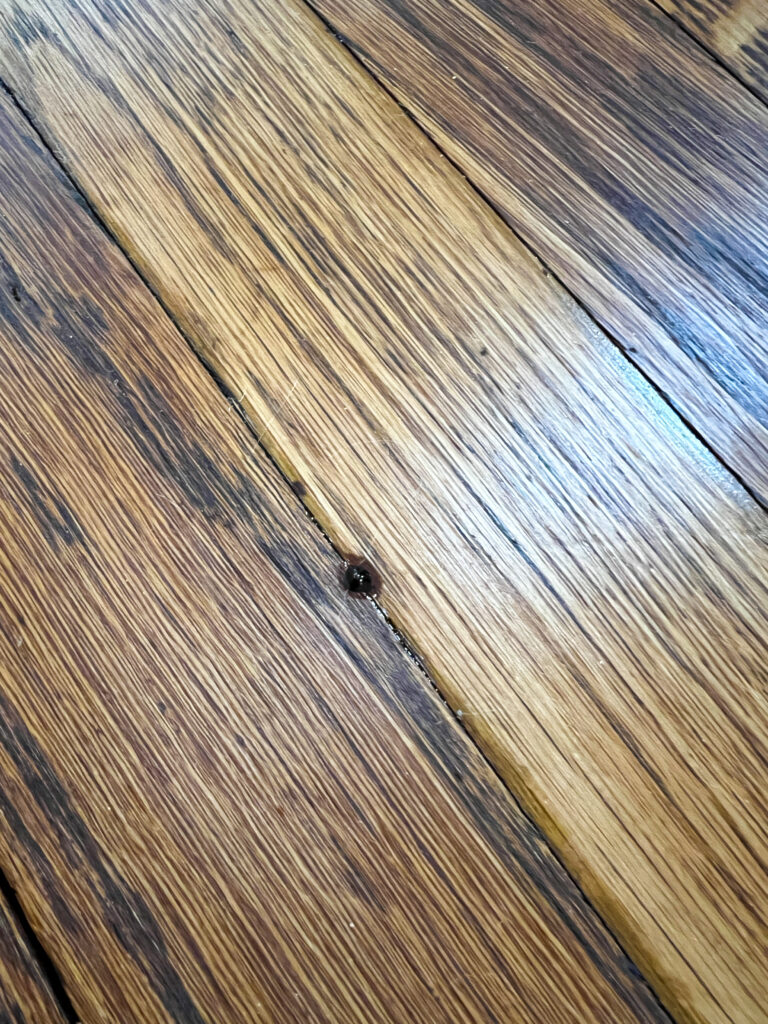
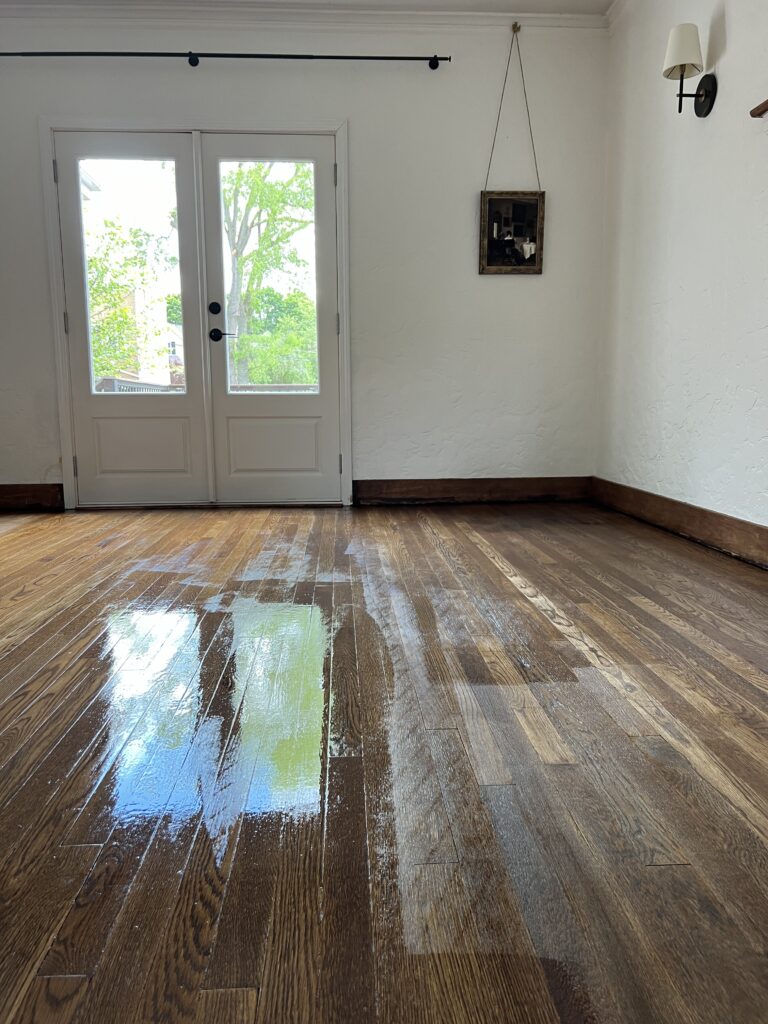
I’m not going to lie, this part was not fun. I spent a couple days on my hands and knees scrubbing, but at the same time I was just very thankful that it was working and I didn’t have to start completely over. You can see in the photo below the area I wiped off… the grain is much more apparent!
As I was doing this, I noticed some little beads of stain resurfacing in the crack between planks here and there. After doing some research, I learned that this is called bleed back and it’s a very common thing to experience with staining hardwood floors. Luckily I caught them early enough to just wipe them up, but if you don’t, they will dry this way.
Another reason I’m planning to use Bona DriFast for our DIY staining hardwood floors part two is because it actually says “No bleed back” on the product page!
How to safely dispose of oil-based stain rags
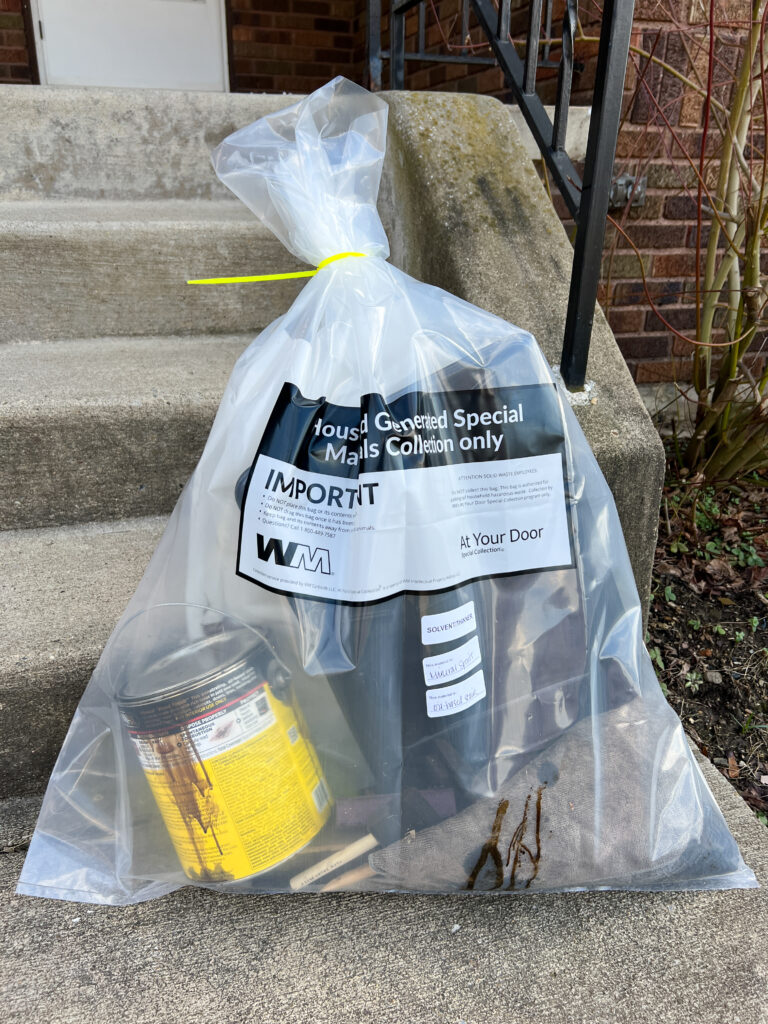
Did you know that oil-based stain rags can spontaneously combust? So if you choose to use oil-based stain, it’s very important to safely dispose of your rags, empty cans, etc!
First you’ll want to let everything dry out in a well ventilated area. Lay the rags out individually away from any flammable materials. We laid ours out on the concrete with rocks to hold them down. Meanwhile, check with your local waste management for instructions on how to handle these products.
We were sent this bag to put it all in and scheduled a pickup date!
Water Based Polyurethane Finish
The polyurethane sealant is a protective layer that will enhance the richness of the stain as well as provide durability against daily wear and tear! You definitely don’t want to skip this step! If you’re unsure about floor finish to use, check out my Water Based vs Oil Based Polyurethane Floor Finish blog post!
Just when I thought I’d suffered enough from our stain mistakes, more issues occurred with the poly! What did I do to deserve this?! LOL kiddinggg it’s all part of the process and once again, everything turned out okay in the end! Before we dive in, this is an important FAQ I want to share:
Can you use a water-based poly over an oil-based stain?
Yes, you can! The most important thing you can do to ensure a successful finish is let the oil-based stain fully cure before applying the water-based poly! Refer to the manufacturer recommendation of whatever product you’re using!
You also want to make sure the products you’re using are compatible. You can determine this by testing the poly in a small inconspicuous area like a closet.
The polyurethane saga
An important thing to mention before getting into this is that it had been about 2 weeks since we applied the stain when I attempted the poly. This is because I got sick and then my husband ruptured his Achilles tendon right after I did the mineral spirits repair on the floors. It was a rough month for us! LOL.
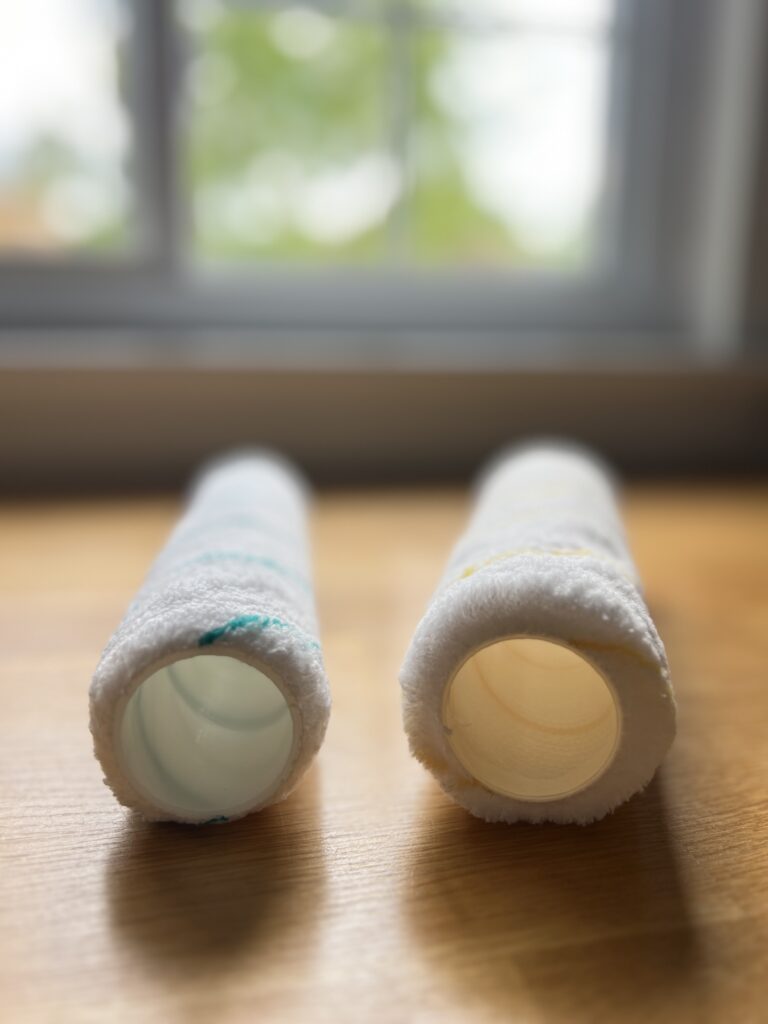
For starters, I wish I’d tested a small area like I suggested above because I just started applying the poly and after covering about 30 square feet, I noticed that it was sort of beading up.
I later realized this was simply due to using the wrong roller brush. I accidentally got a 1/2″ nap roller when really I needed a 1/4″ nap roller… that quite a big difference! Oopsies!
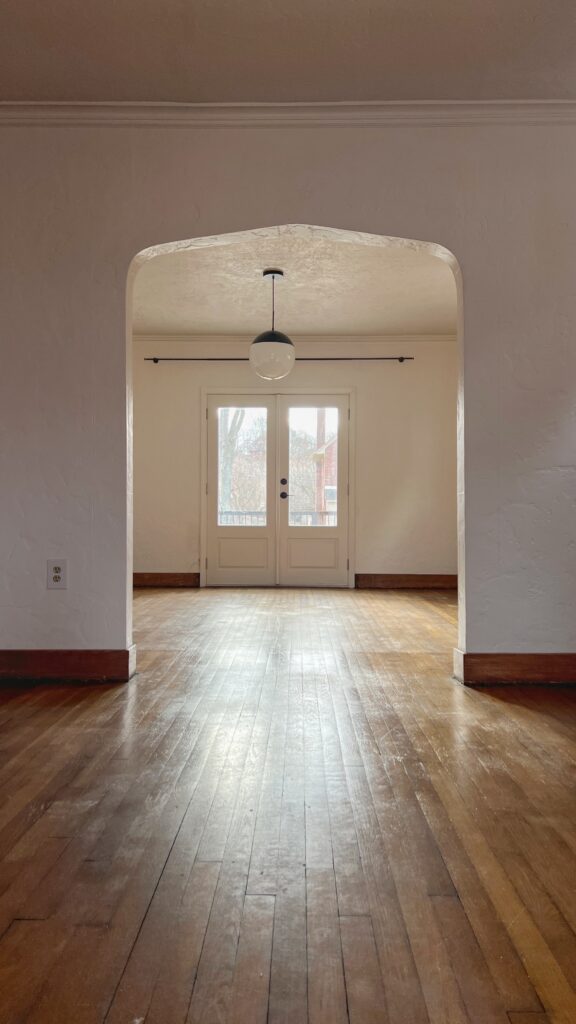
But that wasn’t the only issue… I decided to let this section dry (glad I did!!) and see how it looked before continuing. This is when I realized the poly was turning the wood grain in our hardwood floors white. Gah!
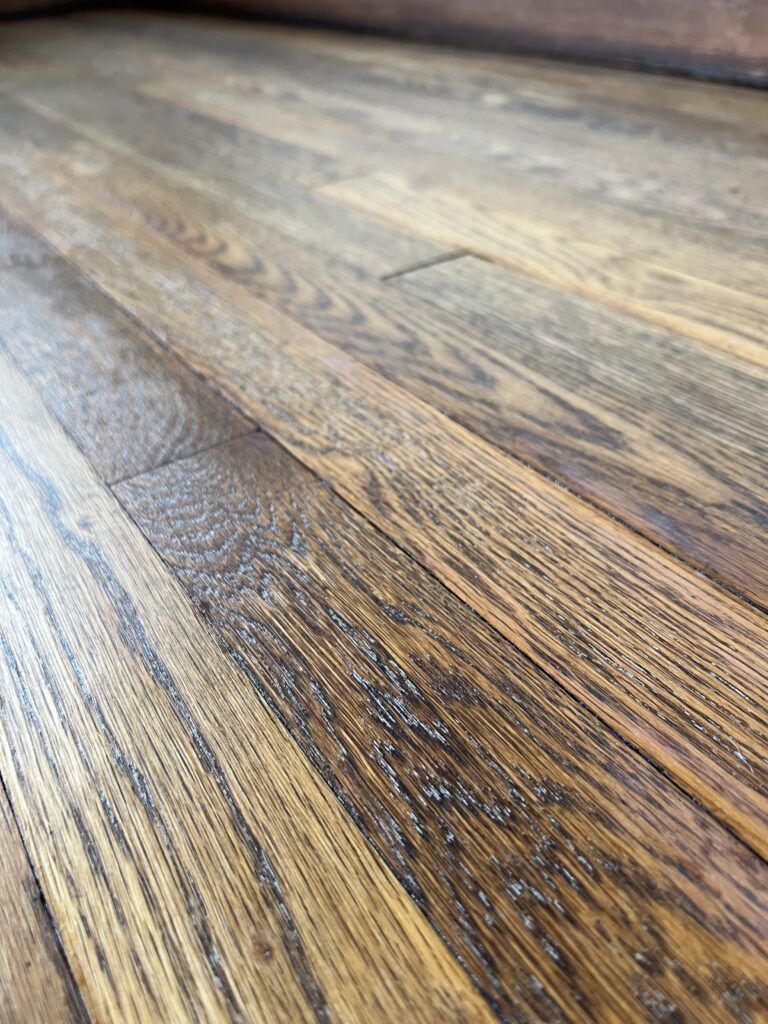
It may not look like a big deal in this up close photo, but the floors were visibly lighter in the areas I was testing the poly. It just seemed like it was dulling the appearance of the stain!
This was when I took a break and started researching like crazy! What I learned is that the poly was likely turning white because the hardwood floors were still holding moisture from the stain. Even after 2 weeks! Crazy, right?! They felt dry to the touch, but oak hardwood floors have deep pores and since all that excess stain sat on the floors for a while, it seeped really deep into those pores.
At this point, all I could really do is give the floors more time to dry. As I mentioned before, my husband got injured in the midst of all this so we moved our furniture back (with felt pads) and moved on with our lives! During this time we were very careful not to spill anything since the floors weren’t protected- the last thing we needed was water damage!
A few months later, I applied the poly room by room so we didn’t have to move all the furniture upstairs. I don’t think the floors really required that much time to dry, life just got busy!
How to Apply Water Based Polyurethane to Floors
Even though you’re seeing all the things that went bad with my first attempt, I promise that applying polyurethane to floors is really easy and dare I say enjoyable?! It’s also very satisfying to watch! You can see the full process, as well as the before and after, in our YouTube video!
Prep Work
The first thing you’ll do is give your floors a good vacuum and clean with a damp mop before getting started. Gather everything you need:
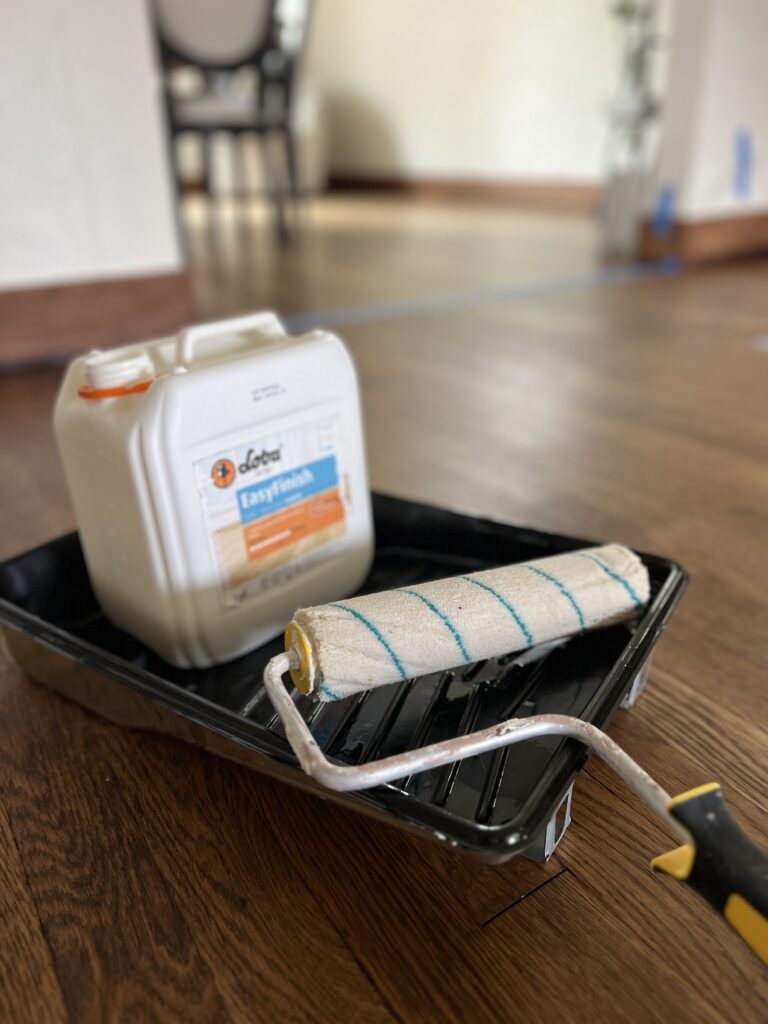
- Polyurethane- this is what I used! I went with a satin floor finish and love it!
- Painter’s tray (just to set your brushes in)
- 1/4″ microfiber roller brush (Run water over the roller first so it glides nicely!)
- Paint brush (for cutting in)
- Painter’s tape (I put some around my wrist in case I saw cat hair or anything else on the floor)
Start in a corner and cut in with a paint brush. Pour the poly directly onto the floor instead of pouring it into a tray. This is because water based polyurethane dries fast and you’ll end up with little dried up chunks in the tray!
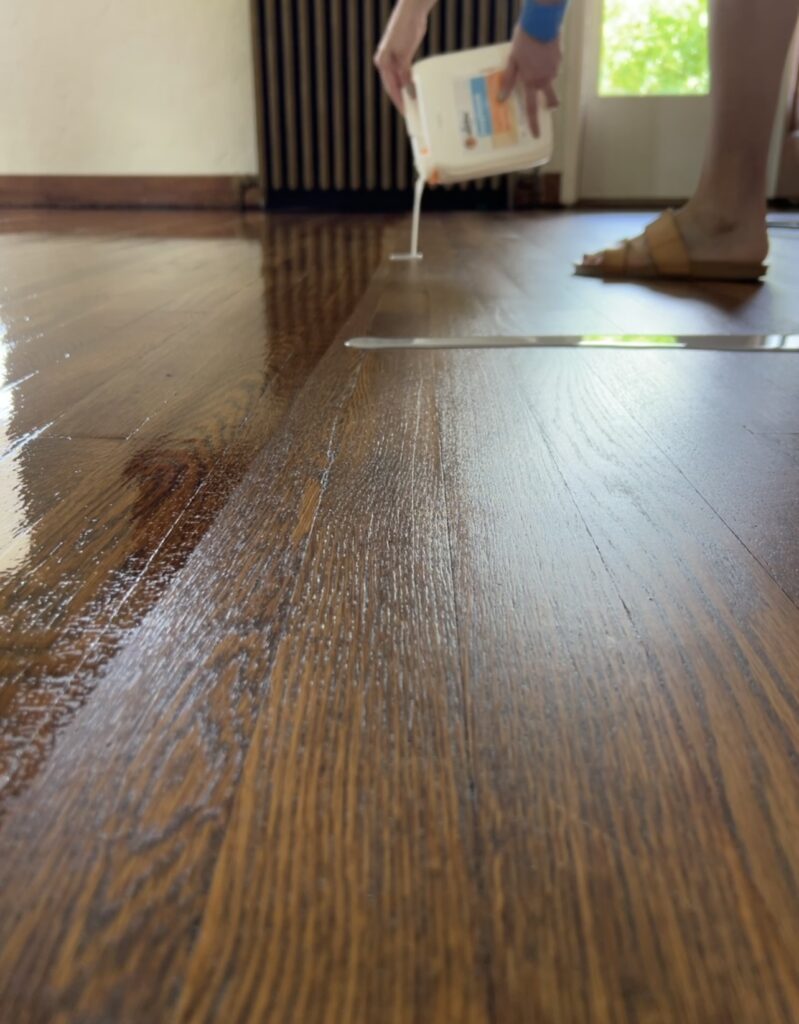
Work in small sections at a time and pour the poly every 3 or 4 feet from one end of the room to the other. The first coat is always a test run to get a feel for it! As I got more comfortable, I started working in even smaller sections because sometimes it was difficult for me to reach the far end!
Since water based polyurethane dries fast, you want to work somewhat quickly. Work methodically across the floor, following the grain of the wood. Avoid over-applying the sealant, as this can lead to drips and uneven drying.
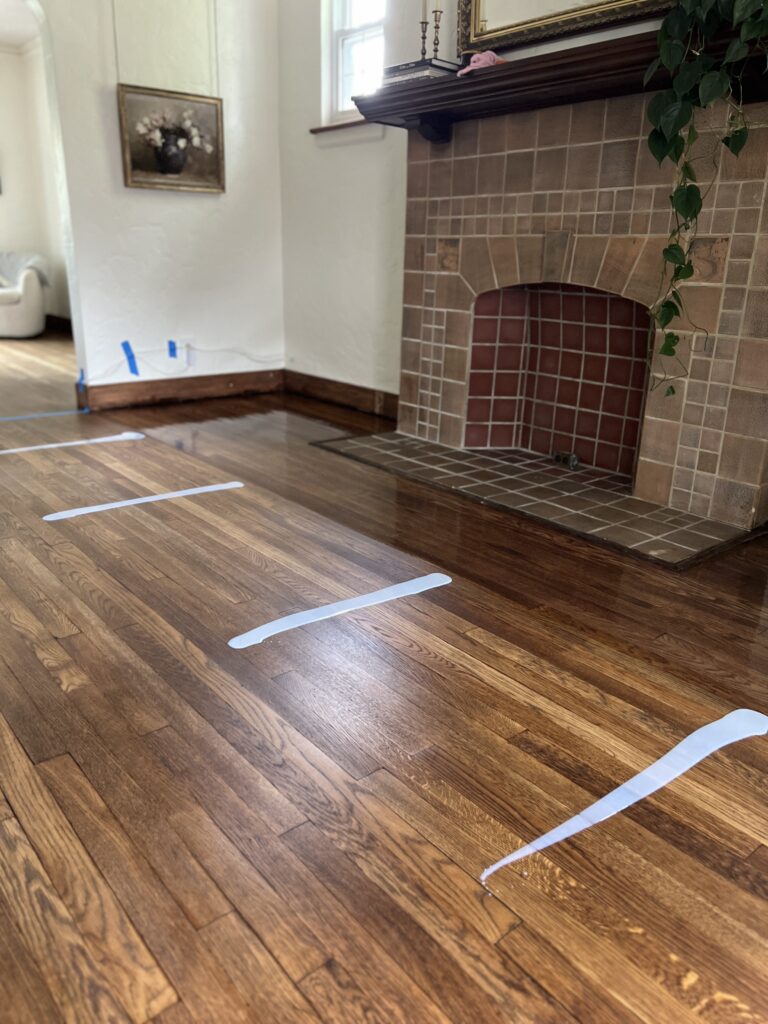
Do you see the diagonal lines from the roller brush? With the luck I’d had, I was so nervous it was going to dry that way LOL but thankfully it didn’t! Phew!
One really nice thing about water based polyurethane is that it dries fast so I was able to get two coats done in one day! The type of finish I used required a four hour drying period before the second coat and it also said not to do more than two coats in a day. On the second day, I did a quick screen sand with 180 grit paper, vacuumed, and then applied the third and final coat. It’s recommended to do at least three coats (four is even better) of water-based polyurethane!
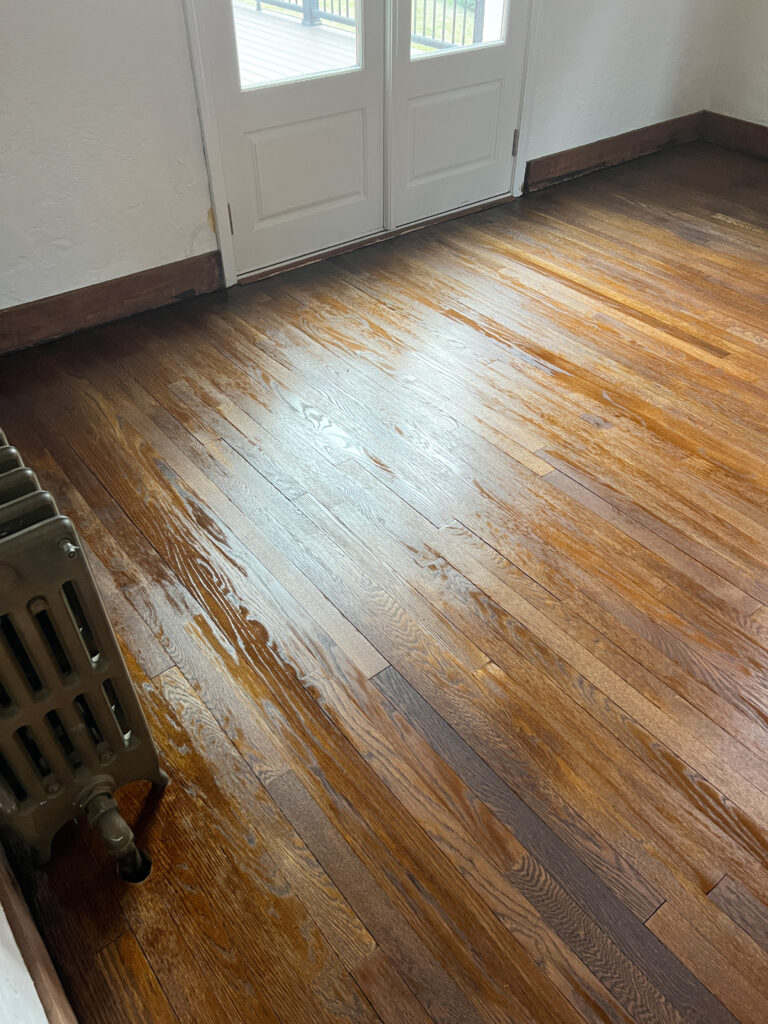
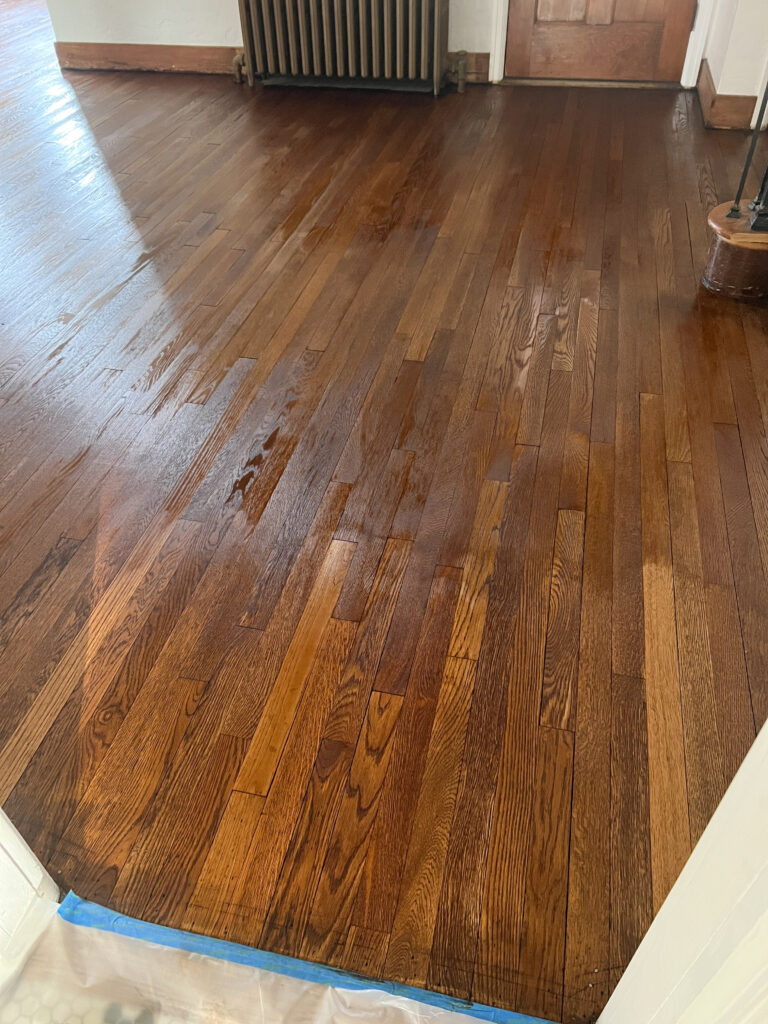
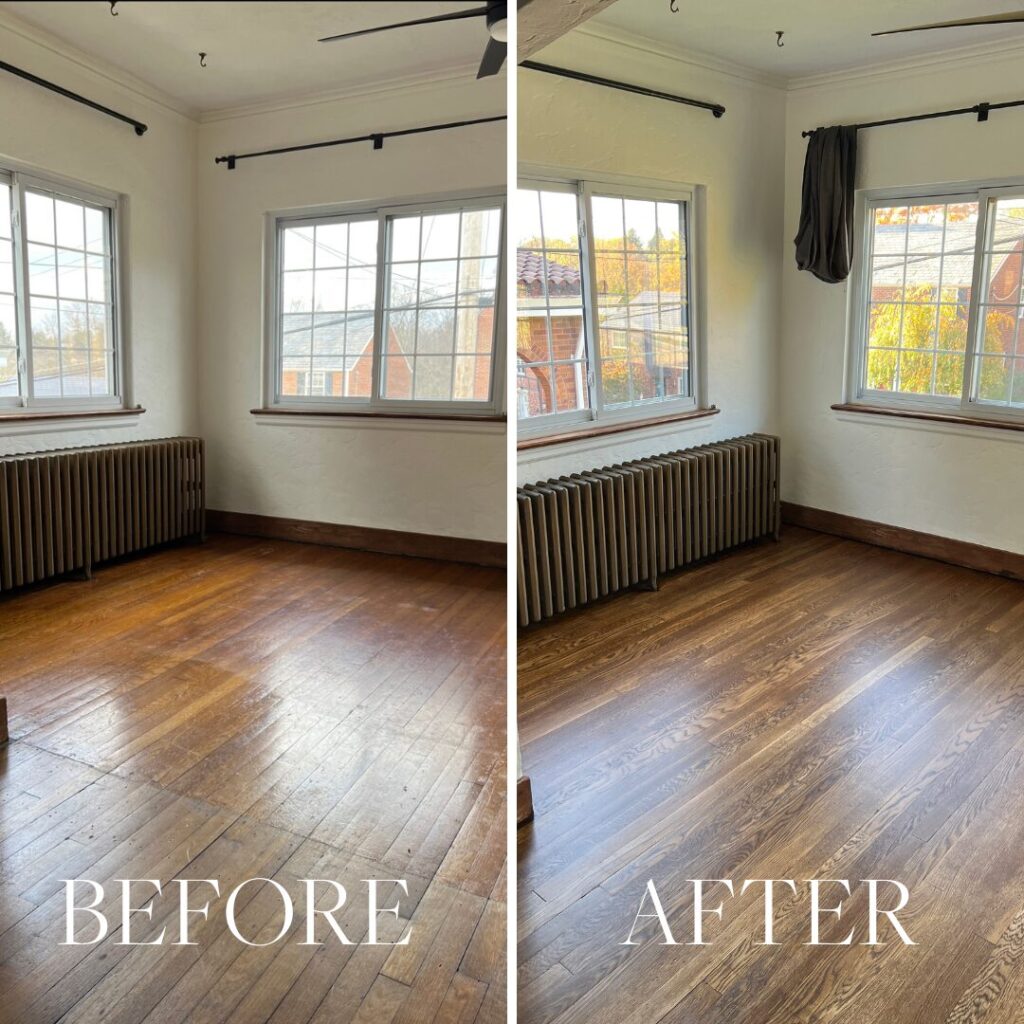
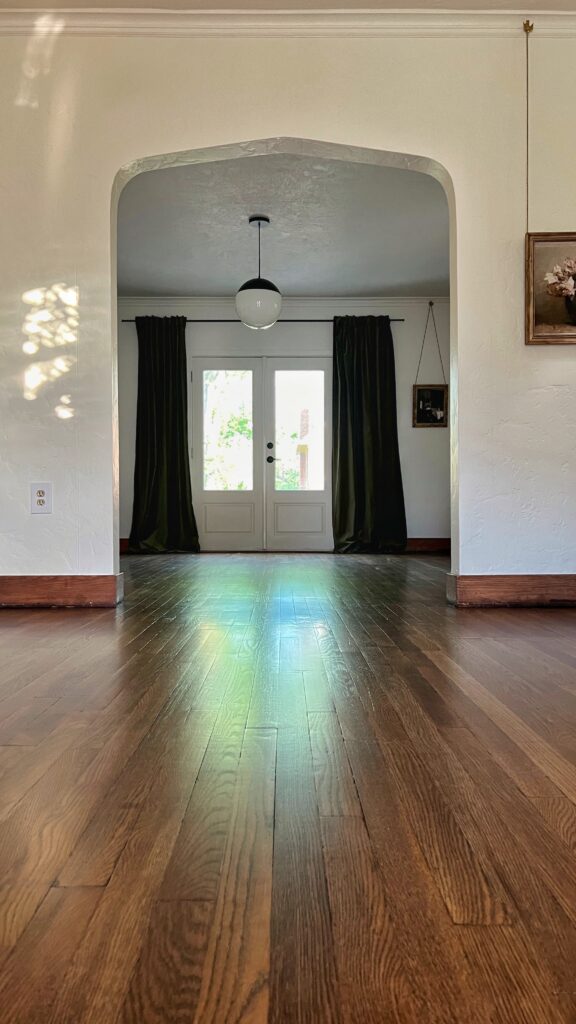
The polyurethane made the biggest difference! It smoothed everything out and just brought new life to the floors. Not to mention, it will of course extend the floor’s lifespan! Check out the difference:
Before and After Staining Hardwood Floors
Frequently Asked Questions
Can I stay in my house while floors are refinished?
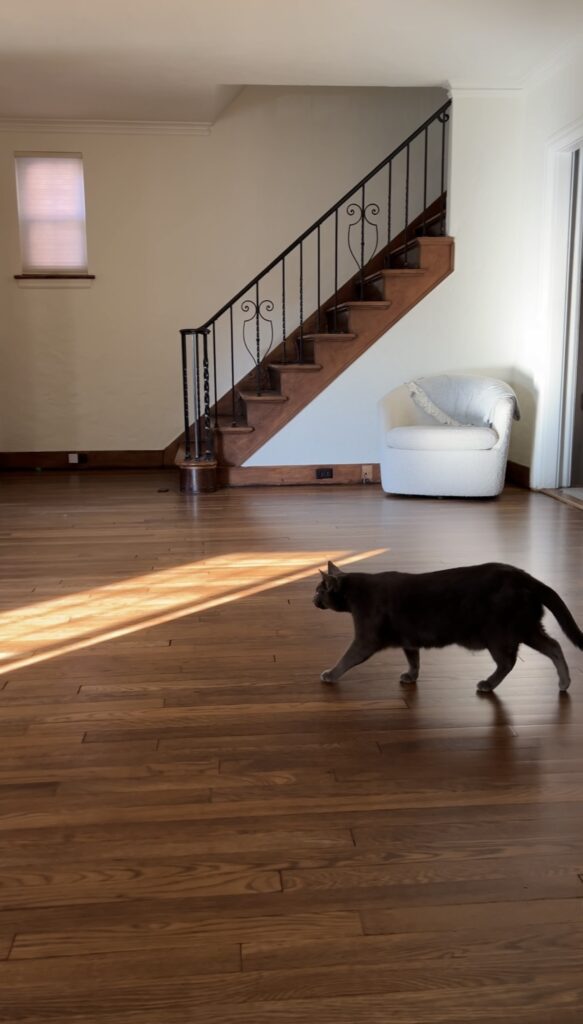
This really depends! Ideally, it’s best to leave the home while your floors are refinished. Since we refinished our floors ourselves, we made it work taking extreme precautions. You’ll want to have a safe space that’s blocked from the dust and odor. For us, that was our upstairs! We were extra careful because our cats were in the home with us. If you’re in a similar situation, here’s some tips for how to refinish your floors with cats.
How much does it cost to refinish hardwood floors?
It cost us about $1.50 per square foot to refinish our hardwood floors, but it could have been cheaper for a few reasons. Click here for the more detailed cost breakdown!
What is the best time of year to refinish hardwood floors?
This of course depends on your climate, but ideally you want it to be somewhere between 68°F and 72°F outside. After refinishing our floors in the Winter, we learned to never do that again! When we do our upstairs, we’ll aim for Spring or Fall.
Final Thoughts
It goes without saying that refinishing floors is hard work. But even with all of the setbacks we had, I don’t regret it for a second! I’ve heard many stories from friends who’ve hired professionals to refinish their floors and they made mistakes too!! Personally, i’d rather be in control of the outcome of our floors. With that being said, I also don’t blame others for hiring this job out! It’s not for the faint of heart!
Hopefully I haven’t scared you away from this project!! Trust me when I say this has been the most rewarding DIY we’ve ever done. We admire our floors every single day not only because they turned out exactly as we’d hoped, but also because we put so much love into them! Knowing that we’ve given our 94 year old floors new life is just the best feeling ever!
Please leave a comment if you have any additional questions!!
Elisha
