Wallpaper itself is expensive enough! Avoid the extra expense by installing it yourself in just a few simple steps! I promise it’s not as intimidating as it seems. You’ll just need the right tools, proper preparation, and as always, patience. In this step-by-step guide, i’ll show you my best tips for how to hang wallpaper with paste so you can tackle this DIY project with confidence!
Disclaimer: This post contains affiliate links. This means, if you purchase something from a link I provided, I will receive a small commission. This is at no extra cost to you!Thank youso much for thesupport!
Before we get into the wallpaper tutorial, it’s important to understand the different variations of wallpaper. There’s different application methods and a variety of materials, so be sure you know the exact type of wallpaper you’re working with. All of this information should be accessible on the manufacturer’s website.
I have an in-depth post on the types of wallpaper, and pros and cons of each, but here’s a quick summary:
Wallpaper Types
Paste-the-Wall– Apply paste directly to the wall and hang
Paste-the-Paper– Paste is applied to the back of the wallpaper and folded onto itself before hanging (this is called “booking”)
Peel and Stick– No wallpaper paste is required- this removable wallpaper has a sticky adhesive on the back
Pre-Pasted– Pre-pasted wallpaper already has a built-in wallpaper adhesive that just needs to be activated by water
Paste the wall wallpaper (also known as traditional wallpaper) is my favorite and peel and stick wallpaper is my least favorite!
Wallpaper Materials
In addition to understanding your wallpaper application type, it’s equally as important to know what material your wallpaper is for proper handling. Here’s a quick breakdown of the most popular wallpaper materials:
Non-woven– A great beginner-friendly material made of natural and synthetic fibers. This type of wallpaper is resistant and can usually handle gentle wiping with a damp sponge.
Paper– This is a more delicate version of wallpaper that can tear or stain easily so you’ll want to handle it with care.
Vinyl– A very durable type of wallpaper that’s easy to clean. It’s known for it’s moisture resistance and therefore a popular choice for kitchens and bathrooms.
Grasscloth/Natural Fibers- These types of wallpapers and generally sensitive to moisture and usually can’t be wiped with a sponge.
I’ve only ever worked with edge-to-edge wallpaper, overlap isn’t as common, but I wanted to mention this just in case. My sister-in-law ended up with overlap wallpaper once and it was an unexpected learning curve.
Edge-to-Edge– the panels are hung so the edges touch, but don’t overlap
Overlap– panels are overlapped by a small amount and a sharp utility knife is used to cut through both layers (double cut method) to create a perfect seam
How to Measure for Wallpaper
Figuring out how to calculate wallpaper may be the most difficult part of the whole wallpaper installation process! You really want to order the right amount because it’s stressful running out mid-project and the dye can also vary between batches.
Measure Your Walls
Measure the height and width of each wall you plan to wallpaper. Multiply width × height to get square footage, then add all the walls together. You’ll want to calculate for each entire wall, even if there’s windows or doors!
Calculate the Square Footage Per Roll
Some brands may tell you exactly how many square feet one roll covers, others might require a little bit of math. Look at the product specifications to see what you can find! If the square footage isn’t listed, multiply the width of the wallpaper roll by the length. (You may need to convert inches to feet before doing this!)
After this, you’ll take your total square footage and divide by the number of square feet per roll. If you end up with a number like 2.3, round up to 3 wallpaper rolls at least.
Also, check the website you order from to see if they have a wallpaper calculator- many do!!
Pattern Repeat
Wallpaper pattern does matter when it comes to determining how much wallpaper you need. Pattern matching in general is going to create more waste because each wallpaper strip has to line up perfectly. Block patterns, for example, don’t create as much waste but if you have a larger pattern, you’ll definitely want to make sure you have extra.
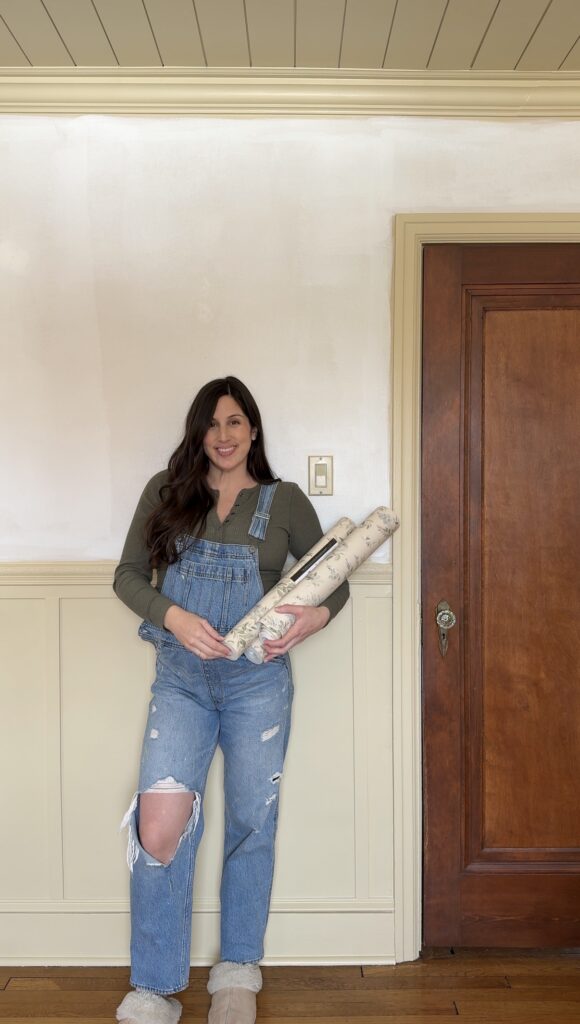
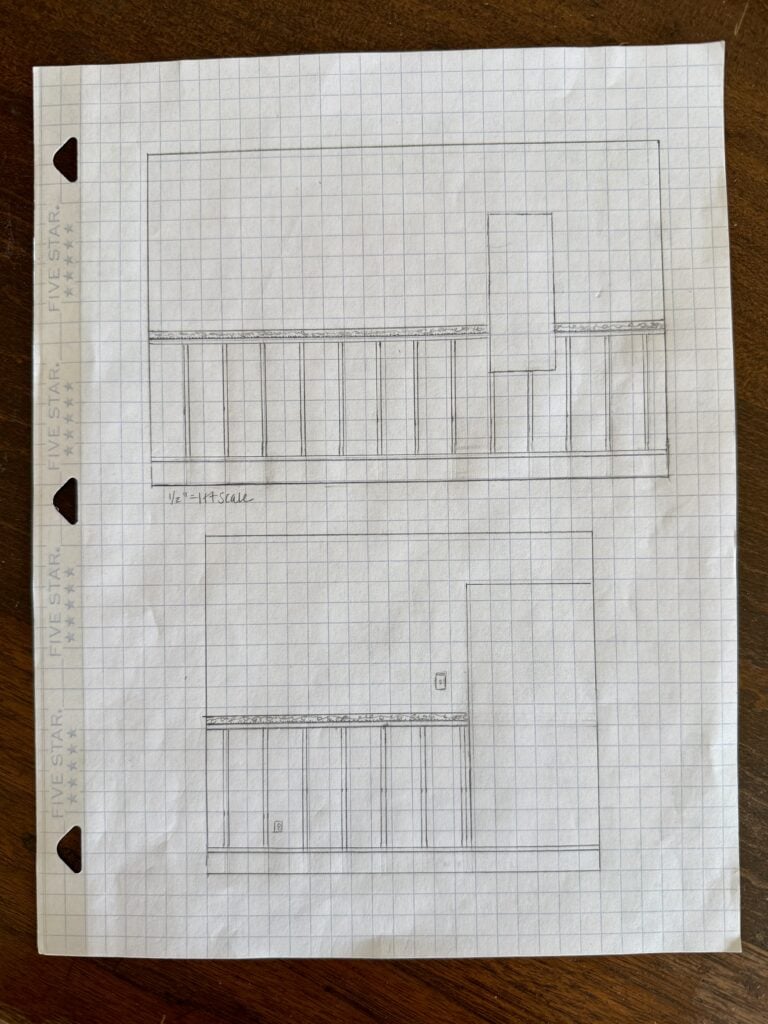
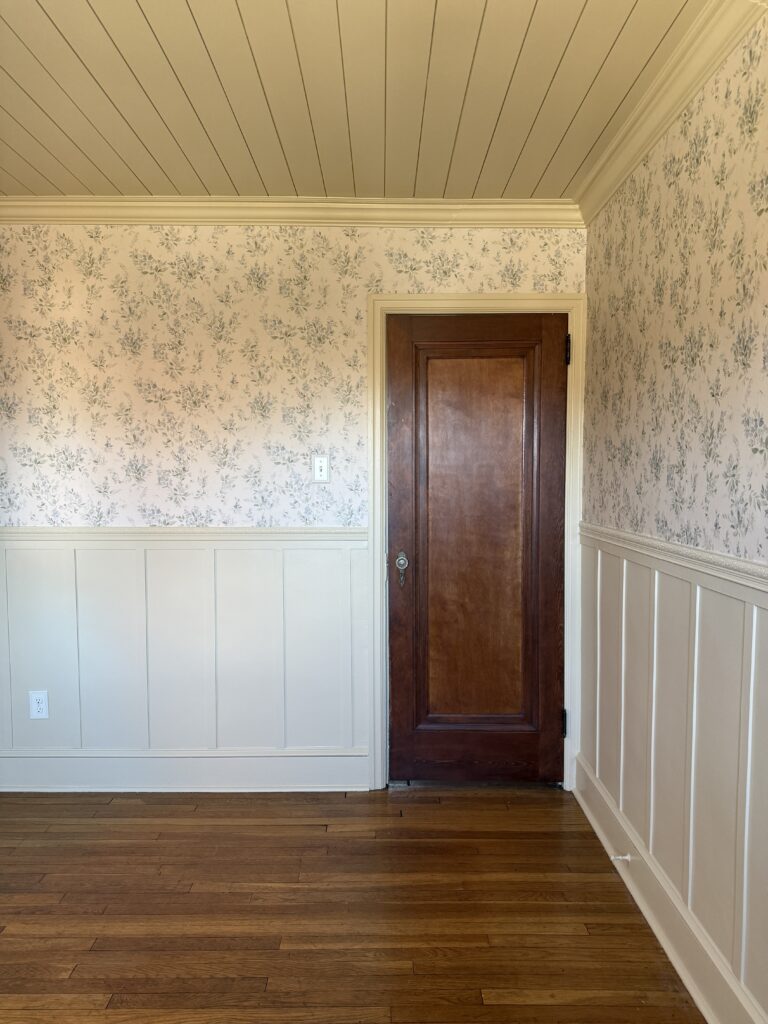
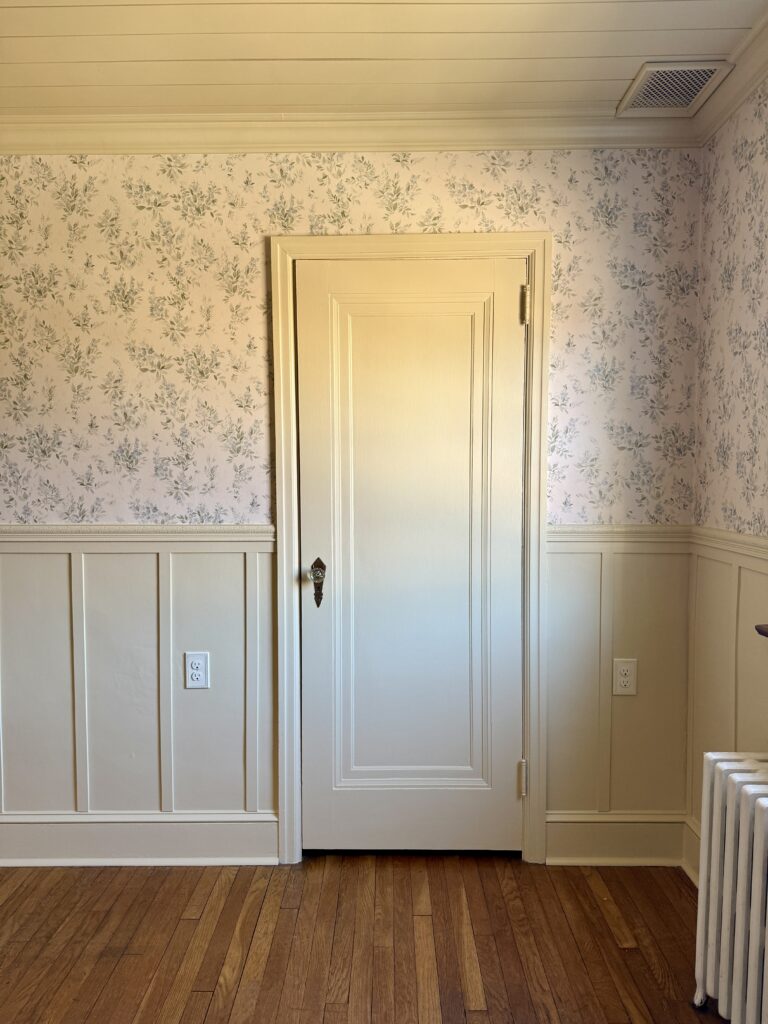
The wallpaper I used for this tutorial has a 21″ pattern repeat. I kept this in mind while I was planning! Since I did a wallpaper board and batten design, I only needed wallpaper for the top half of my walls which was about 48″. Since my pattern repeat was 21″, I knew i’d waste about 6″ per panel which isn’t bad at all!
However, it’s always smart to order at least one extra roll. This will cover you for any mistakes, tricky cuts, future repairs, etc. Having extra wallpaper is definitely better than not having enough. Plus, you can use the excess paper for small projects like closets, drawer liners, etc!
Prepping Your Walls for Wallpaper
Clean and Smooth Wall Surface
Wallpaper can really highlight imperfections on walls, so be sure to fill and sand any holes so you have a flat surface to work with! After that, wipe the walls down clean before applying your primer or wallpaper.
Wallpaper Primer
This is totally optional, but I really like to use the Zinsser Shieldz wallpaper primer when i’m hanging wallpaper with paste. Not only does it help with adhesion, but it’s also meant to help with easy removal in the future. This was really ideal in my case since this is nursery wallpaper!
Another plus to using this product is that you can tint it to the color of your wallpaper so if there’s any small gaps there won’t be an visible seams. Unfortunately I forgot to do this this time around, but I did do it when I hung wallpaper in our French vintage guest bedroom and it worked like a charm!
How to Hang Wallpaper with Paste
Determining Where to Start
The first step is determining where to start. If you’re only wallpapering one wall, you can simply choose a corner to start from. If you’re wallpapering around an entire room, you’ll want your starting point to be in the most inconspicuous corner because it’s very unlikely that your pattern will match up at the end.
The first panel
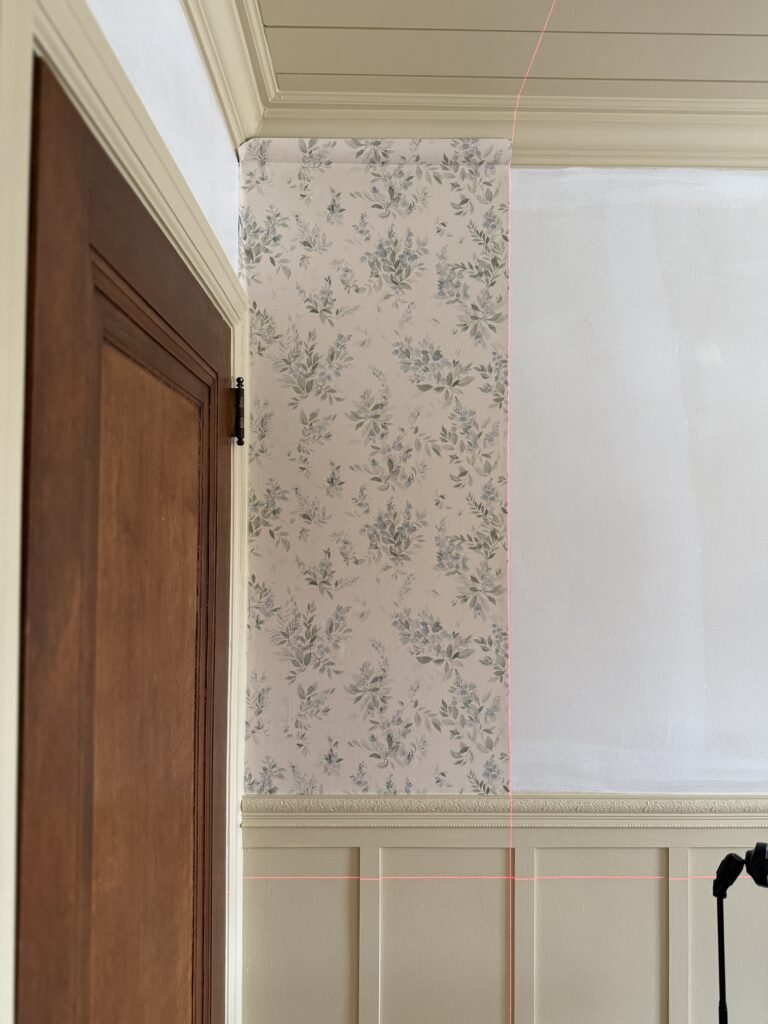
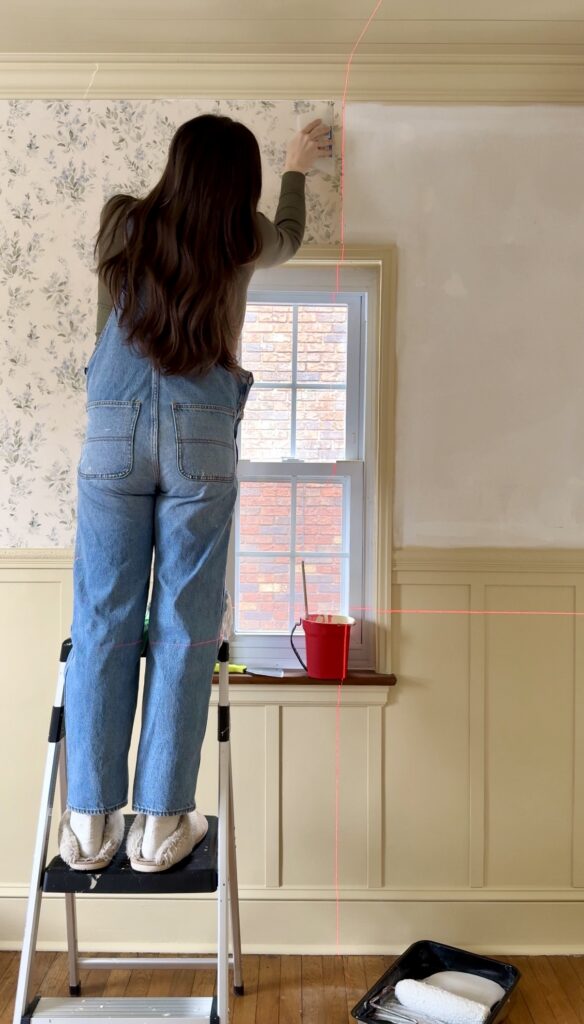
The first strip of wallpaper is the most important! If it’s not straight, the rest of the panels will be off as well. Since you can’t rely on your walls being straight, you’ll want to have some overlap in the corner.
Our wallpaper was 21″ wide so I set a plumb line with my laser level 20 3/4″ out from the corner. If you don’t have a laser level, you can use a large spirit level and pencil mark to get your straight line.
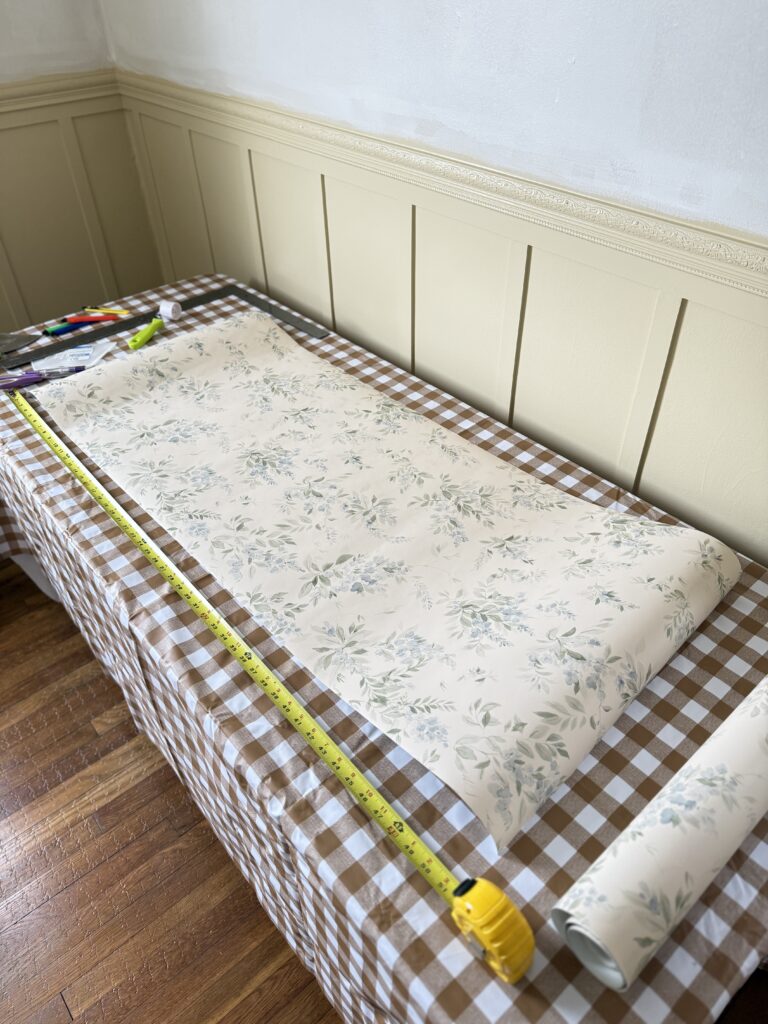
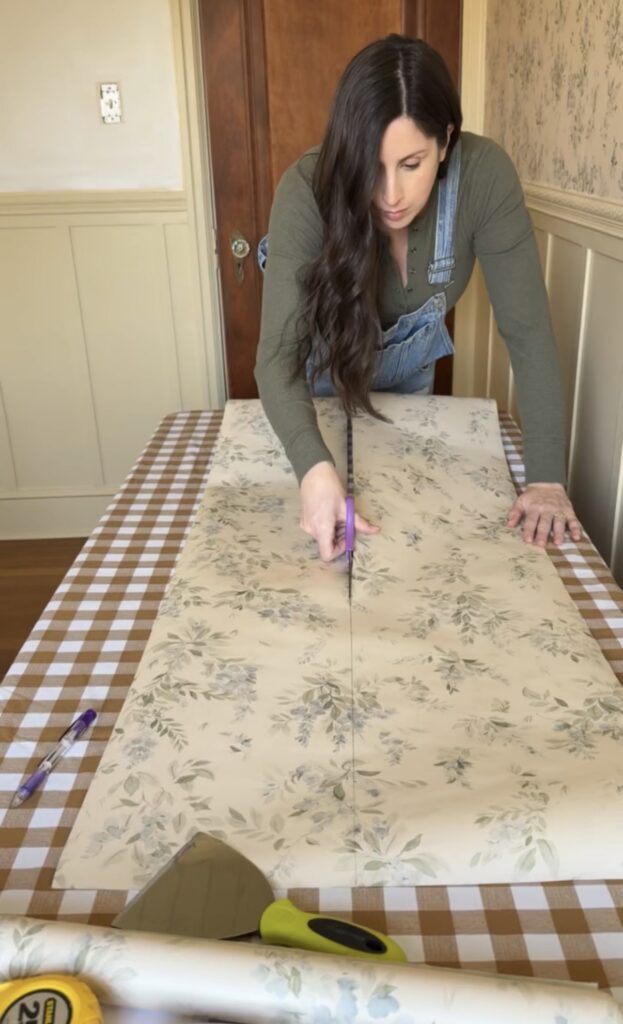
Measure and cut
You’ll want the length of your panel to be a little longer than the height of your wall. I was wallpapering 48″ of the wall, so I cut my panel 52″ long. You really only have to measure for the first one! After that, you’ll just match up the pattern and just cut a little beyond.
I like to use a carpenter square when I cut the panels! Technically it doesn’t have to be a perfectly straight cut since the excess gets trimmed off, but I like to keep my cuts straight just in case.
Tip: Set up a little table with all your tools- this will be your cutting station!
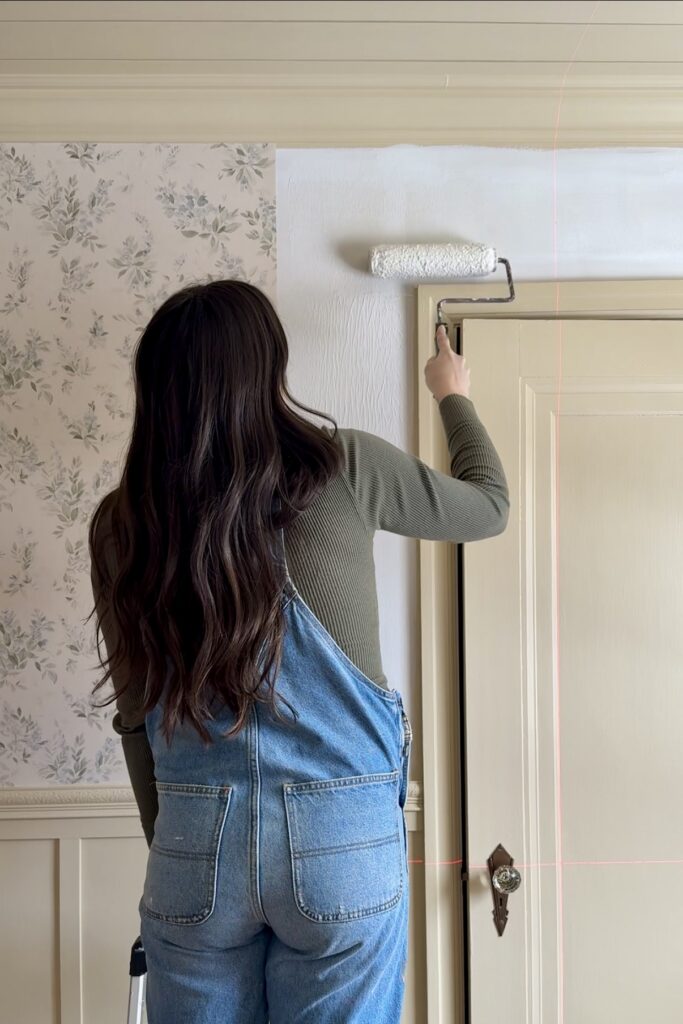
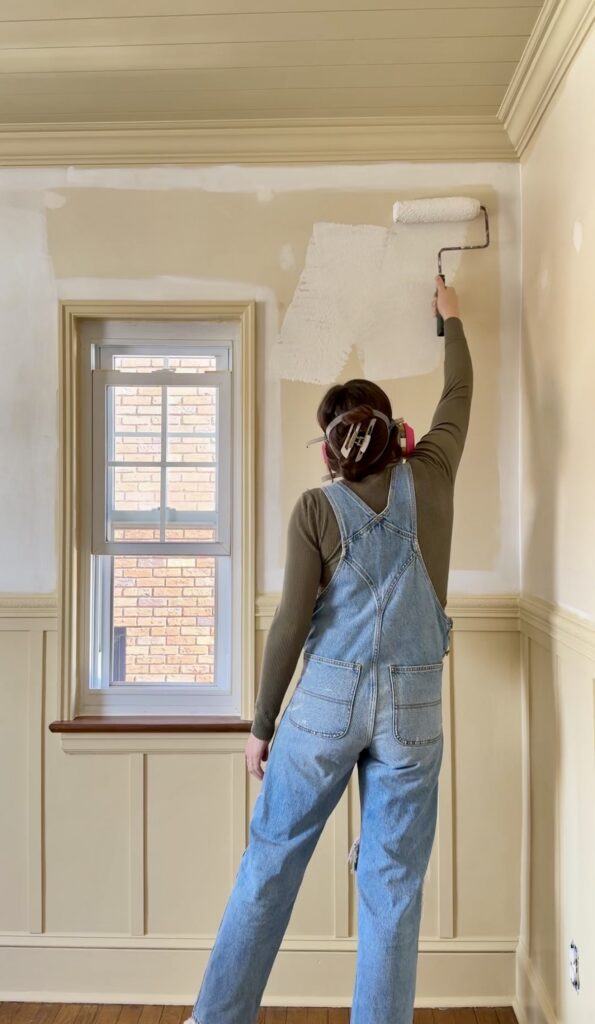
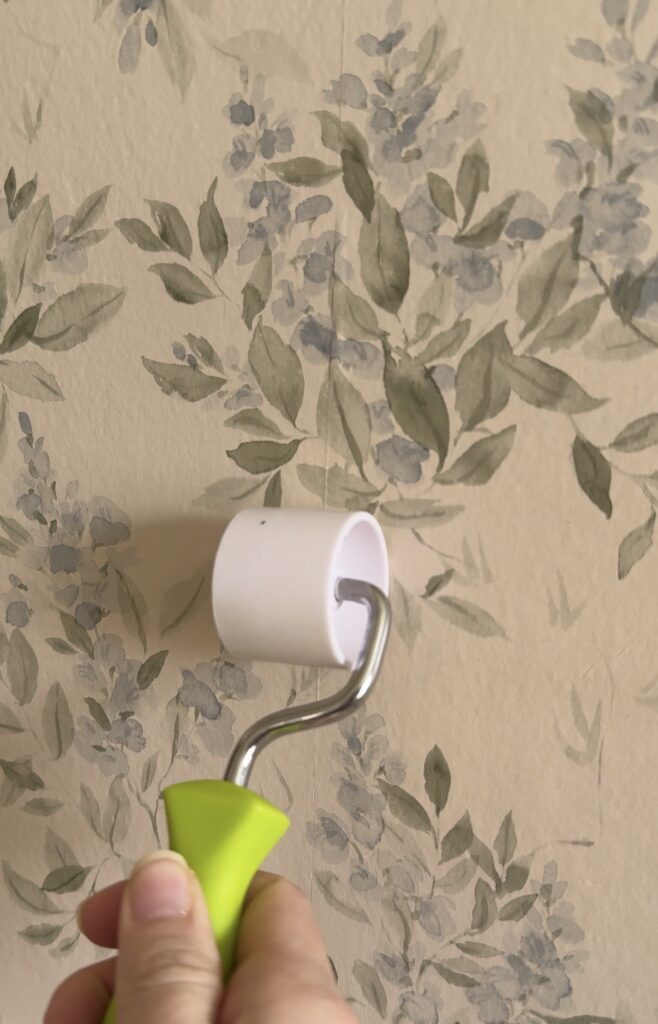
Paste the wall
It’s really important to be generous with the wallpaper glue! Use a high nap paint roller that’s meant for rough surfaces. For the edges and corners, use a paint brush!
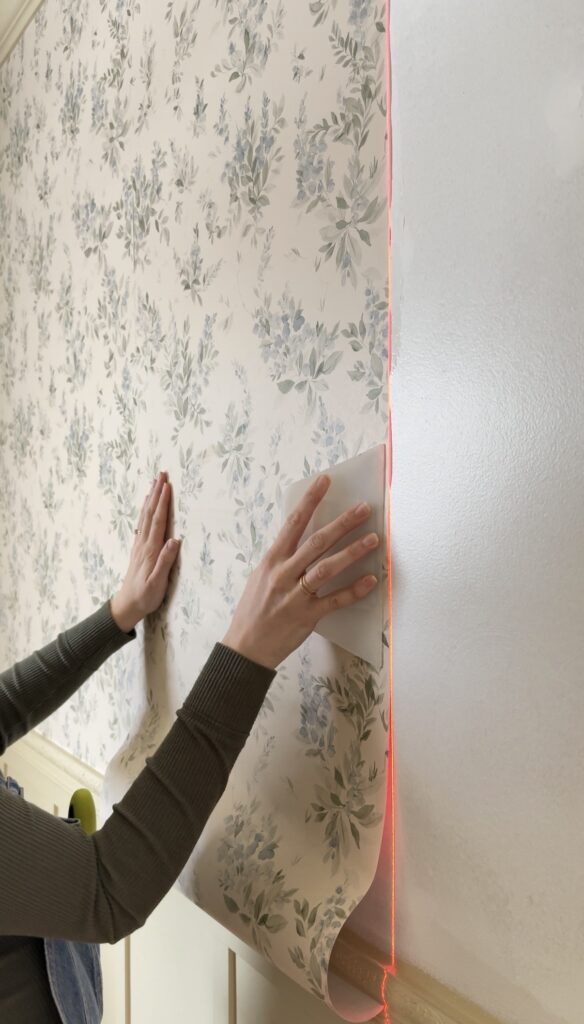
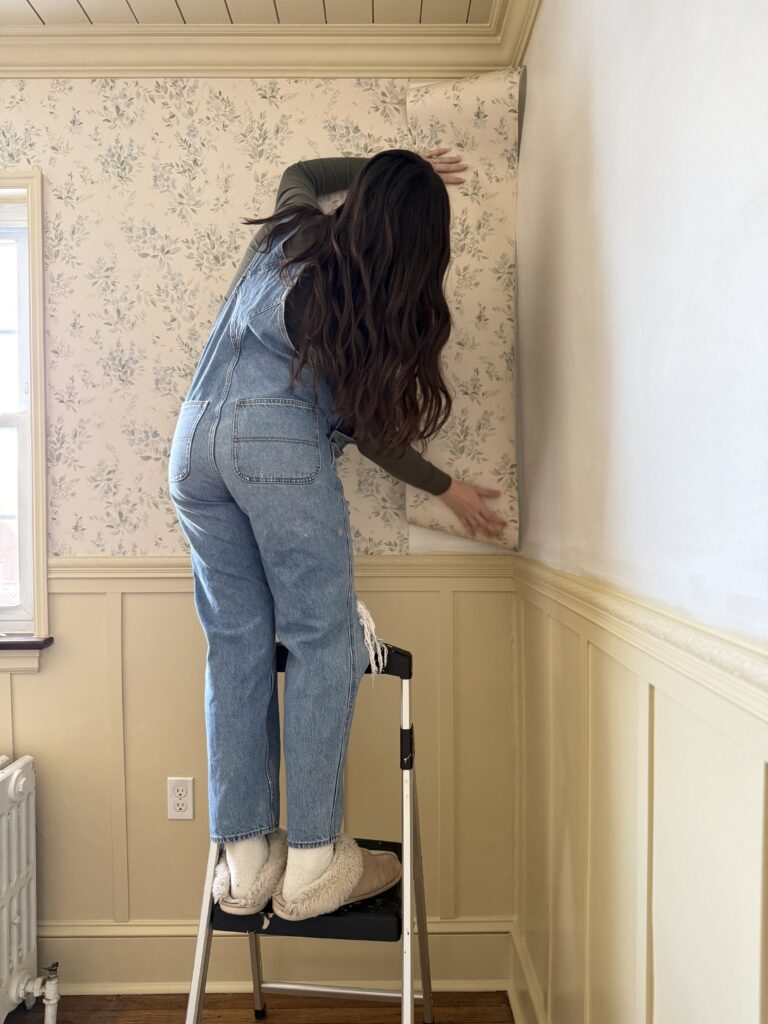
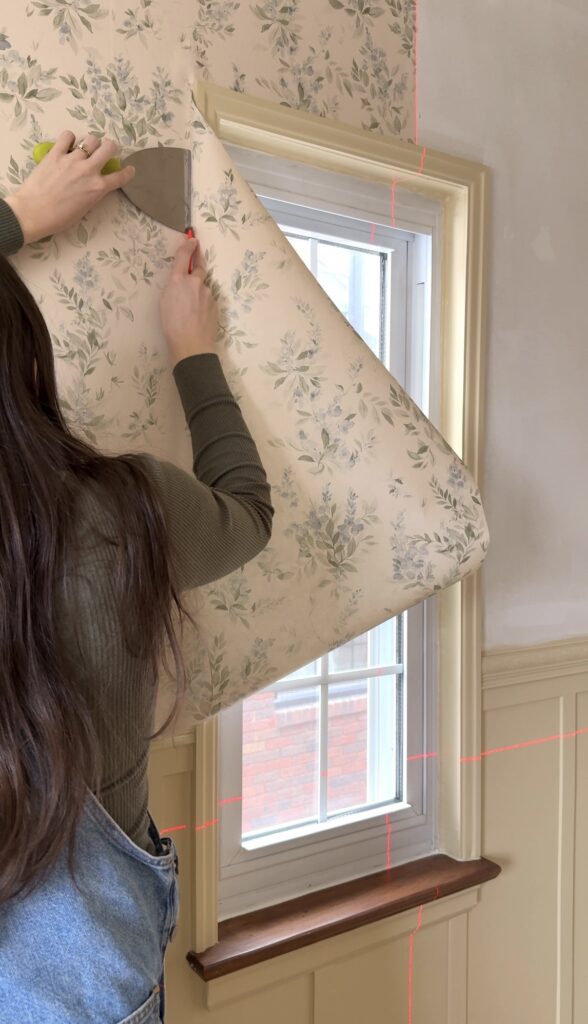
Smooth the wallpaper
Line the edge of the paper up with the laser level and use your wallpaper smoothing tool to smooth the panel in place. If you have delicate or paper wallpaper, you could use a wallpaper brush in place of a plastic smoothing tool! I like to work from the top of the wall to the bottom, smoothing up and outwards toward my laser level line.
If you were generous with the glue, you’ll probably notice that some is oozing out as you smooth out all the air bubbles. That’s totally fine! Just have a damp rag nearby to wipe it up as you go!! I do recommend rinsing the rag after wiping up a lot of glue just to ensure you’re working with a clean cloth!
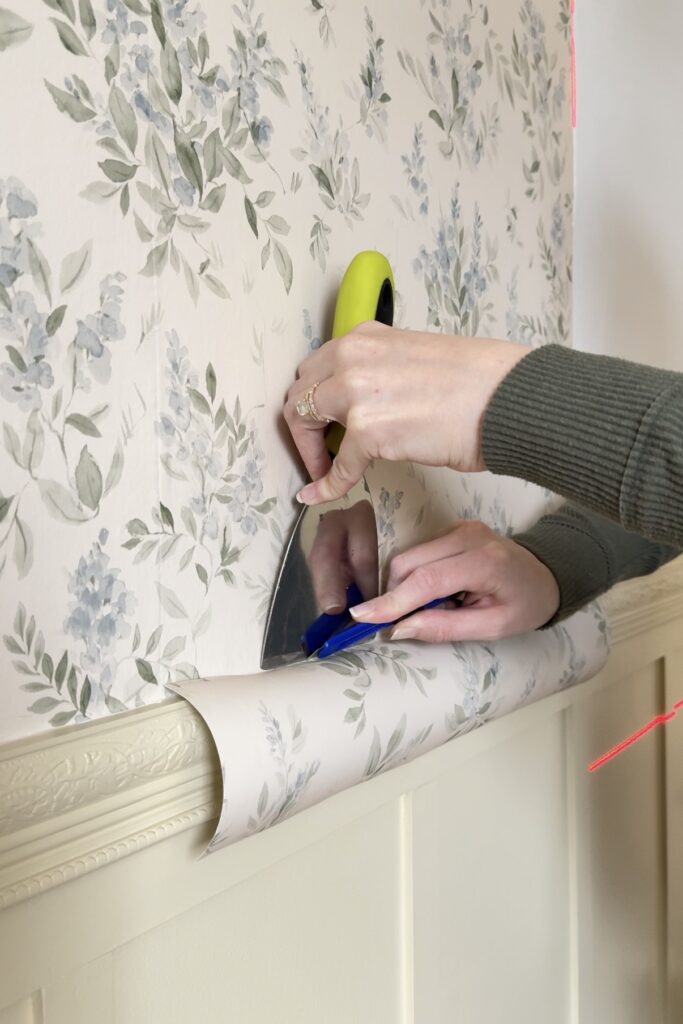
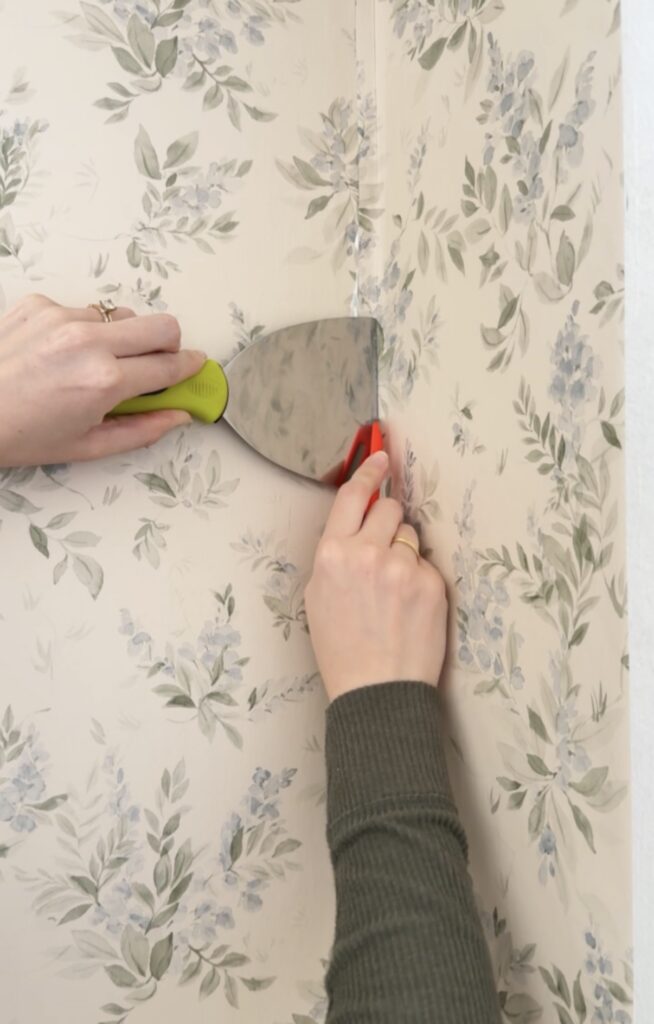
Trim the edges
Once your wallpaper is nice and smoothed out, you’ll then trim off the excess wallpaper. Use a wide, sturdy putty knife as a guide and a sharp utility knife to cut. Go slow as you do this! It’s tempting to drag it along but you’re more likely to tear the paper or make an uneven cut when you do that.
It’s also incredibly important to keep a sharp blade while you’re wallpapering. I prefer to use these cheap utility knives. They have built-in extra blades so I break off a new one every couple wallpaper panels. It sounds excessive, but trust me on this! You’ll notice your wallpaper starting to tear (which is very frustrating) if you don’t!
Tip: Use a pair of pliers to break off a new blade. Place the old blade into a little piece of painter’s tape and fold it up for safe disposal! You can also use the cap of the utility knife to break off a new blade if you’re in a pinch, but I definitely find this method to be the safety and easiest way!
Final Touches
After trimming the excess, I like to go back with my paint brush and apply more glue to the edges and smooth one last time! Again, wipe up the excess paste with a damp rag.
To make sure the edges are flat on the wall, I use this seam roller which isn’t a necessary tool, but it’s nice to have if you plan to wallpaper again.
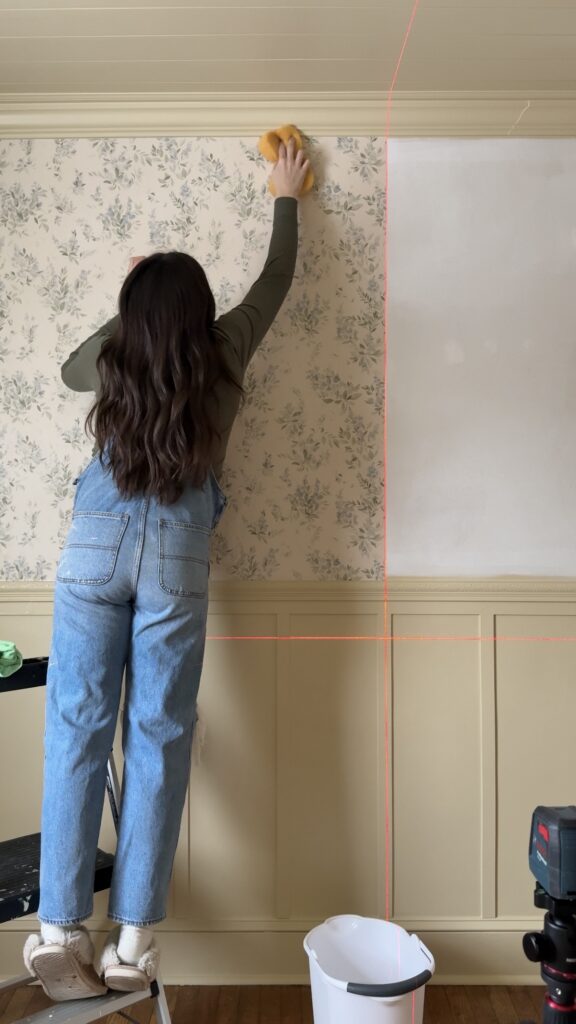
Lastly, I use a damp sponge and warm water to wipe the whole panel down. This particular wallpaper is listed is “spongeable”, but not all wallpaper is, so definitely check before doing this step. This removes paste residue and smoothes everything out.
By the way- if you’re wallpapering over multiple days like I did, put your brushes in a ziploc bag and store them in the fridge in between uses!
How to Wallpaper Corners
You don’t want to just wrap your paper around the corner because there’s a good chance it’ll lift over time and you also can’t rely on corners for being straight! For best results, use the double cut method for wallpapering corners!
Double Cut Method
First you’ll match up your pattern and cut your panel to size, per usual. Next, you’ll measure the gap (from top to bottom) between the edge of your last panel and the corner. In my example here, the largest gap measurement was 11″, so I cut my panel lengthwise to 11 1/4″ so I can have 1/4″ overlap in the corner.
Again I use my carpenter’s square to mark my vertical line. Be very careful that you cut the correct part of the panel!! One wallpaper mistake can become very expensive.
Apply a generous amount of glue to that side of the wall as well as the corner. Put up the panel as you normally would, trimming both the top and the bottom, but NOT in the corner.
For your next panel, you’ll use the other half of that piece of wallpaper. Mine was 9 1/2” wide, so i’m setting my laser level 9 1/4” out so it overlaps in the corner. Install this side of the panel as you normally would, matching up the pattern in the corner (it’s a little tricky with the overlap, but just do your best!) and the edge with the laser level.
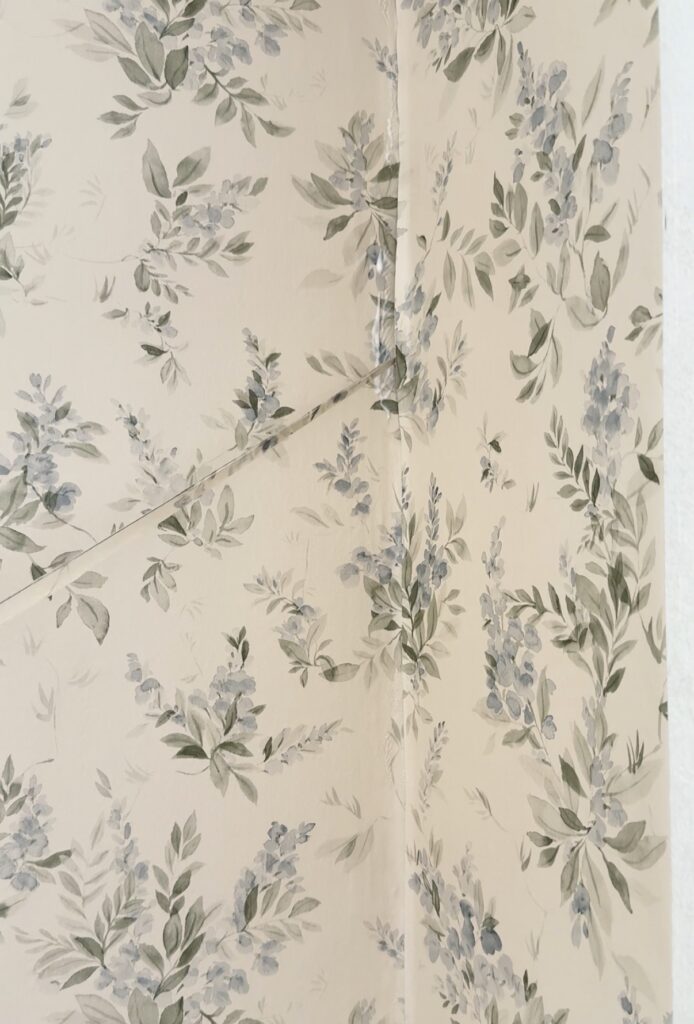
Now, you’ll take your utility knife (you’ll definitely want a fresh blade for this!) and use your putty knife as a guide to cut down the middle of the corner, through both layers of wallpaper.
First you’ll peel off the scrap from the top layer, then you’ll reach underneath and pull the scrap from the bottom panel. Pull slowly just in case it wasn’t a clean cut. Below is me pulling off the scrap from the bottom panel!
Lastly, you’ll just go back and reinforce the edges with some additional glue and wipe up the excess! Easy peasy!
Keep in mind that your pattern will of course be a little offset (since you removed about 1/2″ of it) but you really can’t tell in a corner, and now you’ll have a straight edge to work with!
How to Wallpaper Around Windows
When you reach window or door frames, I use a really simple method that involves relief cuts… let me show you!
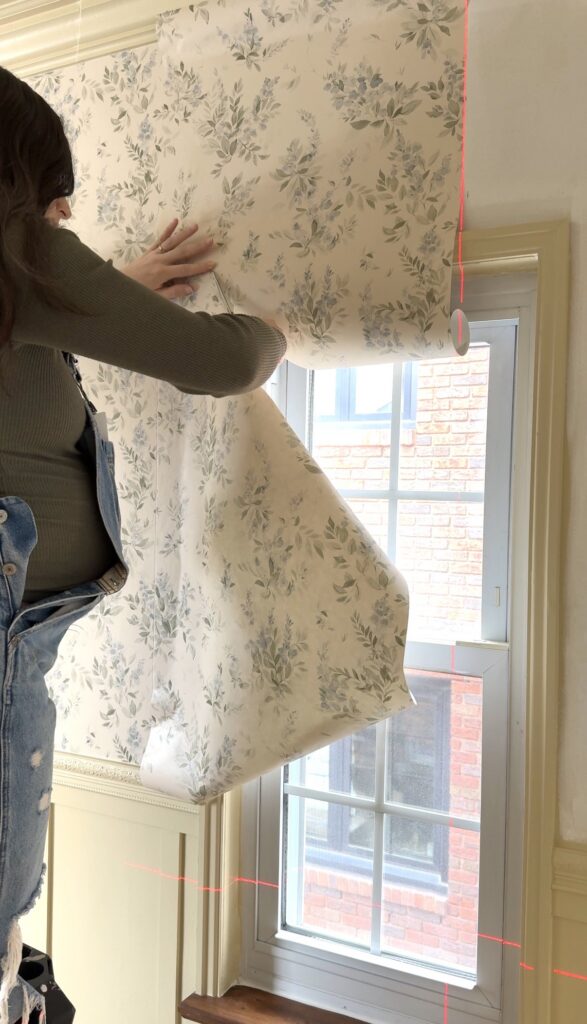
You’ll get started like any other panel! Set up your level, match the pattern, cut the panel to size, and apply a generous amount of glue. Bring your panel up to the wall, line it up, and gently press into place along the top and side of the window. You don’t have to worry about smoothing everything down perfectly yet, but make sure it’s matched up with the pattern!
Next, you’ll find the corner of the window frame with your finger. Use your other hand and make a relief cut through the window opening to that corner!
Smooth the paper towards the edges of the frame and use a sharp utility knife to cut the excess. You’ll also trim the excess along the top and bottom. It’s definitely important to take your time making these cuts- it makes all the difference!
After trimming around the window, now you can really perfect the panel. Per usual, I like to lift up the edges, apply some additional glue, and smooth it down again. Lastly, I use my seam roller and wash the panel down with a damp sponge.
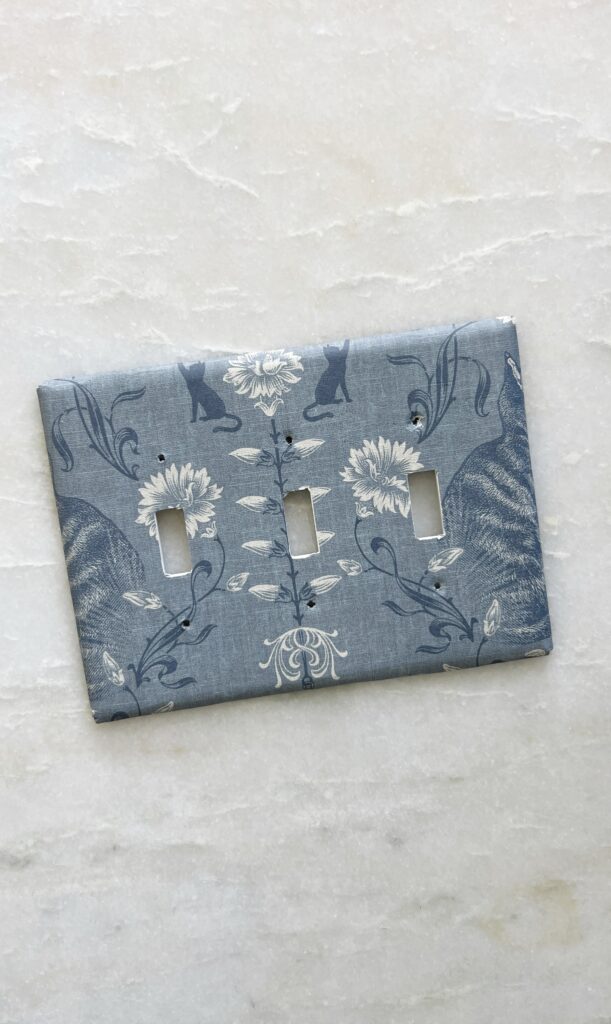
How to Wallpaper Light Switches
If you want a really polished look in your space, consider wallpapering your light switch and/or outlet covers! I decided to go with these covers for our nursery, but I just wanted to share that this is an option!
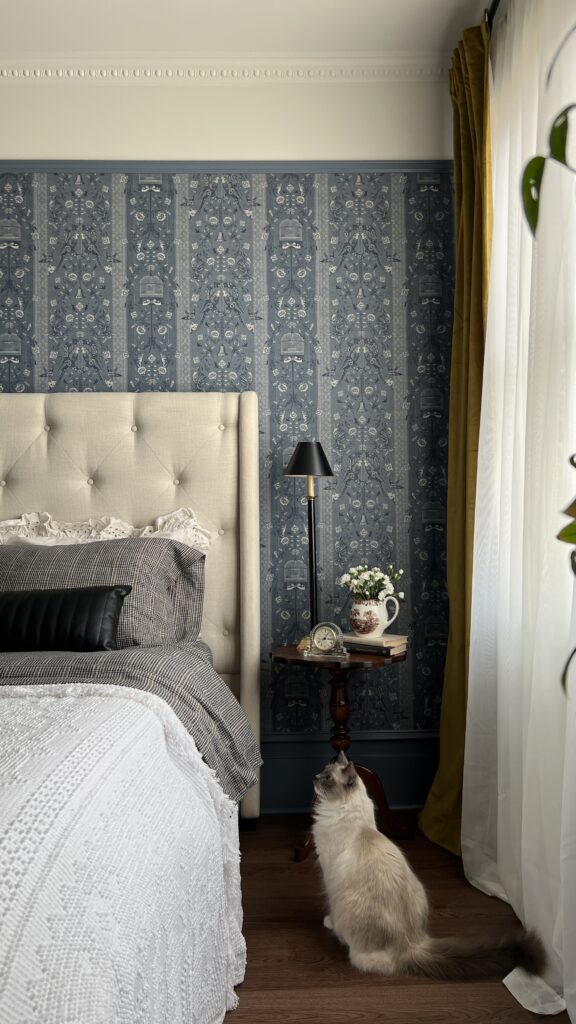
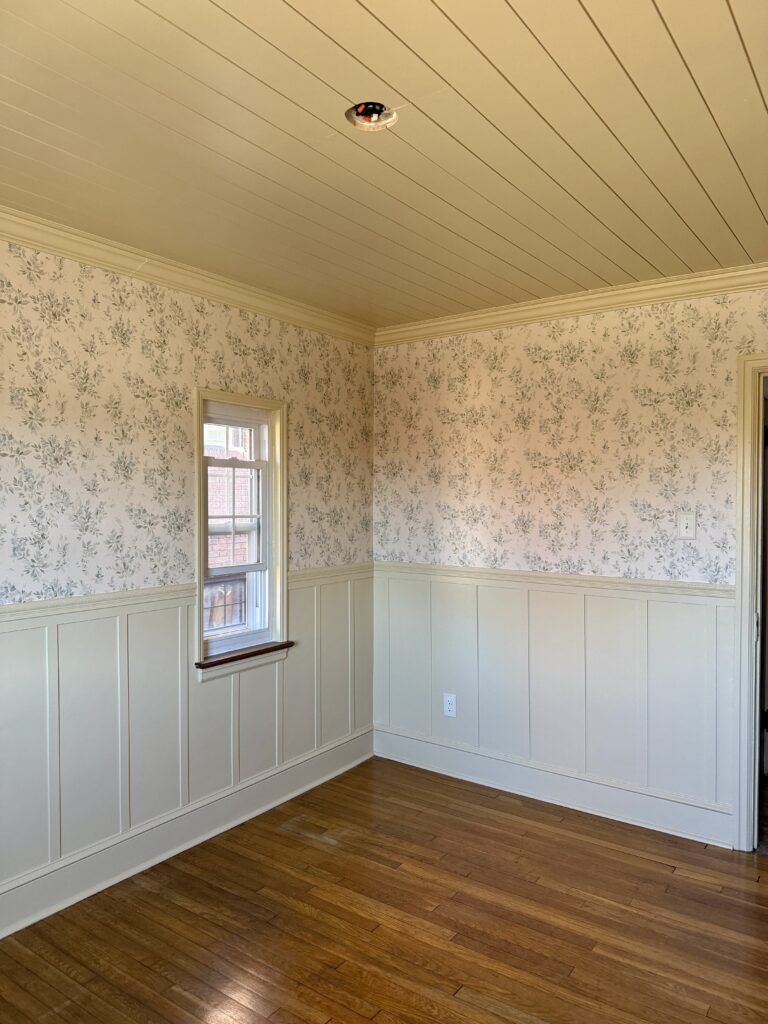
This beautiful floral wallpaper was the last piece of the foundation of our nursery! We couldn’t be more in love with how it’s looking and can’t wait to start adding the furniture and fun details to this space… be sure to stick around to see how it turns out 🙂