

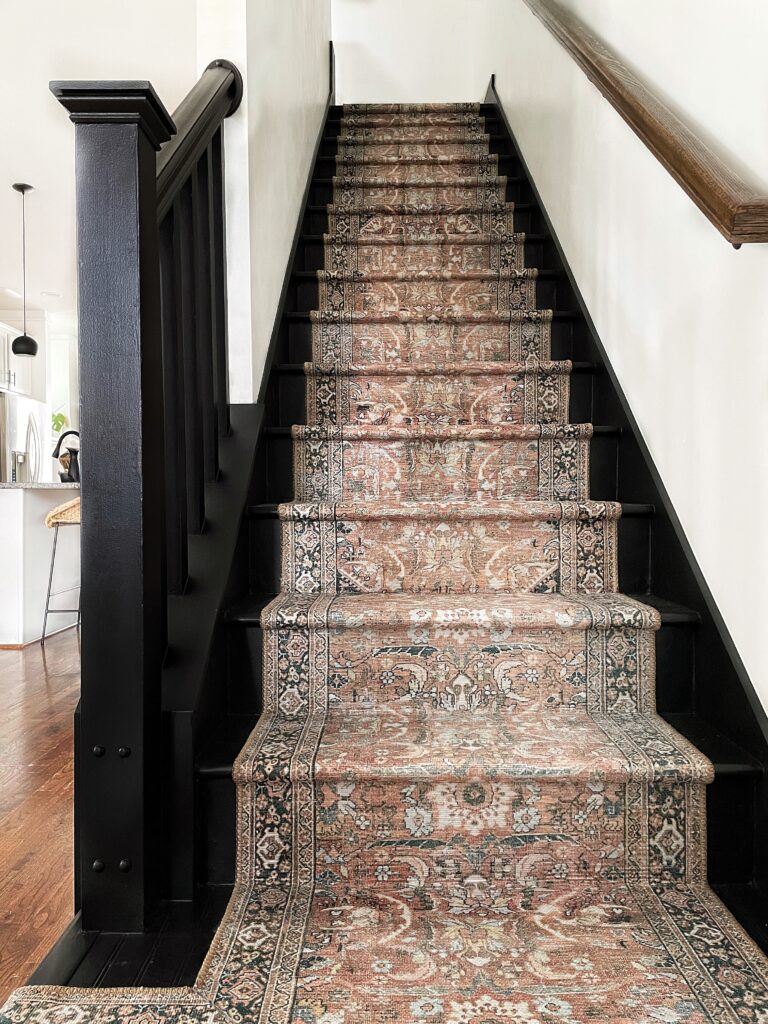
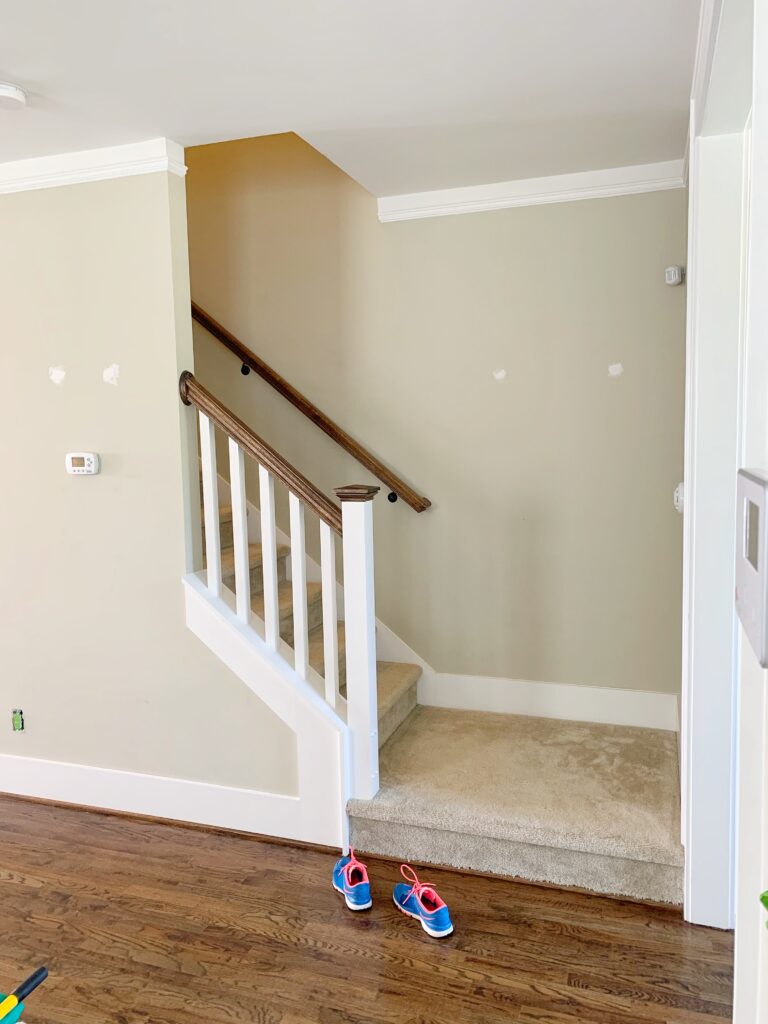
Let’s just say I wasn’t a big fan of our old stairs. The beige carpet was totally cramping my aesthetic and I knew a DIY stair remodel could completely change the feel of our first floor!
But I also wasn’t sure if it would be a good idea to rip up the carpet. Am I at the skill level to tackle this project? How do I know if our wood stairs will be in good condition? What if I needed new stair risers or new treads?
You don’t always know what you’ll find when you rip up old carpet, so it is important to consider that before going into this project. I knew there was a possibility we might have to buy new stair treads. That aside, this is a very easy diy project that makes a huge difference!
Disclaimer: This post contains affiliate links. This means, if you purchase something from a link I provided, I will receive a small commission. This is at no extra cost to you! Thank you for your support!
MATERIALS:
- Backer Rod
- Wood Filler
- Bondo
- Sandpaper
- Paintable Caulk
- Painter’s tape
- Primer
- Paint
- Polycrylic
- Crown Staples
- Beadboard (optional)
- Stair Nosing (optional)
- Stair Runner
TOOLS:
- Gloves
- Safety glasses
- Pry bar
- Needle nose pliers
- Tape Measure
- Utility knife
- Crown Stapler
- Sander
- Jigsaw (optional)
- ShopVac
- Flexible PVC Adapter
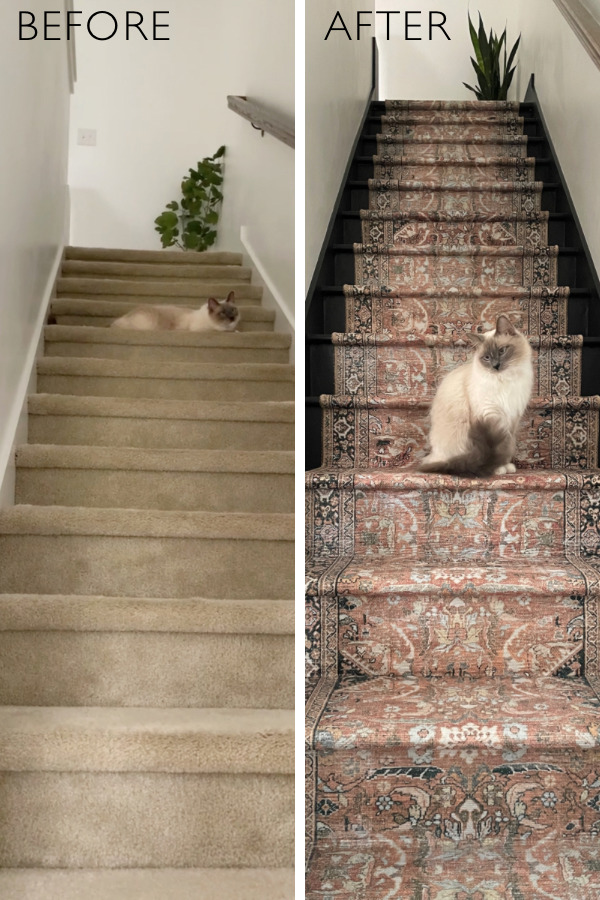
Stair Makeover Before and After

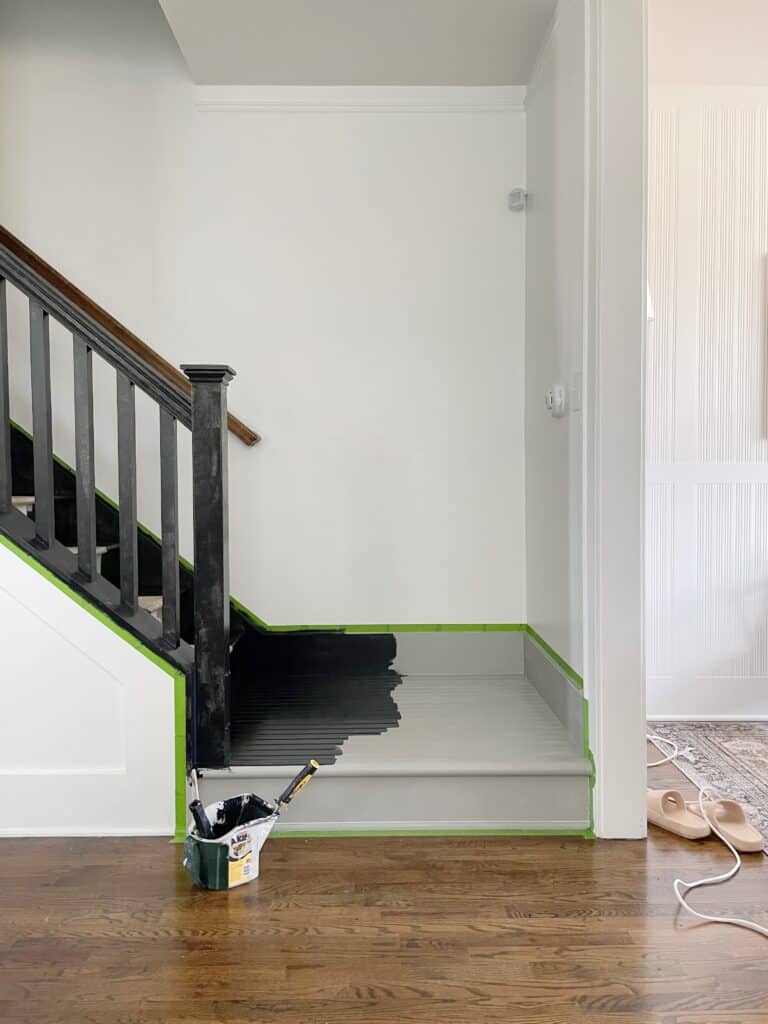
Step One: Removing the Old Carpet
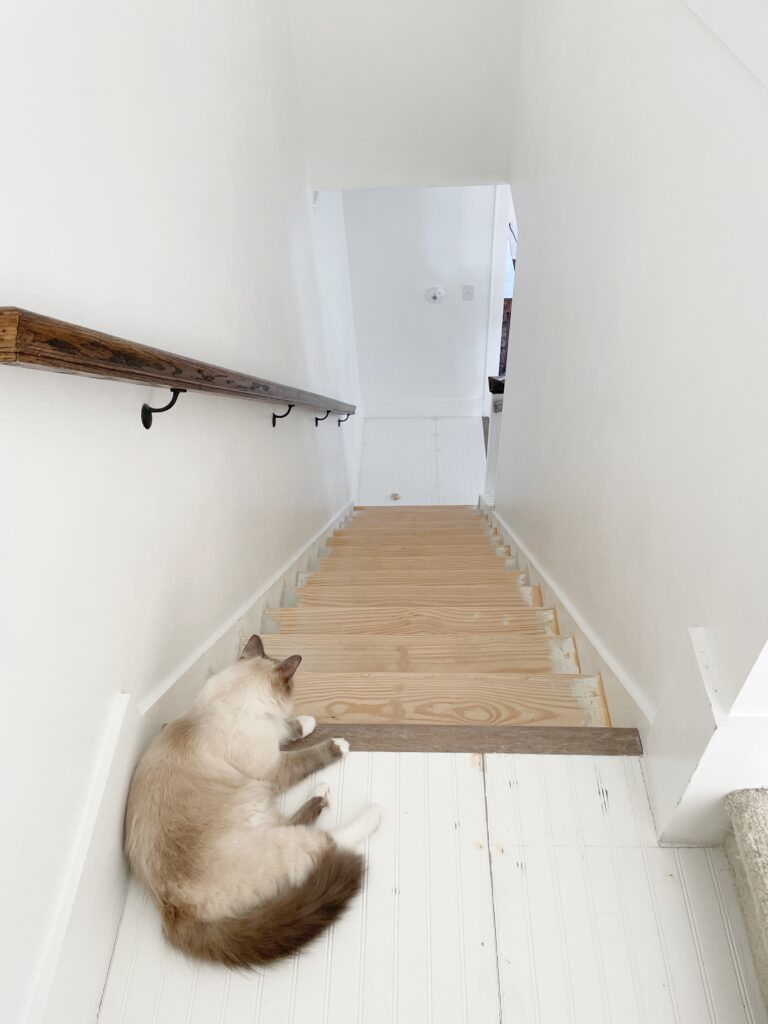
The first step for our DIY stair remodel was ripping up the old carpet and in my opinion, that was the best part!
Find a corner and just start pulling! It was so satisfying to do and we were pleasantly surprised with what we found underneath. Our existing stairs were beautiful pine treads… we got lucky!
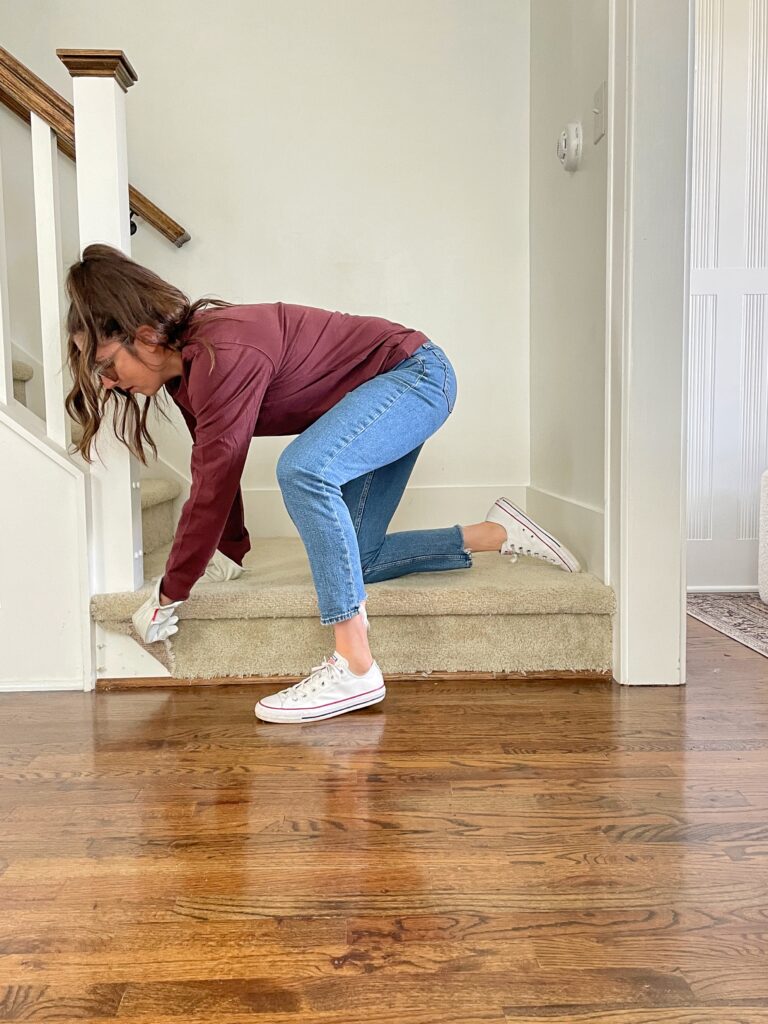
Safety tip: Be sure to wear gloves and safety glasses– there are staples and nails poking out everywhere! It also helps to have a large trash bag nearby to clean as you go.
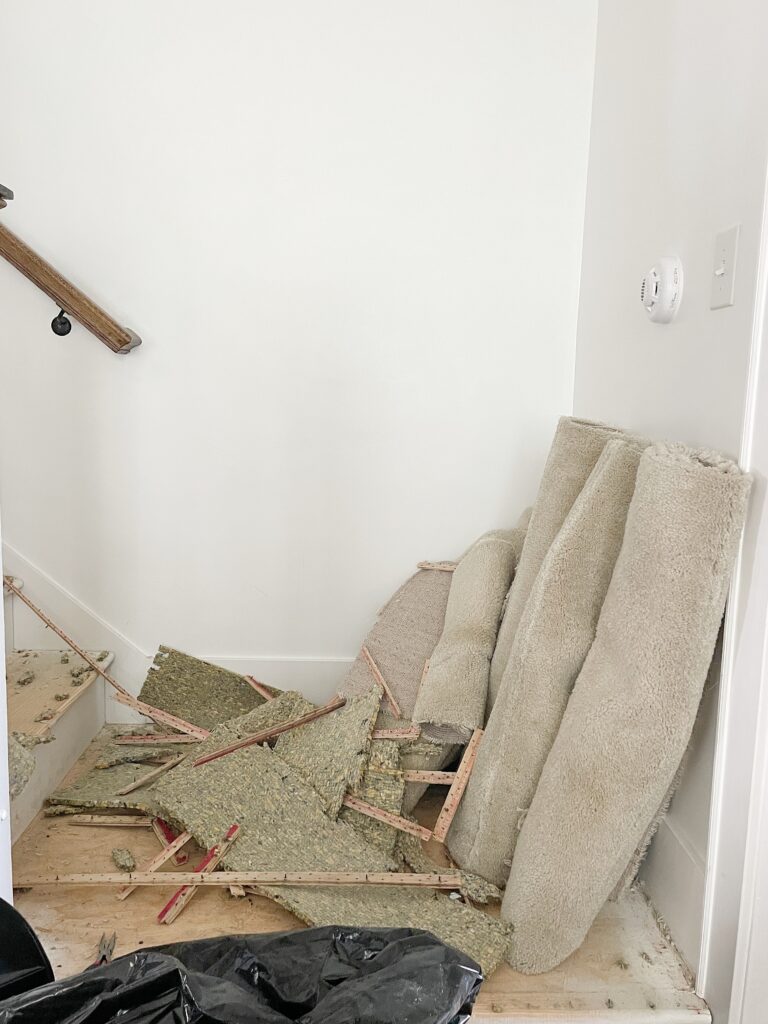
Once you remove the carpet and carpet pad, you’ll see tack strips around the edges. Those are nailed into the floor, so you’ll just need a pry bar to get them up.
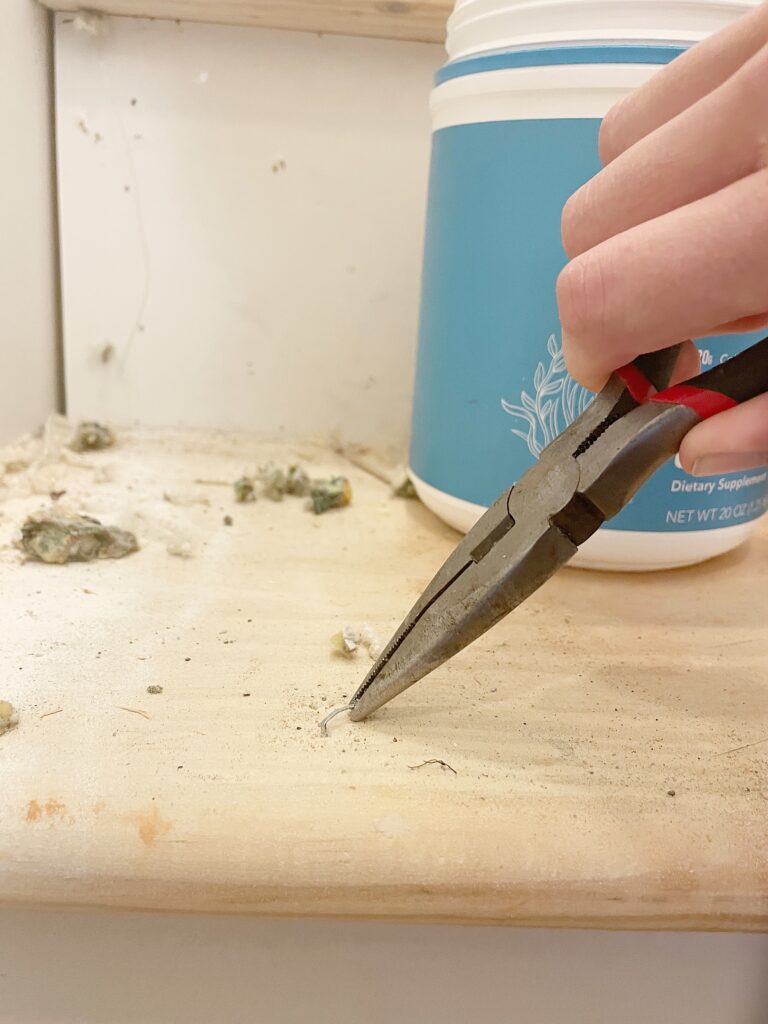
The staples can be removed with pliers! I kept a little bucket next to me to collect them as I pulled them up.
Step Two: Prepping the Stairs
The next step is to prepare the stairs for primer and paint.
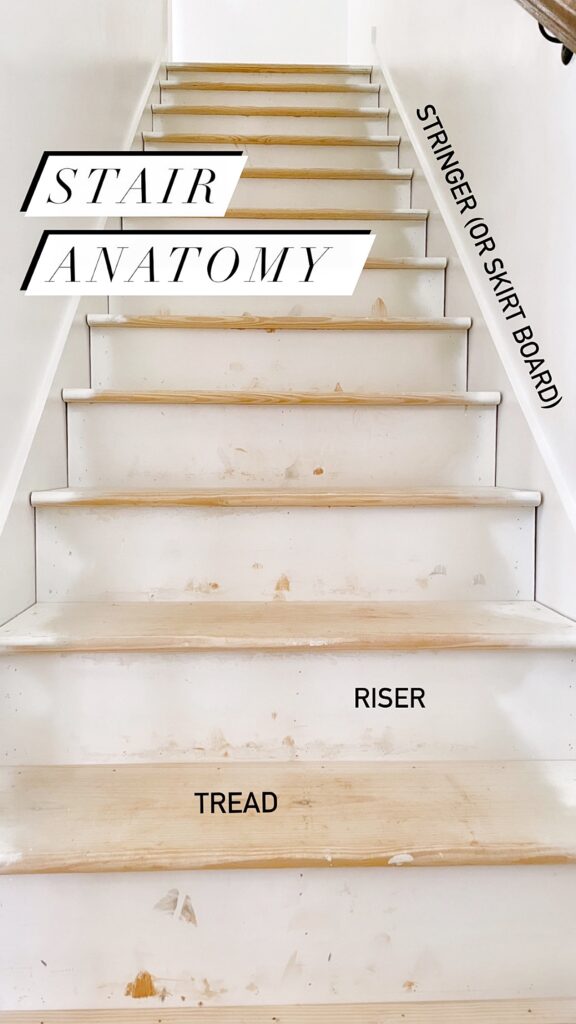
In order to fully understand my tutorial, let me just share this little diagram on simple stair anatomy so you know what I’m referring to:
I did run into an unexpected issue…
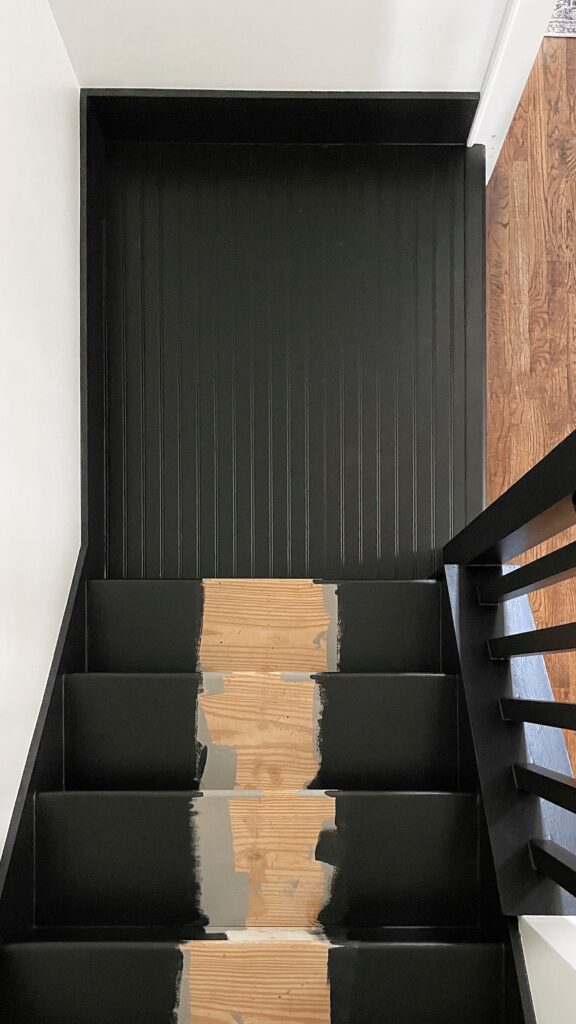
One thing I noticed right away was how large the gaps were between the treads and the stair stringers. Some of the gaps were as big as ½” so I knew caulk wasn’t going to be a great way to fix these. I had to brainstorm.
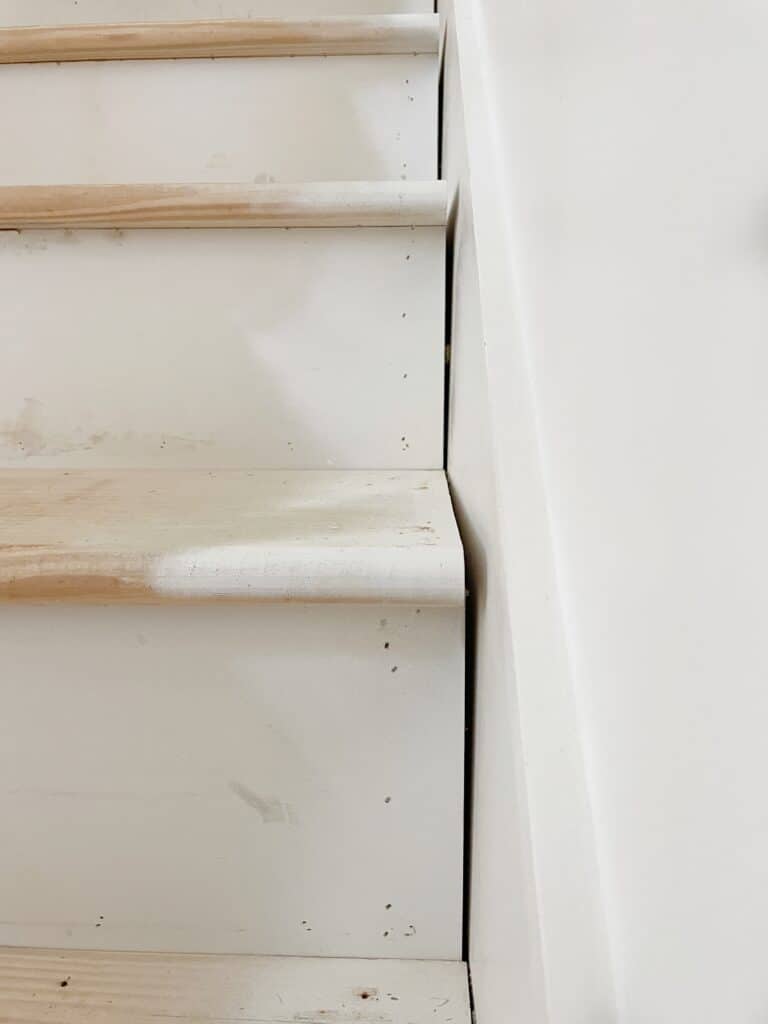
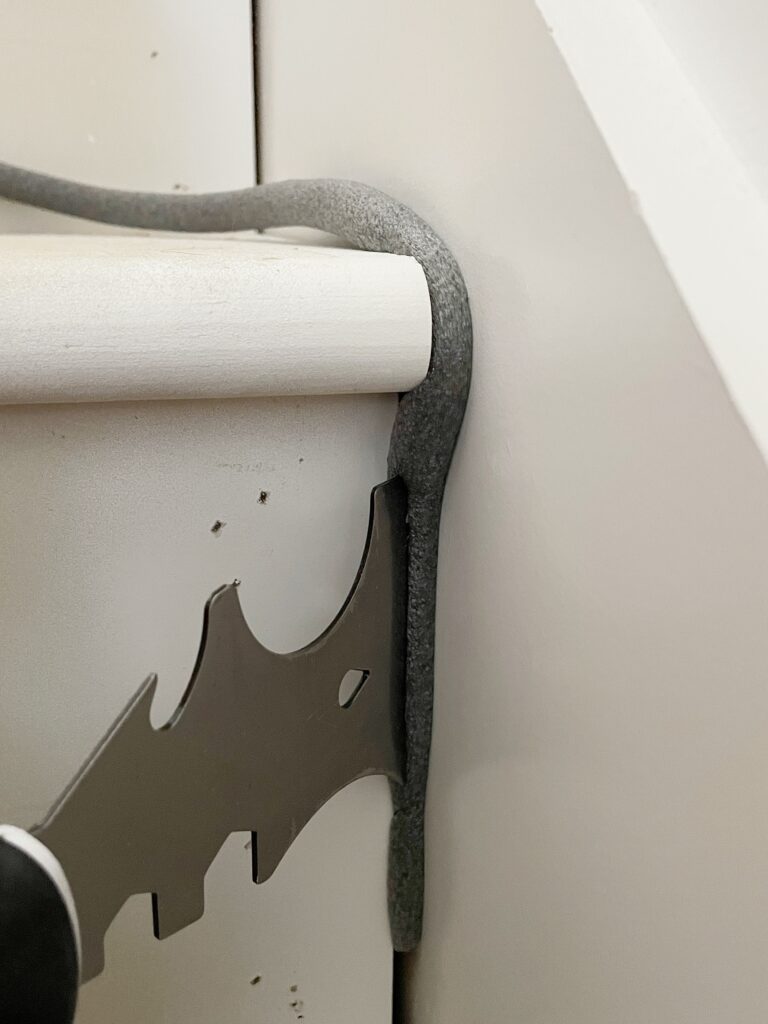
I knew it wouldn’t hurt to add some backer rod first. If you’ve never used this, it’s great! It’s essentially a foam strip that you shove into the gap to account for some of the space before you start filling the gap…which means you won’t need nearly as much caulk! Just use a painter’s tool to push it in.
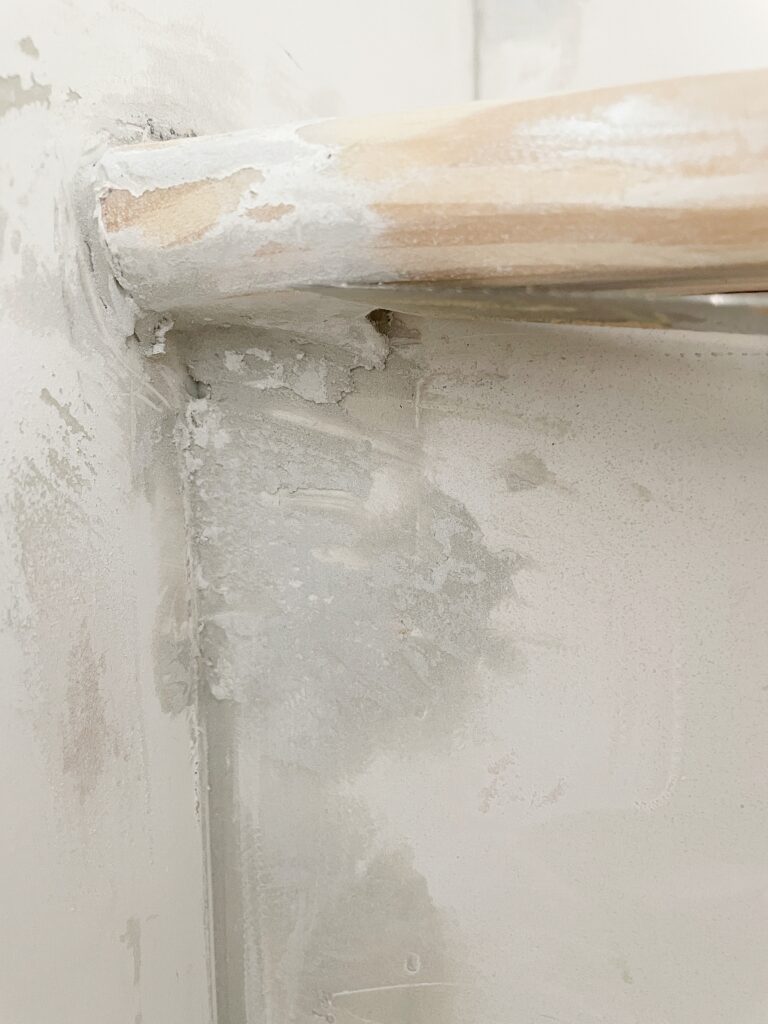
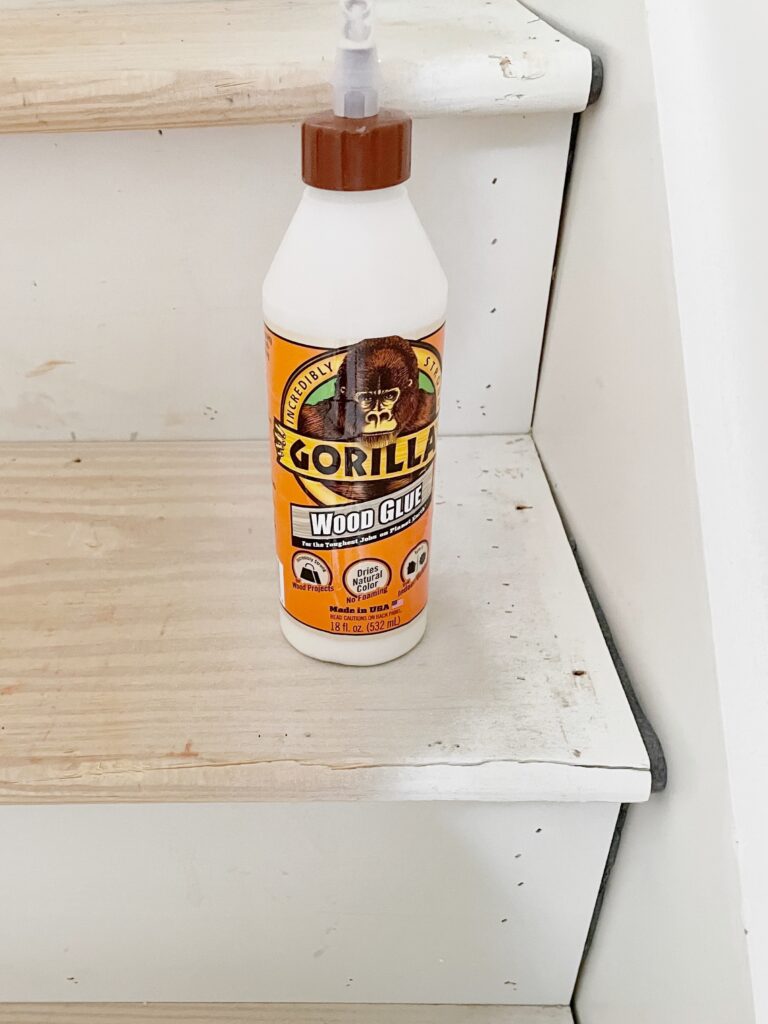
To fill the gaps, I decided to try out a product called bondo. It smelled awful and it was tricky to work with because it dries very fast, but it did the job! It dries hard like concrete!
I made the mistake of overfilling the gaps, leaving me with excess bondo that I had to chisel away and then sand. I’ve since learned that I used bondo all-purpose, but bondo wood filler is easier to find and would’ve been more ideal for this job.
Thankfully, there weren’t extreme gaps on all the stairs treads. Most of the gaps on the left side of the stairs were much smaller and could easily be filled with your standard wood filler!
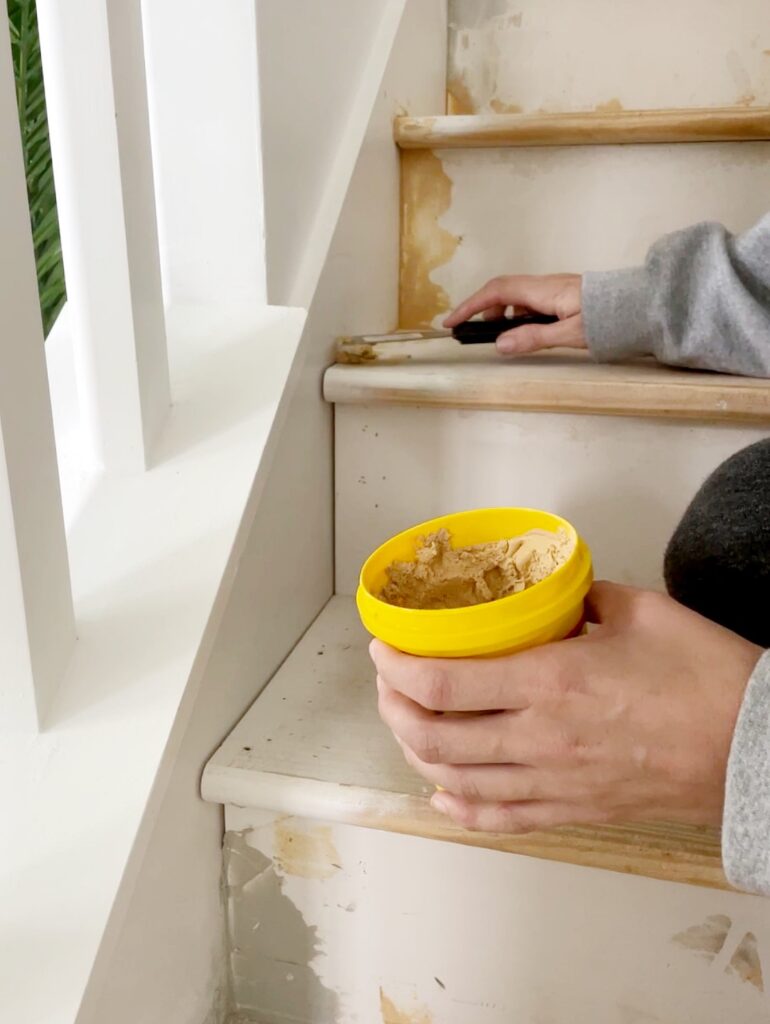
What if your wood treads are cracked in areas?
Be sure to check for any cracks or structural problems in the treads.
I only noticed one! It was a large crack at the edge of the tread (you can see it in the photo below!) so I just used some wood glue, pressed it back in place, and held it for a minute or two. This worked perfectly!
What if you end up needing new stair treads or risers?
If this happens, you can actually purchase new stair treads from Home Depot and you can just cut them to size! If you need new risers, I’ve seen others use hardboard or plywood to place overtop the existing riser. Just do a little research!
What did you do for the landings?
We have a landing at the top and bottom of the stairs! I went a little unconventional here and used beadboard to cover it up. I definitely wouldn’t recommend beadboard for flooring in most other cases, but since this was just the landings (which were mostly covered with a runner), I went for it! I really love the character this adds to the stairs.
Another fun option to consider would be to use a peel and stick flooring like this!
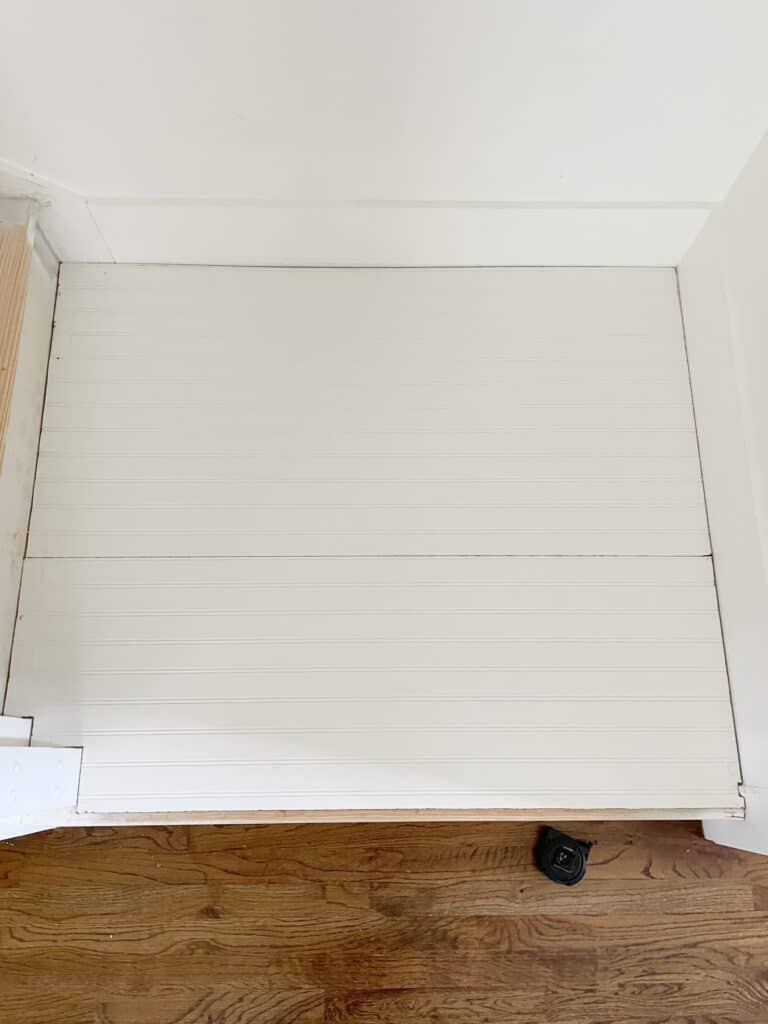
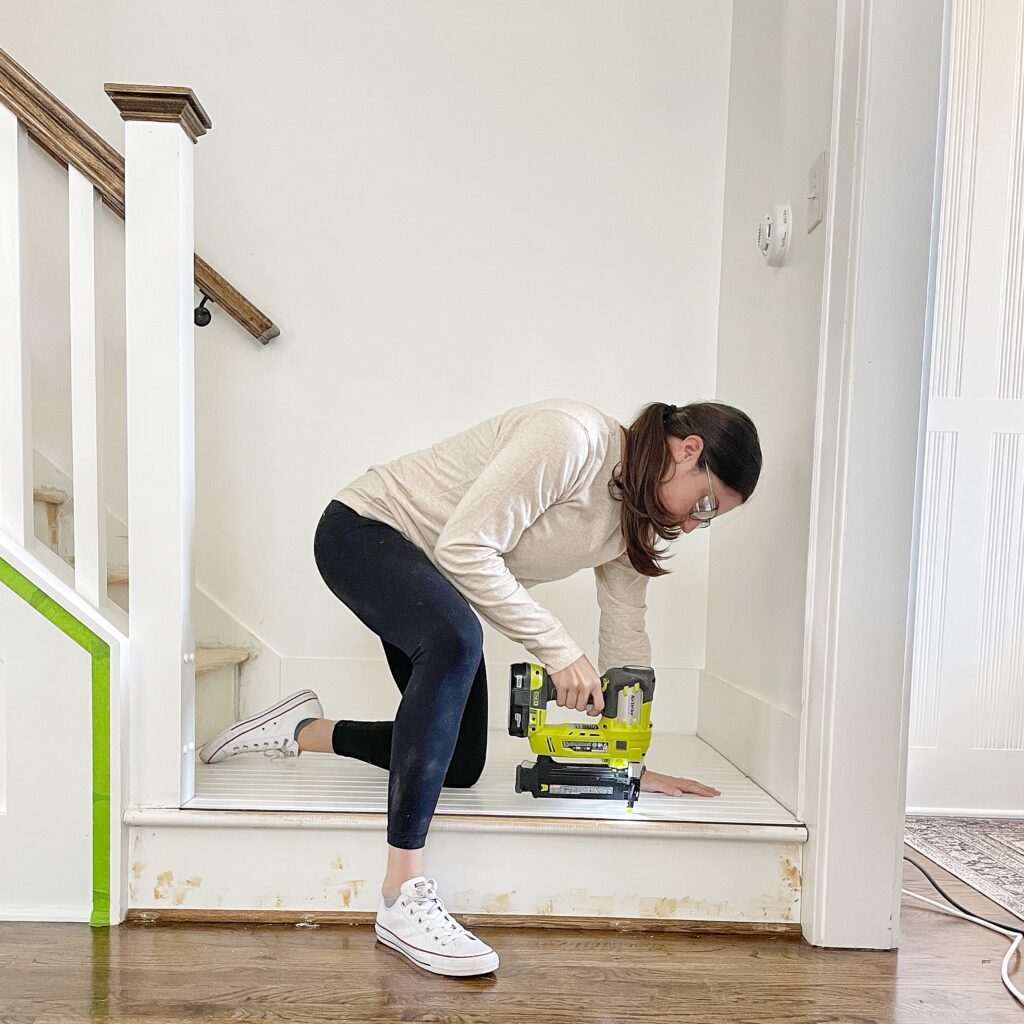
To do the landing I first cut the beadboard panel to size using a jigsaw. I then secured it to the landing using my brad nailer and nailing along the edges, at the seam, and some scattered throughout the middle. Lastly, I caulked the edges and seams as needed!
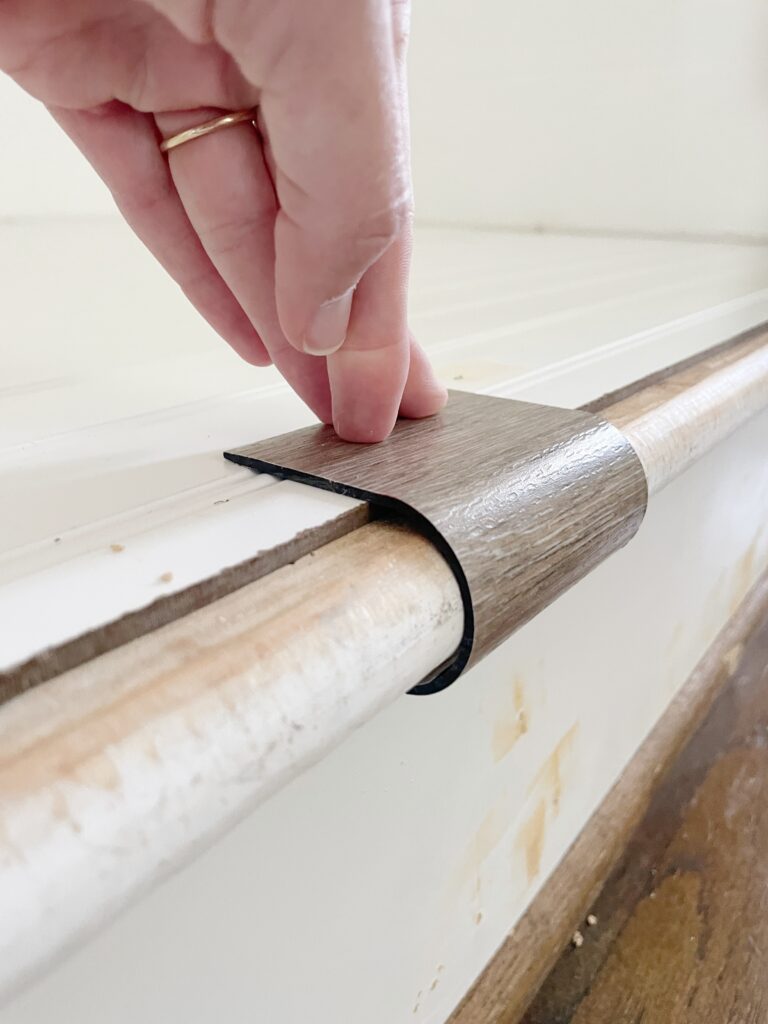
The beadbard raised the landing a little so I had to improvise and get a new stair nosing.
This was very simple to install- I just cut it to size with my miter saw and attached it with brad nails! They no longer sell the exact one I used, but this one is the same style and measurements as what I used! If you’re planning to paint your stair landing like we did, the color of the stair nosing won’t matter!
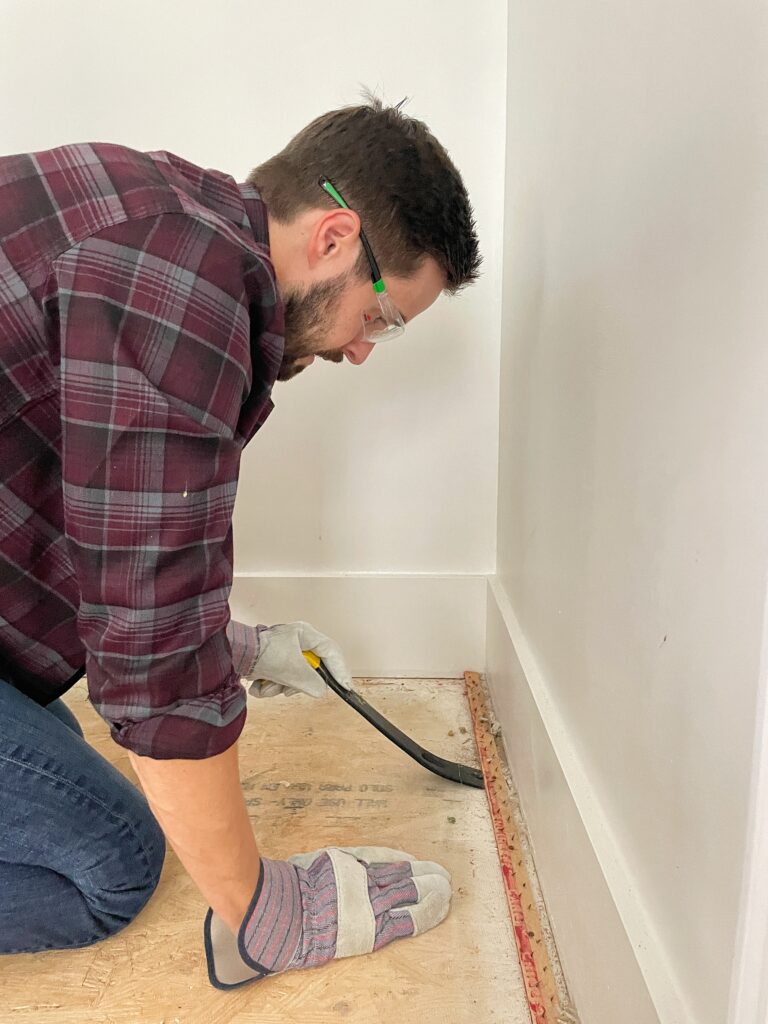
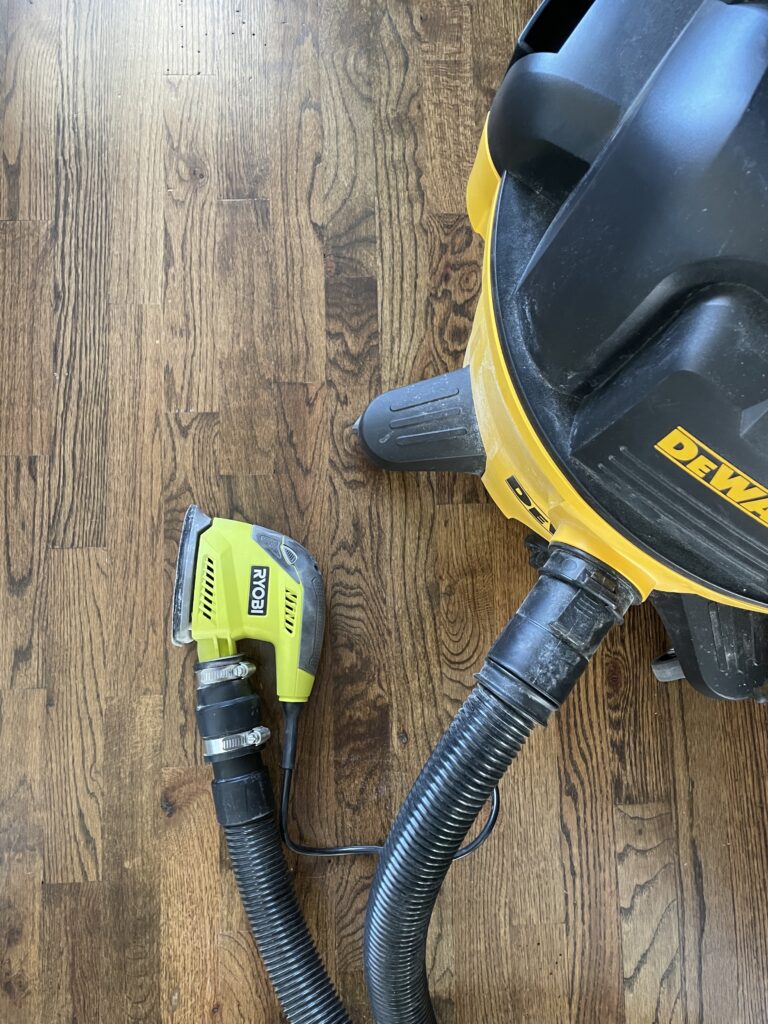
Sanding was the part I was dreading most.
The idea of sanding the stairs was totally stressing me out. I just hate sanding inside and getting dust everywhere. Luckily, I found the COOLEST hack for dust-free sanding.
If you have a shop vac and a mouse or orbital sander, all you need is a flexible PVC adapter! This allows you to tighten the adapter and connect the two. The size of the adapter will depend on your shop vac and sander!
This is truly life changing and has come in handy for many other indoor projects. I sanded these stairs down and there was practically ZERO dust!
Taping the stairs
Since I decided to paint the stairs and the stringers, the taping was simple! If you’re planning to stain your stair treads, or you don’t want to paint the stair stringers, you’ll have to tape accordingly!
Step Three: Priming the Stairs
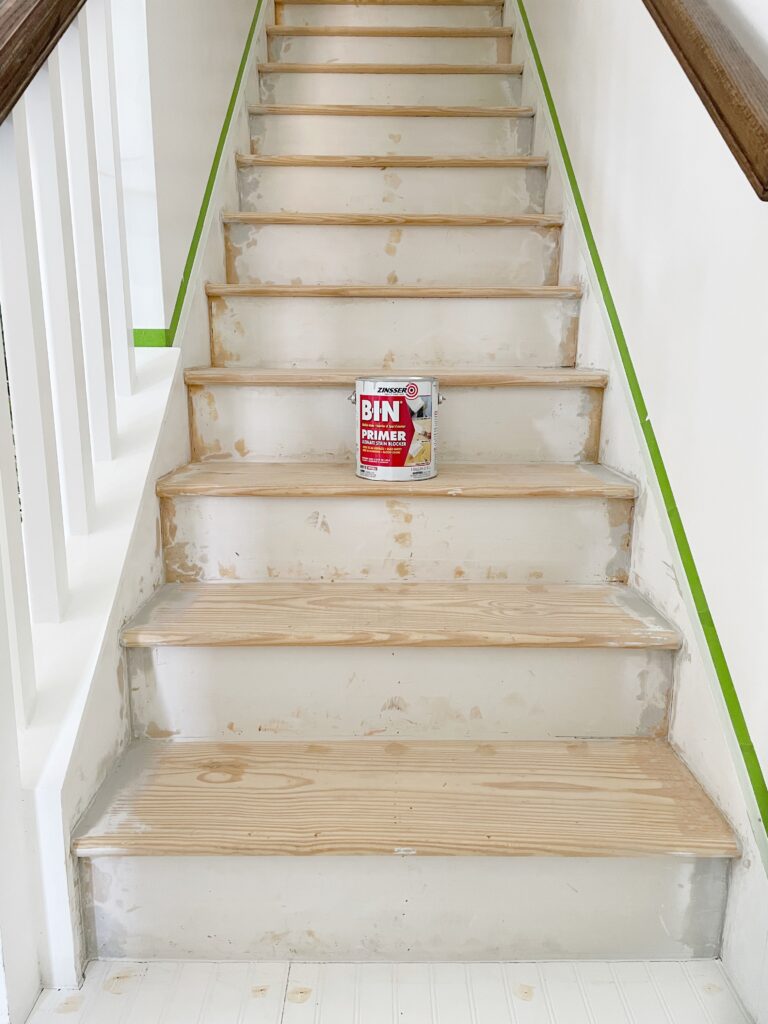
This is the shellac-based primer I used. It’s incredibly durable and does a great job of priming anything in a high-traffic area.
Pro tip: Ask the paint department to tint your primer if you’re using a dark paint color. That’s what I did which is why it looks like gray paint! This helps with better coverage so instead of having to do three coats of black paint, I only needed to do two!
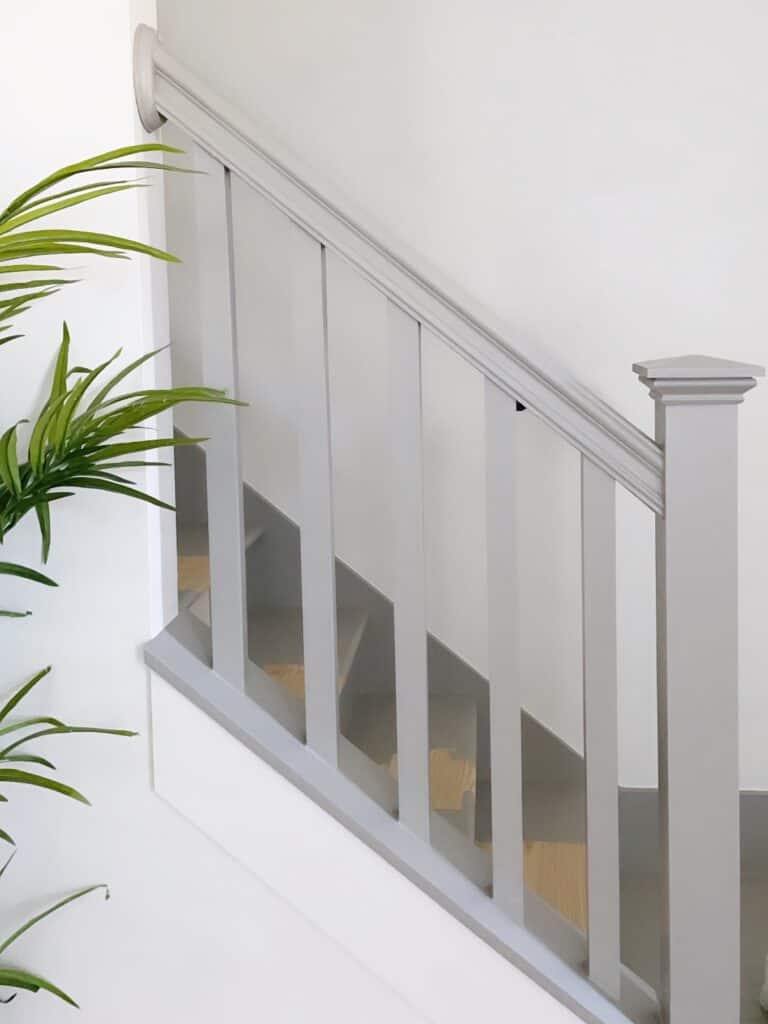
Did you paint the newel post?
I decided to paint the newel post because I thought it would look great black! Again- personal preference! I did two coats of primer. In between coats I sanded with 320 grit sandpaper, vacuumed, and wiped the stairs down with a damp rag.
After the second coat, I caulked the seams on the risers using paintable caulk! Once the caulk dried, I sanded, vacuumed, and wiped the stairs to prep for paint.
Step Four: Painting the Stairs
What’s the best paint for stairs?
We used this porch and patio paint and I highly recommend it! It held up perfectly on our stairs!! The paint color I used is Limousine Leather. It’s a perfect true black paint and provides such a rich, sleek look!
I applied the paint with a small 3/8″ nap roller for most of the stairs. A small angled brush was needed on some of the balusters. You’ll notices I didn’t bother painting the middle of the stairs since I knew the runner would cover it anyway! Plus, it allowed us a space to walk while the paint was drying.
How many coats did you do?
Two coats of paint provided great coverage since we used the tinted primer! In between coats I sanded with 320 grit sandpaper, vacuumed, and wiped down the stairs.
I know the sanding in between is extra work, but it’s best practice if you’re looking for a smooth, professional finish.
Step Five: Sealing the Stairs
With all the traffic stairs get, I recommend using a poly finish to seal them! I applied two coats of this satin water-based polycrylic using a foam brush and it worked perfectly. Whatever top coat you choose to use, test it out in a small hidden area first. The poly can change the look of the paint!
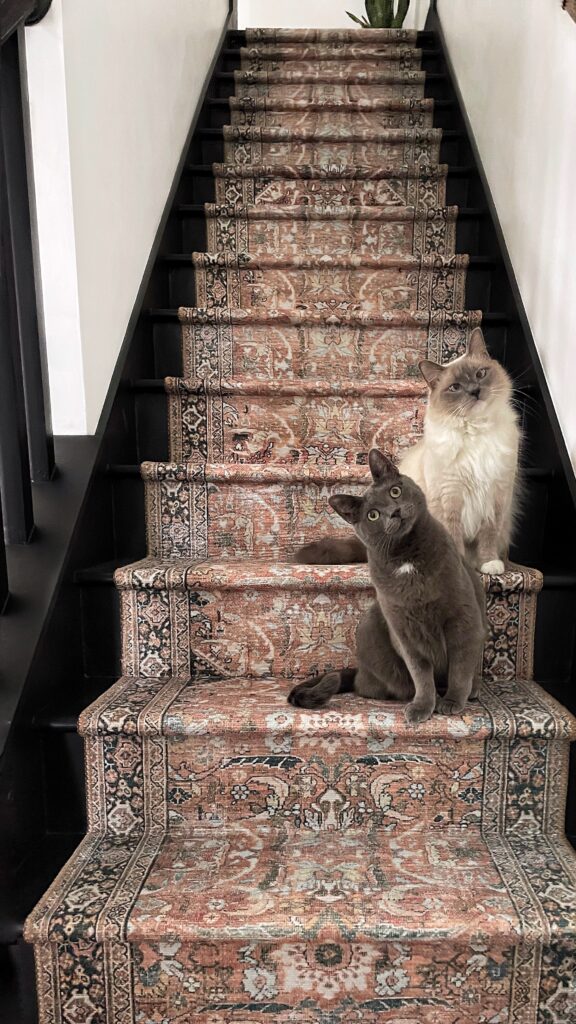
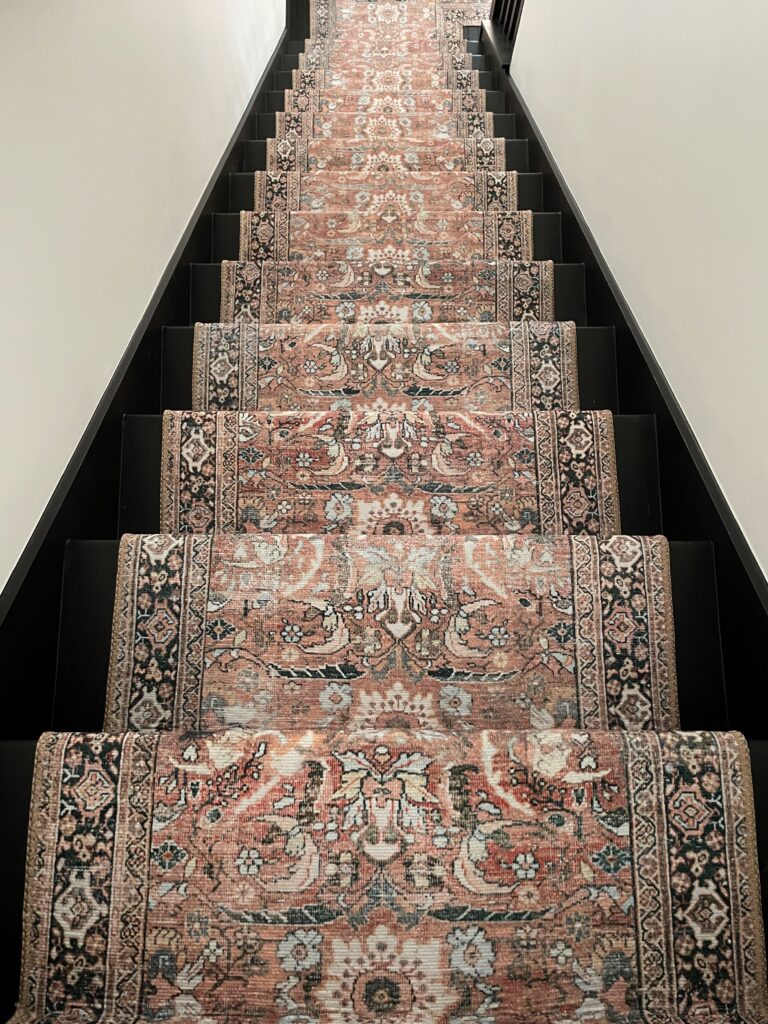
How to Install a Stair Runner
We absolutely adore our new stairs and trust me when I say this was the easiest stair makeover! I hope this step-by-step tutorial was helpful.
If you’re interested in learning how to install a stair runner, I have a blog post tutorial as well as this YouTube video:
Additionally, you can watch this DIY stair remodel in my IG highlight!
Thank you so much for being here and please don’t hesitate to let me know if you have any other questions!
Elisha

This looks awesome. I am close to starting this project and I have a similar layout to you. How far did you carry the black on the trim?just that one wall with the board and batten?
Hi Kelley! Thank you so much! I initially I just did the stairs and stopped at both landings, but later on I ended up painting all my trim in my downstairs as we well as my upstairs hallway! You can see more views on my Instagram or if you search “satin” on my blog you can see photos in my post on painting trim! Hope that helps 🙂
I love, love, love! Going to try to copy this in our addition. Could you tell me where you purchased your runner and what brand/style/name it is? Also did you add padding? You did a wonderful job!
Hi Dara! Yay, that makes me so happy! And thank you so much! I just added the runner under materials and also have all the details on that process in this post here: https://ouraestheticabode.com/diy-stair-runner/
Where did you stop the black trim at the top and bottom? I love the idea of black charcoal steps with a runner but can not figure out where to end the trim!
Hi Amanda! Ugh, I just looked through my camera roll and I can’t find a picture 🙁 But basically, at the landing on the top of the stairs, I painted the baseboards black up until they turned left and right into our hallway if that makes sense! A year or so later I ended up painting all the trim and doors in our hallway black too, but even if it didn’t I still felt like it looked just fine this way!
When you sanded in between the coats of paint with 320 grit sandpaper were you using the sander or did you do that part by hand? This article is so well written, and the pictures are perfect. Thank you so much.
Hi Erin! Thank you so much for the kind words- that means a lot! And yes, that part was just by hand so real quick and easy 🙂 Good luck!
Hi, what a great project, I’m planning to redo my stairs so lots of helpful info. Would like to know what did you use for ur stair nosing (the snug fit) … somehow can’t figure it out … Thanks
Hi Petra! Thank you so much i’m glad it was helpful 🙂 I linked the stair nosing product I used under the Materials list towards the top of the post, but I just looked and apparently Lowes no longer sells that product! Such a bummer!! Try googling “stair nosing” cover and hopefully you’ll see some options that would work! Good luck!!!
Hi! This is gorgeous! I need exactly that same type of piece of stair nosing- Where did you get the stair nosing piece?
Hi Alli!! Thank you so much! I got that stair nosing from Lowes but I just checked and it’s no longer sold there 🙁 But the exact product was “ProCore Plus 2.5″ x 94″ Vinyl Oak Stair Nosing”. I even went to ProCore Floor’s website, and they show them, but the link goes to Lowes. But I found one on Wayfair!! Here’s my affiliate link: https://rstyle.me/+dZdz4bjOgDf4m–CTjaeQw Hope this helps!!
Great look. For now I will stay with carpet and recarpeting of our stairwell. The kids and their friends going up and down all day, the Klacking noise would drive me crazy I will wait till they are out of the house. And I will also install white carpet in my living room. Lol.
Hahaha! Well that makes total sense! I don’t blame you 🙂