

Crown molding is such a beautiful architectural detail and a great way to add character to your home!
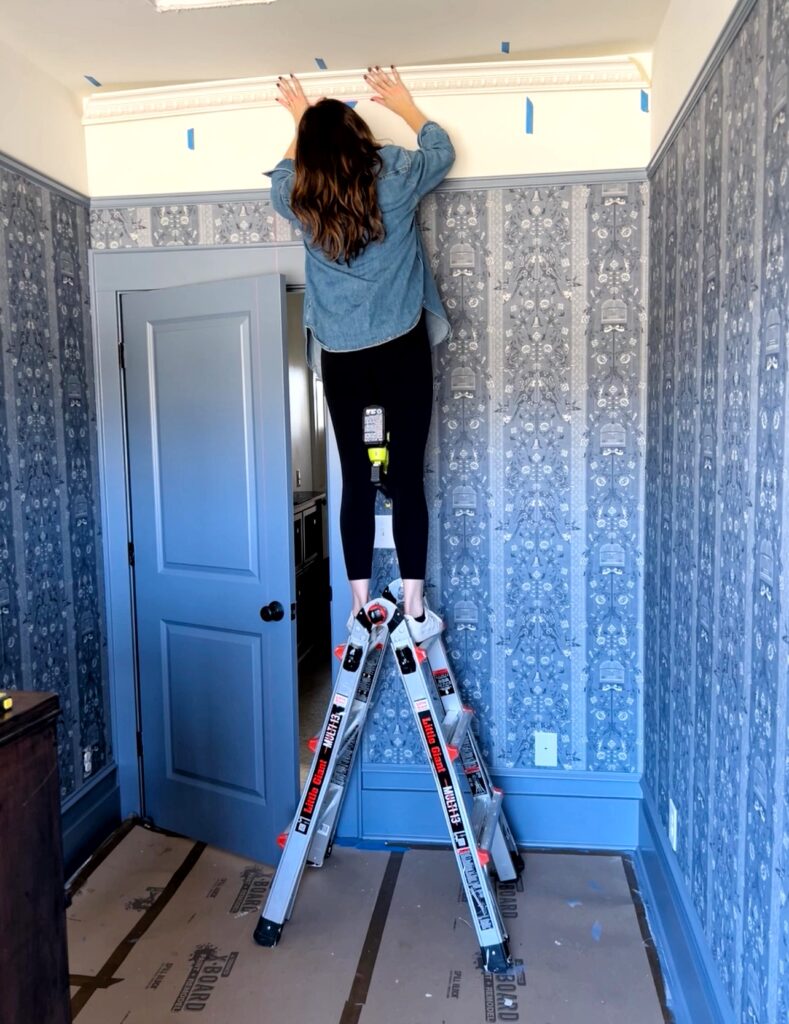
After DIYing for two years, I finally built up the courage to learn how to install crown molding. I’d heard so many horror stories about crown molding installation that I avoided it as long as possible. I’m not going to lie to you, it is definitely a learning curve. But if you have patience, and some experience making a 45-degree cut with the miter saw, I’m confident you can do it!
Now keep in mind that this was my first and only time installing crown moulding (at the time of writing this) so I know I have room for improvement. My goal is not to act like I know everything there is to know about installing crown moulding, but to share everything I learned in a way that makes sense to a beginner DIYer!

Disclaimer: This post contains affiliate links. This means, if you purchase something from a link I provided, I will receive a small commission. This is at no extra cost to you! Thank you for your support!
Tools
- Power Miter Saw
- Speed Square
- Laser Level
- Tape Measure
- Nail Gun
- Stud Finder
- Caulk Finishing Tool
- Angle Finder
- Caulk gun
Materials
Foam Crown Molding
What are the advantages to using foam crown molding?
The main reason I decided to use foam crown molding is that it’s lightweight! Why does this matter? Well, it makes it easier to both cut and install crown molding by yourself. Holding long pieces of solid wood trim up over your head can be challenging!
When it comes to cutting crown moulding, the placement is very important and it’s much easier to hold the trim in place when its light!
Another advantage to using foam crown molding is that you won’t have to worry about warping.
It can be really frustrating when you work so hard on trimwork and come winter the wood starts to shrink and create gaps. With foam crown molding, this won’t be an issue!
Is foam crown molding cheaper?
At the moment, lumber prices are pretty high. If you’re like me and prefer a more specialty crown molding, it’s going to cost you!! I found it was cheaper for me to get the look I wanted by using foam crown moulding.
Now, I will say, not all foam moulding is created equal. Some products are more like a styrofoam that might crumble more when cutting it. There’s different levels of quality so like anything else, do your research!
Where do you get foam crown moulding?
I found a brand on Overstock that has affordable, high quality, and unique foam crown molding options! Below is a roundup of my favorites! Click on the image for the links.
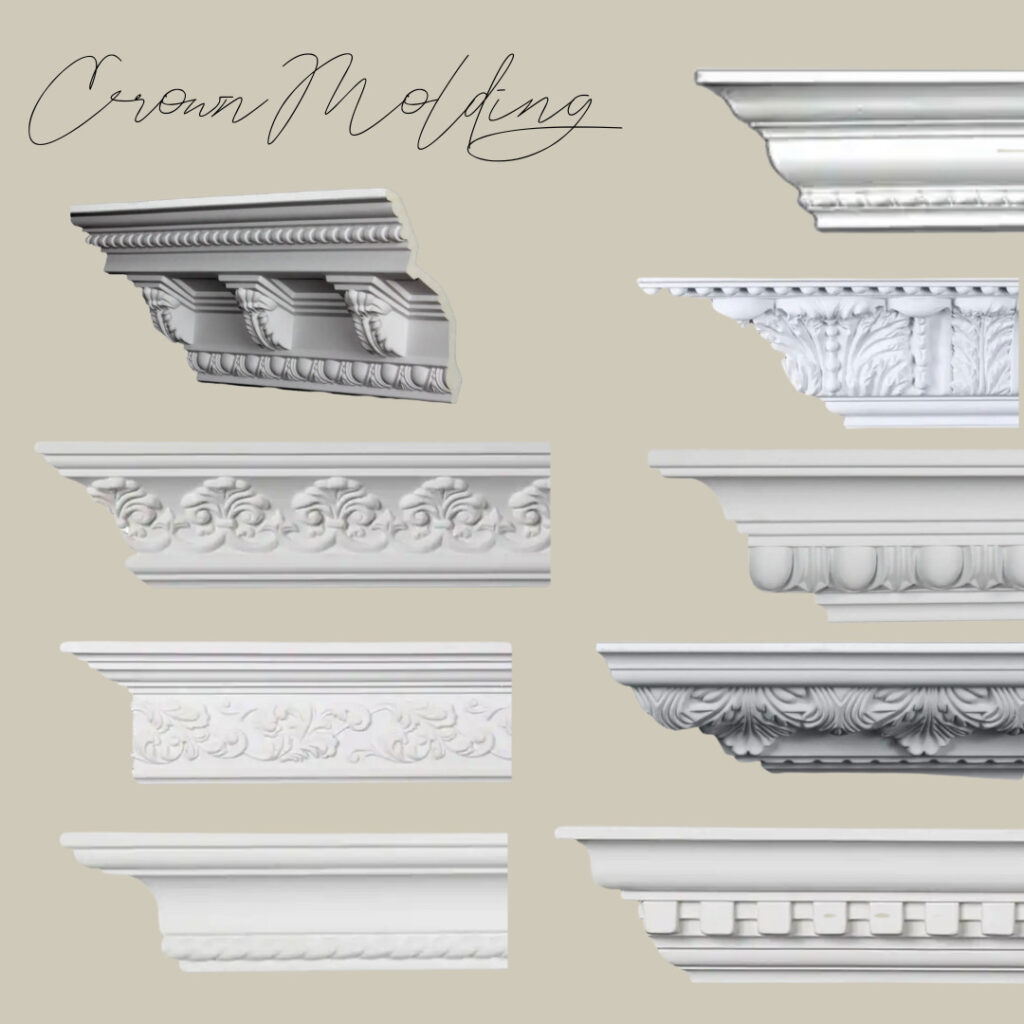
A few important notes about this foam crown moulding:
- It’s a polyurethane material that I would describe as more of a dense, high quality foam.
- When I ordered it, the estimated delivery wasn’t for a month but it arrived within two days. I’m not sure if I just got lucky or what, but?!
- The only negative to this brand is that the moulding is sold in sets of eight 8ft pieces. Again, I got lucky and needed 8 pieces anyway, but it could be frustrating if you needed 10, for example.
- I personally loved my experience with them and plan to order more crown moulding in the future!
What you need to know before installing crown molding
Size matters
The bigger the crown moulding, the more difficult it will be to work with. I love the look of a chunky crown moulding, but I knew it would be more of a challenge, so I went with this 4″ foam crown moulding since it was my first time.
Another important note: If you have a 10″ miter saw blade, it’s recommended to not cut crown moulding larger than 4″. If you want a larger crown, you’ll need a 12″ miter saw blade.
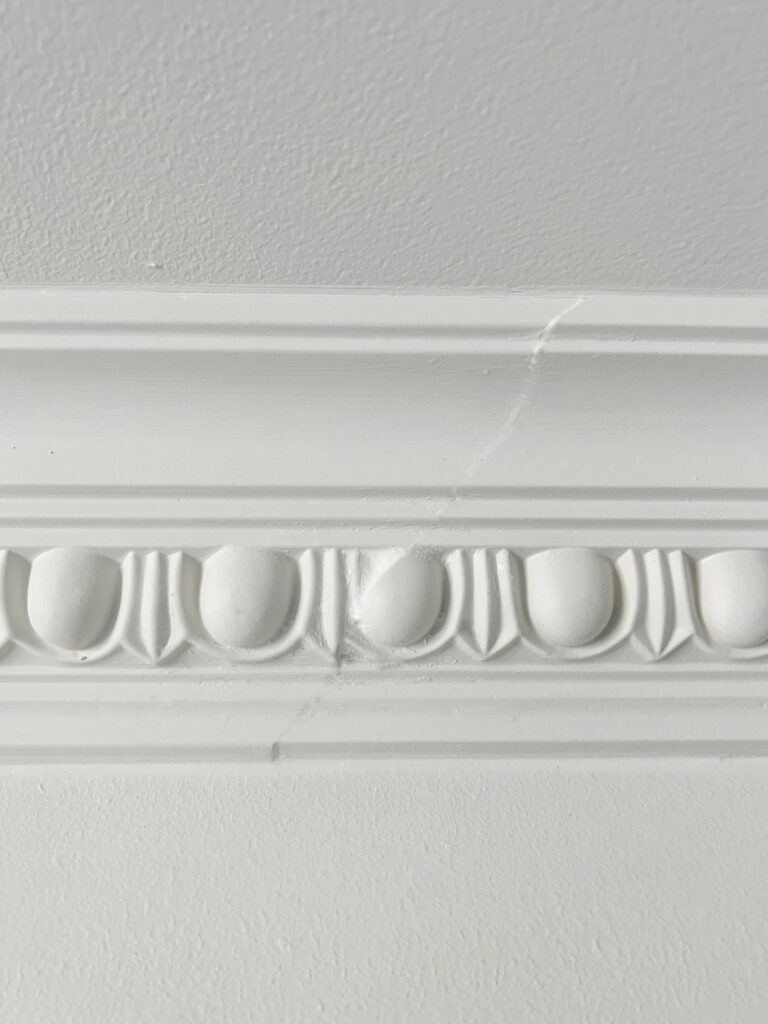
Design matters too!
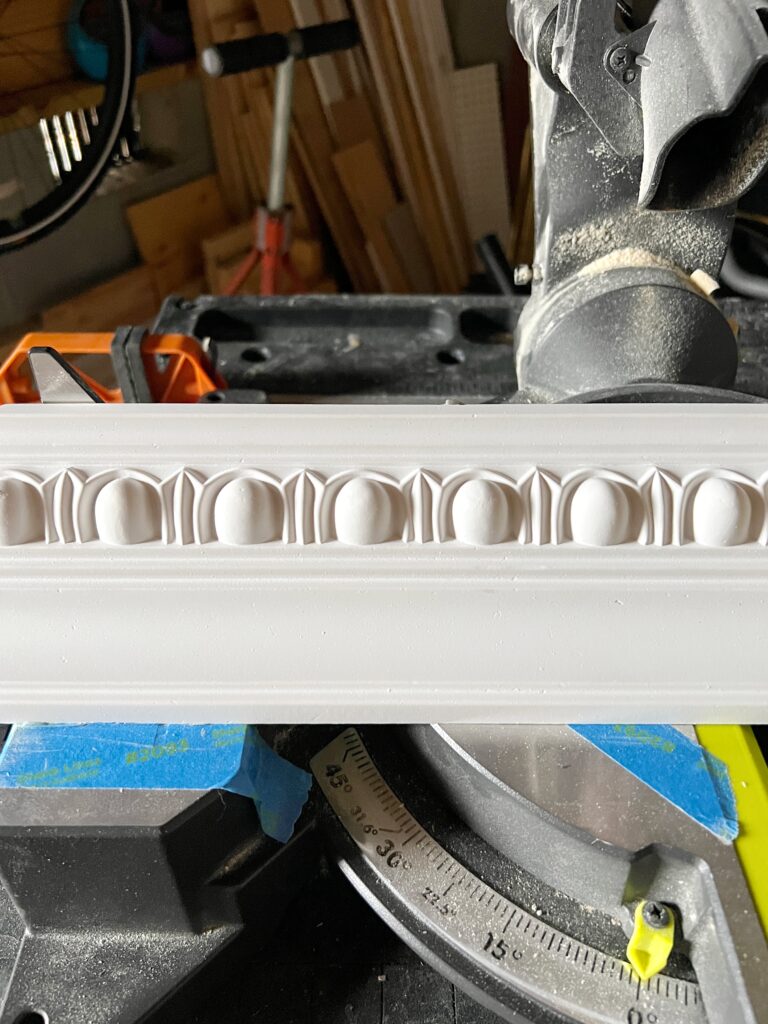
This is something I actually didn’t think about until I started installing the crown moulding. The moulding I used had this “egg and dart” design on it which made it a bit more challenging.
When joining two trim pieces together, I had to try to match up the design with my cuts. Not all of mine lined up perfect, but with some caulk and a little paint it’s hard to tell!
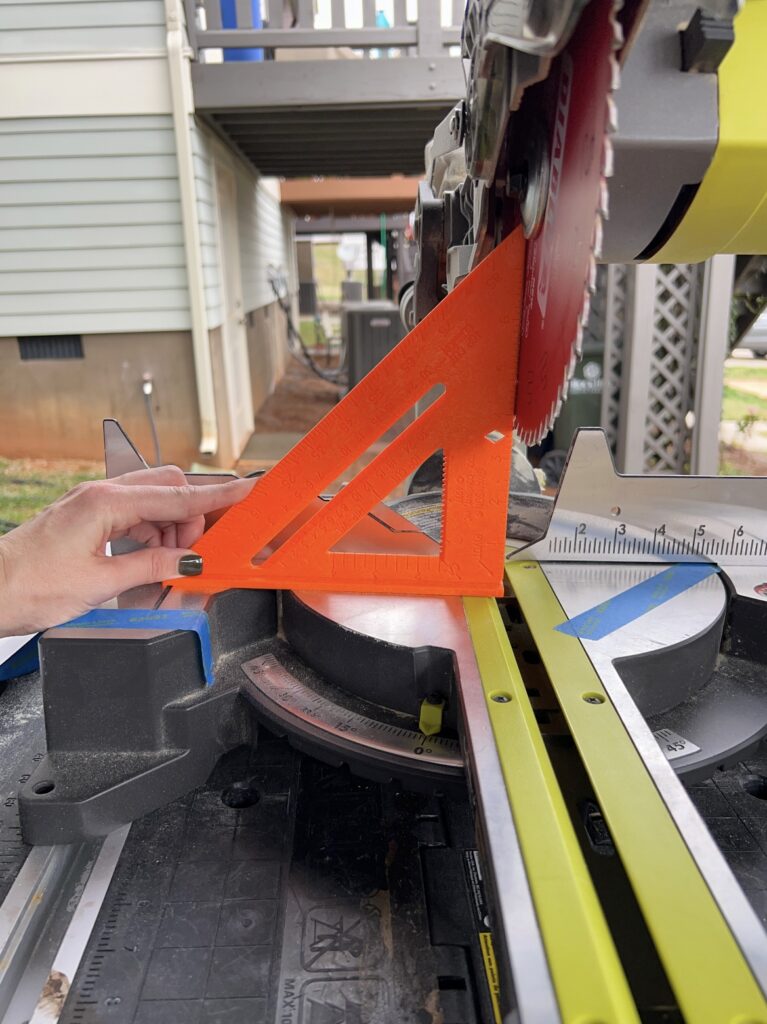
Make sure your miter saw is calibrated
If your miter saw isn’t calibrated, you won’t have accurate cuts. To see if it’s 90 degrees, lift the blade guard and place a speed square against the blade.
Mine was a nice right angle, but if yours isn’t, you’ll have to adjust the blade until it is! Here’s the video I watched that shared how to check this and adjust if necessary!
Finding the angles for each corner
Another thing you’ll want to do before you get started on installing your crown molding is to check the angles for all the corners in your room. Many homes don’t have perfectly square corners.
You can use a simple angle finder tool like this. Mine were (thankfully) all very close to 90 degrees. Here’s a helpful video I found if you’re cutting crown moulding for a corner that isn’t a perfect 90 degrees.
How to measure crown moulding
To measure for crown moulding, you have to measure where it would hit on the wall, not the ceiling. The best way to do this to use a laser measurer! Otherwise, it can be difficult to fumble with measuring tape while you’re up on a ladder.
When you use a laser measurer, you just have to butt it up against the wall, aim the laser dot to your end point, click the button and it shows you the exact measurement, down to the 1/16″… so helpful!
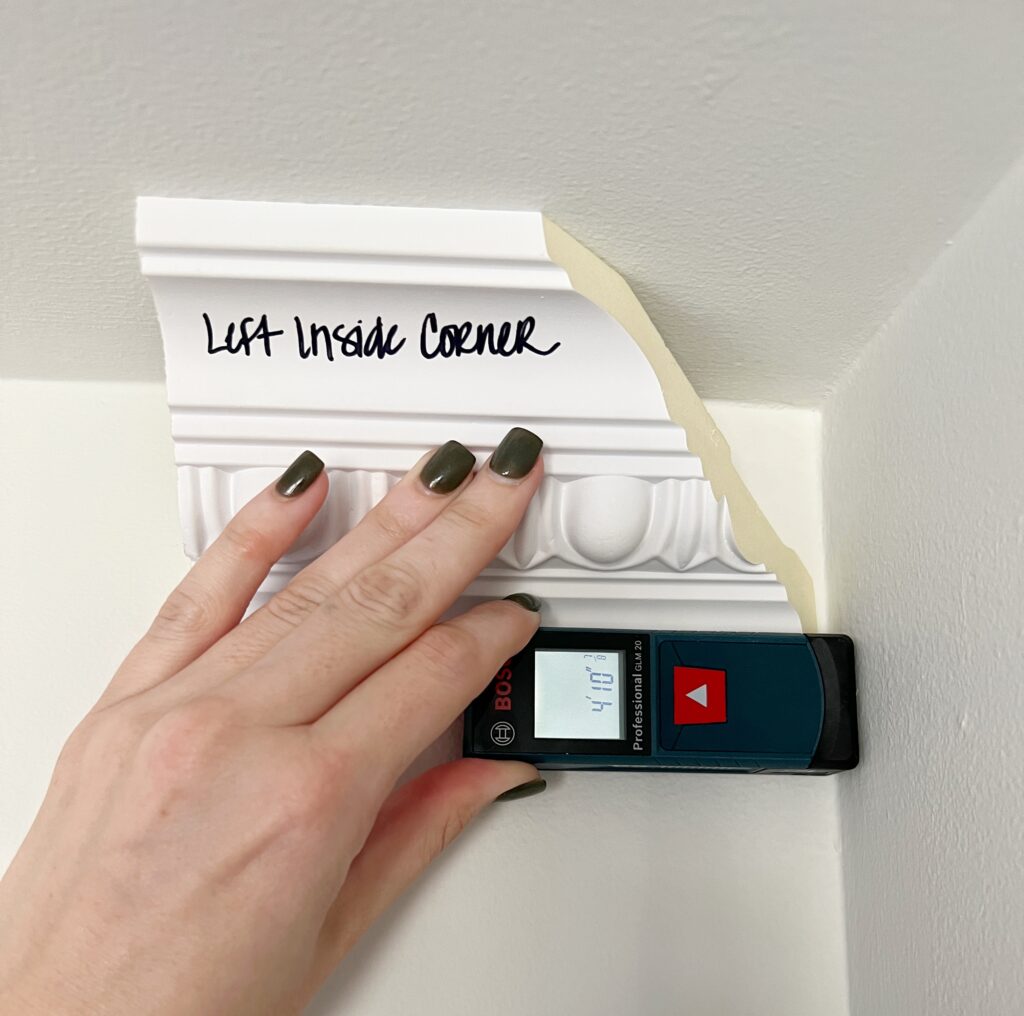
When you’re measuring crown moulding, make sure you’re marking your pencil line on the bottom of the molding (the more detailed part of the trim) since that is the part that’s going to hit the wall!
How to cut crown molding
Don’t be alarmed when you research how to cut crown molding and find that every source shares a different method. There are multiple ways you can cut crown moulding, but I’m going to share the method I used!
The method I used here doesn’t require a bevel cut or compound miter saws- just a simple miter cut!
What’s the easiest way to cut crown molding?
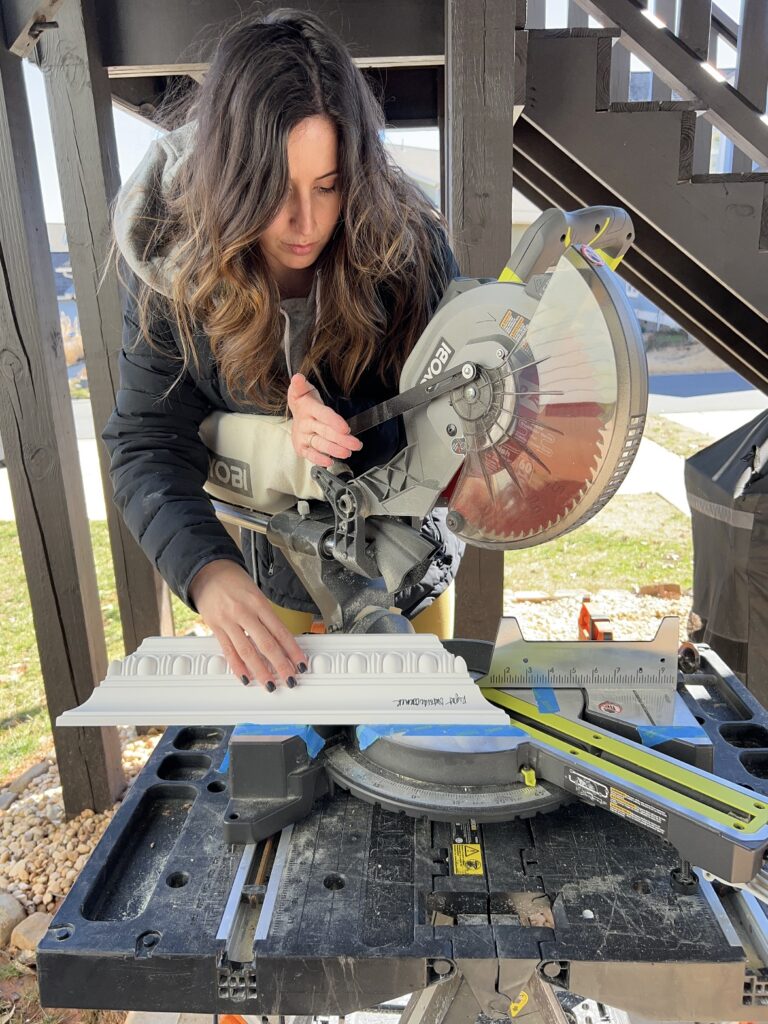
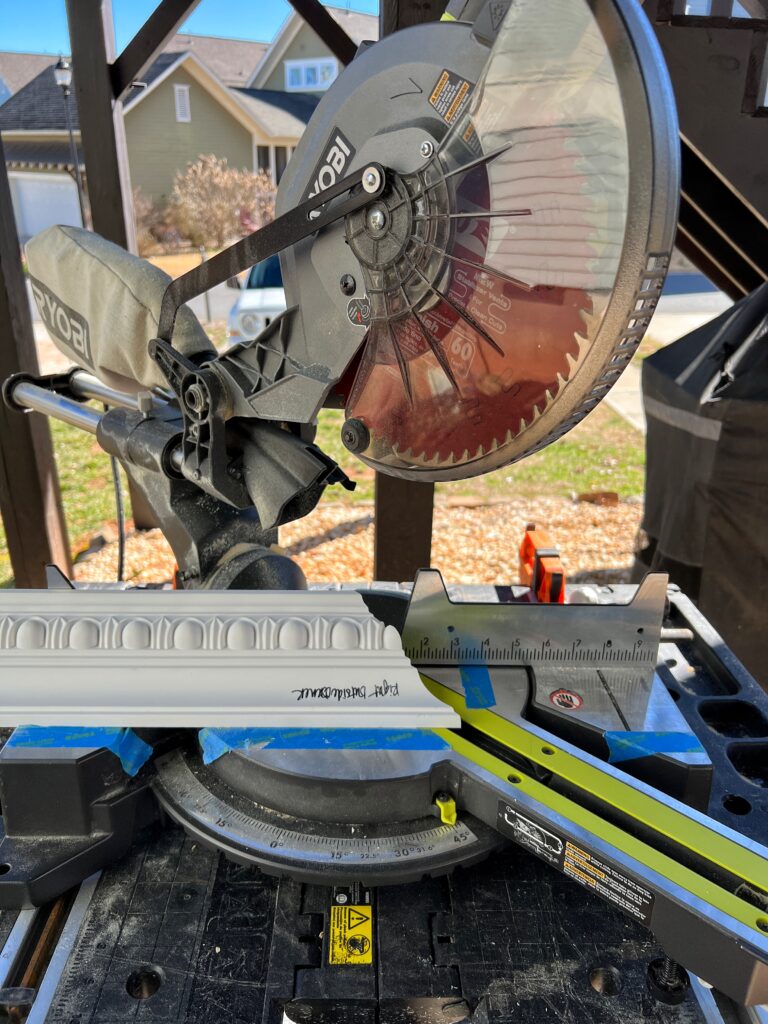
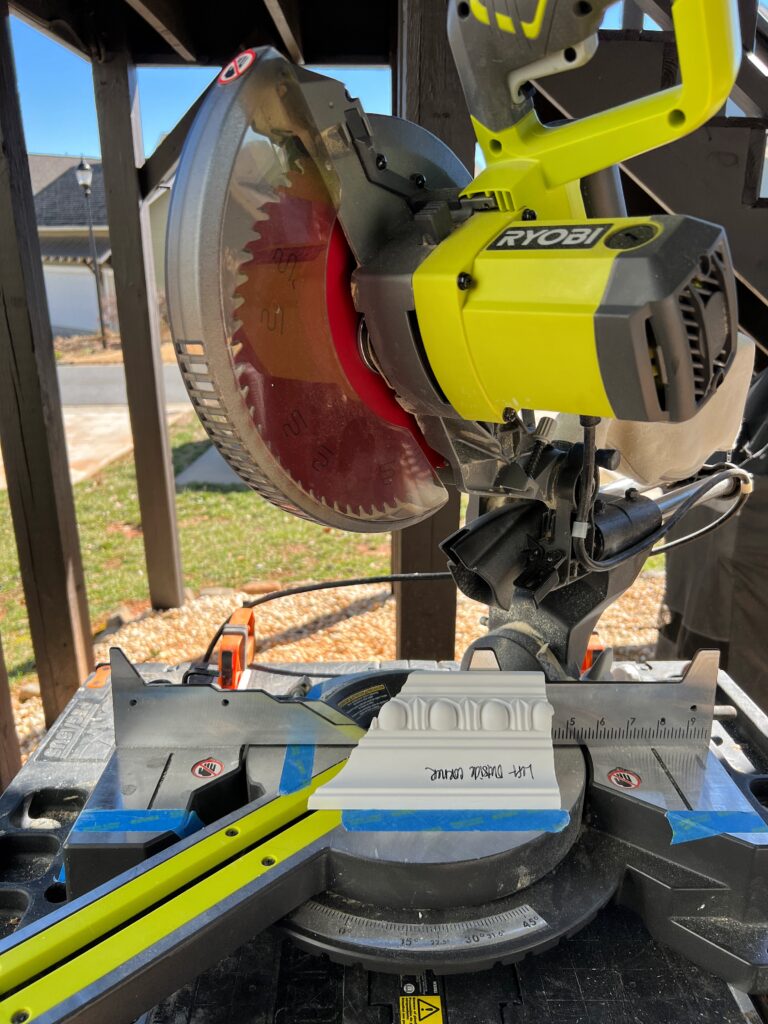
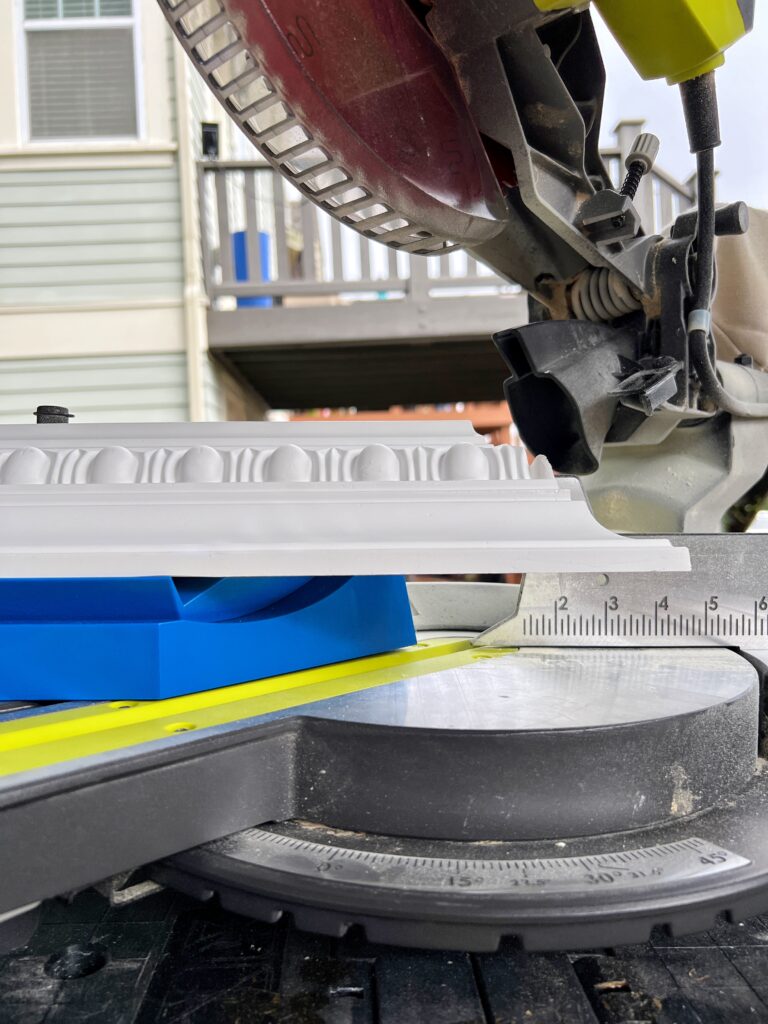
After lots and lots of research, I found that it’s easiest (and best) to cut crown molding resting on the miter saw. The only time this wouldn’t work is if you have a really large crown that’s too tall to rest on the fence.
When cutting crown molding resting, you want to make sure the crown is laying flat on both the fence and the table, just as it would on the wall! You can see my example below!
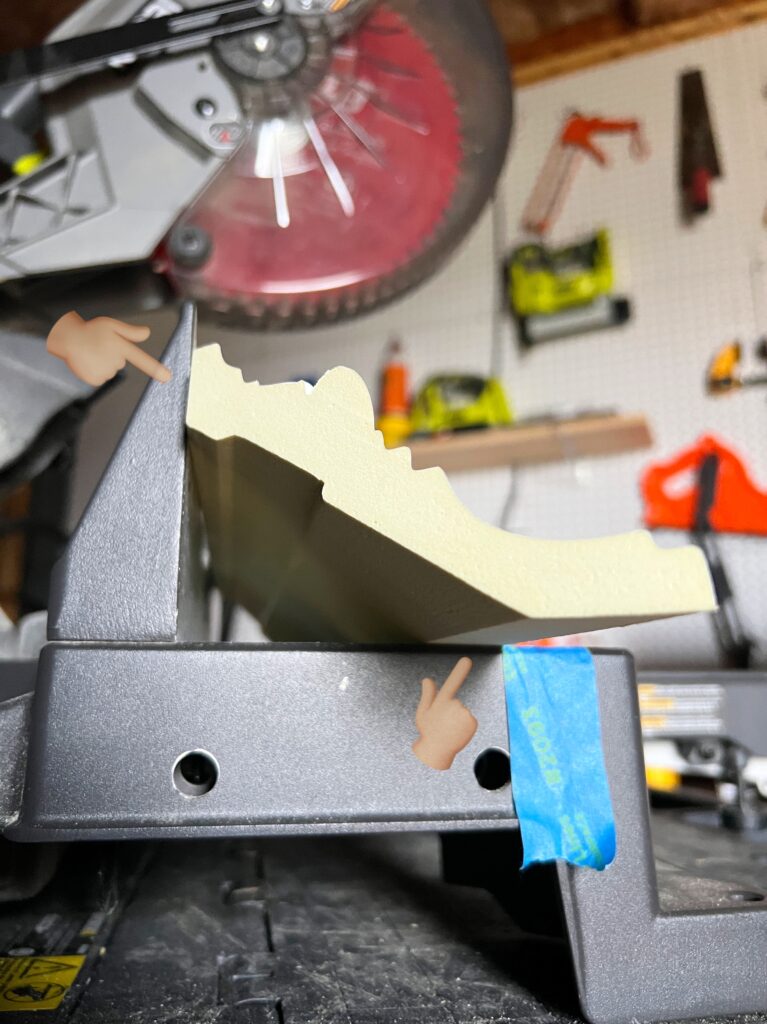
Once you find the proper placement, you can mark the miter saw table with painter’s tape. This will be a reminder for where to position your crown moulding before cutting.
As an alternative to marking the placement with tape, you could also purchase a crown stop like this one! It attaches to your miter saw and gives the crown a place to rest. Next time I install crown moulding, I’m thinking I’ll try one of these out!
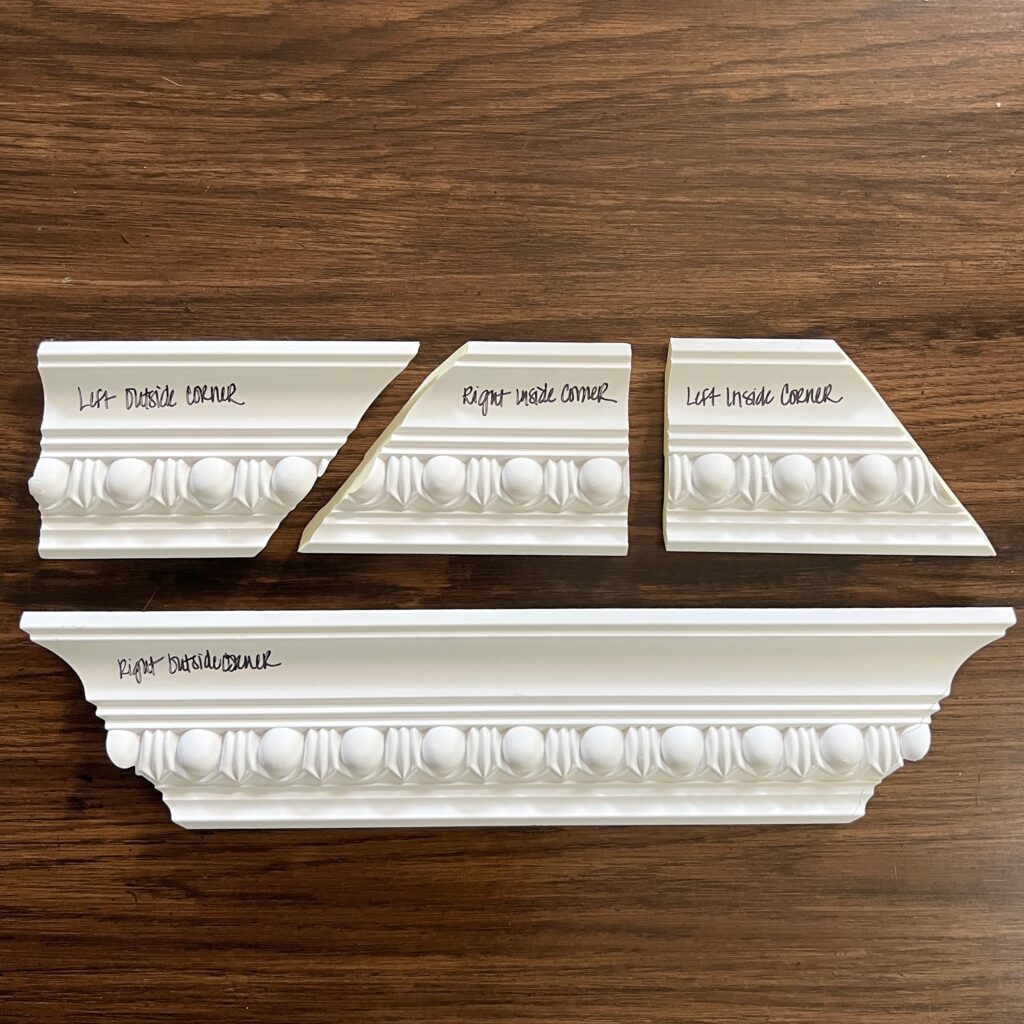
How to make sample templates for crown molding
Before you start cutting your pieces to size, you’ll want to make some test pieces. It is so important to make templates for each cut that you’ll need. In my case, I had both inside and outside corners in our guest room so I had to make 4 samples.
Use short pieces of crown for your samples in case you mess up and have to make more!
Bring them into the room and make sure they work for all corners. Play around with the placement when you’re testing them. It might initially seem like they don’t fit, but really the angle you place it might just need a little adjusting.
But first, let me show you how to set up your miter saw for all inside and outside corner cuts…
What angle do I set my saw for crown molding?
The method I’m sharing only requires you to cut using a 45-degree angle on your miter saw! Seems easy enough, right?? It really is!
What makes crown moulding so tricky is that you have to cut it upside down and backwards… I know! It can get confusing! But that’s why these samples are so helpful.
The bottom of crown moulding is usually the more decorative/detailed part. So you’ll want the detailed end resting on the fence of the miter saw.
Another trick I learned is to stand behind the saw to visualize how it will look on your ceiling. You can even label your samples “top” and “bottom” if that helps too!
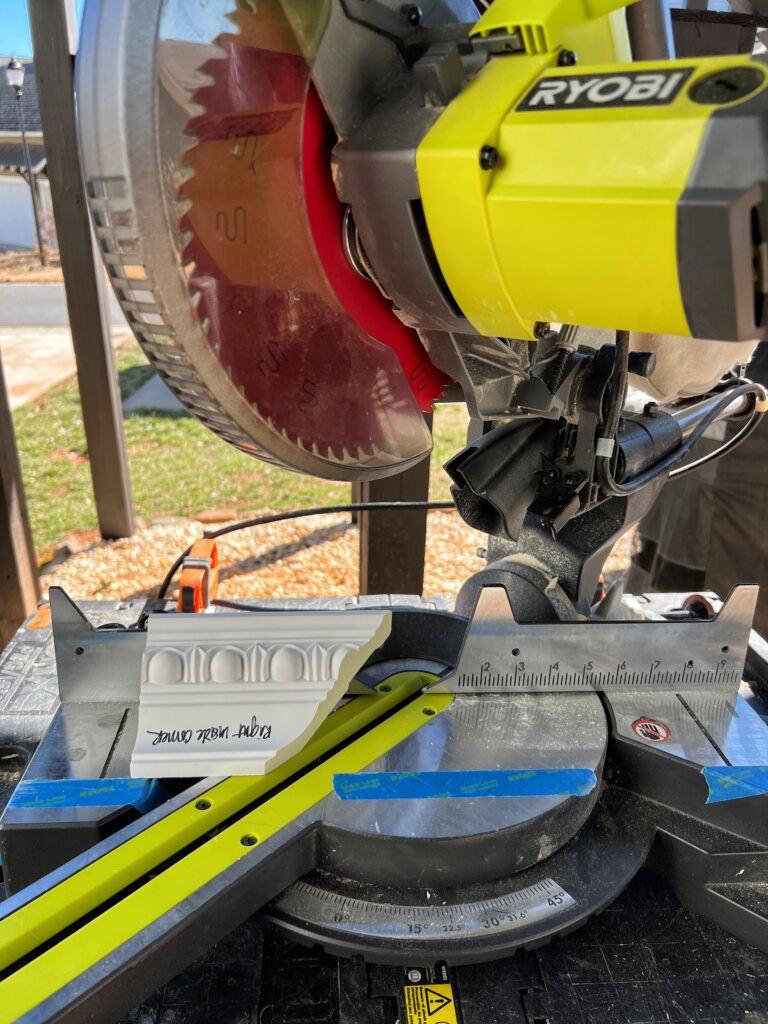
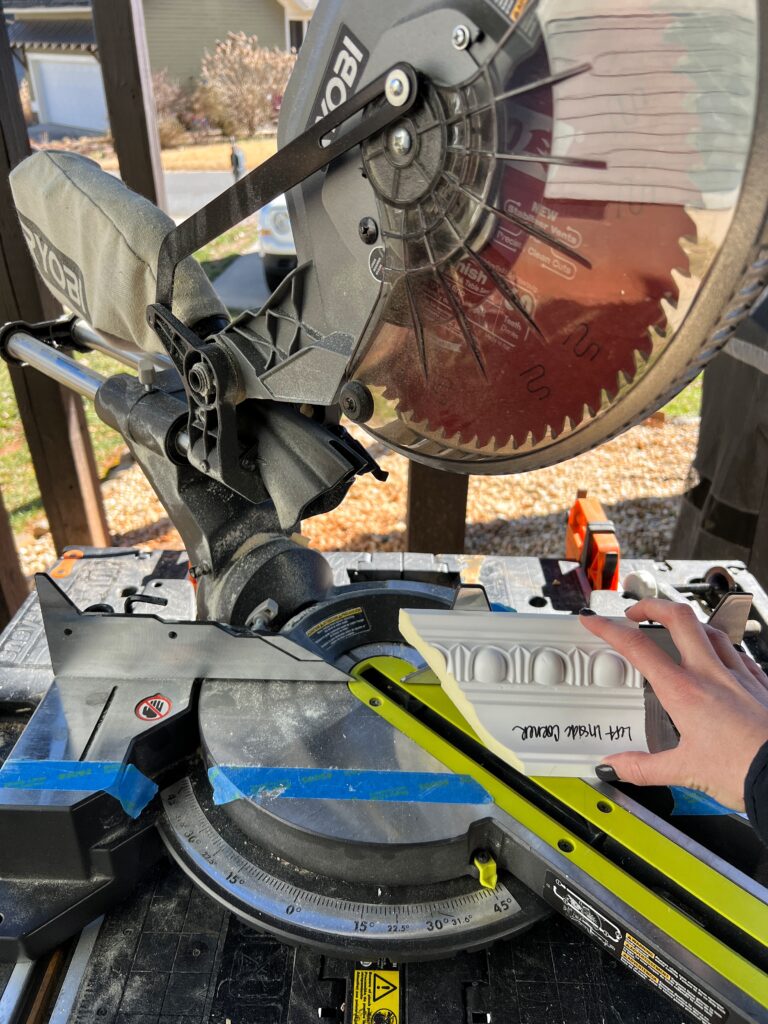
How to cut crown molding inside corners
Crown Molding Inside Corner- Right
Crown Molding Inside Corner- Left
How to cut crown molding outside corners
Crown Molding Outside Corner- Right
Crown Molding Outside Corner- Left
Again, these templates were a life saver for cutting crown molding as a beginner. You can see in the video below that I would use them for each cut to help with setting up the miter saw.
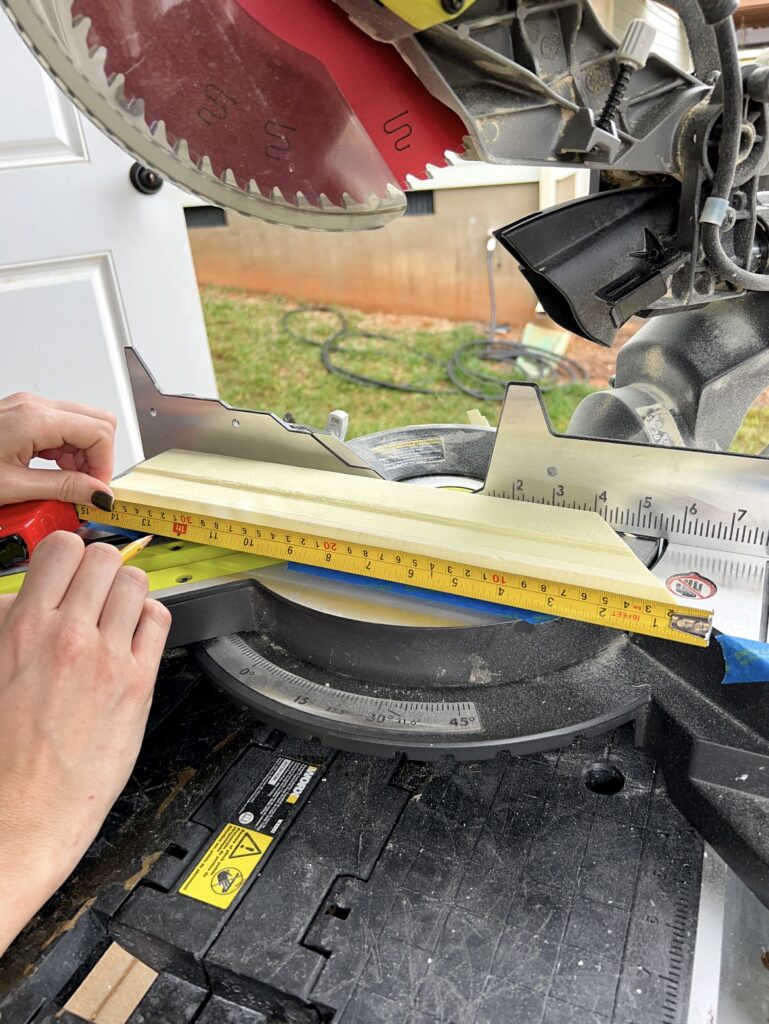
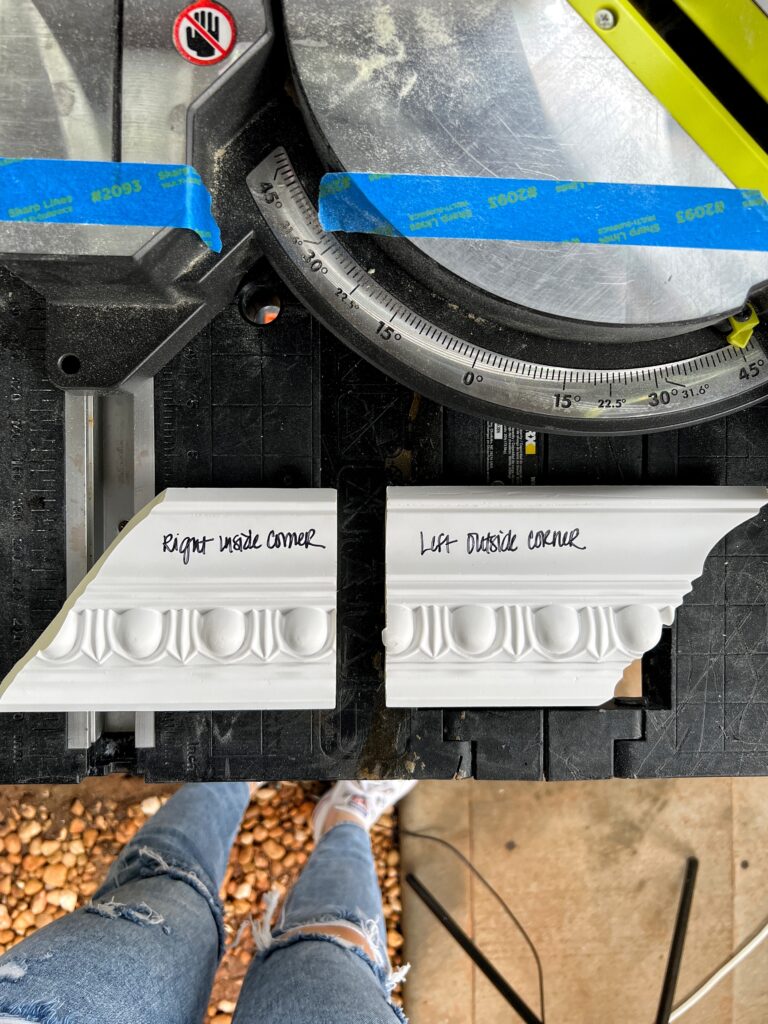
For each cut I would grab the two different templates I needed and lay them out like you see in the photo below.
I would take my piece of trim and make one cut close to the edge (let’s say the left outside corner, for example) without measuring anything and wasting as little as crown possible. Once that side is cut, then I would measure, mark, and cut for the right inside corner.
Don’t forget: You have to mark your measurement on the bottom (more detailed) part of the crown!
Things to remember when cutting crown molding:
- Don’t forget you’re cutting it upside down!
- To be on the safe side, make your cuts a tiny bit larger than they should be (maybe 1/16″) because you can always trim it. If it’s too short you may not be able to use it!
- Be sure to firmly hold your crown in the proper resting position while cutting. Any shifting could throw off the cut!
- Use your templates and double, triple check before making your cuts!! Crown is too expensive to waste.
- Be patient and take your time 🙂 If you get frustrated, step away and revisit it another day.
How do you cut a scarf joint for crown molding?
If you have long walls, you’ll likely need to cut scarf joints. My crown molding pieces were only 8ft long and I had one wall that was 14ft long, for example.
In this case, you’ll do what’s called a scarf joint. A scarf joint is used to connect two pieces of trim and it’s really simple to do! (There are fancier, more discreet ways to do this, but I kept it simple this time around!)
What I did was rest the crown like I had been except right side up (it would work fine upside down too) and just cut at a normal 45 degree angle with the crown laying flat.
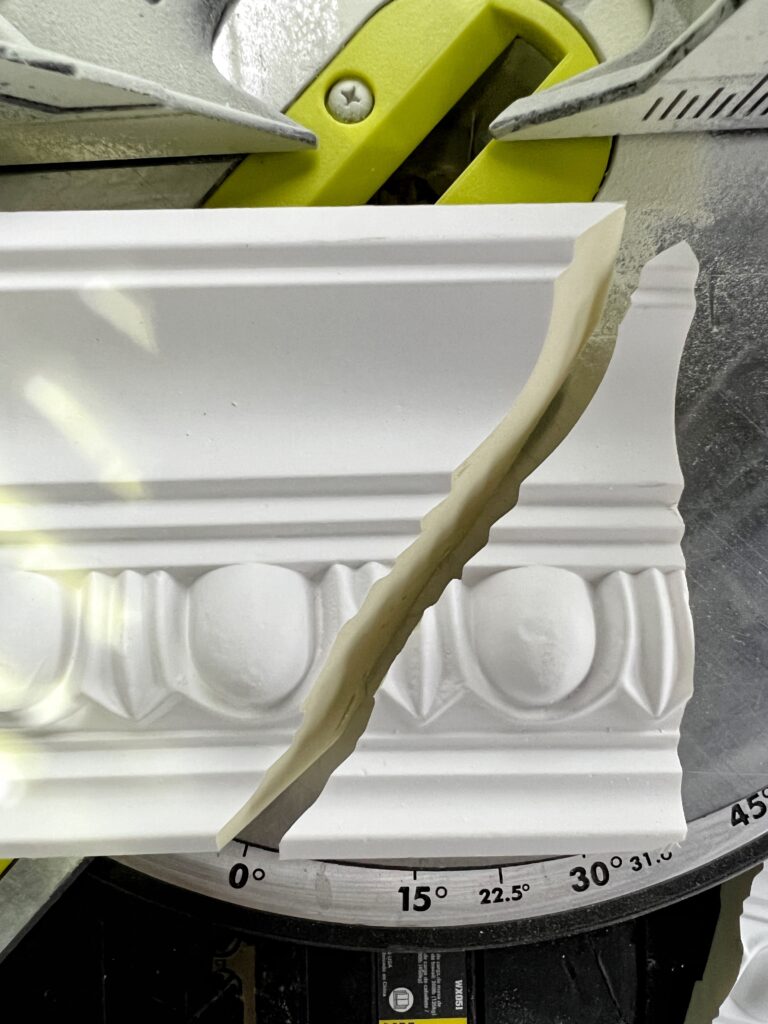
When I cut a scarf joint, I would save the scrap piece (the right piece on the photo above) as a reference for my next cut. This way, I know i’m cutting at the right angle and matching up the pattern on the crown as best as I can!
Did you cut all of your crown molding pieces at once?
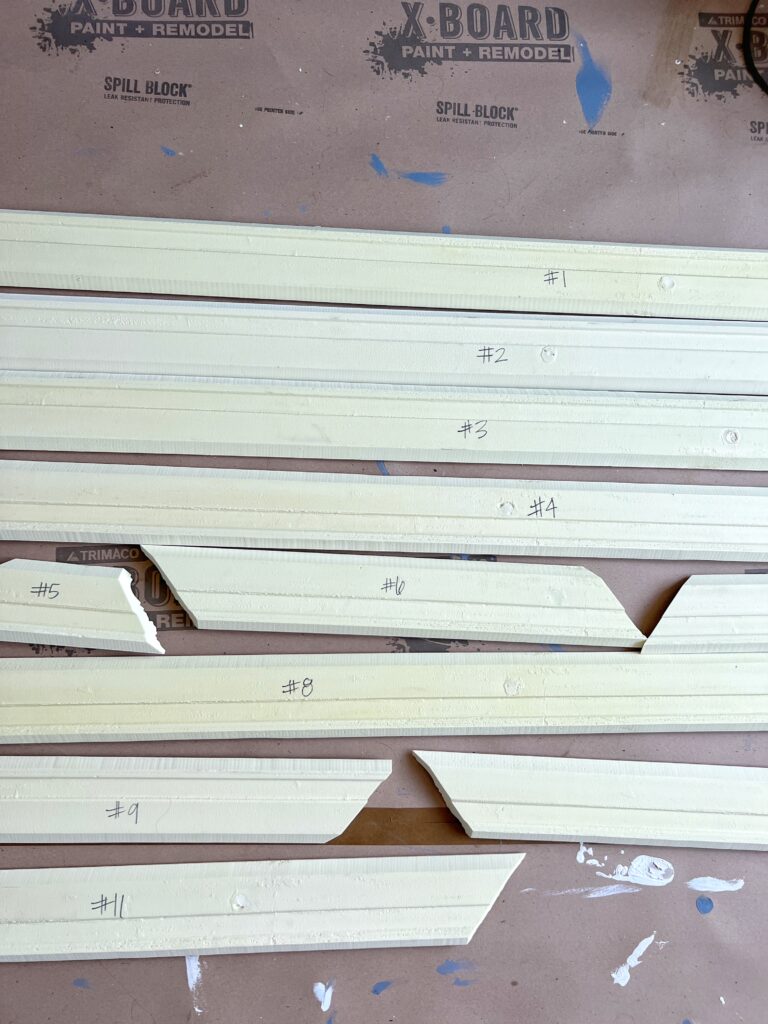
Yes, I did! What I would do is cut one piece, bring it upstairs to see if it fit, and if it did, I just used my brad nailer to temporarily hold it in place.
I did this until all the pieces around the room were cut and temporarily installed. I only used a couple nails per piece (and avoided studs) so it would be easy to pull right off.
The reason I didn’t just install them right away was because I had to paint them first which I’ll talk about next! Before painting, I labeled the back of the molding so I knew exactly what order to hang them.
Is there a jig for cutting crown molding?
Yes, they do make crown molding jigs! I actually bought the Kreg crown pro to try out. It worked fine, but after playing around a little, I just preferred to cut without it. It props up the crown so much that it was hard to keep it in place when cutting and it just crowded my miter saw table.
But it is really simple to use! There’s a setting on the bottom where you can set the spring angle for your crown molding and then you just rest it on the jig and cut your 45 degree angle!
Check out this source to learn what a spring angle is and why it’s important!
If you’re using the cutting method i’m sharing, the spring angle won’t really matter! But if you plan to use this jig, you will need to find out! The most common spring angle is 38 degrees, but my crown was 52 degrees.
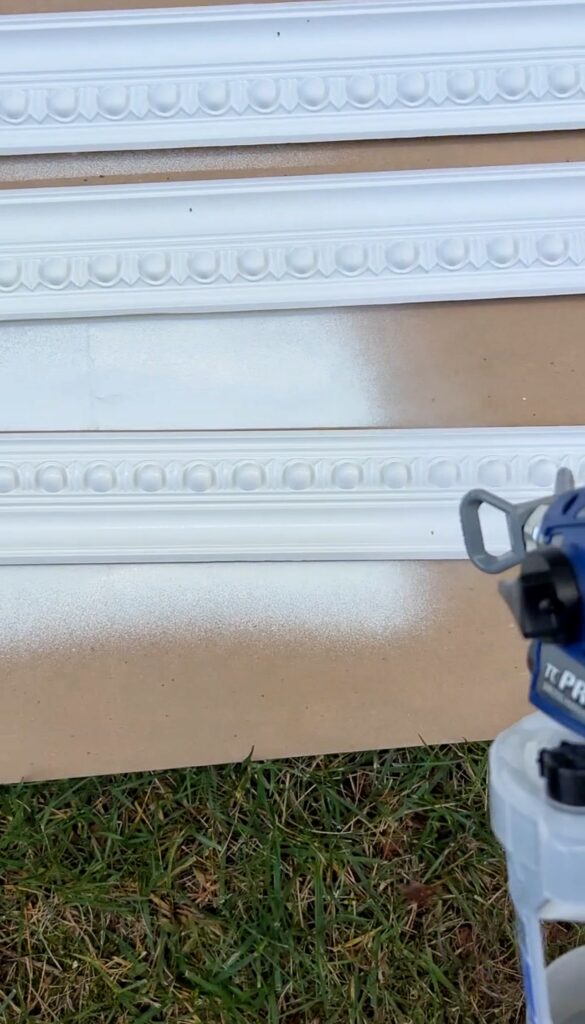
How to paint crown moulding
For best results and a smoother overall look, use a paint sprayer so you can save time and avoid brush marks. Especially if your crown has more decorative features!
Also, if you’re in the market for a paint sprayer, this Graco cordless sprayer is incredible! I highly recommend it!
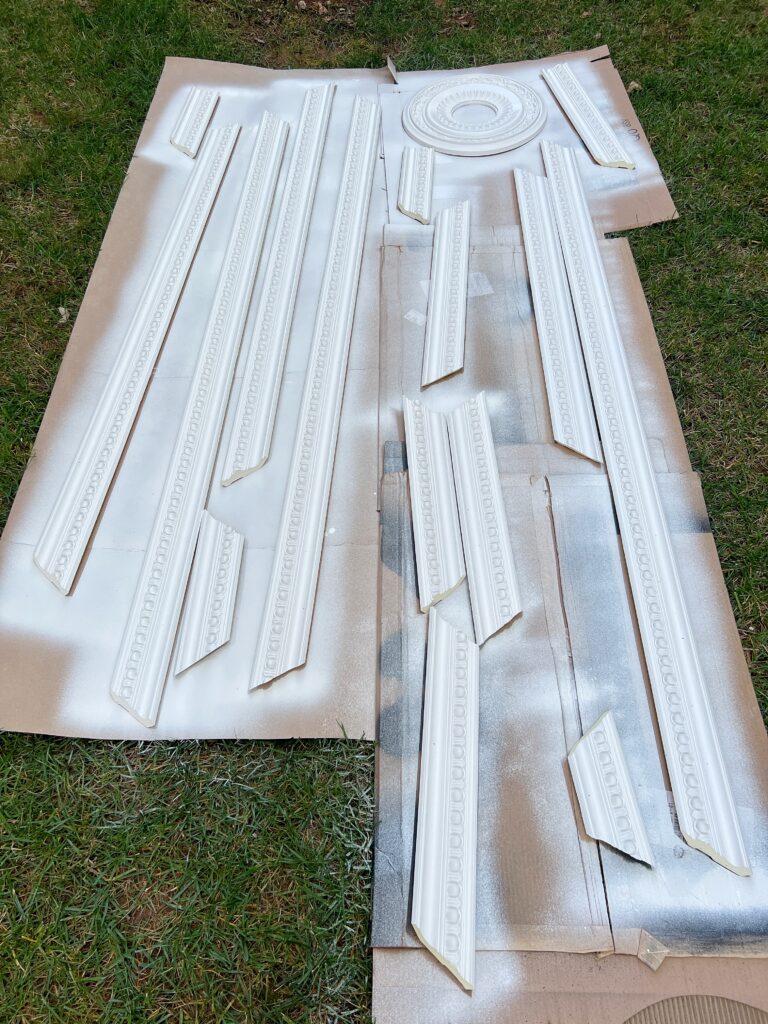
Do you paint crown molding before or after installation?
It’s a good idea to wait and paint the crown moulding after it’s been installed if possible. Why? Because you’re going to have nail holes to fill and caulking to do either way.
This is also my recommendation due to the fact that I painted my crown molding before I installed it. The reason I painted before installing crown was because the entire interior of the room was done (painted, wallpapered, etc.) before I was able to install the crown molding.
With that being said, the “touch ups” I was doing after the nails holes and caulk turned into me just painting them over again by hand… lol! Not to mention all the little bugs that landed in my fresh coat of paint… R.I.P. little guys!
If I were painting crown molding again, and if circumstances allowed, I would install the trim in an unfinished room and use a paint sprayer inside.
If you don’t have a paint sprayer, no worries at all! You can absolutely use good brush and paint by hand!
Do you have to prime crown molding?
It depends on what you’re using! I used a foam crown molding that came already primed, so I didn’t have to. If you’re using raw wood for crown, you’ll definitely want to prime before painting. Just remember, primer never hurts!
What sheen should crown molding be painted?
My personal favorite finish for trim is a satin sheen. To me, it has just the perfect amount of shine to it.
To learn more about the different paint sheens, check out this blog post on How to Paint Trim and Why Satin is the Best Finish.
Tips for how to install foam crown moulding
What to do before installing crown molding
Mark your wall studs and ceiling joists
When you install foam crown molding, you’re going to nail the crown into both the ceiling and the wall.
Use a stud finder (I love this simple magnetic one) and mark any of the studs and joists. Since my walls were already painted, I just used painter’s tape to mark them!
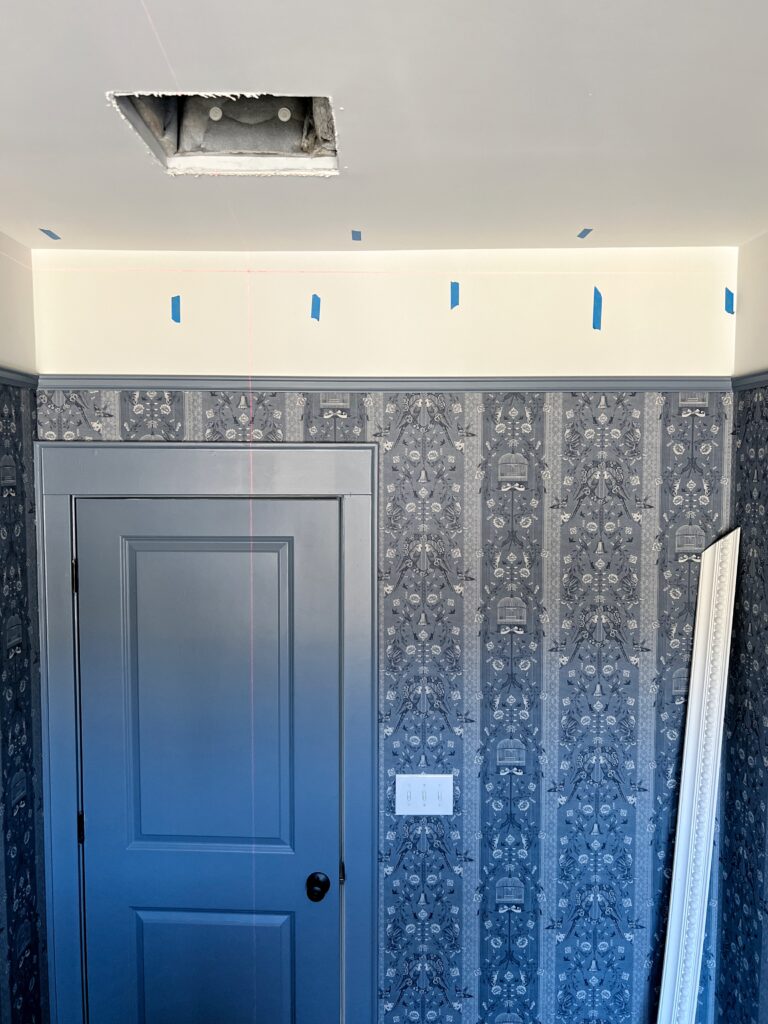
Set up your laser level
I’m not sure what i’d do without a laser level when installing crown molding. It’s hard enough to hold the trim in place and nail it in… I can’t imagine having to hold a level in addition. Trust me, a laser level is worth every penny! (This is the one I have and it’s awesome!)
If you’ve never used a laser level, just know that you’ll need a tripod (this one is great!!) to set it up. Sometimes you have to get creative to get the laser high up on a wall.
This was my fancy setup:

Where do you put the nail in crown molding?
When installing crown molding, nail it into both the ceiling and the wall. I used my favorite brad nailer and 2″ brad nails.
You can see in the video below I nailed at on the bottom and top of the molding. You want be sure to nail along the edge since the middle of the crown is hollow!
Installing crown when your ceiling is uneven
Of course this thought never came to mind until I was in the situation where my ceiling was so uneven on the very first wall that I started on! Man was this frustrating!
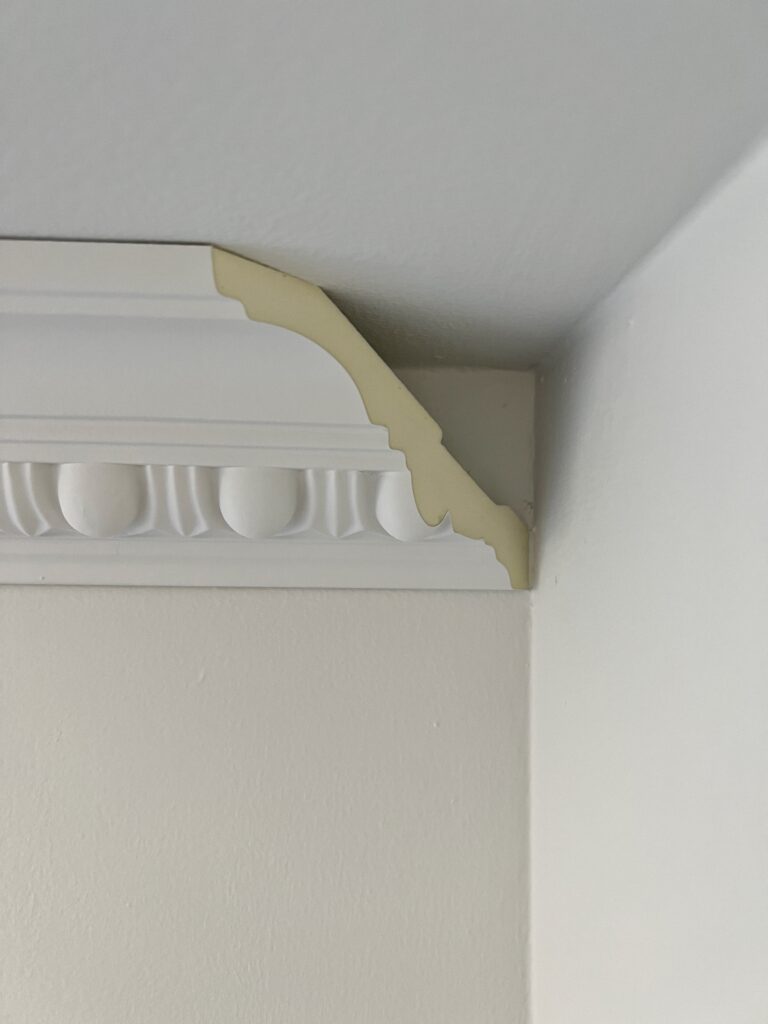
If you look at the photo below, you can’t see the laser, but the crown was lined up perfectly with it. And do you see the gap on the top right? Ah!!
I knew it was just way too big of a gap for caulk so I pondered for a while. I came up with the genius idea to nail in the crown at the bottom first and sort of manipulate the top edge of the crown to reach the ceiling and nail that in.
That worked until it didn’t. Because I changed the angle of the crown, the second piece wouldn’t fit unless I changed the angle of that too which would just screw up the entire room. Here’s a video of this “problem solving” unfolding.
If you look in the corner when I’m trying to fit that next piece in, you can see what I mean and why this didn’t work.
So what did I do to fix it? Well, I took that first piece down and decided to just deal with the fact that the crown is just going to look uneven on this wall. Noticeable? A little. But i’m still so proud of how it turned out that this little imperfection doesn’t bother me!
If you’re looking for an alternative solution, I found this helpful blog post!
Fit two pieces at a time
If there’s one thing I learned about installing crown moulding, it’s that the placement is so important. You might put a piece up and think it’s great, but then you’ll grab your next piece and realize they’re not fitting together properly.
If you can have an extra set of hands when you’re installing the crown, I highly recommend it! I just found that, especially for corners, it was best to hold two pieces in place at once. This way, I knew they fit together nicely before actually nailing them in.
Here’s a video of my struggle when I didn’t do this:
The piece to the left was installed more slanted so when I tried to join them in the corner, there was no chance of them meeting up. You can see when I looked over at the other pieces to see where I went astray. Sadly I had to go back and remove those pieces and properly adjust them.
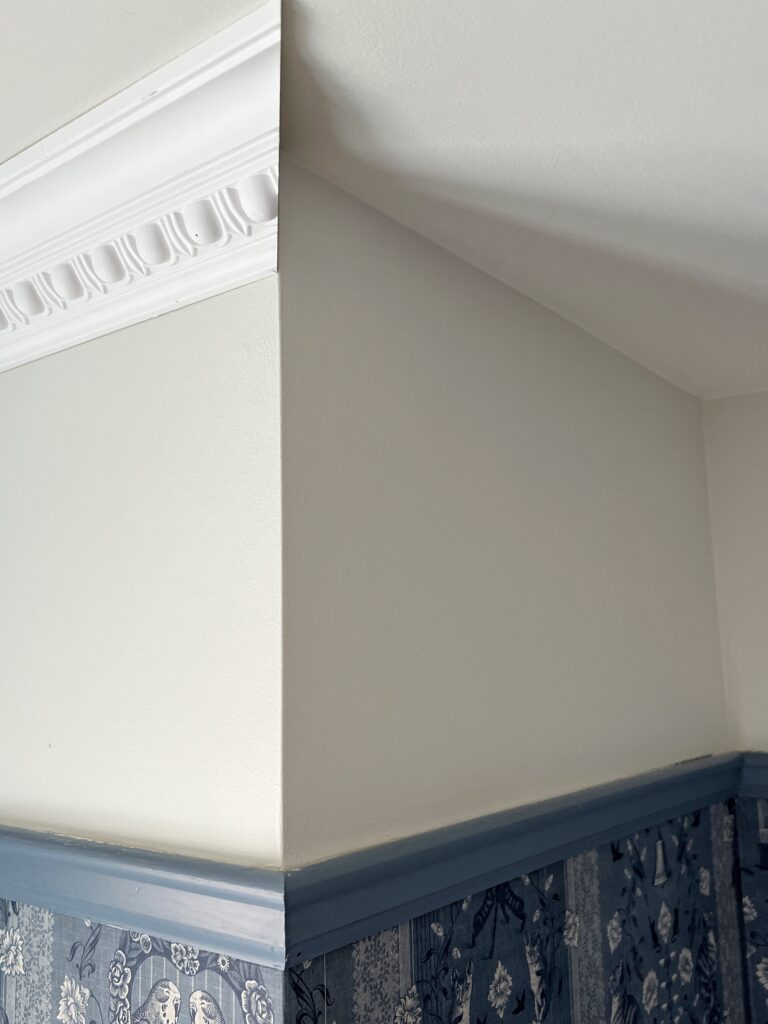
Making beautiful corners
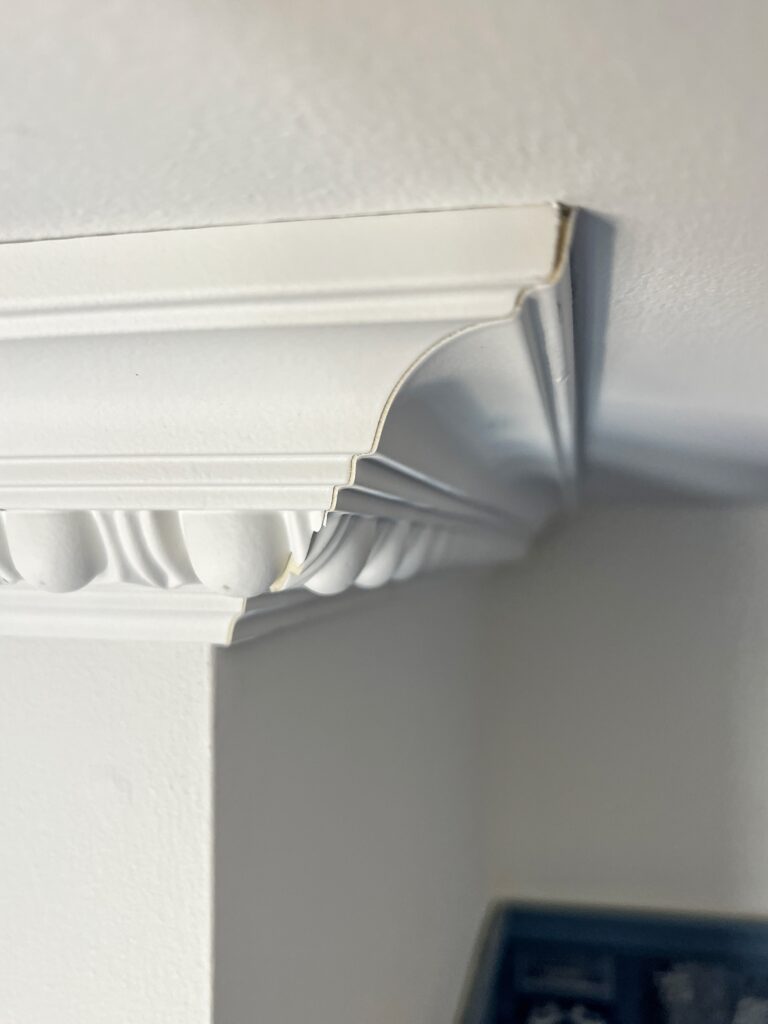
The outside corners were most important to me because they have the potential to look so beautiful… and they also stand out the most.
You want to make sure your outside corner cuts are very precise. In a couple areas I even had to cut just the tiniest sliver off of the trim so that it landed right on the corner.
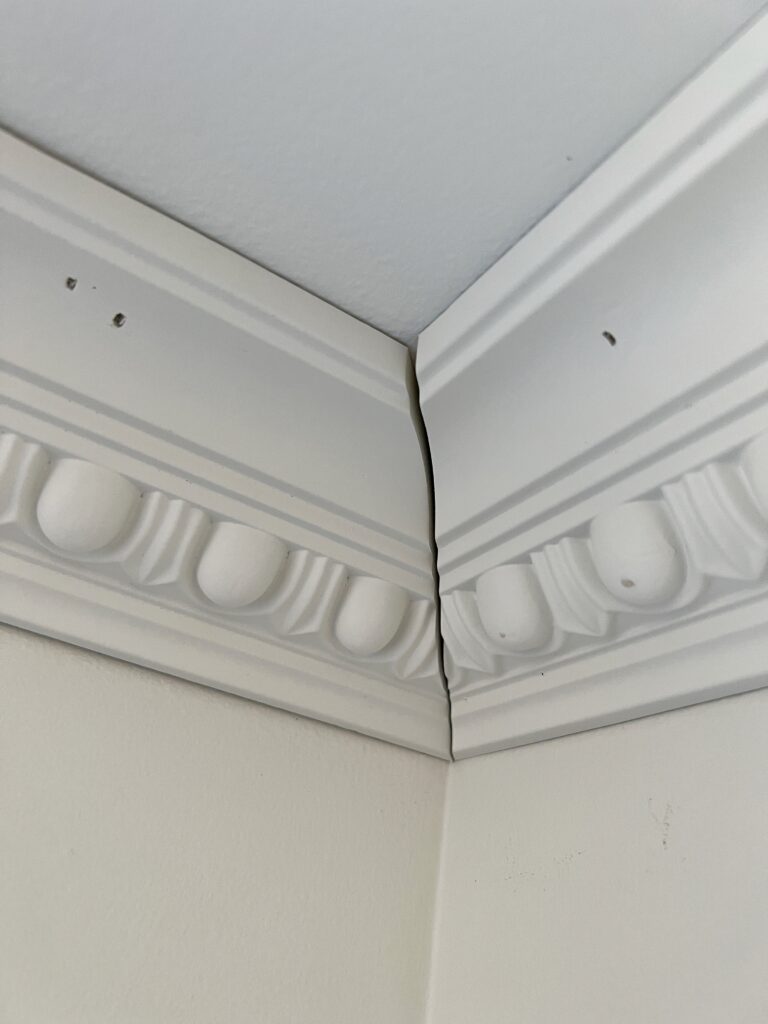
It’s no different for inside corners. You really want precise measurements so it hits right in the corner.
If your trim is too short, you’ll have a bigger gap to caulk. If your trim is too long, it’ll be a tight fit and you want to leave room for the next piece!
Just do your best and whatever isn’t perfect, you can just fix it with some caulk!
As you can see, not all of my corner pieces were perfect. Regardless, you want to make sure your crown lines up nice and flush on the top and bottom edge!
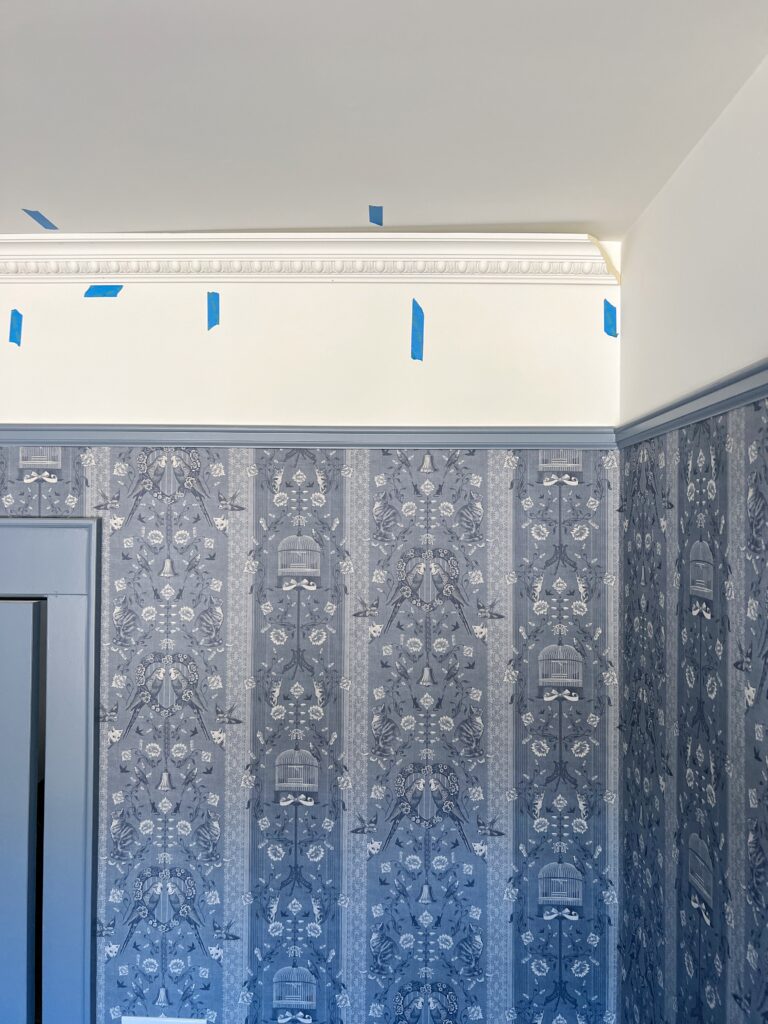
The Finishing Work
This is where the magic happens and all of these imperfections become irrelevant because YOU DID IT! You installed crown molding! It may not be perfect, but like anything else, you have to start somewhere! Your next time will be even better.
Filling the nail holes
This part was quick and easy to do! I used this lightweight spackle and just filled in the nail holes with my finger.
Once the spackle dried, instead of sanding I just used a damp rag and wiped any excess residue!
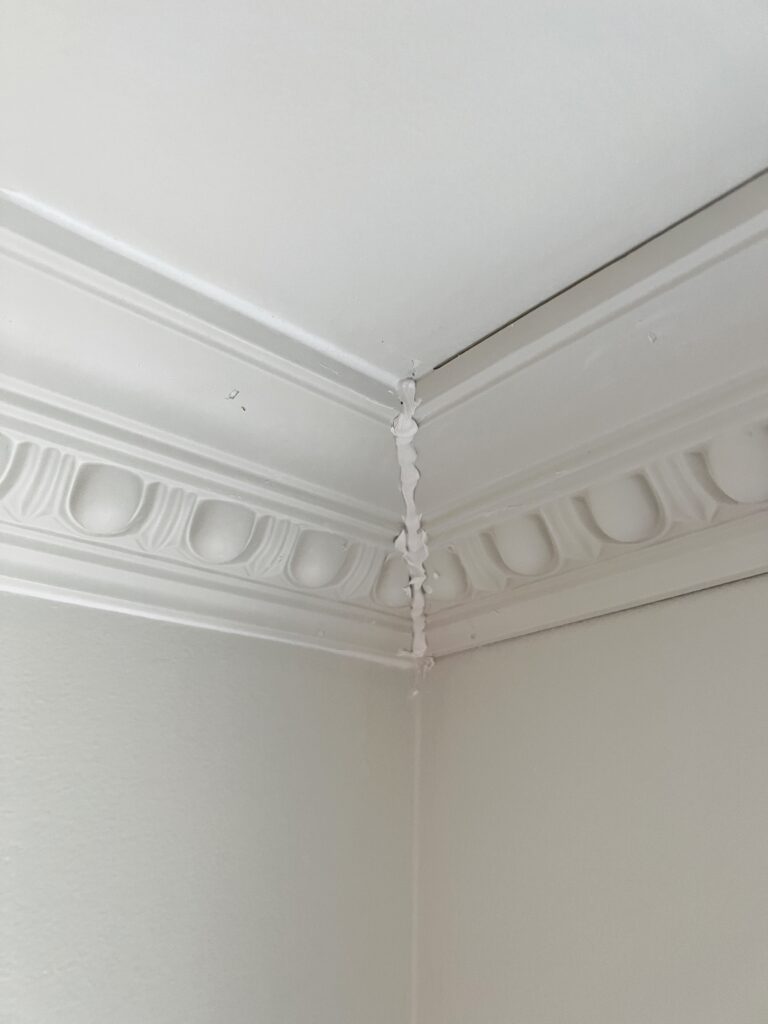
Caulking crown molding
I used caulk for all the corners and the seams where the crown hits the wall and the ceiling. This caulk gun and caulk finishing tool are my two favorites for caulking! See them in action in the video below!
My corners definitely weren’t all perfect and some needed a whole lot of caulk! For the corners, I just used a slightly dampened paper towel and wiped until it was smooth 🙂
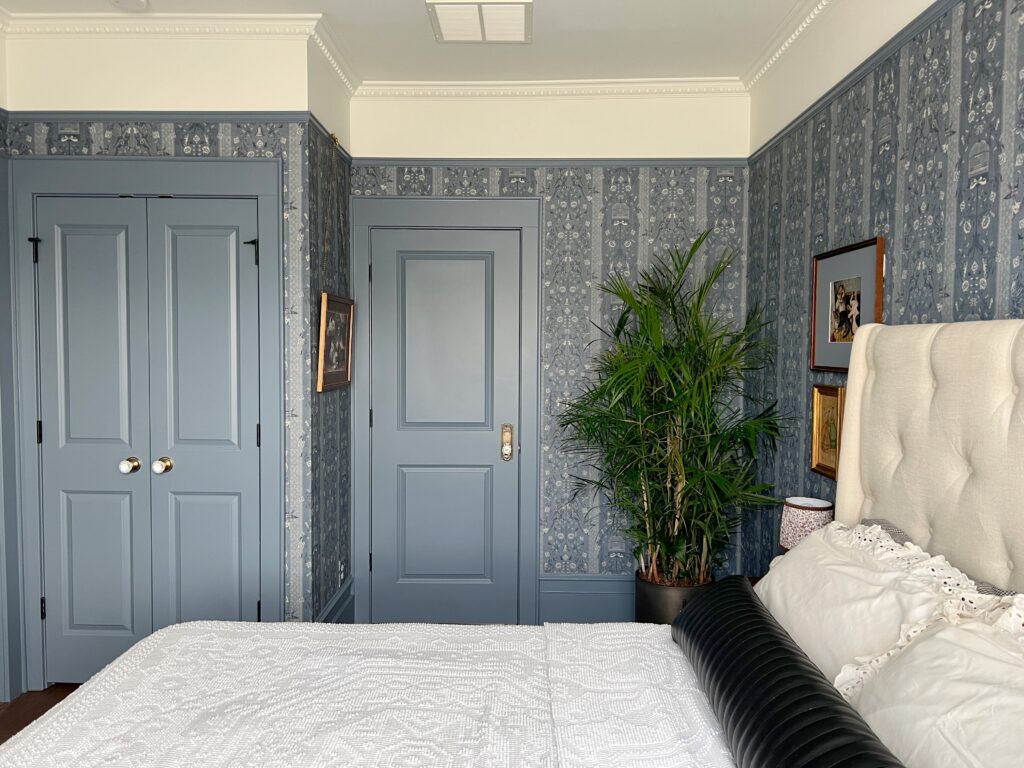
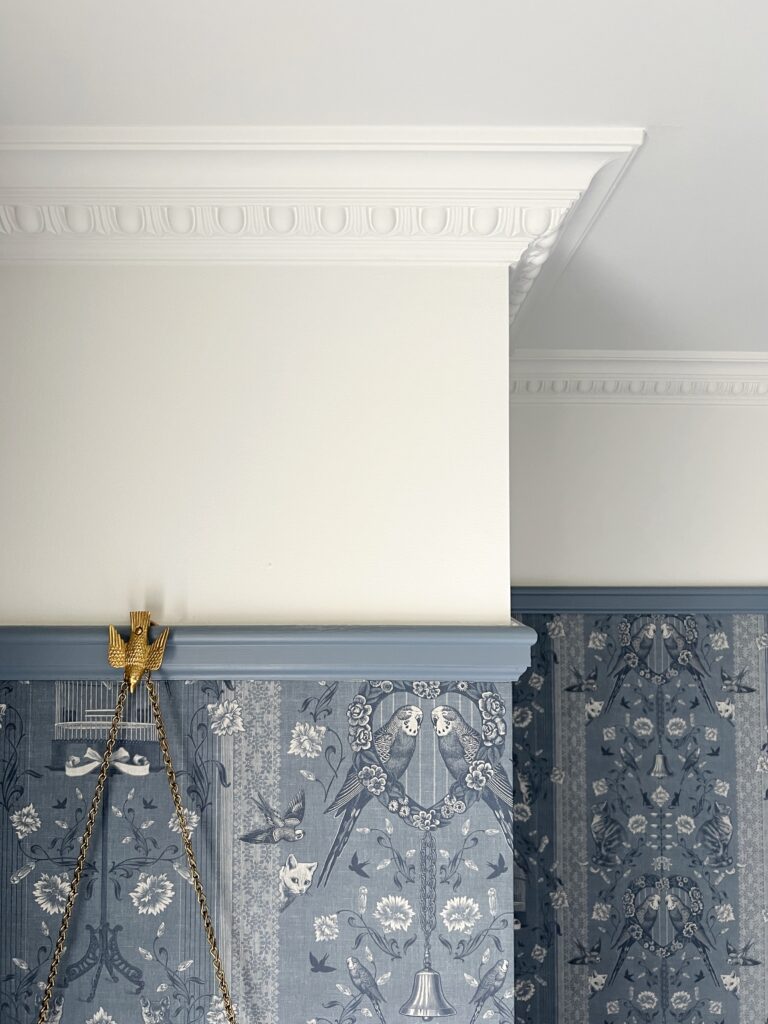
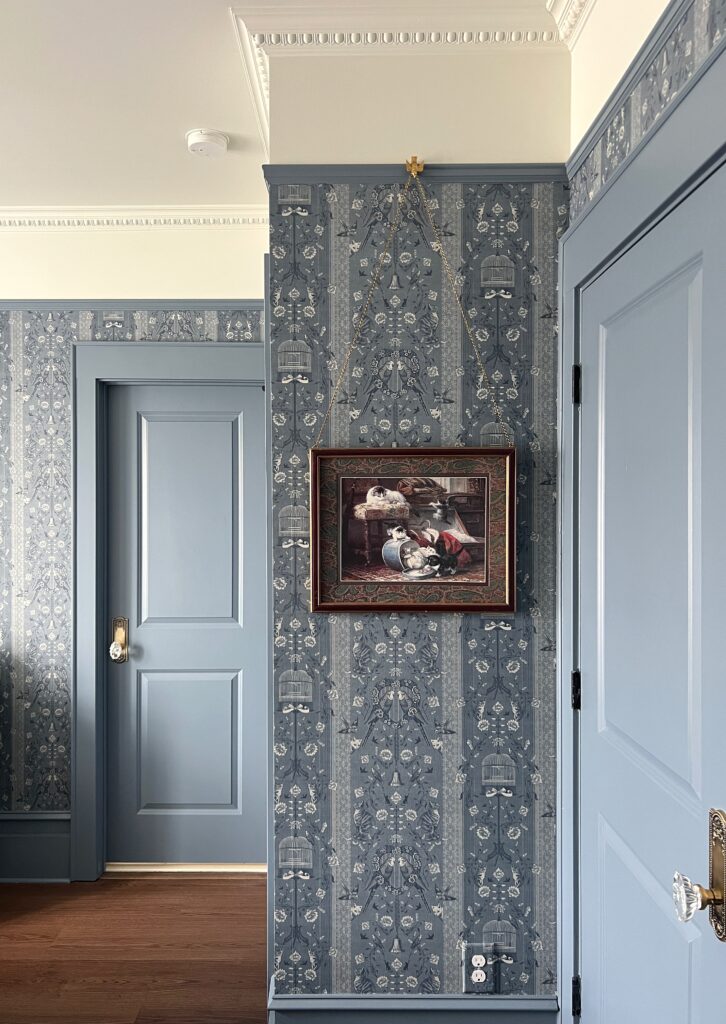
I think it’s safe to say that this added so much character to our guest bedroom. I absolutely love it!
Hopefully this tutorial is helpful 🙂 I personally refer back to it every time I install crown molding… it can really be a head scratcher!
