My husband and I got the keys to our 1930 brick home a year ago! I distinctly remember measuring our new sunroom and dreaming up all the ways we could use it. What’s great about a bonus room like this, is you get to determine the purpose of your space. We wanted a cozy place to sit and chat over a cup of coffee or a glass of wine!
In addition to the details on our sunroom makeover, i’m also sharing tips for how to decorate a small sunroom! After spending weeks browsing sunroom inspiration on Pinterest, I got a few ideas 😉
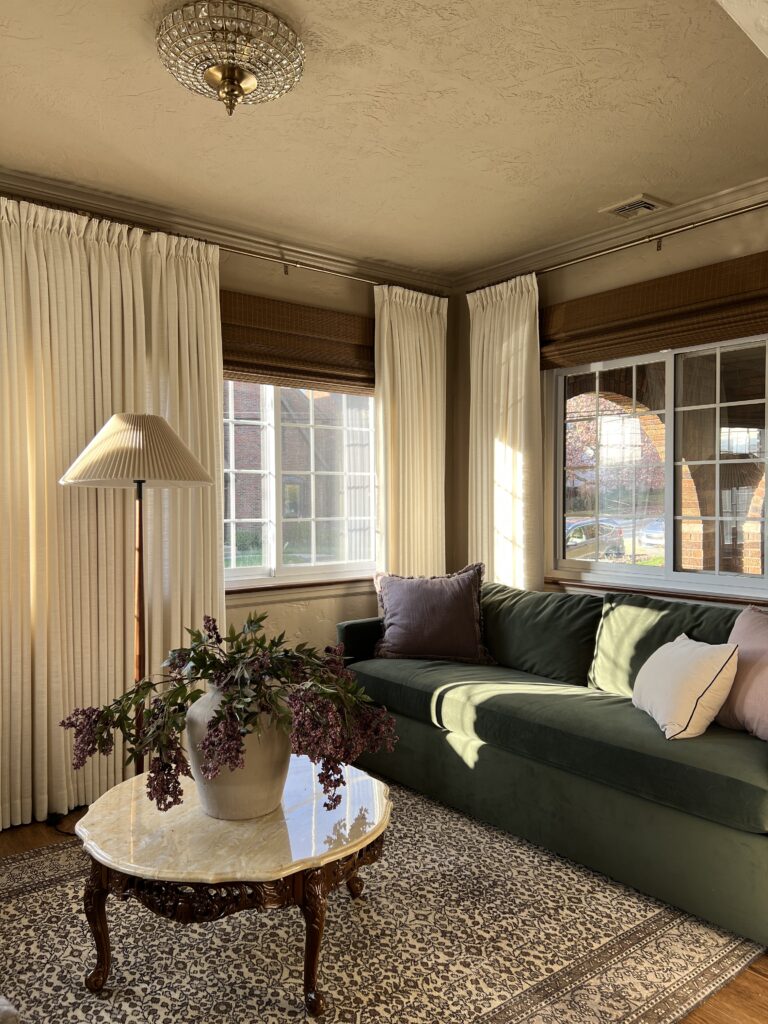
Sunroom YouTube Video
In case you’re more of a visual person, I also have a video on our sunroom makeover!
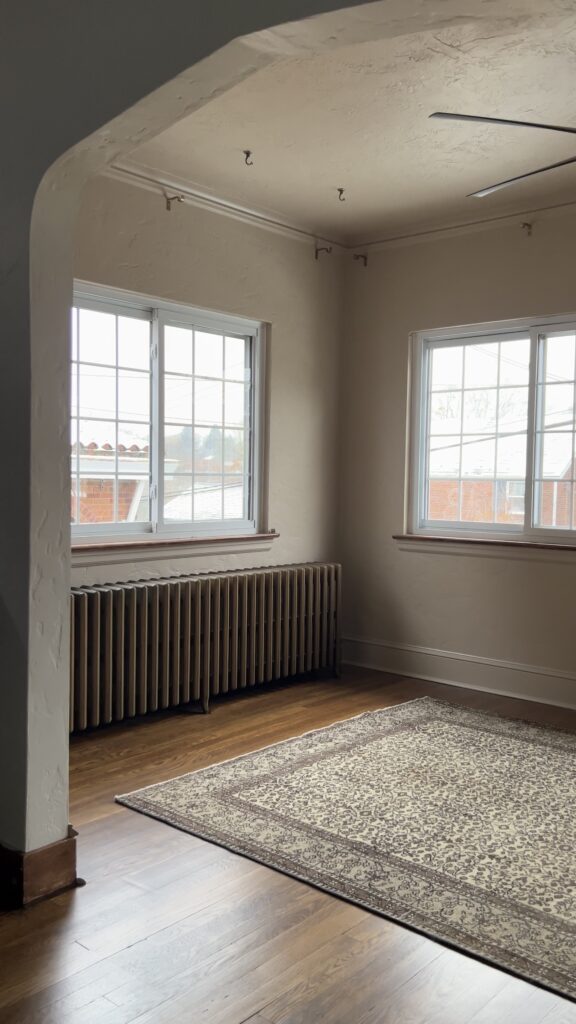
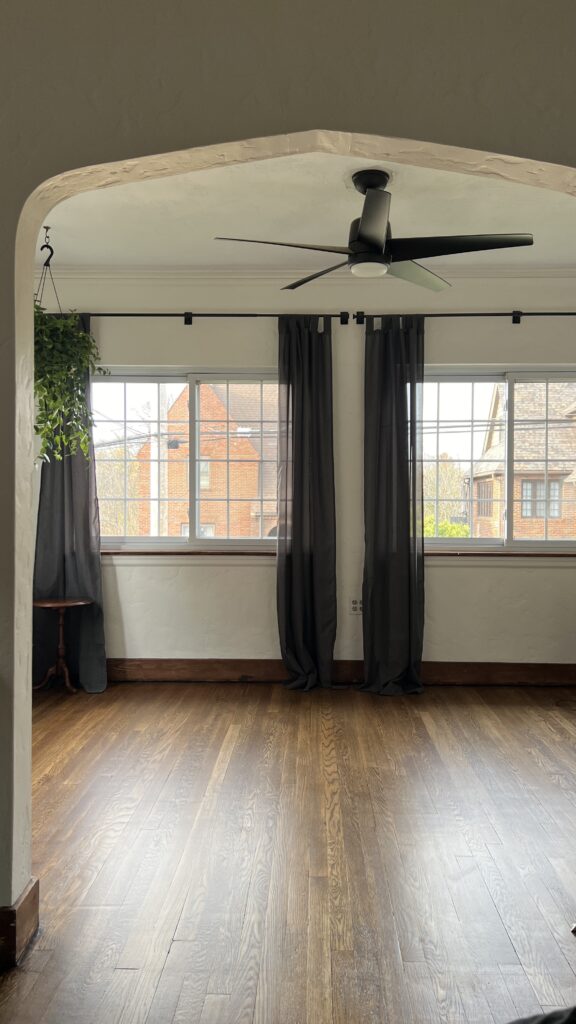
Our Sunroom Before
In order to really appreciate the after, let’s take it back to veryyy beginning! This picture was taken the day we got to see our new home in person!
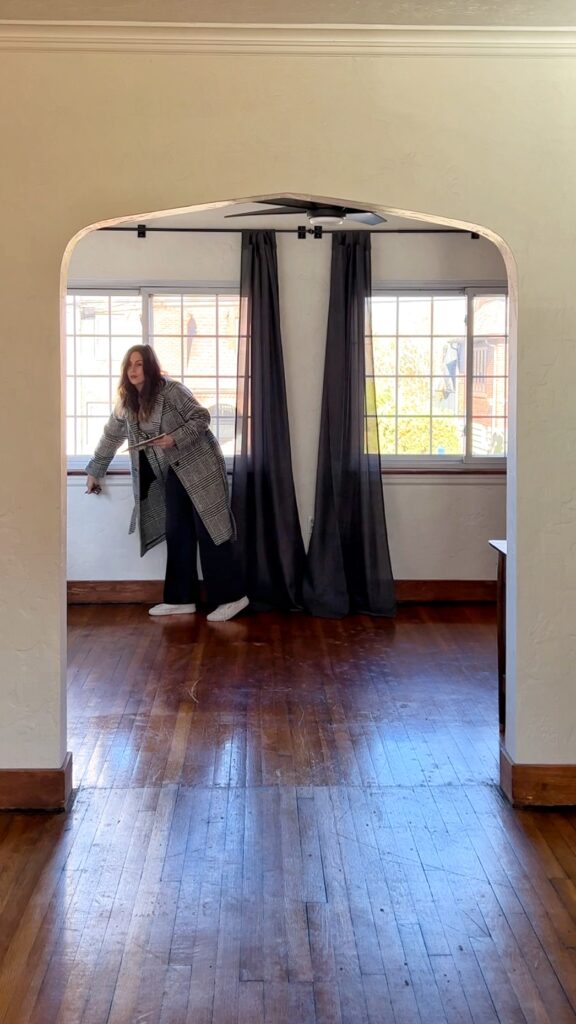
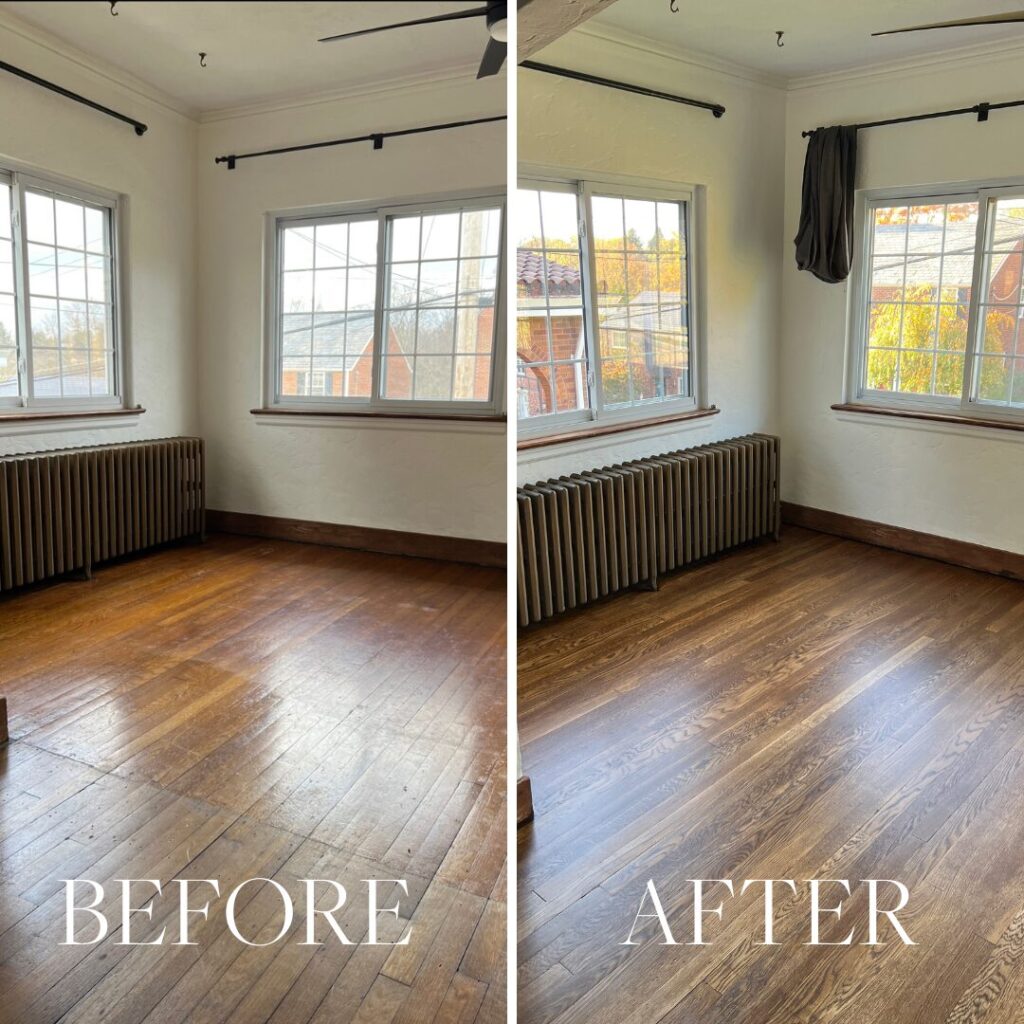
The first thing we did after moving in was refinish our downstairs floors. You can see in the photo above how badly they needed some love. For all the details on sanding and staining hardwood floors, check out our Beginner’s Guide to DIY Hardwood Floor Refinishing.
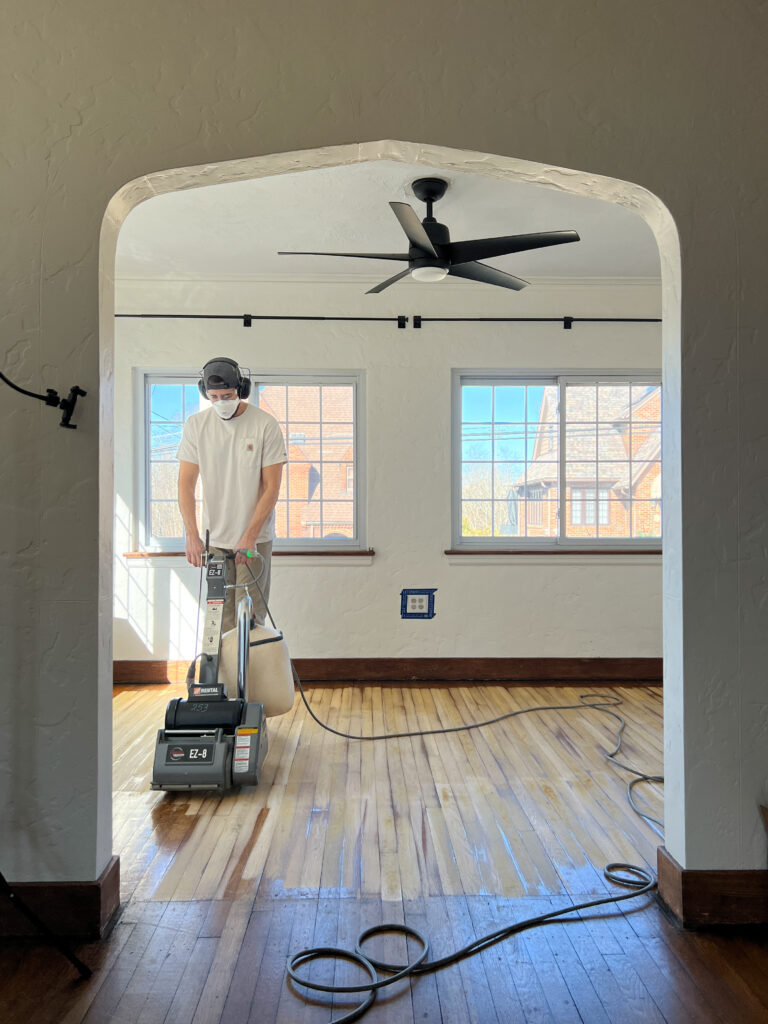
Long story short, we ran into some big hurdles refinishing our hardwood floors which meant that we started them in February and I didn’t actually finish our sunroom floors until October! Sometimes that’s just how it goes in the world of DIY. But, all that to say, they turned out beautifully and it was so worth all the blood, sweat, and tears!
Choosing a Paint Color
I’m always wanting to use a fun paint color so I tend to grab a variety of samples with no real commitment to a color palette. All of these colors are beautiful, but they’re not all right for this space.
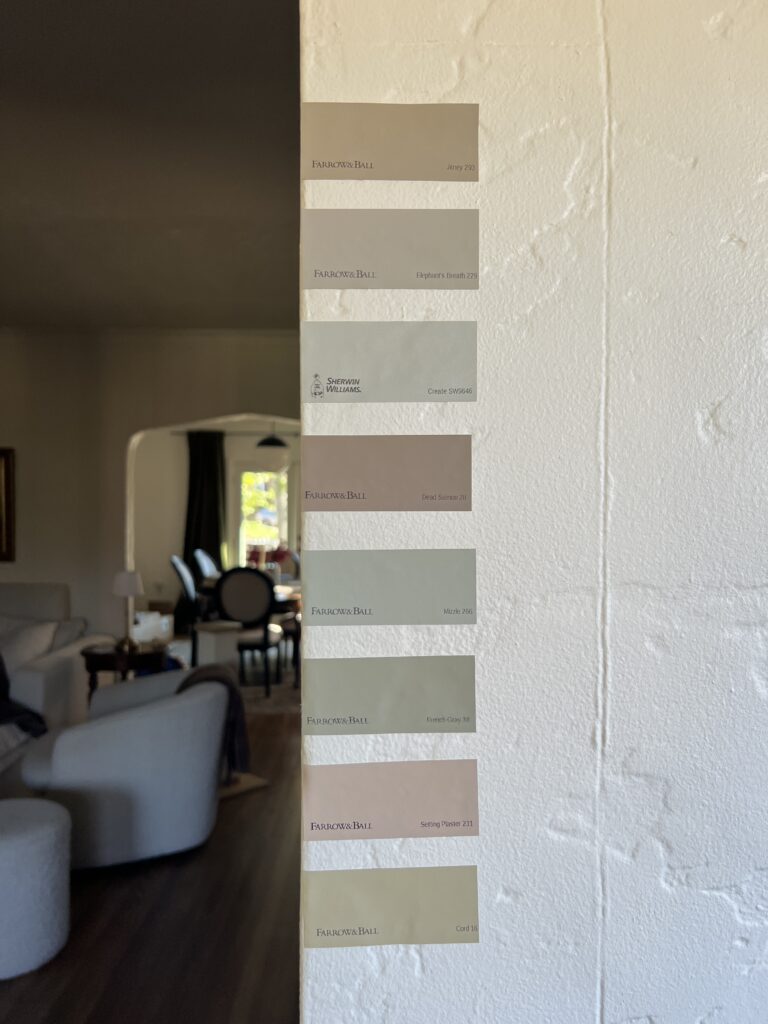
Considering the lighting
When choosing paint colors, it’s very important to take lighting into consideration! Especially with all the natural light a sunroom provides. Our sunroom has both North and West facing windows and here’s how that affects our light throughout the day:
- North facing windows– bring indirect, cool light all day
- West facing windows– bring intense warm light in the evening.
As much as I was envisioning a soft green or blue-green for this room, I don’t think that would’ve been the right call. With the North facing windows, I knew I needed something warmer so I narrowed it down to these two colors:
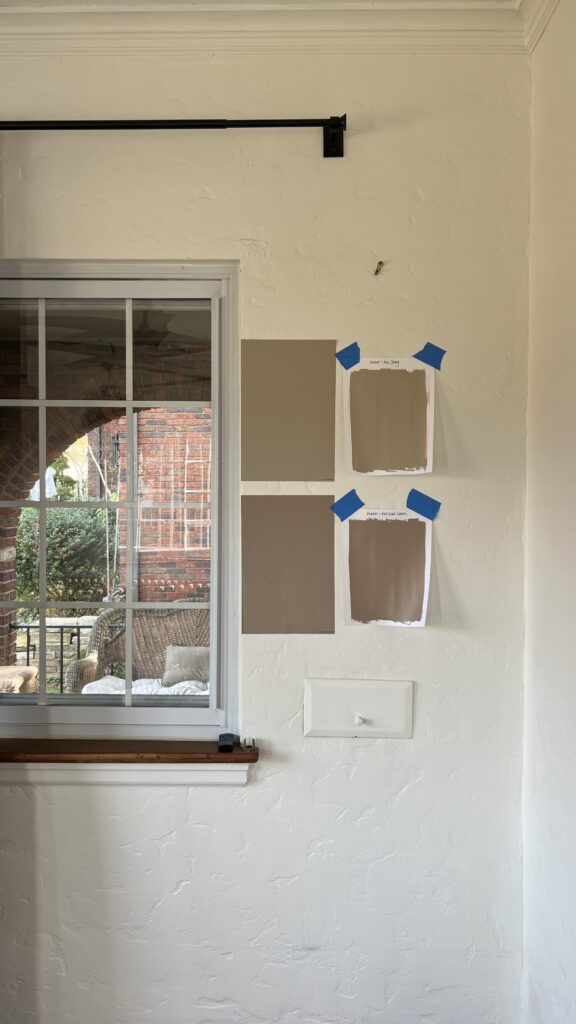
The top is Farrow and Ball Jitney and the bottom is Farrow and Ball Dead Salmon. I was immediately drawn to Dead Salmon because I love a dusty pink, but with all the brick coming through the windows, I was worried it might come off too pink. It’s also a darker color so it wouldn’t have provided enough contrast next to the bamboo shades I got.
Jitney is so great in here. It’s a beautiful mid-tone brown and while it is a neutral color, there’s plenty of depth! When pairing it with our green velvet sofa, it has the slightest pink undertone and I just love it!
Getting a Farrow & Ball paint color matched at your preferred paint retailer is a great way to save some money. I had Sherwin Williams do mine and it turned out wonderfully. In the above photo, you can see the comparison between the Farrow & Ball Samplize samples (left) and the Sherwin Williams samples (right)!
Color drenching
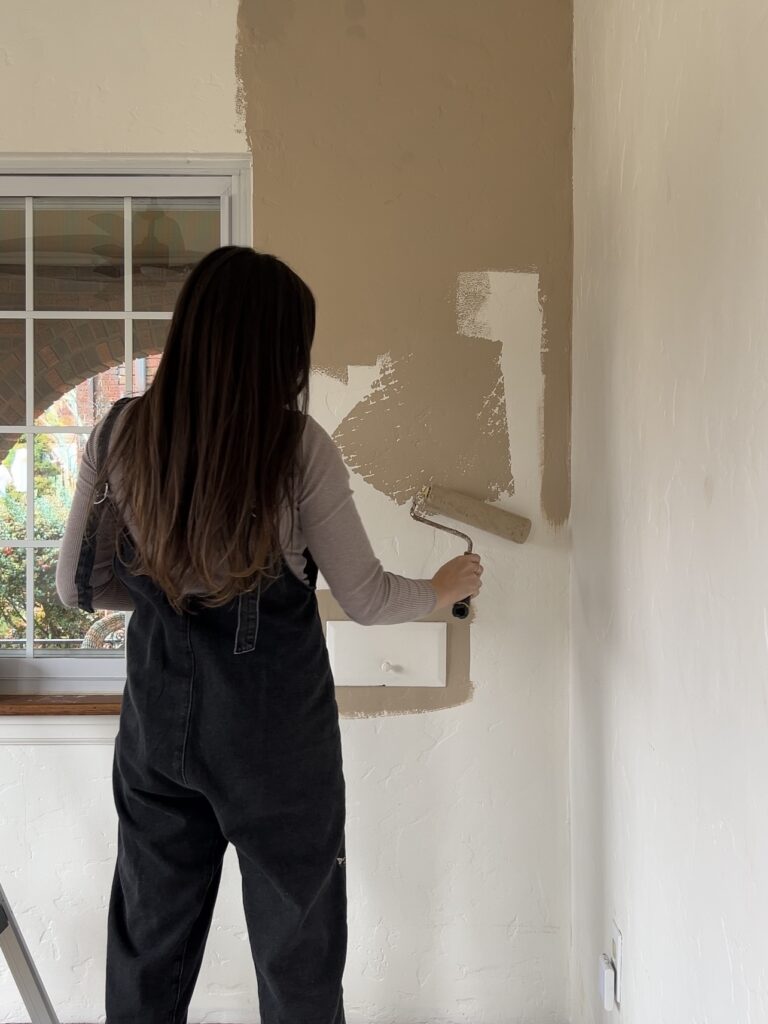
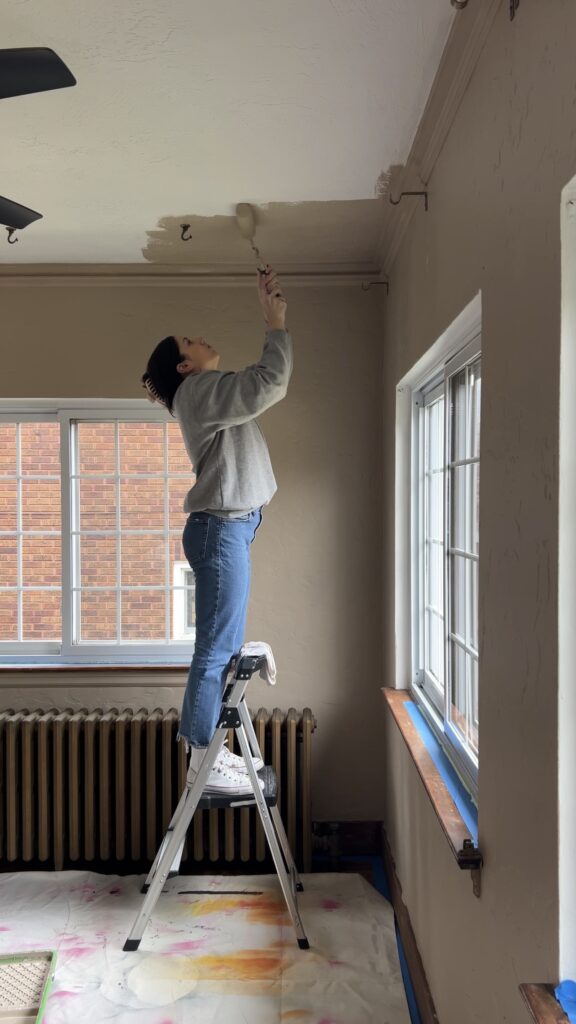
The goal was to have a cozy sunroom and when you color drench a space, it really feels like a big hug! To be on the safe side, my usual tactic is to paint the walls first and then decide if I want to bring it up to the ceiling. In this case, it was a quick yes!
Have you tried color drenching a room yet?! I’ve used this approach a handful of times and I’ve never once regretted it! My very first experience was this black powder room. My boldest color drench was our burgundy bedroom. If you’re scared to try it, test it in a small space first!
Paint Sheens
A common question I get is, “what paint sheens did you use?” and I actually have a blog post breaking down all the different paint finishes! Everyone has their preferences, but this is my go-to in most cases:
- Eggshell on the walls
- Satin on the trim
- Flat on the ceiling
In our sunroom, I used this satin trim paint on the baseboards, crown moulding, and window trim. For the walls and ceiling, I used this paint in eggshell. As I mentioned, I normally prefer flat for the ceilings, but the texture of our ceilings is quite forgiving so the eggshell worked just fine and saved me from having to buy another can of paint! If you have smooth ceilings, I highly recommend going with a flat finish.
Trimwork
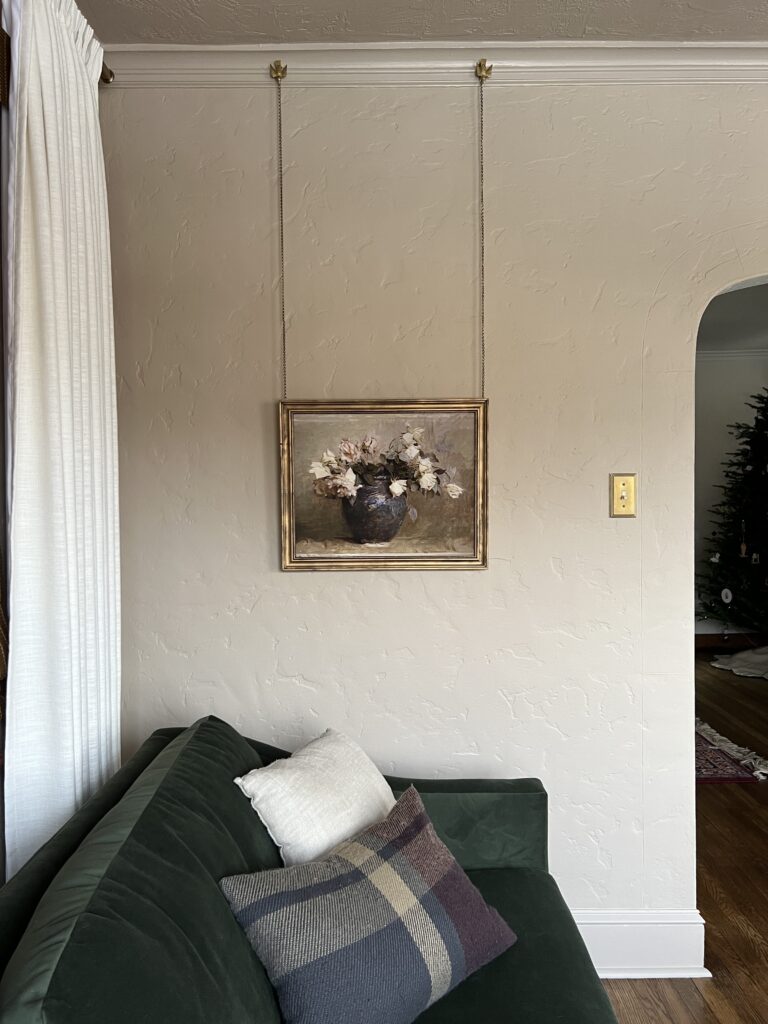
We’re very fortunate in that we already had some beautiful crown moulding with picture rail!
If you don’t have picture moulding, it’s an awesome way to decorate a sunroom! Not only does it add character, but you can easily hang art, mirrors, and decor from it! It’s also really simple to add. I installed it myself in our last home! Here’s my blog post: How to Install and Use a Picture Rail Hanging System 🙂
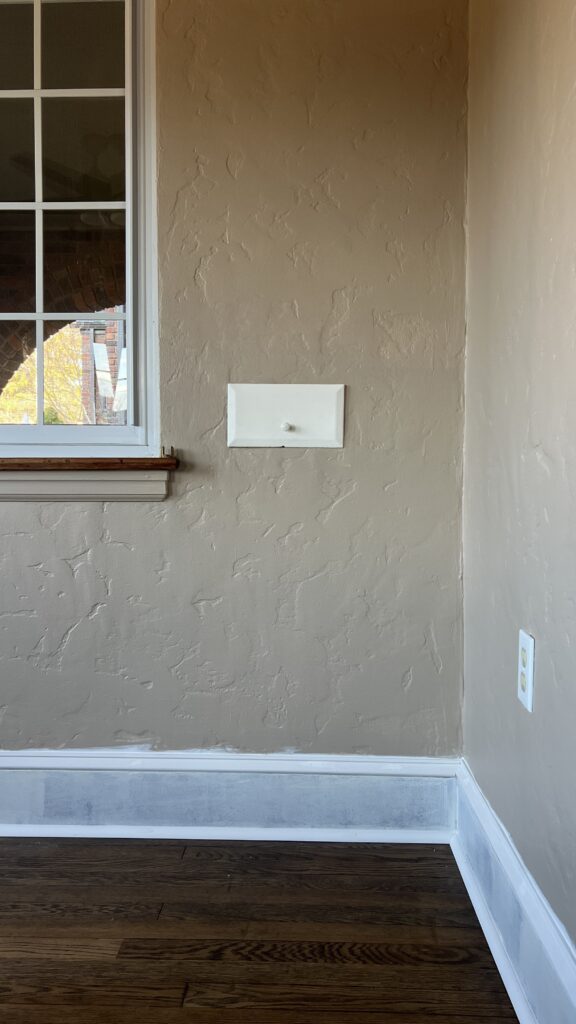
As for the baseboards, they weren’t in the best shape! I considered sanding them down and re-staining them, but ultimately decided not to. If it were more intricate trim, I would have, but the thought of having to do this all throughout the house was really overwhelming to me. If I do decide to tackle that one day, I can always strip the paint!
I knew I wanted to beef up the baseboards though so I kept it simple and added some shoe moulding and base cap moulding using my brad nailer! Since the baseboards were wood, I made sure to prime them before painting!
Furniture
**Full disclaimer, I partnered with Article for our sunroom furniture, but this post is not sponsored and any opinions are my own!**
It was definitely tricky choosing furniture because it’s a pretty small sunroom and I just wasn’t sure what kind of layout would work best. To my surprise, I was able to fit a sofa bed and two large swivel chairs… who knew?!
I ultimately decided to go with a statement green velvet sofa and oh my goshhhh. It’s so lovely. I’ve never owned any velvet furniture, but my fellow cat owner friends on Instagram convinced me to go for it because apparently cats don’t scratch it. Well… we’ve had this sofa for over a month and i’m amazed. Our two cats really have not tried to scratch it. Mind blowing!!
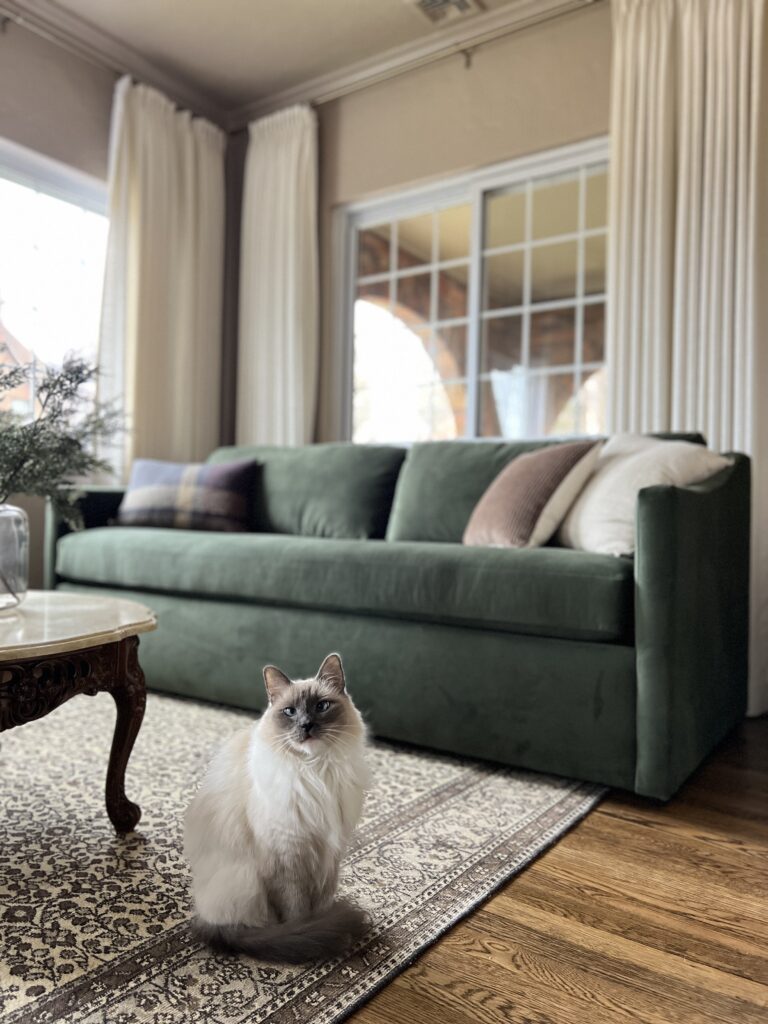
In addition to being pet friendly and super soft, this sofa also has a hidden mattress which will be so convenient to have when we family is visiting!! (See “sunroom into bedroom” below for photos)
We also got two swivel chairs and I practically live in these. I’m actually sitting in one as I write this! They’re just so comfy and I love how spacious they are! If you’re looking for sunroom furniture ideas, definitely consider getting a swivel chair or two!

Window Treatments
As another disclaimer, our sunroom window treatments were gifted from Two Pages Curtains, but this post is not sponsored and again, any opinions are my own! You can also use code ELISHA for a 15% off discount site-wide.
I’d been so anxious to replace our sunroom curtains since the day we moved in. The curtains that were here definitely weren’t my style and also didn’t provide much privacy. But I was patient because window treatments aren’t cheap and I honestly wasn’t entirely sure what direction I wanted to go.
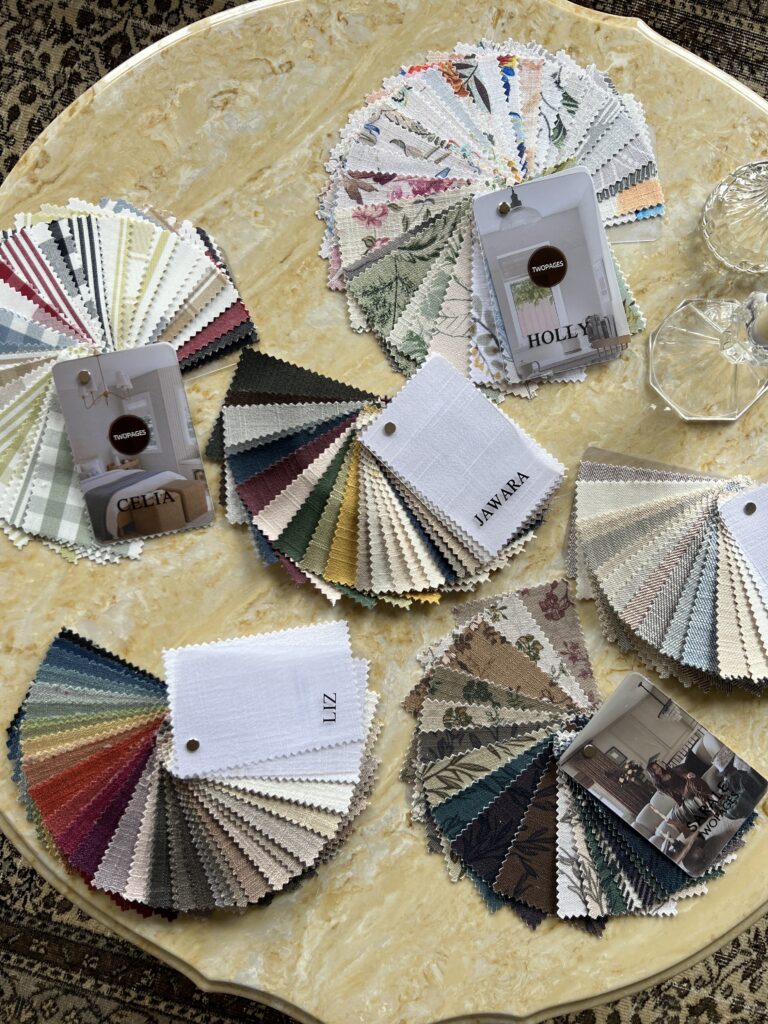
One of the things I truly appreciate about Two Pages Curtains is they have sooo many options! It’s helpful so see them in person so I got a bunch of their swatch books. Aren’t those floral prints gorgeous?! Trust me, I was tempted!! But with so many windows in this space, I worried that a bold pattern might feel a bit overwhelming. Don’t worry, I’ll find another spot for them 😉
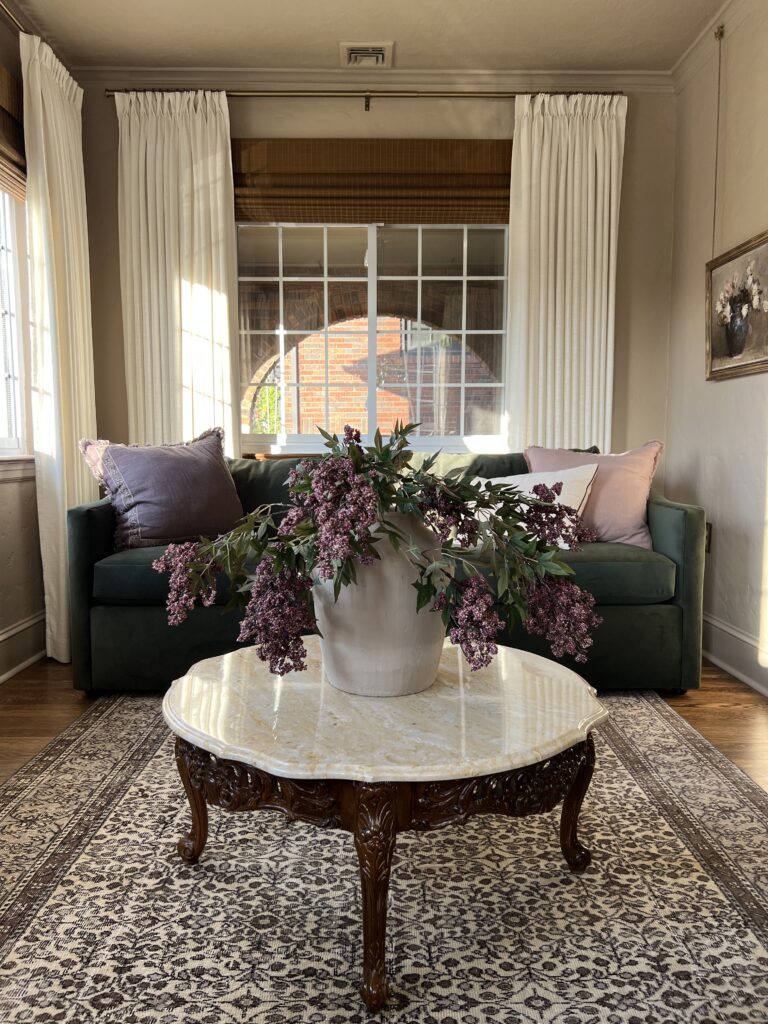
After sifting through tons of swatches, I ultimately decided to do a layered look with ivory linen curtains and bamboo shades. Overall, I’m so happy with how it looks!
Butttt if I could go back, I would do a couple things differently. I also made a couple mistakes! I’ll share it all, I promise!
Tips for Hanging Linen Drapes
Let me start by sharing exactly what I ordered and why!
Liz Linen Drape Pleated
Color: Ivory White
Header Style: Triple Pleat
Lining Type: Room Darkening, Shading 70%
Memory Shaped
Measurements per panel: 60″ width x 94″ height
I chose triple pleat as the header style for an elegant, classic look. There’s eight options for lining and I went with room darkening. I knew I wanted at least some sort of lining just because it adds to the durability, which is important as a cat mama. The memory shaping is an added luxury but it means the curtains will arrive beautifully trained!
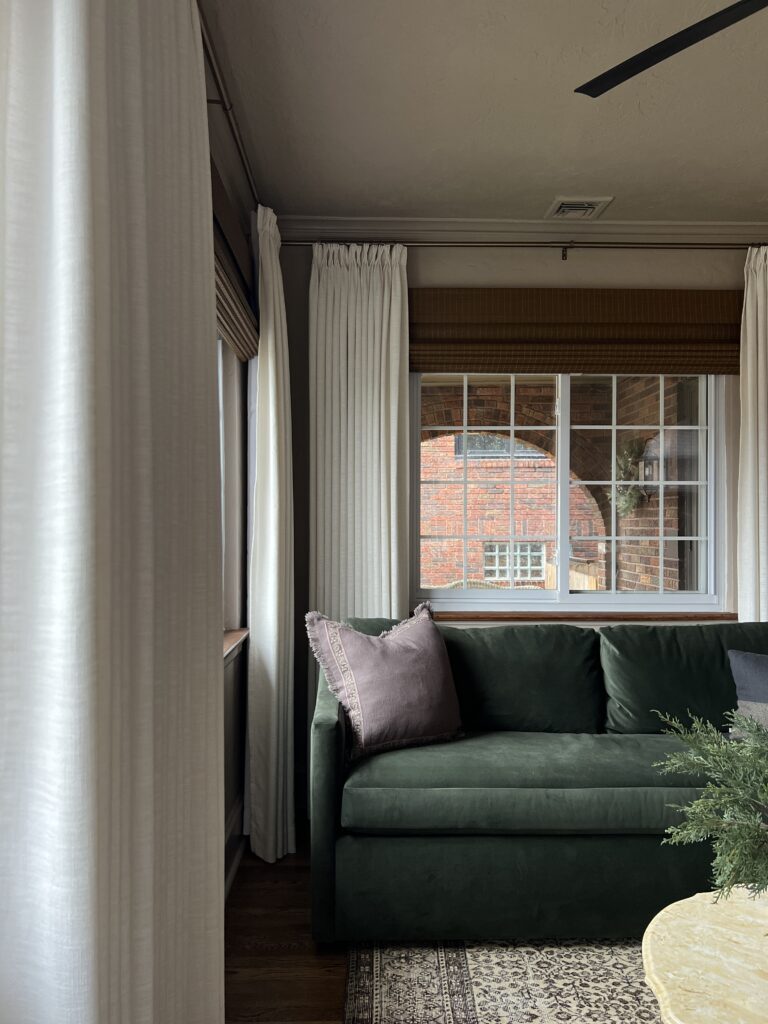
Curtains should be hung high and wide so I actually replaced our curtain rods and moved them higher so they sit just a couple inches beneath our crown moulding. I measured from those to the floor. The goal was to have them about 1/2″ from the floor! You can also use the adjustable pin hooks to get them exactly how you want! In the photo below you can see the pleats I started to lift on the right side.
Curtains should either kiss the floor, puddle a little, or hover just above the floor.
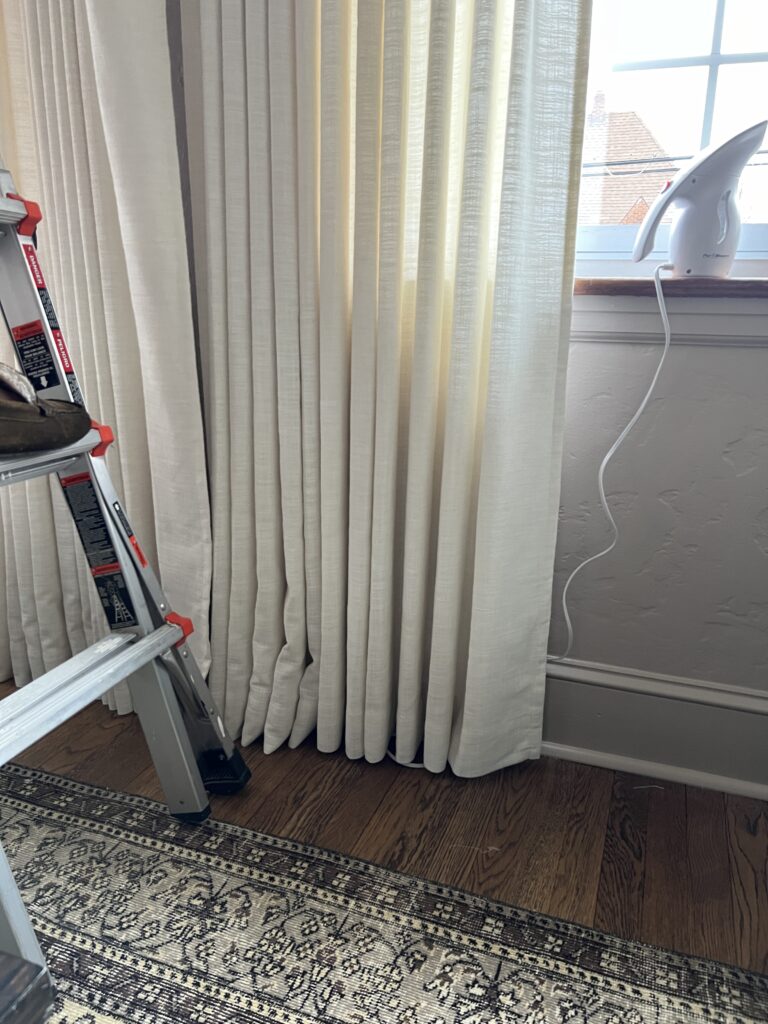
When it comes to choosing the width of your panels, a common rule of thumb is to have enough fabric to cover at least twice the width of your window. For example, our windows were 60″ and two 60″ panels (120″ total) was perfect! It gives about 10″ on the side when they’re open. The wider you go, the more fabric!
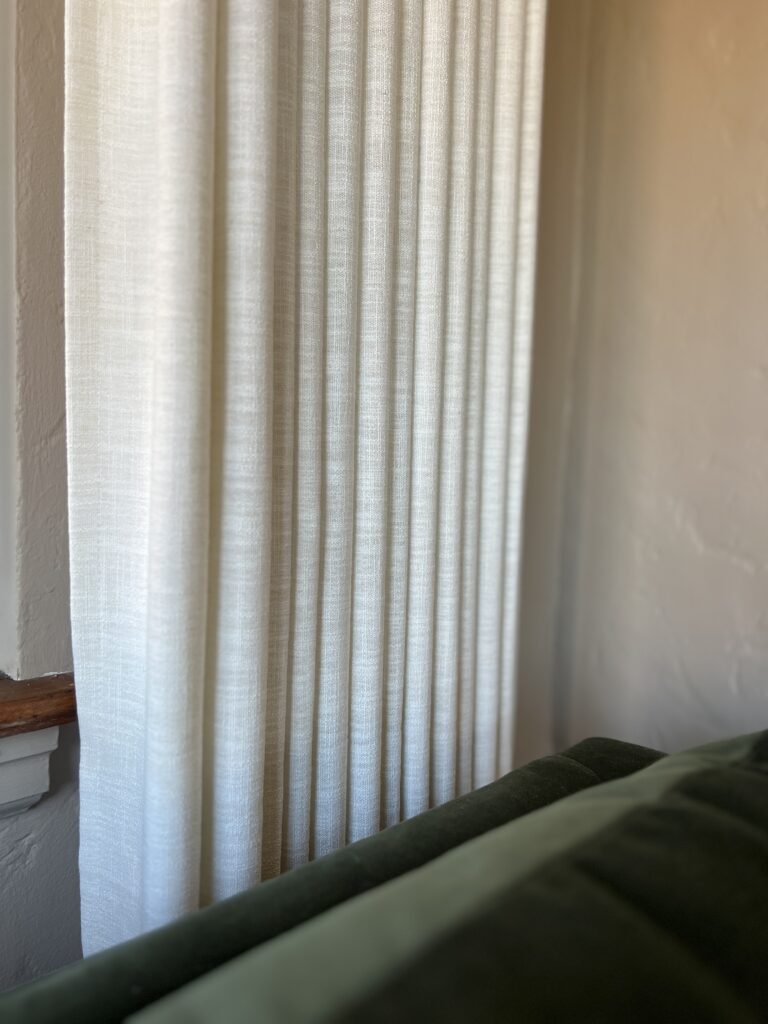
There was an awkward situation with a very large radiator underneath one of the windows. I considered not doing curtains on this one, but I wanted to keep the look consistent so I measured those panels to hit the window sill!
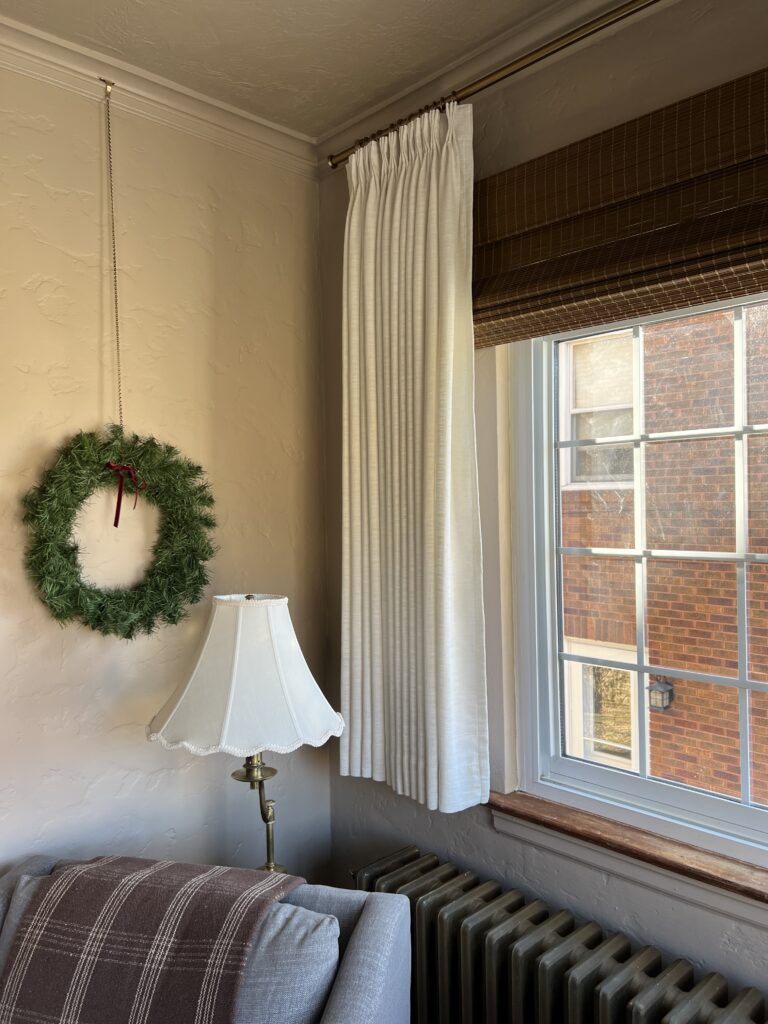
These are easily the heaviest drapes i’ve ever had! If you choose a lining for yours, just keep that in mind! It definitely adds to the weight. You’ll need a curtain rod that’s sturdy enough to handle it- at least 1″ in diameter.
I used these very affordable (and beautiful) curtain rods! Affordable was definitely key with all the windows in here! I also saved a little money by ordering one really large rod (extends up to 240″) for the wall with two windows and then used the 144″ size for the other windows.
When installing these curtain rods in our plaster walls, we used these anchors! If you’re hanging window treatments in your sunroom, it’s incredibly helpful to use a laser level to make sure everything lines up!
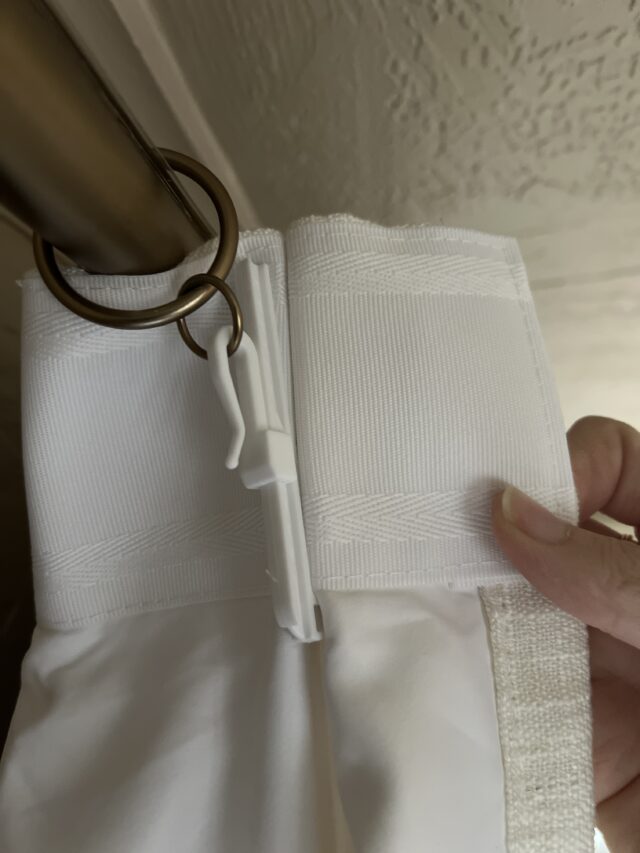
One thing I learned in terms of hanging these curtains is you need to get eyelet curtain rings! Initially I ordered curtain rings with the clips but those didn’t work properly for these curtains. The rings fit over the rod, but the the pleats won’t lay flat with this method. These are the ones I used instead!
Each pleat has a little gap to slide in an adjustable pin hook (the white plastic thing!) and then you just slide the small ring onto the hook.

Another tip I have is to get some gliding tape for the top of your curtain rod! It just helps the rings slide nicely so they don’t get caught on the seams of the rod. You simply remove the red backing and place it on the rod- it’s clear so you can barely see it!
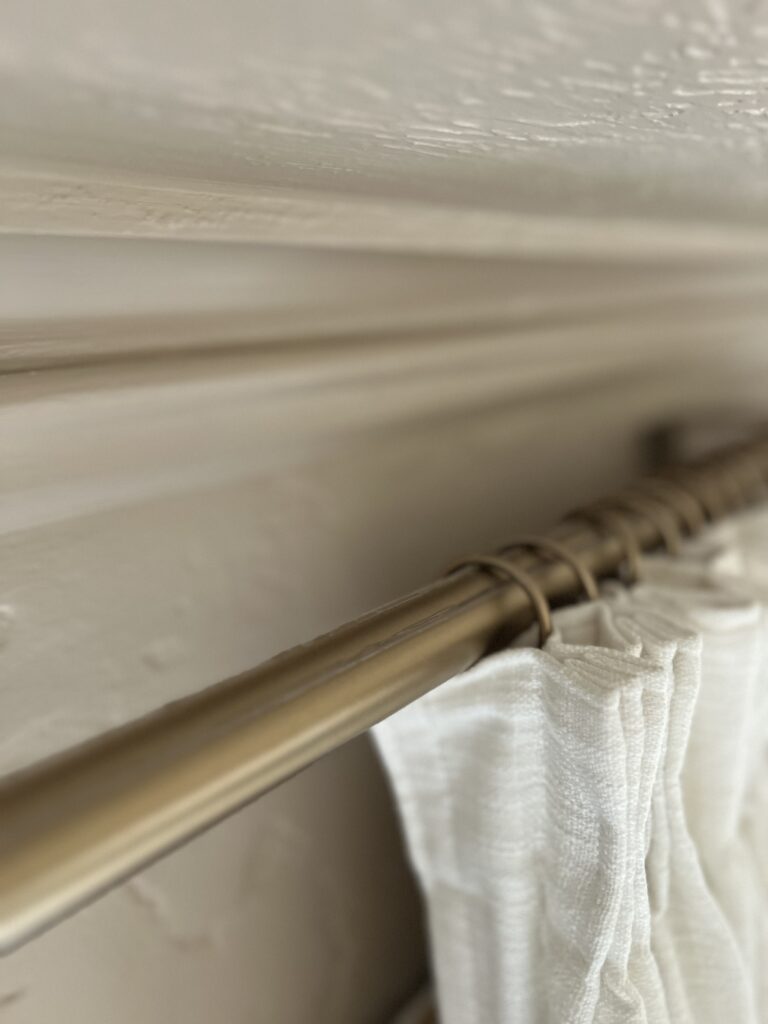
One important thing to note about this tape is that you have to have your rod adjusted to the right length before applying it! Once it’s on you won’t be able to adjust the size without completely removing it.
Bamboo Shades
Sybil Bamboo Roman Shade Cordless
- Color: Almond
- Installation Method: Outside Mount
- Lining Type: Privacy Lined
- Edge Binding: None
- Measurements: 56″ height x 65″ width
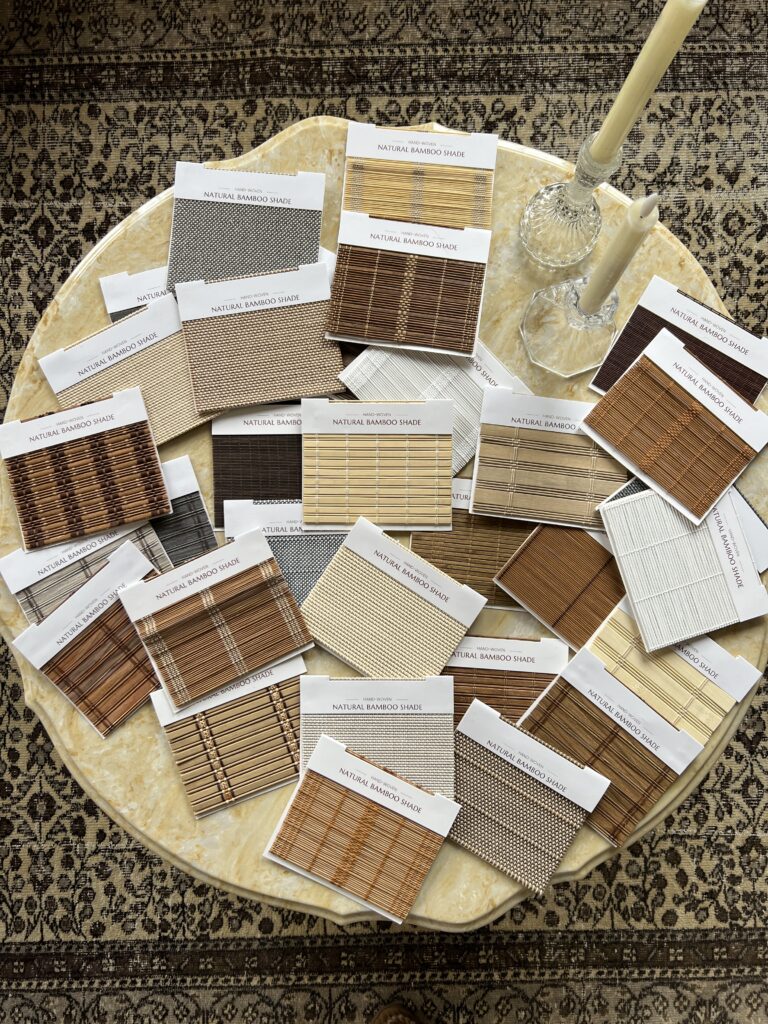
This was my first time ordering roman shades! Here’s what I learned:
You can get inside or outside mount roman shades. Inside mount means the brackets are within the window frame. With these particular shades, you actually need at least 2 3/4″ depth in the window frame to do the inside mount. Ours didn’t have enough depth so I went with the outside mount. I also figured the outside mount was a good opportunity to hide our unframed windows!
The blinds have three different lining types and I chose the middle one, privacy lined. I didn’t go with any edge banding because I figured you wouldn’t see it anyway!
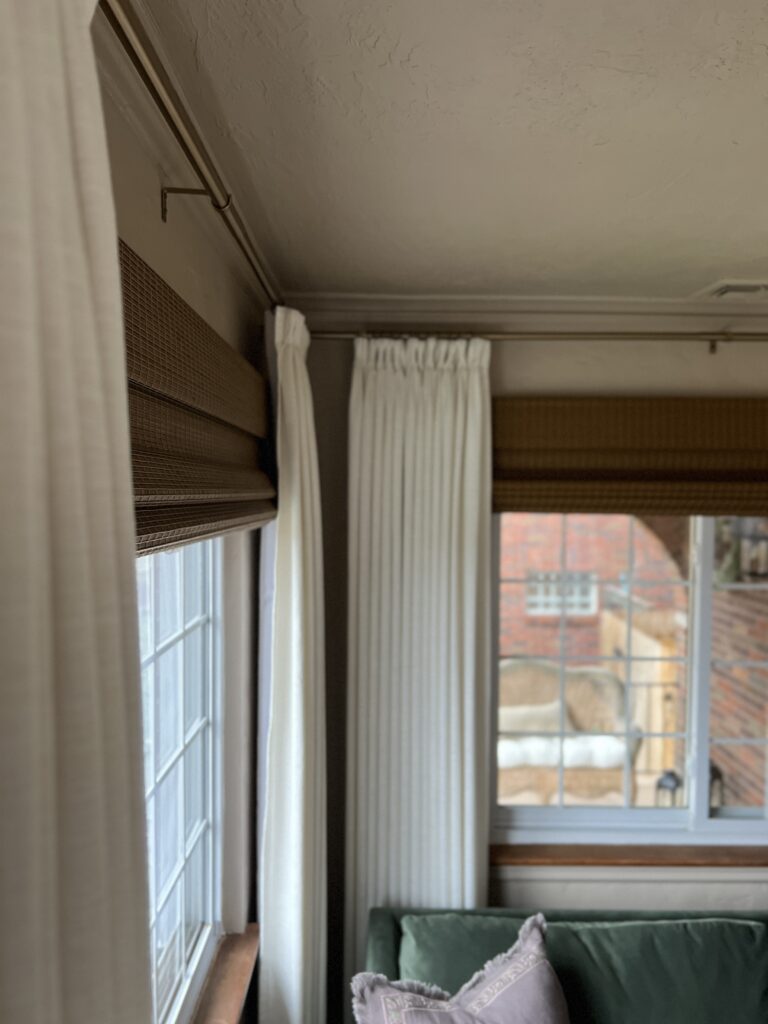
To determine the height, I measured from the window sill to the top of the window and added 10″. This way, they don’t block any sun when they were fully up! For the width, I added about 2.5″ to each side of the window. In other words, the window width + 5″.
My husband hung these up but he said it was really easy to do! Essentially you just have to hang the brackets (we used the same anchors we did for the curtain rods) and then you slide the shades over and screw them into place! Two Pages also has a page with a bunch of installation videos!
What I’d Do Differently
If I could go back, i’d choose our sunroom window treatments a little differently. I definitely love the layered look, but I think I made a mistake in getting both the curtains and shades privacy lined. It feels a little visually heavy for a small room. I’m also just very critical of myself but I like to be honest in case it’s helpful to someone else!
Instead, I’d get get the shades unlined for a lighter look! I’d also scale back on the lining of the curtains to get a privacy lining (60% shading) instead of the room darkening (70% shading).
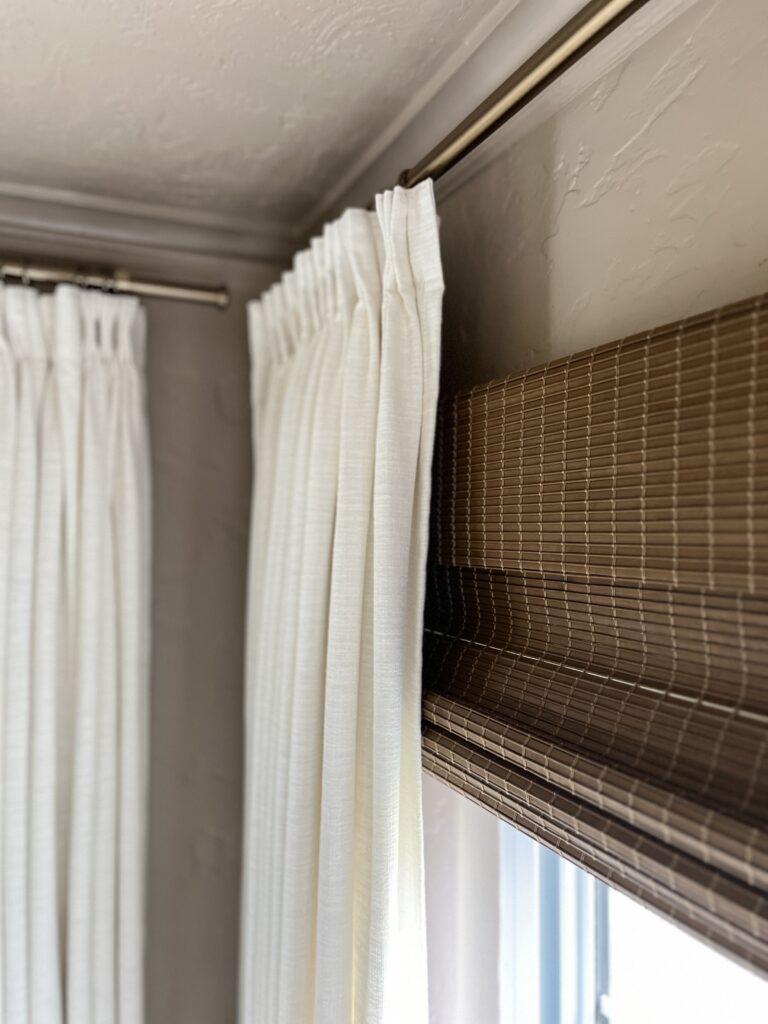
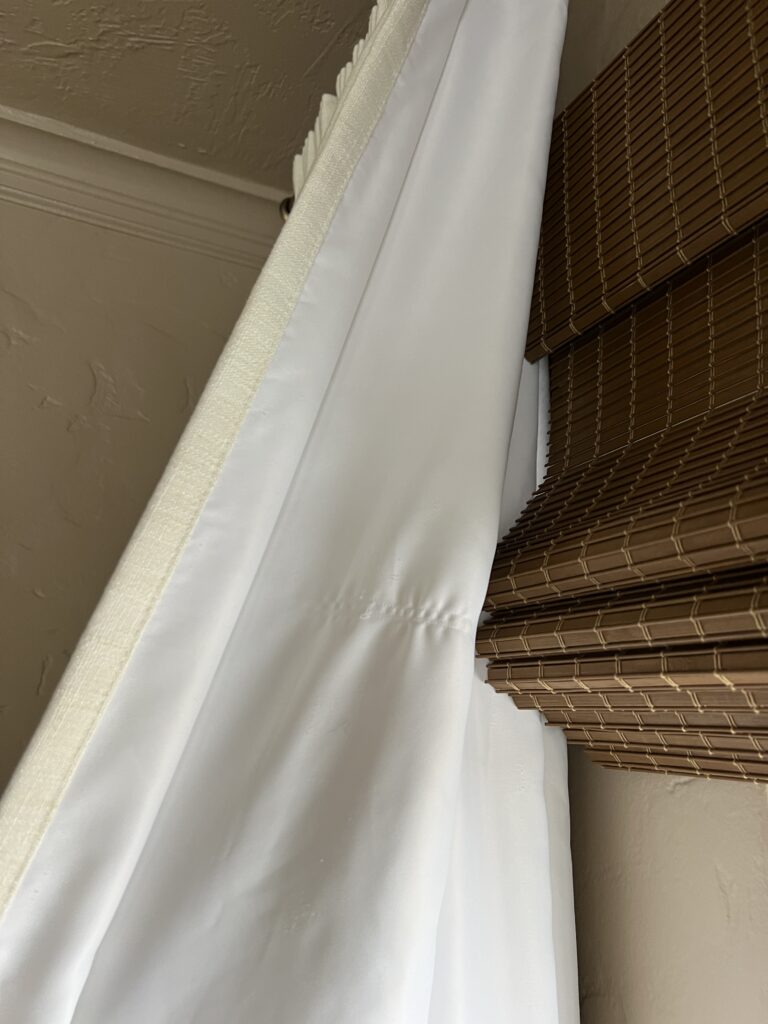
Another thing, when you’re layering outside mount blinds and curtains like this, be careful about the blinds you choose. Next time, i’d choose blinds with a slimmer profile. You can see in the photo above how they jut out a bit. Visually, it’s not super noticeable, but functionally it’s not ideal.
It’s tricky to open and close the blinds of our large windows without them rubbing against the back of the curtains. The edges of the blinds sometimes get caught and create runs in the lining 🙁 I wonder if the edge banding option on the blinds would have helped solve this problem?! I bet it would!
Hopefully these sunroom window treatment tips were helpful! Let me know if you have any questions!
Sunroom Into Bedroom!
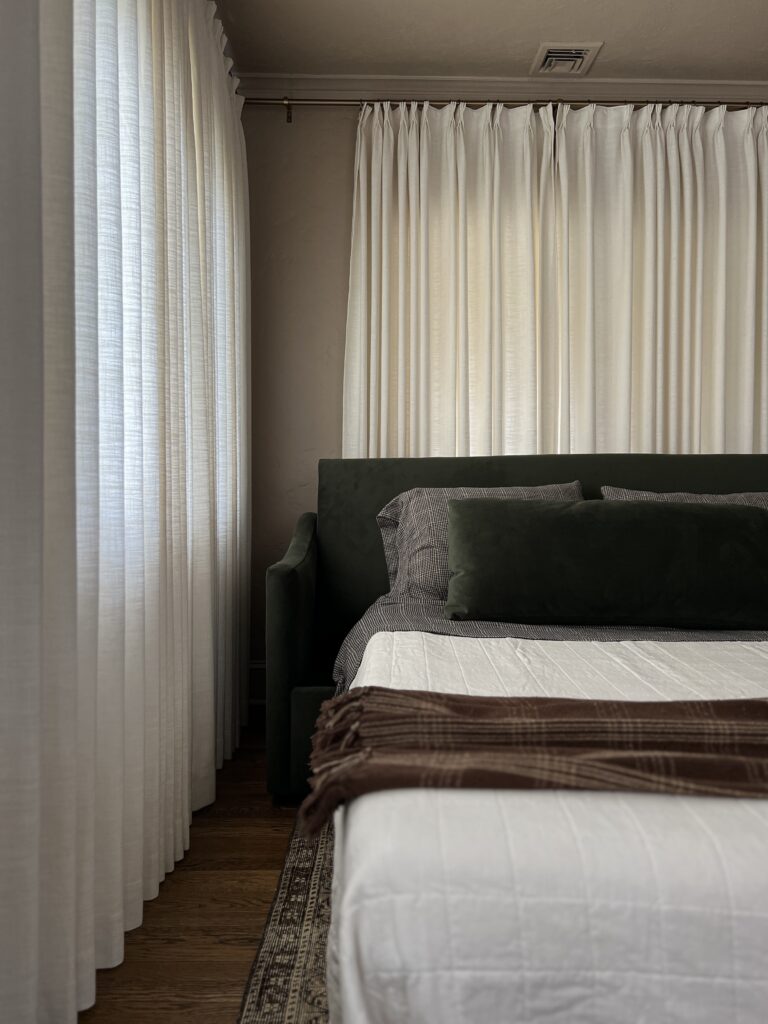
As I mentioned above, our green velvet sofa we chose has a hidden mattress so when we’re in a pinch and need an extra space for family to sleep!! This is part of the reason why I chose privacy lined options for the window treatments!
I love how it looks with all the linen drapes surrounding the room- it’s cozy as ever! This photo was taken before we installed the Roman shades so it will get be nice and dark in here for the mornings!
Tips for How to Decorate a Sunroom
There’s really so many directions you can go with your sunroom design and I think it’s great if you can make it a multi-purpose space. With the abundant natural light, it could be the ideal place for a little home office area. That’s actually how we had ours setup before this makeover!
Depending on the amount of sunroom space you have, you could also use it as a secondary living room or heck, even a formal dining room!!!
Furniture
In a small sunroom, every piece of furniture should have it’s purpose. When you’re working with limited space, try using multifunctional furniture, like a coffee table with hidden storage or a sleeper sofa. It would also be the perfect spot for daybed or chaise lounge! Small ottomans also contribute a lot to a small space, acting as both footrest and extra seating. Don’t forget to prioritize comfort when making your furniture choices!

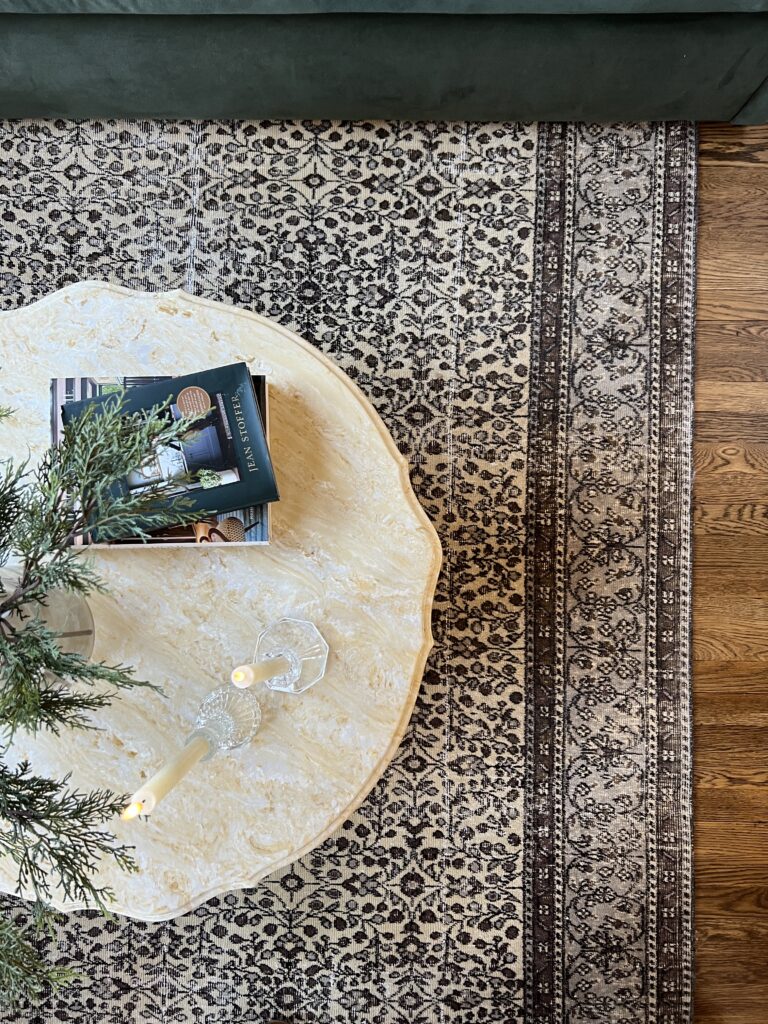
Play around with different styles as well as mixing old and new. Since the sofa bed and chairs we chose were new with clean lines, I wanted to bring in some old with a vintage ornate marble cocktail table I found on Facebook Marketplace!
Outdoor furniture might be a great fit for your sunroom too– wicker furniture would look so darling!!
Another brilliant idea for a sunroom would be a built-in window seat! I don’t know about you, but I’ve always dreamed of having a cushioned window seat! Bonus points if it has built-in storage! Maybe one day we’ll do a sunroom makeover round two with a built-in bench 😉
Lighting
Of course sunrooms provide plenty of natural light, which is awesome, but don’t forget to consider how you want to incorporate artificial light into your sunroom design.
Layer soft lighting throughout the room with table lamps, floor lamps, and battery operated flickering candles. These add the perfect little glow! Sunset is actually my favorite time in our sunroom.
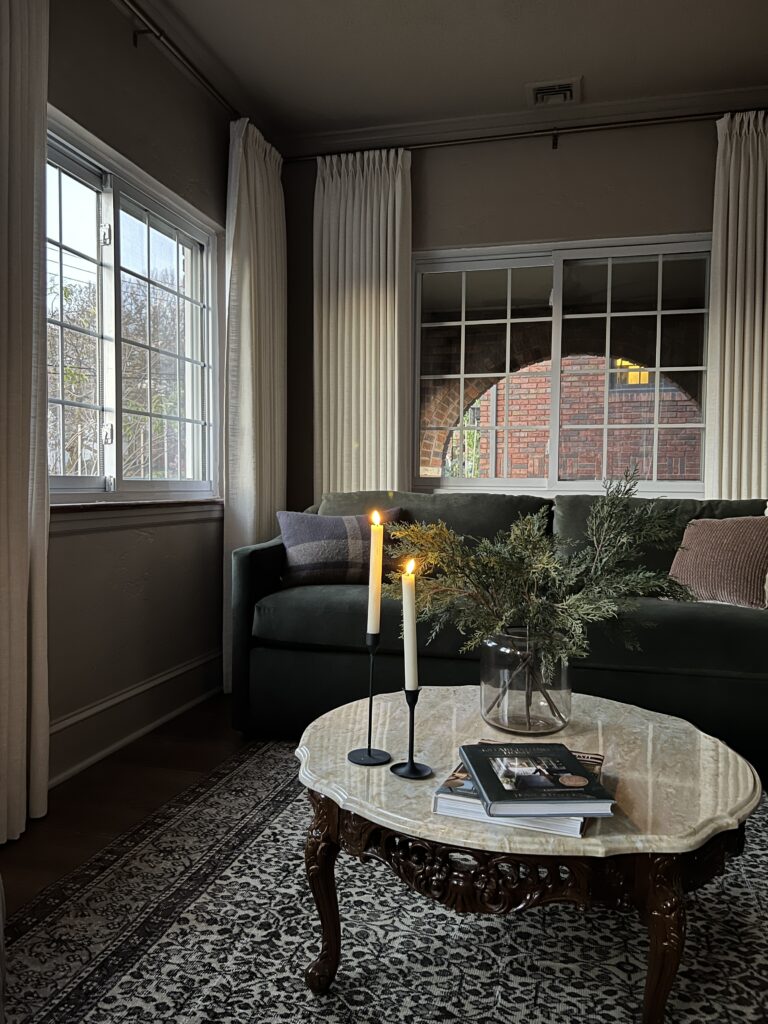
We have two floor lamps in our sunroom. One is behind a chair which creates the perfect little reading nook! If you’re looking for a good book for your coffee table, I rounded up 9 of the Best Books on Interior Design for Beginners, with this being my favorite book for design inspiration!
One day i’d love to take the cozy up a notch and get a cute accordion scone!! I’m on the hunt!
Our sunroom also has a ceiling fan with a light, but I prefer lamp light! Eventually we may swap this out, but we haven’t been able to actually use this space during summer so first I want to see if we actually use the ceiling fan.
Decor
When floor space is limited, think vertical! I love the idea of installing built-ins or floating shelves to display indoor plants, books, or art that represents your personal style.
With lots of natural light, I think greenery is a must for a sunroom. If you don’t have a green thumb, opt for plants that are easy to take care of, like snake plants! I really wanted trailing and found this gorgeous Mona Lisa lipstick plant.
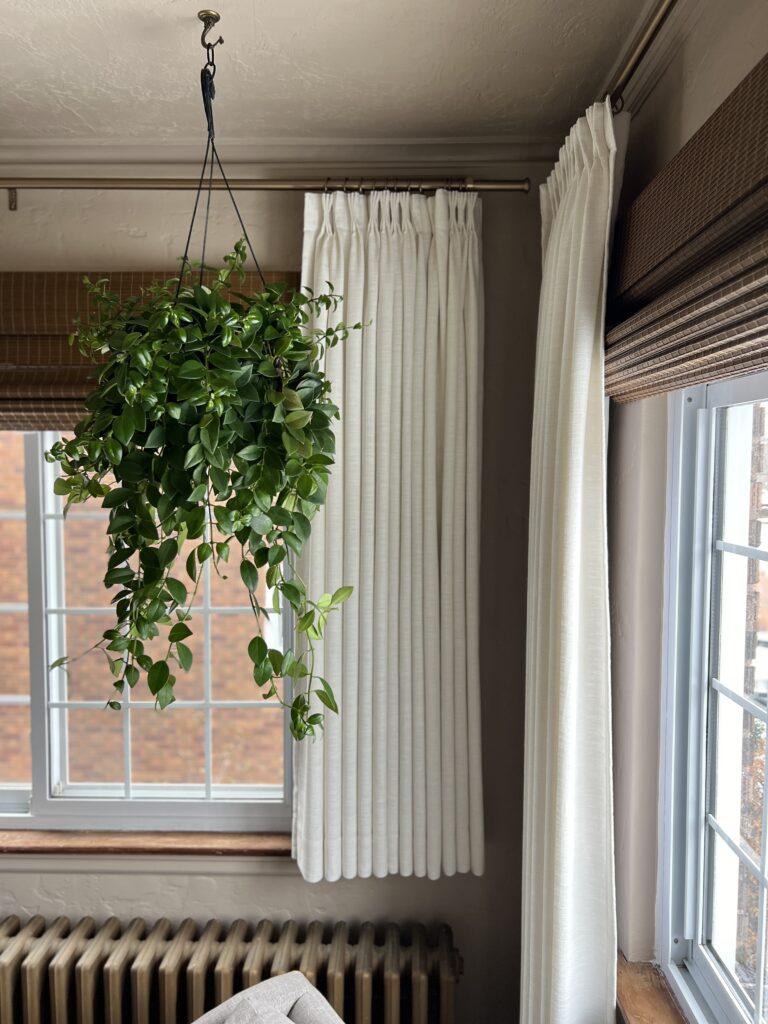
Layering textures is key for a space like this. The combination of velvet, linen, marble, and bamboo adds a lot of warmth and personality to our small space! Natural elements are always a great idea for a sunroom!
Throw pillows, cozy blankets, and area rugs are a great way layer in some additional color and texture. I found a beautiful vintage rug from Etsy (the shop is called TraditionalDecorRug) for our sunroom and it really helps tie everything together!
Window Treatments
See above for all the details (and honest thoughts) on our layered window treatments, but there’s other options too!
If you have an especially small sunroom, i’d keep it light and airy with sheer curtains or unlined bamboo shades! You can also do fabric Roman shades, which would allow you to bring in some pattern!
Sunroom Makeover Before and After
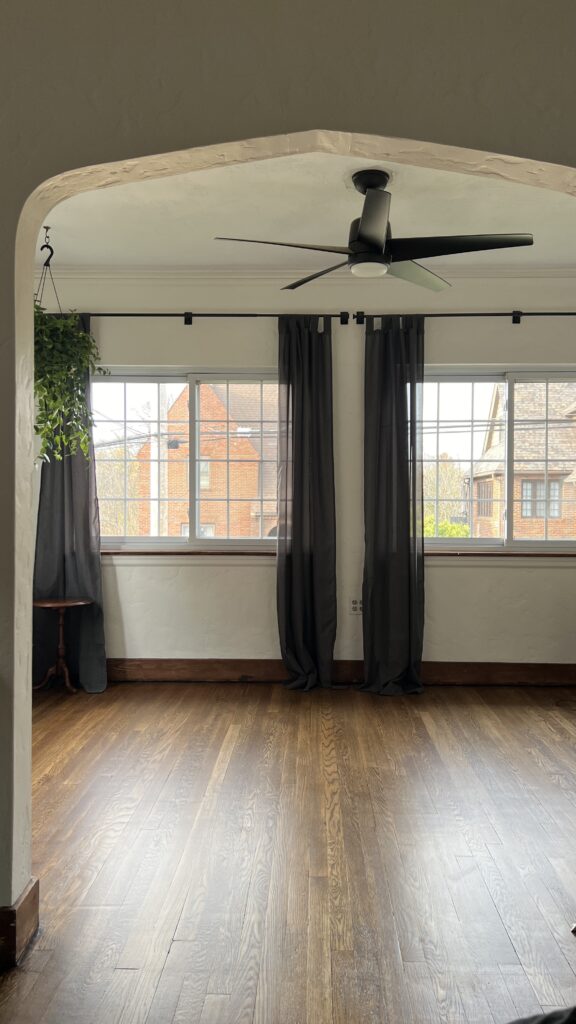
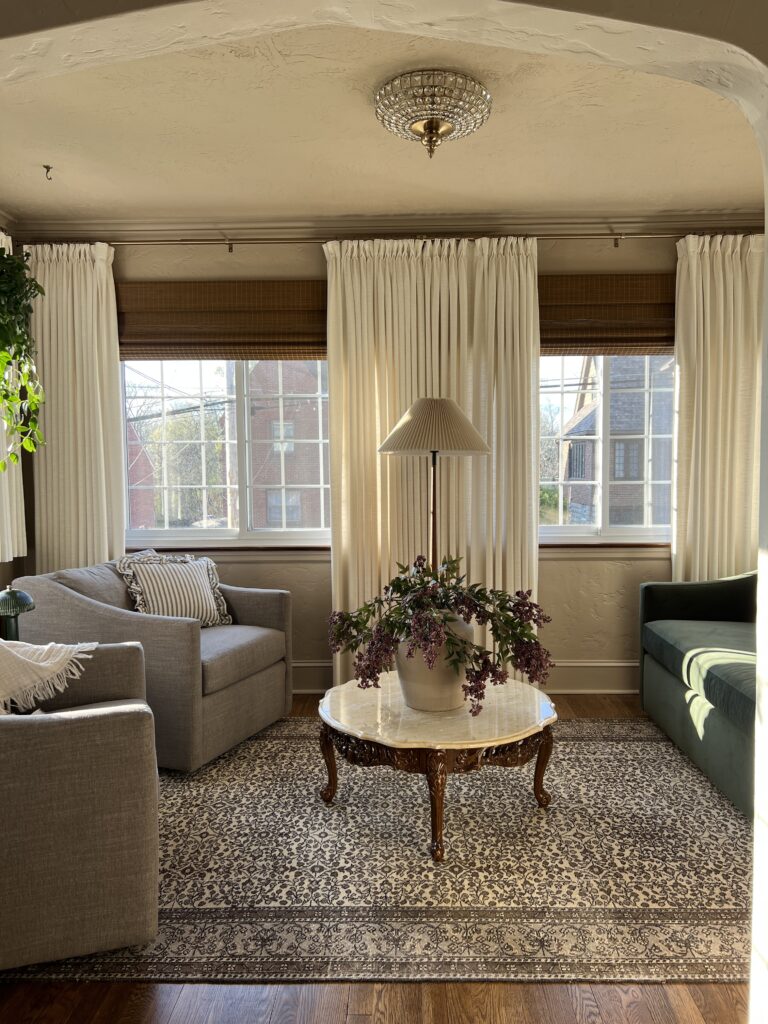

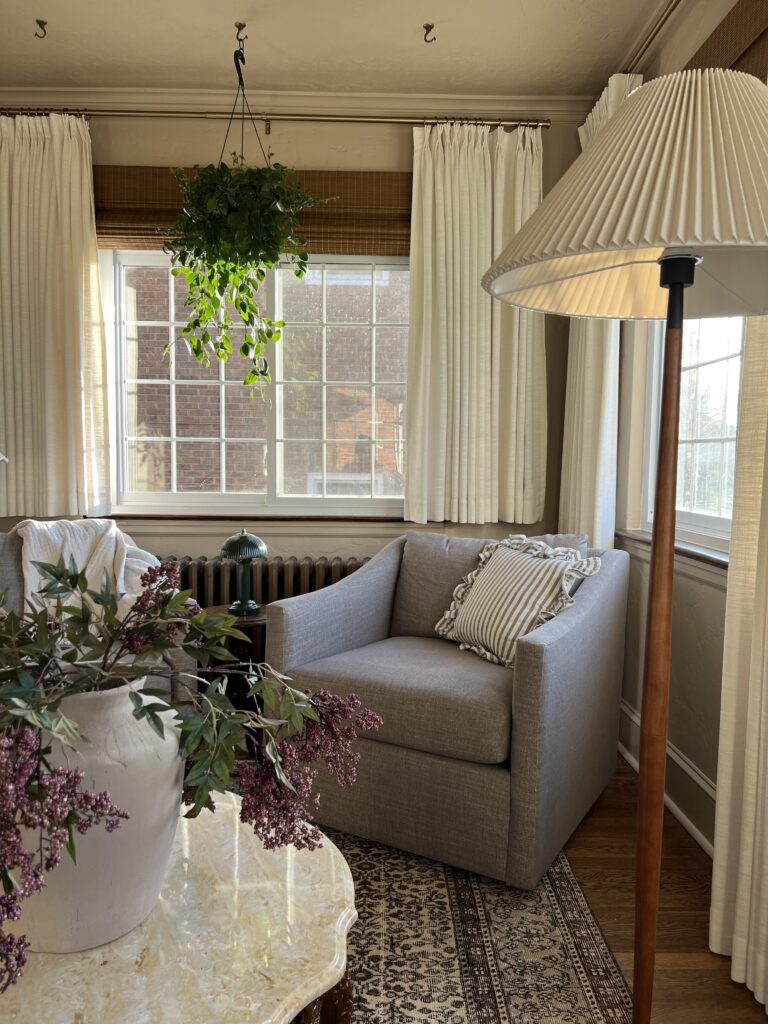
It makes me so happy this room is finally a functional space for us! And I’m not kidding when I say I spend majority of my day in here now! As far as i’m concerned, it’s the perfect place for just about any activity! Click here to shop our sunroom 🙂
Whether you’re using your sunroom as a dining space, somewhere to play board games, or simply as an extra seating area, I hope you got some great small sunroom ideas from this post!! Thank you so much for being here and please let me know if you have any questions at all!
Elisha