

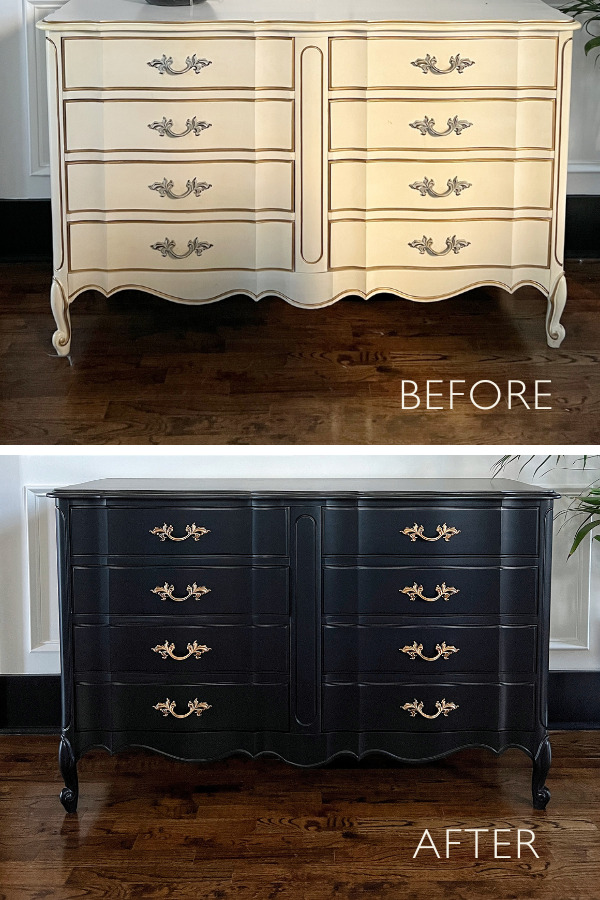
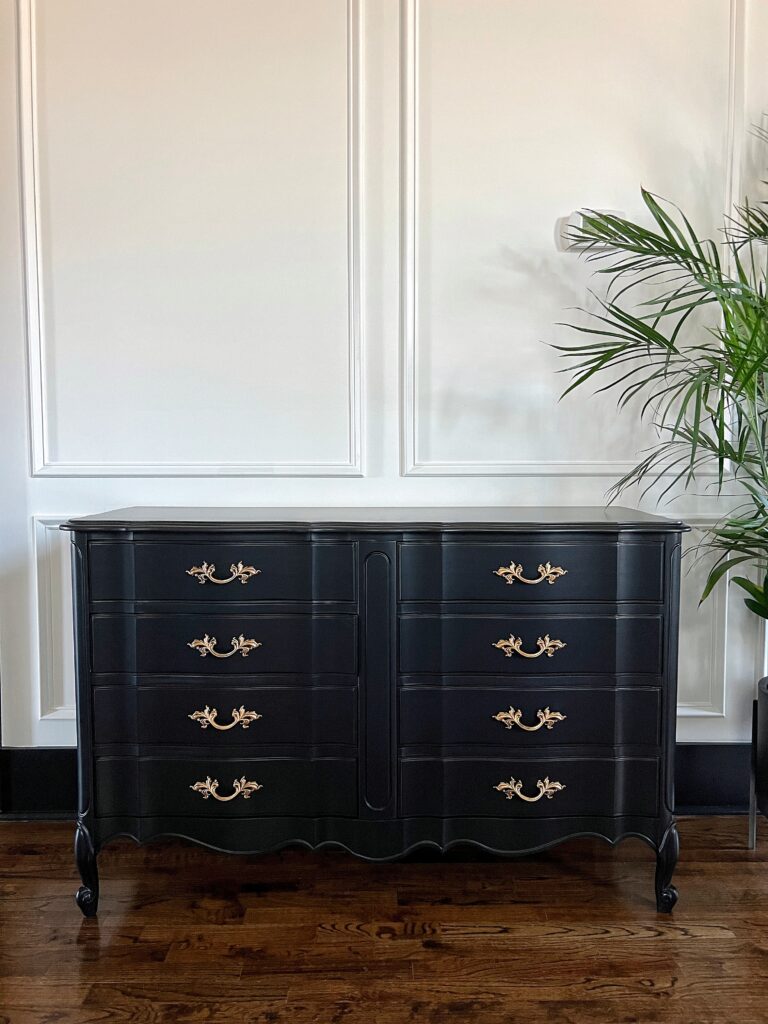
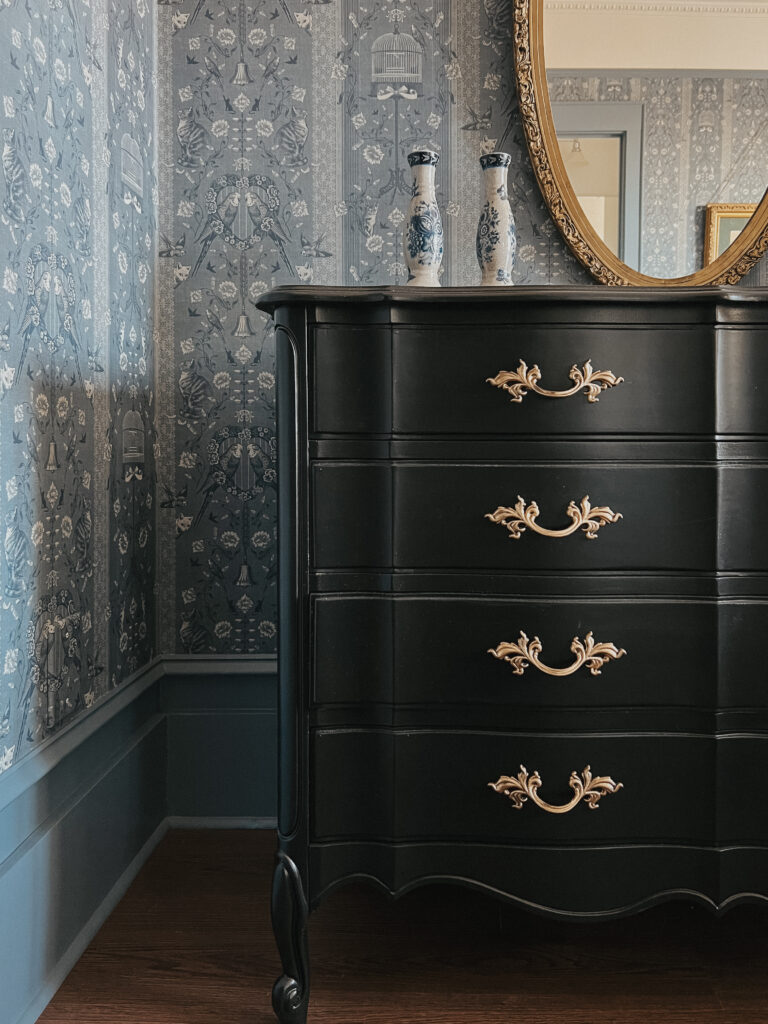
This black dresser makeover is one of my favorite details in our French vintage guest bedroom!
You don’t often see a French provincial style dresser, with its delicate curves and charming look, painted black. But I think this unexpected look is the perfect combination of classic and bold.
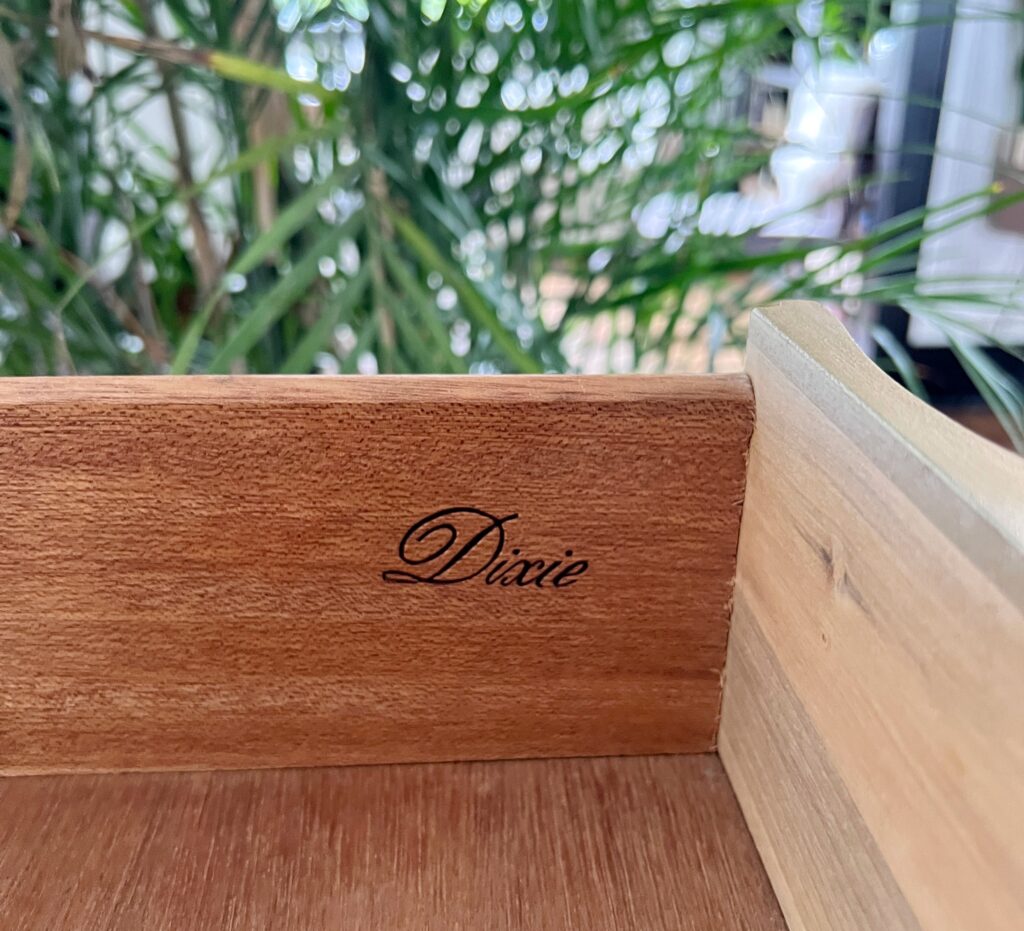
I don’t know about you, but I’m always coming across vintage Dixie French provincial furniture on Facebook Marketplace so it only took me a couple weeks to find the perfect candidate for this black dresser makeover.
Disclaimer: This post contains affiliate links. This means, if you purchase something from a link I provided, I will receive a small commission. This is at no extra cost to you! Thank you for your support!
History of French Provincial Furniture
French Provincial furniture (sometimes referred to as French country) originated in the Provinces of France during 17th and 18th centuries.
Inspiration was taken from the luxurious and ornate furniture found in royal homes and made with simpler designs that were more affordable and accessible to middle class families.
Is French provincial furniture outdated?
French Provincial pieces became popular in the United States in the 20th century and still remain to be a classic aesthetic today.
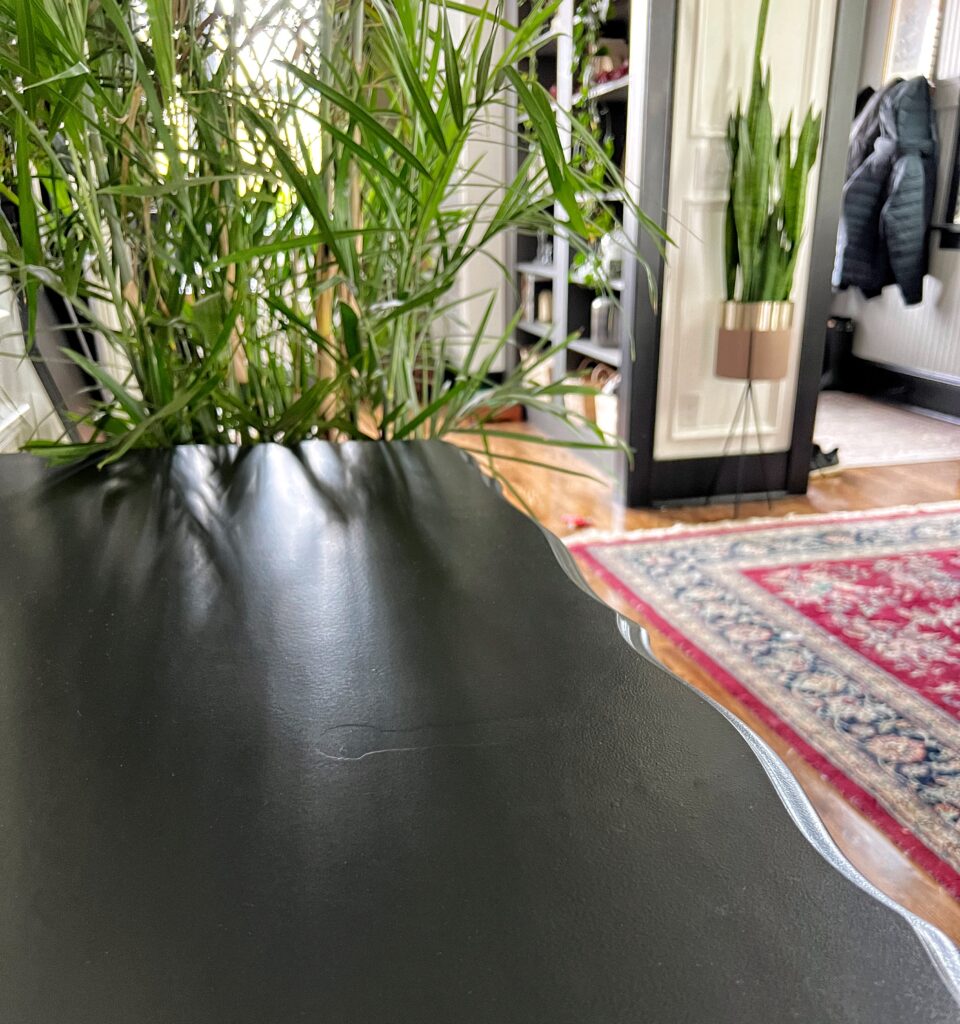
Common characteristics of French Provincial furniture include scalloped carvings, curved drawers, cabriole legs, and ornate brass hardware.
Is Dixie furniture good quality?
Dixie furniture company was founded in 1901 in Lexington, North Carolina and is no longer in business.
Dixie furniture was in the mid-range price so it isn’t considered high end furniture, but it’s a respected brand with solid construction often using a combination of solid wood, pressed wood, and laminate.
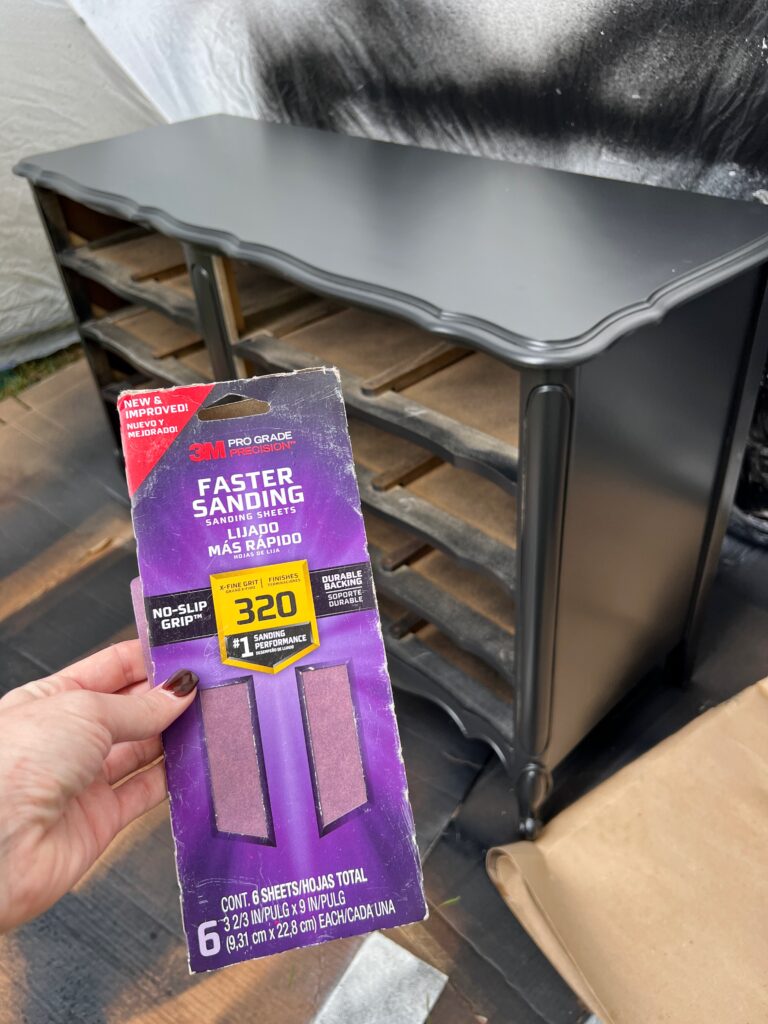
Best Black Paint for Furniture
The best black paint (in my opinion) is Limousine Leather by Behr paint. It’s a rich, true black that I’ve used for many projects in my home.
My favorite projects using this paint color are my DIY black stairs remodel, my black powder room, and I even painted all of my trim and doors with this black paint!

It can also be overwhelming trying to decide the type of paint to use on old furniture pieces. There’s so many options from chalk paint to milk paint and everything in between.
I decided to use this Behr cabinet paint for my black French provincial dresser. I had heard good things about it and I loved that I could easily pick it up from Home Depot!
Spoiler alert: it worked great!
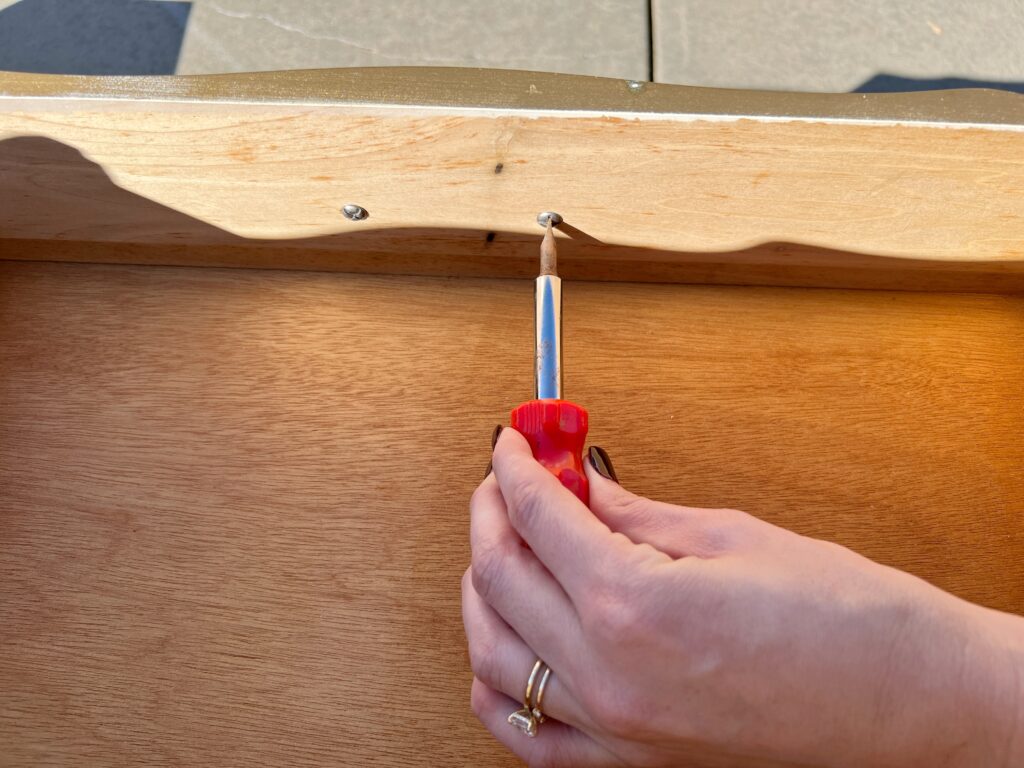
Step One: Remove Hardware
The first thing I did was remove the handles from the dresser using a flat head screw driver.
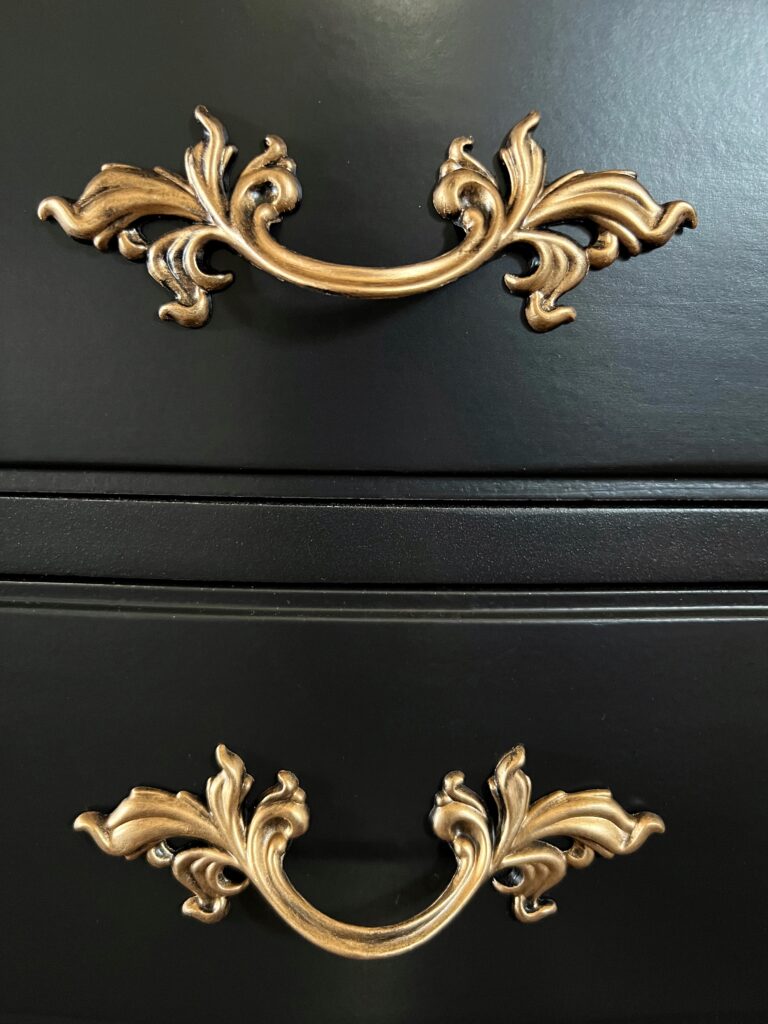
I decided to keep the handles on this vintage French provincial dresser! It’s such a classic style and the ornate hardware is signature to the French Provincial aesthetic!
How do you clean dresser hardware before painting?
I let them soak in warm water with a little dish soap and a splash of vinegar for 30 minutes. After that I used an old toothbrush to get into the grooves! You can see how big the difference is (the left is before cleaning!).


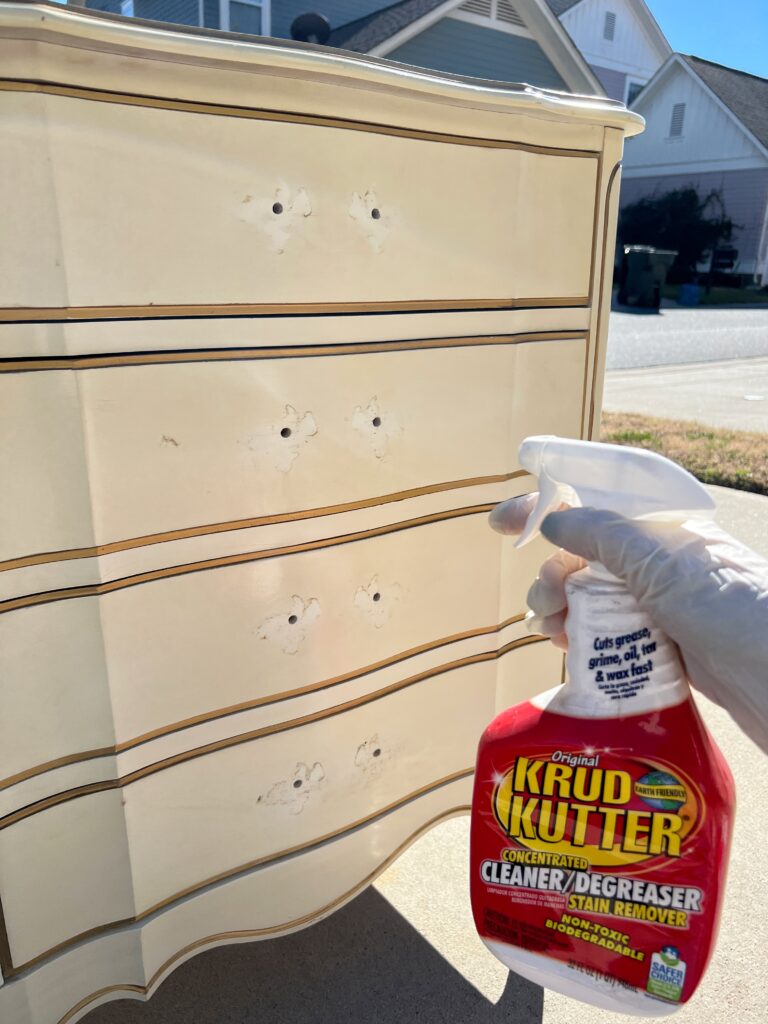
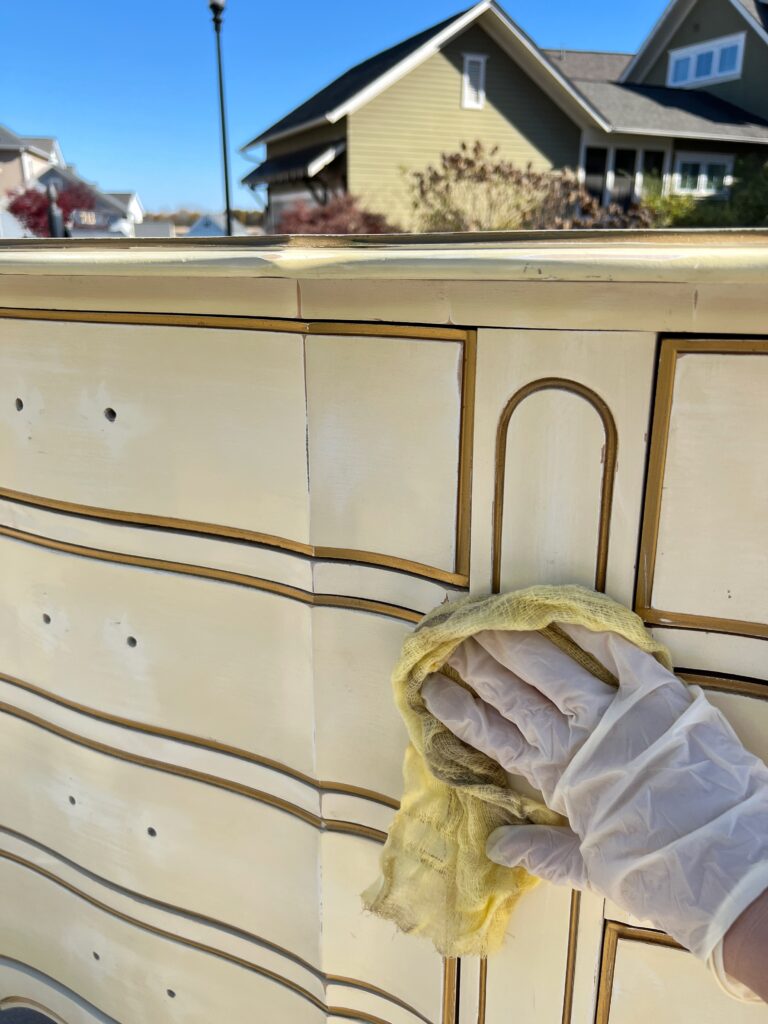
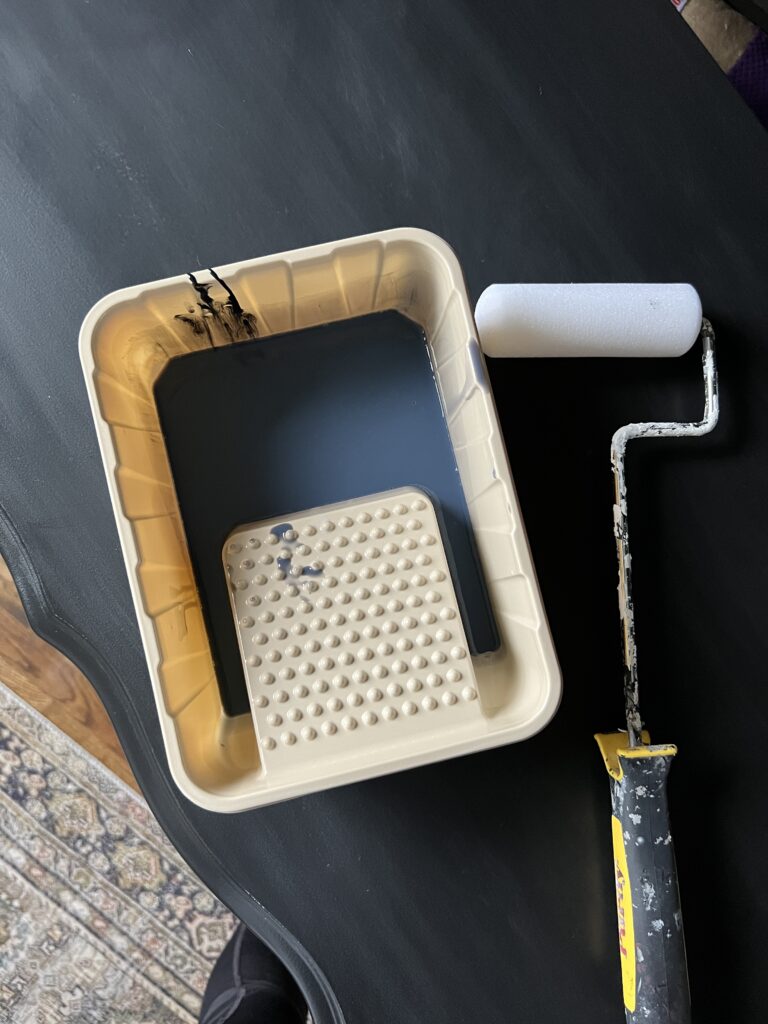
Step Two: Clean
Krud Kutter is my always go to product for cleaning furniture in preparation for paint. It’s easy to find and you can use it around the house too!
Clean all surfaces of the entire dresser and try to get as much of the “krud” off as you can because paint won’t stick to areas with grime.
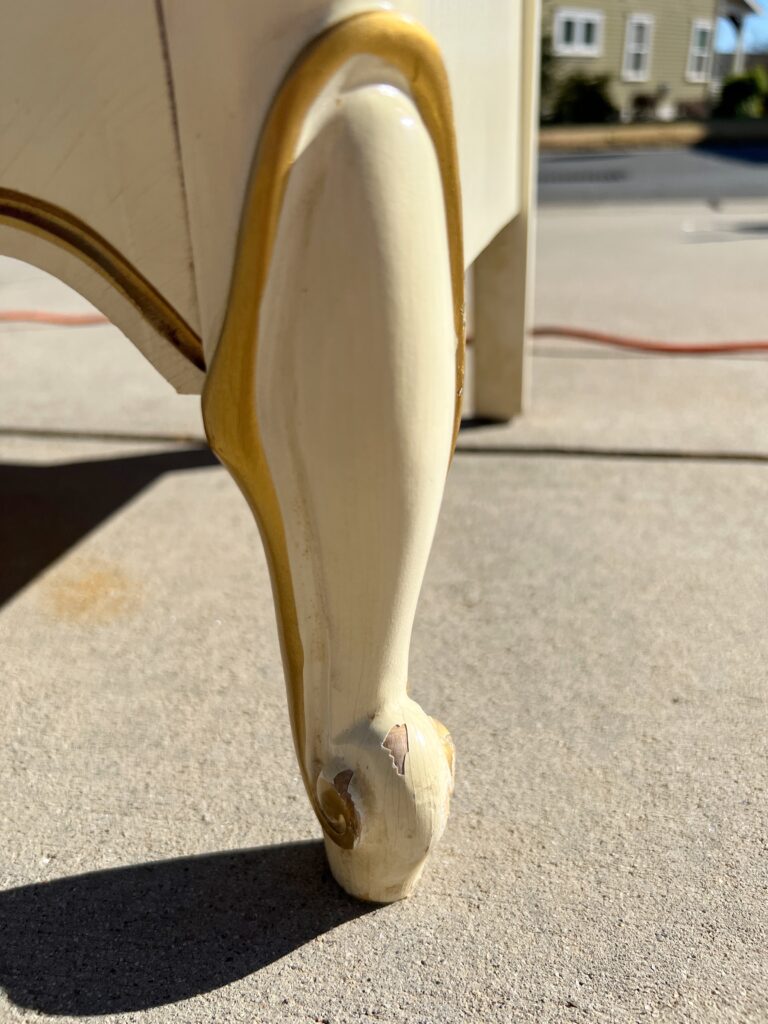
Step Three: Fix Blemishes
Examine your furniture piece for any imperfections.
If the wood has any dents or chips, you’ll want to fill them with wood filler. Since this dresser was in near perfect condition, I didn’t have any areas that needed filler.
Note: If you are planning to use new hardware that’s not the same size, you’ll have to fill the holes. If so, I recommend this wood filler– I used it last year when I did a vintage desk makeover for my office and it dried nice and hard!
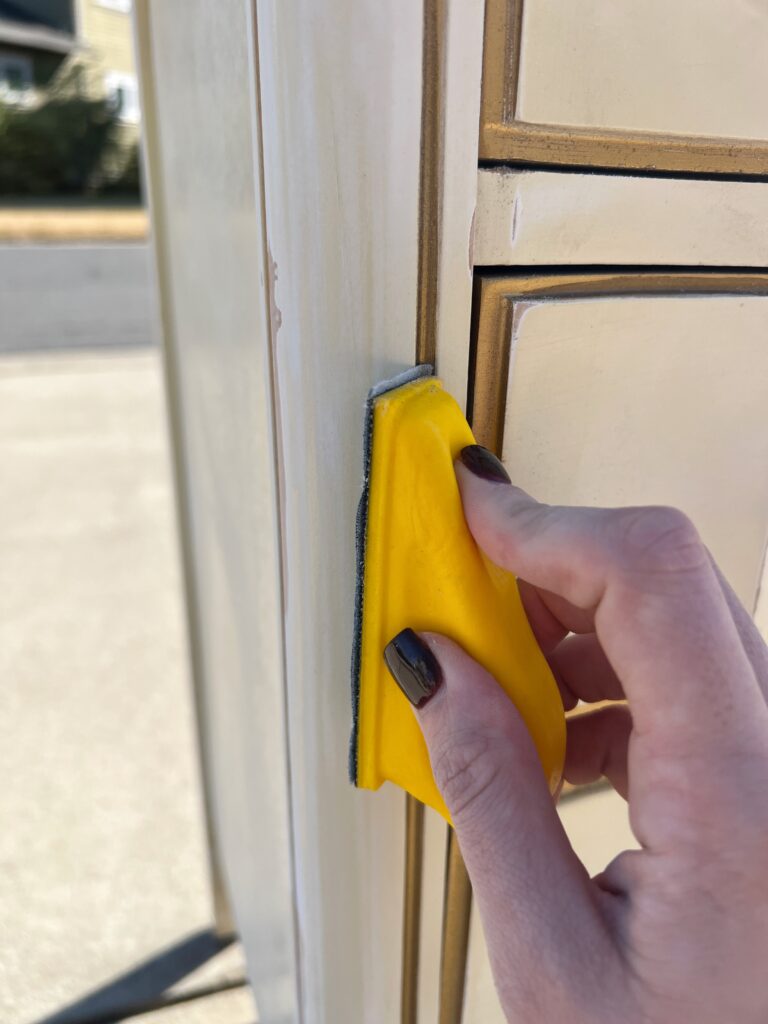
Step Four: Sand
Before you panic, I promise you don’t have to go crazy sanding down your old dresser… a little scuff sanding does the trick! The goal is to prep the surface for paint.
This dresser in particular had a very smooth finish, so roughing it up a little helped the paint adhere better.
I used my orbital sander with 180 grit sandpaper.
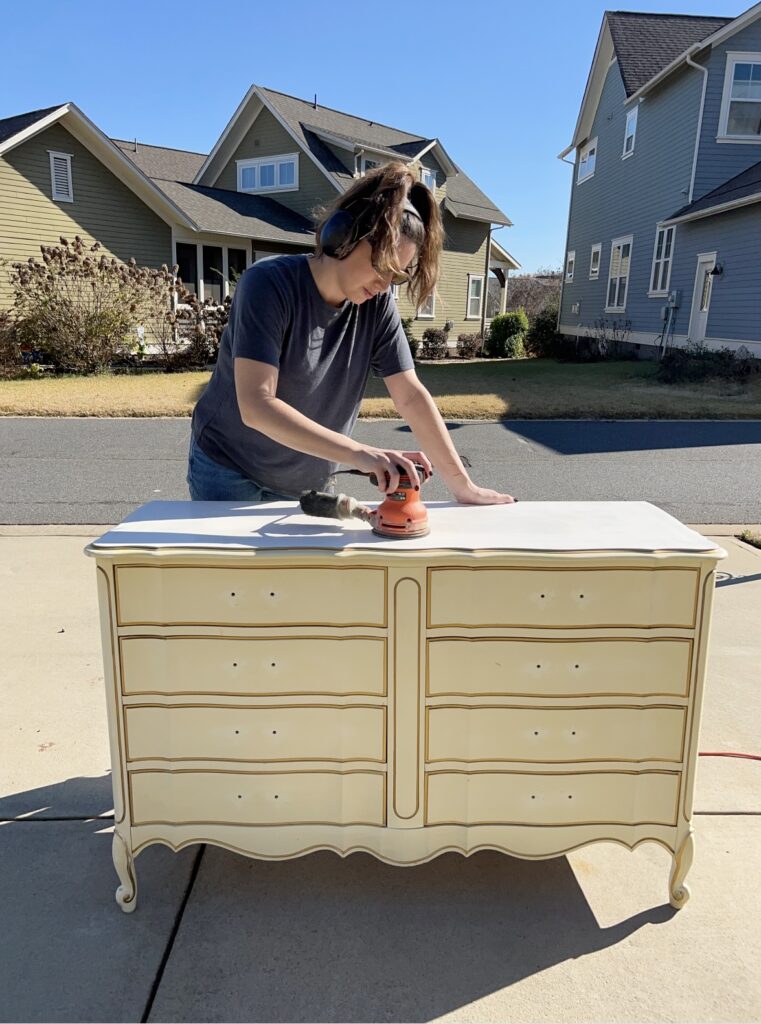
The gold details and legs were harder to get to with my orbital sander so I used this little micro tool for the detail sanding!
Be on the lookout for chipped paint if your dresser was previously painted. You’ll want to make sure to sand these areas down nice and smooth!
Step Five: Prime
Before priming, it’s important to make sure your dresser is completely free of dust. First use a vacuum or shop vac to vacuum it down.
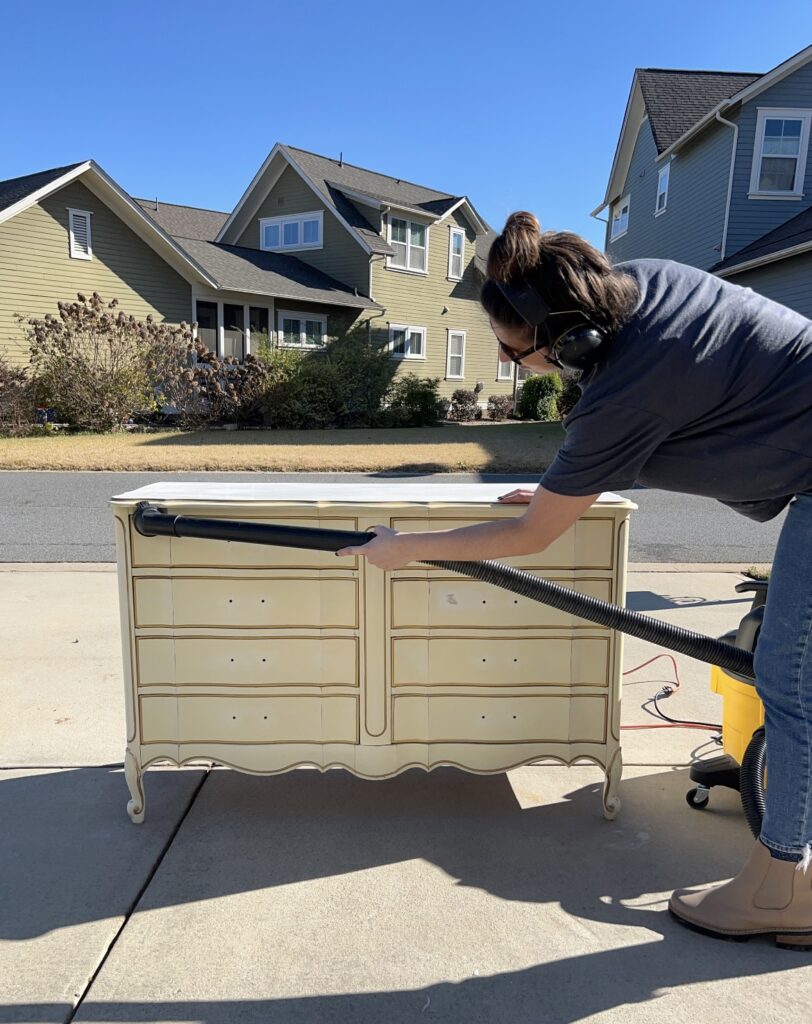
To get all the additional dust, use a tack cloth or a damp cloth!
What kind of primer do you use for furniture?
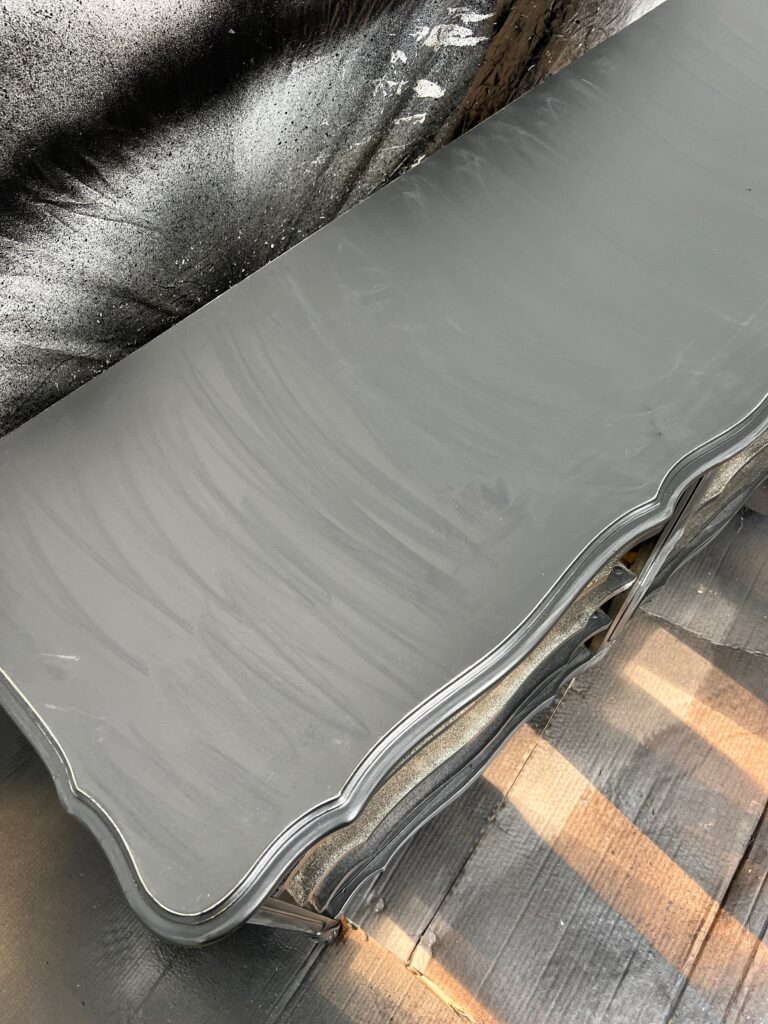
To prime my DIY black dresser, I used this Zinsser clear shellac spray. It’s most commonly used as a top coat to seal a project, but in my research I found it can also be used as a primer!
I used two light coats of this and sanded in between with 220 grit sandpaper. To be safe, I allowed one full day to cure in between coats, but that’s probably not necessary.
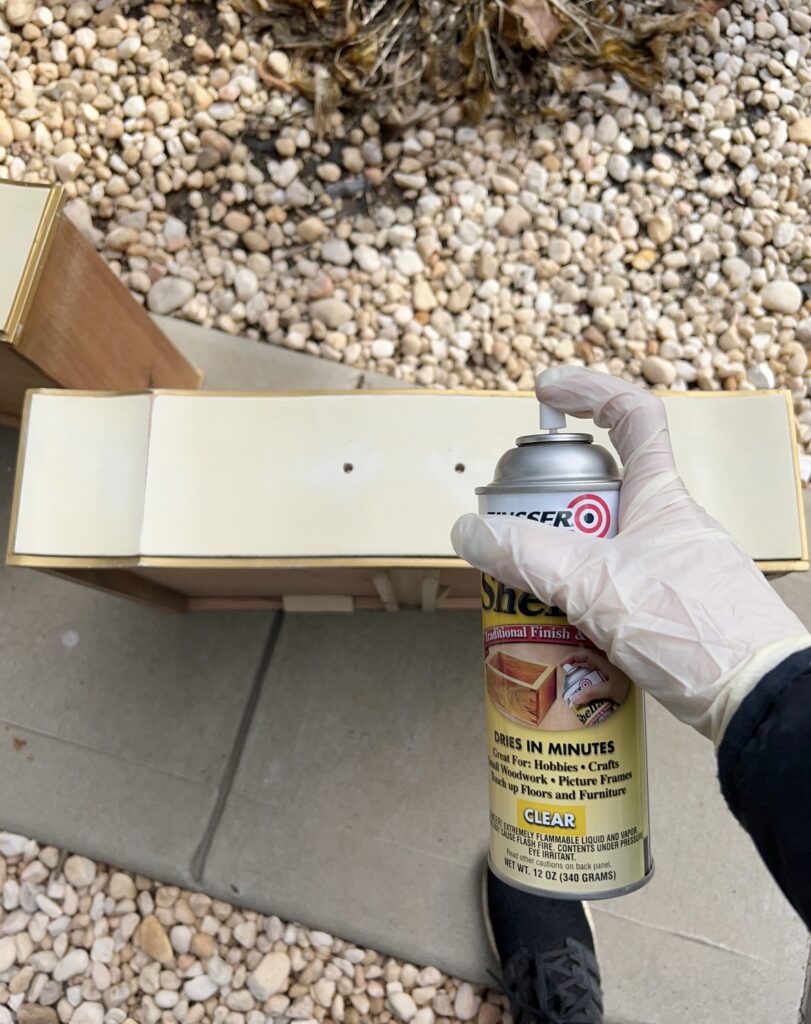
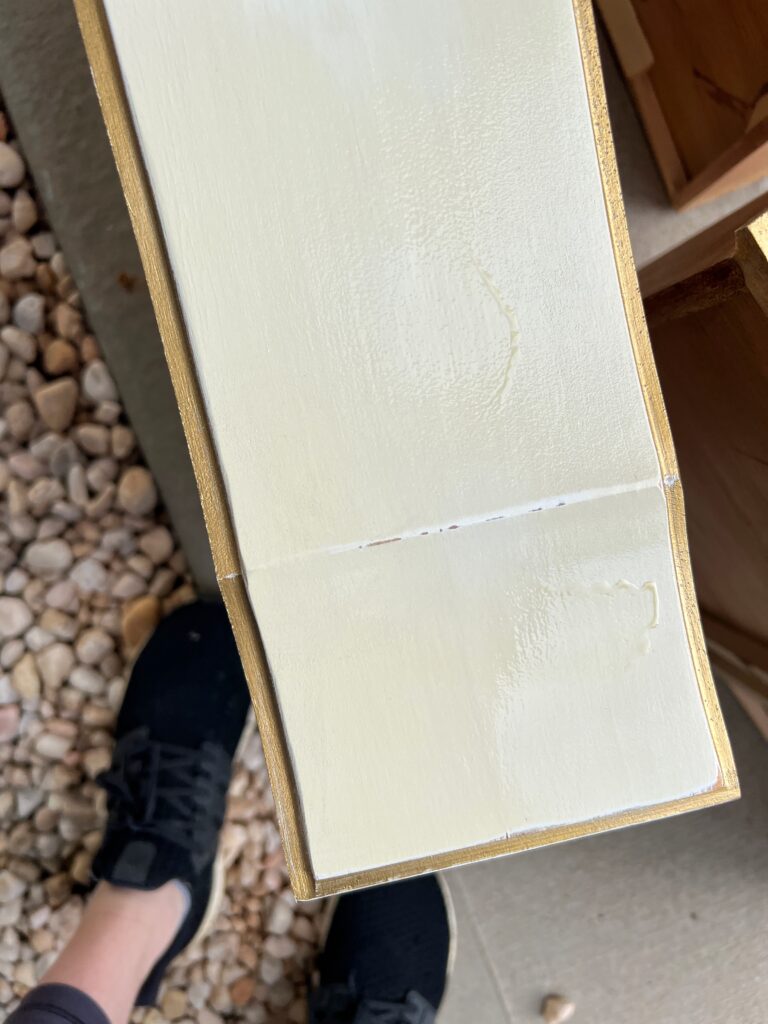
Be careful not to spray too close or too heavily otherwise the shellac will build up as you can see in the photo below ????
Why I recommend Zinsser Shellac Spray as a Primer
I’m incredibly happy with my experience using this shellac spray as a primer for my black dresser makeover and highly recommend it! Here’s why:
- A little goes a long way! (I did two coats on the whole dresser and I still have more than 1/2 can left)
- No prep or clean up is required! (unlike typical primer)
- It dries SO fast! (dry to the touch in 15 minutes)
- It really works! Here’s how I know…
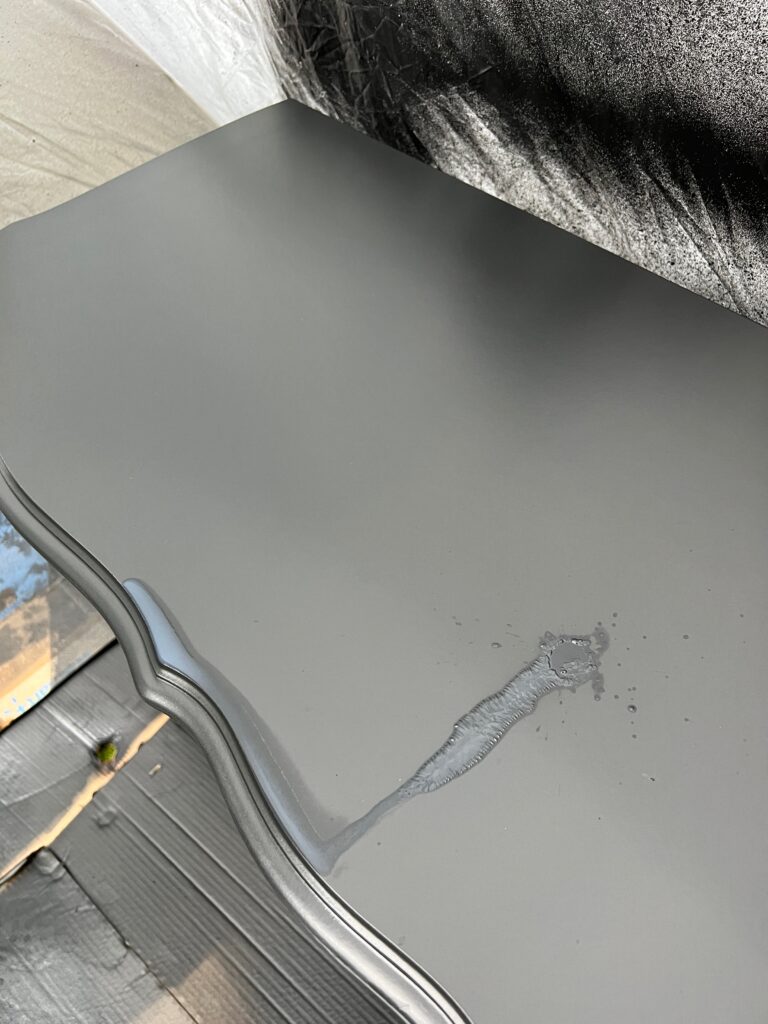
Remember that spot where I put too much shellac and there was build up? Well, I sanded it down it a little too much and didn’t think to add another coat of primer before I painted.
Here’s how that turned out:


Can you believe that difference? The paint just didn’t sit the same on that little spot with no primer! Again, can’t recommend this shellac spray enough!
In order to fix this, I sprayed that area with more shellac, let it dry, and sanded with 220 grit sandpaper before doing the second coat of black paint.
Step Six: Prep
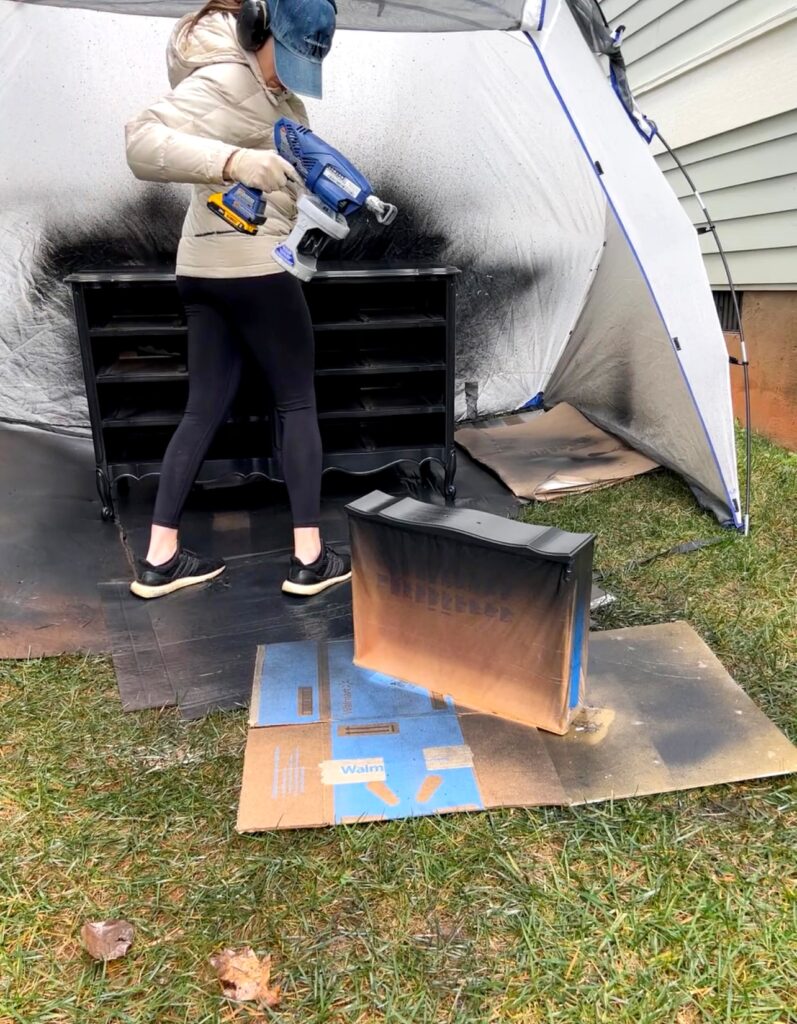
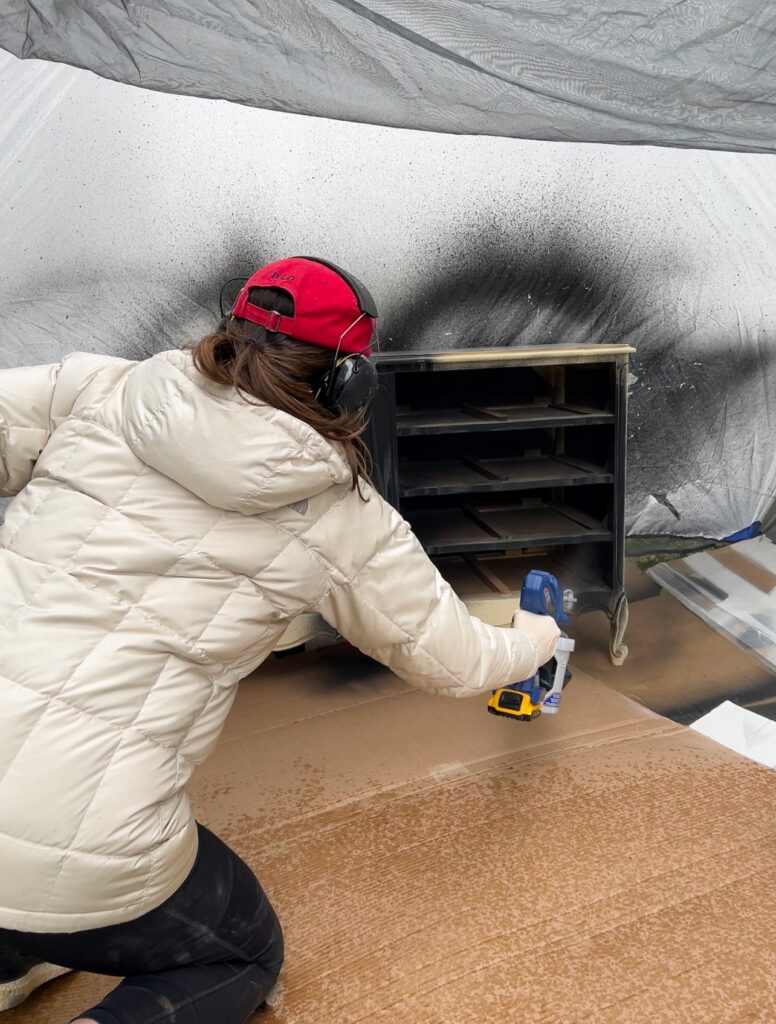
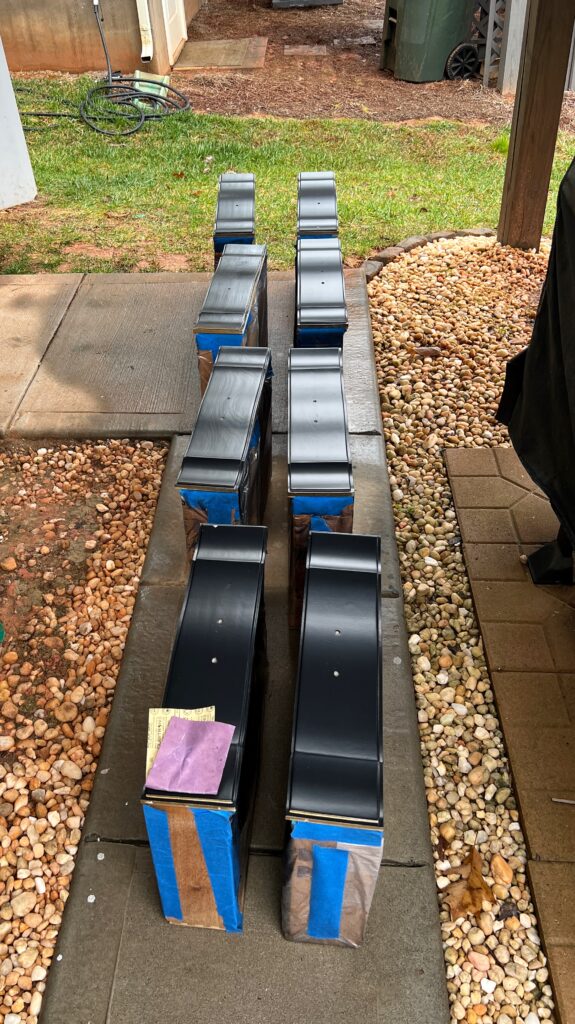
Since I used a paint sprayer for this dresser makeover I decided to paint all the drawer fronts separately.
I took them out and used this painter’s tape and plastic tarp combo. If you haven’t tried this yet it’s so handy!
Can you paint a dresser with the drawers in?
You can! I’ve seen others do it! Why didn’t I? I was a little nervous that the paint might sneak through the gaps and just look sloppy inside the drawers.
But I have to say, next time I plan to try it that way instead! It would use less material, take up less space, and just ultimately save time.
Another reason may have to do with the fact then while I was painting the drawer fronts, I backed into my freshly painted dresser and smudged it ???? To be fair, it’s my DIY coat!
If you do try painting with the drawers in, you’ll just go back after it’s dry and use a roller brush to get the top edges and any areas the sprayer couldn’t get to!
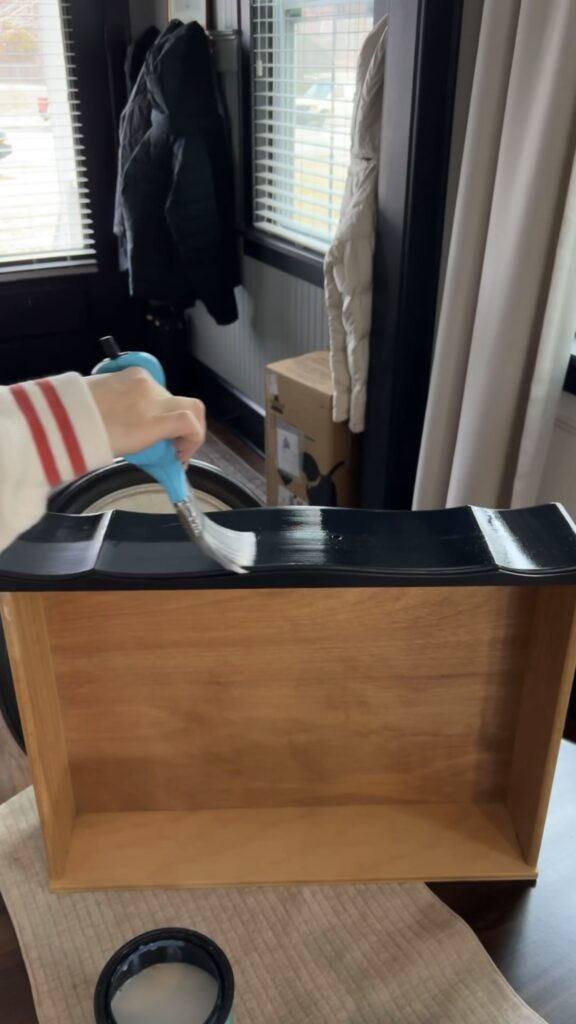
Step Seven: Paint
After your second coat of primer, make sure you do a light sand with 220 grit sandpaper and use a tack cloth to prep for paint!
I decided to use a paint sprayer for this black dresser makeover because of the details on the dresser.
What sheen should I paint a dresser?
You can really use any sheen you prefer, but I love a satin sheen. Especially for black furniture makeovers! It provides just the right amount of shine!
If you want even more shine, you can use a semi gloss or even go bold with a high gloss!
Is it necessary to sand in between coats of paint?
I highly recommend sanding between coats of paint with a fine grit sandpaper. This really helps you get that smooth, professional looking finish!
I’m always hesitant to put sandpaper on something newly painted. But don’t panic when you see scratches… they’ll go away with your next coat!
Sanding in between coats also allows you the opportunity to fix any drips or rough spots.
If you do get drips (I did), 180 grit sandpaper helped to fix them! After I sanded it, I sprayed a just little more shellac spray and let that dry an hour or so before the next coat.


How many coats of paint does furniture need?
You’ll need two or three coats! In most cases, two coats does the trick! It really depends on the color and type of paint you’re using.
Or, in my situation, I had to do a third coat on the base of the dresser because water leaked through my tent and dripped onto my 2nd coat of paint before it dried????
This was a total bummer because as you can see, the finish was looking so smooth. Not to mention an extra day of work to do a third coat.
I tried my best to sand that spot even before the third coat, but I guess I didn’t do a good enough job because it is still visible. You really have to look for it to notice, but it is there.
Do you need a paint sprayer to paint furniture?
No, you definitely don’t! If you don’t use a paint sprayer, I recommend using microfiber roller brushes and sanding between all coats of paint, primer, and poly for a smoother finish.
However, it is nice to have a paint sprayer if you DIY regularly. Especially with something like an ornate antique dresser, for example. It’s just much easier to get a clean, even finish on details
What is the best budget paint sprayer?
Homeright Finish Max Paint Sprayer is the best budget paint sprayer. It was my first sprayer I got (based on tons of recommendations!) and it worked awesome for me my first 2 years of DIYing.
I ended up selling it on Facebook Marketplace when I upgraded to this Graco TC Pro Cordless Airless Paint Sprayer. It’s been so nice to have the cordless option!
Step Eight: Top Coat
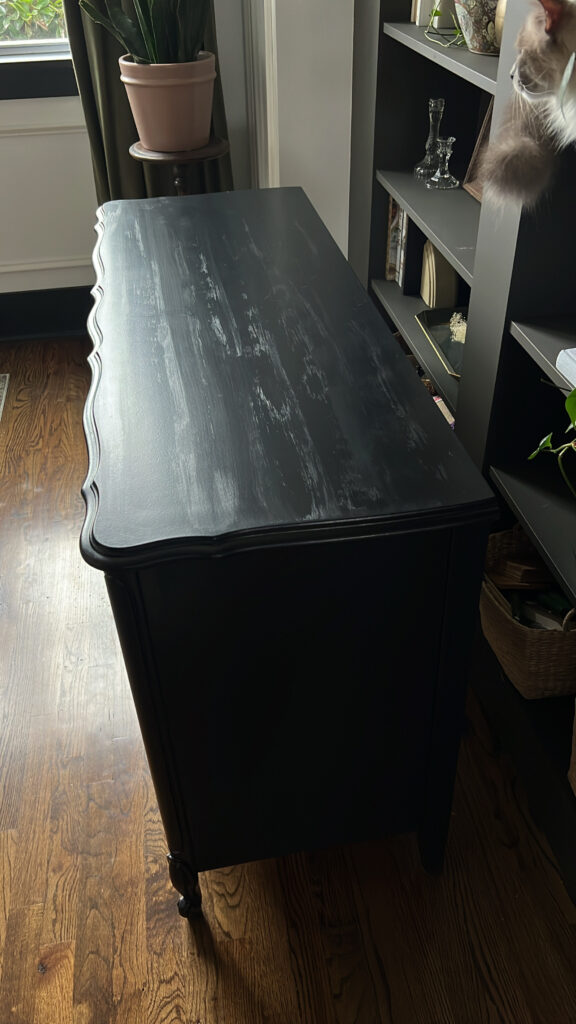
The top coat is the most stressful part for me! It’s scary because you’re so close to the finish line and there’s always a possibility you might have to backtrack.
My go-to top coat is this Minwax polycrylic in a satin sheen. One of the things I love about water-based poly is that it dries quick and doesn’t smell awful so I can use it inside!
Whatever you decide to use, just make sure you test it out in a small, inconspicuous area (definitely not the top of the dresser) because it will alter the finish.


I was happy with how the sample looked so I decided to go for it! To start, I just followed the instructions on the can and used this synthetic bristle brush to apply it!
I tried my best to do long, single strokes but I think I ended up overworking it because, as you can see below, it dried very streaky!! Yikes!
How do you get rid of brush strokes in polycrylic?
First, I used 0000 steel wool to buff out the streaks. Make sure you wear gloves when you use this! You can also try a high grit sandpaper.
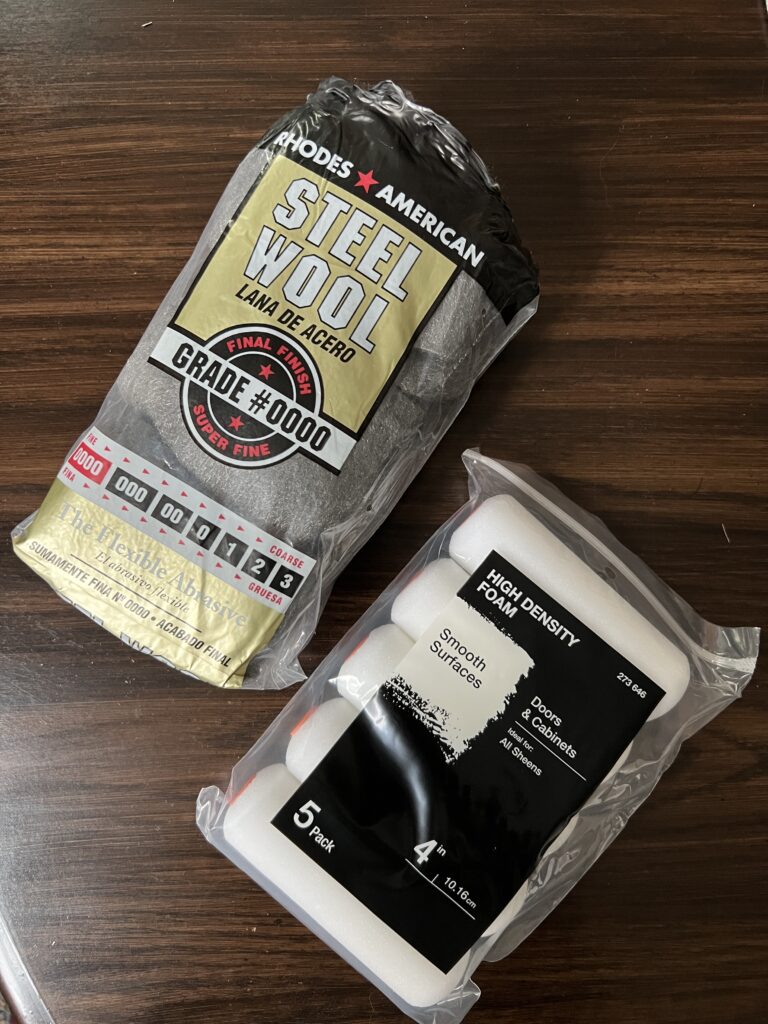
The steel wool produces a lot of dust so definitely use a tack cloth before applying the poly.
This time, I decided to try applying the poly with a foam roller. I’d tried this once in the past and got a lot of bubbles so I was hesitant, but a lot of people suggested it and shared some tips for application!
One of the tips was to mix a bit of my paint into poly to help with the “milkiness” unique to polycrylic. I would estimate I used about a teaspoon of paint!
Then I used the foam roller first and quickly went back over it with the foam brush. Try to have enough polycrylic on your brush so you can make it across the length of your piece without running out.
Polycrylic dries fast so you really want to move quick when using it. If you keep going back over it as it’s starting to dry, that’s when you’ll get the streaks!
Luckily this method of using a foam brush immediately after helped smooth everything out!


You guys! I’m not going to lie I wasn’t sure how this would work out but do you see that difference it made?!


What is the best way to apply polycrylic?
When I shared about the streaks on my Instagram, my amazing community came through with all the tips to help me out, so I wanted to share some of those here:
- Don’t shake the can (it creates bubbles) and be sure to stir well!
- If you’re using a bristle brush, it helps to start with a wet brush (you can use water or even mineral spirits and it helps glide it along)
- Sand in between coats with high grit sandpaper (300+) or even paper bags!
- Tint the polycrylic with a little of your paint color
- Try a brush specifically for polycrylic
- Use a good amount of polycrylic when applying because the more you have, the longer you have until it starts to dry!
- Apply in one direction and don’t overwork it
Can you apply polycrylic with a paint sprayer?
Yes, you can! I personally haven’t tried this yet, but I’ve heard it works awesome and gives the smoothest finish! Just be sure to check your paint sprayer’s manuel for instructions!
Do I need to put a clear coat over paint on a dresser?
In most cases, it’s best practice to use a top coat because it adds an extra layer of protection and makes it easier to clean.
Paints with enamel, like the one I used, are durable enough that you could probably get away with no top coat depending on what you’re painting and how often it’s being used!
Check the paint manufacturer’s recommendations because some even suggest not to use a top coat!

Step Nine: Refinish Hardware
This step only applies to you if you’re using the old hardware but want to give it a fresh look!
I wanted my handles to have an antique gold look to them so first I spray painted them black.
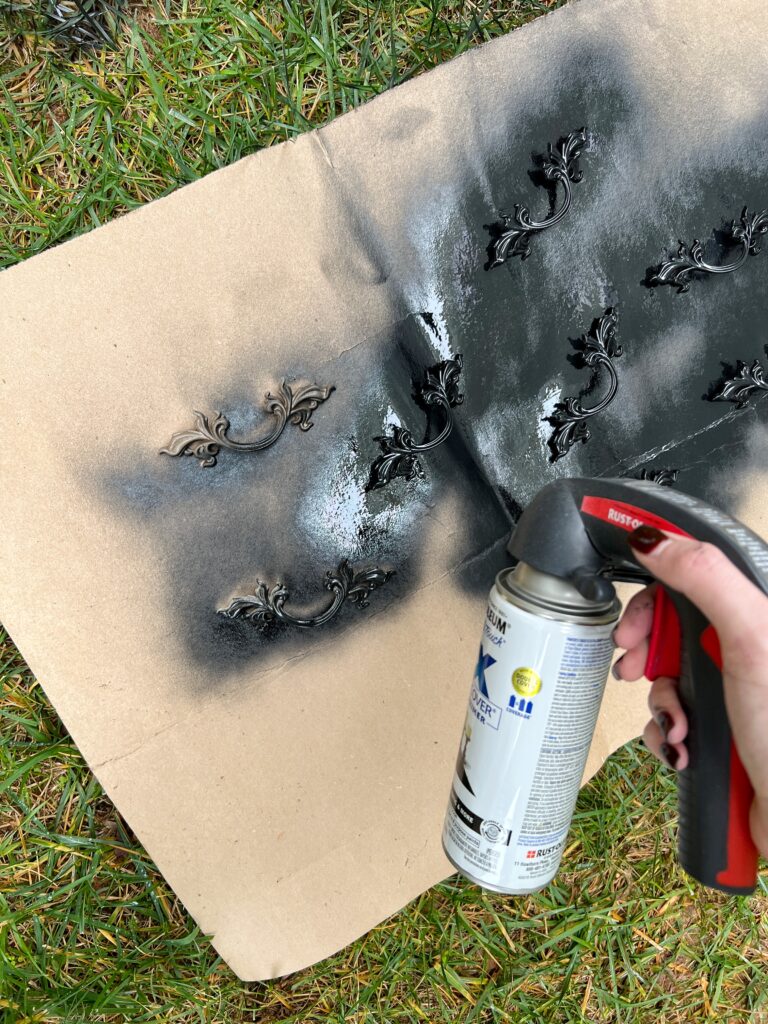
Once the paint is dry I used rub n’ buff to give them that aged gold look. I used an equal mix of gold leaf and antique gold and applied it with an old makeup brush.

Here’s a closer look! I just love rub n’ buff! You can see I didn’t apply it perfectly and let some of the black paint pop through as well ????
I’m so pleased with how this dresser came out… I will never get over the power of paint.

Let me know in the comments if you have any additional questions on this DIY black dresser makeover!
Also, if you prefer video tutorials, I shared most of this DIY black dresser makeover on my Instagram! Click here for the highlight! 🙂

Love this !
Thanks so much Isabel!!! I’m so happy with how it turned out!
Hi Elisha,
Beautiful job.! I’m doing the same thing with a dresser I have and I wanted ask you question, I have the same paint that you used and I want to spray it as well, but the can says “do no thin”, did you thin it anyway?
Hi Lisa! Thank you so much!! Oh perfect, I did not thin mine at all 🙂
Hey there,
I have the exact piece I am in the process of refinishing. However, I am missing 1 drawer pull and I am having difficulty locating one. Any help and/or suggestions are appreciated.
Hi Dana! Oh great question! I think you should be able to purchase one! I found one on Amazon that might work i’d just measure yours screw to screw and be sure! Here’s the link: https://amzn.to/3xO8T9B Good luck! 🙂