

Did you know an IKEA shoe cabinet happens to be the perfect size for storing wine bottles?! Well, now ya do!! We had this boring, unused space below our stairs and I knew I wanted some sort of console table or sideboard. But it seemed impossible to find something that was the perfect size. It was a pretty small space and I didn’t want anything with too much depth or it would disrupt the traffic flow. Thats when it hit me that the hemnes shoe cabinet is a perfect solution for a narrow space.
And remember, you don’t have to use it for shoe storage 😉 I love a good IKEA hack and can’t wait to share this one with you!
Disclaimer: This post contains affiliate links. This means, if you purchase something from a link I provided, I will receive a small commission. This is at no extra cost to you! Thank you so much for the support!
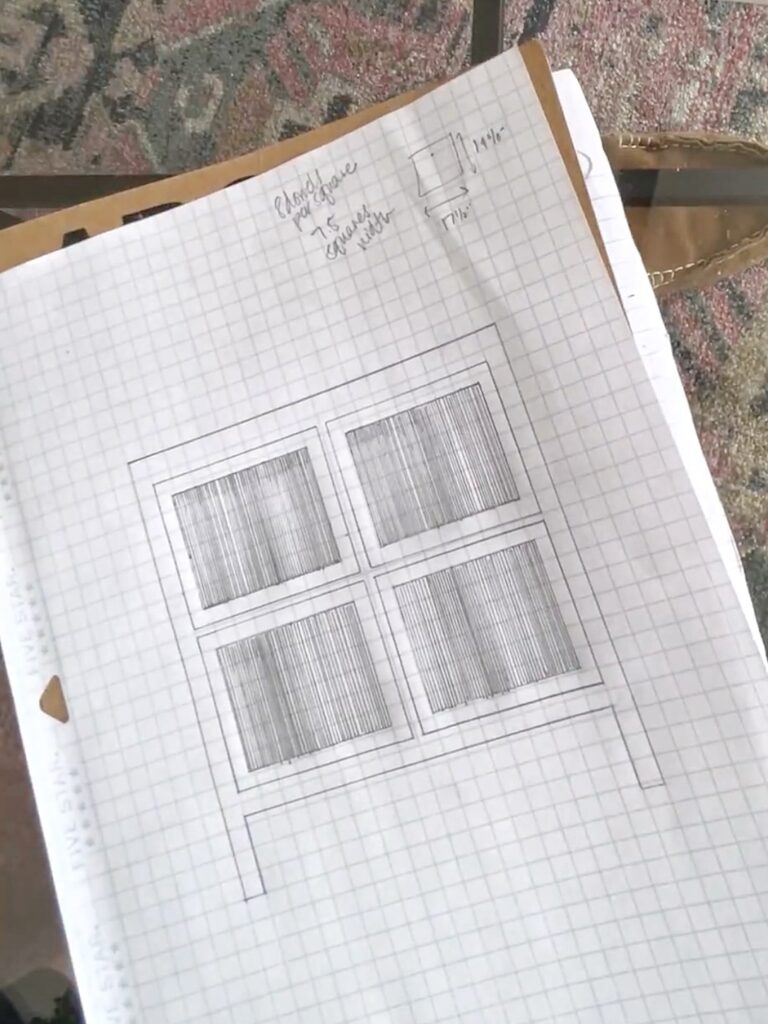
Step One: Planning Our IKEA Hemnes Shoe Cabinet Hack
My inspiration for this project came from my friend Annie at Champagne Chaos. She’s truly the Queen of IKEA hacks! Here’s the tutorial for her curvy shoe cabinet. It was easily one of the best IKEA shoe cabinet hacks i’d ever seen. I followed her instructions pretty closely, making a few changes here and there 🙂 The biggest difference is with the drawer fronts! She did a very pretty woven look, while I did fluted drawer fronts.
Materials:
- IKEA Shoe Cabinet
- Lattice Moulding
- 1/4″ Dowels
- 1x8x8
- 1x2x8
- 3/4″ quarter round
- 1x10x8
- Bendable plywood (see step 3 for details!)
- Primer
- Paint
- Polyurethane
- Knobs
This is the list of materials I used, but keep in mind that you can use whatever you want! It’s always fun to get creative and try to use at least some scrap wood if possible!
Fun fact: When I did this project in 2021, the IKEA shoe cabinet was only $99… now it’s $150 and called the IKEA Gullaberg shoe cabinet. Don’t forget you can always look on Facebook Marketplace to make this a more budget-friendly project.
Step Two: Framing and Fluting the Drawer Fronts
Making these fluted drawer fronts is definitely extra work, but it added so much to this otherwise very basic IKEA hemnes cabinet.
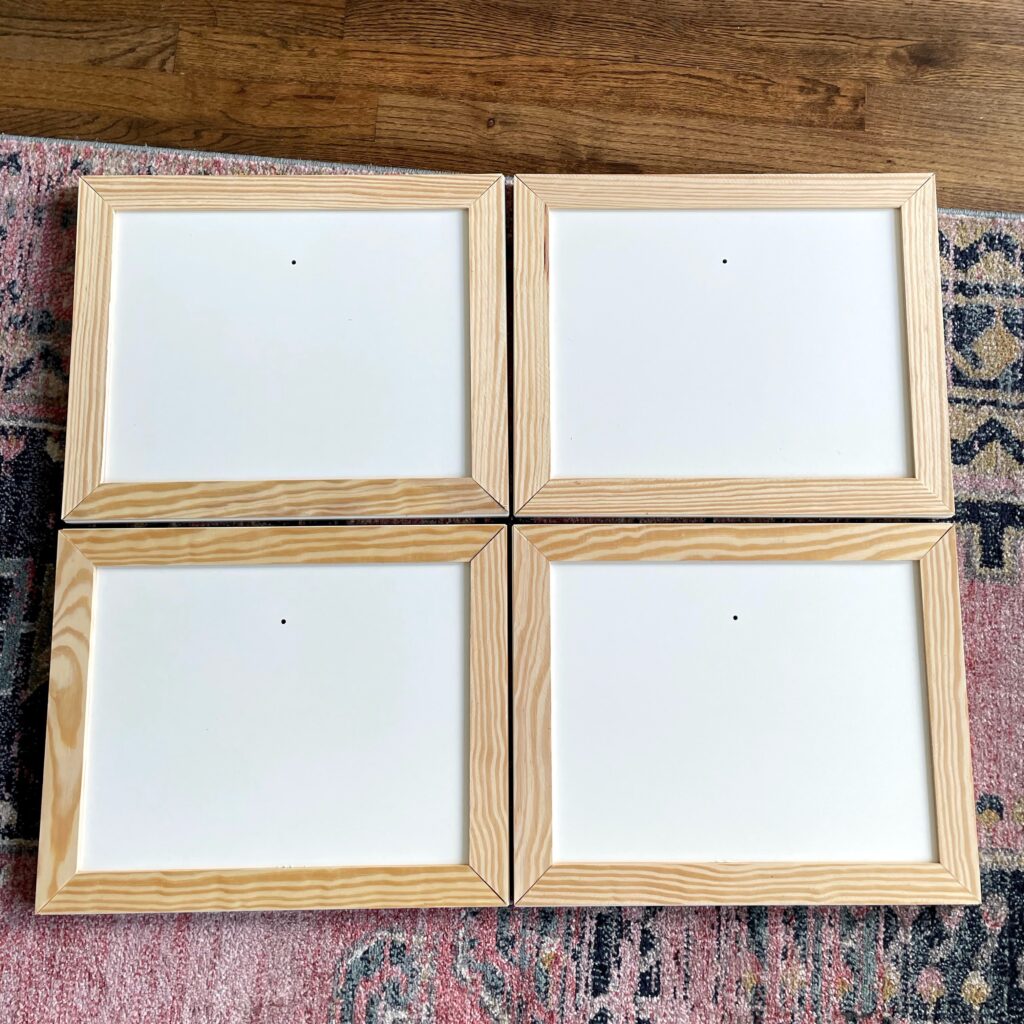
Framing the Drawer Fronts
The first thing I did was frame out each drawer using some leftover lattice moulding I had leftover from my DIY Grid Accent Wall. This is the exact trim I used, but it’s currently out of stock. Here’s a few other options:
- This one is the most similar! (Just a tiny bit wider at 2 1/2″)
- This option and this option are smaller in width (Only 1 1/2″, but the same 1/4″ depth)
- With these options, the 12″ dowels might not be long enough, in which case you’d to get 14″ dowels
You can honestly use whatever trim you want, but the reason I really liked the lattice trim is because it was the same 1/4″ depth as the wooden dowels, so the finished look was nice and flush.
All I did was cut the trim pieces at 45 degree angles and attached them with wood glue. Very simple! After that, I used wood filler in the mitered corners and caulk along all the edges where the trim met the drawer front.
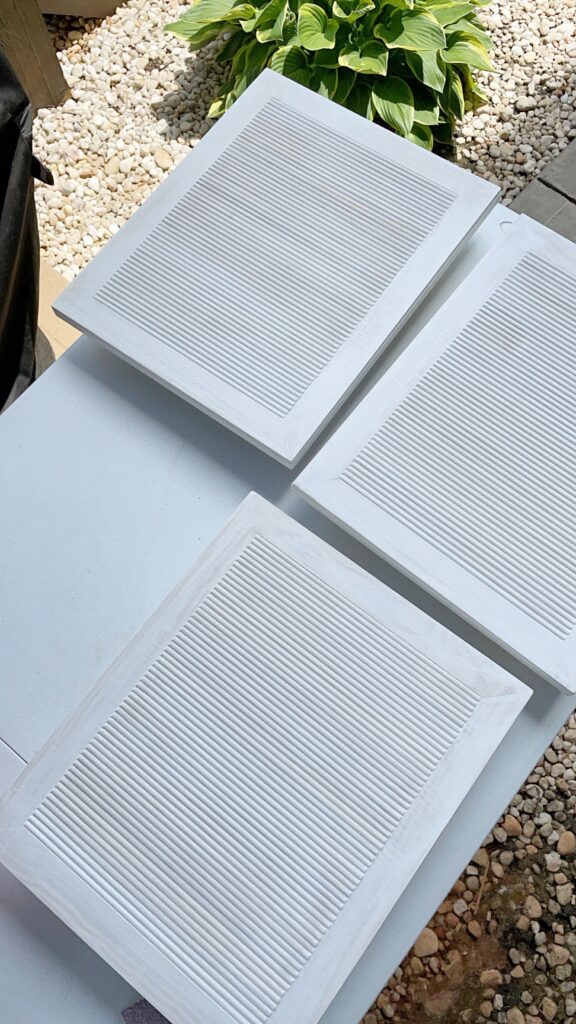
Fluting the Drawer Fronts
If you’ve been around for a while, you know I love a fluted detail! I’ve done everything from a fluted accent wall, to a DIY fluted coffee table, and even a fluted bathroom vanity!! Naturally, I had to keep up the momentum with this IKEA shoe cabinet 😉
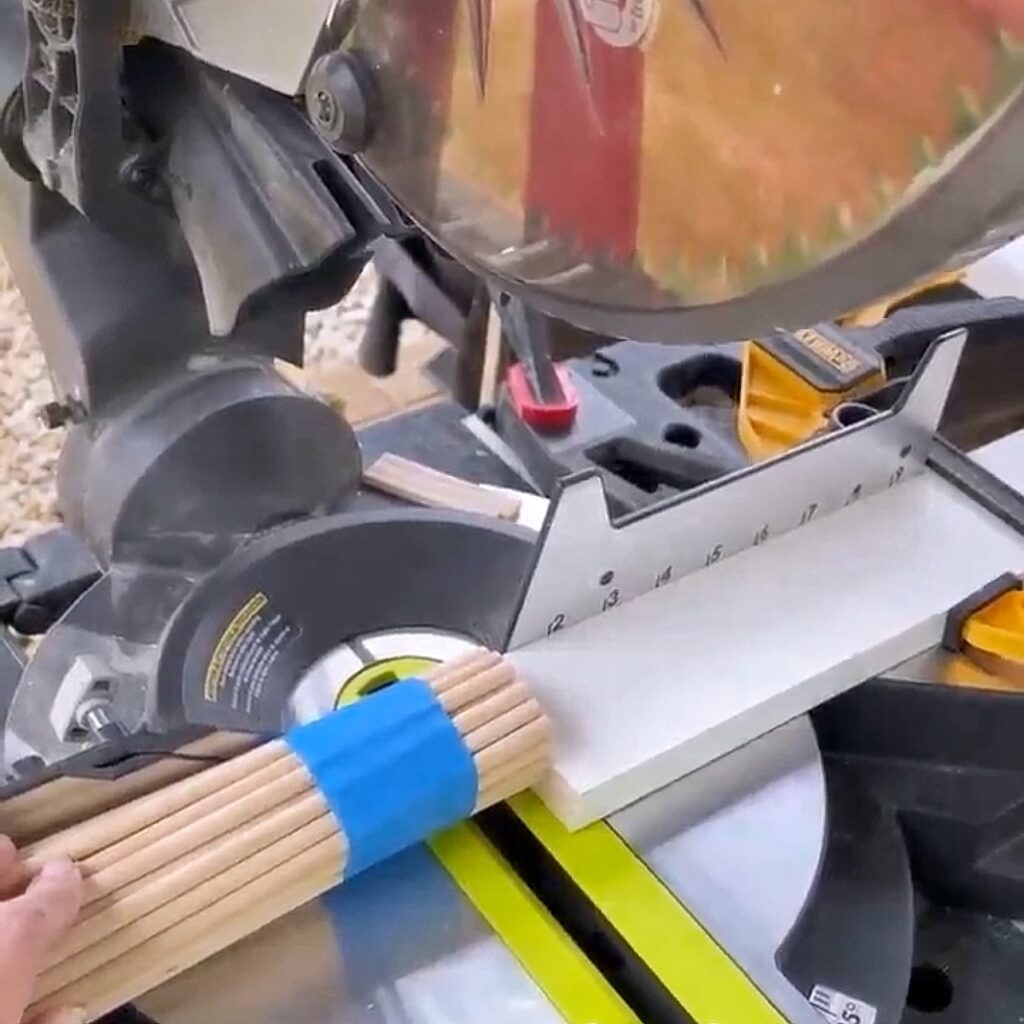
To get the fluted look, I used these wooden dowels! They’ve gone up in price quite a bit since I did this project in 2021, so feel free to shop around and find the best deal! They have different lengths and depths, but I went with the 12″ length and 1/4″ depth.
Rather than cutting these dowels one by one, I bundled a bunch at time, wrapped them in painter’s tape and cut them on the miter saw. It’s helpful to have a fine tooth blade on your miter saw if you want a clean cut. I ended up replacing mine during this project and it made a huge difference. The blade your miter saw comes with isn’t usually great quality. This is the blade I got to replace it.
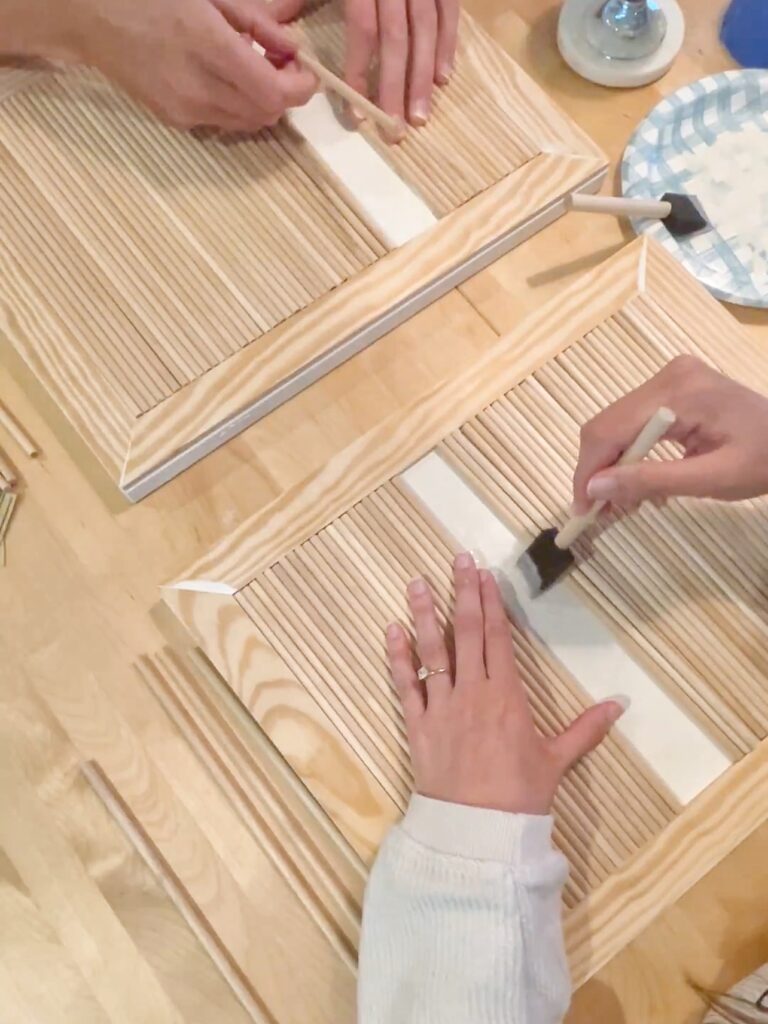
To attach the dowels, I just used wood glue! Working in small sections at a time, I spread the wood glue with a foam brush, attached the dowels and pressed down firmly for a bit. This part did take a little more time than I anticipated, but it was pretty relaxing. I made some margaritas and turned it into a date night activity with my husband… lucky guy 😉
The last step for this part is to caulk the top and bottom of the dowels. It’s a little messy and annoying because the caulk gets into the ridges, but having a damp rag nearby helps and these little details always result in the most professional looking finish.
Step Three: Extending the Legs
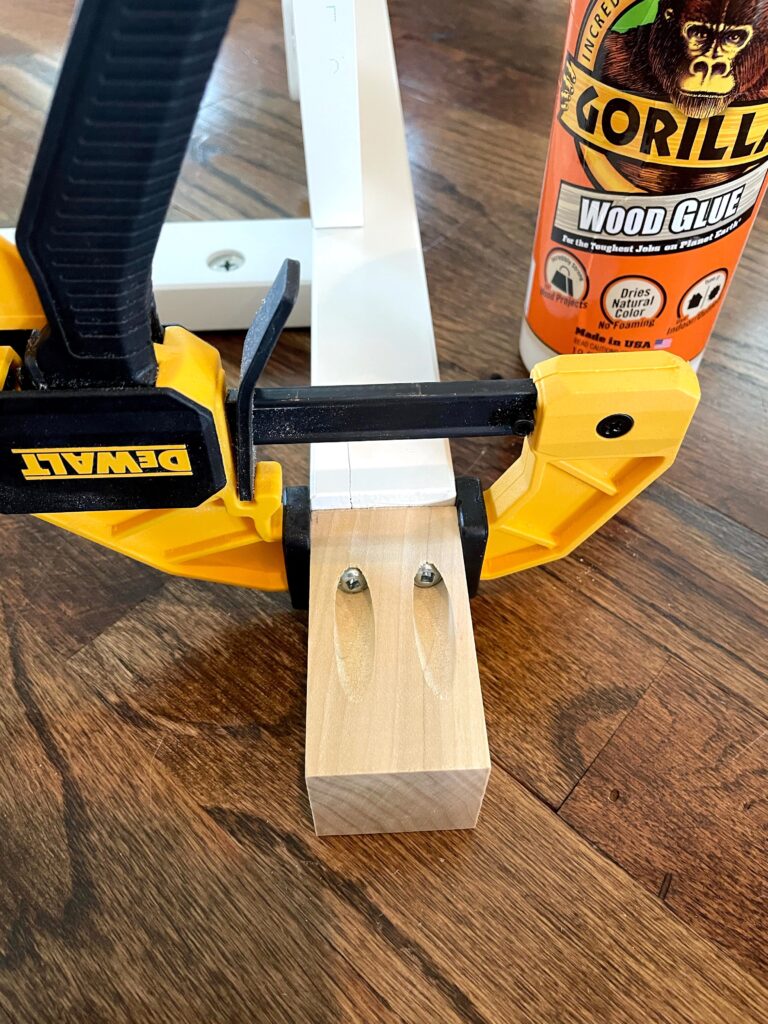
This step may not be necessary for you! With our baseboards being 7 1/4″ high and the legs only 5 1/8″, we had to either cut into our baseboard or extend the legs. We decided to extend the legs.
To do this, we cut down a 2×2 piece of wood and attached it to the existing leg using pocket holes. This piece of wood wasn’t the exact size we needed so it wasn’t flush. If I could go back, i’d definitely add a piece of 1/4″ scrap wood to account for that space!
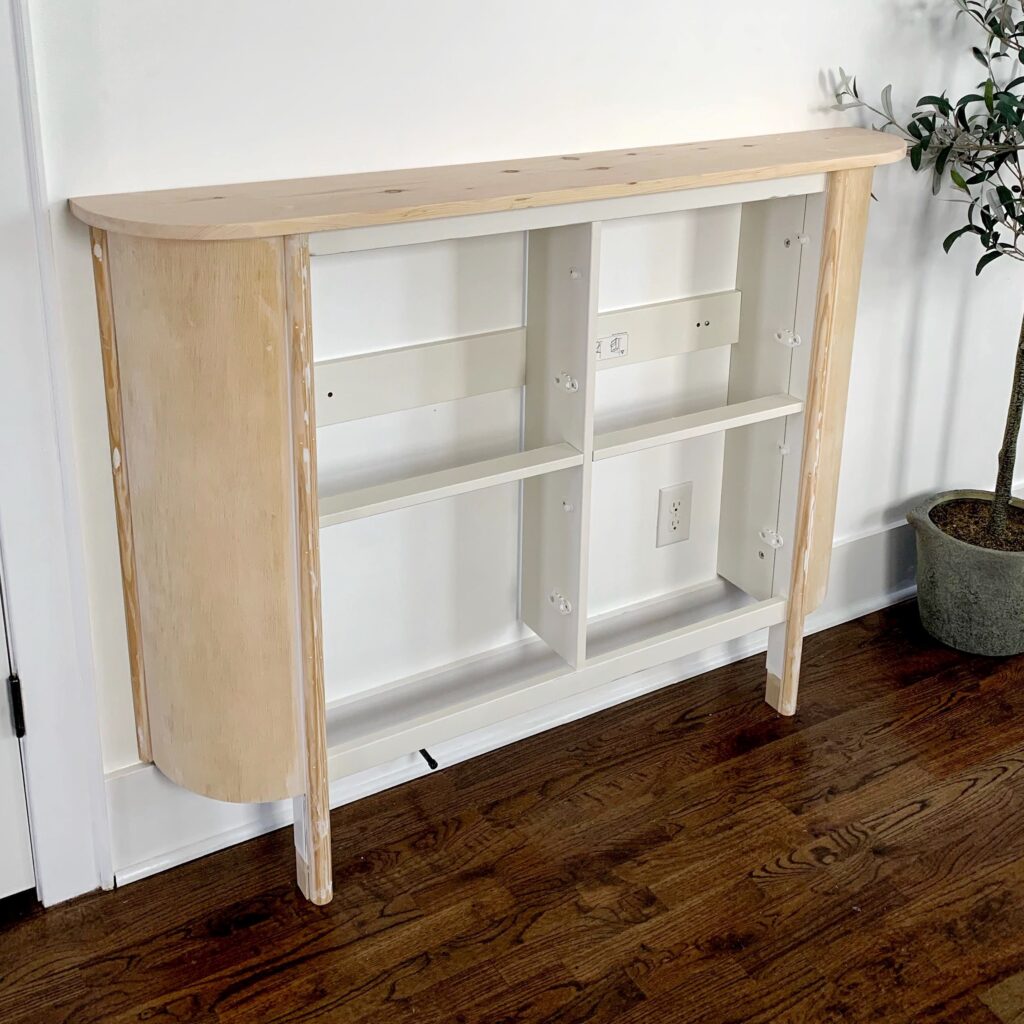
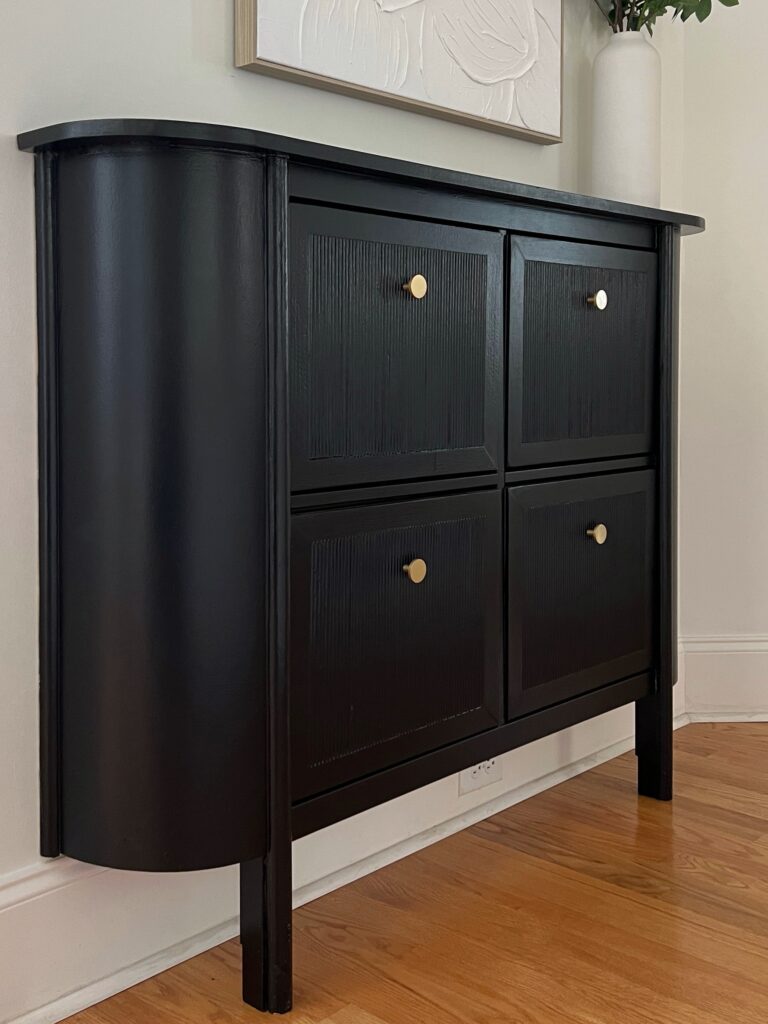
Step Four: Making the Curves Sides and Top
Adding curved sides is such a creative way to add personality to this plain storage piece! I truly cannot take any credit since I got this idea, and the tutorial for the curves, from Annie! So if any part of this step is confusing to you, check out her tutorial! When I did this project I didn’t have a blog yet so there’s not as many photos as I’d normally prefer. It might also be a good idea to watch my Instagram highlight too!!
Attaching the “wings”
In order to add curves to this hemnes unit, you have to extend the sides by adding some “wings”.
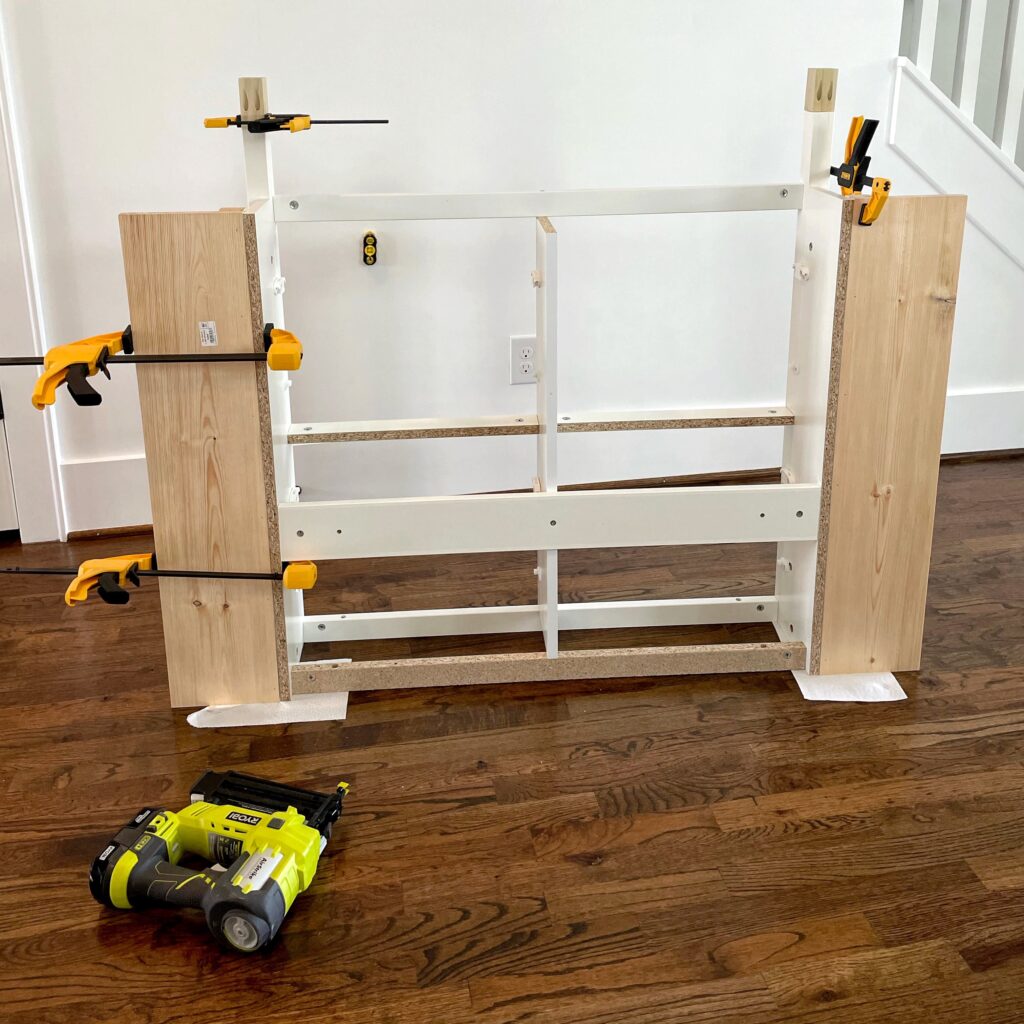
First I cut two 1×2 pieces and two 1×8 pieces the same length as the side of the cabinet. With the shoe cabinet laying flat on the ground, I laid the 1x8s down first (without attaching), followed by the 1x2s. I attached the 1x2s using wood glue and 2″ brad nails and let them sit overnight with clamps.
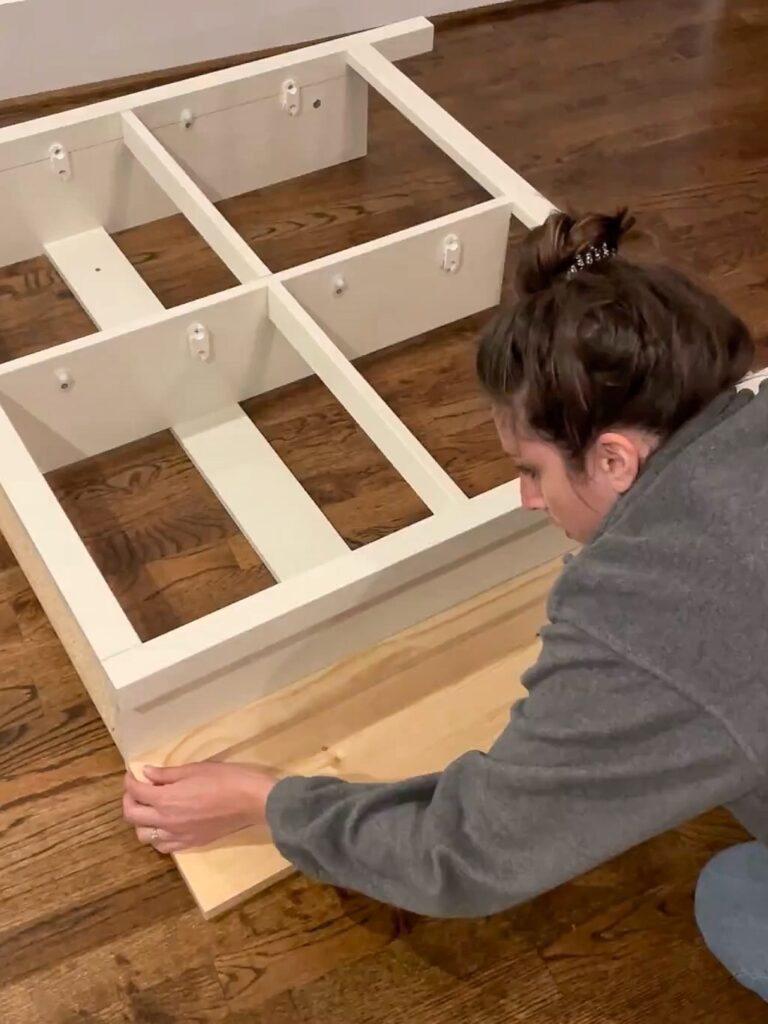
Once those 1x2s are secure then you’ll have something to attach the 1×8 boards to! Again, I used a combination of wood good and brad nails, nailing directly into the 1x2s. I clamped everything in place and let it sit for a while.
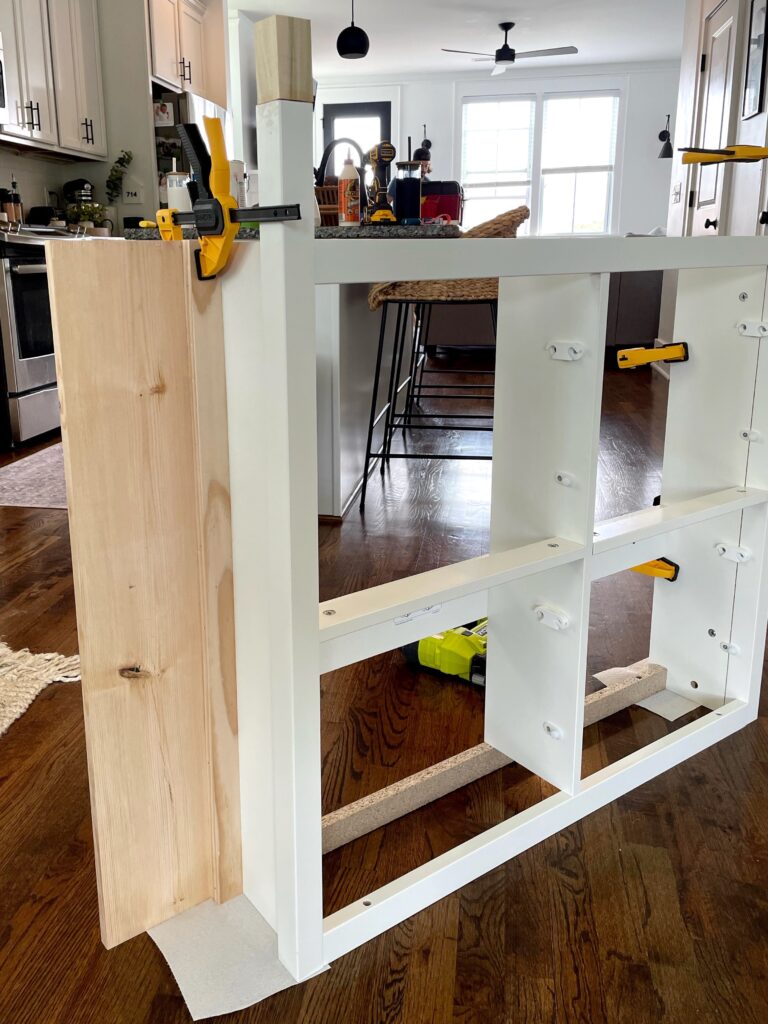
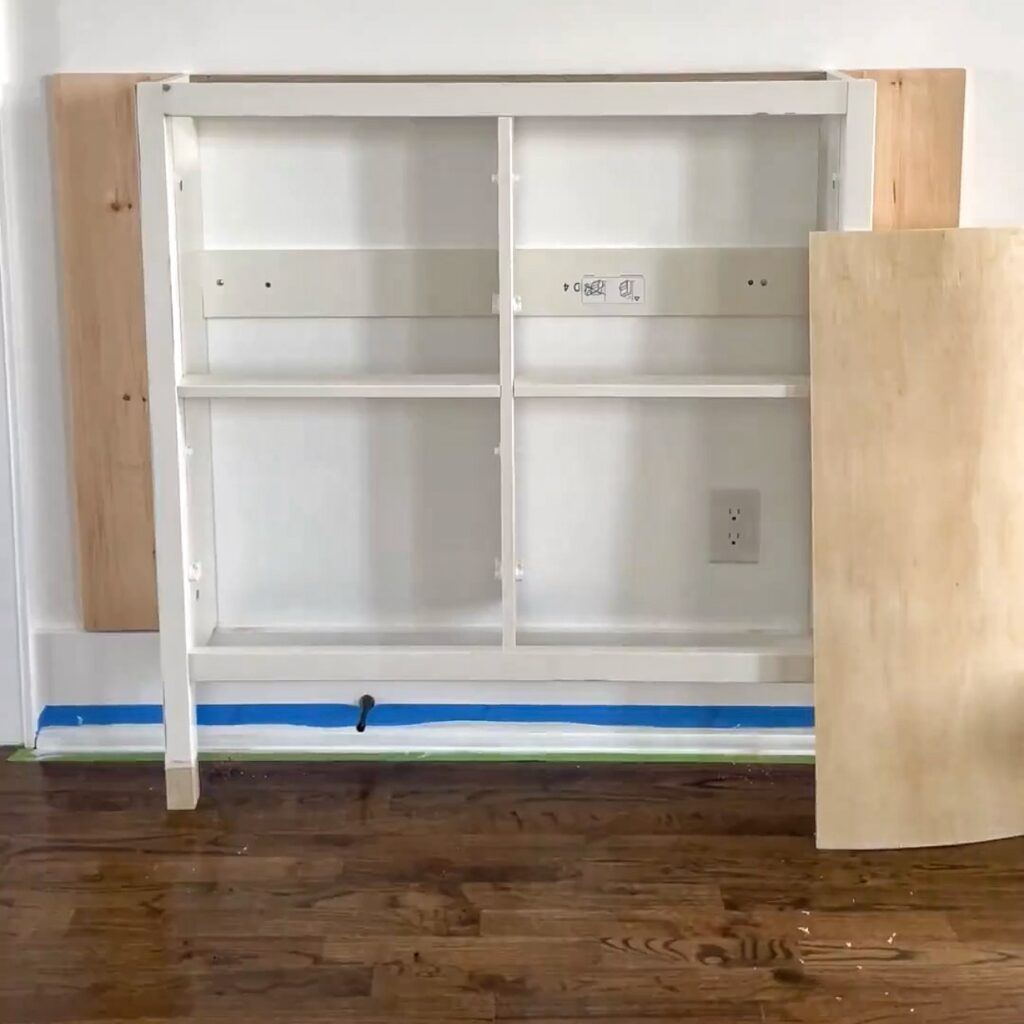
When everything was secure, we attached the shoe cabinet to the wall by screwing the back support pieces (which are already a part of the shoe cabinet) into the studs.
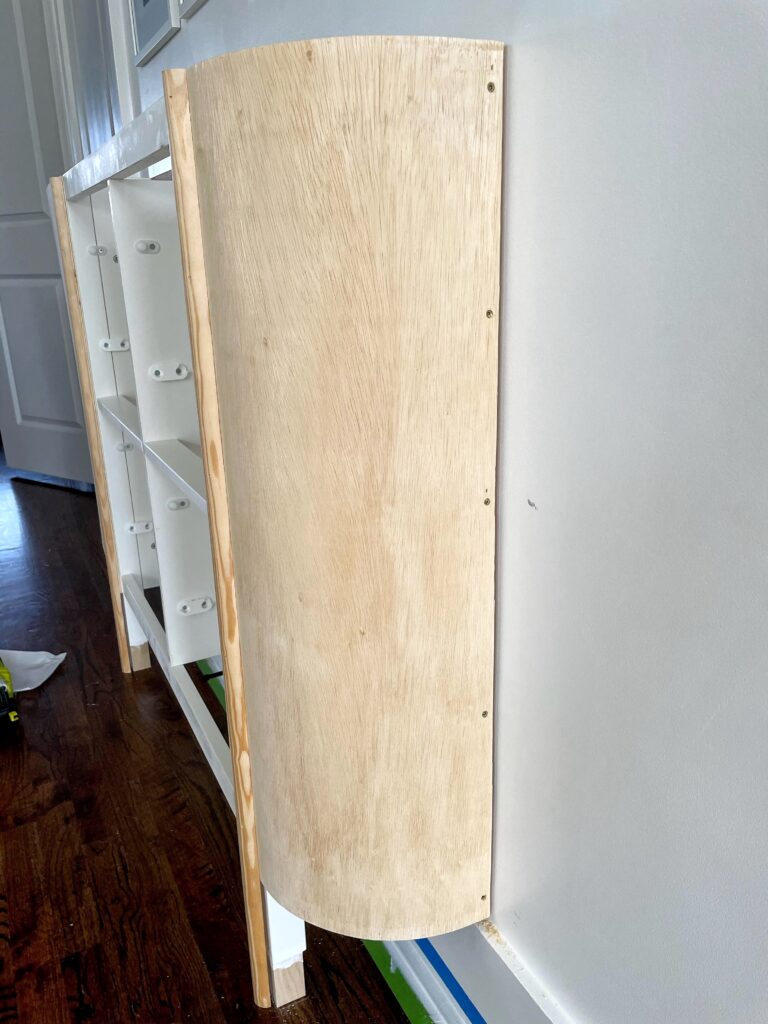
Creating the Curves
For the curves, I used this bendable plywood. As you can see, it’s since been discontinued 🙁 But I have a few other options/ideas for you:
- This website offers custom size bendable birch plywood!
- I’m not positive on this, but I have a feeling hardboard would be flexible enough to get this look!
- Bendy MDF. I’ve never used this but I’m sure it’d work perfectly!
- Bend your own plywood! Here’s a tutorial!
Just for reference, especially if you order a custom size, you’ll need a panel that’s a little less than 36″ in length and about 13″ in width for each side. I’d order 15″ x 36″ to be safe and then cut it down to the exact size.
To attach the curved wood, I first glued and nailed it down the front of the cabinet. I also added more trim to the front, over top of the plywood, also using wood glue and nails. This detail added more curves to the look and provided extra security for the plywood. I used two pieces of 3/4″ quarter round, but you can make it easier by using 1.5″ half round trim.
If you decide to use the quarter round trim pieces like I did, you’ll want to use wood filler in the seam and sand it smooth! You’ll also notice in the photo below that there’s a gap between the trim and the original leg… a 1/4″ piece of trim or plywood will fit perfectly in that gap 🙂
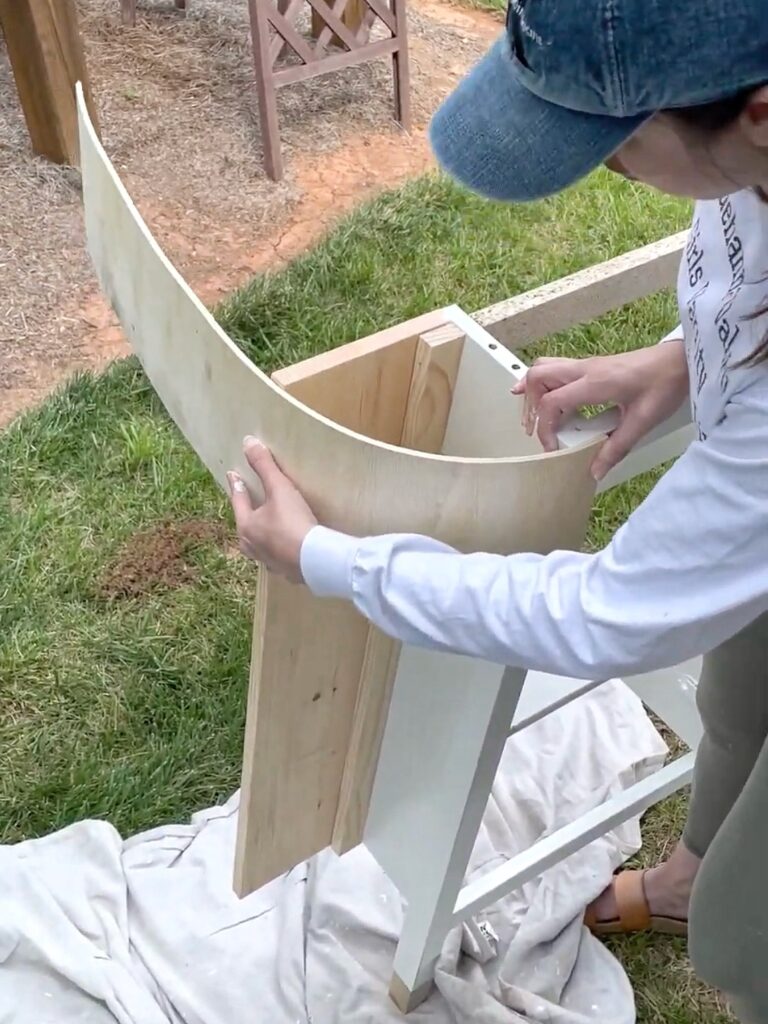
Now you need to carefully bend your panel to the back and attach it to the wing edge with wood glue and screws. (We tried brad nails but that didn’t provide a strong enough hold!)
Lastly, to give this a more faux built-in look, and to cover the screws, I added a piece of 3/4″ quarter round to the sides and caulked all the edges.
Cutting the top piece
For the top of this cabinet I used a 1×10 board. To get the curve, I actually used this contour gauge to try to mimic the curve from the sides. But you could totally just trace a bowl or something circular to get the look you’re going for. Once you have that, just use a jigsaw to cut it!
After that, I sanded the board down smooth and attached it to the cabinet using wood glue and nails. I caulked around the curves too! For some reason I didn’t caulk where the board met the wall, but I remember regretting that!!
Step Five: Paint and Hardware
The secret to great IKEA hacks is all in how you paint! I actually have an entire blog post dedicated to it: Painting IKEA Furniture: Everything You Need to Know. Feel free to check that out for a more in depth tutorial! I learned a great deal from doing our arched billy bookcases IKEA hack.
Prep for Painting
A light sand on both the solid wood and the laminate is always helpful before starting the painting process. You could even just use a 220 grit sanding sponge for this! After sanding, use a tack cloth or damp rag to clean off any of the dust.
This is the most popular primer for IKEA furniture. A strong primer that works for shiny surfaces is crucial for a long-lasting finish! This is another (perhaps even better!) alternative that I haven’t personally used, but I plan to for my next IKEA hack! I heard it works amazing and it doesn’t have the terrible odor that the shellac primer has.
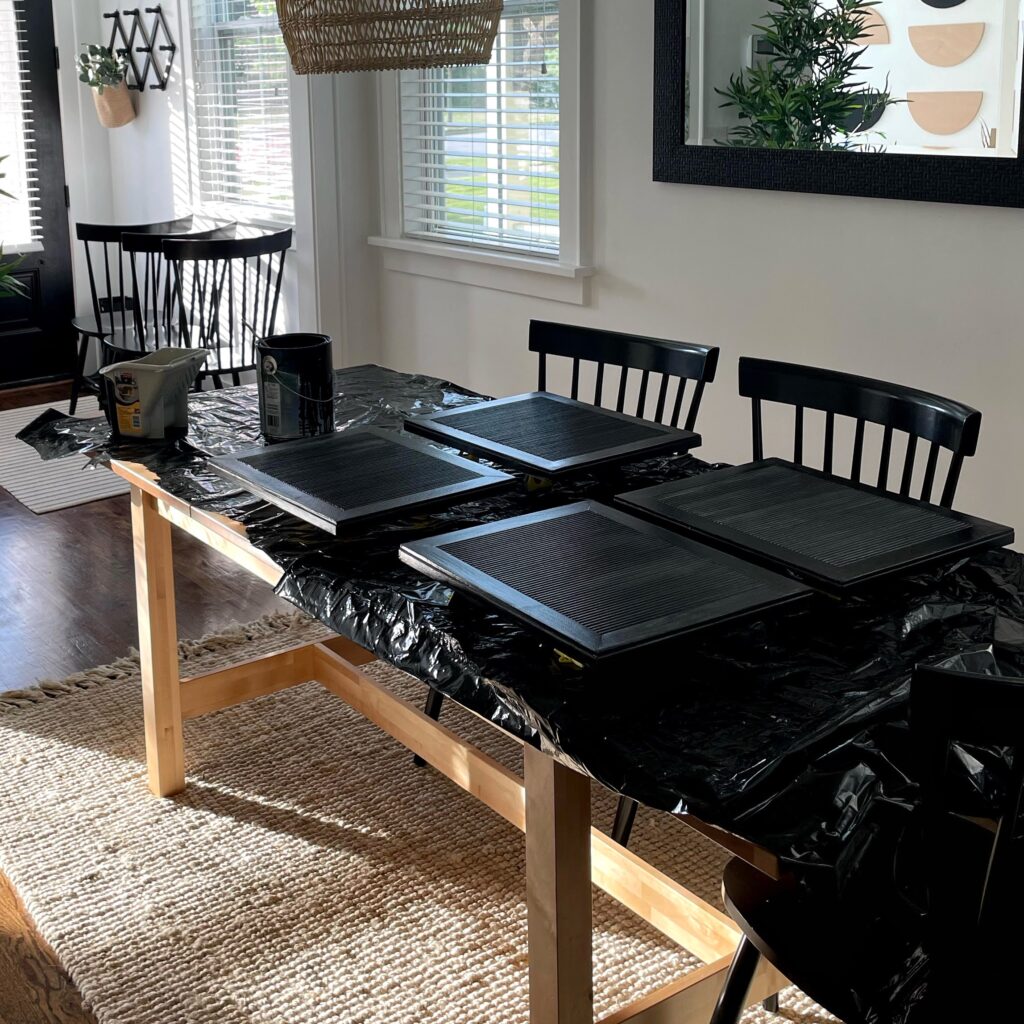
Paint
We had a bunch of leftover black paint (the color is Tricorn Black) from our bathroom vanity makeover. The paint I used was Sherwin Williams urethane trim enamel, which is incredibly durable. I’ll warn you, it’s expensive, but I always wait until they have their 40% off sales to buy it! It’s truly such a great product! But if you prepped properly and used one of the primers I recommended, you can definitely get away with using a regular latex paint.
I applied the paint with a microfiber roller brush and did two coats total. In between coats I sanded with a 220 grit sanding sponge. This will give you a super smooth finish!
Polyurethane
With the type of paint I used, you really don’t need a top coat. But I decided to use one anyway because a little extra protection never hurts and I wanted more of a matte finish. (The paint I used was a satin finish) This is the exact polyurethane I used! If you decide to use polyurethane, test it out in a hidden area first to make sure you’re okay with how it looks. It can alter the look of your paint color!
To apply the polyurethane, I first used a bristle brush and then quickly went over it with a damp roller brush to smooth it out! I only did one coat since I didn’t even need it to begin with. If you used regular latex paint, I’d recommend at least two coats but maybe even three or four if it’s a high traffic area.
Hardware
The final touch was adding some cute new knobs to the drawers! Luckily we didn’t have to make new holes, we just used the existing ones and drilled through the dowels. However, if I were to do this again, i’d drill the holes for the knobs before painting because I ended up having to do some touchups.
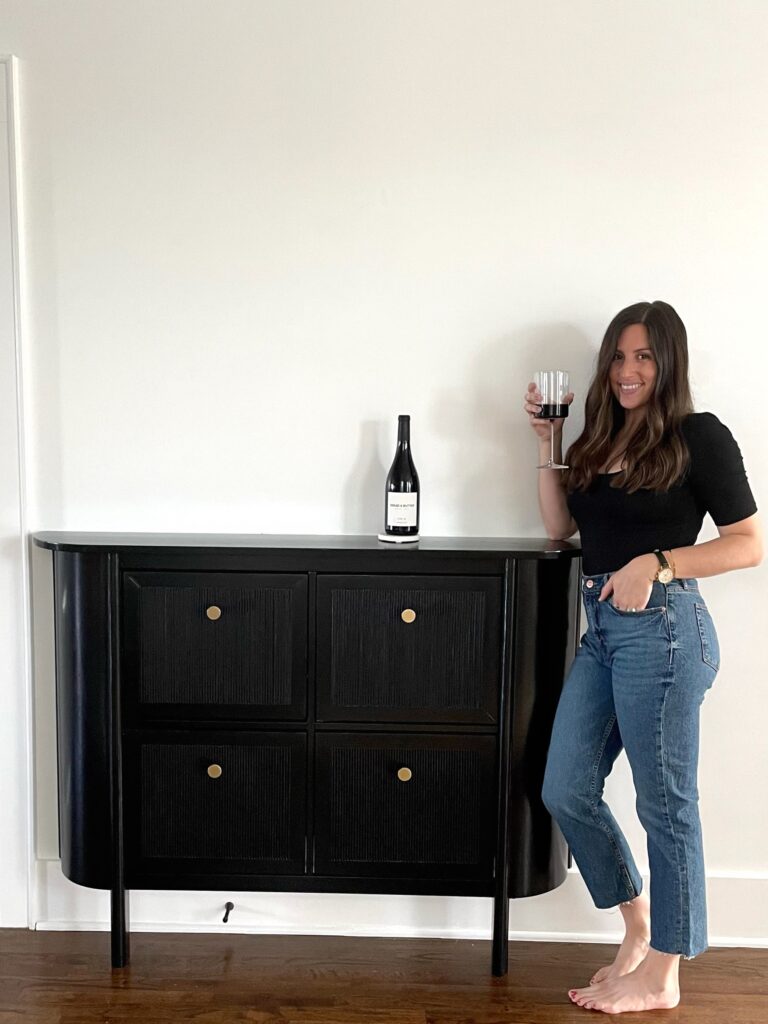
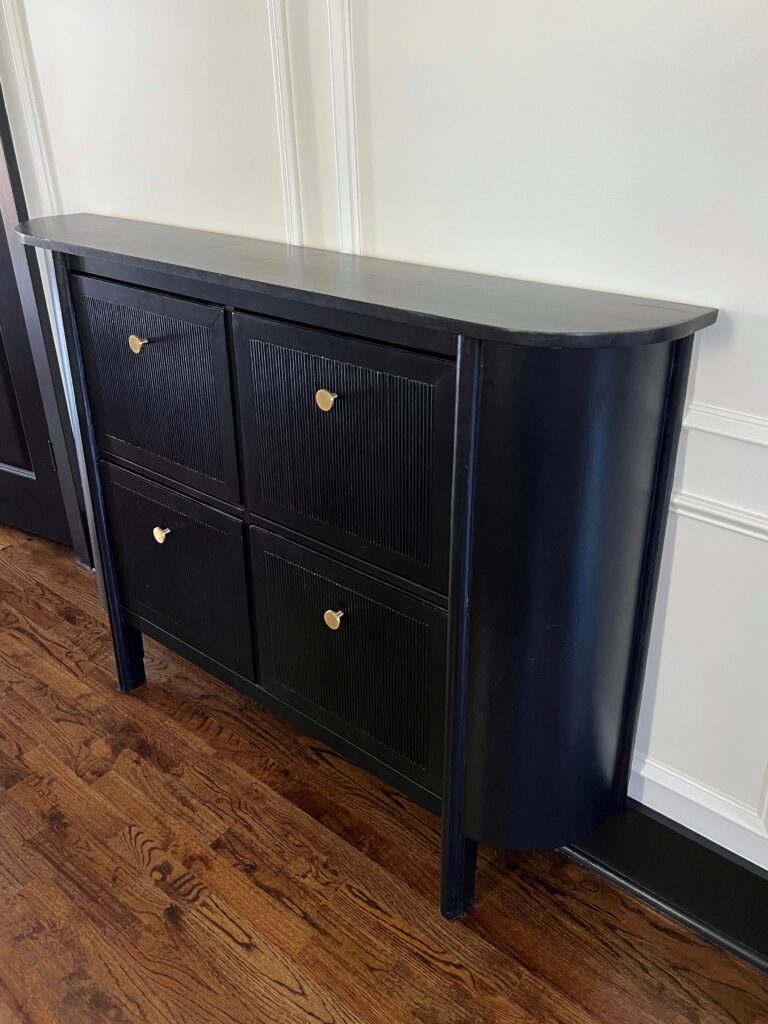
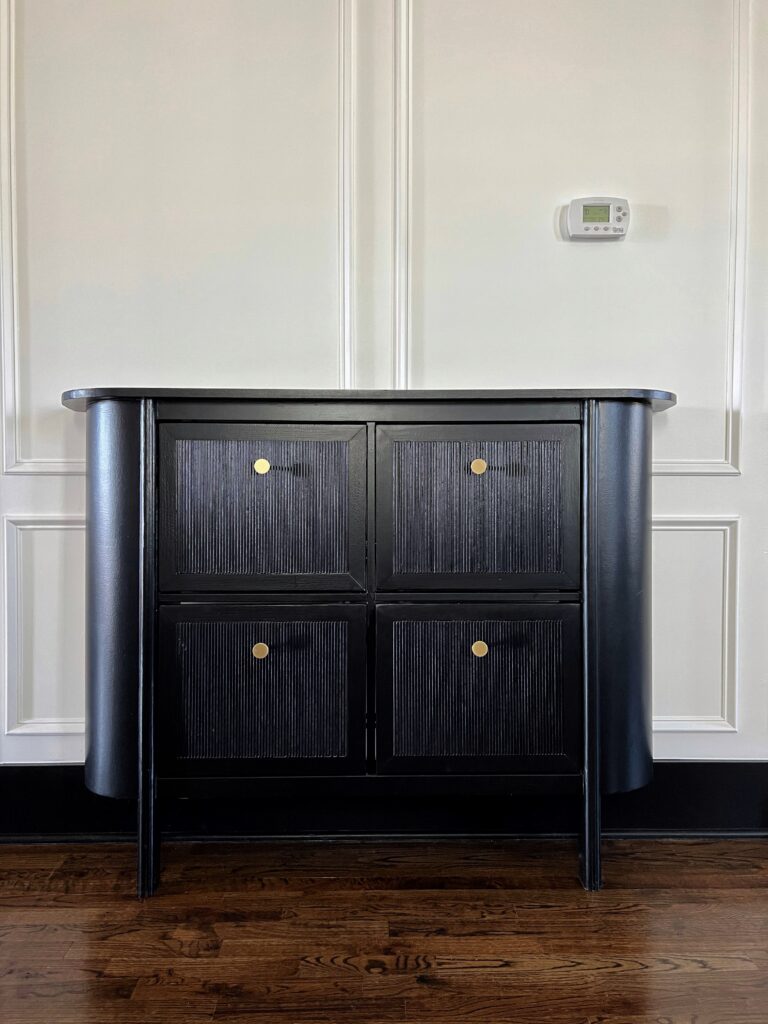
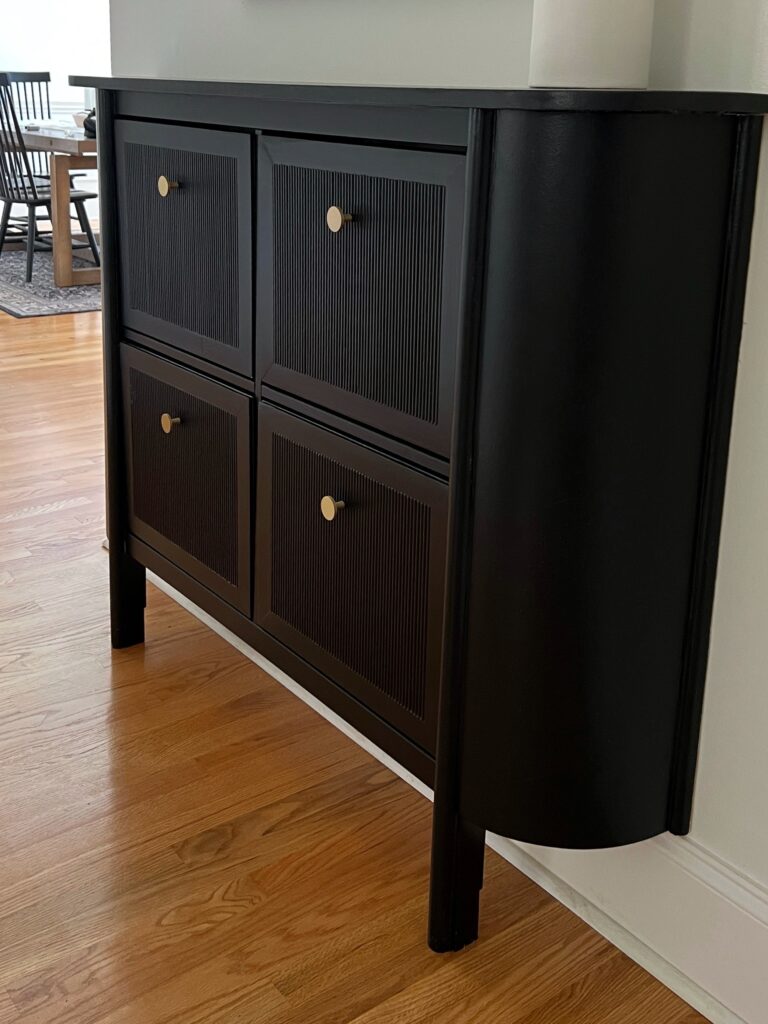
IKEA Hemnes Shoe Cabinet Makeover *After*
We absolutely loved how this shoe cabinet hack turned out! Not only did it provide us extra storage, but it became the focal point of our dining area!
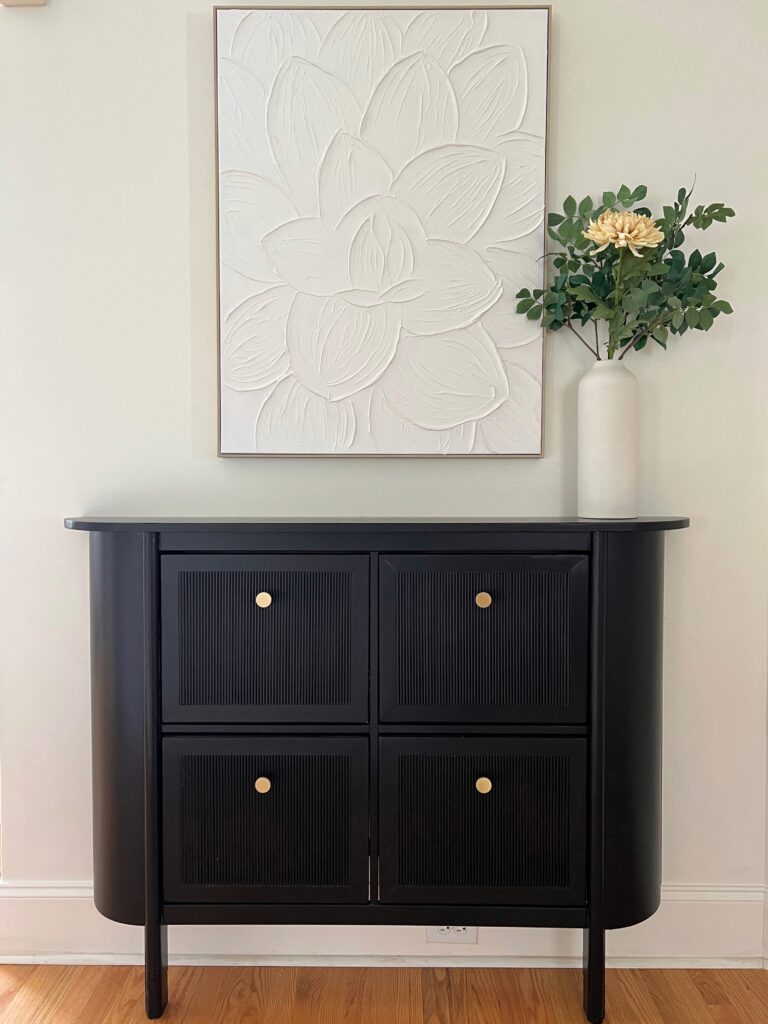
Unfortunately we did this project so long ago I only have minimal photos to share 🙁 But I played around with the styling a lot, using a round mirror above it at one point and placing garland on it for Christmas. At one point we even temporarily moved it upstairs for hallway storage while we installed box moulding!
Just in case you’re planning to use yours for storing wine too, the plastic shoe holders store five bottles each! Not too shabby!!

A year ago we made the big move from the Carolinas to Pennsylvania and ended up selling this piece to one of our friends! They didn’t have much storage in their entryway area and happened to have the perfect place to put it!! It looks SO good in their home 🙂
Oh, and get this… our new home just happened to have an IKEA shoe cabinet when we moved in!!! We removed it when we refinished our hardwood floors, but we plan to put it back! So of course i’m already scheming up plans for another hemnes shoe cabinet hack! This one will be a lot different since my style has changed over the years, but i’m so excited! Stay tuned 🙂
Thank you so much for being here and please let me know if you have any questions!
Elisha
