

Anytime I walk into a room with a coffered ceiling, I feel this sense of grandeur and luxury. It’s been a dream of mine to incorporate this classic architectural style into my own home.
Now, did I ever think I would be able to build a DIY coffered ceiling? Um, heck no!! If you told me that 4 years ago I would have said you’re crazy!!!
But after a few years of DIY, a lot of box molding, and challenging trimwork projects like this recessed wainscoting panel wall… I decided it was time to make this dream a reality!
If you can use a drill and make a 45-degree angle cut on a miter saw, you can build a DIY coffered ceiling. Trust me! This step-by-step tutorial will give you all the resources you need to feel comfortable tackling this ceiling project!
Disclaimer: This post contains affiliate links. This means, if you purchase something from a link I provided, I will receive a small commission. This is at no extra cost to you! Thank you so much for the support!
tools:
- Stud Finder
- Measuring Tape
- Laser Measurer
- Chalk Line
- Miter Saw
- Drill or Impact Driver
- Brad Nailer
- Multi-tool
- Optional: Table Saw
- Caulking Tool
- Sander
materials:
- 2×6 Boards
- 3/4″ Plywood (or 1×6 boards)
- Baseboards
- Crown Moulding
- Chair Rail
- 3″ Construction Screws
- 2.5″ Construction Screws
- Caulk
- Wood Filler
- Shims
- Sandpaper
How do you plan a coffered ceiling?
A diy coffered ceiling (sometimes referred to as waffle ceilings!) is a big project so you definitely need a plan! For me, that always starts with finding inspiration.
Coffered Ceiling Inspiration
There’s so many ways to customize your coffered ceiling when it comes to the pattern, details, size, paint colors, etc. You could go with a simple coffered ceiling or something more intricate. If you haven’t already, your first step is to make a Pinterest board and save any coffered ceiling treatment that catches your eye!
Coffered ceilings are perfect for a living room, dining room, bedrooms, or even a home office. Search for inspo specific to the room you’re planning to put it in!
Find coffered ceiling tutorials
You’re probably thinking… wait isn’t this a coffered ceiling tutorial?! Why yes it is! And I definitely hope you use mine 😉
But it’s always a good idea to look at a few different tutorials to explore the many variations of this ceiling design. Find the type of ceiling that works best for you, your budget, and the look you’re going for!
I used a combination of these tutorials to come up a plan for my DIY coffered ceiling:
Coffered ceiling design
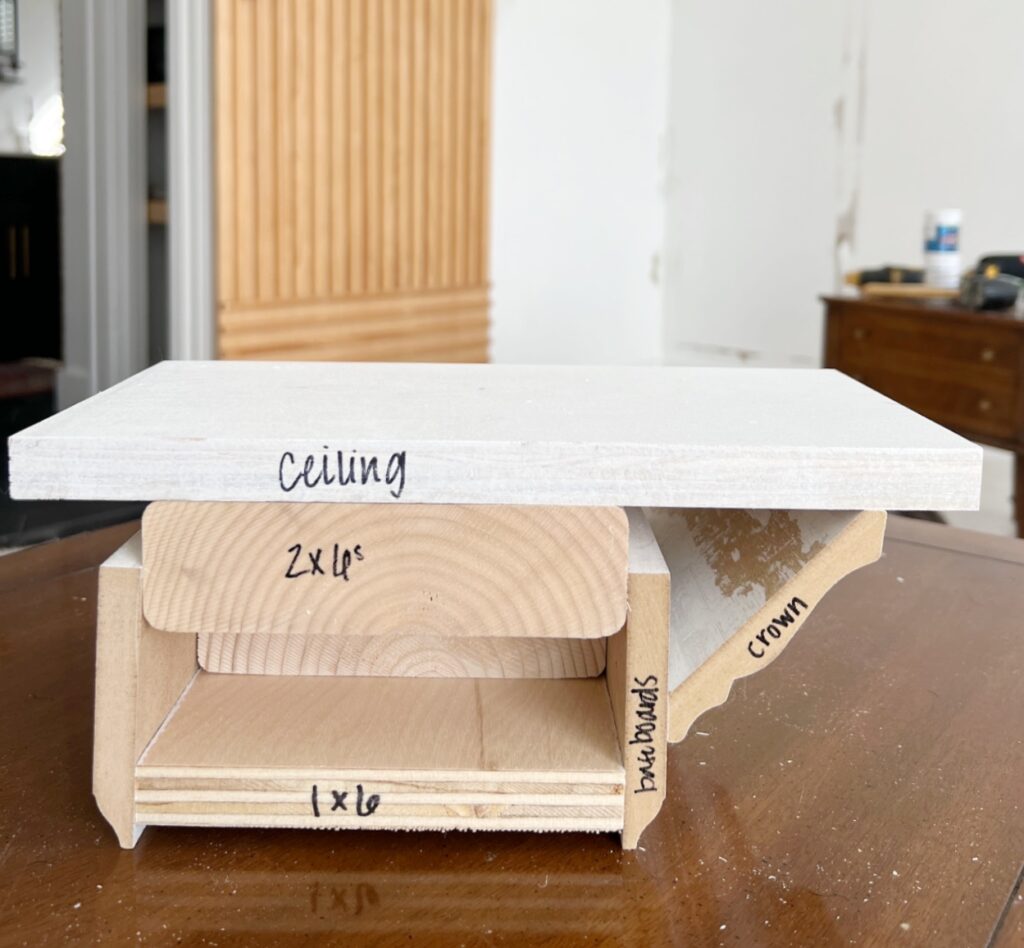
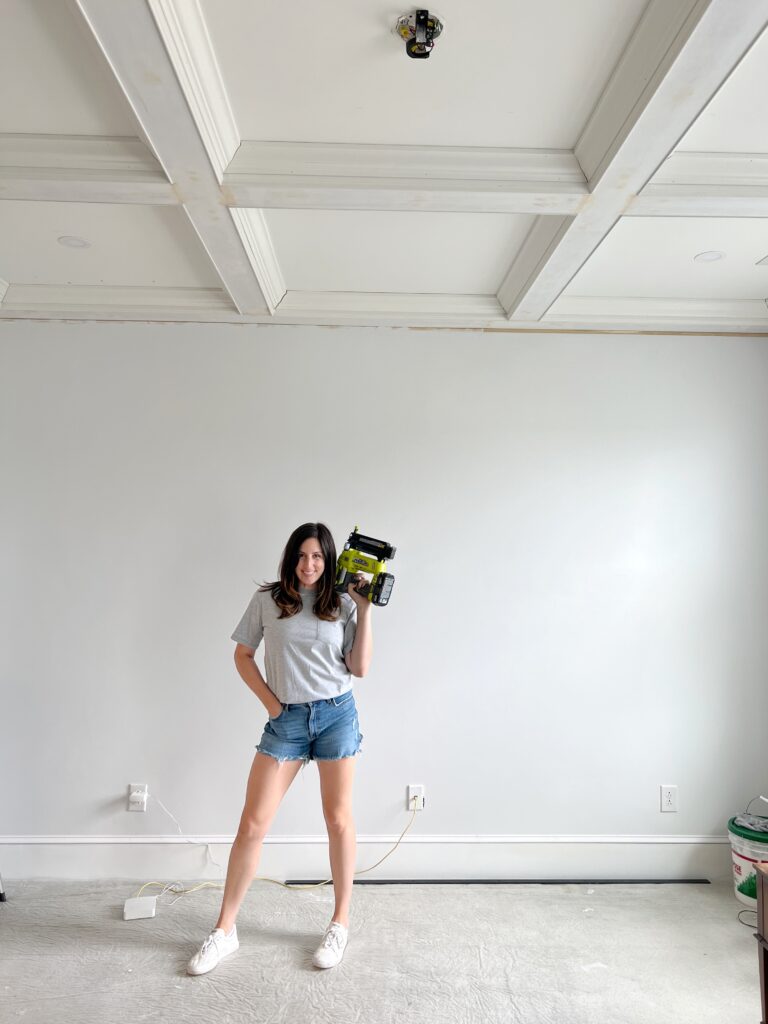
Here’s a prototype of our coffered ceiling structure!
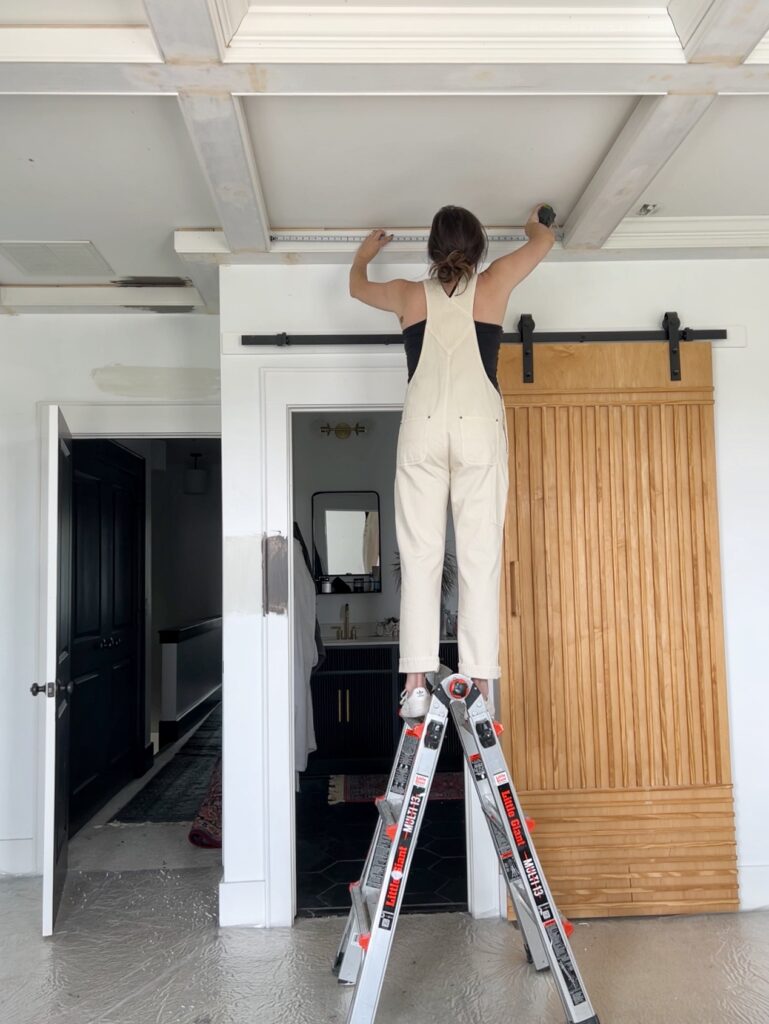
Measure your room
Make a rough sketch of the outline of your room and jot down your measurements for the perimeter of the room.
This laser measurer is SO helpful when it comes to measuring long distances especially if you don’t have someone there to help!
Sketch your ceiling layout
I knew I wanted a standard grid pattern with rows of three for our master bedroom and decided to have a beam width of 6″ (not including the crown).
As for the math, I took the measurement of my bed wall, subtracted 24″ (to account for four 6″ beams), and divided by 3. I did the same for the other wall. My boxes aren’t perfect squares and that’s okay!
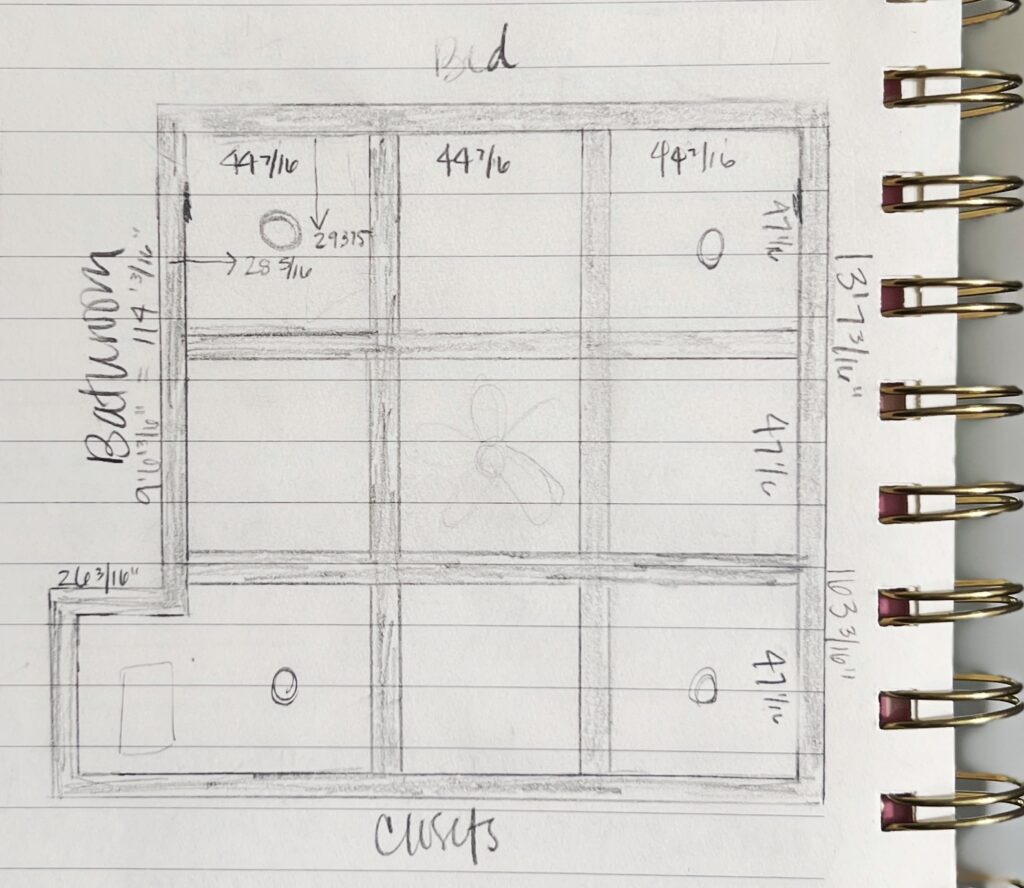
If you look at the floor plan above, you can see we have a little extra square footage to the left where our door is. It was stressing me out a bit at first, but it turned out just fine! I just had to cut some outside corner pieces for the trim!
Important: Don’t forgot to make note of any ceiling obstructions or light fixtures! We had 3 vents, one smoke detector, and of course our ceiling fan. Thankfully they all fit within the design I planned. Otherwise, I’d have to improvise the grid pattern.
How high should your ceiling be to do a DIY coffered ceiling?
Coffered ceilings work best in rooms with ceilings of 9ft or higher.
We have 9-foot ceilings for reference! However, if you have lower ceilings, like 8ft ceilings, you could always do a flat coffered ceiling. Check out this beautiful example! For another low ceiling alternative, check out this one!
Step One: Prep Work
Mark your ceiling joists
Use a stud finder (this simple magnetic one is my favorite) and mark where the joists are!
Determining which way the ceiling joists run is important before getting started because your main beams will run perpendicular (opposite) to the joists!
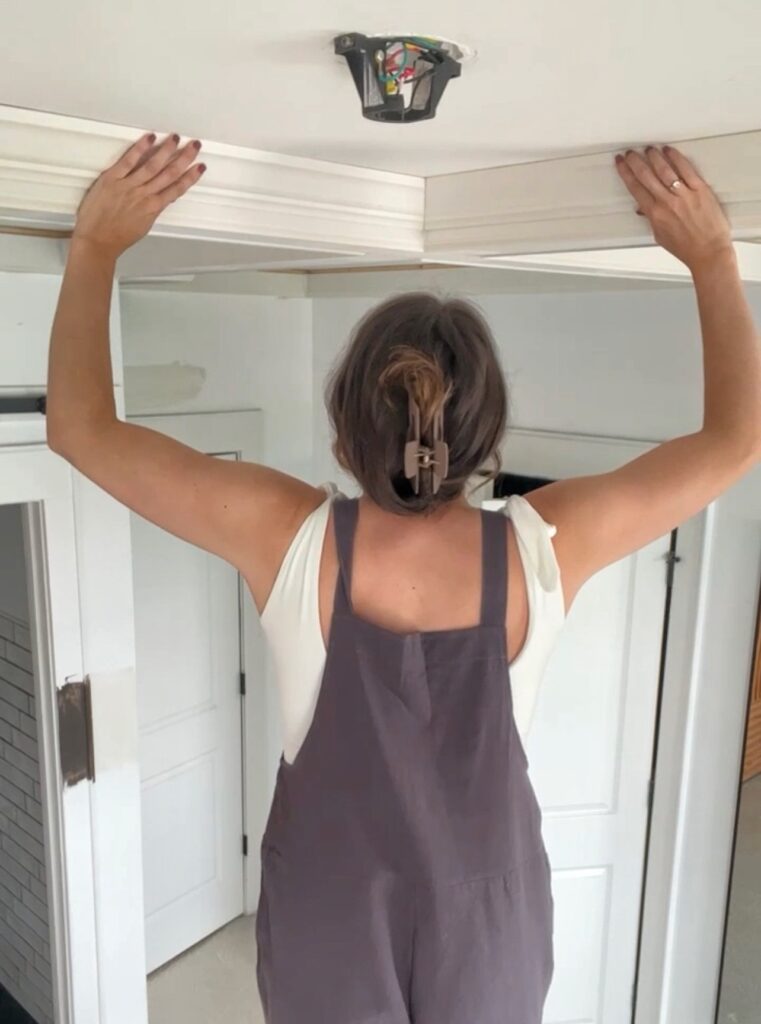
Mark your beam placement
Using a scrap piece of a 2×6 board, I traced little marks where the beams will be placed.
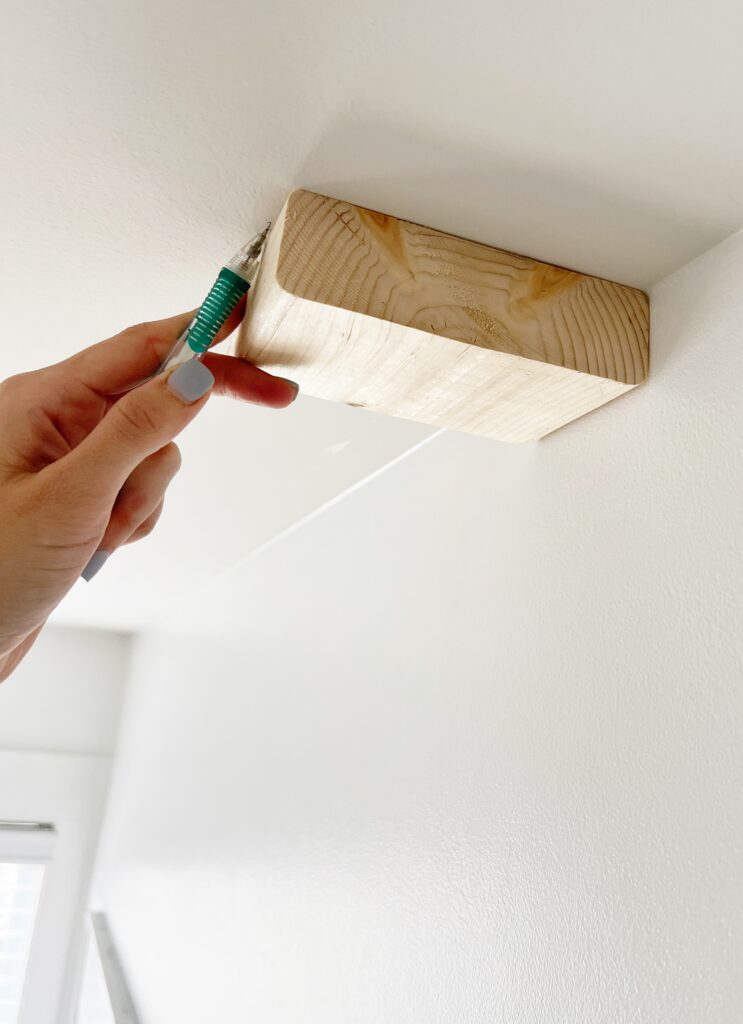
After that, I used this chalk line to extend those lines from wall to wall.
This was my first time using a chalk line and I was so impressed with how great it worked!! This is definitely a great tool for getting a straight line.


Also, if you’re working solo and don’t have someone to hold the other end, you can attach it to a screw or nail before snapping!
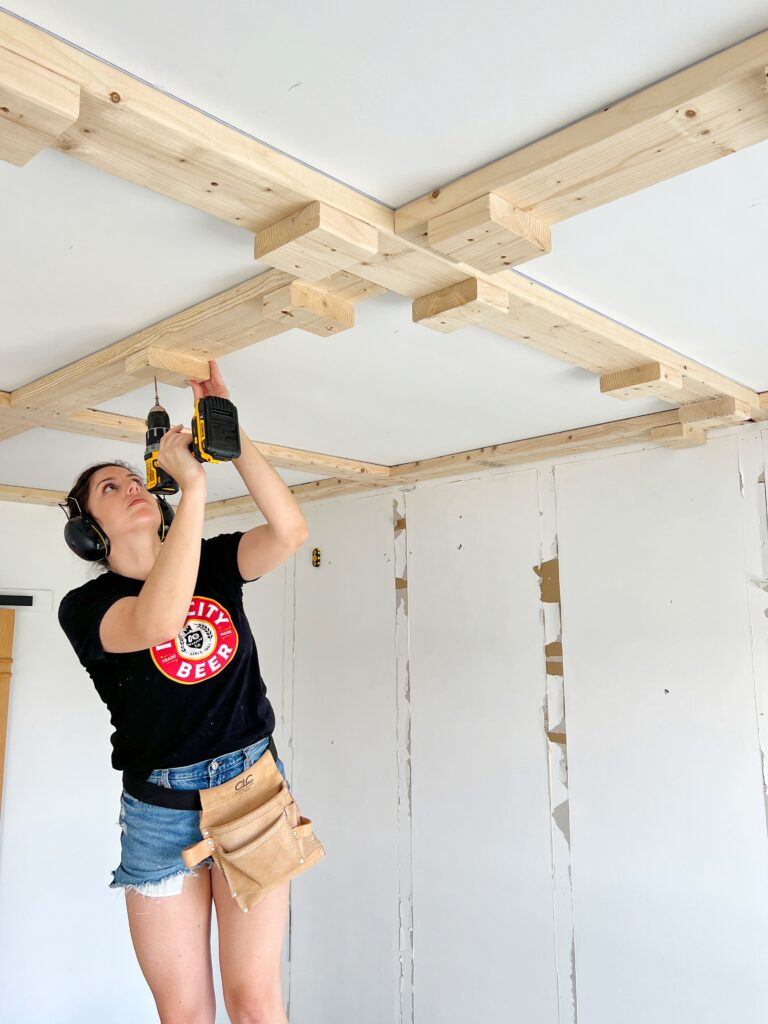
Step Two: Framing with 2x6s
The first boards to go up will be the perimeter beams (around the edges of the room) and the main beams (the ones running perpendicular to the ceiling joists).
As for the type of wood used for these main base beams, I went with these inexpensive 2x6s and 3″ construction screws!
Main Beams
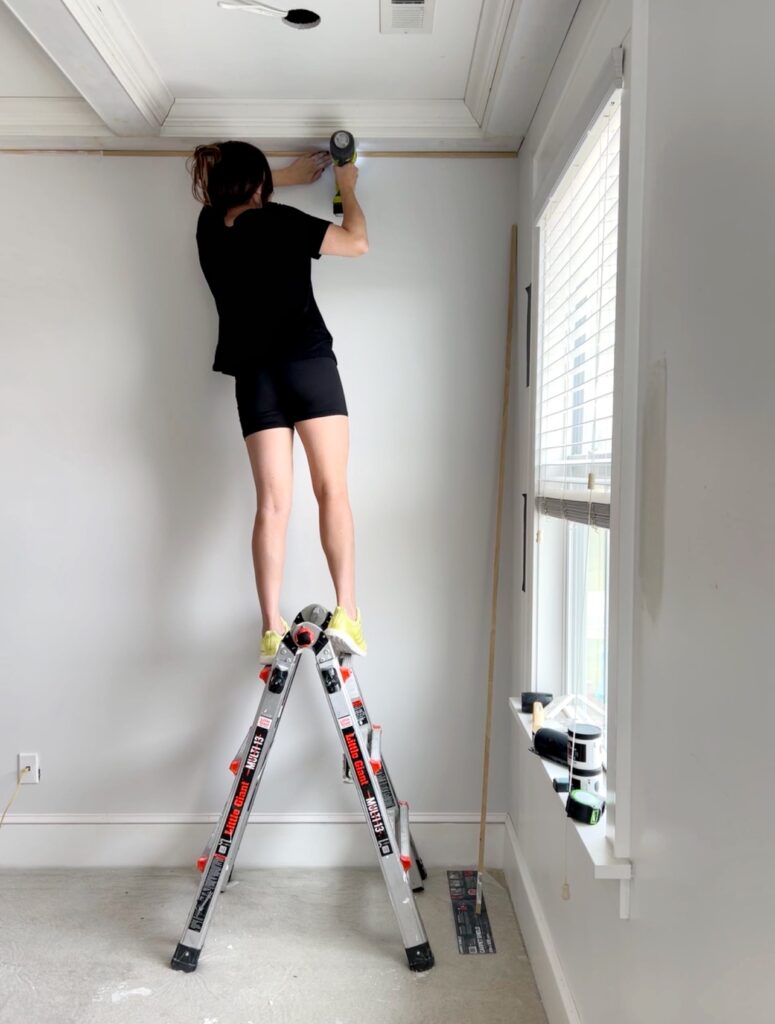
My biggest tip when it comes to hanging the main beams is to pre-drill your screws! It makes the install process much smoother. Or… as smooth as it can be when you’re working overhead!
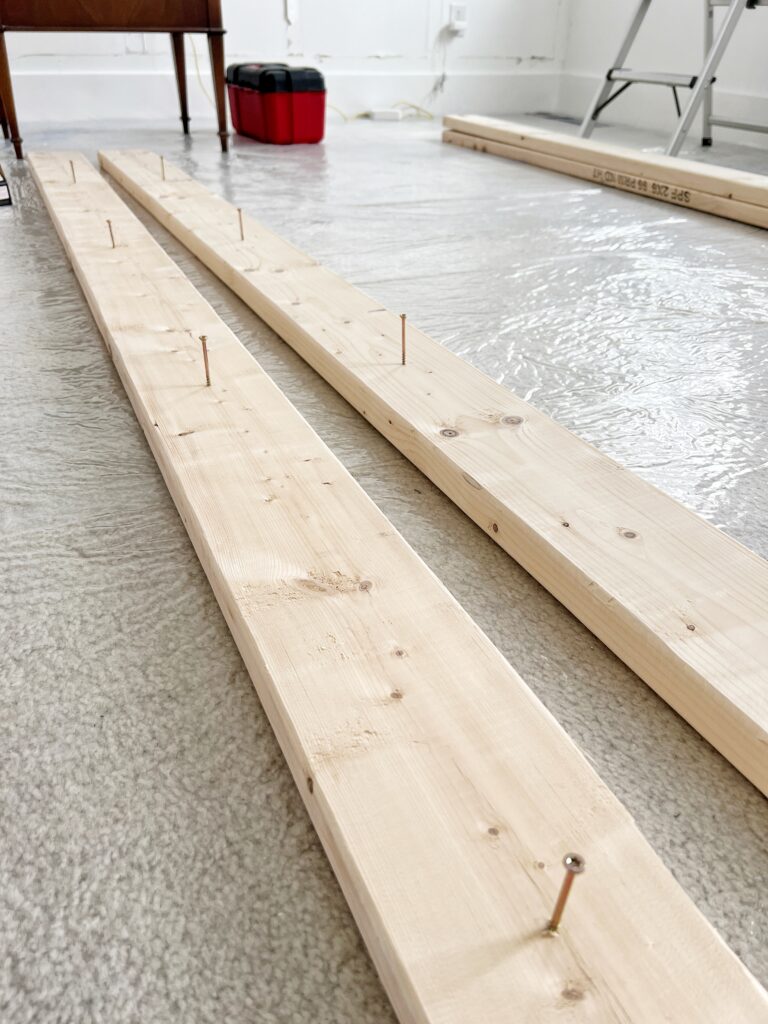
Before pre-drilling you need to mark exactly where the joists are so you’re screwing into the ceiling joists!
You can see in the photo below that I measured and marked how far out each joist is from the wall. I transferred those measurements to my boards!

Unless you have a tool like this, you’re going to need someone to help you install these first pieces!
Trust me, I avoid asking for my husband’s help at all costs, but this time I needed him! It wasn’t long before we remembered we don’t work well together LOL!
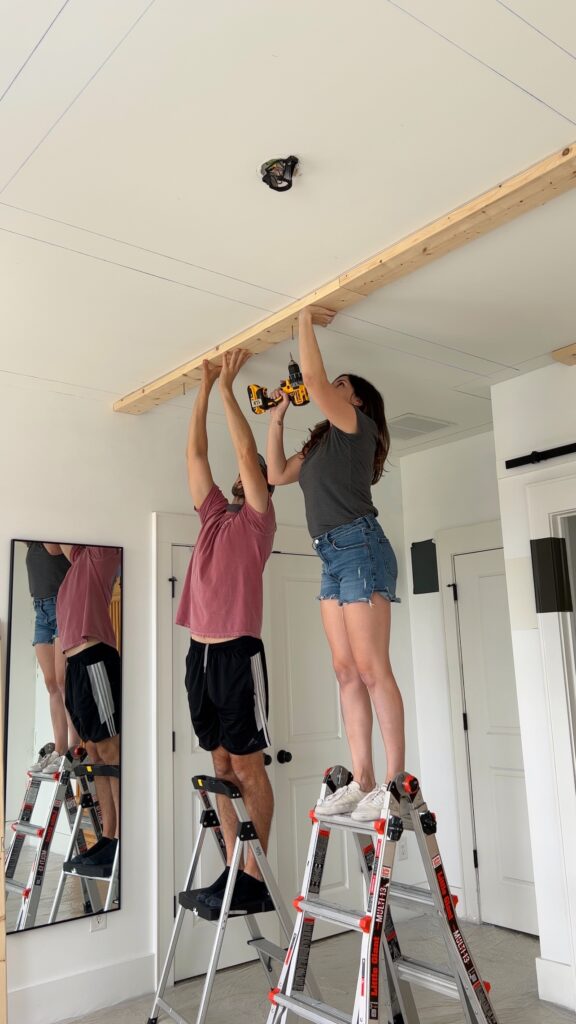
Our 8ft boards weren’t long enough to cover the span of the room. We were able to attach them by toenailing the screws (driving in at an angle).
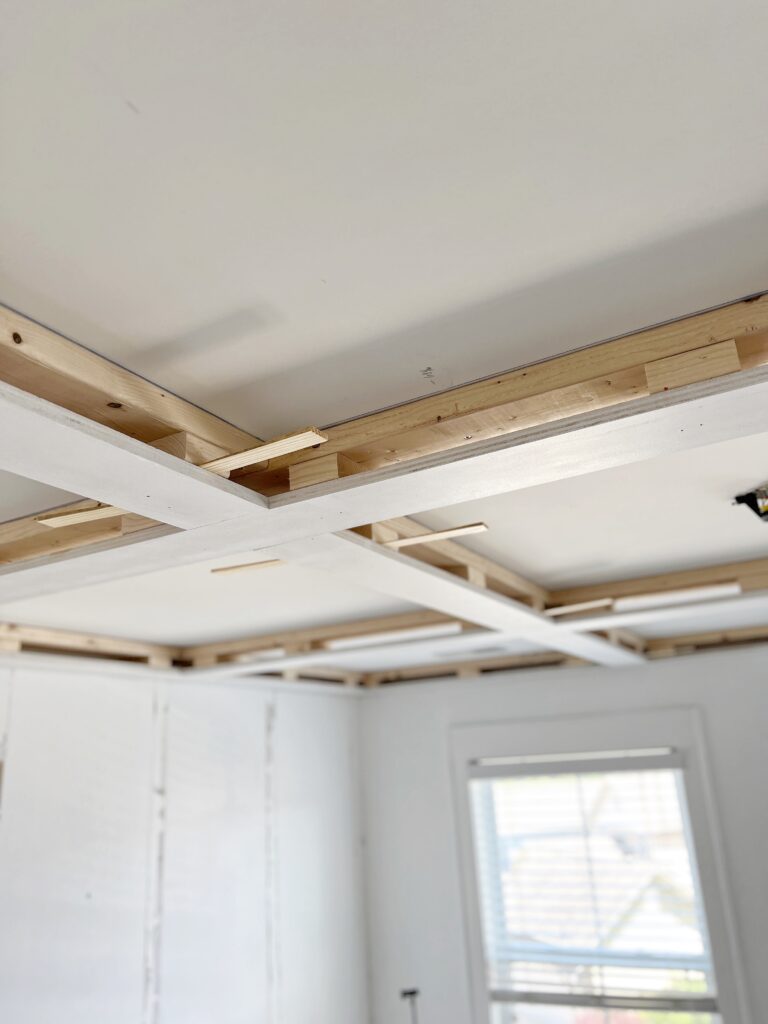
Crossbeams
Unless you get lucky, your crossbeams are likely not going to line up with your joists so you have to attach them to the main beams.

We also used the toenailing method here, screwing in at the corner of the crossbeam and the main beam! Two screws on each end of the board worked great!
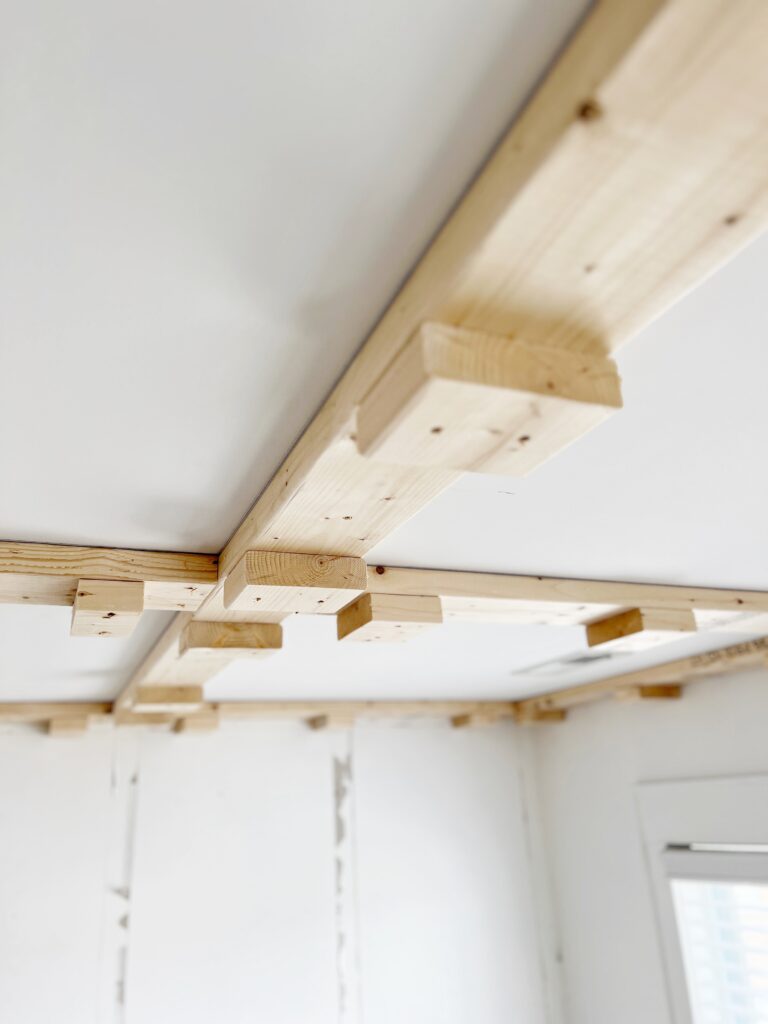
Step Three: Beam Depth
How deep should a coffered ceiling be?
The depth of your beams is totally up to you, but average is 3″-5″. Our coffered ceiling was right in the middle, just under 4″ in depth!
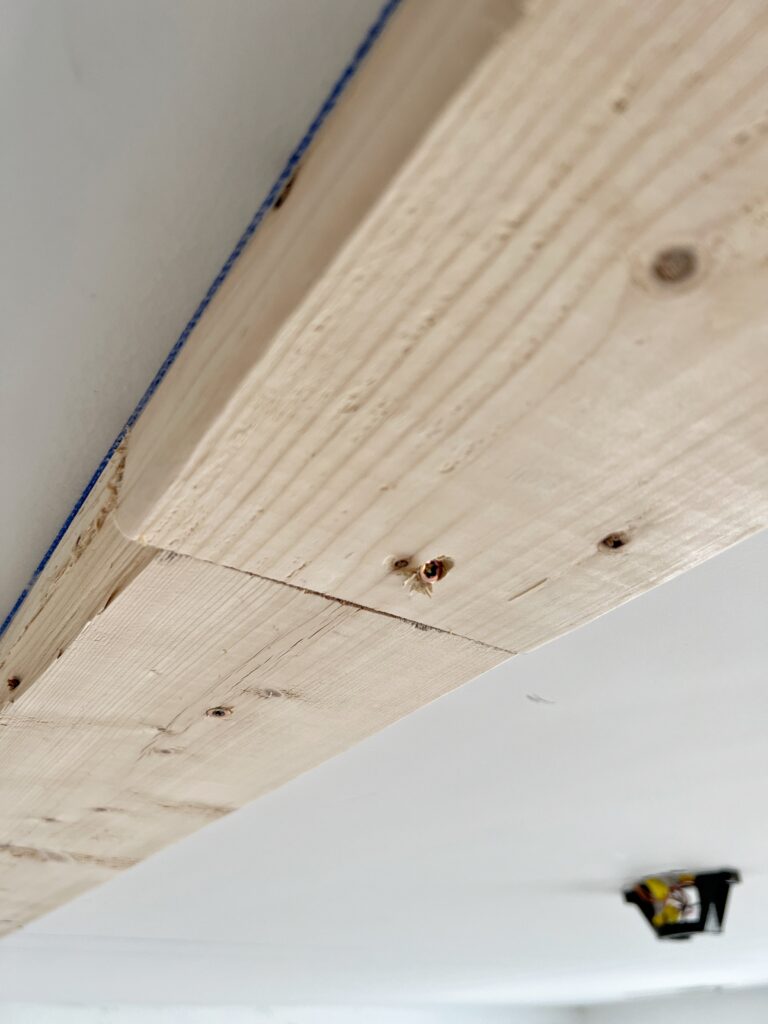
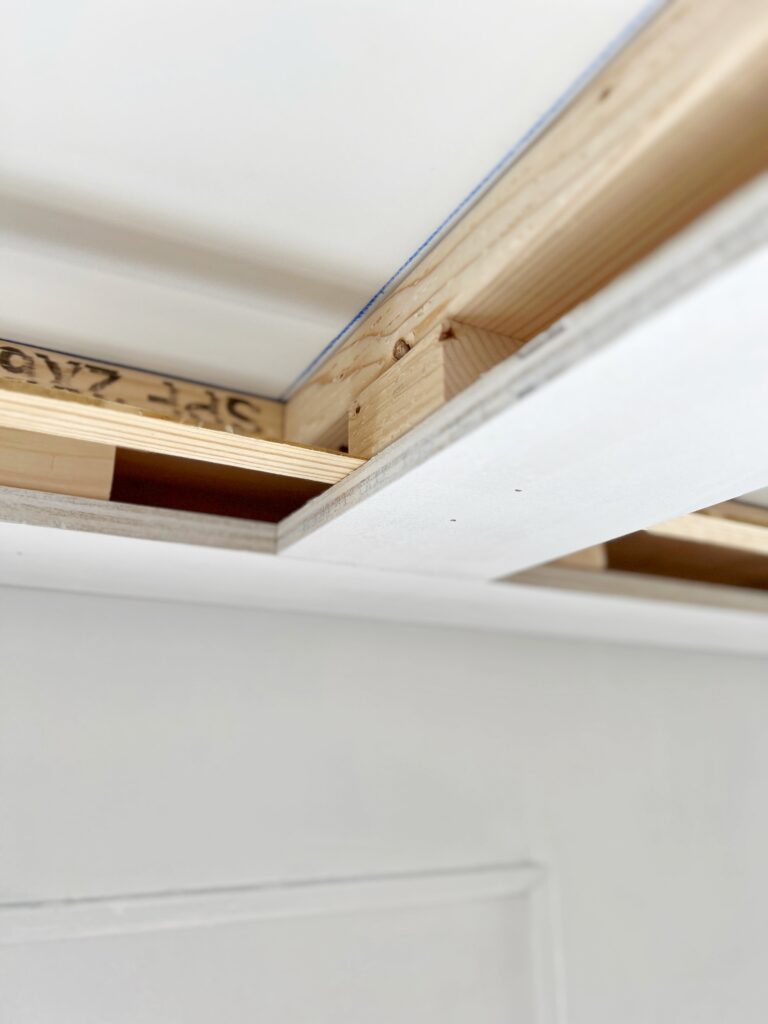
Small 2×6 pieces
To get my desired depth, I screwed in small pieces of 2×6 boards and spaced them out roughly 16″ apart along the main and perimeter beams.
I cut these about 2.5″-3″, not worrying about precision because they get covered up anyway!
Here’s another reminder to pre-drill your screws and make life a little easier! For this part I used 2.5″ construction screws, countersunking them a bit!
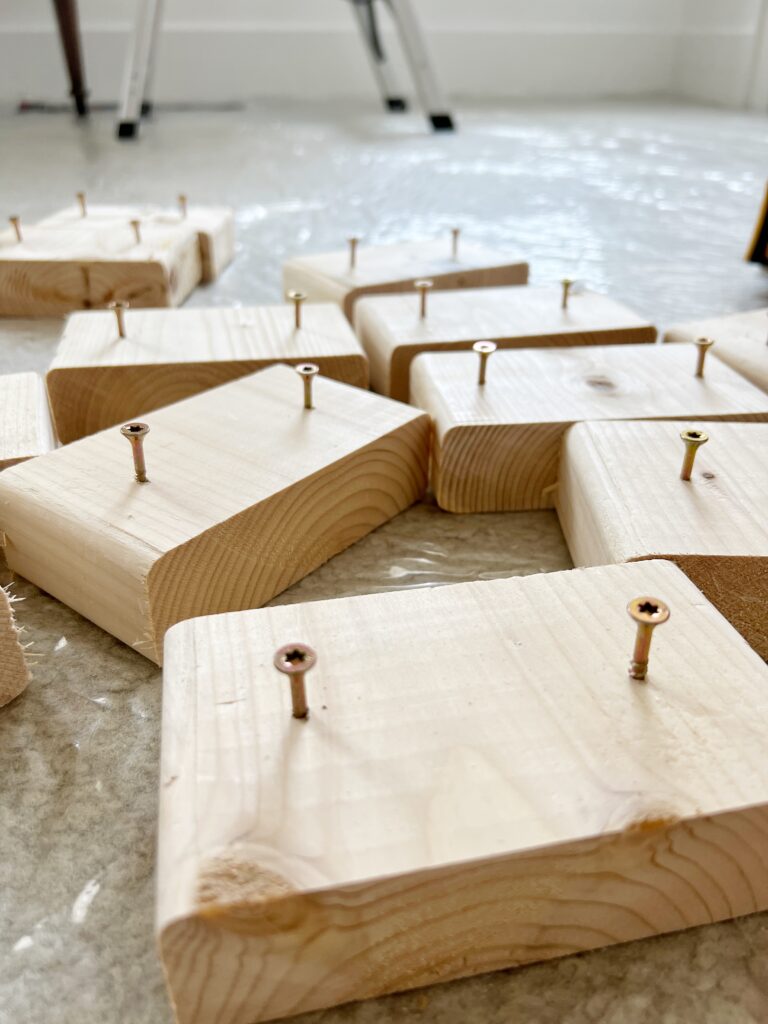
Before you screw them in, just make sure they’re aligned flush with the beam. You don’t want one side jutting out more than the other!

Otherwise you’ll have to trim it down like I had to above! This will make more sense in the next step!
Another important thing I learned is that you want to add wedges anywhere there’s going to be a seam with your bottom pieces. (They’re going to be pretty much the same location of your seams from the main boards)
I didn’t think to do this until I started installing the bottom pieces so I had to just slide some pieces in!
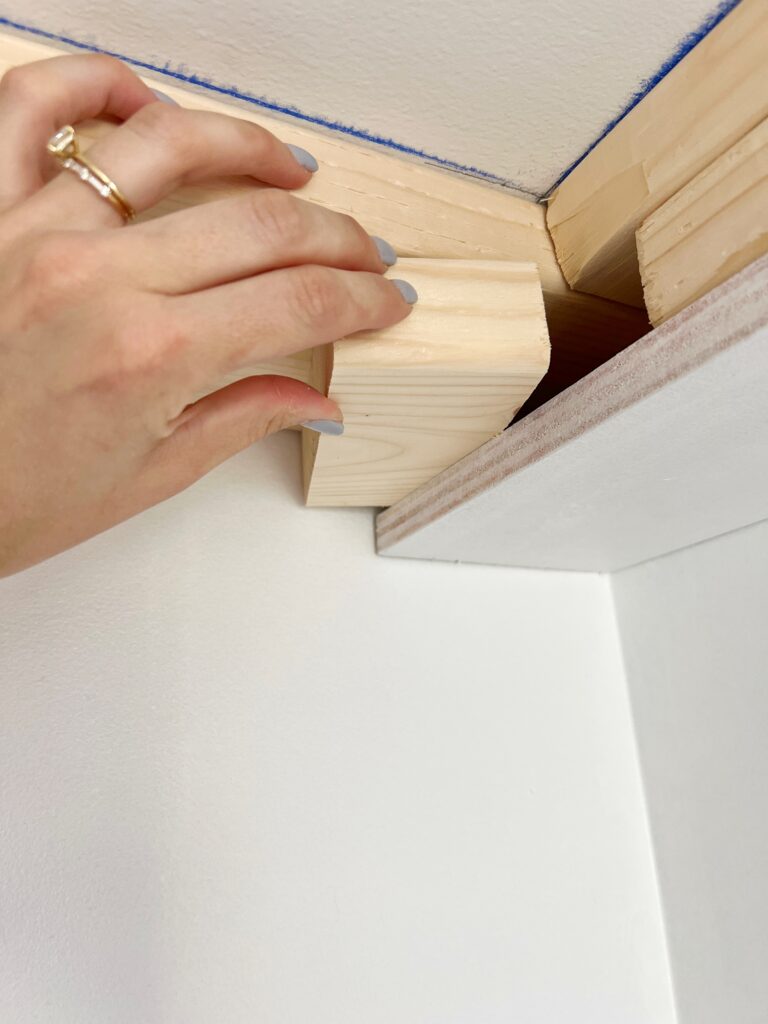
Bottom of the beam
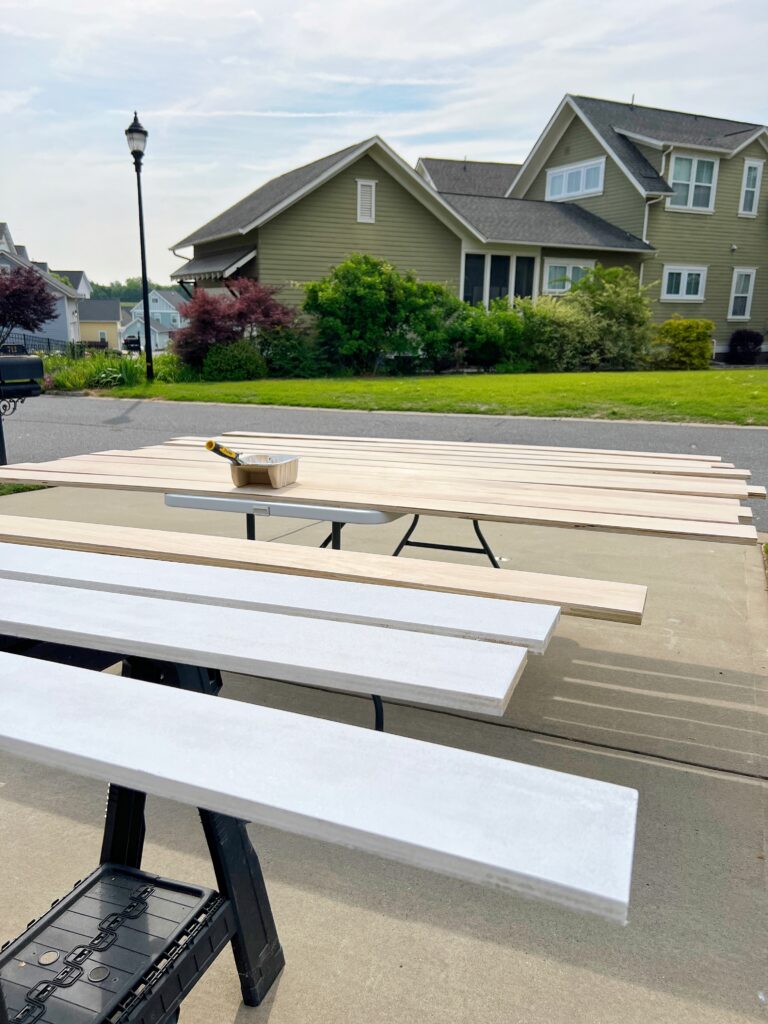
The bottom part of the beam is a 1×6 board. You can buy these pre-made, but I figured i’d make my own since it’s $17 for one board where I live.
The true measurement of a 1×6 is 3/4″ x 5.5″, so I just ripped down two sheets of 3/4″ plywood to 5.5″ pieces and primed them! By making my own, I saved about $100!
To attach the bottom pieces, I used my brad nailer (with 1.5″ brad nails) and nailed into the 2×6 wedges!
I did two nails per wedge, but instead of nailing straight up, I nailed them in at different angles. This is important so they really latch onto the wood!
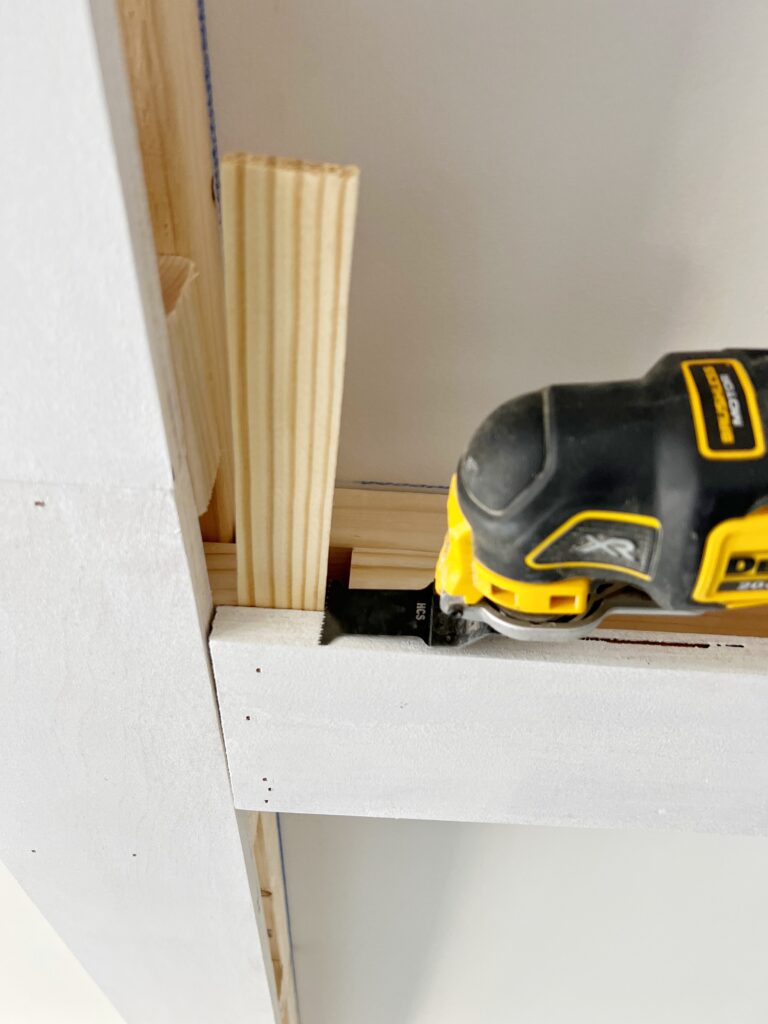
Certain areas needed shims to get the boards to line up flush! Definitely grab a pack or two while you’re at Home Depot or your local hardware store!
If you’ve never used shims, they’re tapered pieces of wood. You just slide the smallest end in until your boards are flush. Once they are, you can cut off the rest with a multi-tool.
After all the bottom pieces are up, fill the nail holes and seams with wood filler.

It made the most sense to sand this all down before continuing onto the next steps of the diy coffered ceiling. (The side pieces drop lower than the bottom piece so they would have gotten in the way!)
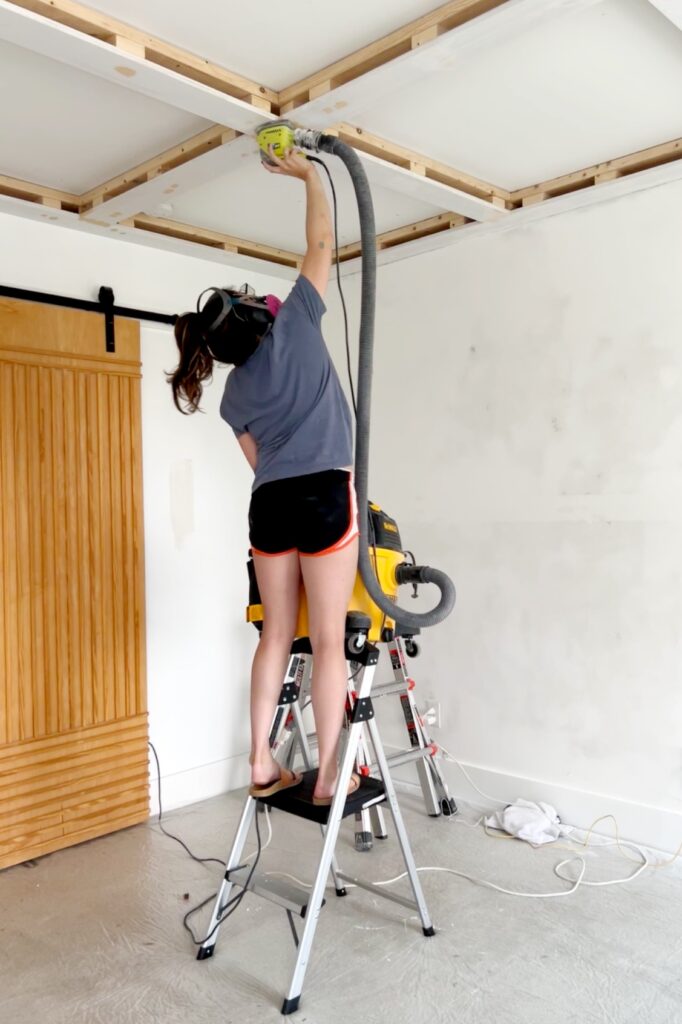
This is my favorite hack for dust free sanding inside. You just have to make sure your shop vac has the proper filter to handle dust! Click here for the links to everything I used for this hack!
Step Four: The sides
For the side pieces I used these baseboards because I liked idea of adding even more visual interest!
Measuring
Make sure to measure for each board individually because there will be variations by the 1/8″ or 1/16″ and that really does make a difference!!
How to cut the side pieces
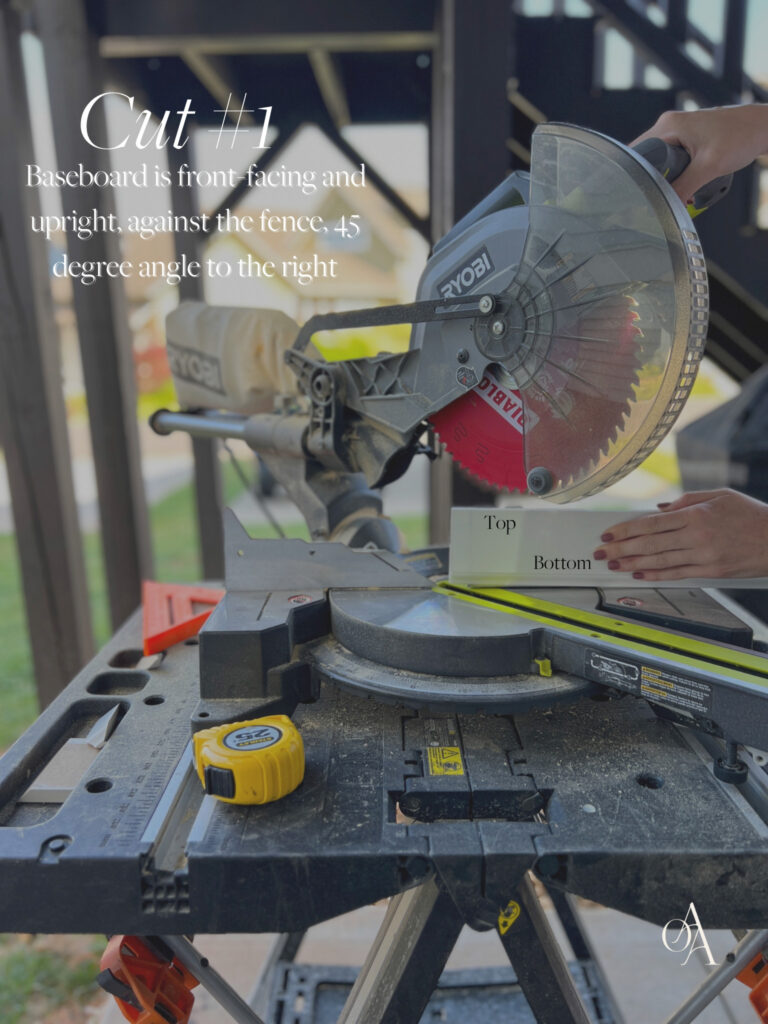
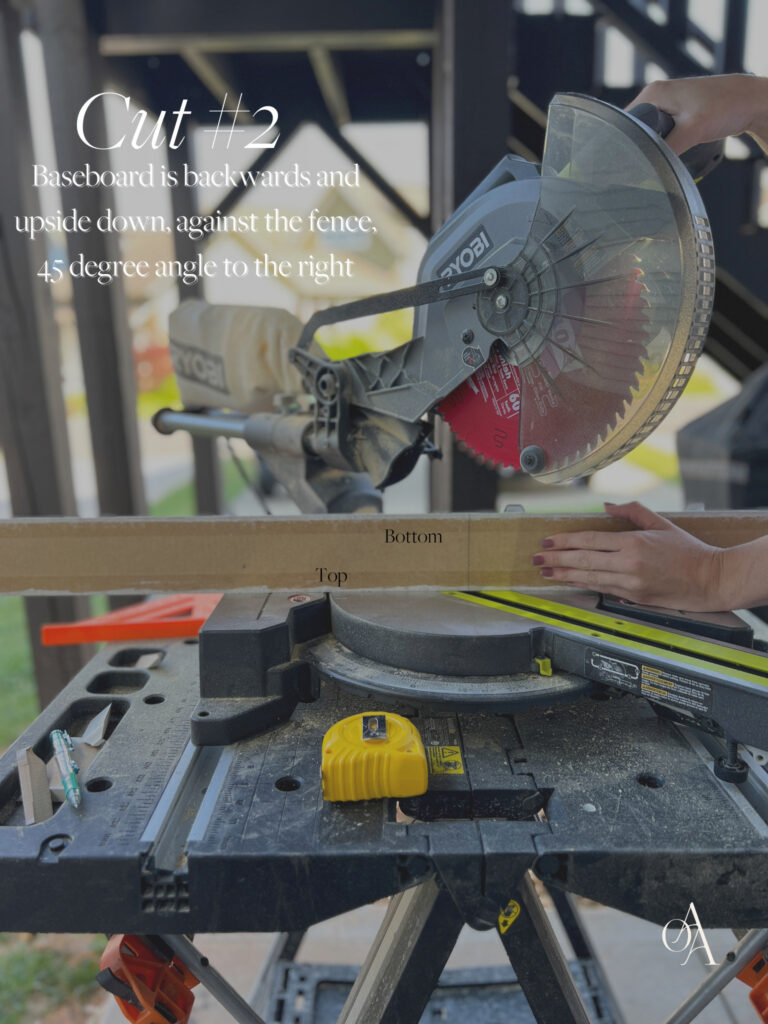
Installing the side pieces
For my coffered ceiling diy, I decided I wanted a very small reveal so I used a scrap piece of 1/4″ plywood as my jig.
You have the option to do this or a larger reveal. Or, if you prefer a more modern coffered ceiling, you’ll probably want flush box beams for a clean look!
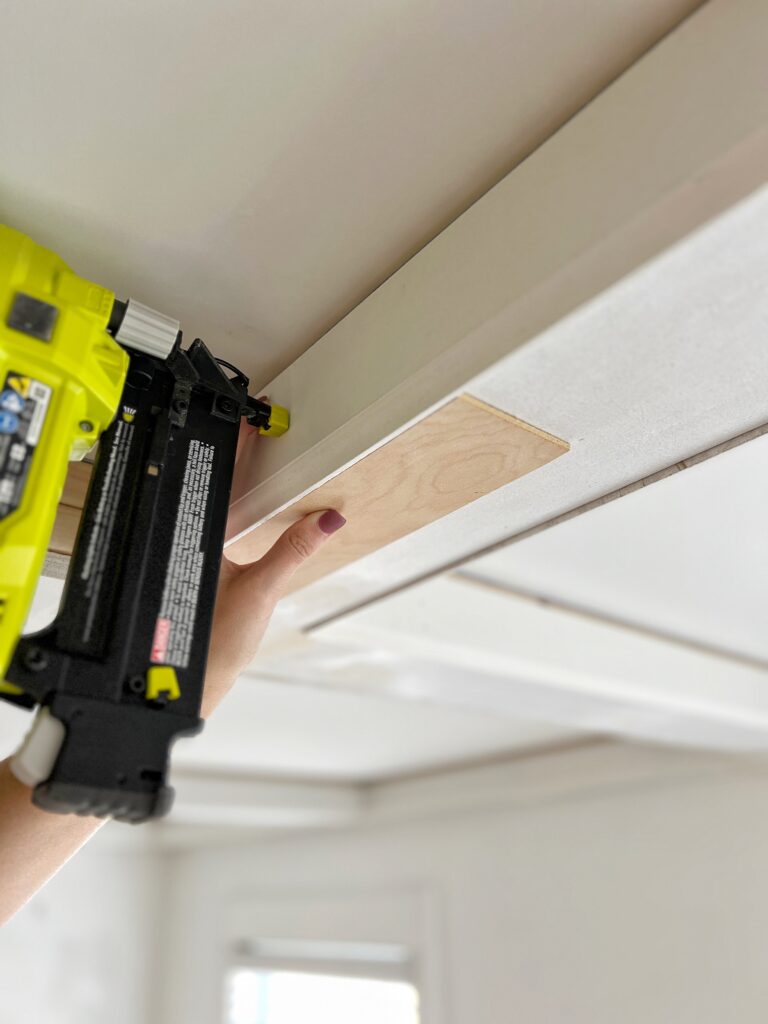
Moving my jig along, I used 1 1/4″ brad nails and nailed in where the wedges are! How do you tell? Just look at the bottom trim boards for the nail holes that you patched up!!
Don’t worry about the gap above the baseboard. That won’t matter because the crown moulding will cover it up! Plus, if the side panels were the exact size I needed, I might run into an issue where the ceiling was uneven.
Not all of my corner seams were perfect, but luckily the crown will cover most of the gap!

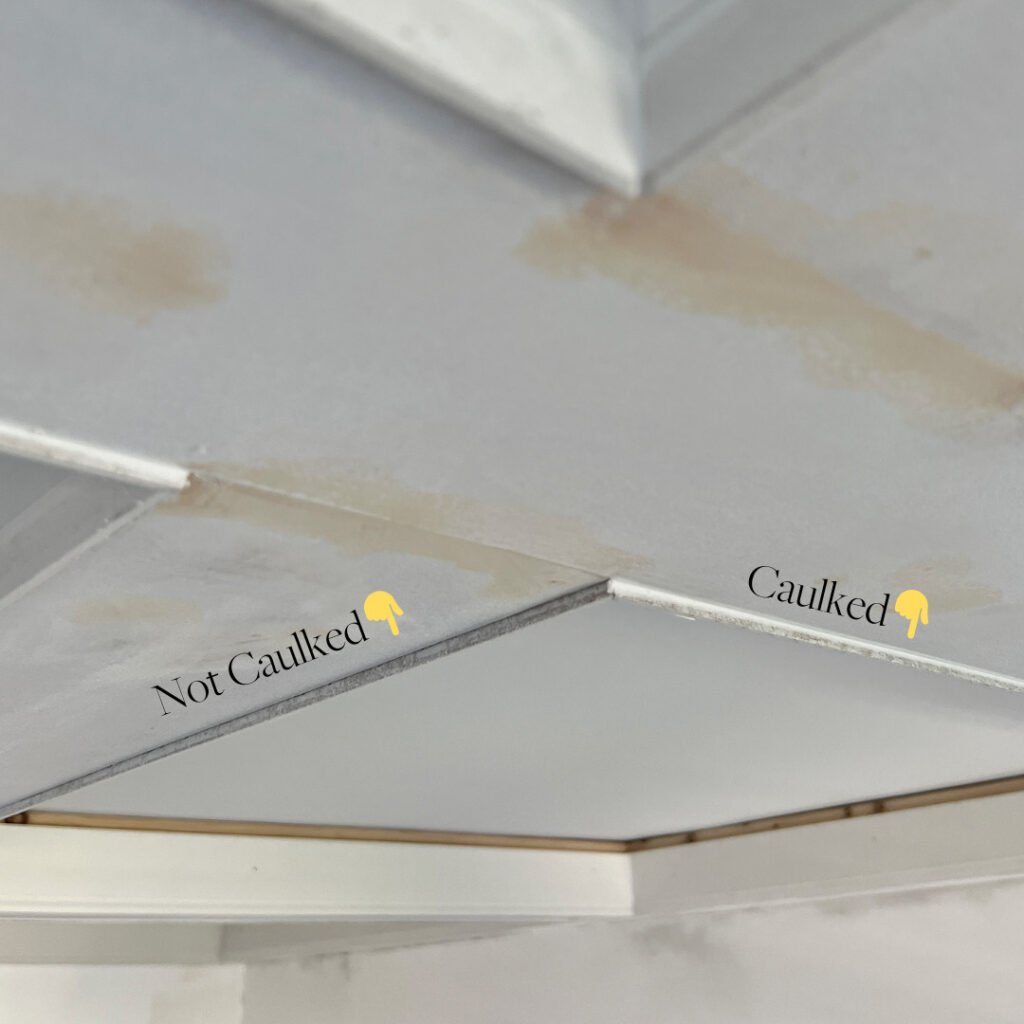
Caulking the corners
Rather than waiting until you install the crown molding, it’s much easier to caulk the corners beforehand!
While I had the caulk out, I also did the reveal too!
Step Five: Crown Molding
If you’re new to crown molding, or you need some tips, check out my blog post on how to install crown molding here!
After cutting 38 pieces of crown for this DIY coffered ceiling, I started to get pretty decent at it! Just remember- the only way you can get better is with practice!
How to measure for crown molding
Just like with the baseboard trim pieces, you’ll want to measure for each board individually! I’m not perfect so my measurements definitely varied by 1/8″, 1/16″ or even sometimes 1/4″!
This will help eliminate waste and trips to the miter saw! I’d also recommend cutting it about 1/16″ bigger than the measurement because it’s always better to have a piece too long than too short.
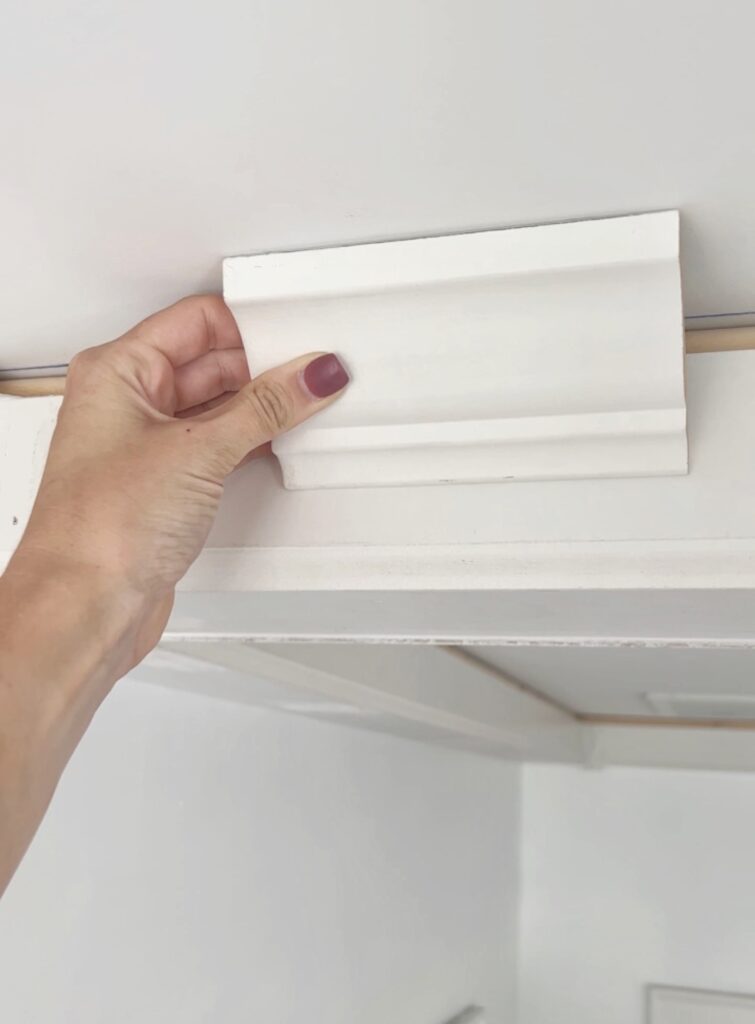
Installing the Crown Molding
When installing crown molding for a coffered ceiling, it’s incredibly helpful to work with two pieces at a time!
Crown can be tricky in that it’s hard to tell if you have it placed at the right angle on your ceiling. But matching up corners is a great way to ensure it’s angled properly!
What I would do is hold up two pieces at the same time and adjust them until the corner seam was flush. After that, I’d drop one piece while holding the other firmly in its place.
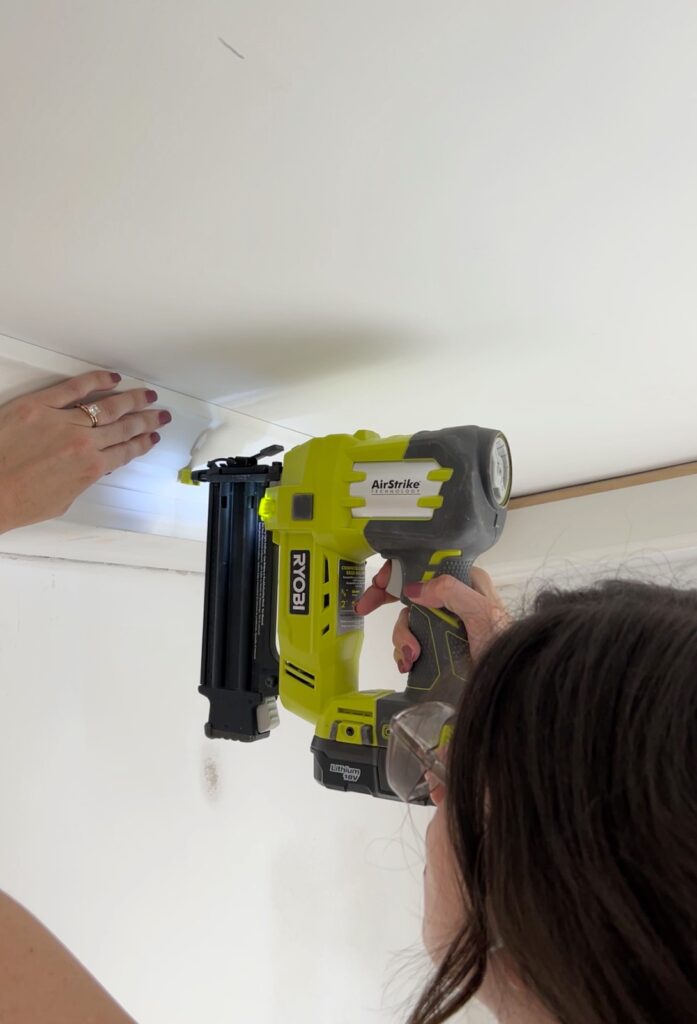
This is when I would grab my nail gun and nail the crown in the *middle* of the trim piece. By nailing in the middle first, i’m able to manipulate the other ends to line up at the corners.
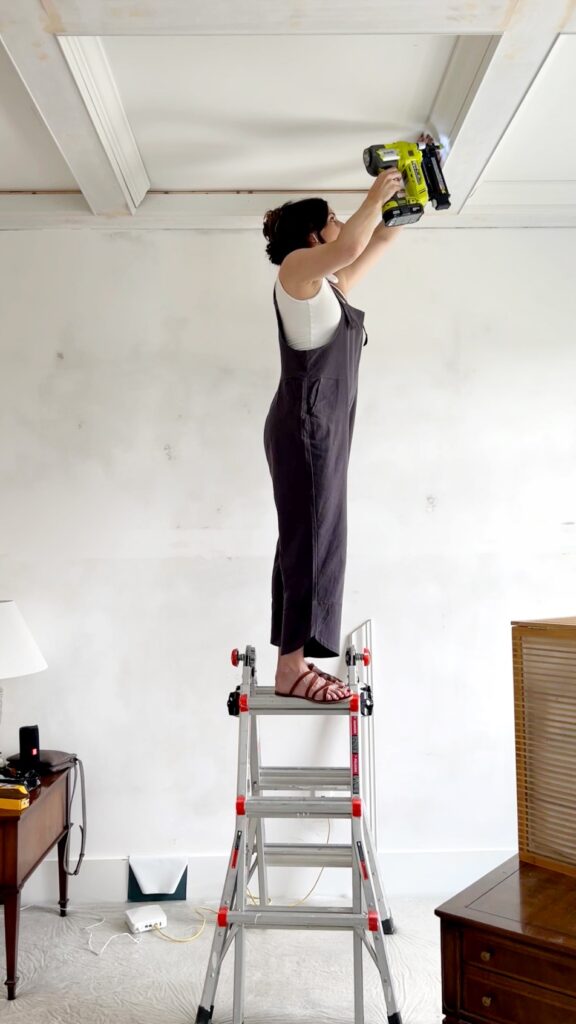
Using 1.5″ brad nails, I nailed into the bottom part of the crown molding (being sure to nail into a wedge!) as well as the ceiling!
Step Six: Perimeter Trim
The last layer of trim for our diy coffered ceiling!!
I didn’t necessarily *need* this piece because the gaps around the perimeter of the room were caulk-able (less than 1/4″ gap) but I feel like it gives the ceiling a more finished look! And as far as i’m concerned, you can never have too much trim work!
This is the trim I used. It’s a very tiny chair rail! You’ll want to make sure you use trim pieces that are wide enough to cover your biggest gap!
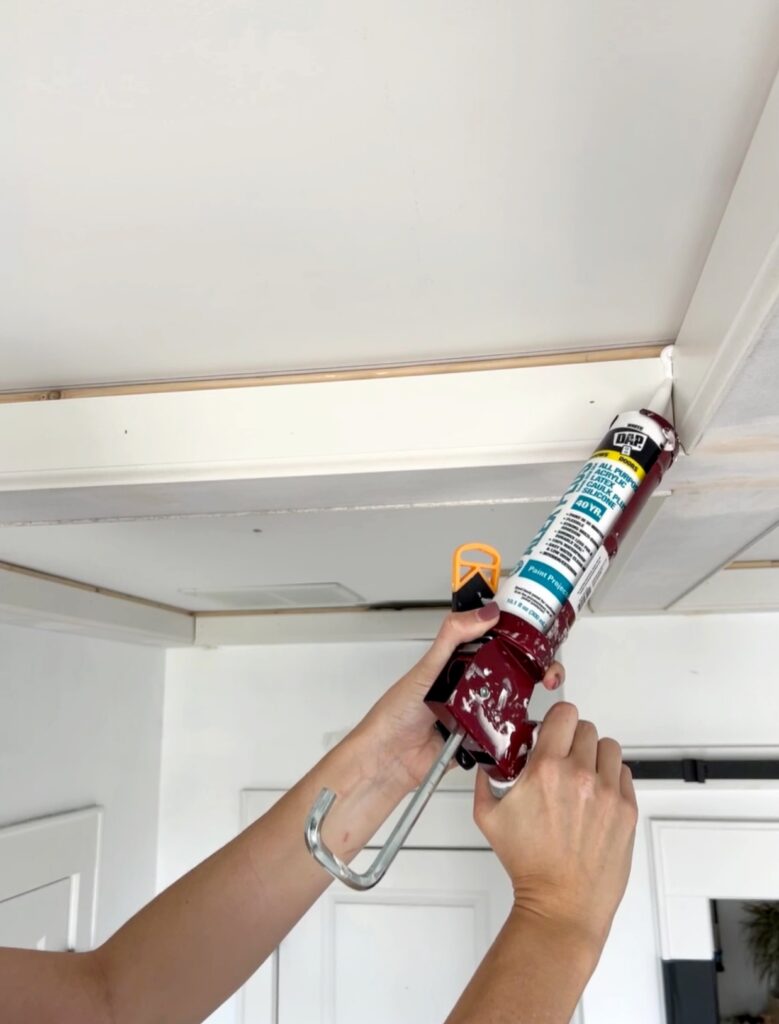
Now this is when you celebrate because you DID it!!! You BUILT a coffered ceiling! And once that settles in, get your caulk gun out and caulk the crown and the chair rail!
You can see in the photo above I hadn’t caulked yet! It really makes a big difference. This is the caulk I used… it’s meant for crown molding with maximum flexibility!
Step Seven: Paint
This is the best part because all of your hard work will come to life with whatever paint color you choose!
What color should you paint a coffered ceiling?
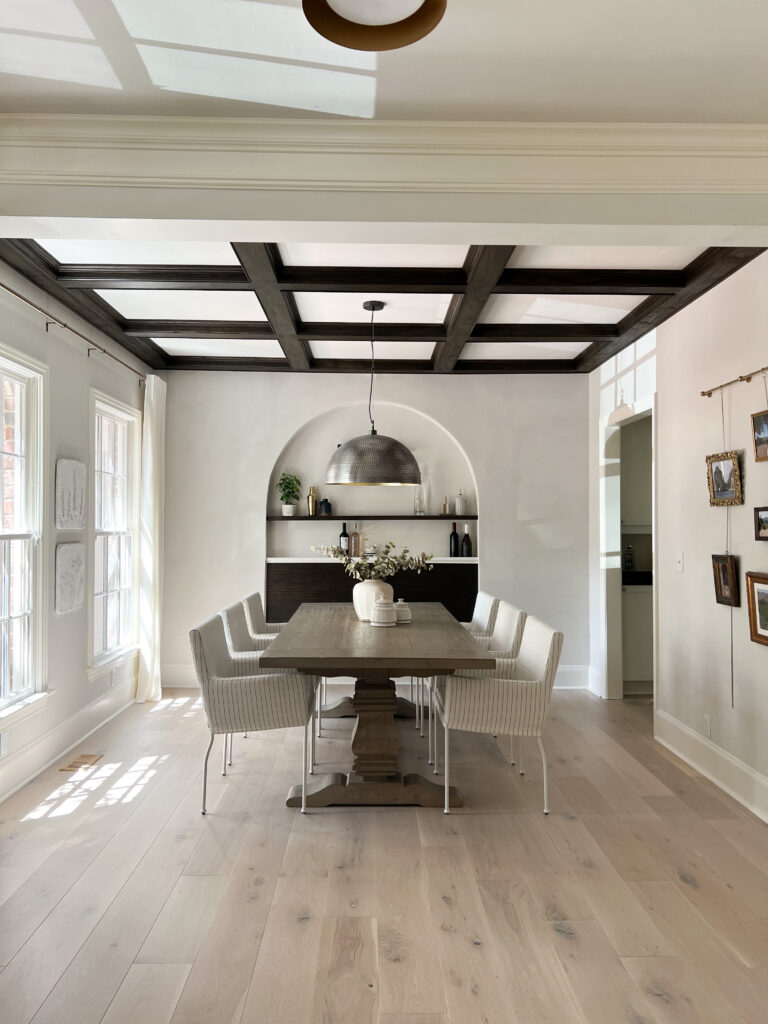
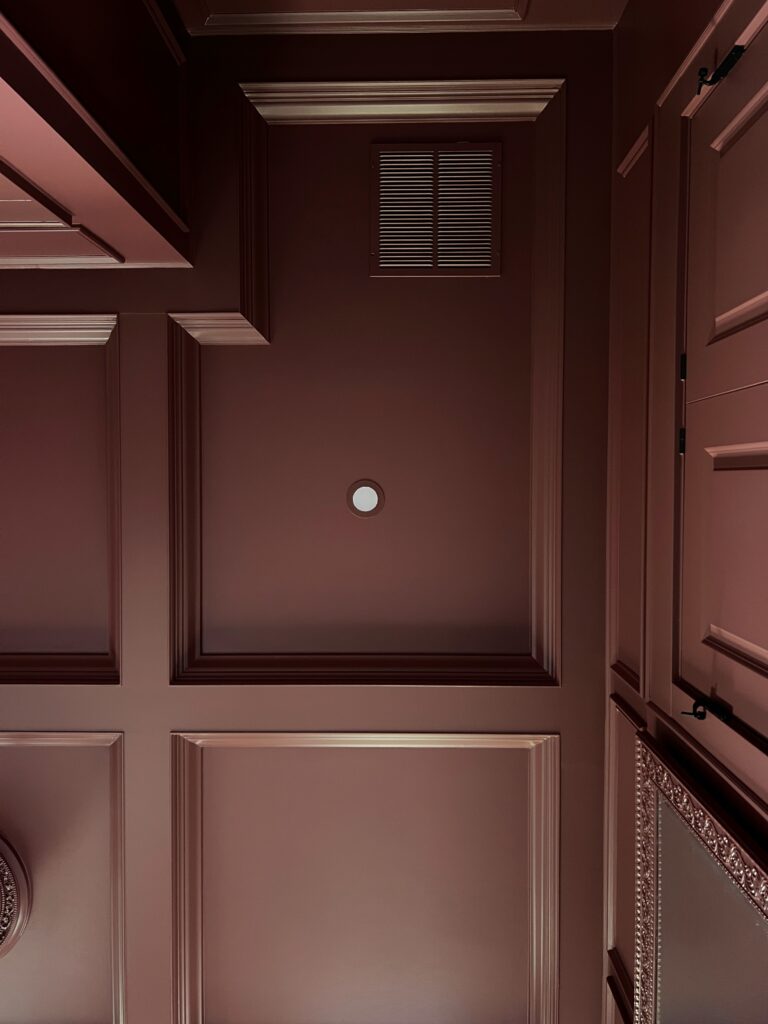
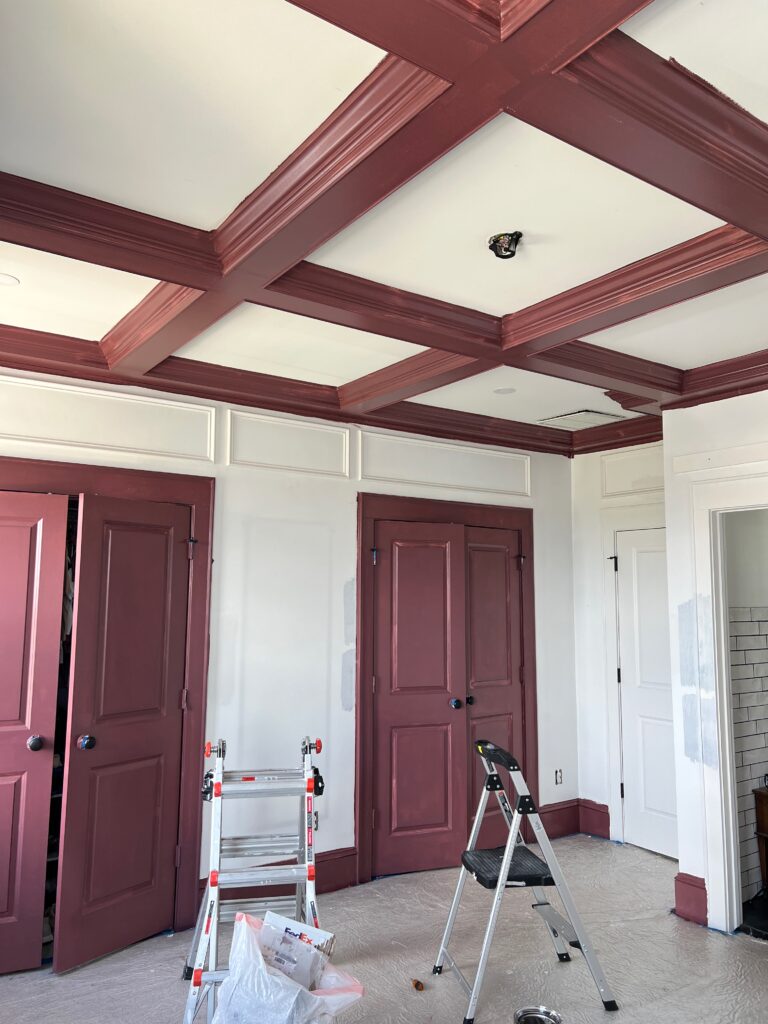
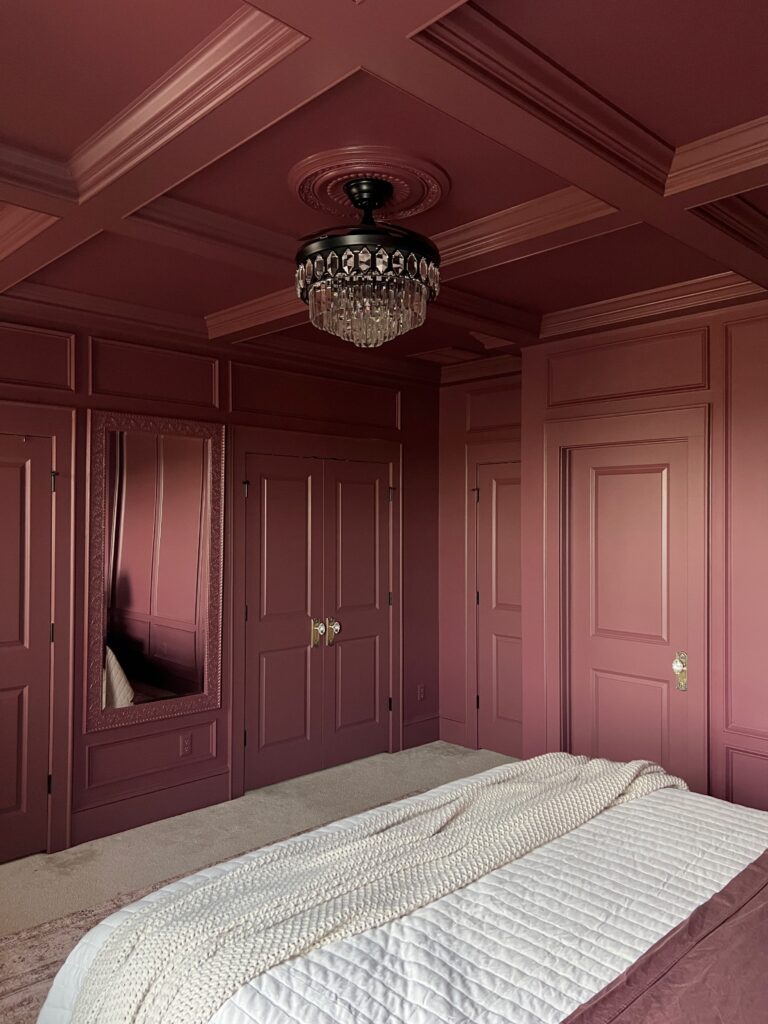
Most people opt for a lighter color for a coffered ceiling. But i’m not most people 🙂 I did a monotone look and used one color for our entire room.
You have options! You could do just the beams a darker color while the middle ceiling is a different color. Or you can do the whole coffered ceiling dark and keep your walls light.
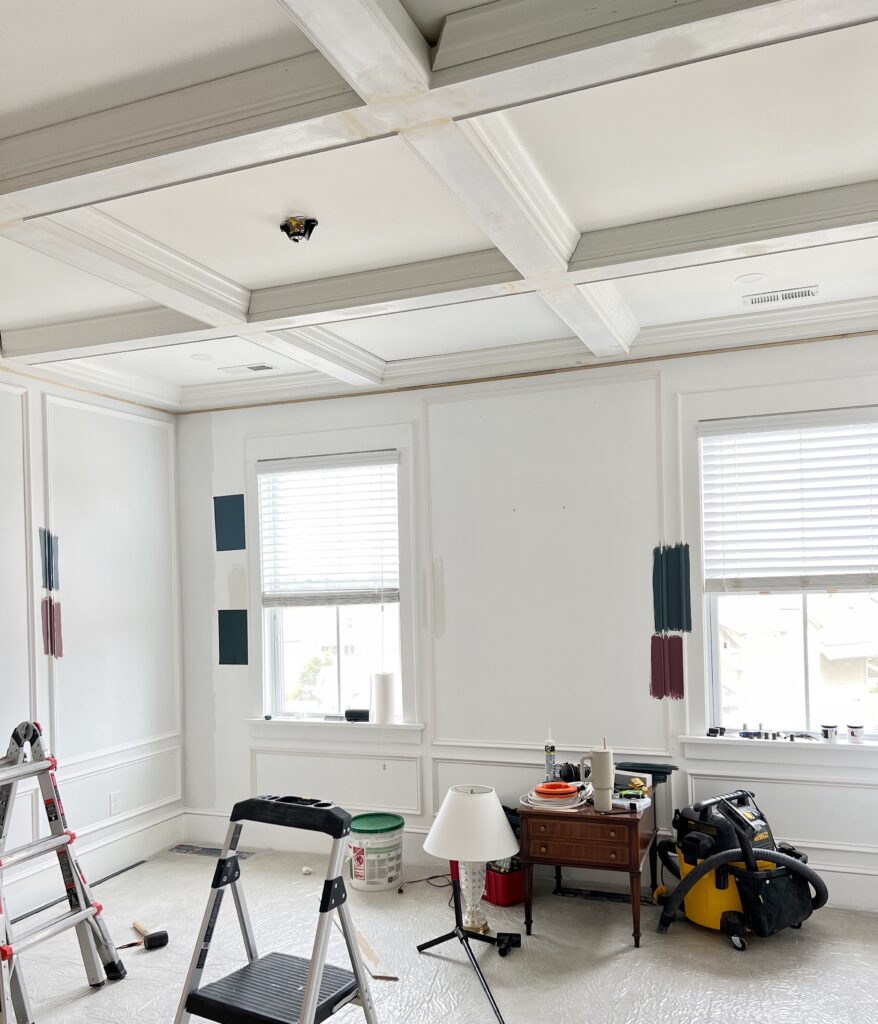
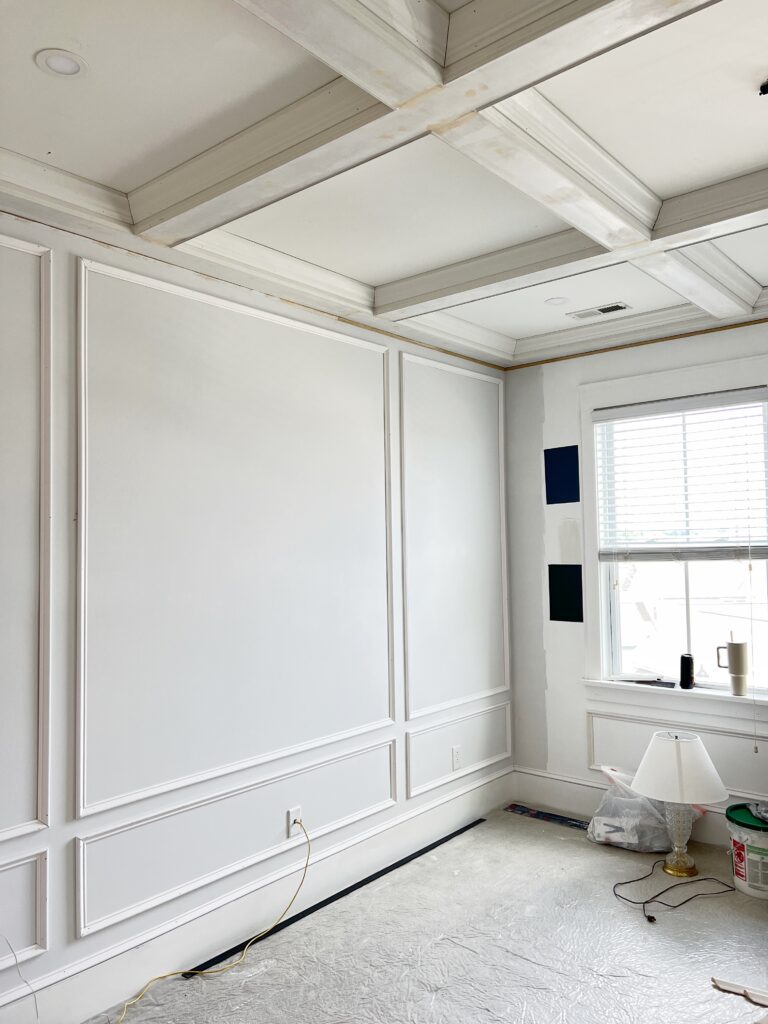
For our primary bedroom, I wanted a dark, moody color! After testing close to 20 different samples, I narrowed it down to these two:
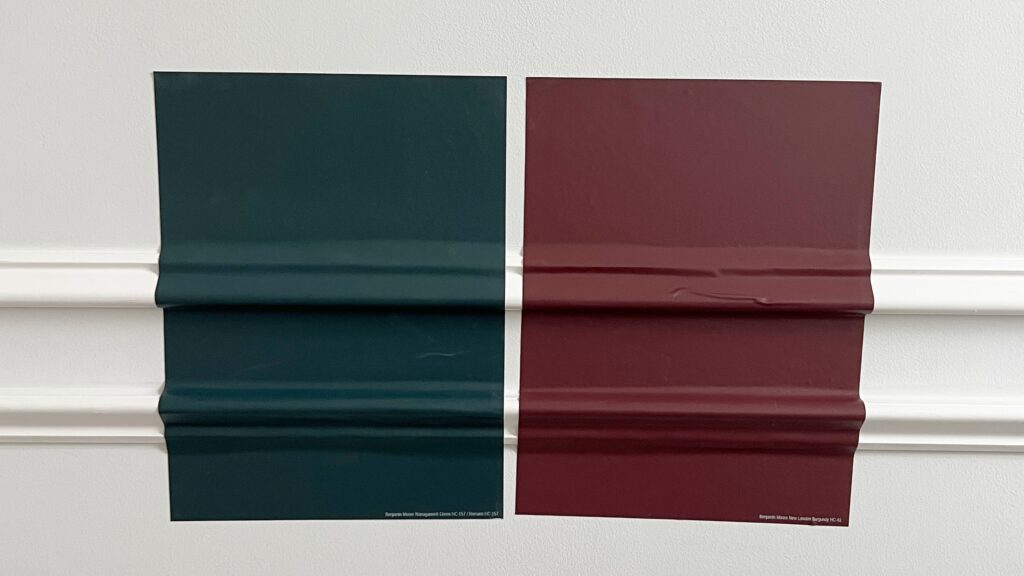
I’m a huge fan of Samplize when it comes to choosing paint colors, by the way! (That’s what you see in the photo above) They’re hand-painted samples on a huge sticker that you can easily move around the room! They have most big paint brand’s colors and their shipping is crazy fast! Check them out here!
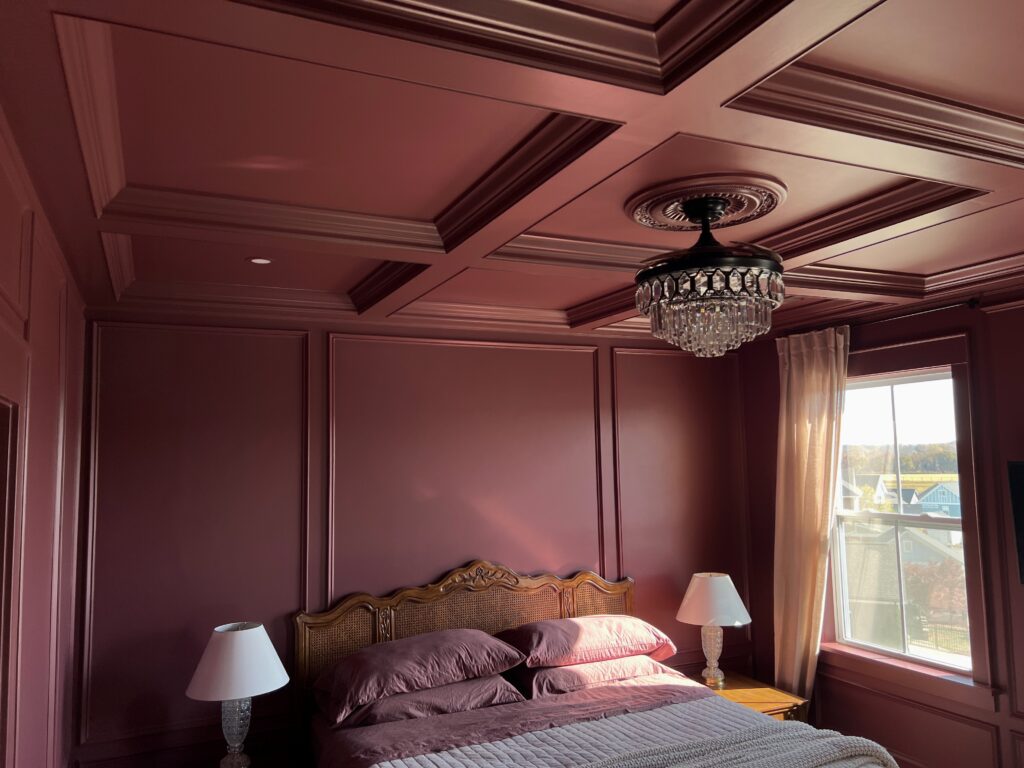
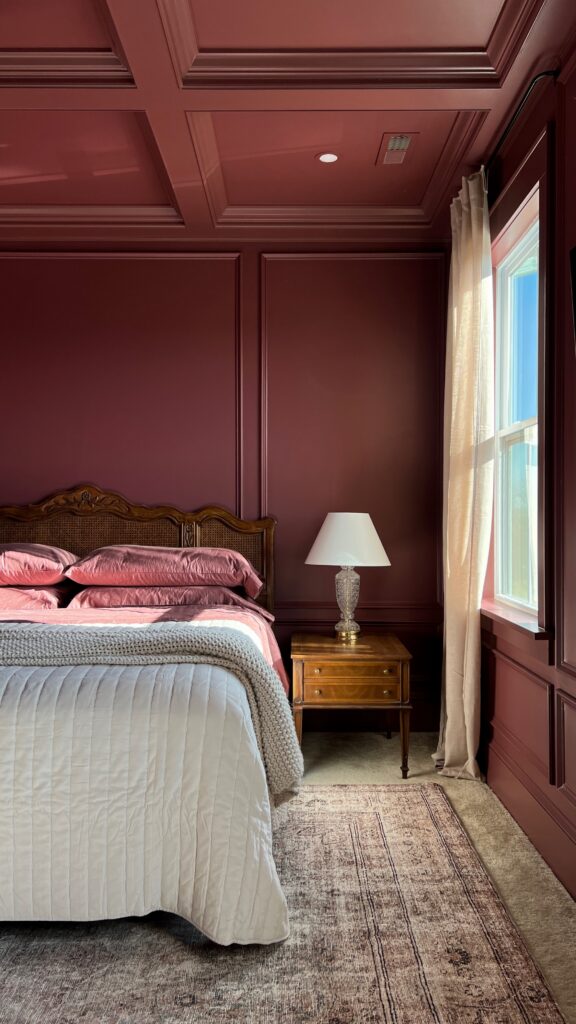
I went with New London Burgundy and saturated our entire bedroom with it! Click here for the details on our modern vintage bedroom!
What kind of paint do you use on a coffered ceiling?
I’d recommend a good quality paint, or even an enamel paint, for a coffered ceiling… or at least for just the beams!
I used Benjamin Moore Advance in a satin finish for the beams and Benjamin Moore Regal in an eggshell finish for the ceiling in between the beams (and the walls).
A flat paint finish is standard for ceilings, but with a statement ceiling like this, a sheen really makes it stand out! I even considered trying a high gloss for the beams but chickened out! The higher the sheen, the more imperfections will show and my diy coffered ceiling was far from perfect.
How to paint a coffered ceiling
Let me start by saying that if I were to do another coffered ceiling in the future, I would spray instead of painting by hand.
Don’t get me wrong, the finish still came out great painting by hand, but it was very time consuming. It was like painting 9 miniature ceilings…
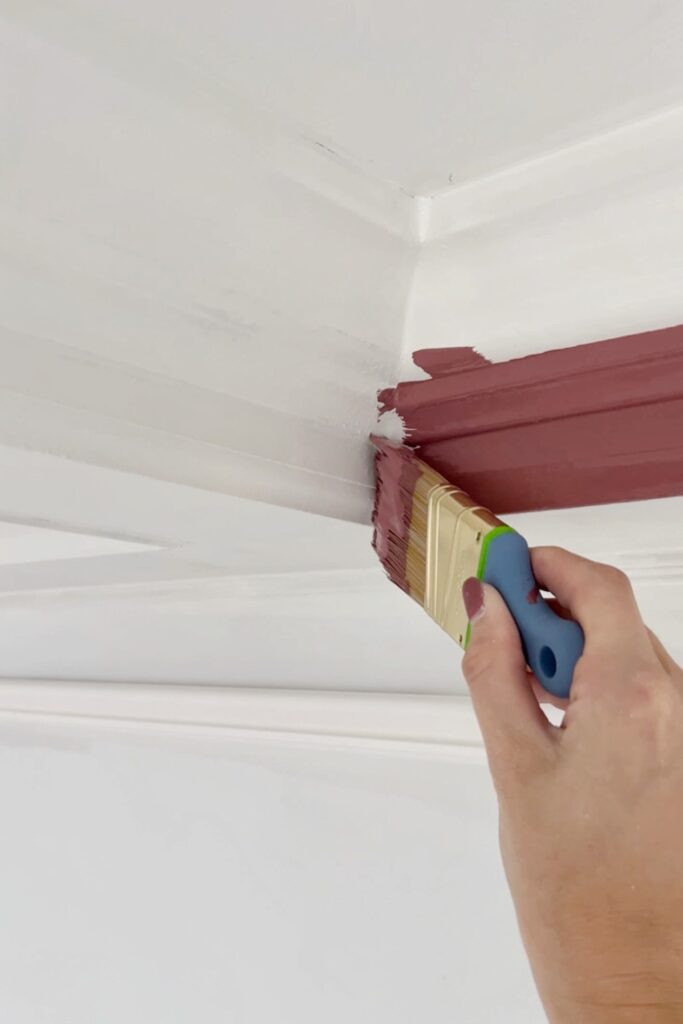
ANYWAY, if you do brave it, start by using an angled brush to get the crown molding and all the grooves.
For the rest of the beams, I used these rollers.
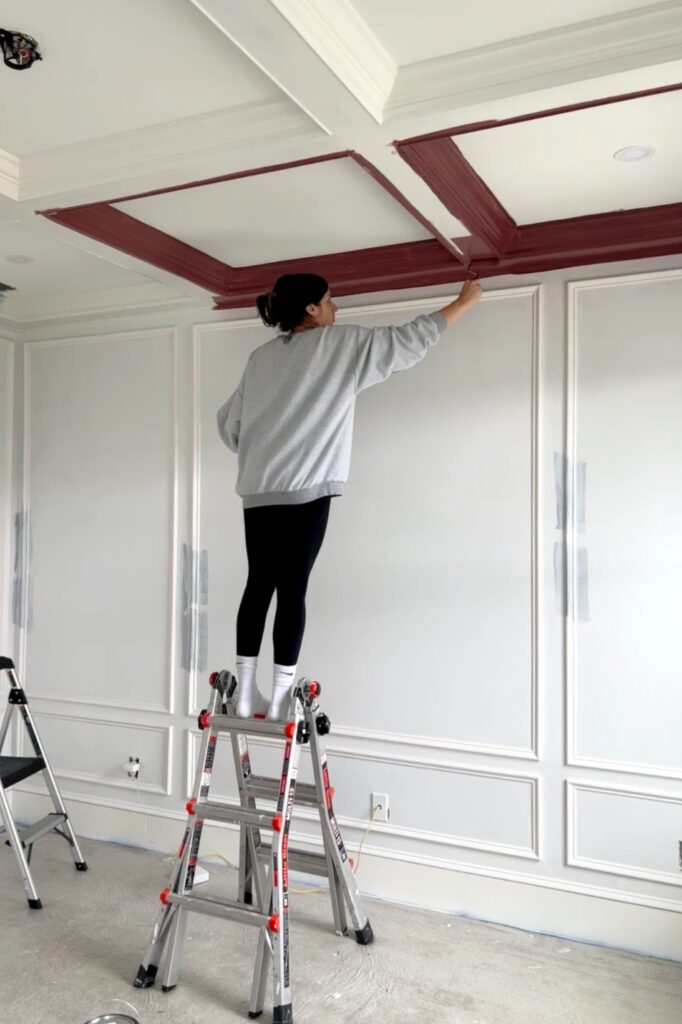
Two coats did the trick for me! For the middle of the ceiling squares, I used the same two brushes; the angled brush for the edging, and a mini roller for the rest.
Should you paint ceiling vents?
You absolutely can! Especially if you go with a dark statement ceiling. But if you do, make sure you do it properly!
When I paint ceiling vents, I always give it a good cleaning using krud kutter and spray it with this primer before painting.
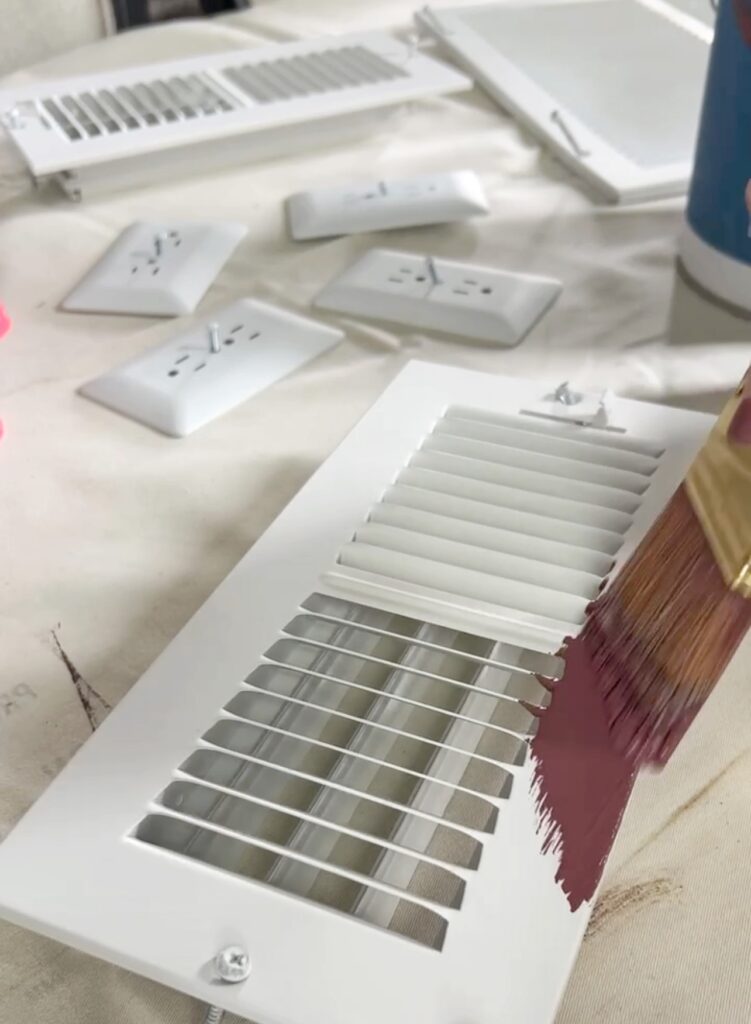
These would be much easier to spray! I personally didn’t feel like getting my sprayer out and a paint brush does the trick!
But I promise, painting your ceiling vents to blend in is so worth it after making a beautiful coffered ceiling!
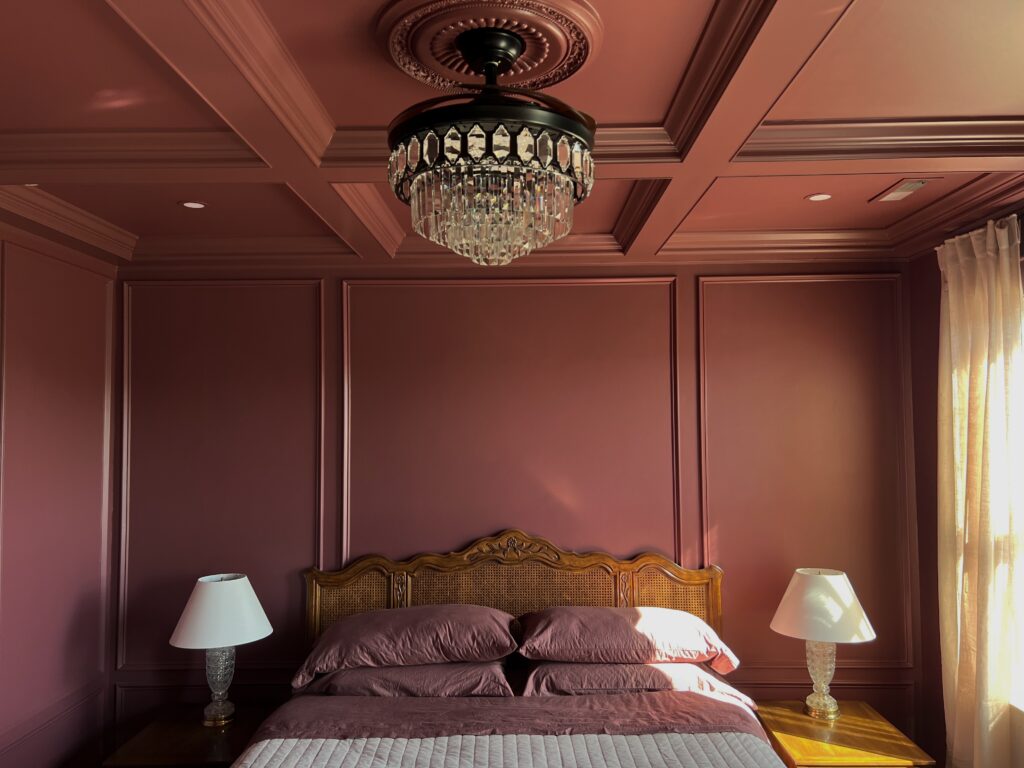
You might have also noticed that my husband installed 4 recessed lights to compliment our diy coffered ceiling and it was the best decision! I painted the shell of those too ☺️
Frequently Asked Questions
How long does it take to do a DIY coffered ceiling?
It took me about 60 hours to install a coffered ceiling in a bedroom that’s about 14ft x 14ft. Now, before you panic, remember…
I did majority of this project by myself! My husband helped me with the framing on the first day and maybe a couple hours another day. I also document the entire process which hugely slows down the process!
It ended up being about 12 separate days of work over the course of a month for me to complete this project. But that’s because I typically prefer to tackle projects in small chunks. (It also helped that we were nice and cozy in our French vintage guest bedroom!)
Either way, it’s hard work, but the finished product is absolutely worth it!
How much does it cost to build a coffered ceiling?
Our total DIY coffered ceiling cost was $770.
Obviously the price will vary based on the size of the room (our bedroom is about 14ft x 14ft) and the materials you choose to use!
Here’s the cost breakdown:
- Chalk line $15
- 2×6 boards $110
- Crown moulding $220
- Baseboard panels $160
- 3/4″ plywood $160
- Primer $15
- Screws $20
- Caulk $20
- Wood filler $7
- Shims $7
- Chair rail $36
This cost is only for trim boards and materials. If you were to hire out, that’s an additional cost of about $10 to $30 per square foot for labor.
The average cost to have a coffered ceiling installed is anywhere between $3,500 to $7,500 for a 12ft x 12ft ceiling!
Do coffered ceilings make a room look smaller?
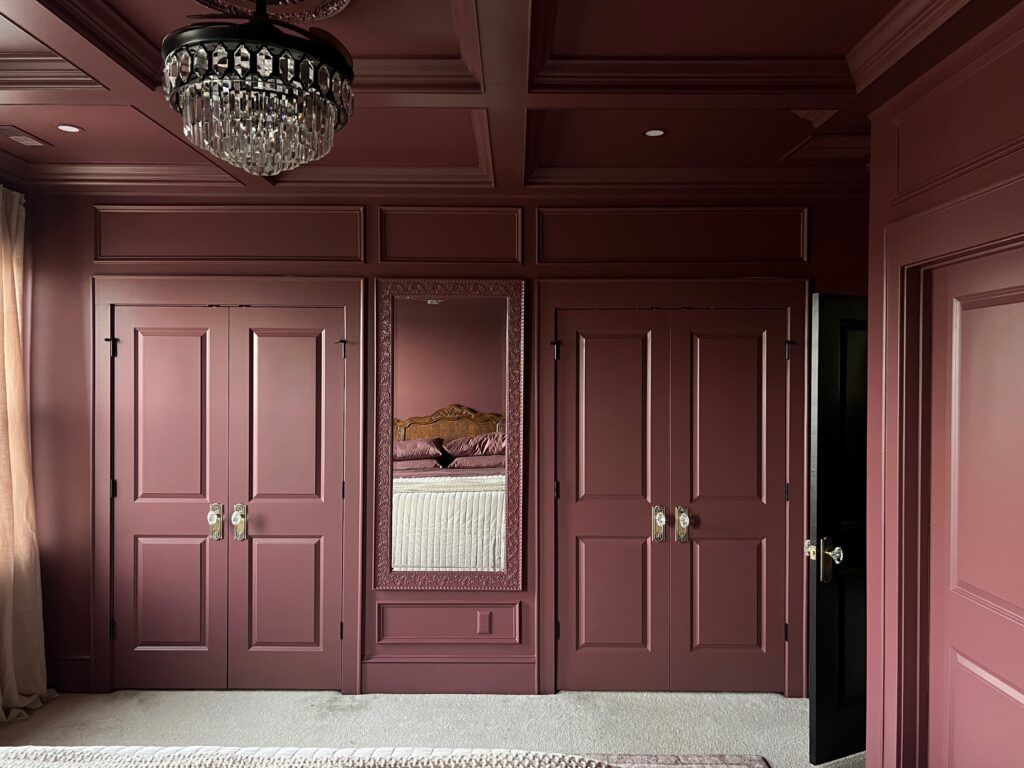
Quite the opposite! Our diy coffered ceiling made our room feel even bigger! It becomes a focal point and draws your eyes up.
Can you coffer a low ceiling?
You don’t have to have super high ceilings to have a coffered ceiling! But personally, I wouldn’t coffer anything lower than an 8ft ceiling. If your ceilings are less than 9ft, I would recommend a low profile sunken panel like this one or this one!
Does a coffered ceiling increase home value?
A coffered ceiling is a luxury detail that can definitely add value to your home. Trim and moldings are very appealing to a buyer.
Can you coffer a 9 foot ceiling?
You sure can! That’s our ceiling height and it looks amazing!
Hopefully this post gave you everything you need to tackle your own diy coffered ceiling!! Honestly, the hardest part is getting started!
I promise you, if you decide to tackle this project, you’ll thank yourself later!

Thank you for the awesome tutorial on doing coffered ceilings. I am planning to do a basement home office and the ceilings are pretty low, so was glad to see the link to the low profile version as well!
You’re so welcome, Frank!! I’m so glad it was helpful!!
Loved the tutorial, it was excellent!
Thank you so much Rhonda!!
Thank you so much for this very detailed and easy to follow tutorial. You’ve got wanting to do more and more builds. This was very helpful, on to the box molding now.
Hi Melody! That makes my heart so happy 🙂 Best of luck with the box moulding- that’s one of my favorites 🙂
I’m so impressed! How long did it take you and was it just the two of you?
Hi James! Awe, thank you so much! Yes, it was just the two of us and actually my husband mainly only helped with the framing and I did most of the rest! Actually, if you look at the bottom of this post, in the FAQ, I gave a detailed response on about how long it took me!!