

Are you looking to add character and a more traditional vibe to your home? A DIY wall trim project is the perfect solution! Whether it’s creating a subtle frame around your room with chair rail or installing elaborate crown molding, adding trim pieces can transform the entire look and feel of a room.
These projects not only make your space more visually appealing, but they also enhance the architectural detail, making your home feel more customized and complete. Get ready to turn your house into a more inviting and styled home with these DIY wall trim ideas!
Disclaimer: This post contains affiliate links. This means, if you purchase something from a link I provided, I will receive a small commission. This is at no extra cost to you! Thank you so much for the support!
Transforming a room can be as simple as adding some stylish wall trim. Wall trim, or moulding, can elevate your space and design plan, giving it character and a finished look without a complete renovation. Whether you’re a seasoned DIYer or just looking to spruce up your home, here are seven easy DIY wall trim ideas that you can install yourself.
Fluted Wall Panel
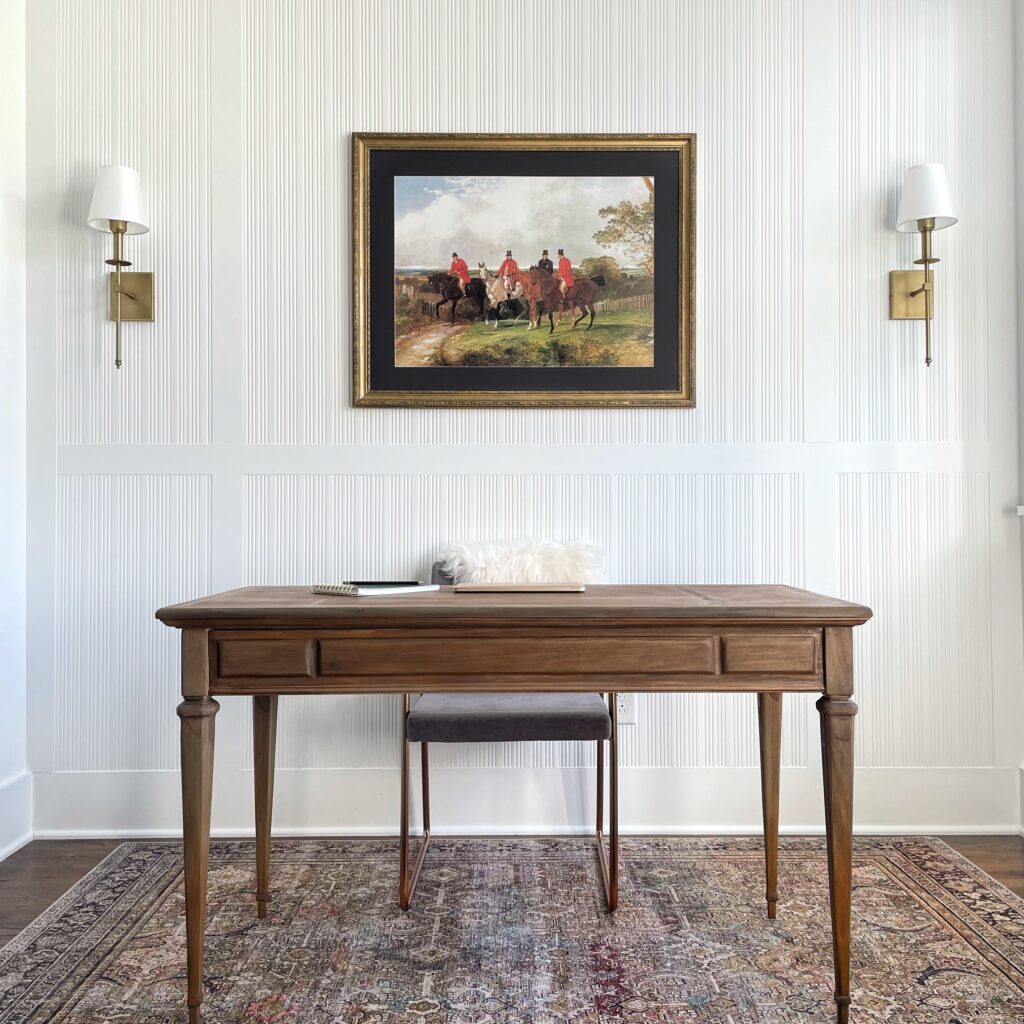
Fluted wall panels have gained popularity for their textured, modern look. This type of wall molding adds depth and interest to any space!
In our previous home, I added a fluted wall panel design to my office! This was such a striking backdrop for video calls and totally enhanced the entire room. The vertical board is what creates the fluted, or reeded, look. One nice thing about DIY wall trim is that you choose the design. In this case, I was able to choose the placement of the horizontal pieces (which are pre-primed MDF boards) and of course the width of the fluted panels in general. Click here for my step-by-step DIY fluted wall panel tutorial!
A great way to enhance an accent wall like this is with some beautiful sconces! As a side note, I went with a matte finish since a fluted wall already has a lot of texture! A higher sheen, in some cases, might look too overwhelming.
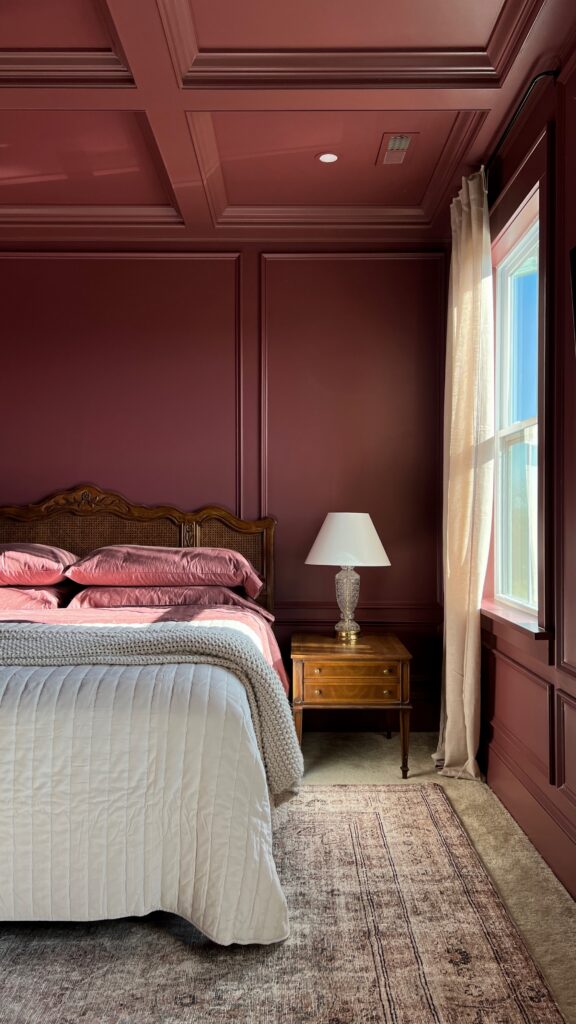
Box Molding
Box molding, also sometimes referred to as picture frame molding, creates framed accents on walls using simple trim pieces! This is such a versatile and classic look that can be adapted to fit any design style. For an even more enhanced look, you can also add chair rail in between the molding boxes!
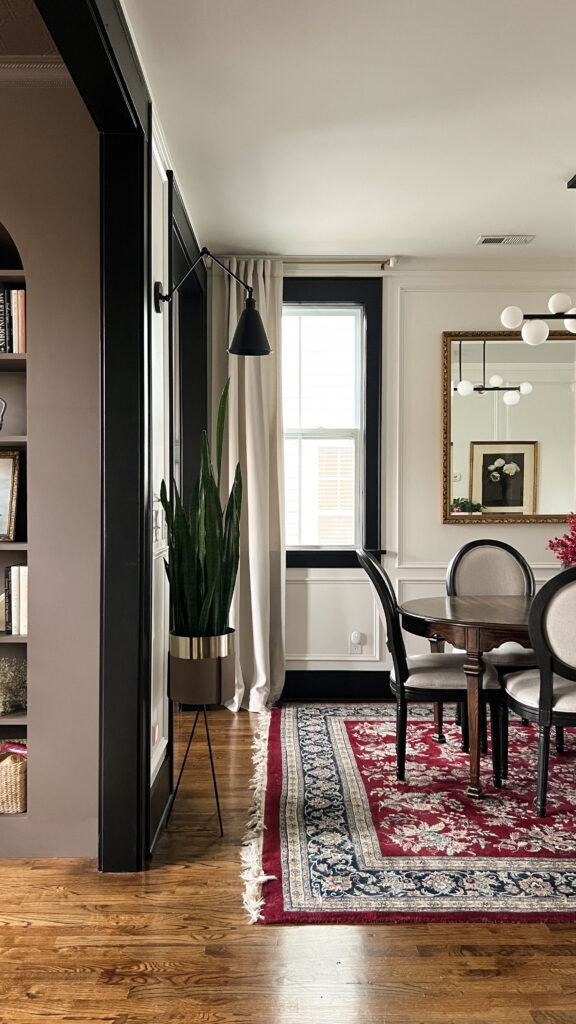
This is definitely one of my favorite DIY wall trim ideas and it’s very simple to do! It can be a little tricky deciding the number of boxes, what the box sizes should be, etc. so be sure check out my full step-by-step box molding tutorial if you’re interested in trying this project!
Trust me when I say that box molding can really add to the interior design of any home. We had box moulding all throughout our entire first floor and also in our moody burgundy primary bedroom. The more box moulding, the better 😉
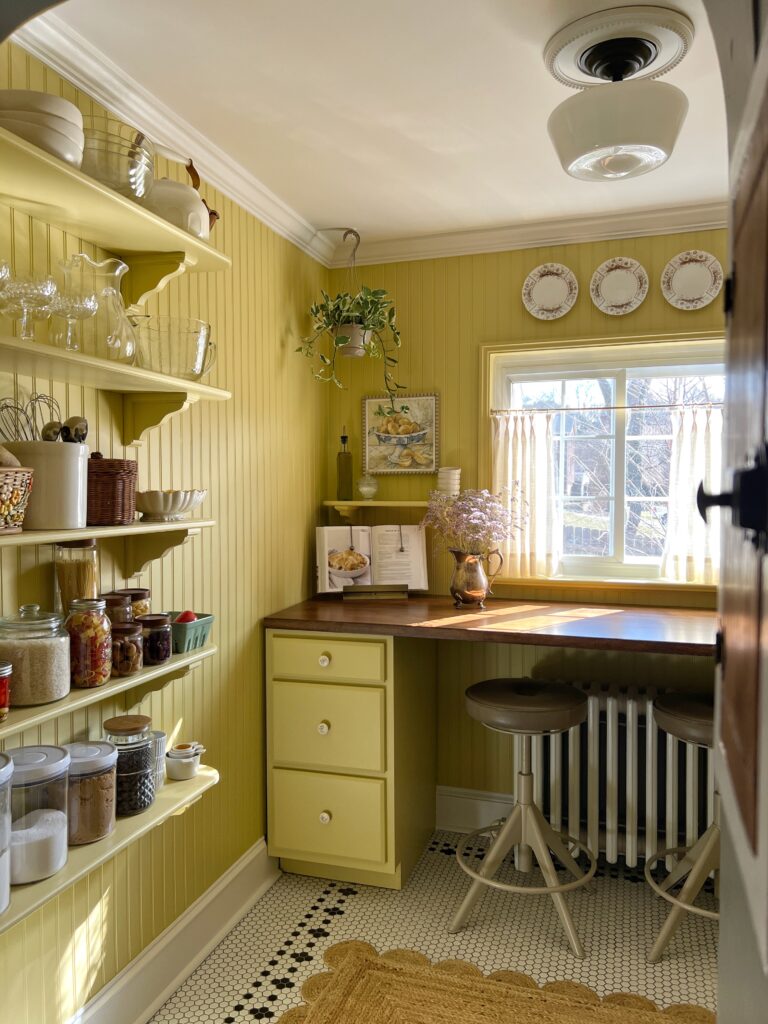
Vertical Shiplap
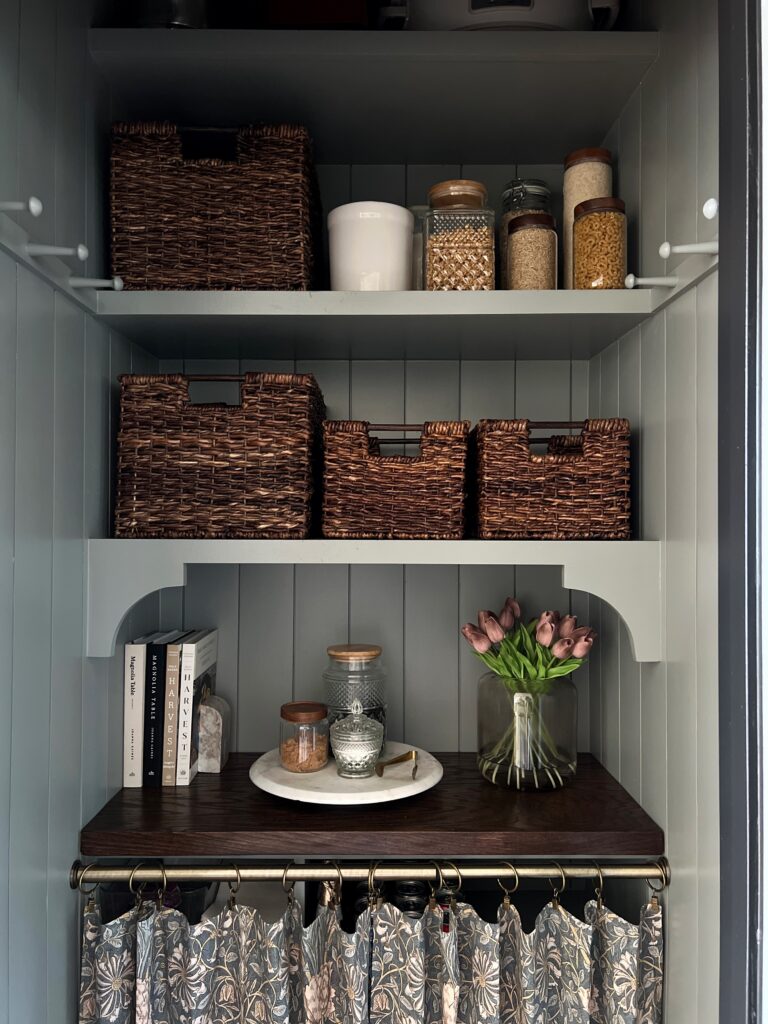
At this point, most of us are familiar with shiplap! But more often, you’ll see this type of molding installed horizontally. However, vertical shiplap is a fantastic way to visually heighten a room. It’s especially effective in small spaces like a bathroom or a laundry room. Check out my small pantry makeover to see just how adding a vertical shiplap can really transform a small space.
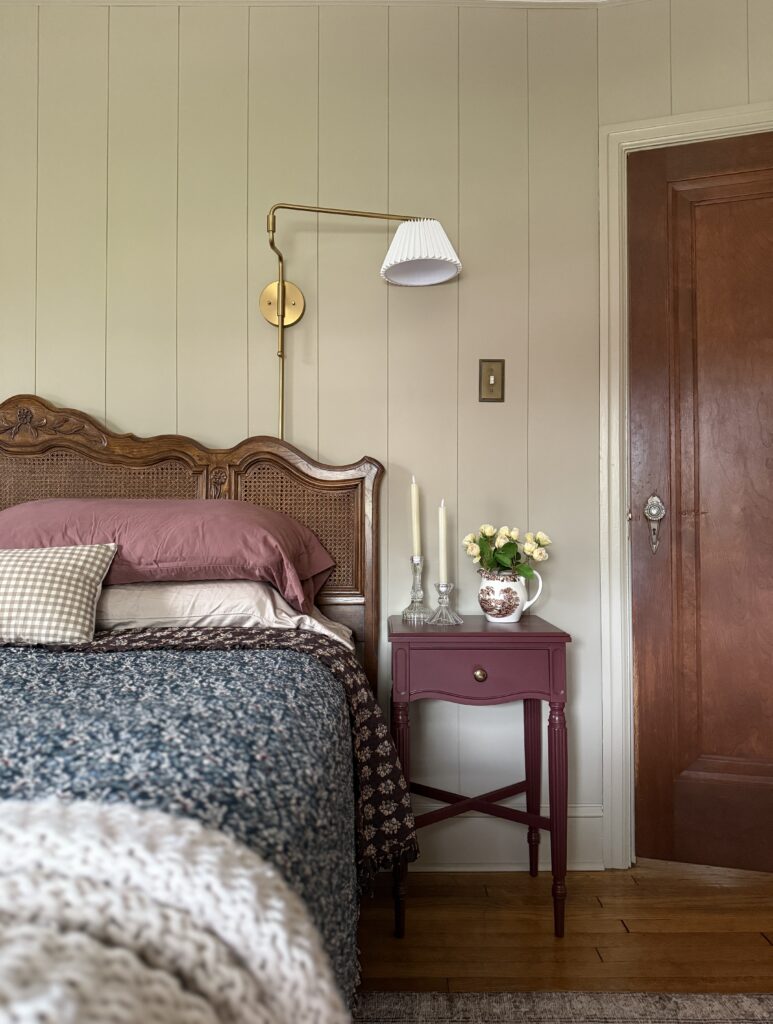
We also did a vertical shiplap look in our cottage style bedroom! For this space, we used plywood which is a nice budget-friendly approach and you’d never even guess!! Tutorial: DIY Vertical Plywood Shiplap
Recessed Wainscoting Panels
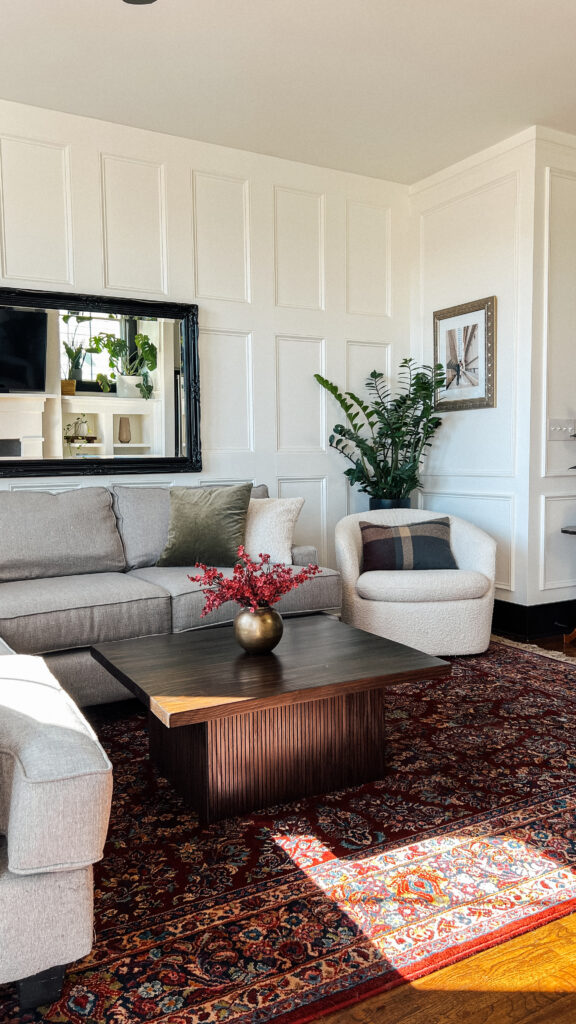
If you’ve ever tackled box molding, or you know how to cut a 45 degree angle, you can absolutely add recessed wainscoting panels to your own home! Walls featuring recessed wainscoting panels elevate beyond the typical board and batten design! The additional trim inside the panels is what gives the traditional and sophisticated appearance.
This is such an elegant wall treatment ideal for a living room, dining room, or hallway. If you’re interested in adding this decorative wall to your home, I have a very detailed tutorial that will walk you through the whole process. Click here to read it!
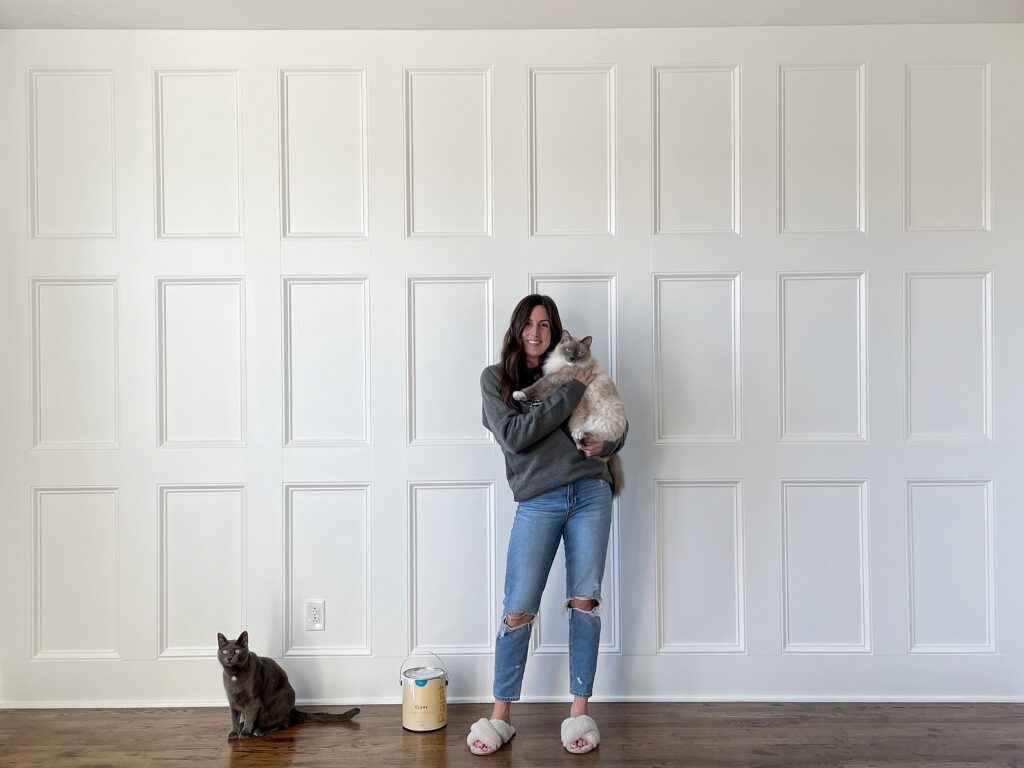
Grid Wall
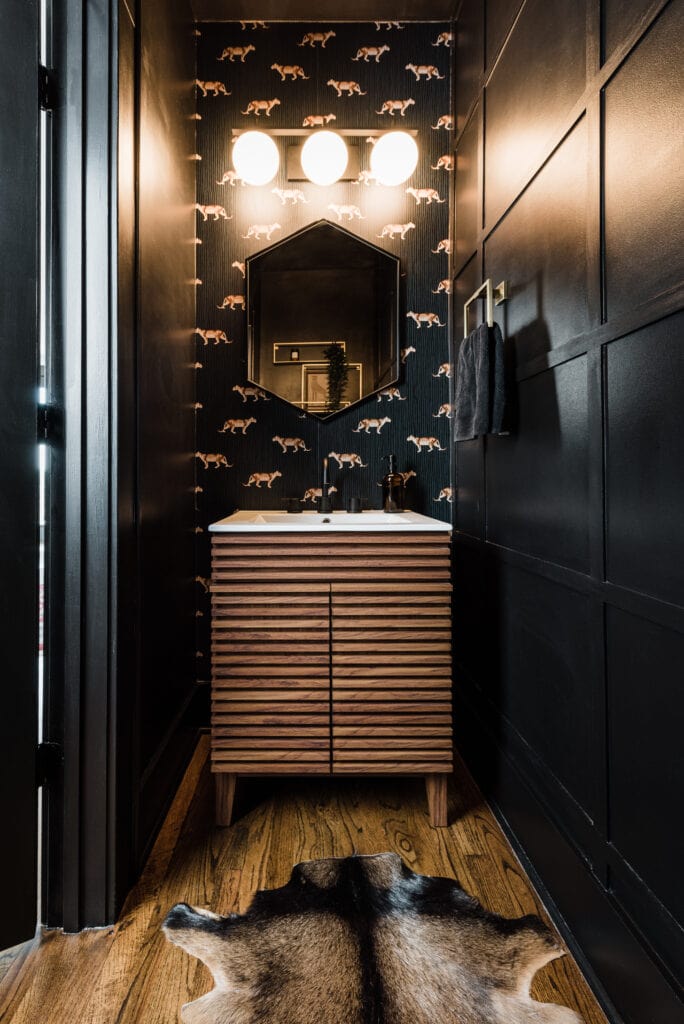
This grid board and batten accent wall was one of my very first DIY wall trim projects as a beginner! It features a series of horizontal and vertical strips that create a geometric pattern. This could be a great option for a feature wall in a living room or bedroom.
Our DIY grid wall spanned the width of the wall in our black powder room which added some additional texture and interest. You really don’t need a ton of power tools for this project, just a nail gun and a tool for cutting the wood. Click here for my DIY grid wall tutorial.
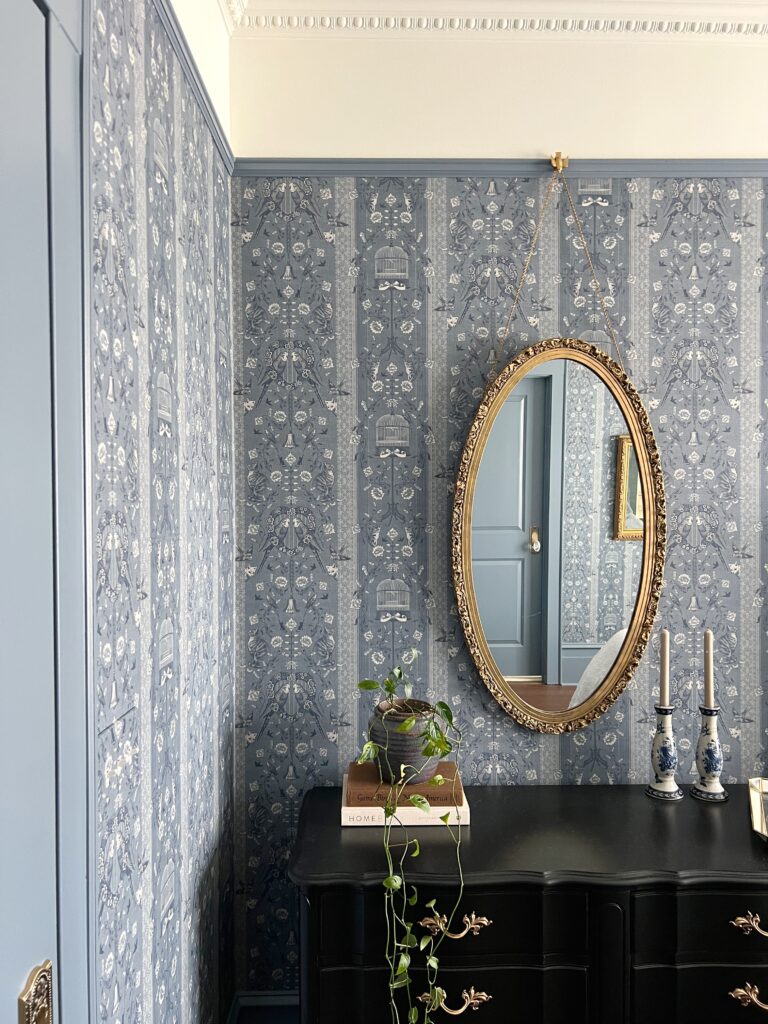
Picture Rail Moulding
Not to be confused with picture frame moulding, this is a specialty piece of trim that is designed to hang art! Picture rails are both decorative and functional which is every designer’s dream.
This DIY wall trim is typically installed near the ceiling and can also be used as a chair rail, which adds a classic architectural element that can make any room appear more finished and sophisticated. Plus, it visually raises the ceiling height, creating a sense of more space and airiness.
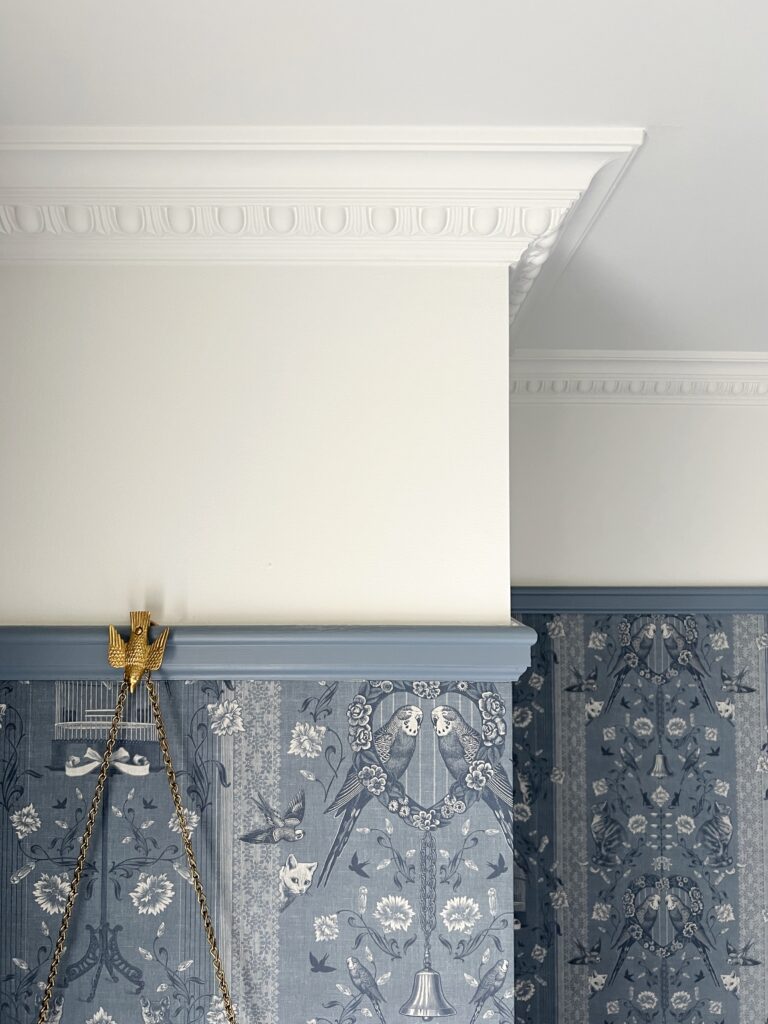
This DIY wall trim is one of my favorites because it’s simple to install and it’s a way for me to hang art without putting holes in my wall. Click here for my tutorial and learn how exactly the picture rail hanging system works!
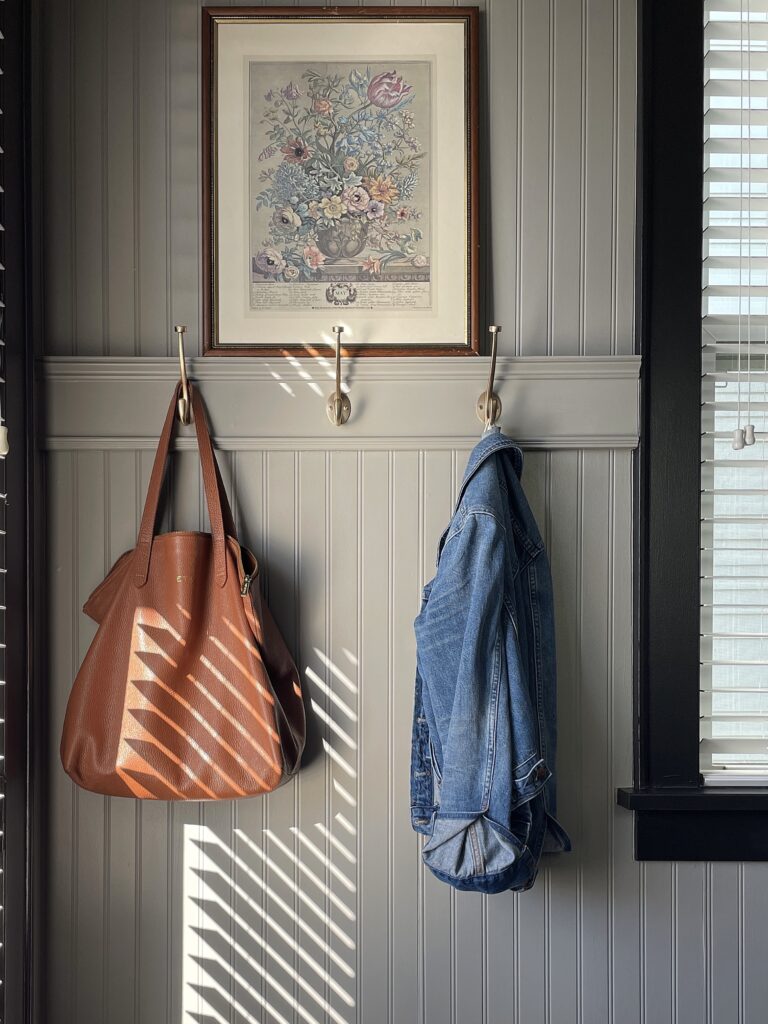
Beadboard
Beadboard is a type of paneling that features a distinctive vertical groove pattern. It’s perfect for adding a cozy, cottage-like feel to any room. Whether you add it to the ceiling, on the walls, or even in the back of a built-in bookcase, beadboard is a timeless look!
Additionally, beadboard is very affordable and easy to install with liquid nails and a brad nailer! Check out my DIY entryway makeover for all the details on how to install beadboard!
Another favorite beadboard project of mine is our DIY Walk-In Pantry!
DIY Wall Trim Tools
First things first- what power tools are required to install wall molding?
This really depends on the DIY wall trim you’re tackling, but there’s a few tools that I almost always use when i’m installing wall molding:
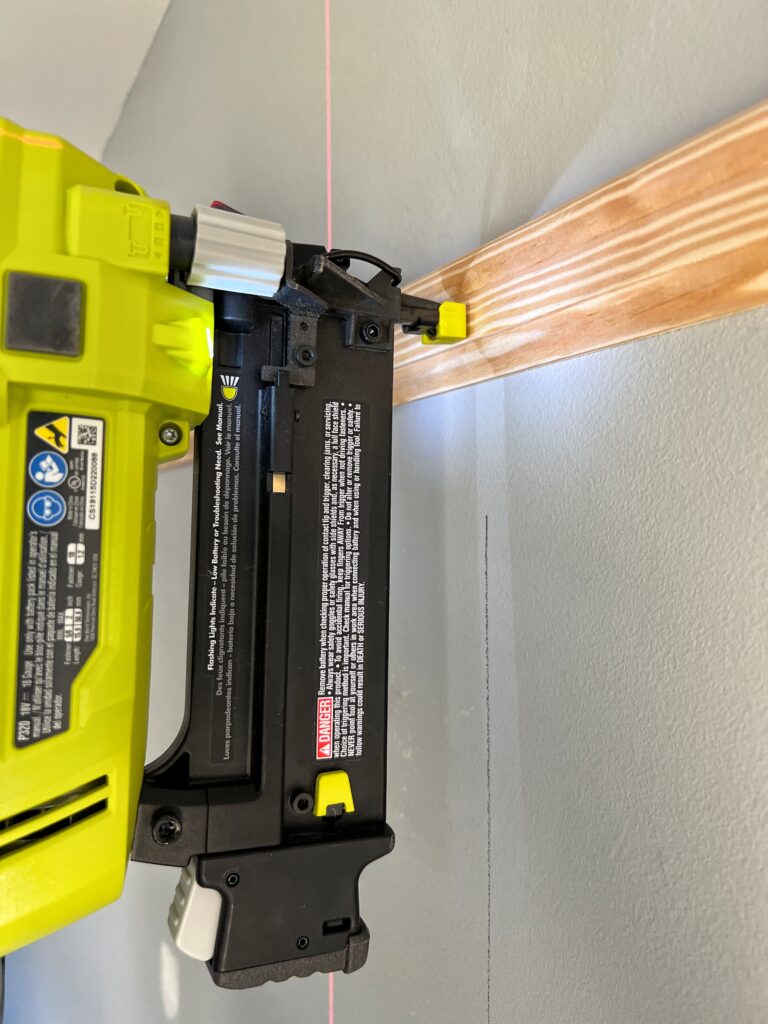
- Brad nailer– This is an absolute must in my opinion. I use this brad nailer for every single DIY project that involves trim. This is the one I have! It’s been with me through 4 years of projects now and still works just as amazing. Don’t be intimidated- I promise it’s very safe and simple to use! Another option for this would be a pin nailer which makes even tinier nail holes and is great for finish work. (This one is on my wish list!) An alternative to a brad nailer would be a hammer and finish nails.
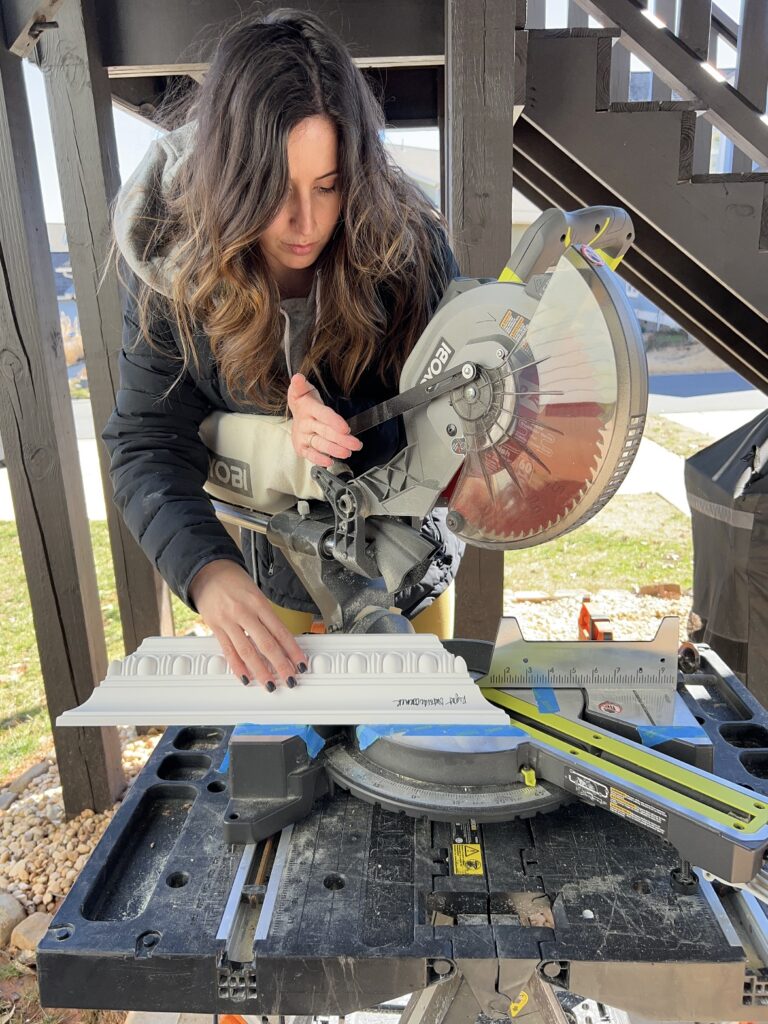
- Miter saw– While this isn’t necessarily a must, it’s easily my most used tool. It gives quick, accurate angled cuts. The one I have does bevel cuts in addition to miter cuts, I love it!! If you’re not looking to invest in this power tool just yet, you do have a couple other budget friendly options for cutting angles. You can use a miter box or, in some cases, you can even use these miter shears.
- Tape measure– Getting a precise measurement is so important when it comes to DIY wall trim so of course you’ll need measuring tape! But, I have to recommend my favorite tape measure. This version is awesome because all those teeny tiny lines are actually labeled with the measurements down to the 16th! No more counting the lines 🙂
- Level– You’ll need some sort of level to ensure that your trim work is even. This laser level is a game changer for most every DIY project, but especially when it comes to installing molding. If you aren’t ready to invest, I recommend a large level like this one.
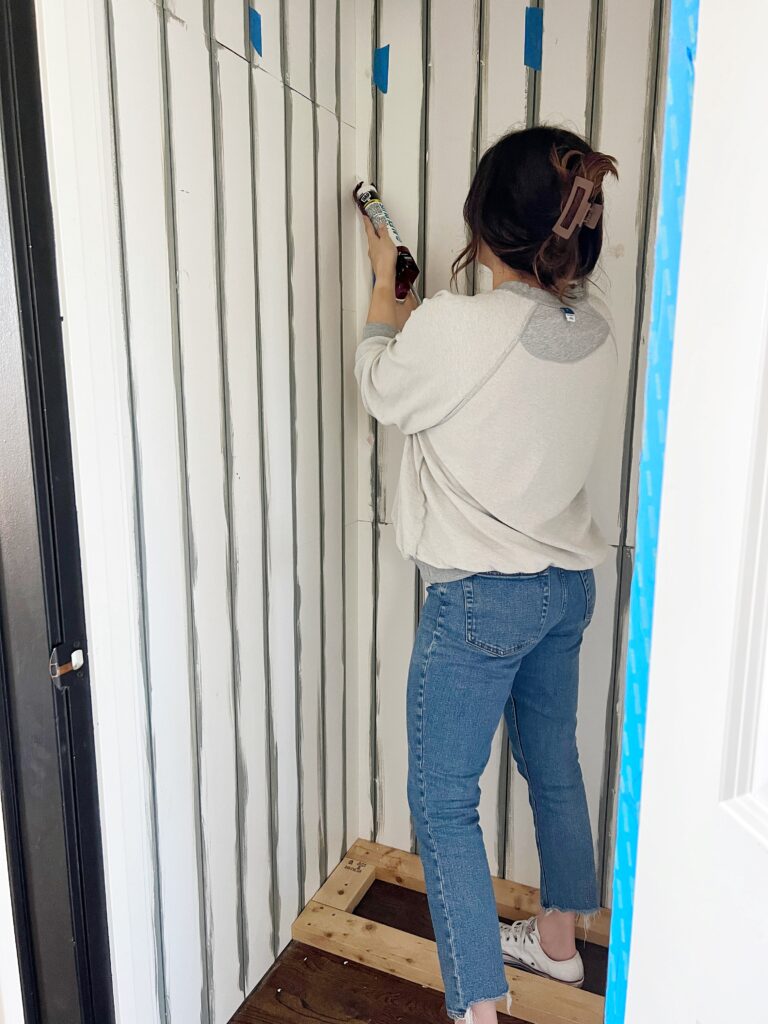
- Caulking gun– The finish work when installing moulding is so important! Get a nice dripless caulking gun like this one to make this process more enjoyable and less messy. For more caulking tips, check out this post: How to Apply Caulk Like a Pro
How to Install Molding
Installing moulding is a straightforward way to enhance the appearance of any room or feature wall and it can be done in a few simple steps that apply to most types of moulding:
- First, measure the walls to determine how much moulding you need. Cut your pieces to size, mitering the corners for a seamless fit. It’s really important to get precise measurements.
- Don’t forget about light switches and electric outlets! Measure your cuts around these when necessary.
- Secure the moulding to the wall using your brad nailer and a level. Avoid liquid nails when possible because it can ruin your drywall when taken down. Liquid nails is really not necessary for most trim pieces, but with beadboard paneling I do recommend it.
- The next steps include all the finish work which is to fill any nail holes and corner gaps with spackle and caulk any seams! This will give a professional appearance.
With these seven easy DIY wall trim ideas, you can significantly boost the style and sophistication of your home. Most of these projects are manageable in a weekend and provides a rewarding way to personalize your space. So grab your tools and get started on transforming your home with beautiful wall trim!
Thank you for being here and let me know if you have any questions!! As you can probably tell, i’m a big believer in trim work and happy to help! Here’s a few of my other blog posts that involve installing moulding:
- DIY Coffered Ceiling
- How to Caulk Like a Pro
- How to Install Box Molding
- How to Install Crown Molding
- Arched Ikea Billy Bookcase Hack
- How to Paint Trim and Why I love a Satin Finish
Elisha
